Setup Guide for CookieYes App on Wix Platform
Last updated on June 19, 2025
On this page
This setup guide will help you install and configure the CookieYes app on the Wix platform. The CookieYes app helps you manage and display cookie consent banners on your website to comply with data privacy laws such as the GDPR and ePrivacy Directive.
Video tutorial: Implement cookie consent on Wix website
Install CookieYes from the Wix App Market
- Log In and Open the Site Editor
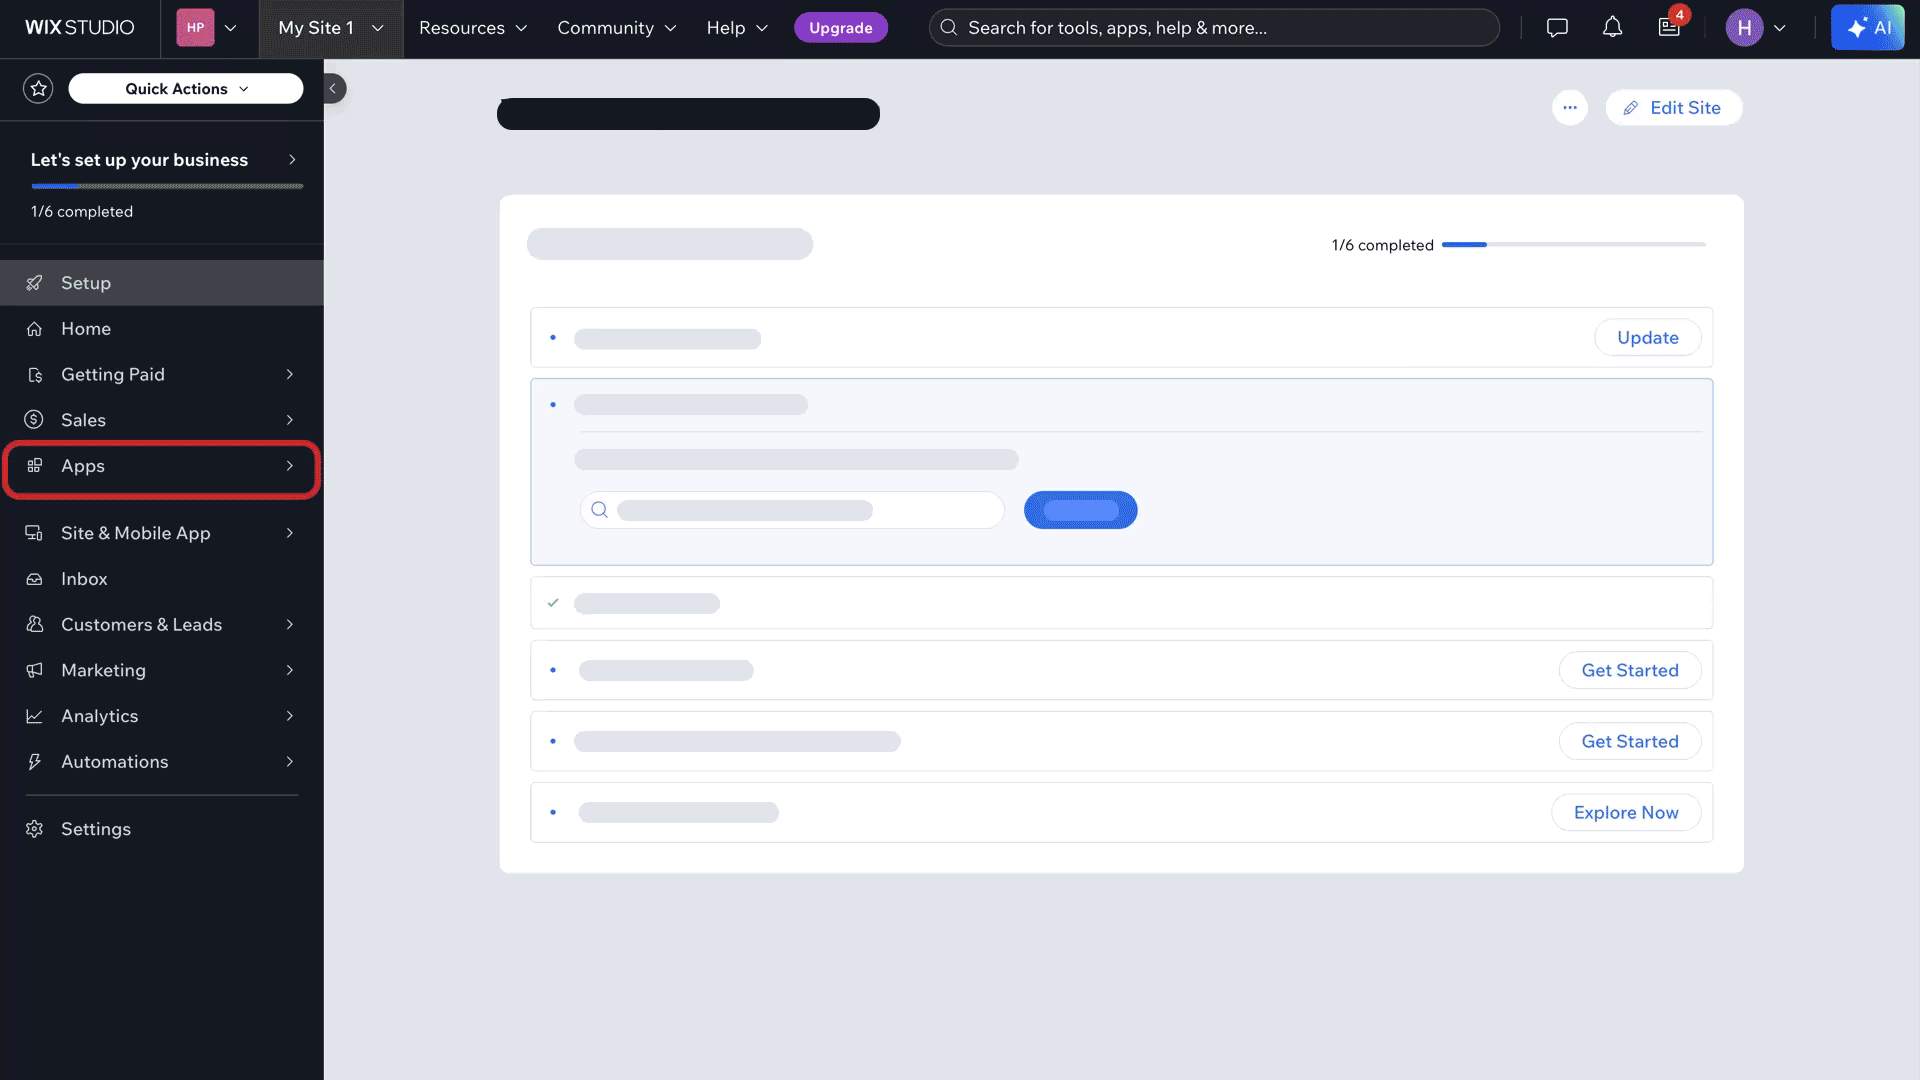
Log In to your Wix account and open the website editor for the specific site where you want to add CookieYes. - Access the Wix App Market and Find CookieYes
In the site editor, navigate to Apps > App Market from the left sidebar. In the search bar at the top of the App Market, search for CookieYes and select it from the results.
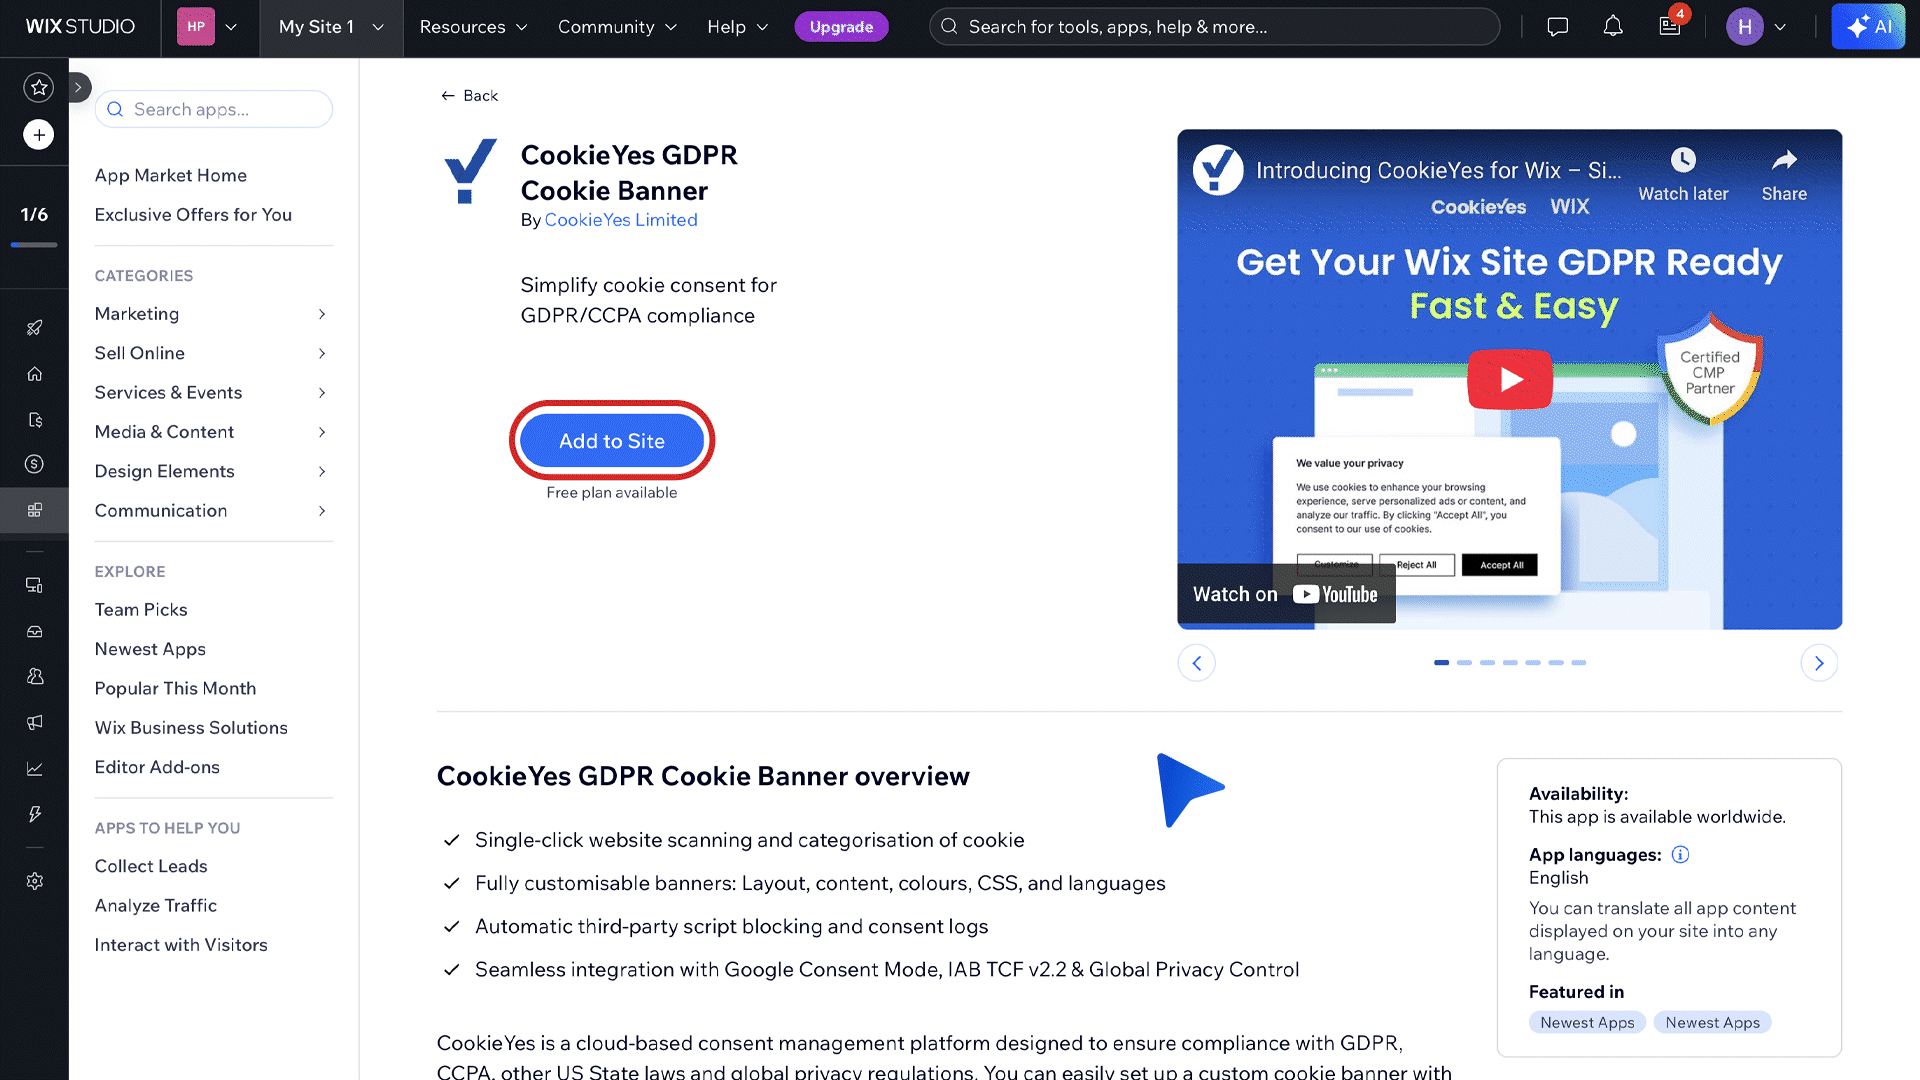
- Add CookieYes
Click the Add to Site button to add the CookieYes app to your Wix site.
For existing users with a Wix site already registered in CookieYes, you will be automatically redirected to the CookieYes dashboard within your site’s editor.
- Review App Permissions
A permissions dialogue will appear outlining the access CookieYes requires to function correctly. Click Agree & Add to proceed.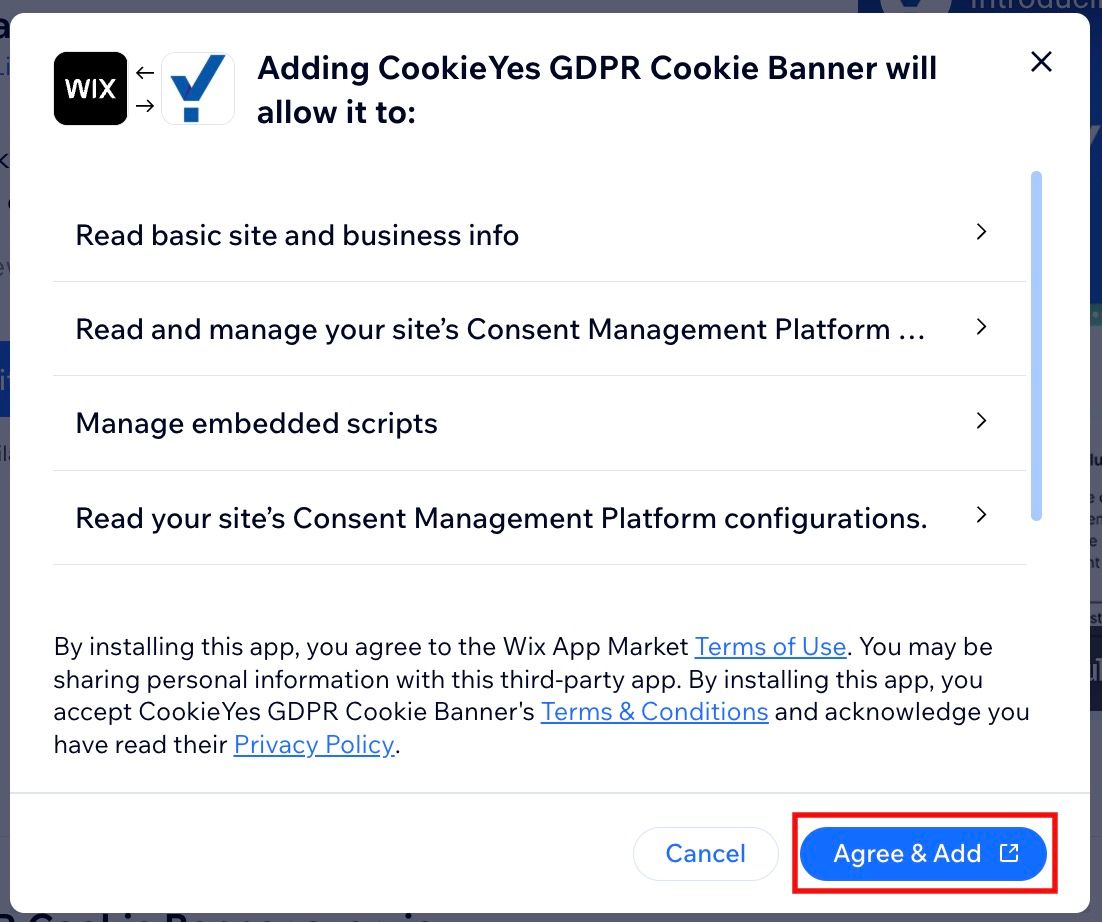
- Configure your banner settings
Choose the Banner Language, Layout and Colour. Click the Next Step button.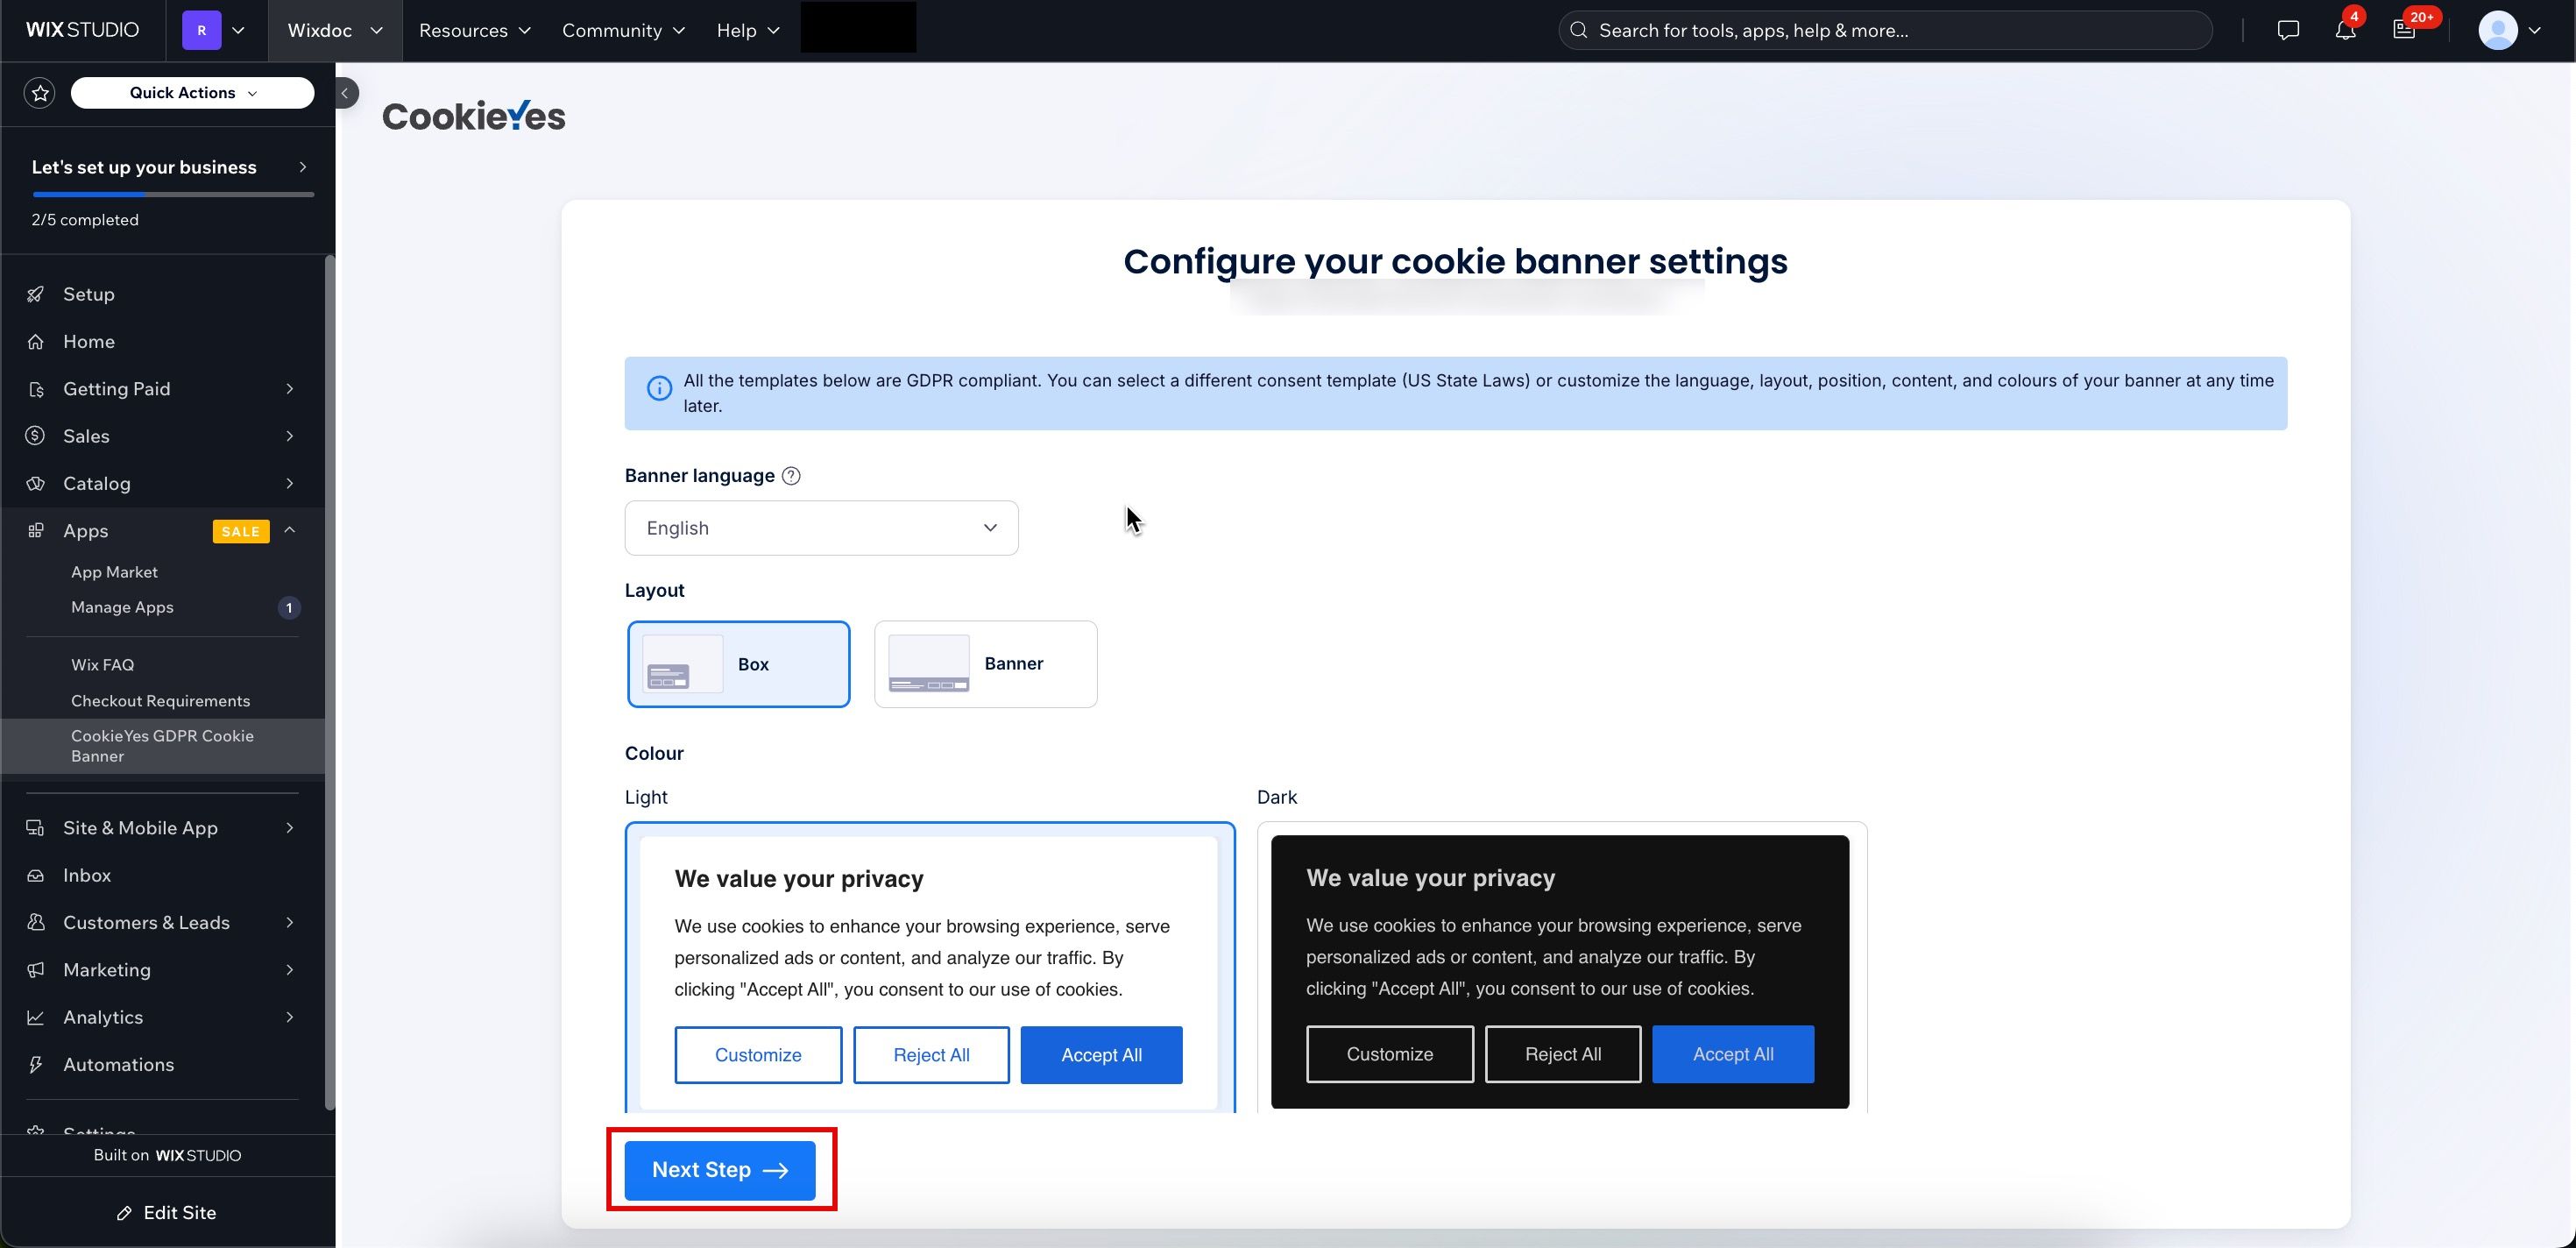
- Choose a Plan (Free or Premium Plans)

Free Plan: To proceed with the free plan, click the Continue with free button. The CookieYes dashboard will now appear in your site’s editor, allowing you to customise the cookie banner, set up compliance options, and manage cookie settings.
You can include only one website in your CookieYes account when using the free plan.
Premium Plans: To proceed with a Premium plan, follow the steps below:
- Click Unlock premium features.
- On the payment page, choose your plan.
- Select your billing cycle and click on Continue to Checkout.
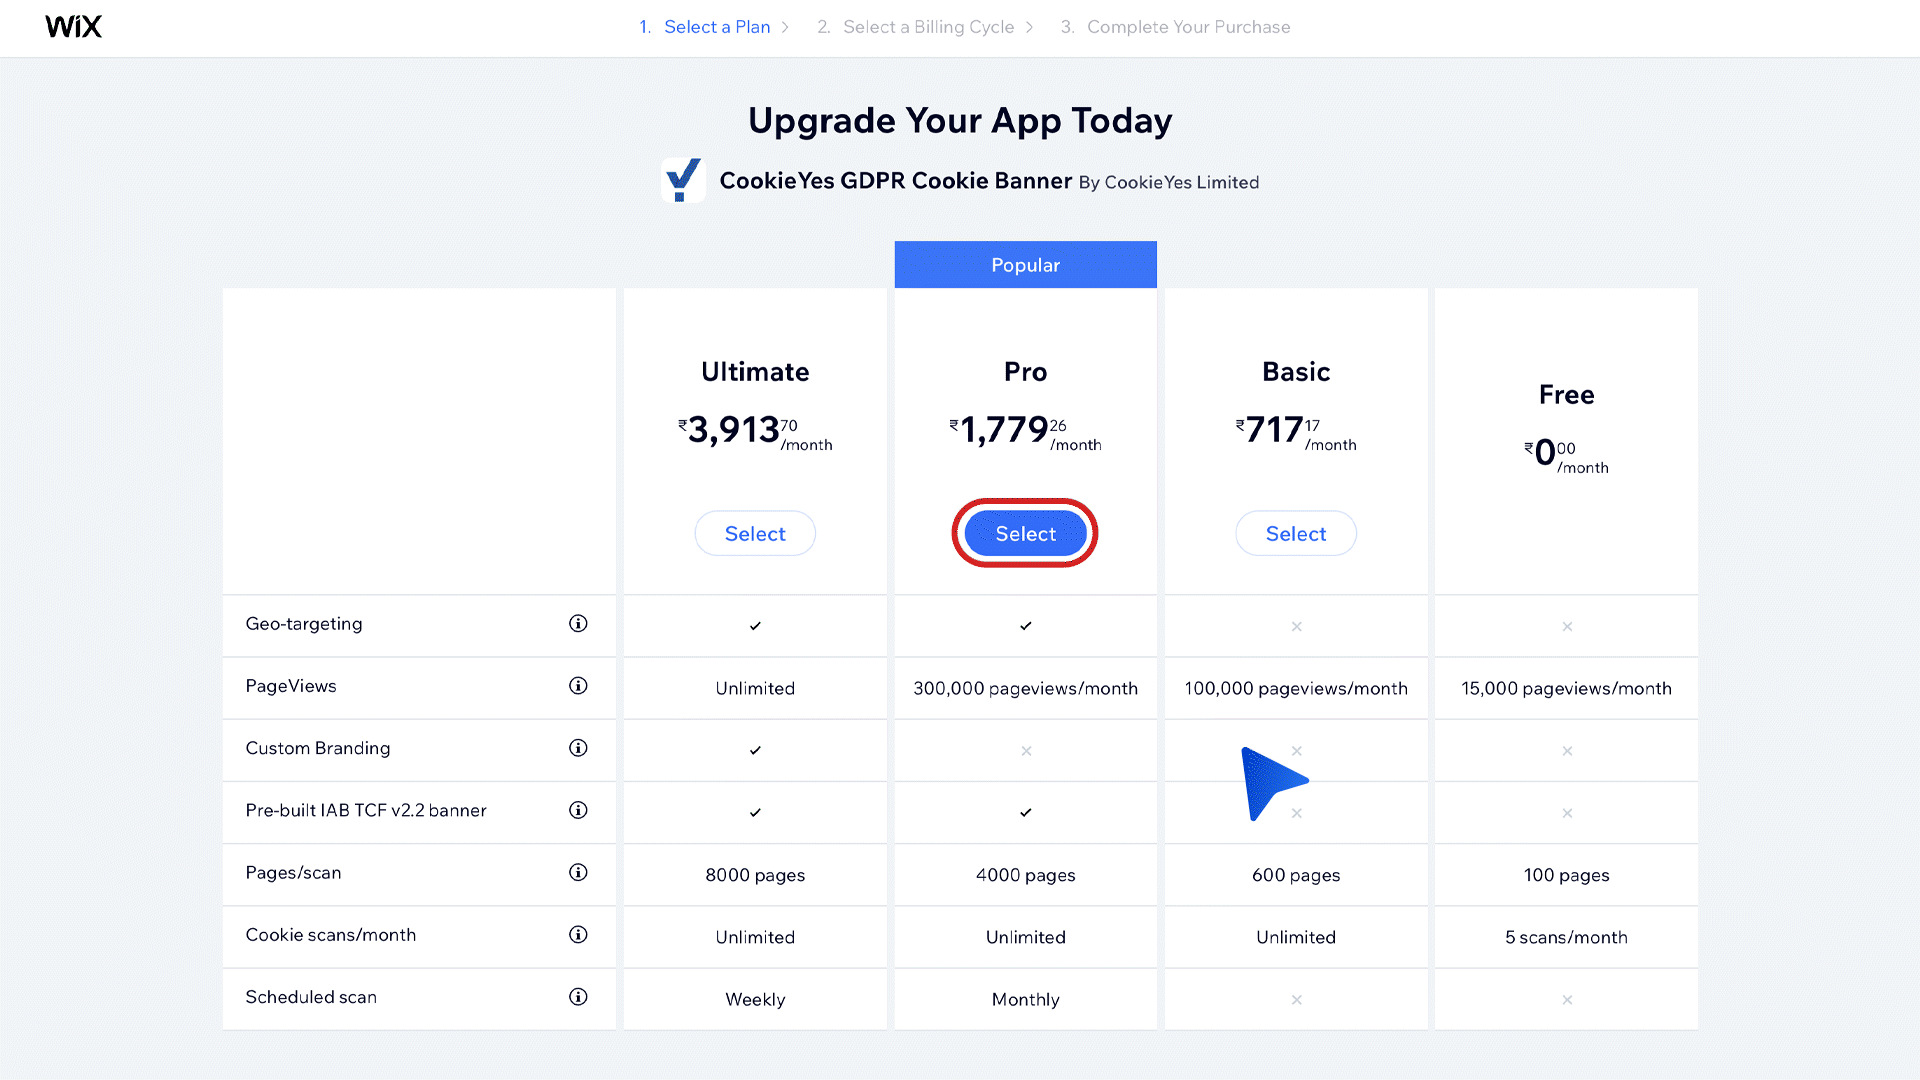
Enter the Card & Invoice details, then click Submit Purchase.
The cookie consent banner will be live on your Wix website! You can explore more options and features from the CookieYes Dashboard.
Accessing and Navigating the CookieYes Dashboard
Once the app is added to your Wix site, you can access the CookieYes dashboard in Wix to customise and control your cookie consent banner. To access the CookieYes Dashboard, from the left sidebar, navigate to Apps and click CookieYes GDPR Cookie Banner to launch the CookieYes dashboard within your site editor.

The dashboard provides a central place to manage your cookie banner, review consent logs, and track visitor interactions. Here’s an overview based on the interface:
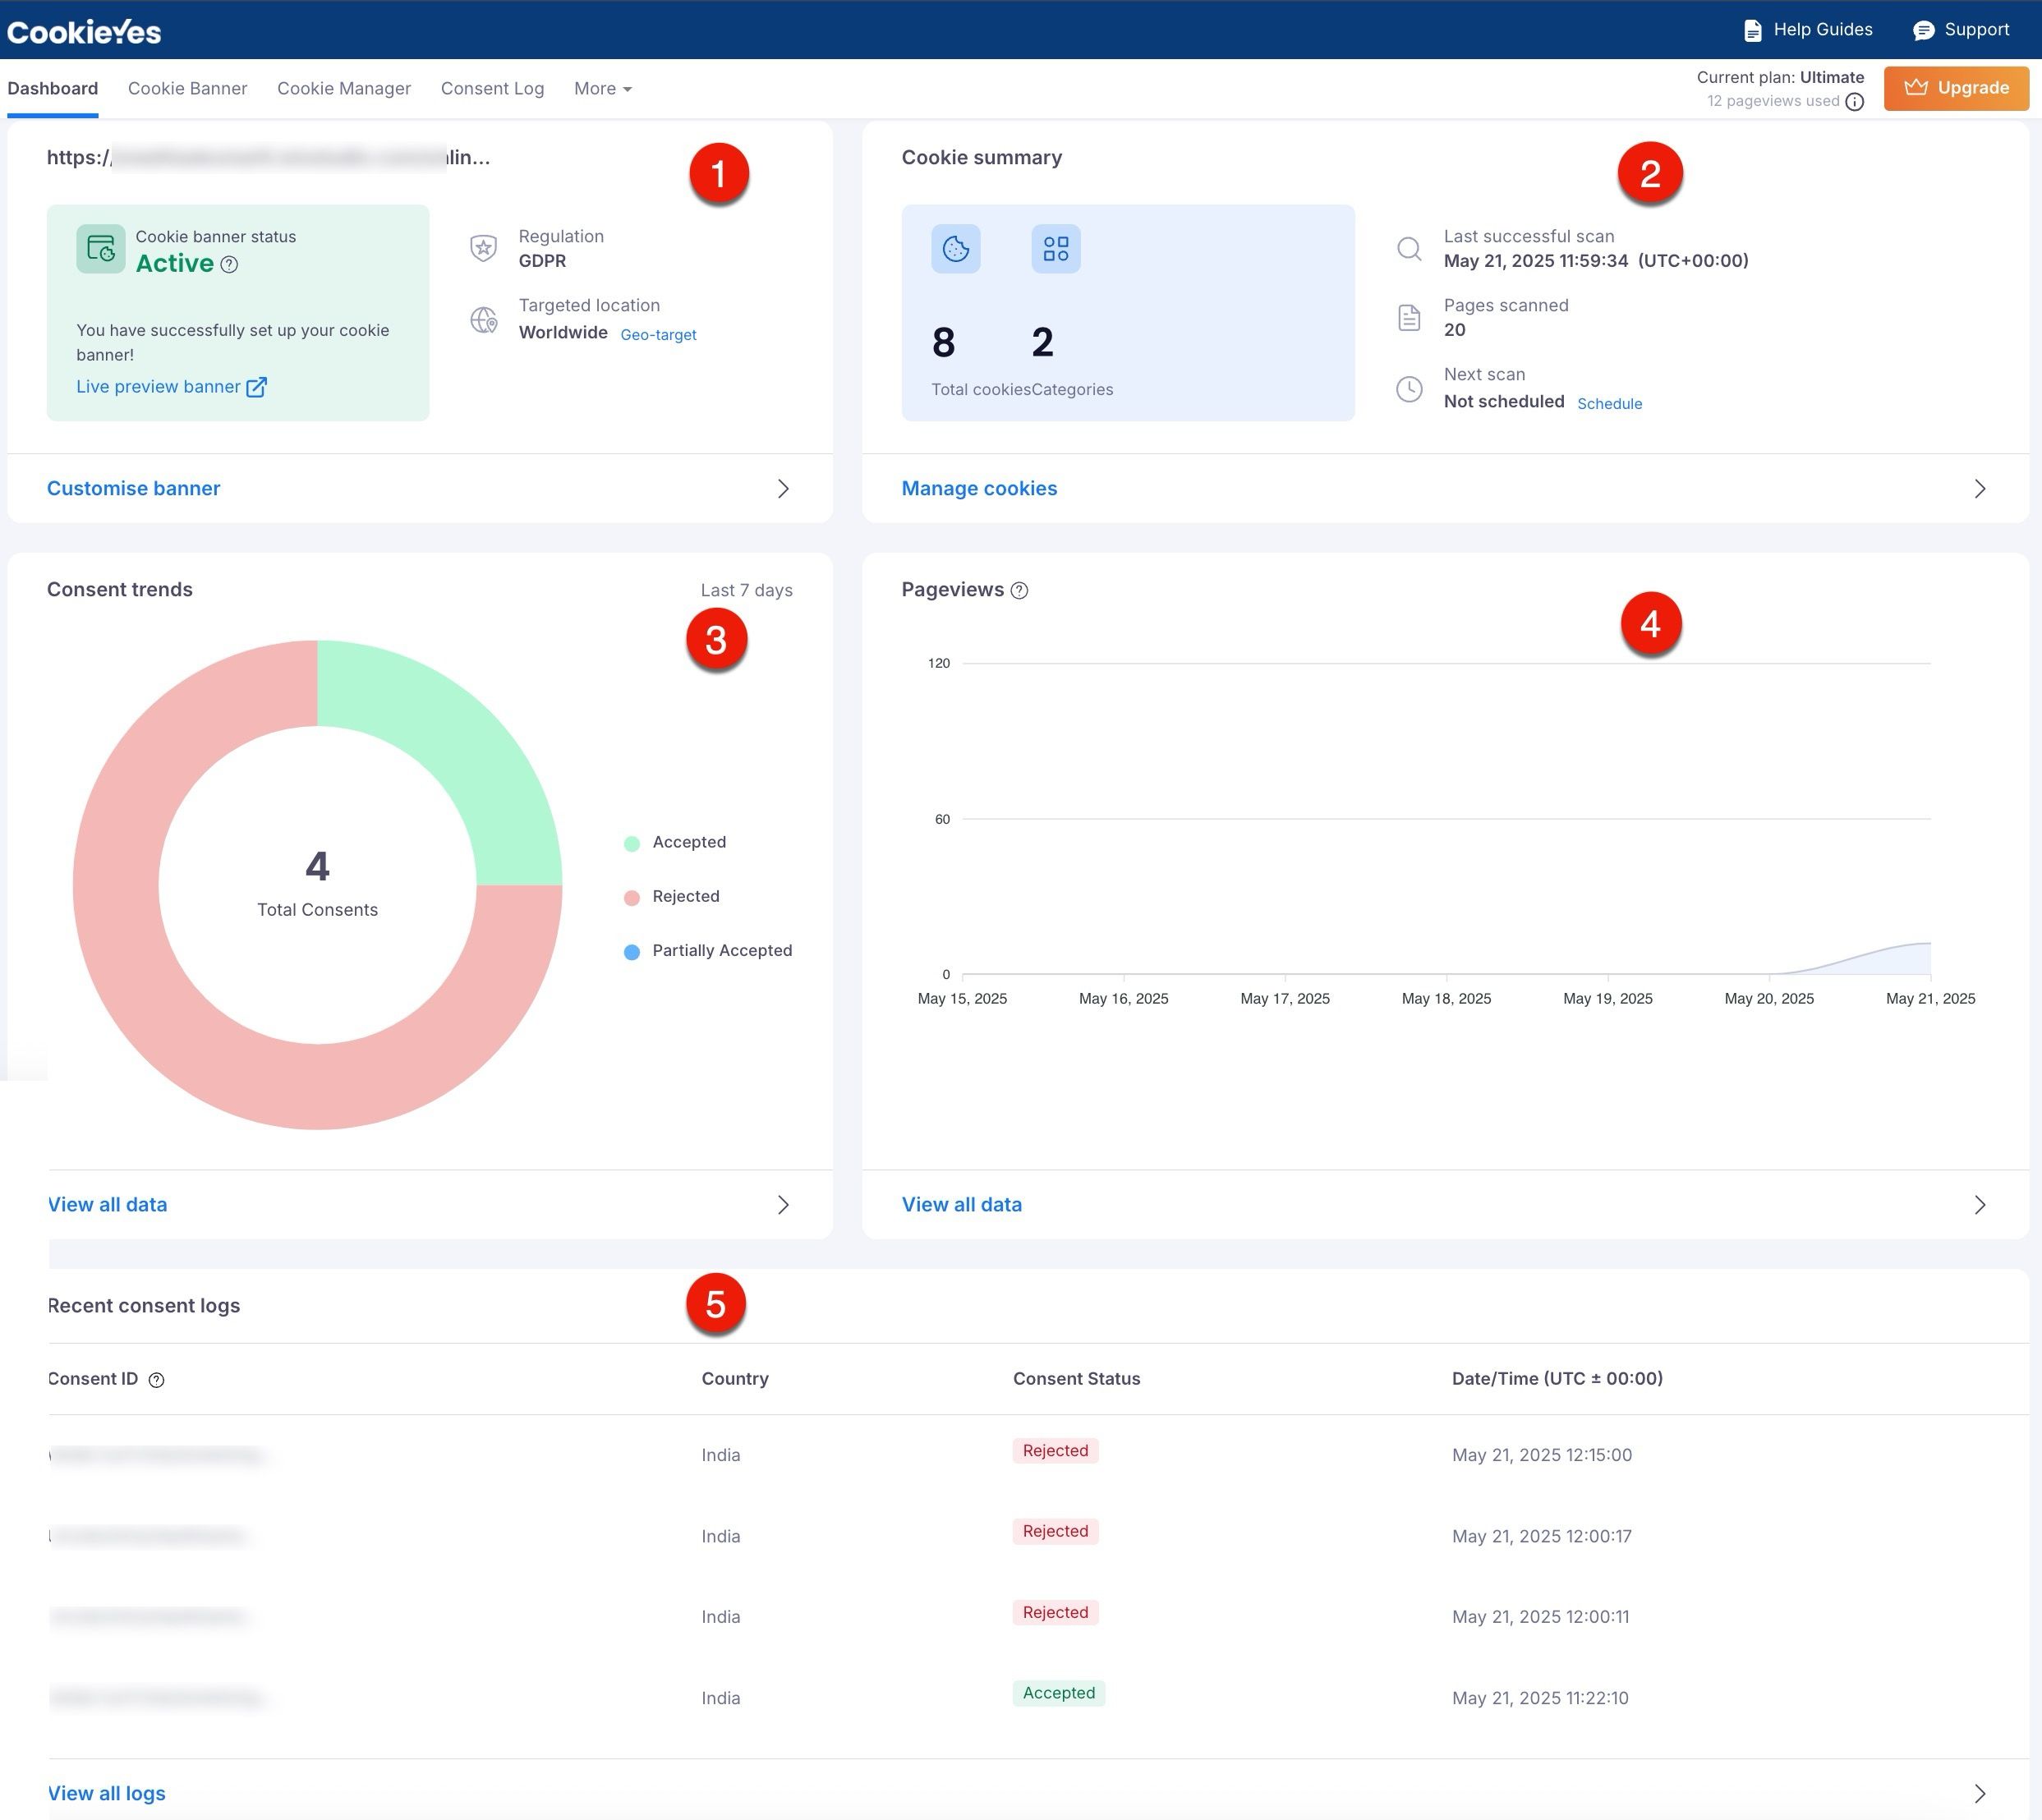
- Dashboard Overview
- Cookie Banner Status: Displays the current status of the cookie banner, indicating whether it is active or inactive.
- Regulation and Targeted Location: This section displays which privacy regulation applies to the site and the targeted location (Geo-target).
- Customise banner: Click Customise banner to adjust the layout, content and appearance of the cookie consent banner, aligning it with the site.
- Cookie Summary
- This section provides a quick summary of the site’s cookies, including the total number of cookies detected and the number of categories.
- Scanning Information: This section displays details about the latest cookie scan, including the last successful scan date, the number of pages scanned and the next scan.
- Manage Cookies: Click Manage Cookies to review, categorise cookies and initiate a new scan.
- Consent Trends
- This section shows a doughnut chart of user consent over the last seven days.
- Pageviews
- This graph provides an overview of pageviews over time, helping you monitor site traffic and engagement with the consent banner.
- Recent Consent Logs
- This area shows the most recent consent logs, which record visitors’ choices regarding cookie preferences.
- View All Logs: Click here to view a detailed history of consent logs for compliance audits or to review user preferences over time.
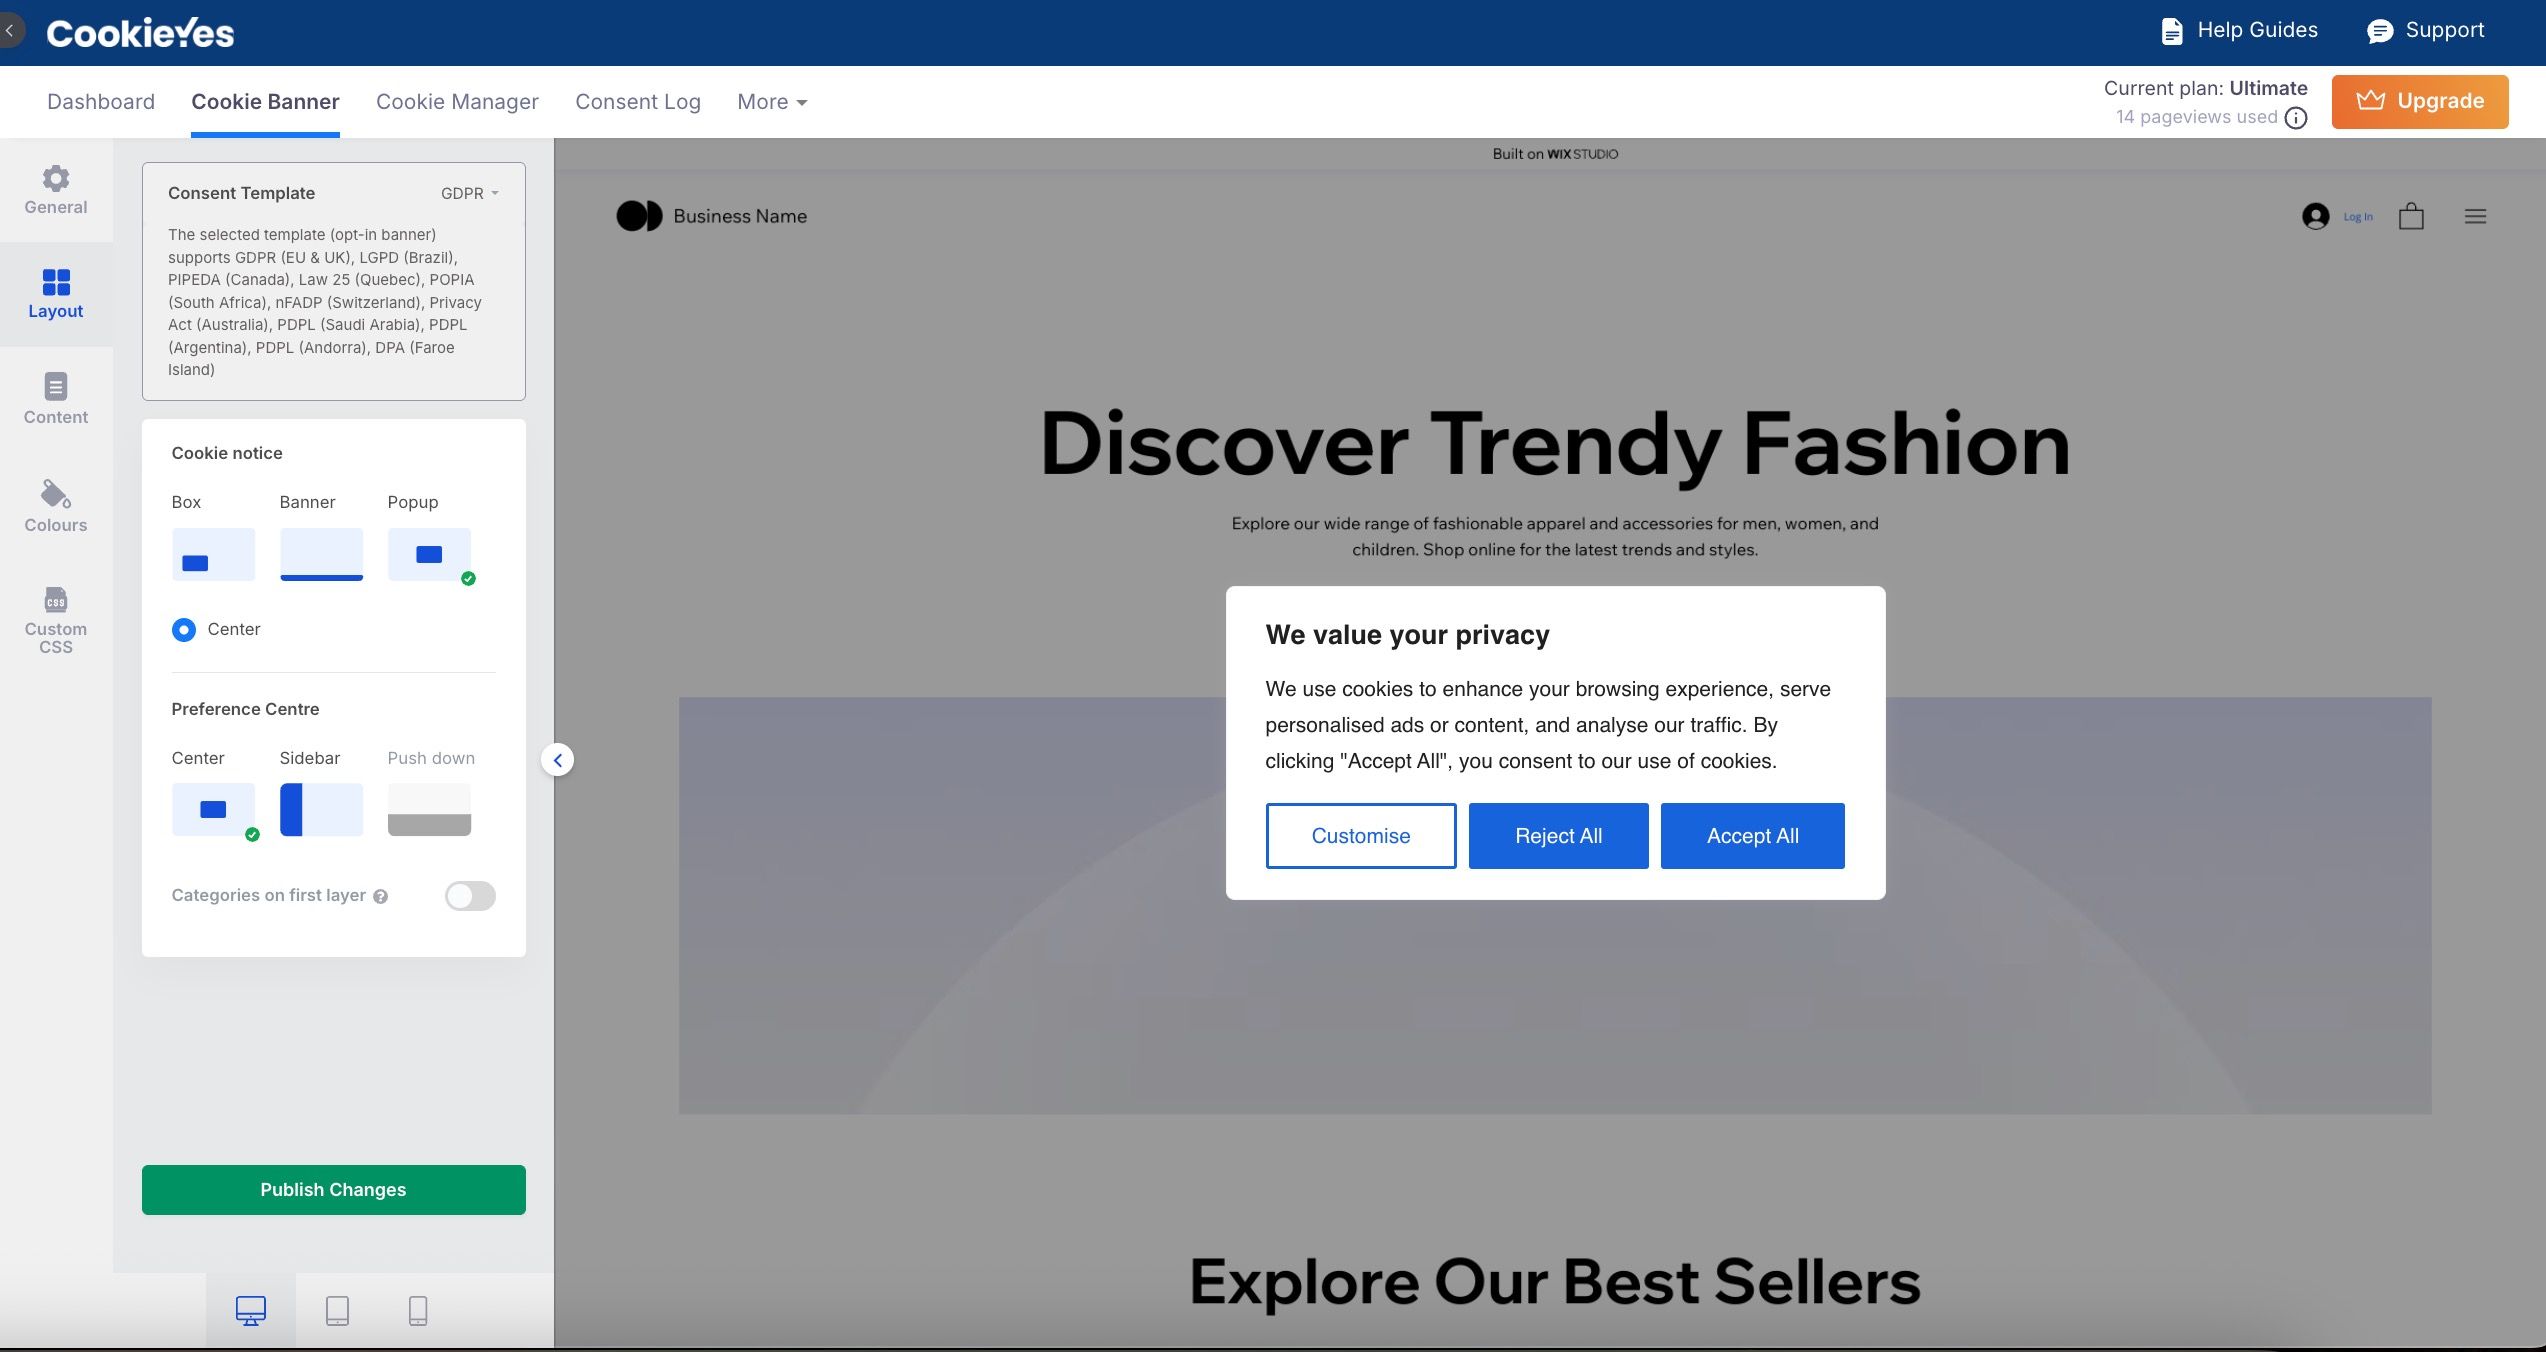
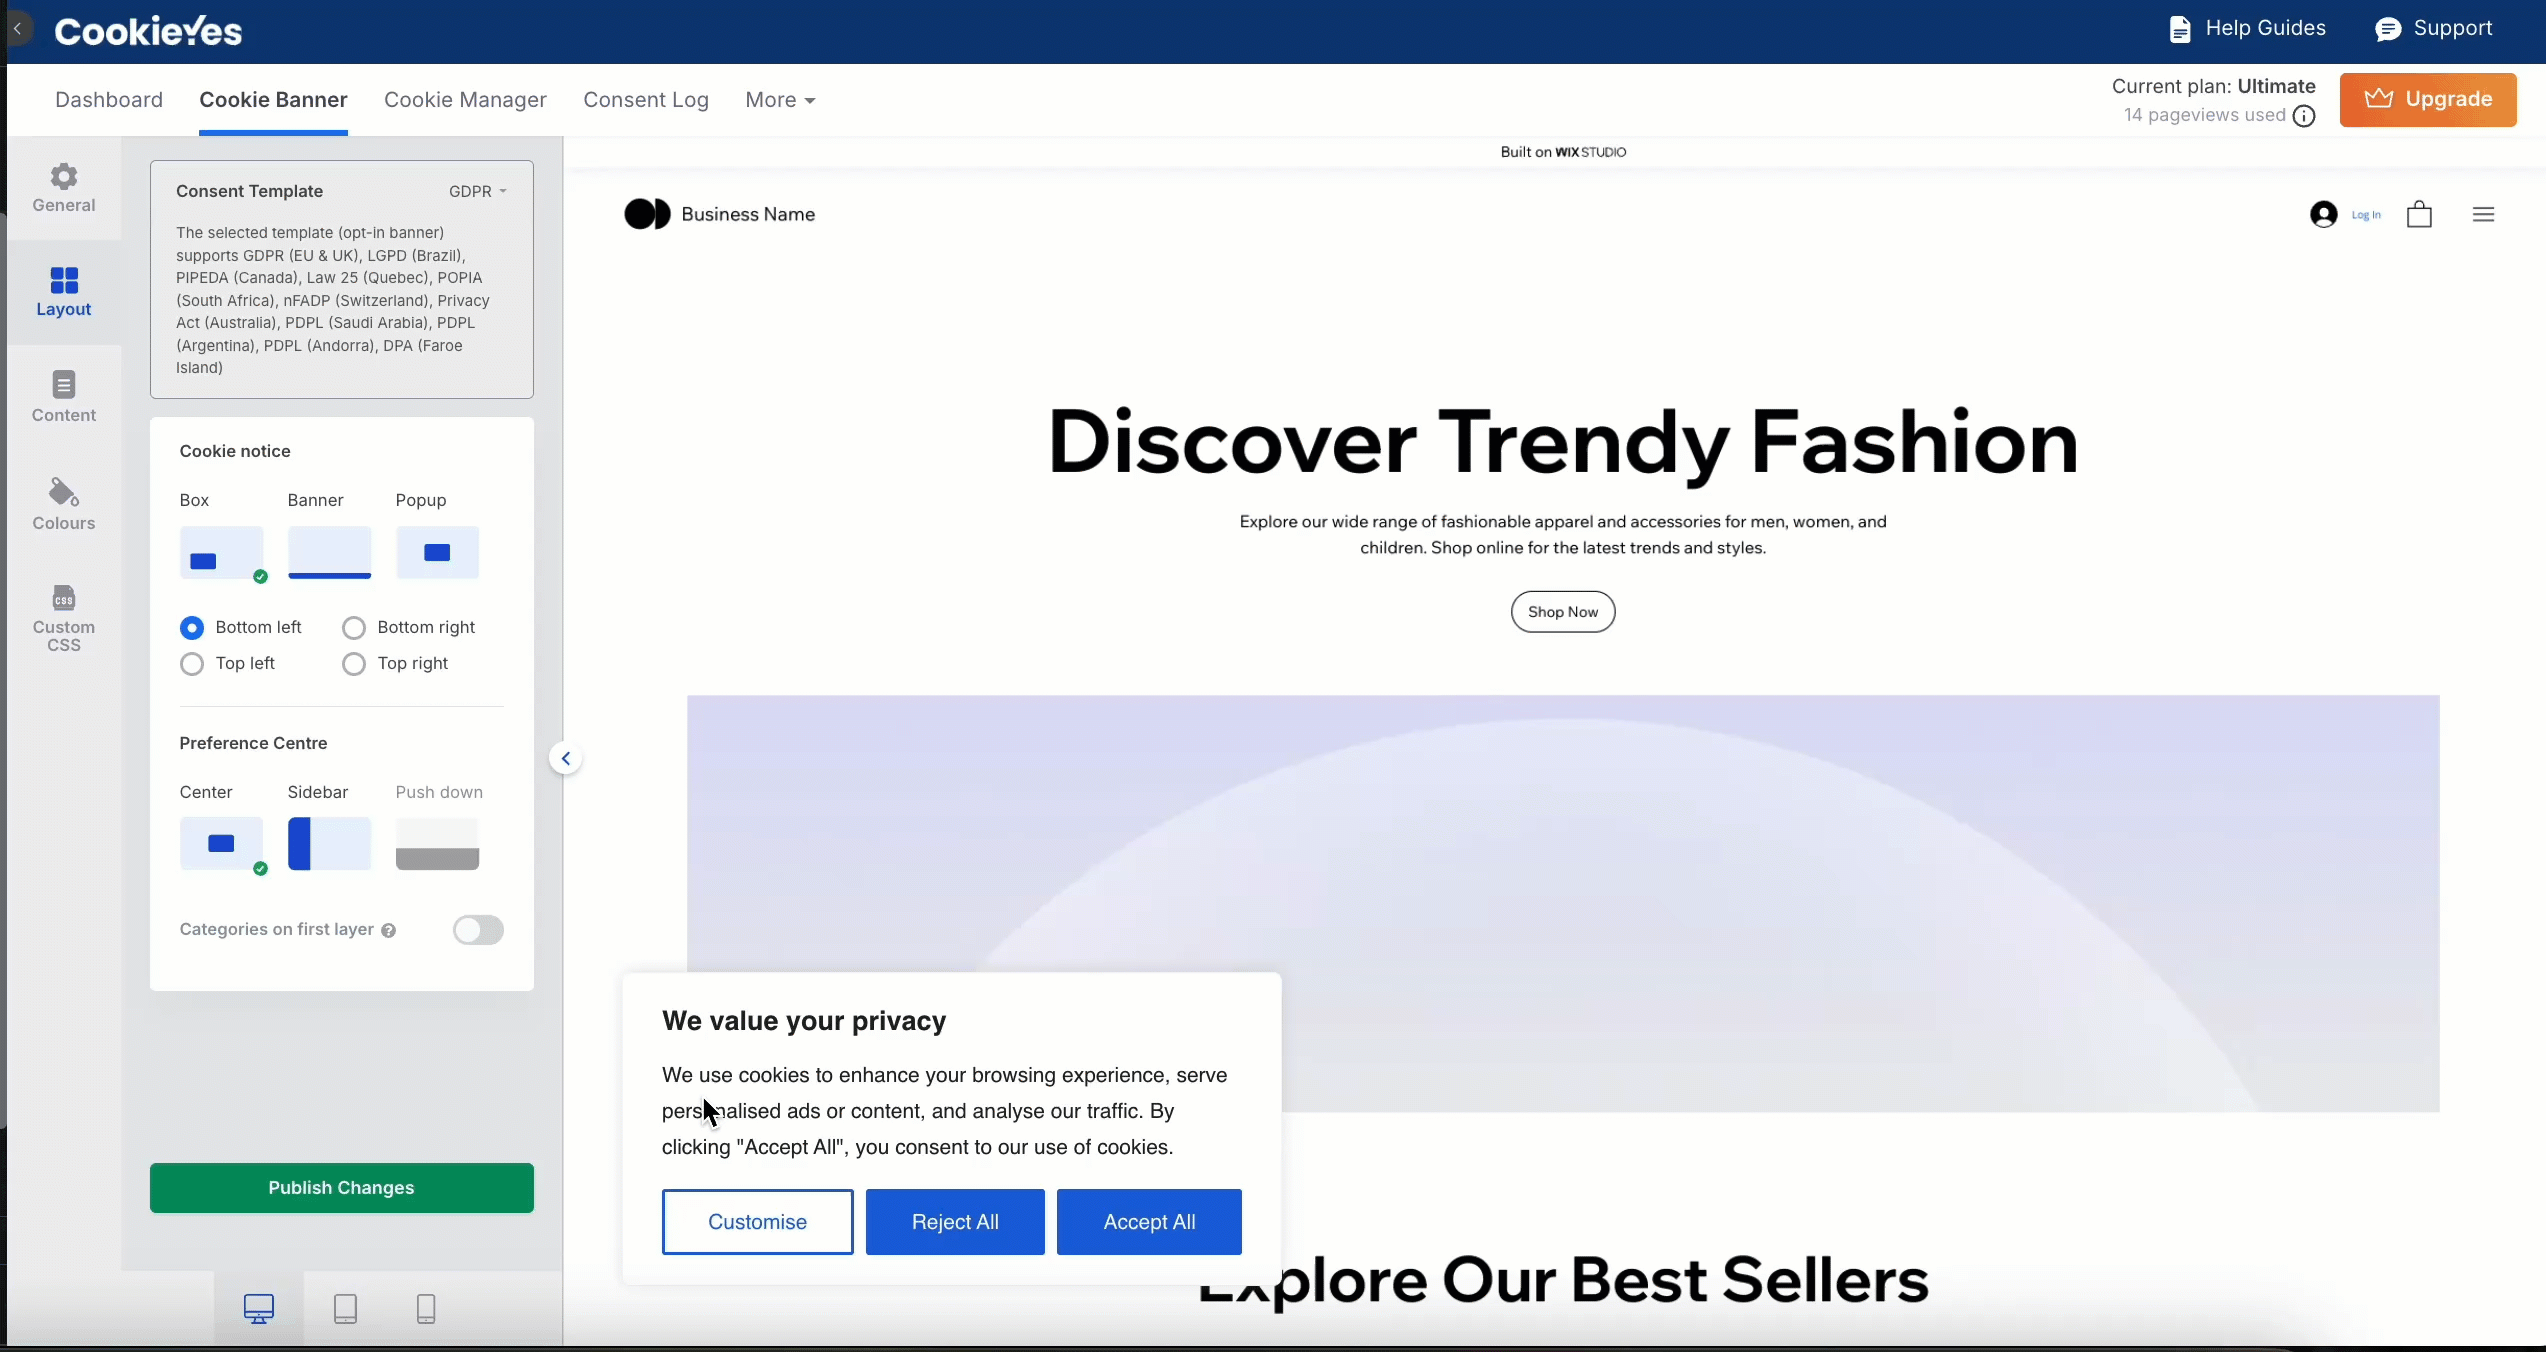
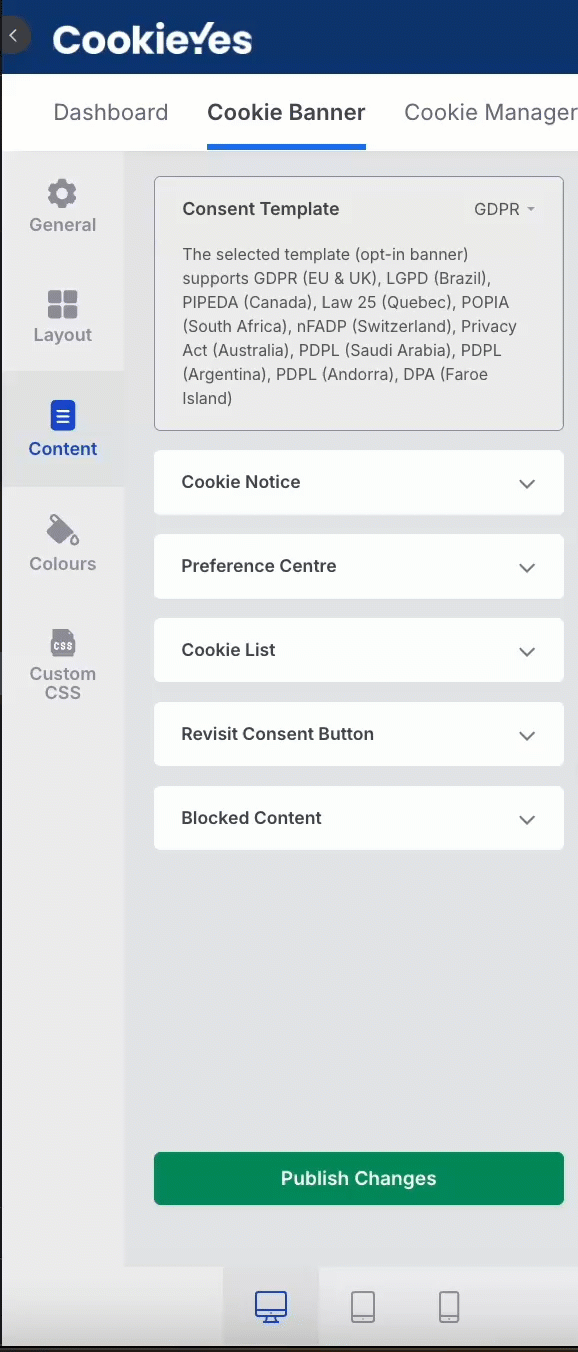
Configuring the Cookie Banner
Accessing the Banner Configuration
- Open the CookieYes Dashboard:
- In the Wix Editor, navigate to Apps > CookieYes app from the left sidebar.
- Navigate to Banner Settings:
- From the top navigation panel, select the Banner Settings tab. This section allows you to customise every aspect of your cookie consent banner.
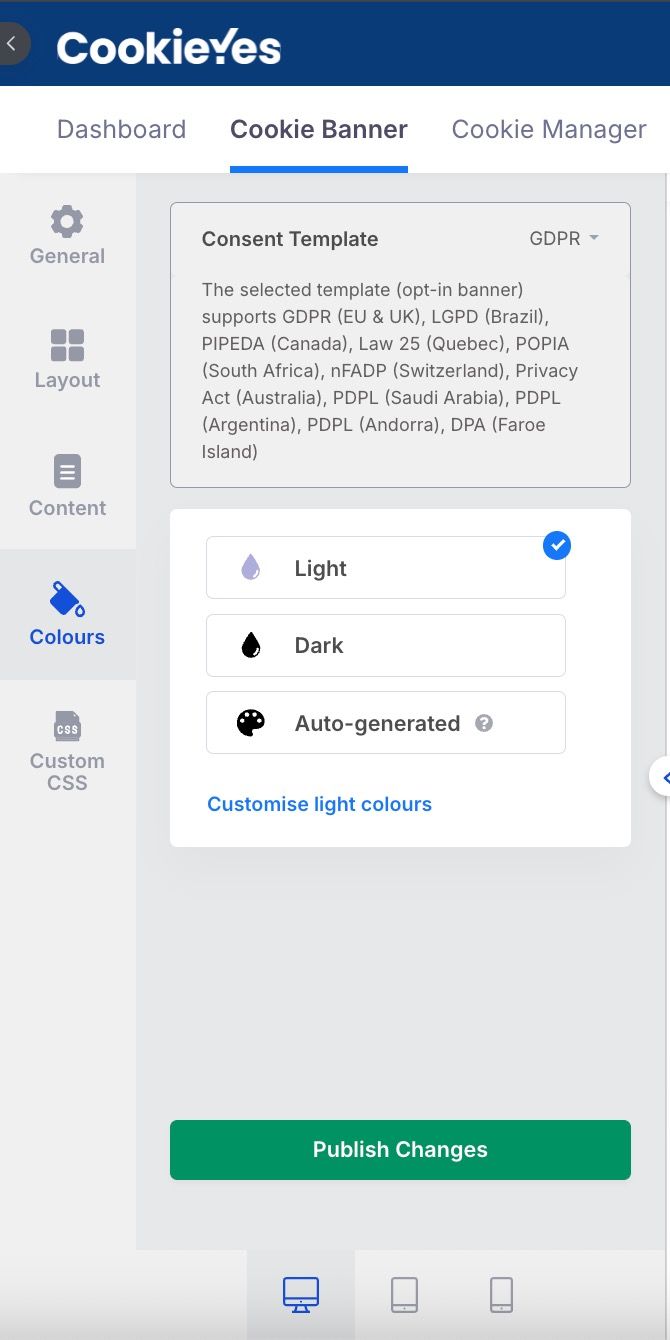
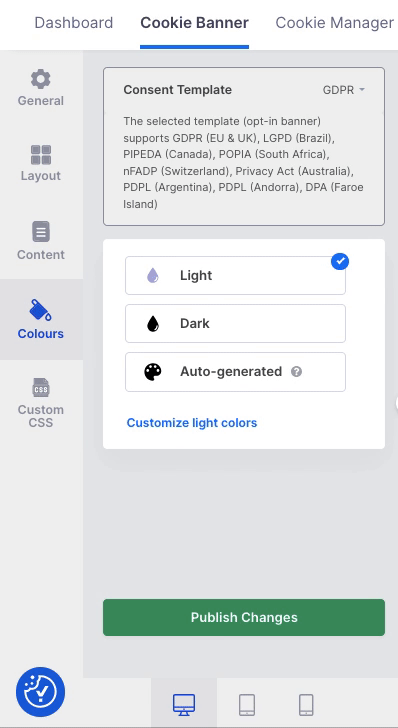
Key Banner Customisation Options

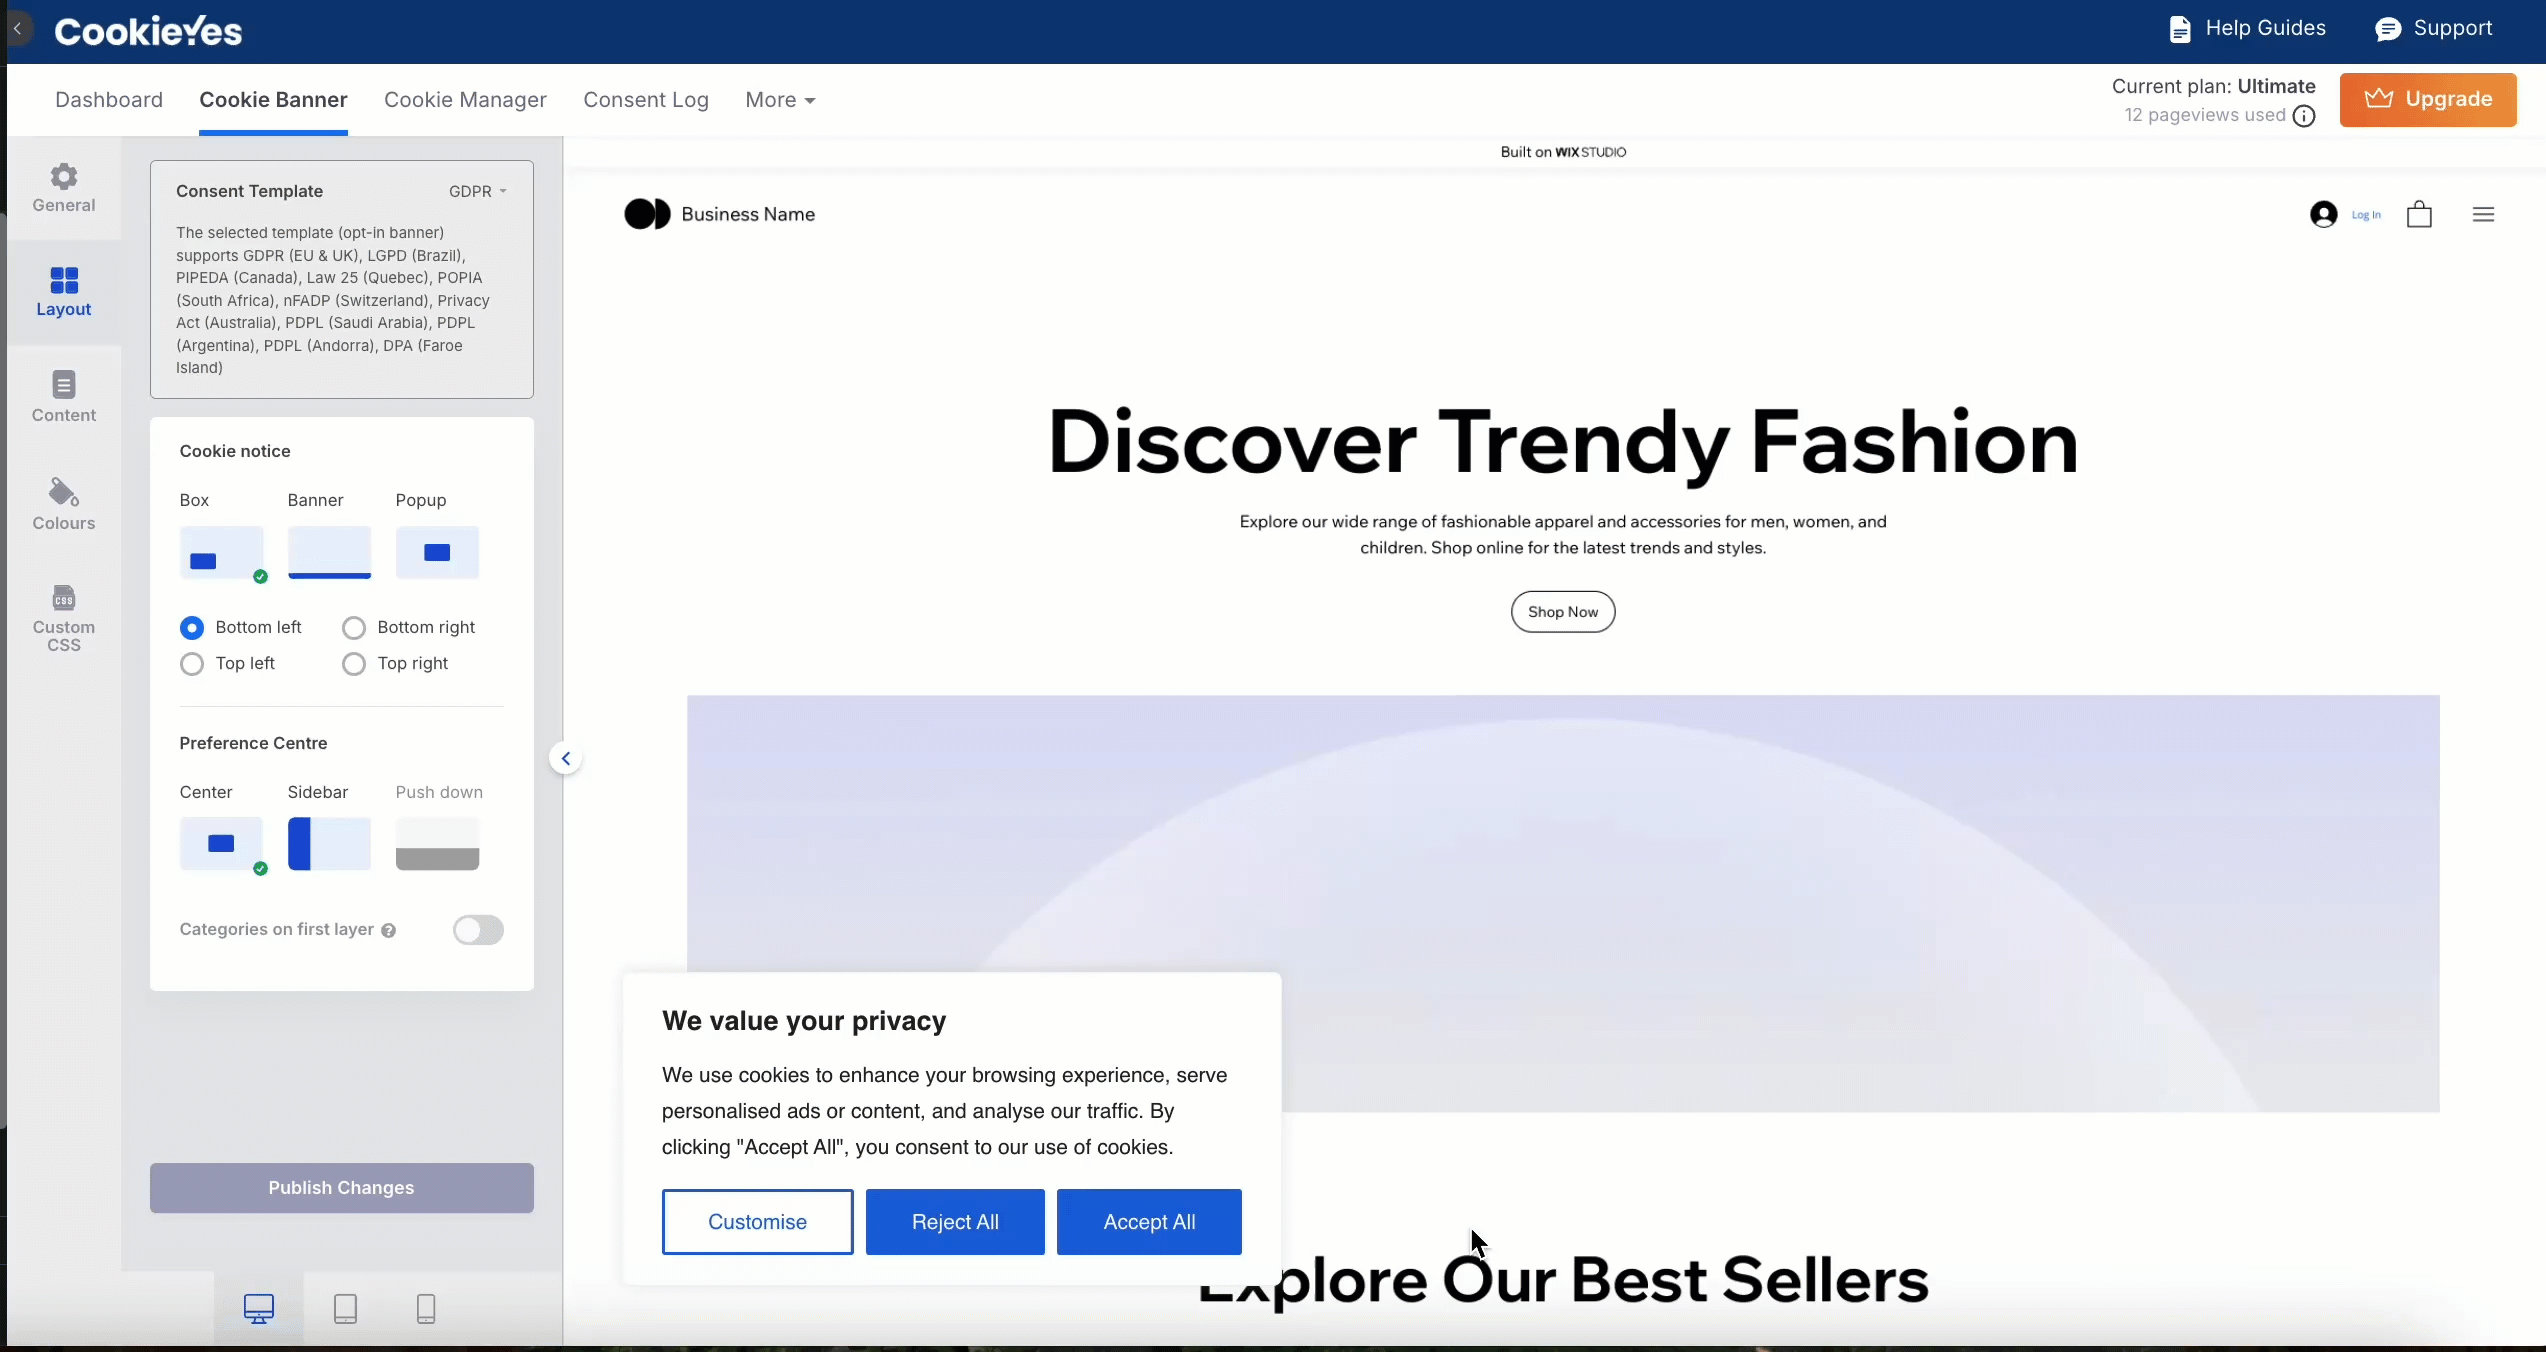
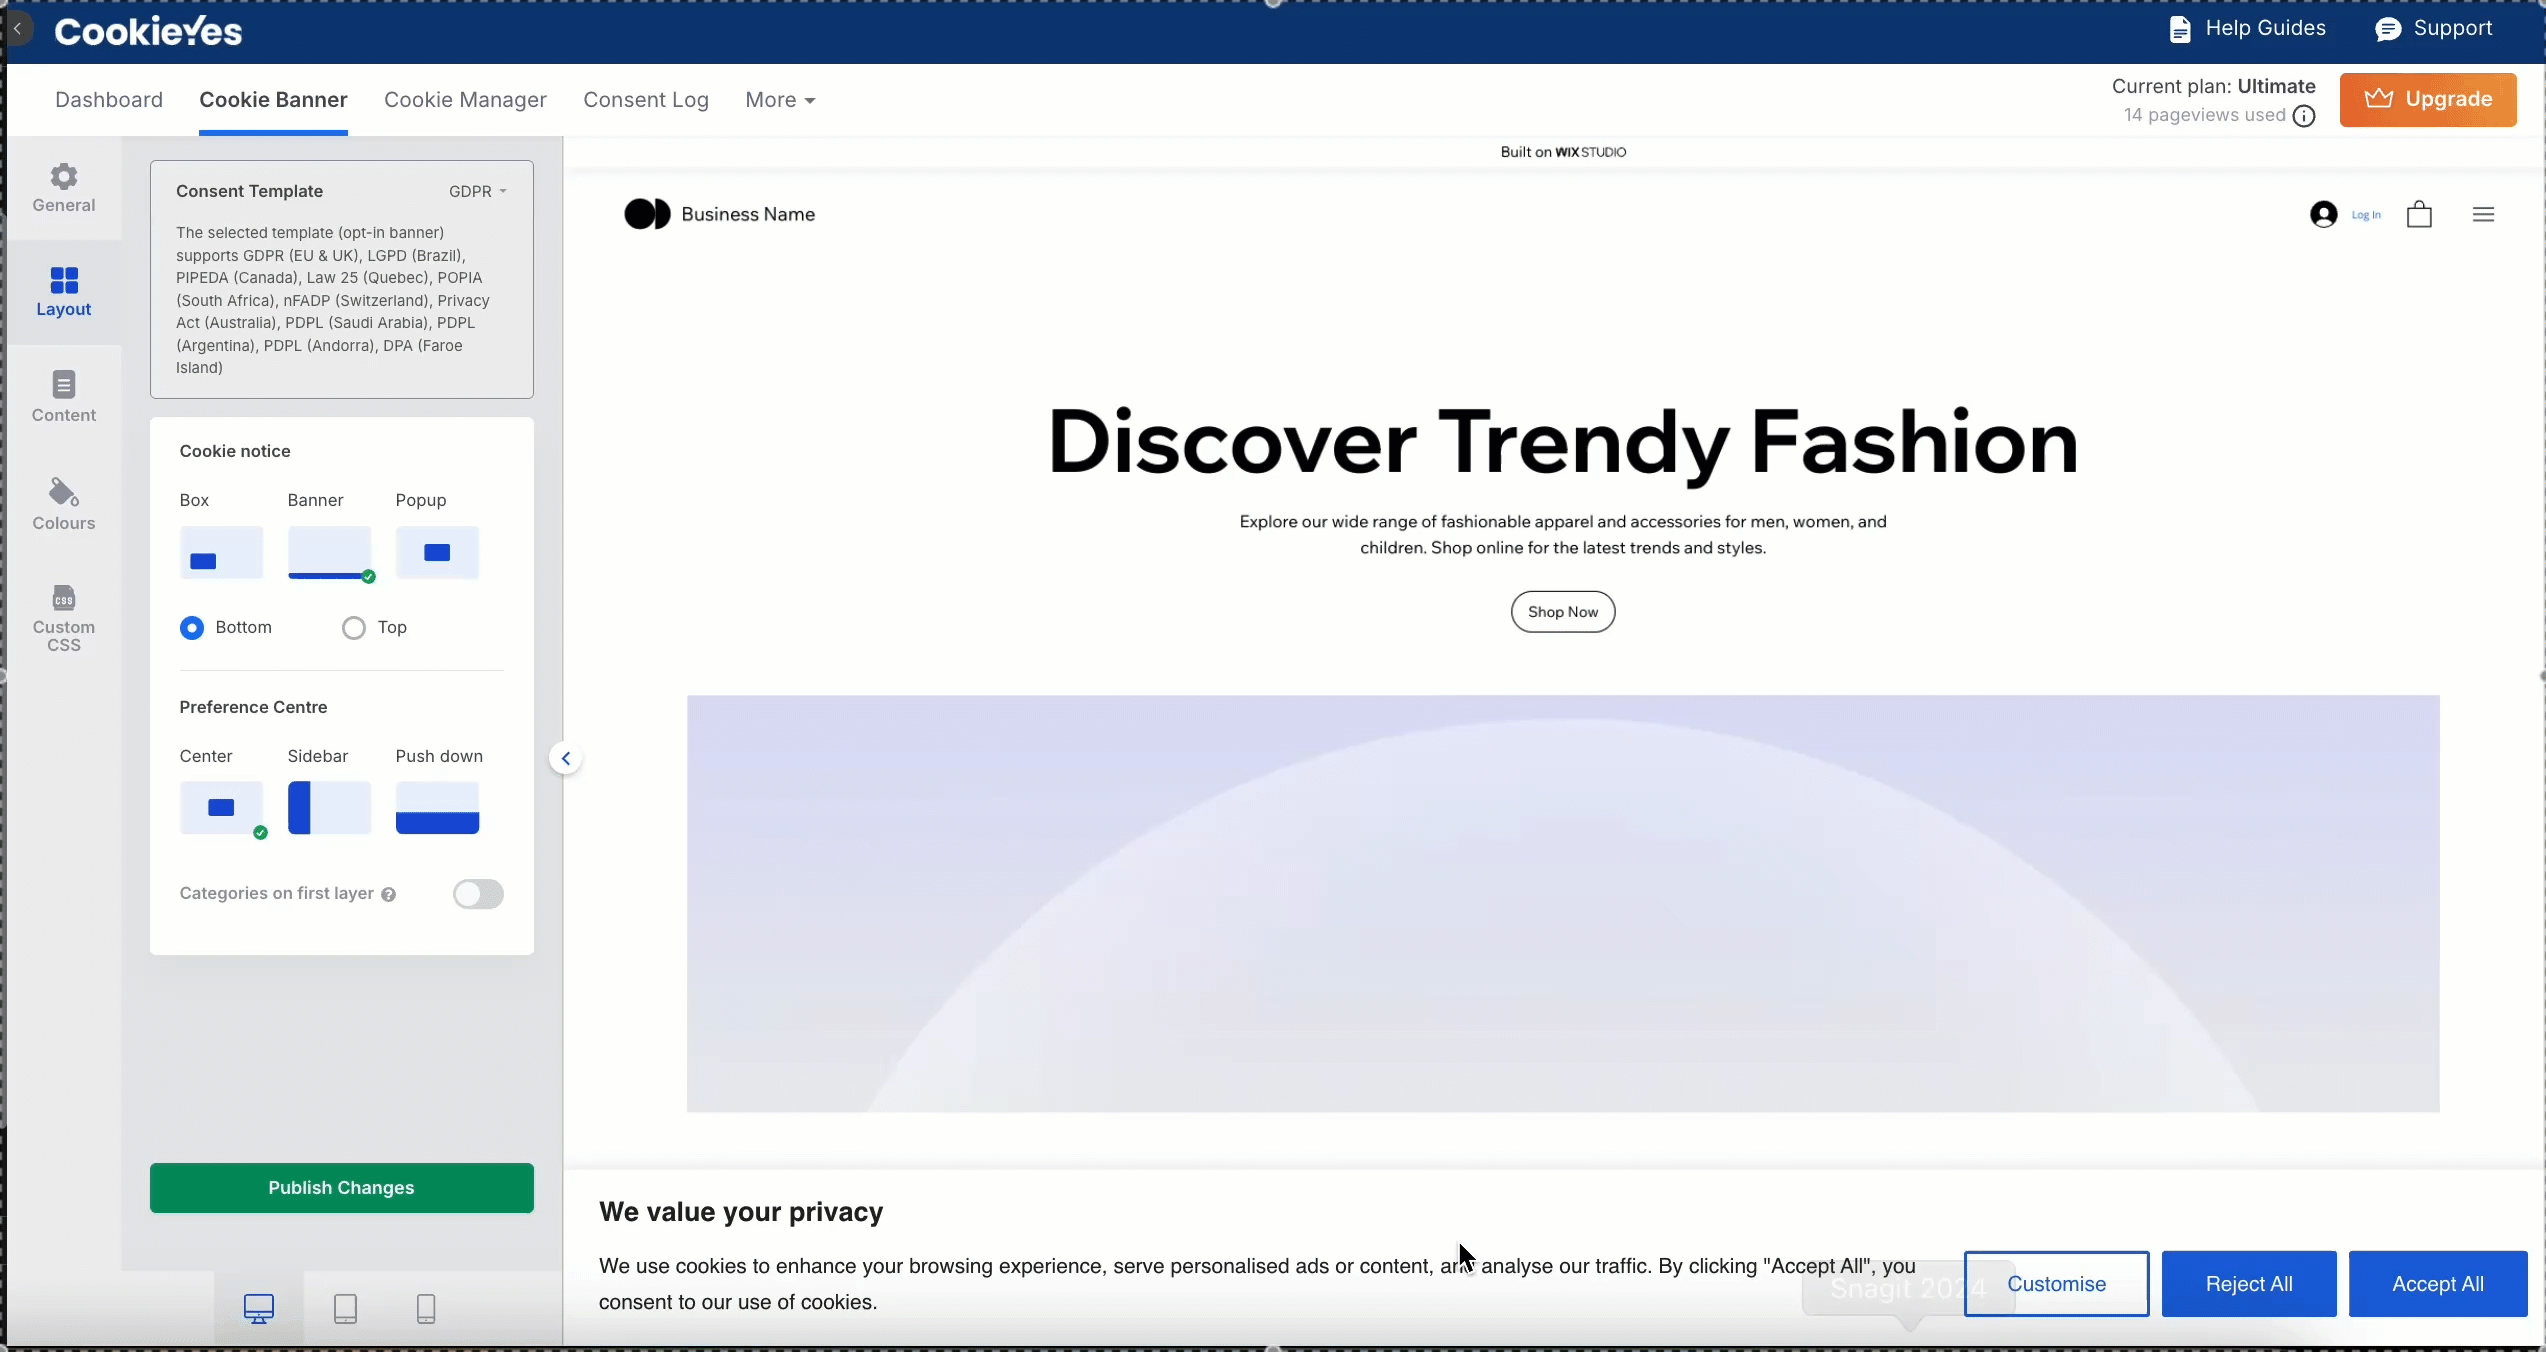
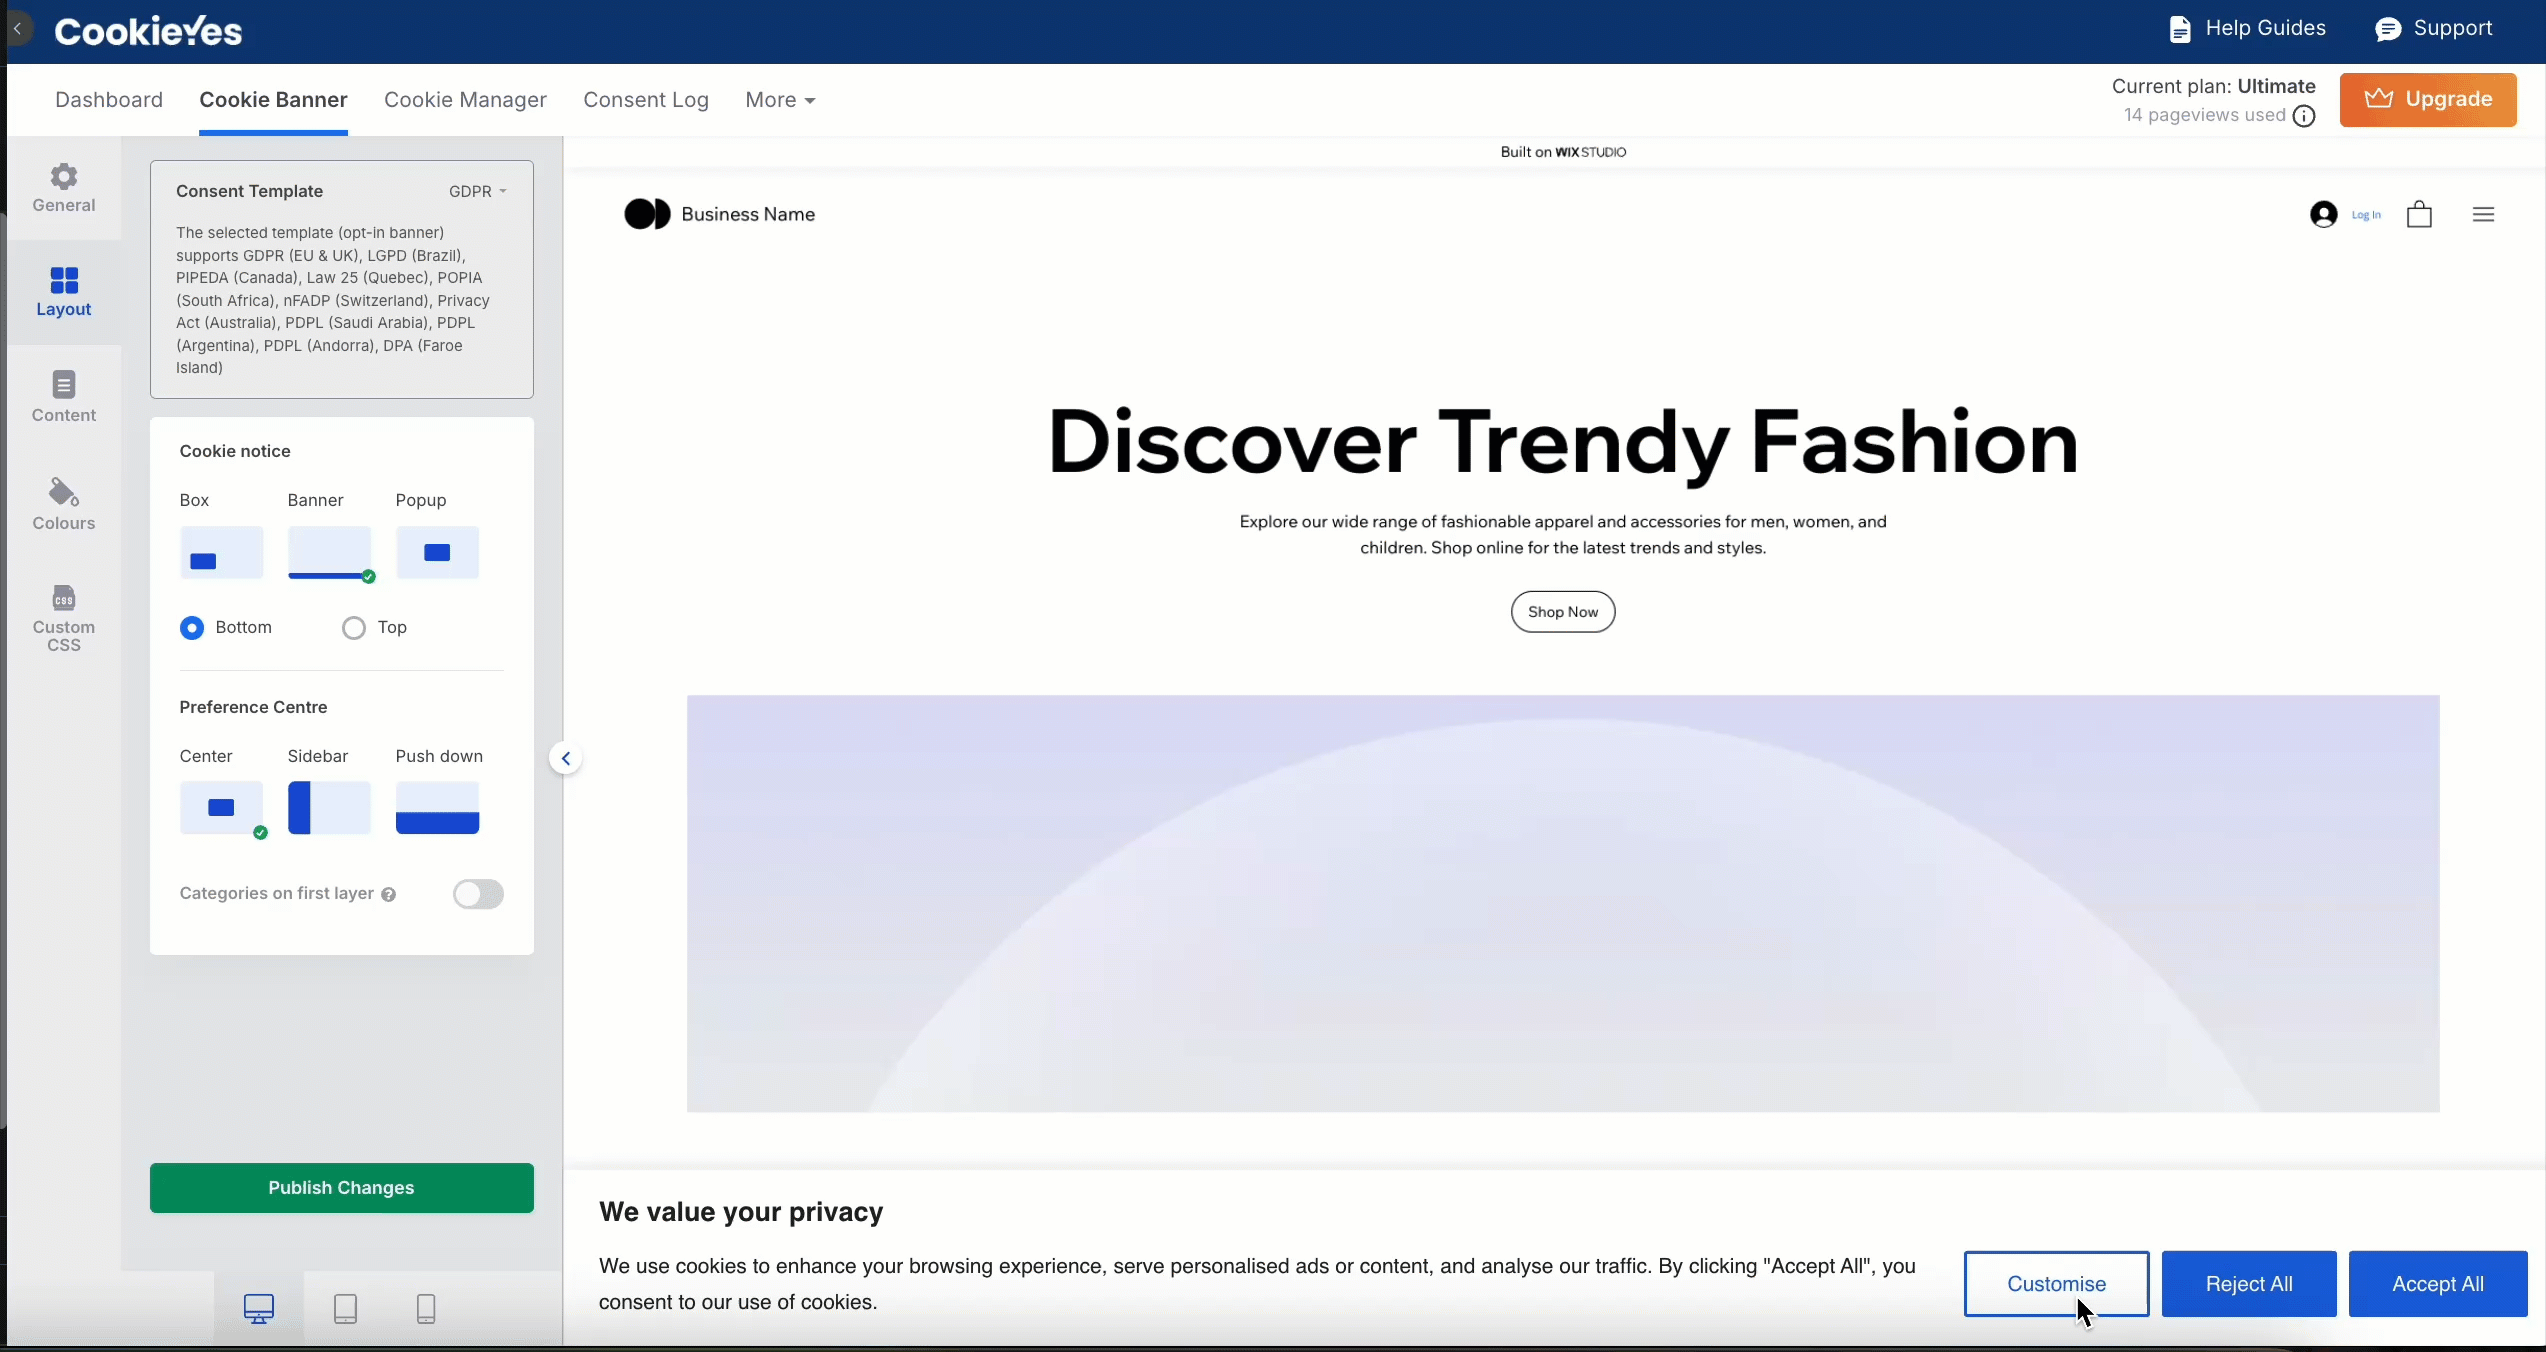

Publishing and Testing the Banner
Once you’ve configured the banner:
- Check the Preview of the changes to the banner.
- Click Publish Changes to apply them to your site.
- Test the banner on desktop, tablet and mobile devices to confirm it displays as expected and provides a smooth user experience.
Managing Cookies Using CookieYes
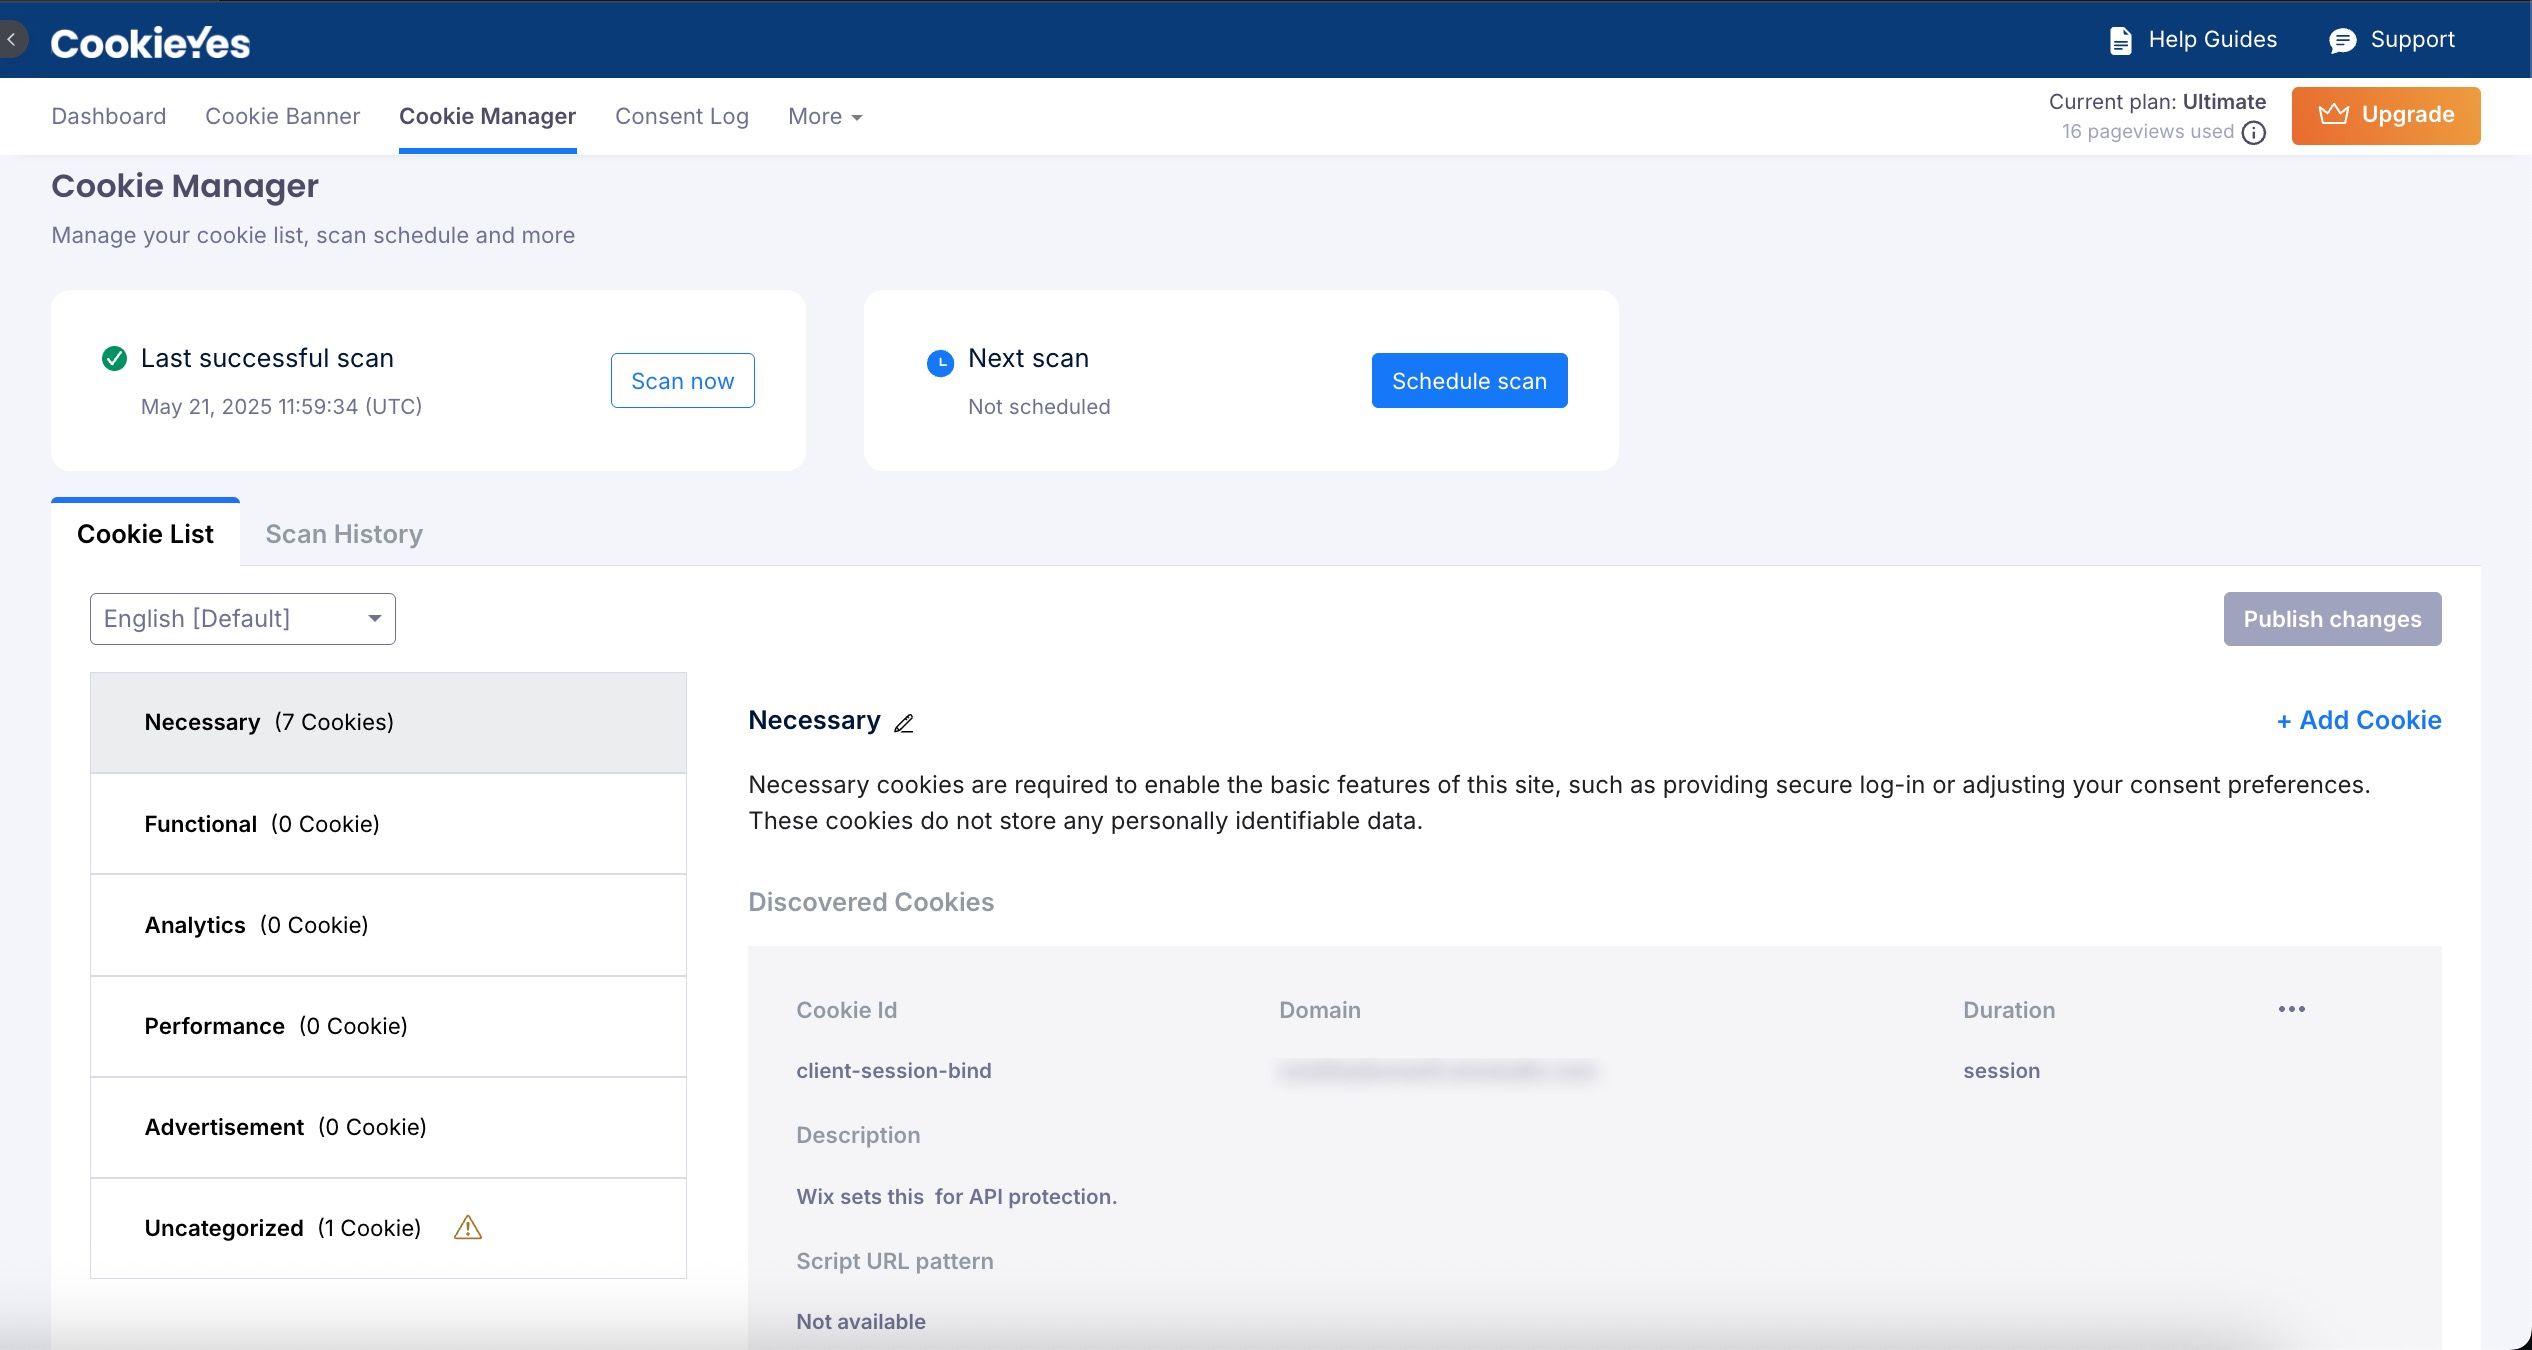
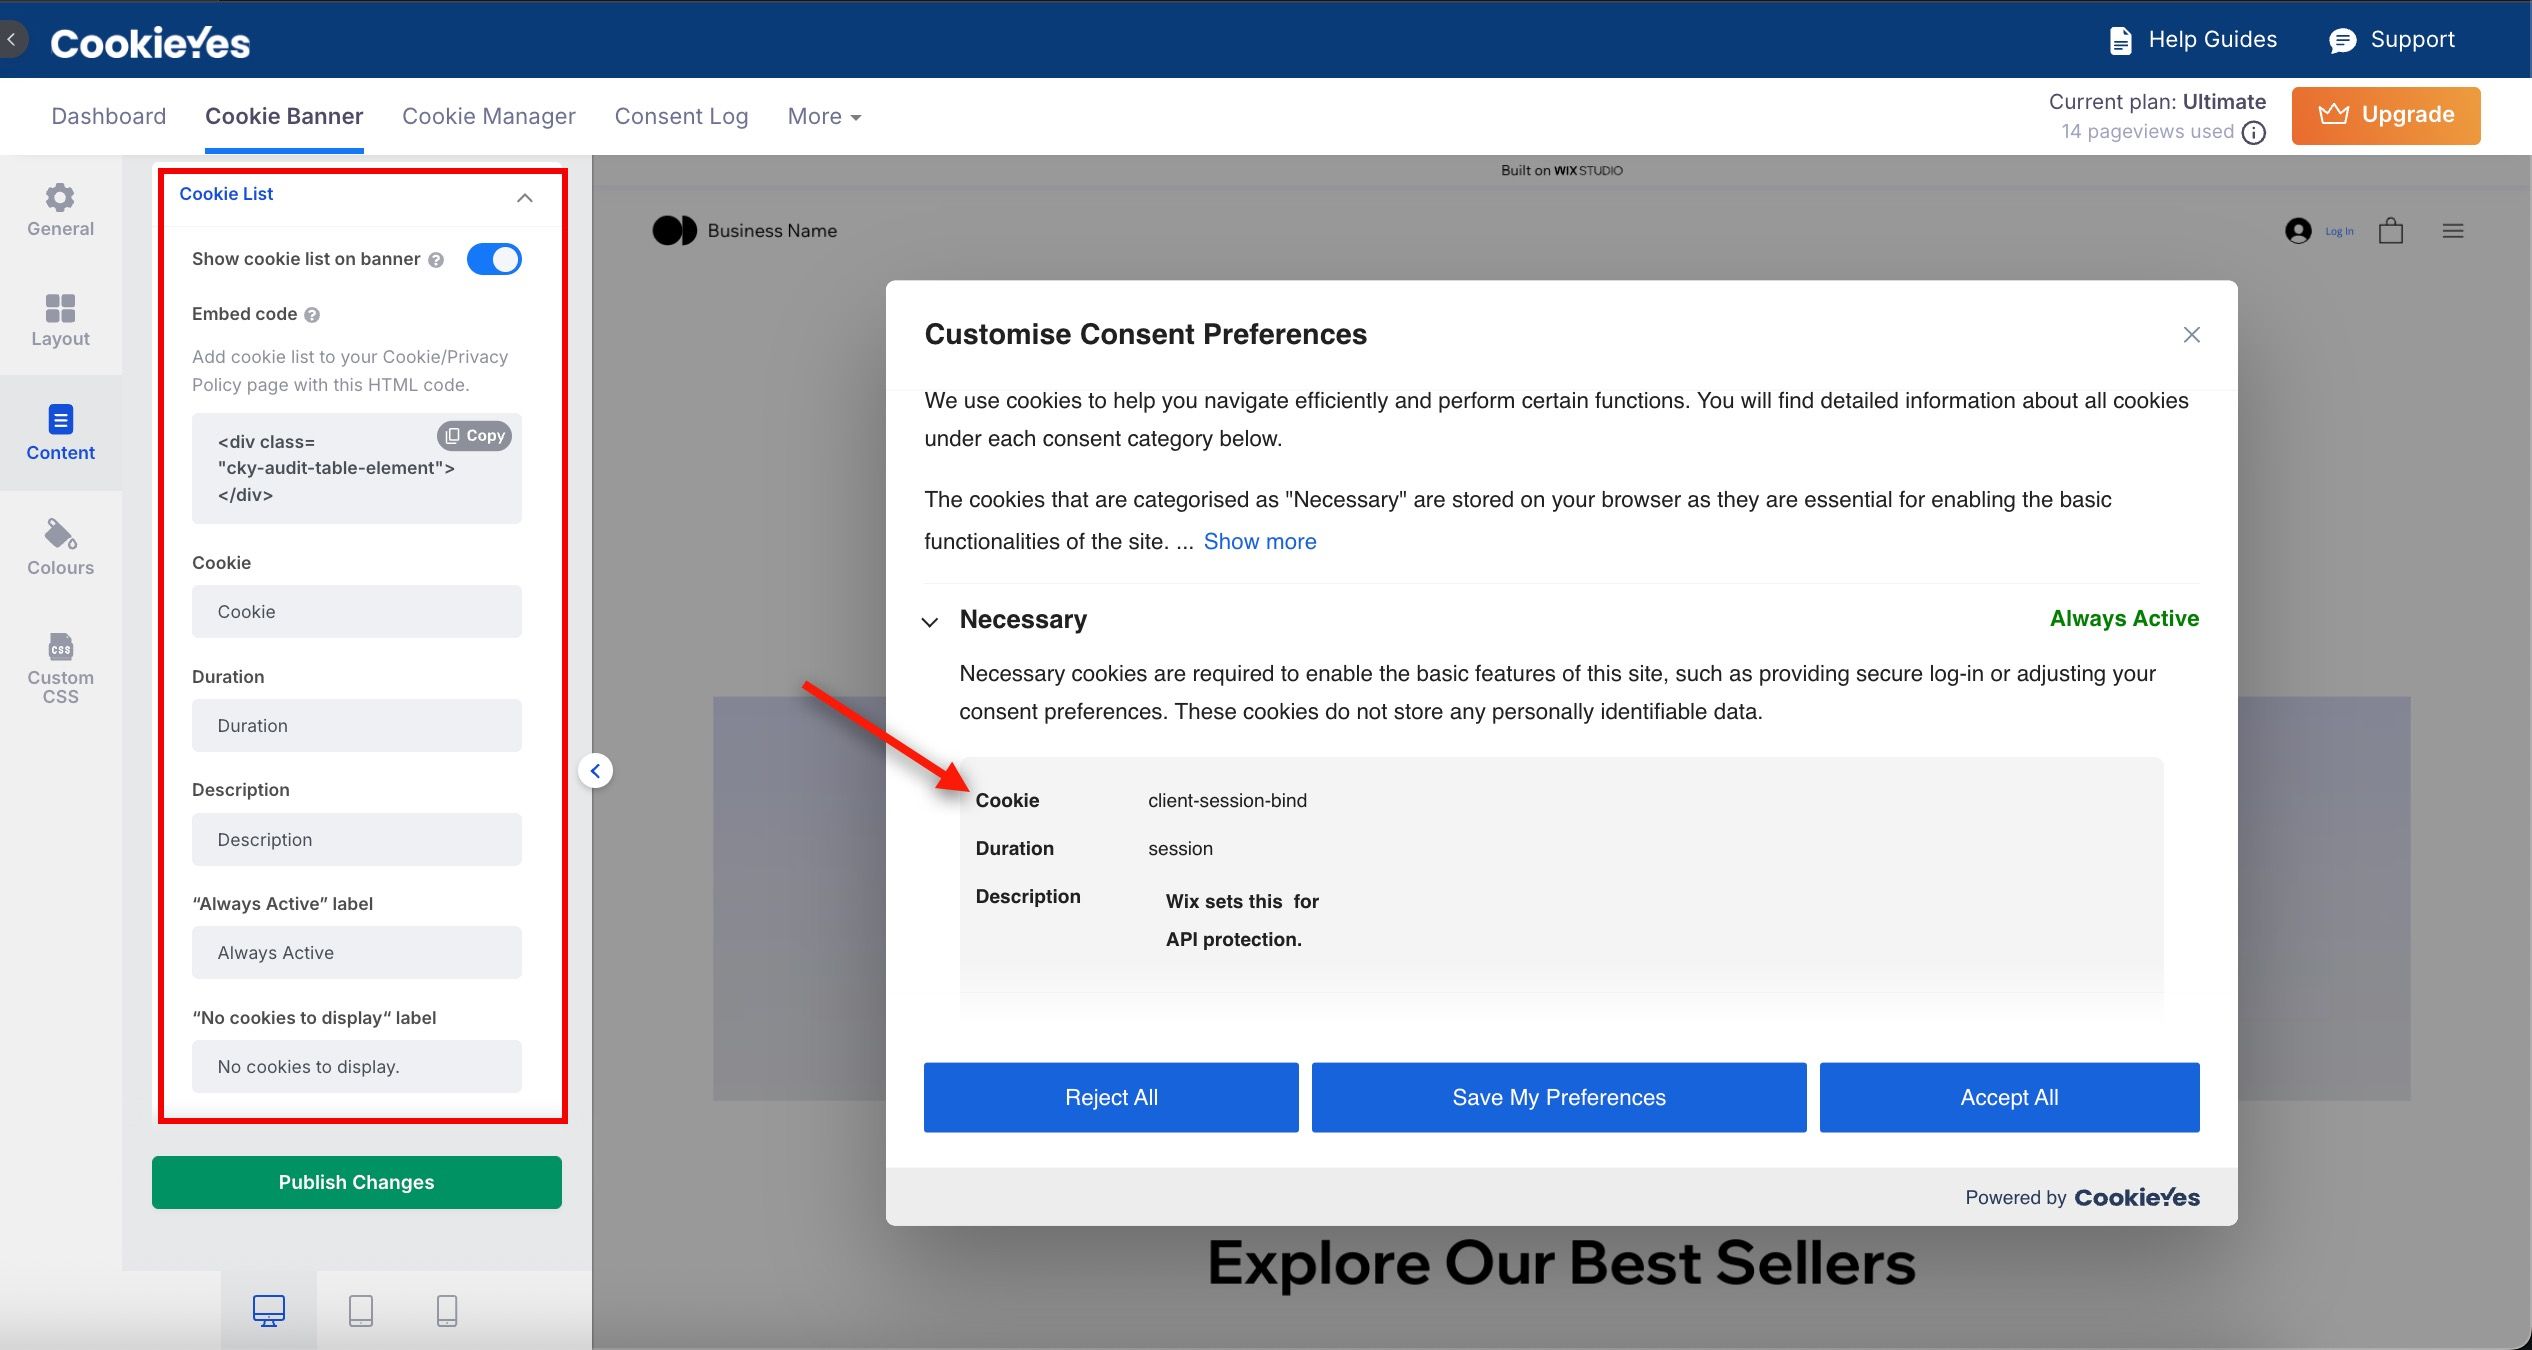
Cookie List
The Cookie List tab organises detected cookies into categories such as Necessary, Functional, Analytics, Performance, Advertisement and Uncategorized; and each category includes:
- Cookie ID: The unique identifier of the cookie.
- Domain: The source of the cookie.
- Description: A brief explanation about the purpose of the cookie and how it is used.
- Duration: How long the cookie remains active.
- Script URL Pattern: The regex pattern or URL path associated with the cookie. This identifies the script or endpoint responsible for creating or managing the cookie.
How to Edit a Cookie Category?
- Go to Dashboard > Cookie Manager.
- Open the Cookie List tab and find the category to edit.
- Click the edit icon next to the category name.
- In the Edit Category modal, make changes and click Save Draft.
- Publish changes by clicking Publish Changes.
How to load cookies before consent?
You can load cookies of each category on a user’s browser before receiving their consent. To enable this feature, follow the steps below:
- Navigate to the Cookie Manager > Cookie Category.
- Click the edit icon.
- Enable Load cookies prior to consent.
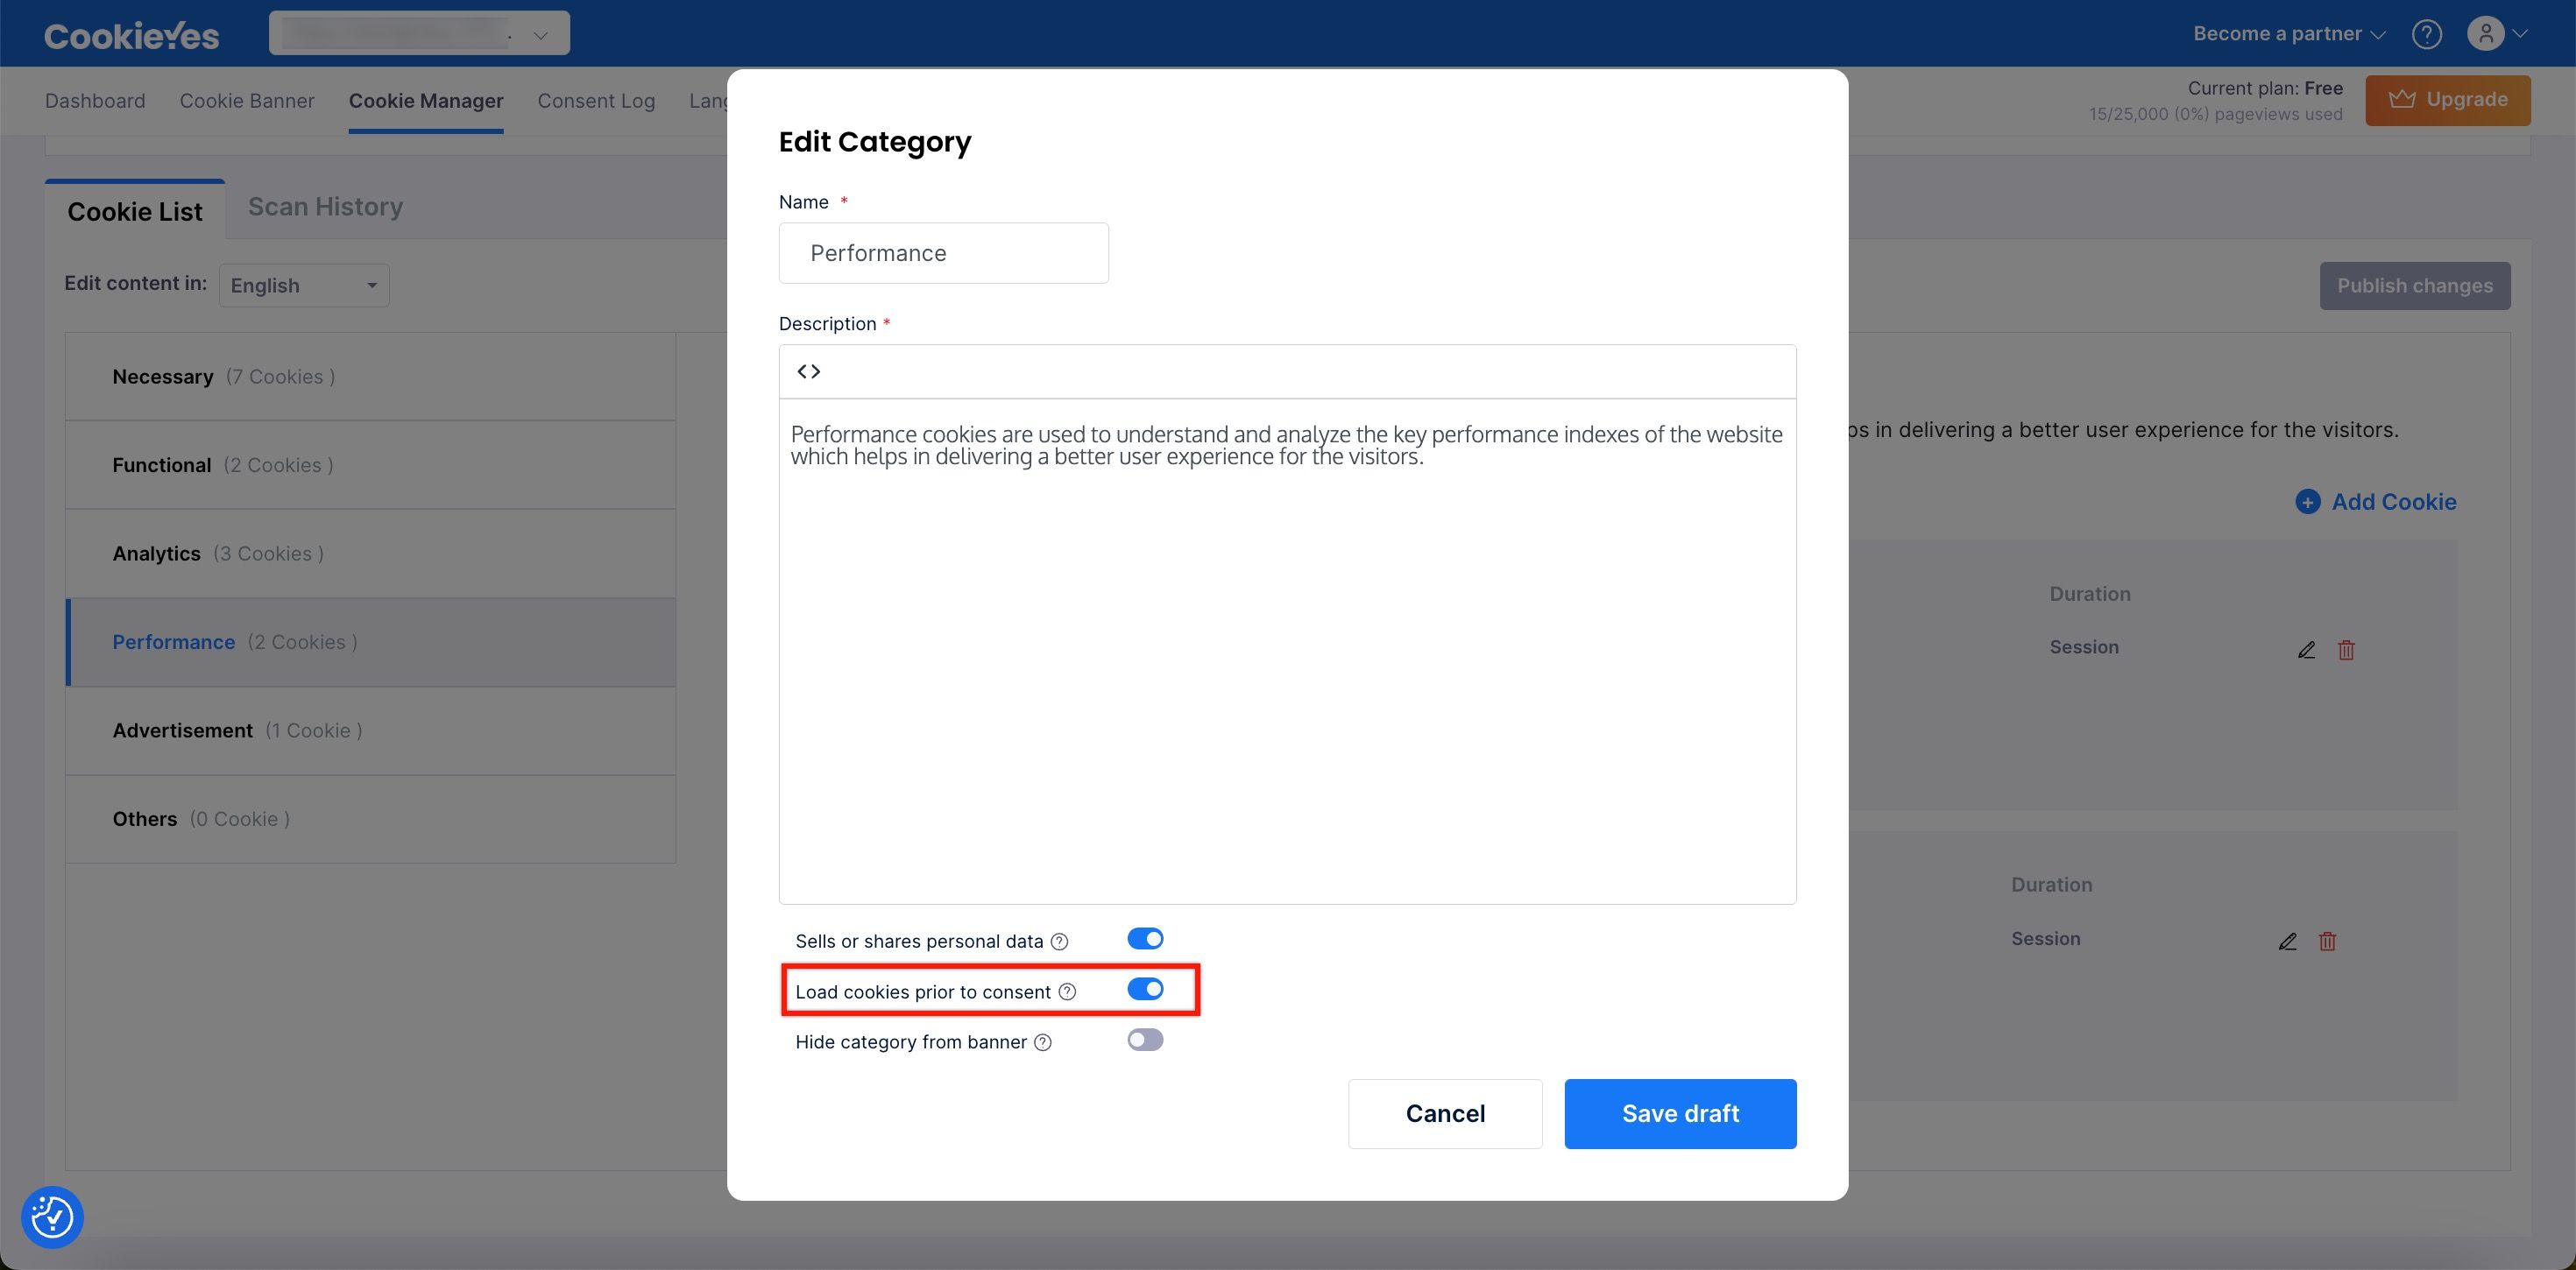
- Click the Save Draft button to save the changes made.
- Now, click the Publish changes button.
Enabling the Load cookies prior to consent option for a category will cause the cookies within that category to load before user consent is obtained. This action may lead to non-compliance with GDPR.
How to hide a category from the cookie banner?
To hide a cookie category so that it doesn’t appear on the second layer of your banner. Follow these steps:
- Go to Cookie Manager > Cookie Category.
- Click the edit icon next to the category.
- Toggle the Hide category from banner option to enable it.
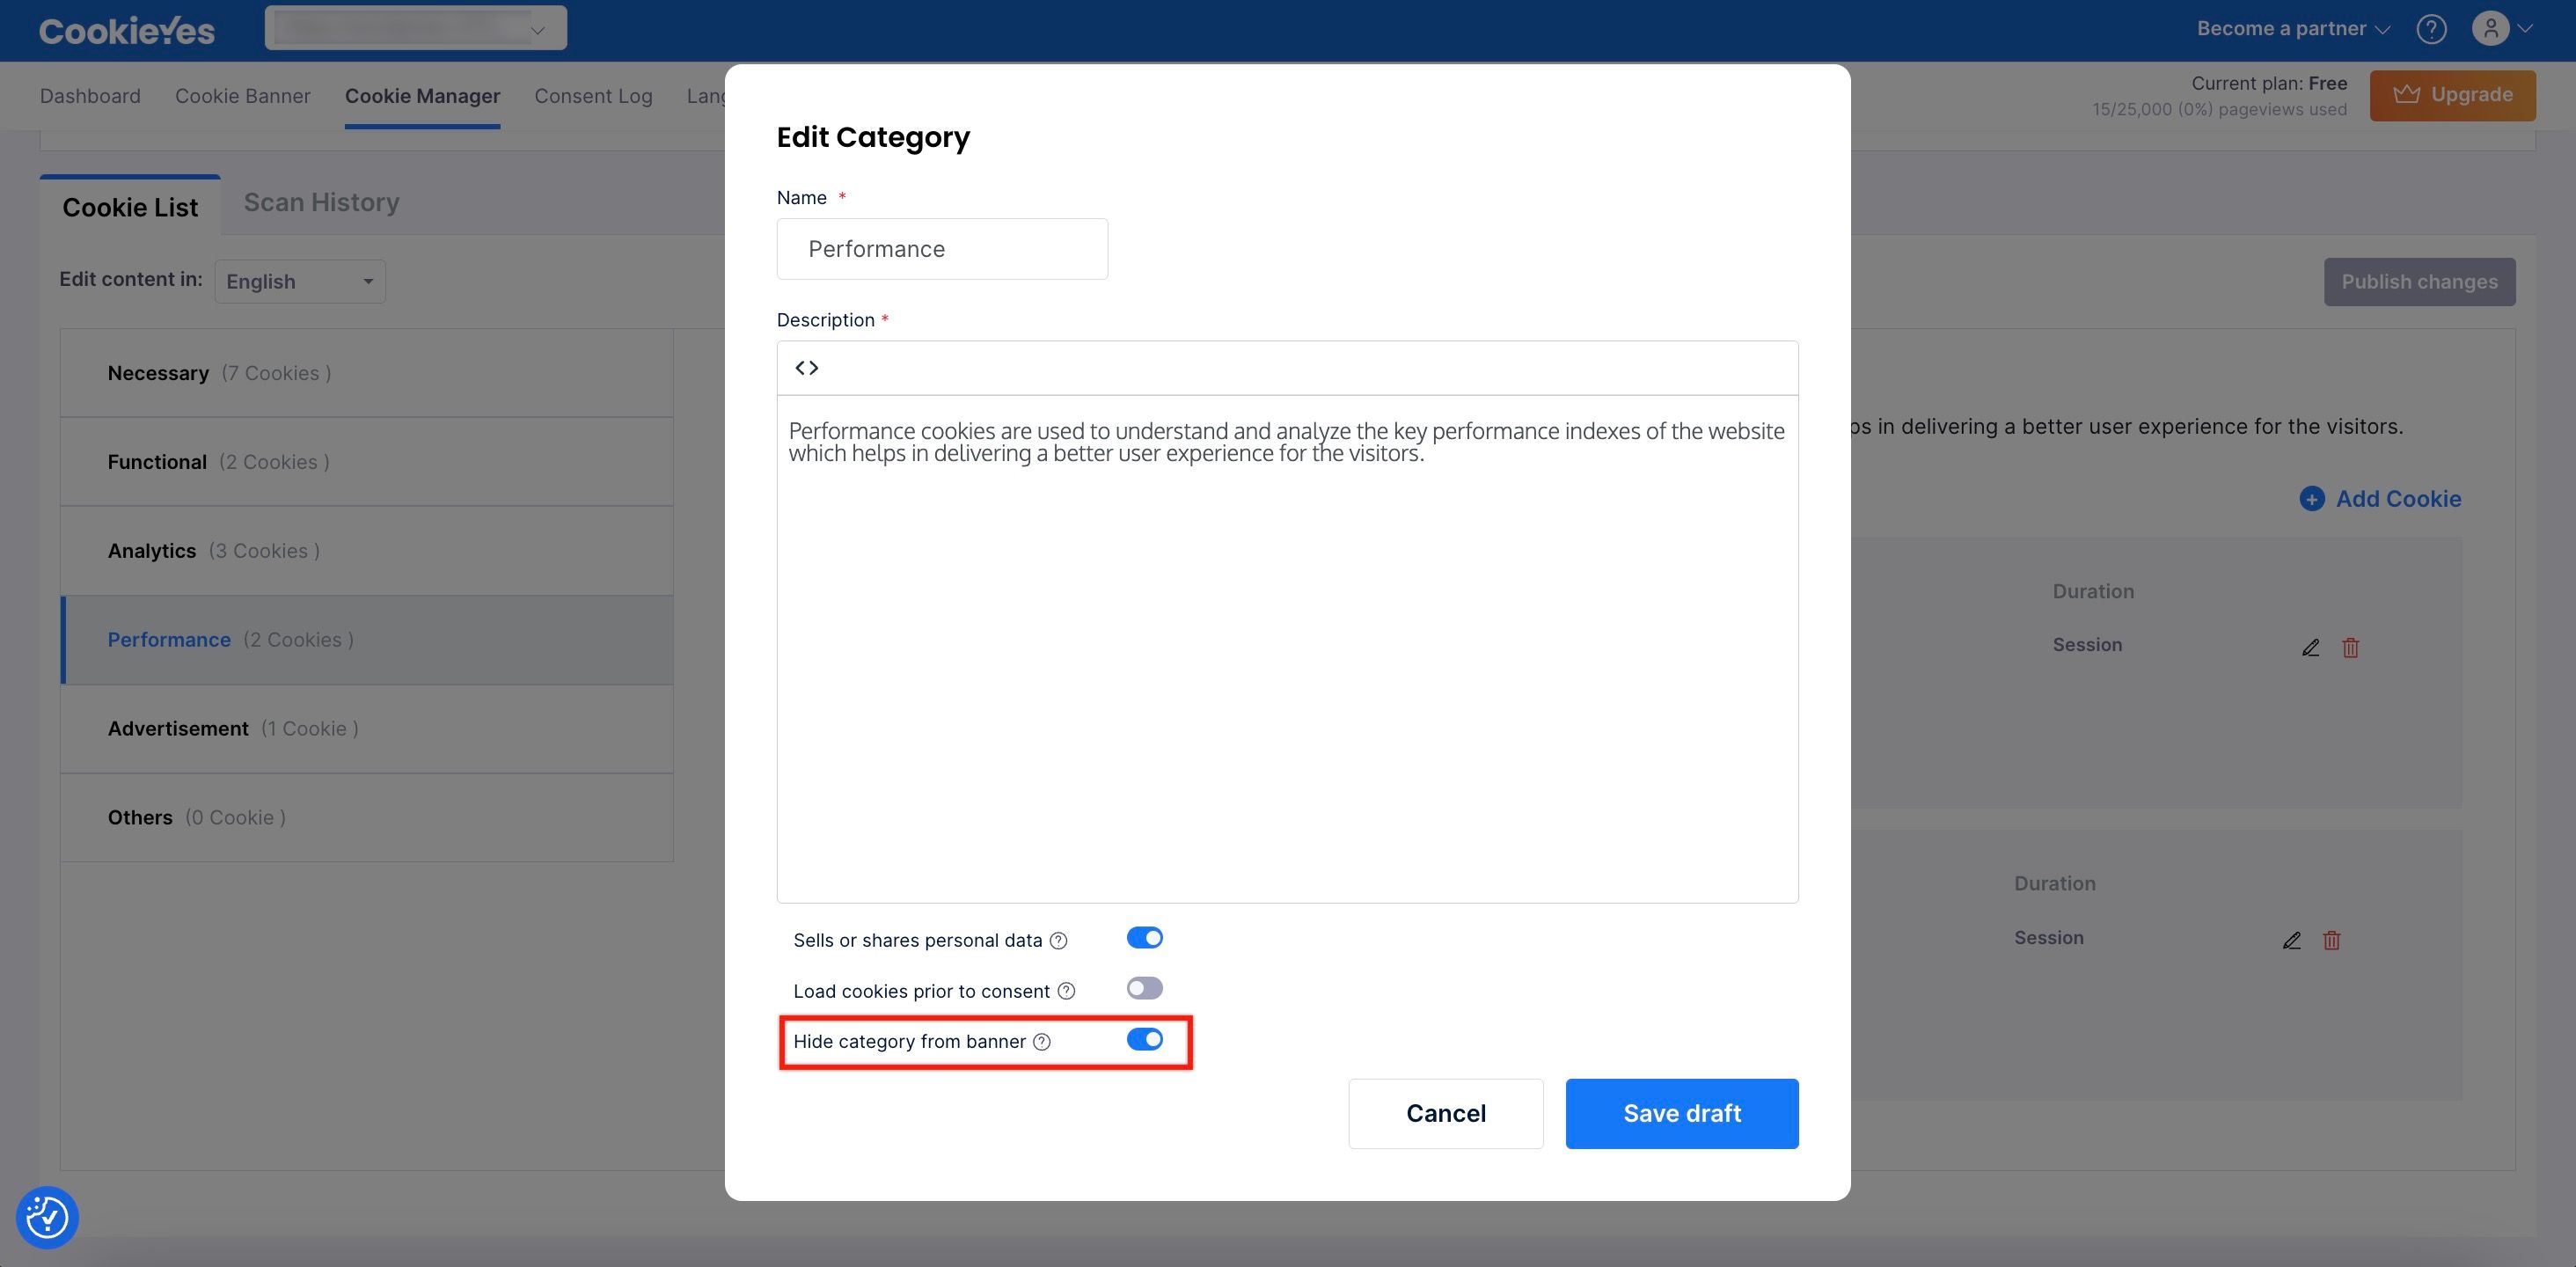
- Click Save Draft to save your changes.
- Click Publish Changes to apply the update.
Loading cookies prior to consent or hiding cookie categories is not a GDPR-compliant practice.
How to manually add a cookie?
To manually add a cookie to block, follow these steps:
- From the Dashboard > Cookie Manager > Cookie List tab.
- Navigate to the cookie category to which you want to add the cookie and click the +Add Cookie button.
- In the Add Cookie modal, enter the cookie details such as Cookie ID, Domain, Duration, Script URL Pattern and Description.
- Click the Save Draft button.
- Click the Publish changes button.
Cookie Scans
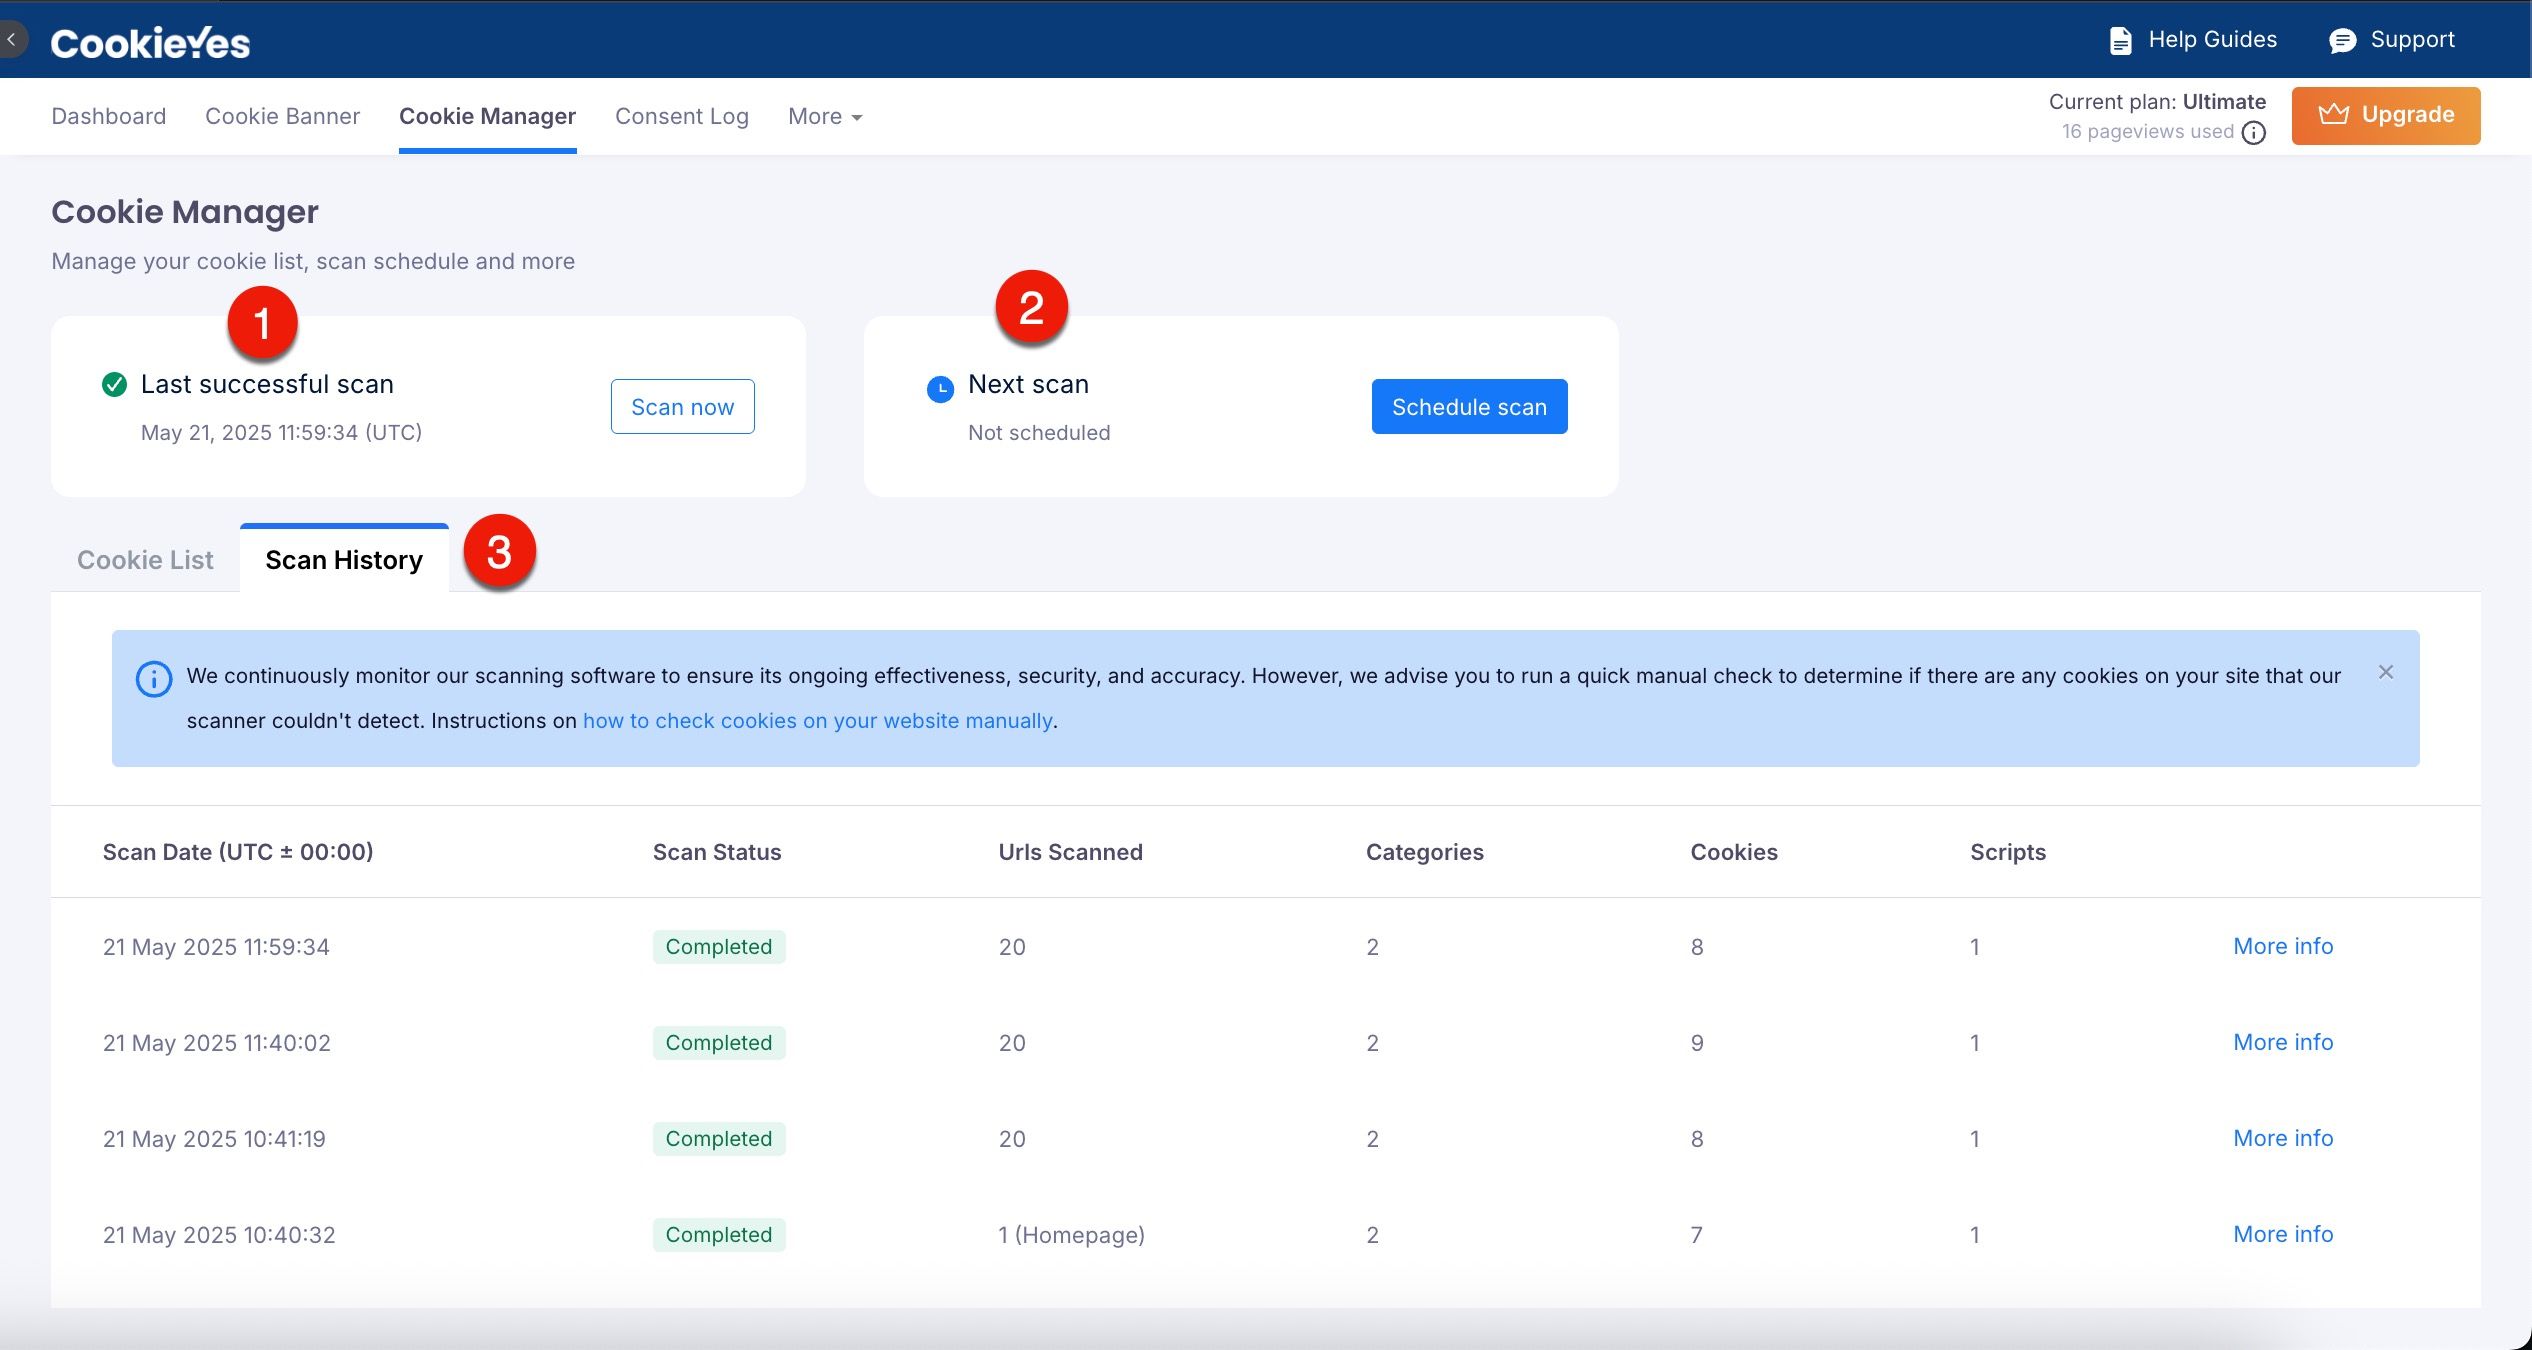
Key features of Cookie Scan
- Last Successful Scan: Displays the date and time of your most recent completed cookie scan.
- Next Scan: Displays the scheduled details for the upcoming cookie scan.
- Scan History: In this tab, the details of previous scans will be displayed:
- Scan Date: The timestamp of each scan.
- Scan Status: Indicates whether the scan was completed, aborted or in progress.
- URLs Scanned: The number of pages analysed during the scan.
- Categories: The number of cookie categories discovered.
- Cookies: The total number of cookies found.
- Scripts: The script associated with the cookie is identified during the scan.
- For a deeper analysis, click More Info next to each scan entry to review individual results.
How to Initiate a Cookie Scan?
- Go to Dashboard > Cookie Manager.
- Click the Scan Now button to open the Scan modal.
- In the modal, select the scan option:
- Full Scan
- Select the Full Scan option
- To include or exclude specific pages, click Show advanced options.
- Add the page URLs in the Include URL(s) or Exclude URL(s) fields.
- Exclude subdomains: Include the protocol (e.g.,
https://) before the subdomain. - Exclude all pages under a subdomain: Add an asterisk (*) at the end of the URL.
Example:https://example.com*excludes all pages underexample.com.
- Exclude subdomains: Include the protocol (e.g.,
- Custom Scan
- Select the Custom Scan option.
- Enter the specific page URLs you wish to scan.
- Full Scan
- Click the Scan Now button to initiate the scan.
How to Schedule a Cookie Scan?
To schedule a cookie scan:
- Navigate to Dashboard > Cookie Manager > Schedule Scan.
- Choose a frequency from the drop-down menu.
- Enter the date, time and scan type (Full or Custom). Add specific URL(s) if needed.
- Click the Save button.
Consent Log
To review all recorded consents, navigate to the CookieYes Dashboard > Consent Log. This allows you to verify compliance and maintain an accurate record of user preferences.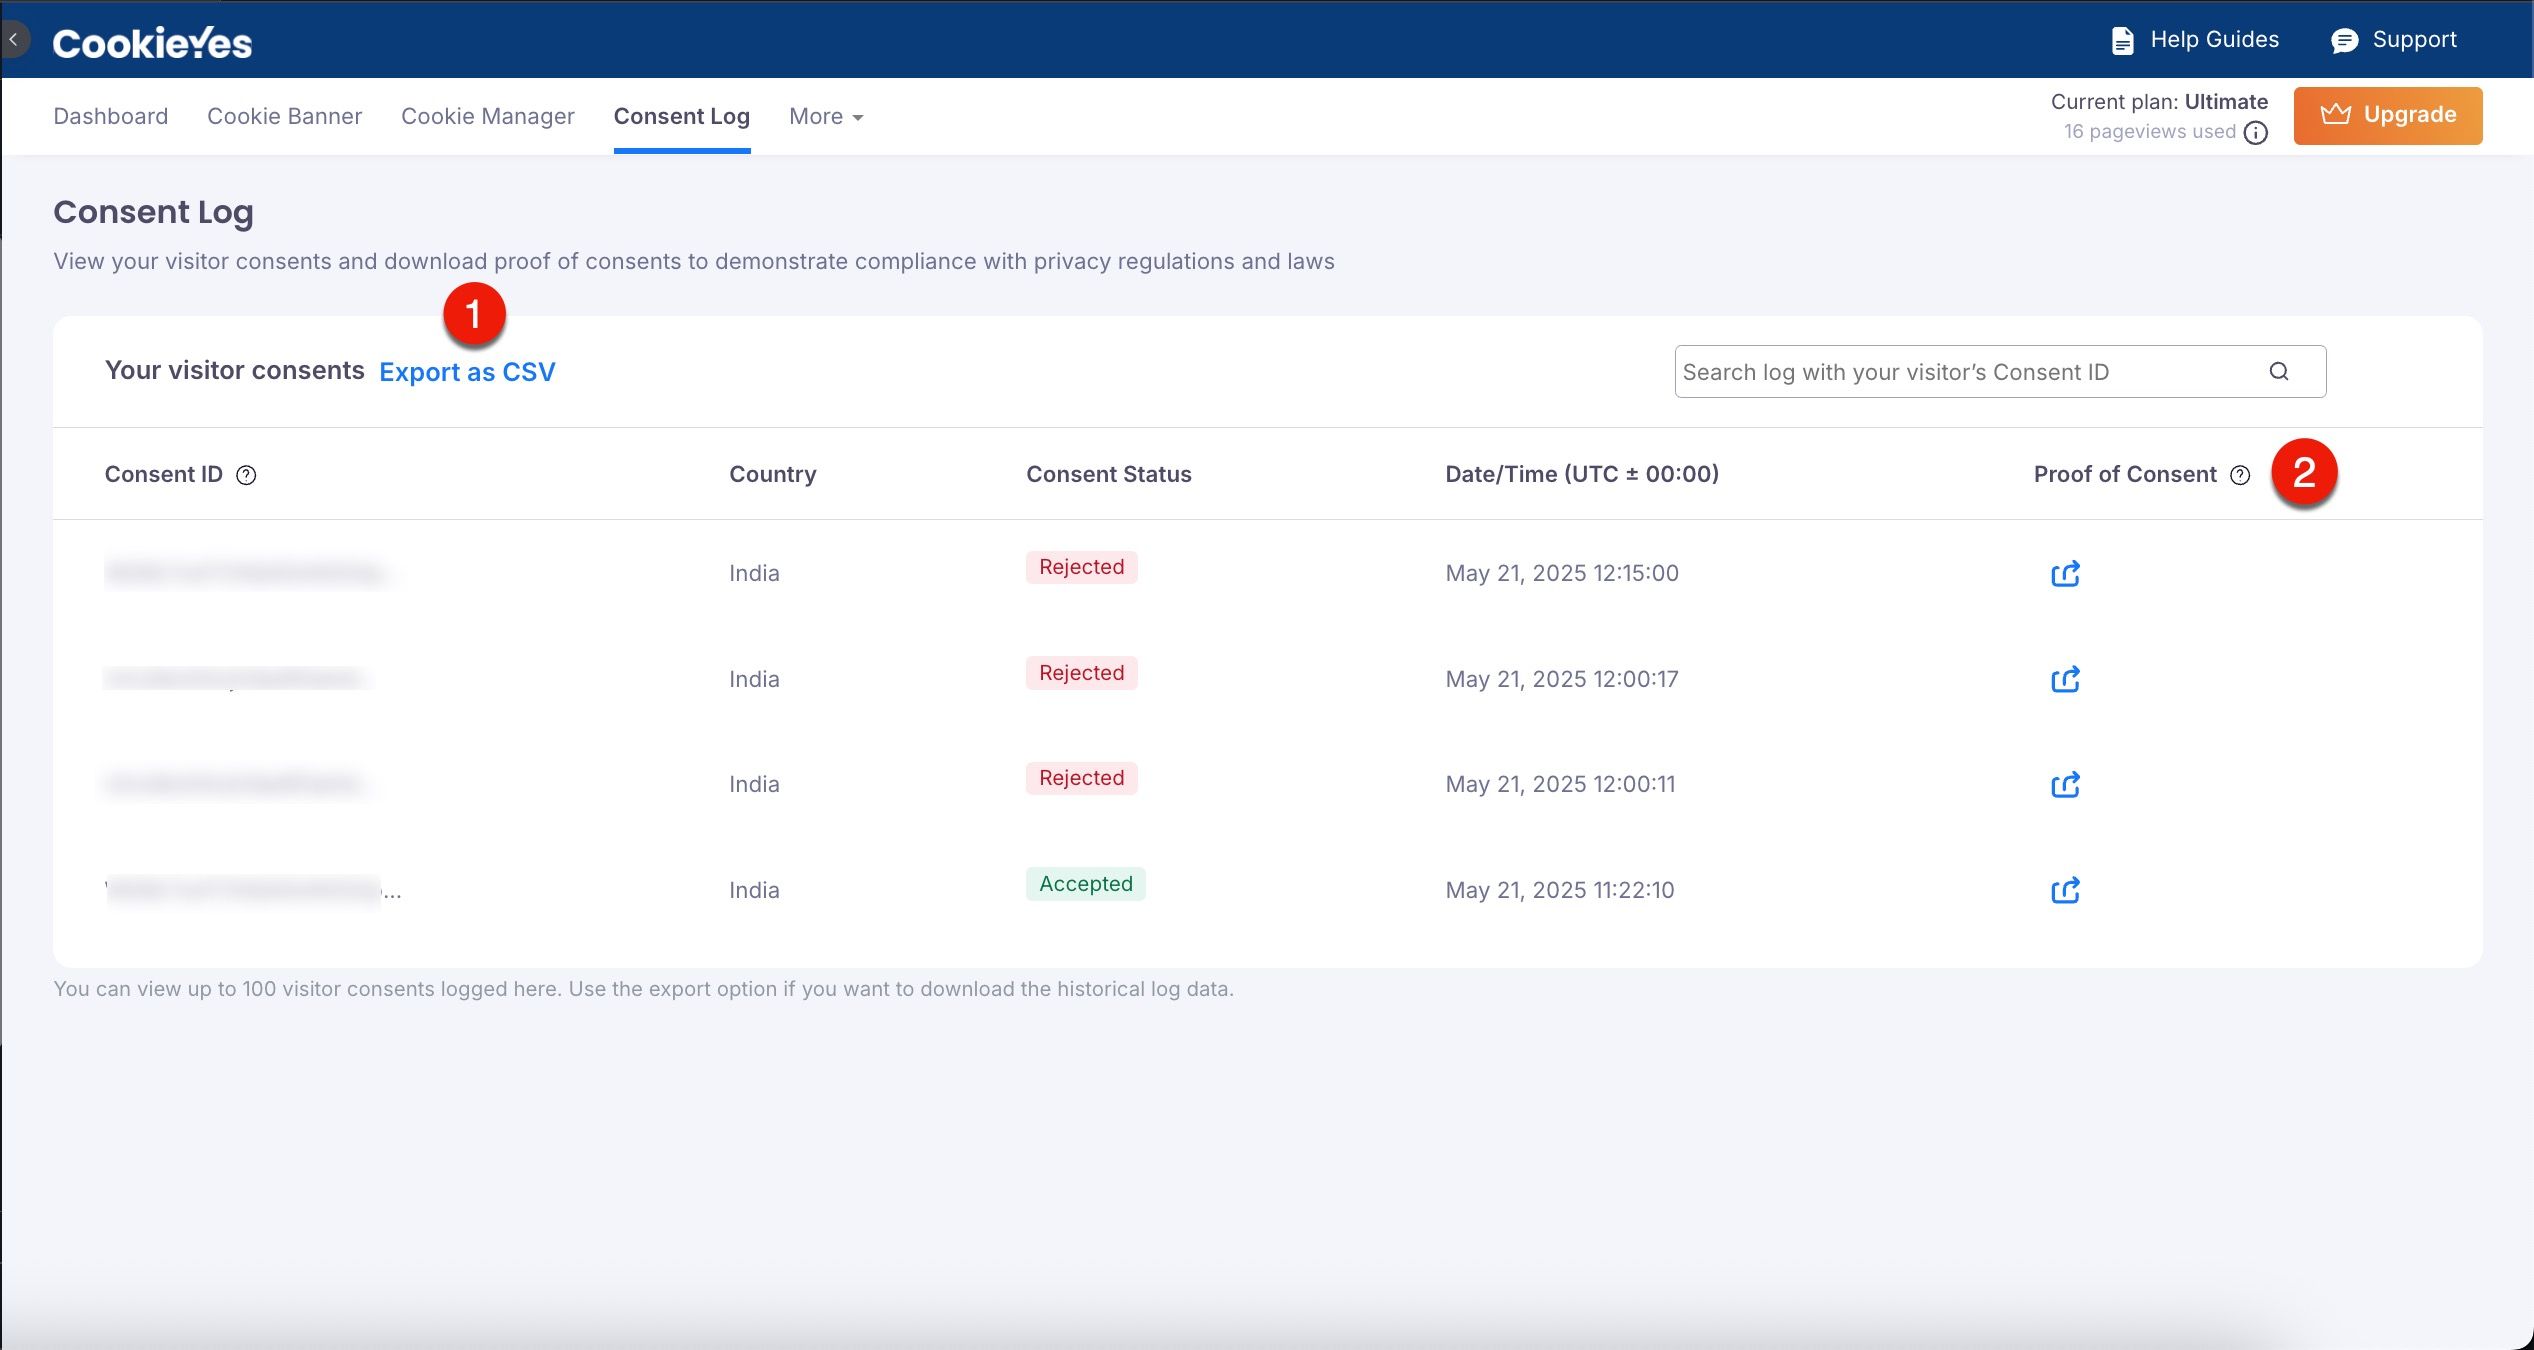
Click the Export as CSV button to download the entire consent log for offline storage or further analysis. This feature is particularly useful for meeting audit requirements or fulfilling reporting obligations.
For each logged consent, you can click the download icon to download a Proof of Consent. This document provides detailed information about the user’s interaction with the cookie banner, ensuring transparency and compliance.
Customising Language Settings for Your Cookie Banner
The Languages section in CookieYes allows you to offer the cookie banner in multiple languages, ensuring compliance and accessibility for a global audience.
Free plan users can use only one language at a time for the cookie banner. However, the default language can be updated whenever needed.
How to add and manage languages?
- Navigate to CookieYes Dashboard > More> Languages.
- Click the Add Languages button.
- Choose the desired languages from the available list and click Add.
- The added language will appear under Your required languages list.
- To set this language as the default:
- Click on the three-dot menu next to the language.
- Select Set as Default from the drop-down.
- To edit the content of the banner in this language:
- Click the Edit Content next to the language.
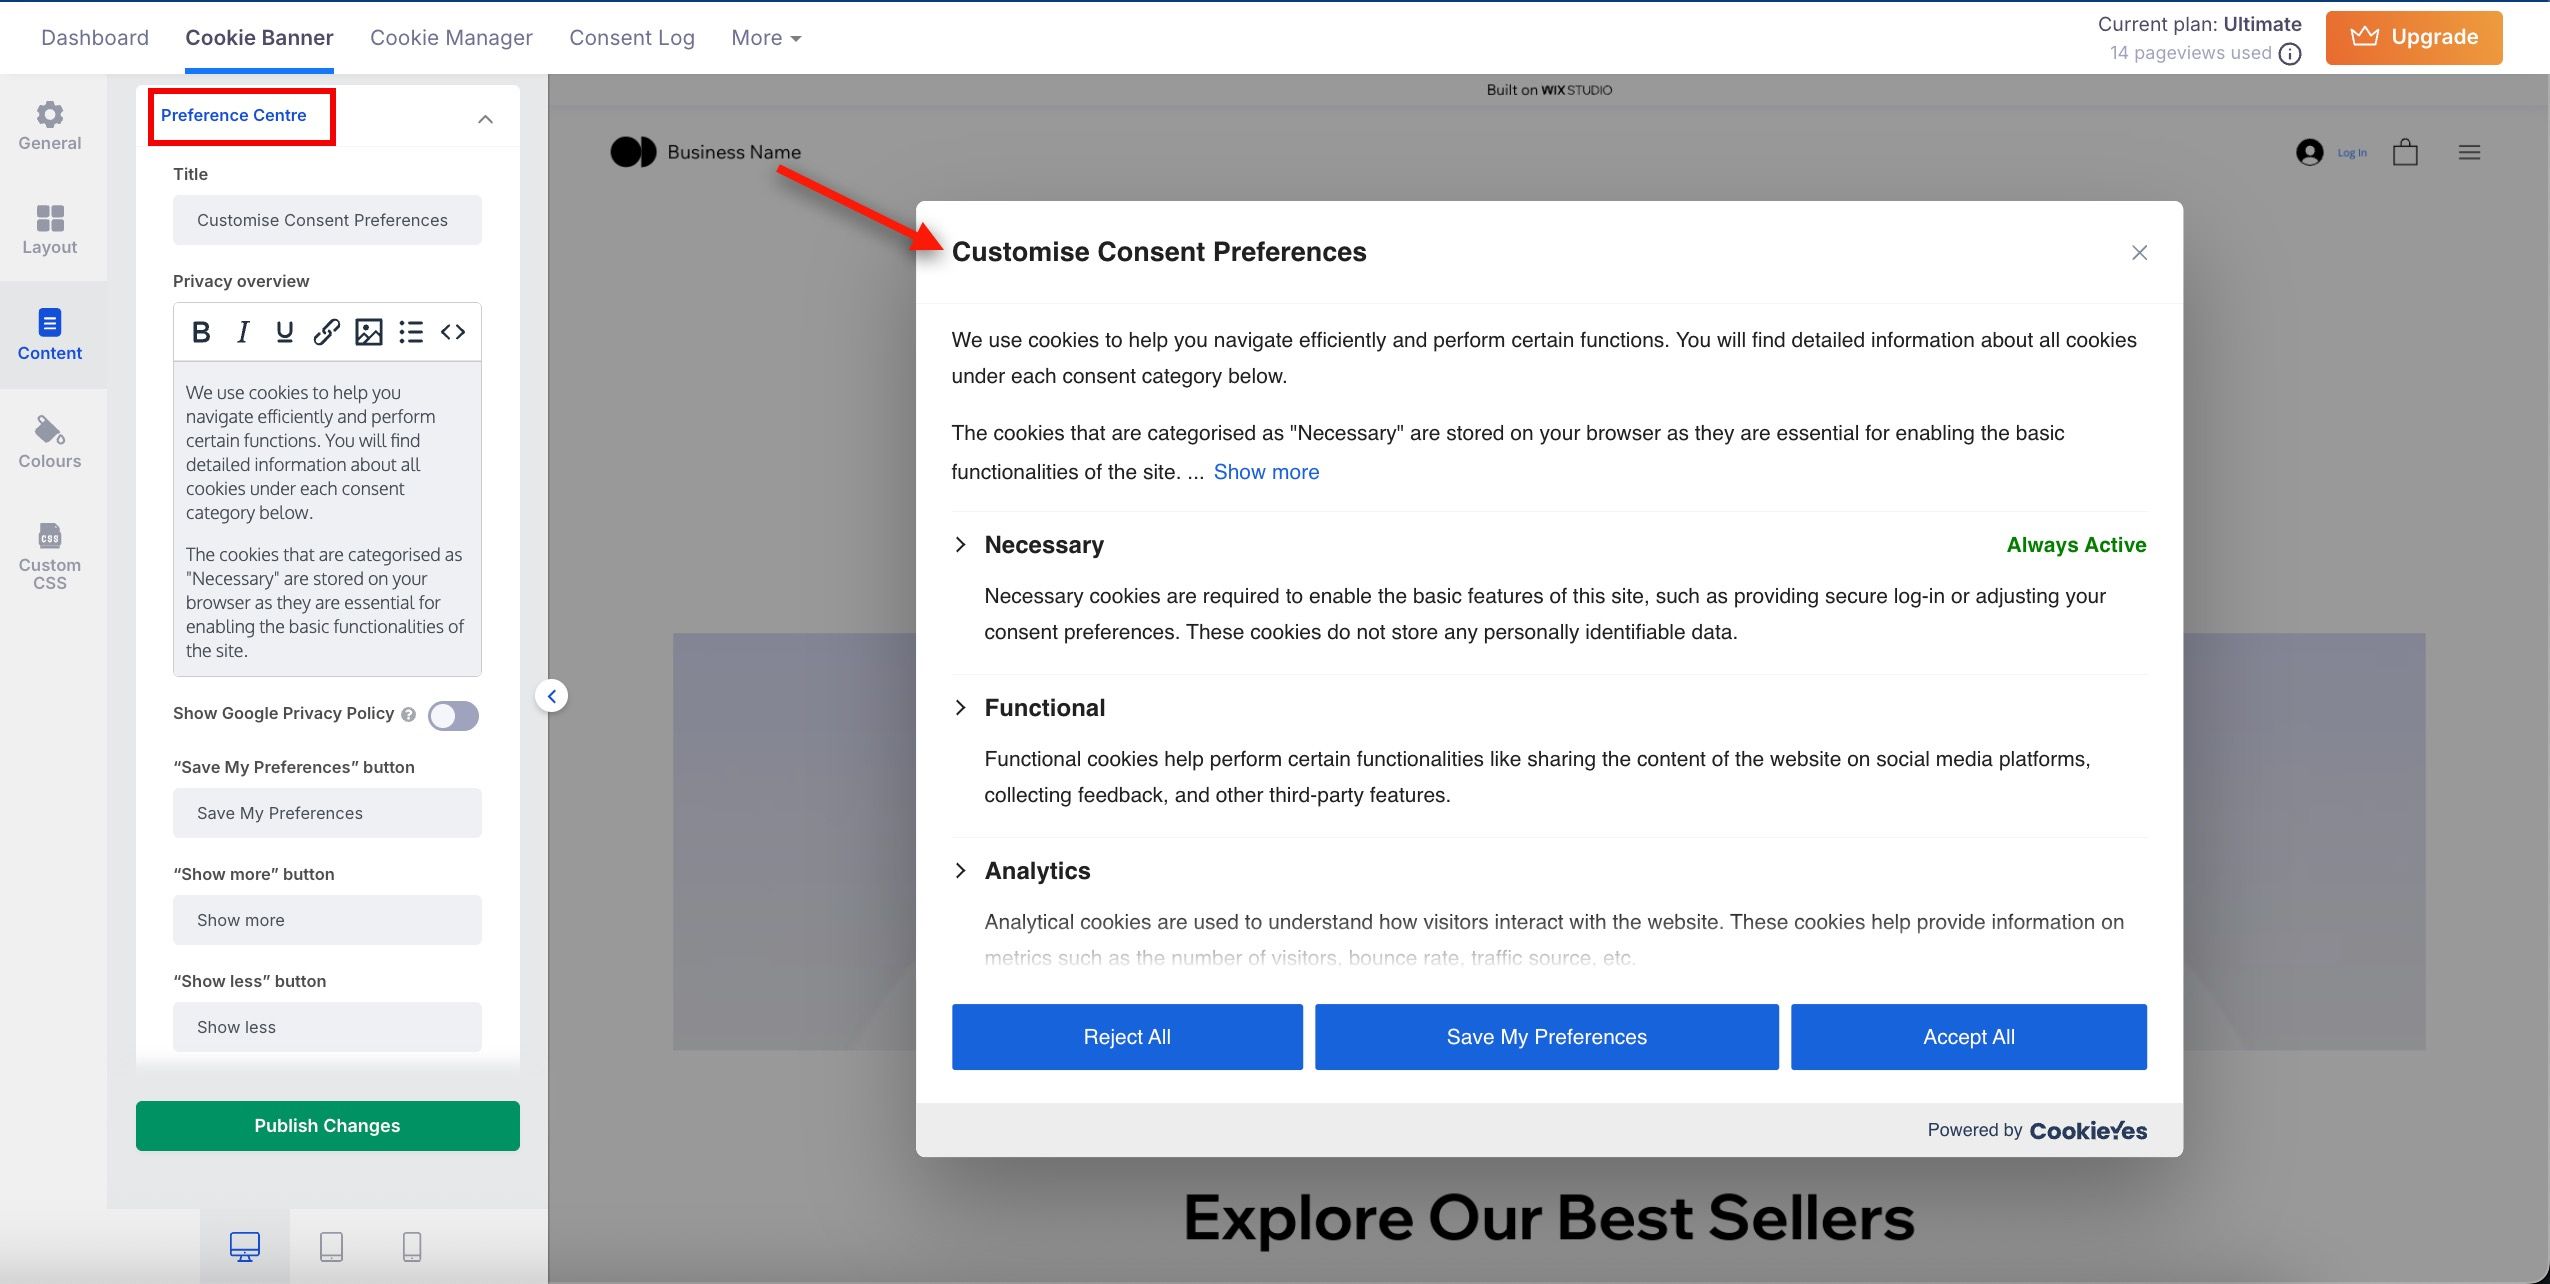
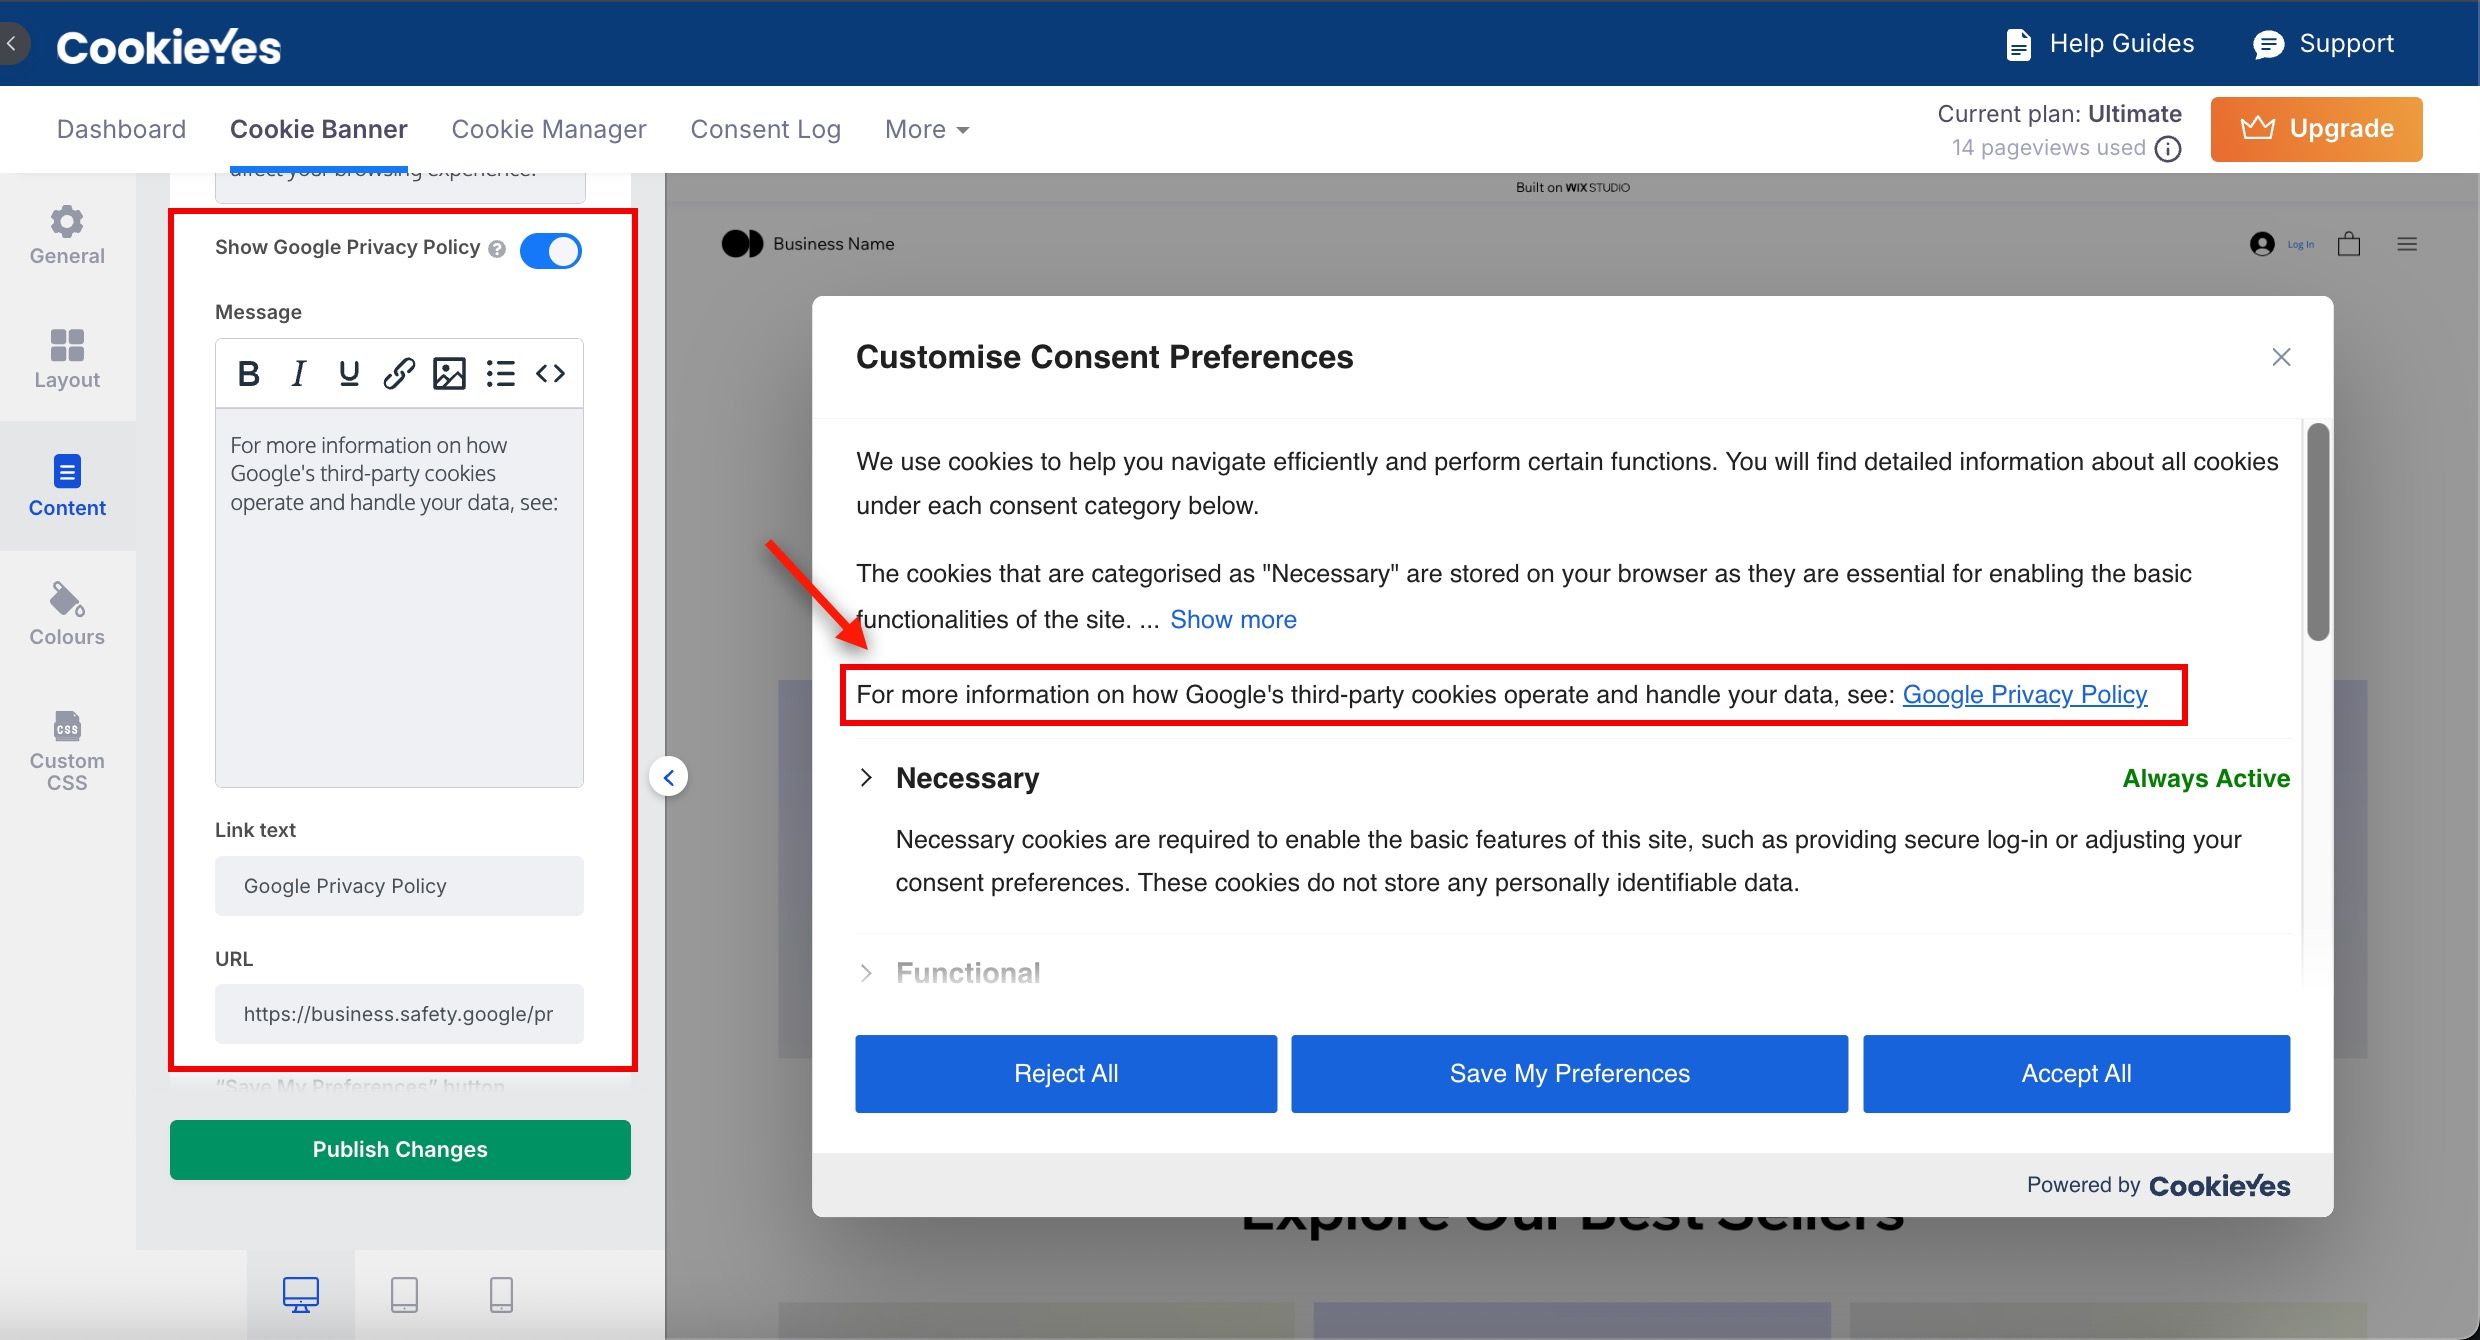
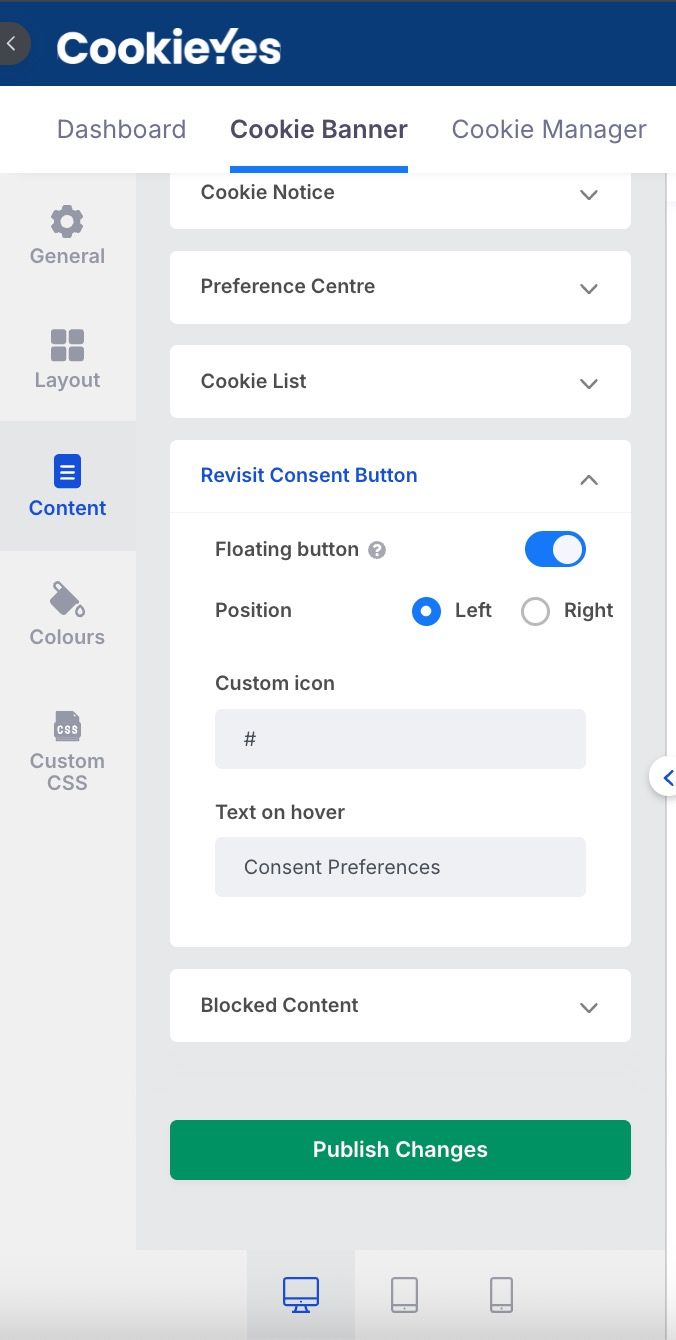
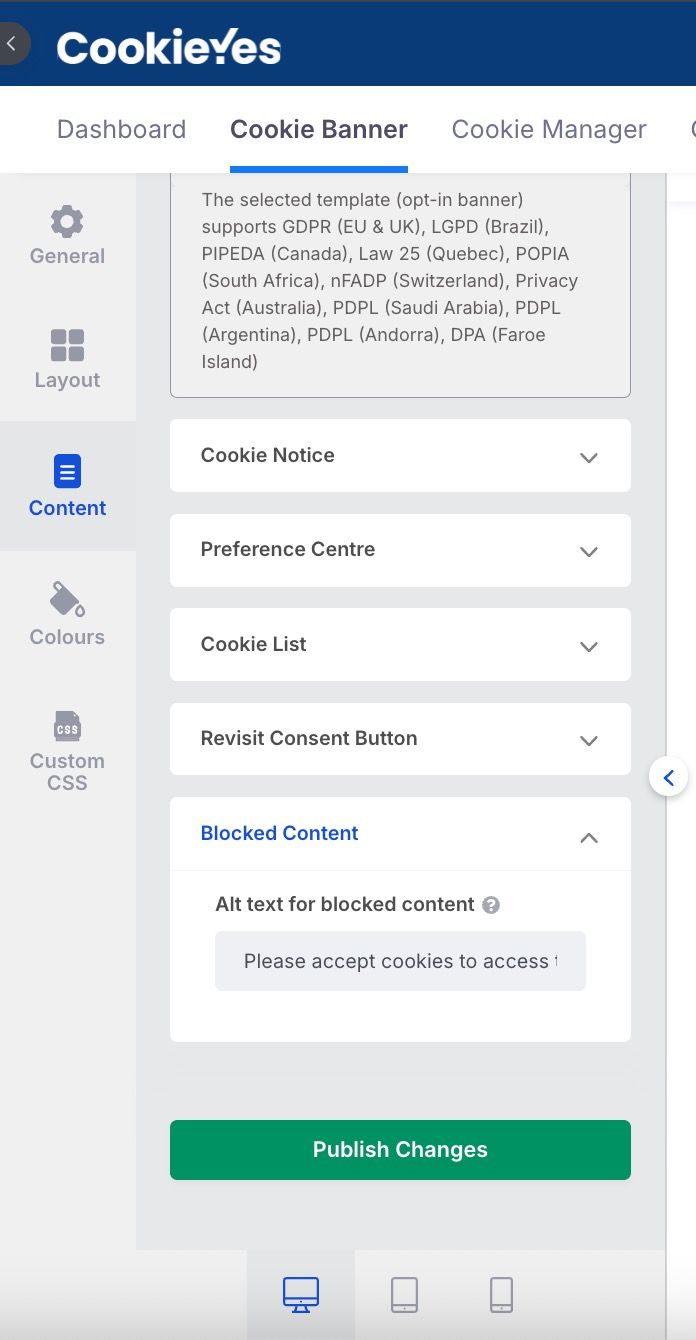
- Make the necessary changes to the auto-translated text under Cookie Notice, Preference Centre, Cookie List, Revisit Consent Button and Blocked Content.
- Add the URL of the translated cookie policy page under the section Cookie Notice.
- Review the changes in the preview and click Publish Changes.
- How to Change the Language of a Cookie Consent Banner
- How to Add a Multilingual Cookie Consent Banner?
- How to delete a language from my required language list?
Important: The user interface (UI) in the CookieYes Web App may differ slightly from the version integrated with Wix. While the core functionality remains the same, certain elements such as menu placements or options (e.g., the “More” dropdown or “Languages”) may appear in different locations.
Finalise Advanced Settings
The Advanced Settings section provides additional configuration options to fine-tune your cookie banner and consent management.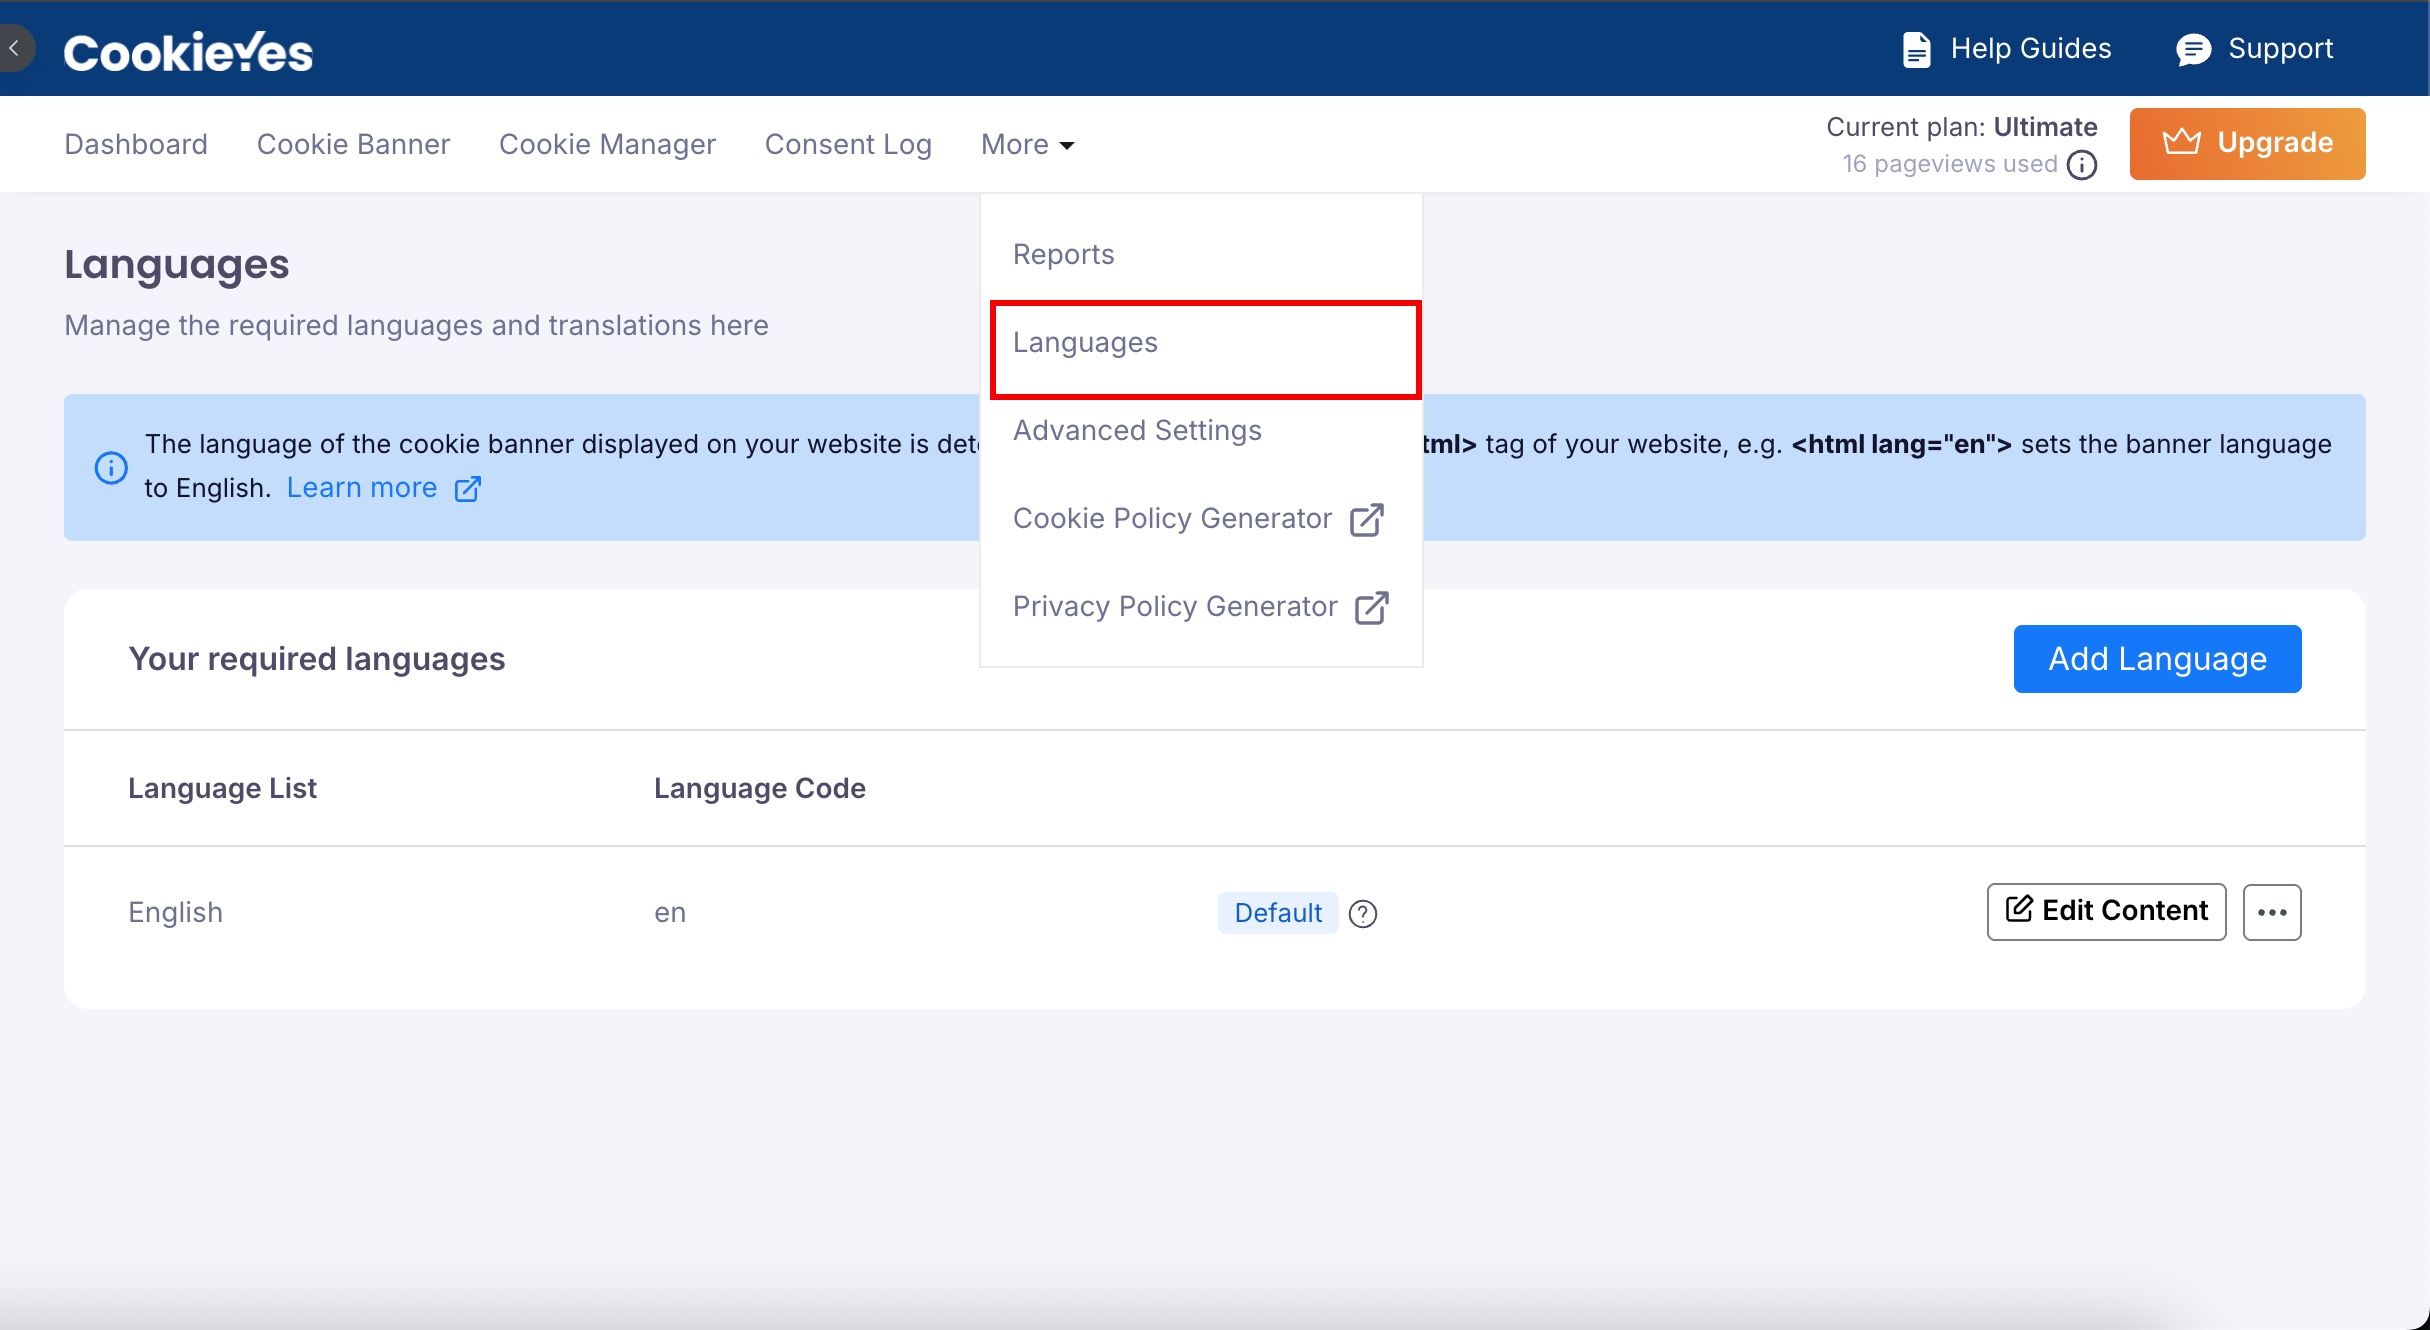
1. Banner Settings
- Cookie banner status: Displays the current status of the banner, whether it is active or inactive. This indicates that your cookie banner is live and functioning on your website.
- Banner display status: This option allows you to enable or disable the banner on your website. Disabling it prevents the banner from appearing. Use this option if you temporarily need to debug issues or want to make significant changes without affecting live visitors.
- Disable banner on specific pages: This option will provide the ability to disable the banner on specific pages (e.g., landing pages or internal tools) where you don’t want the cookie banner to appear. To set this up, follow the steps below:
- Click on the Edit Icon.
- Enter the standard URL(s) or wild card wildcard one per line.
- Click the Save changes button.
This feature is available only on the Pro and Ultimate plans.
How can I Disable the Banner on Specific Pages?
Important: The user interface (UI) in the CookieYes Web App may differ slightly from the version integrated with Wix. While the core functionality remains the same, certain elements such as menu placements or options (e.g., the “More” dropdown or “Advanced Settings”) may appear in different locations.
2. Consent Settings
- Consent log: This option allows you to enable the storage of consent records. This is crucial for compliance with privacy laws, such as GDPR and CCPA, as it provides proof of user consent.
- Subdomain consent sharing: If your website operates across multiple subdomains (e.g.,
shop.example.comandblog.example.com), enabling this will share consent preferences between them, ensuring that users don’t have to provide consent multiple times.
This feature is available only on the Pro and Ultimate plans.
How do you activate Subdomin consent sharing?
Important: The user interface (UI) in the CookieYes Web App may differ slightly from the version integrated with Wix. While the core functionality remains the same, certain elements such as menu placements or options (e.g., the “More” dropdown or “Advanced Settings”) may appear in different locations.
- Renew user consents: This option allows you to prompt users to re-consent if you’ve made significant changes to the banner, cookie list or privacy policy, ensuring their preferences align with the updated settings.
Important: The user interface (UI) in the CookieYes Web App may differ slightly from the version integrated with Wix. While the core functionality remains the same, certain elements such as menu placements or options (e.g., the “More” dropdown or “Advanced Settings”) may appear in different locations.
3. Google Consent Mode (GCM) Settings
These settings allow you to integrate Google’s Consent Mode with your cookie banner to control how Google services like Google Ads and Analytics behave based on user consent:
- Support GCM: This option allows you to implement Google Consent Mode(GCM) seamlessly, ensuring Google services respect your users’ consent choices.
- Allow Google tags to fire before consent: This option allows you to implement GCM’s Advanced Consent Mode. Use this feature if you require additional customisation of Google Tags functionality. It’s suitable for complex digital environments and is especially beneficial for large enterprises with multiple domain consent needs.
- Check now: Use this option to verify your GCM integration with Cookieyes. It helps identify any errors or misconfigurations that may prevent proper functionality.
- Enable debug mode: If you experience issues with Google Consent Mode, enable debug mode. This will allow you to view detailed logs in your browser console for troubleshooting.
4. Microsoft consent mode & Clarity API integration
These settings allow you to integrate Microsoft’s tracking and analytics tools in a way that is privacy law compliant based on your user consent preferences.
Support Microsoft UET Consent Mode: Enabling this option allows your website to manage Microsoft Advertising (UET) tags based on user consent. It ensures that the storage of both first-party and third-party cookies is controlled, enhancing compliance with privacy regulations.
Use this if you’re running ads through the Microsoft Advertising Platform (MAP) and want to prevent cookies from firing before user consent is obtained.
Microsoft Universal Event Tracking (UET) Consent Mode
Important: The user interface (UI) in the CookieYes Web App may differ slightly from the version integrated with Wix. While the core functionality remains the same, certain elements such as menu placements or options (e.g., the “More” dropdown or “Advanced Settings”) may appear in different locations.
Microsoft Clarity Consent API Integration: Enable this option to trigger the Clarity Consent API. When activated, the user’s consent preferences are automatically communicated to Microsoft Clarity before any tracking begins. This ensures that user sessions are only recorded when appropriate consent is granted.
Both features are designed to improve transparency and compliance, especially when using Microsoft services for advertising and user behaviour analytics.
5. Scan Settings
Static IP scan: If your website has firewall restrictions or strict security configurations that may block CookieYes scanners, you can configure the static IP scan.
Enable this option if external scans are restricted. This ensures the scanner can access your site using pre-defined static IP addresses.
CookieYes Scanning by Whitelisting IP Address
Important: The user interface (UI) in the CookieYes Web App may differ slightly from the version integrated with Wix. While the core functionality remains the same, certain elements such as menu placements or options (e.g., the “More” dropdown or “Advanced Settings”) may appear in different locations.
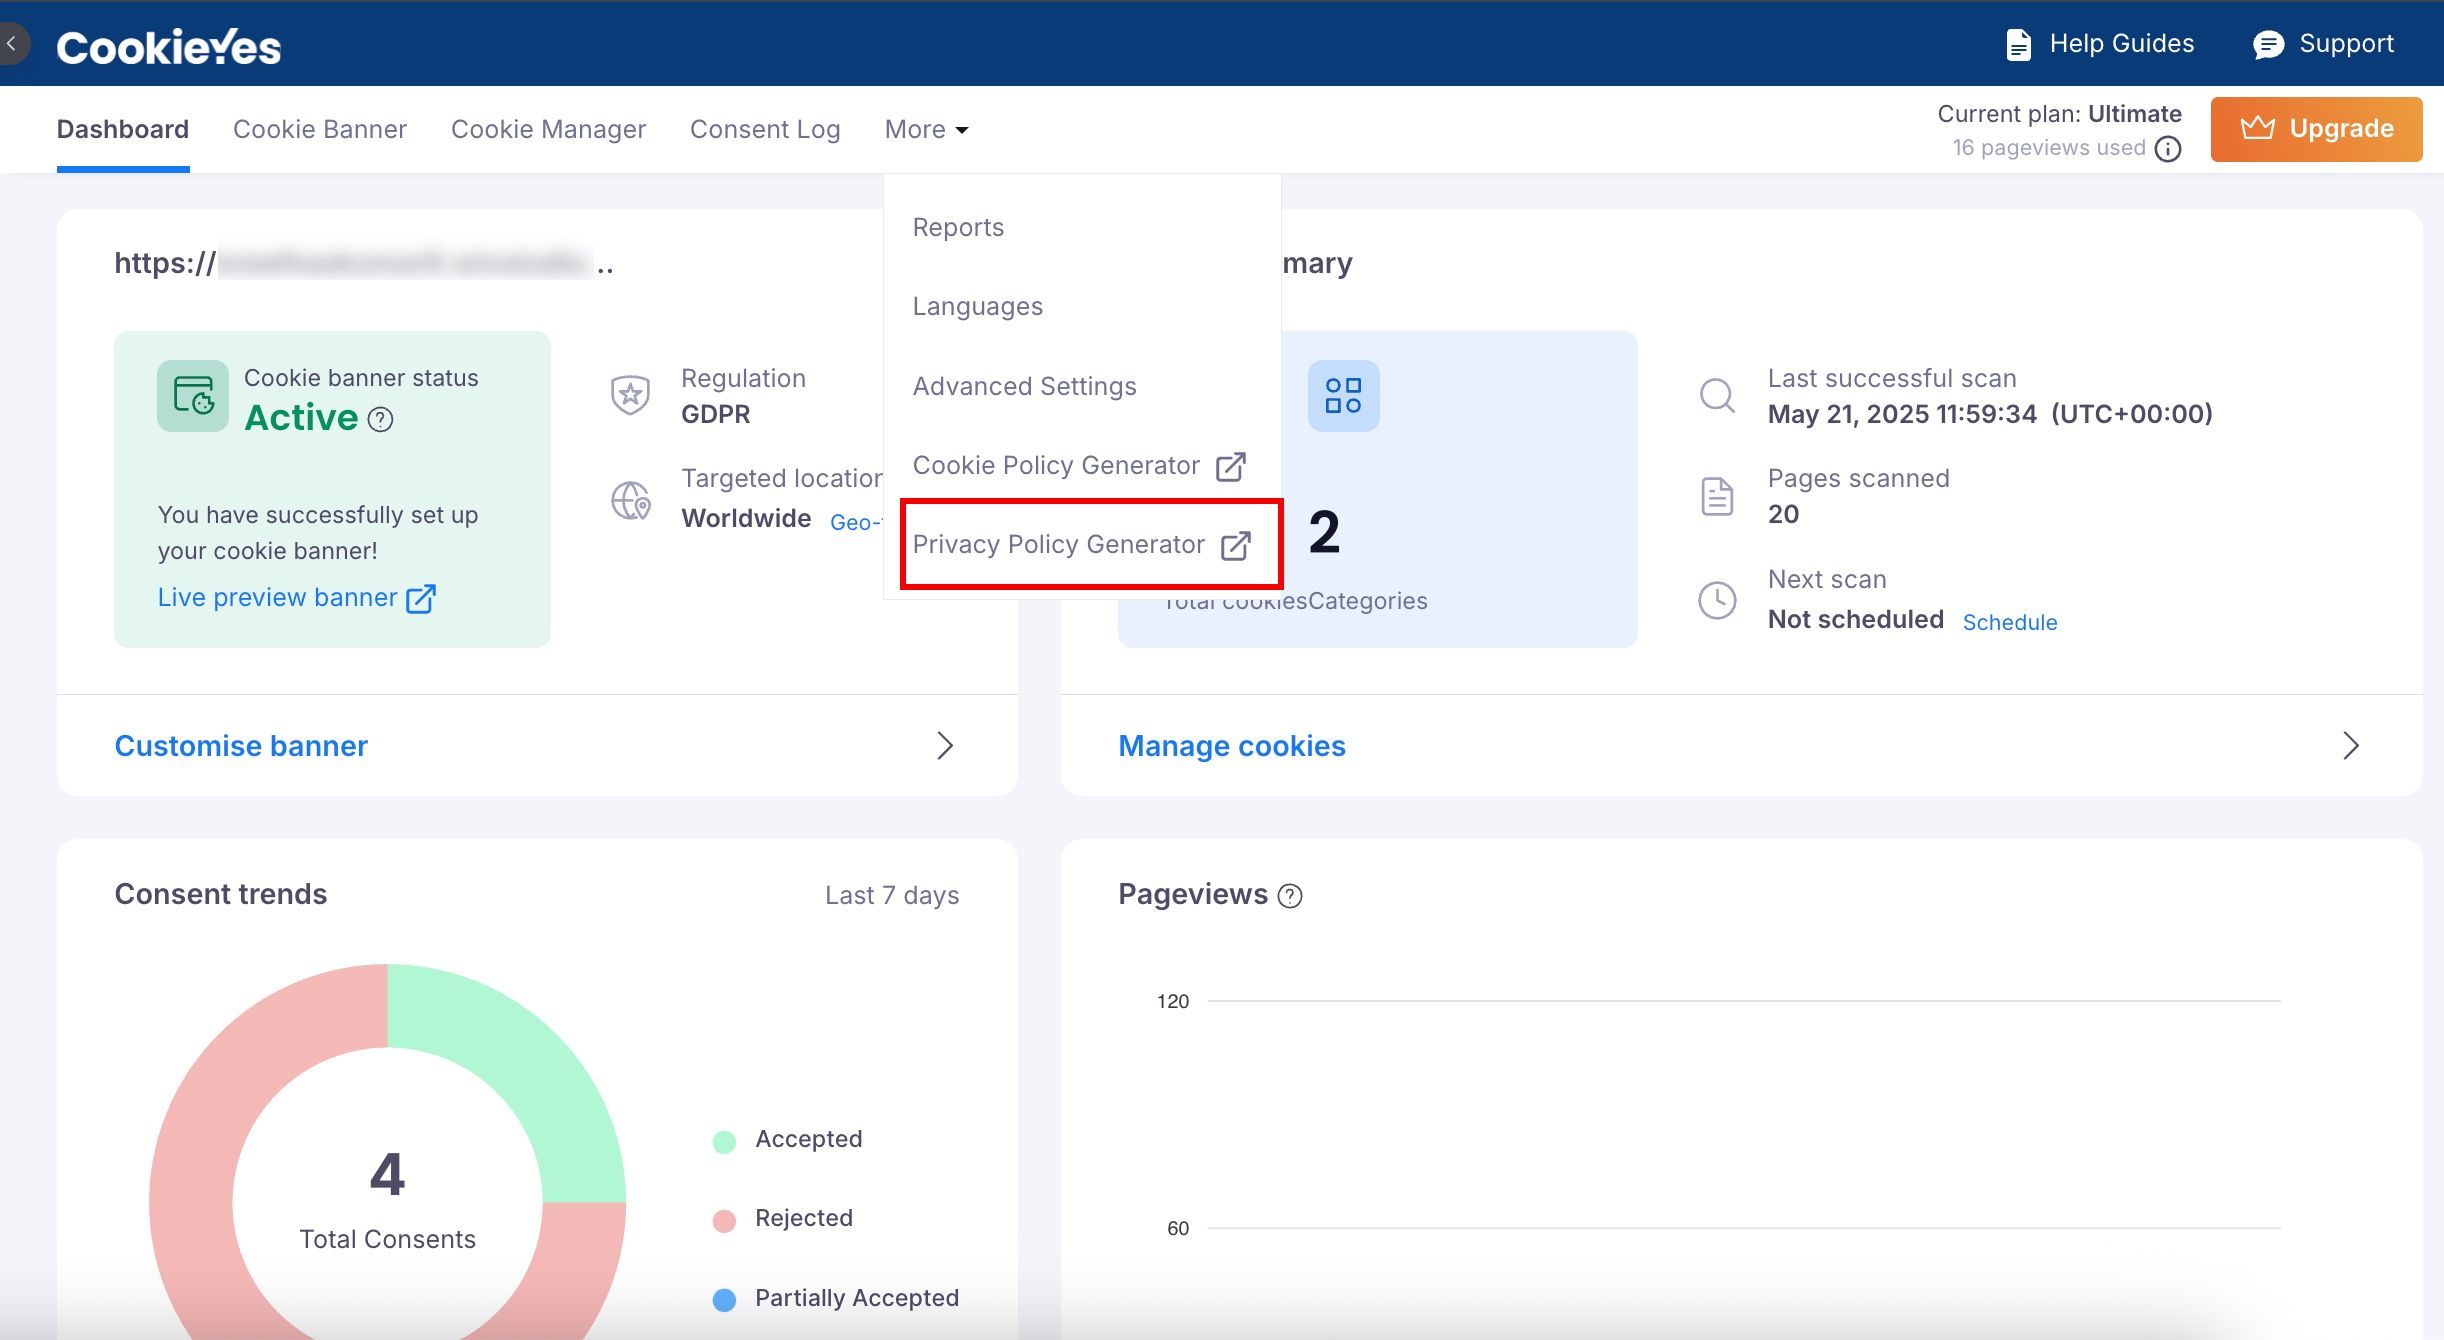
Privacy Policy Generator
To create a personalised privacy policy for your website, go to CookieYes Dashboard > More > Privacy Policy Generator. Simply answer a few questions and submit your responses to generate the content effortlessly.
Cookie Policy Generator
To generate a cookie policy for your Wix website:
- Go to CookieYes Dashboard > More > Cookie Policy Generator.

- Customise the Types of Cookies and Manage Cookie Preferences sections as needed.
- Click Generate to create your cookie policy. Copy the text or HTML and paste it on your website.
Conclusion
By following this setup guide, you have successfully configured your CookieYes cookie banner and consent management settings. Your banner is now live, aligned with your website’s requirements and compliant with global privacy regulations.
If you encounter any issues or need assistance, refer to the Help Guides or contact CookieYes Support.