Getting Started
How to Add a Cookie Policy to Wix
This guide will walk you through how you can generate and add a cookie policy page on your Wix website. A cookie policy is a document that provides detailed disclosure about the types of cookies used on a website and their purposes. It will help your website comply with privacy laws like the GDPR and ePrivacy Directive.
To begin with, Sign up on CookieYes and try it for free.
Note: After you sign up, you will be directed to the installation screens. You can install the cookie banner to get GDPR compliant for your use of cookies. If you want to create a cookie policy first, then skip the installation and proceed to the app dashboard.
You can also follow the step-by-step instructions below to easily add a cookie policy to your Wix website.
How to generate a cookie policy for Wix website
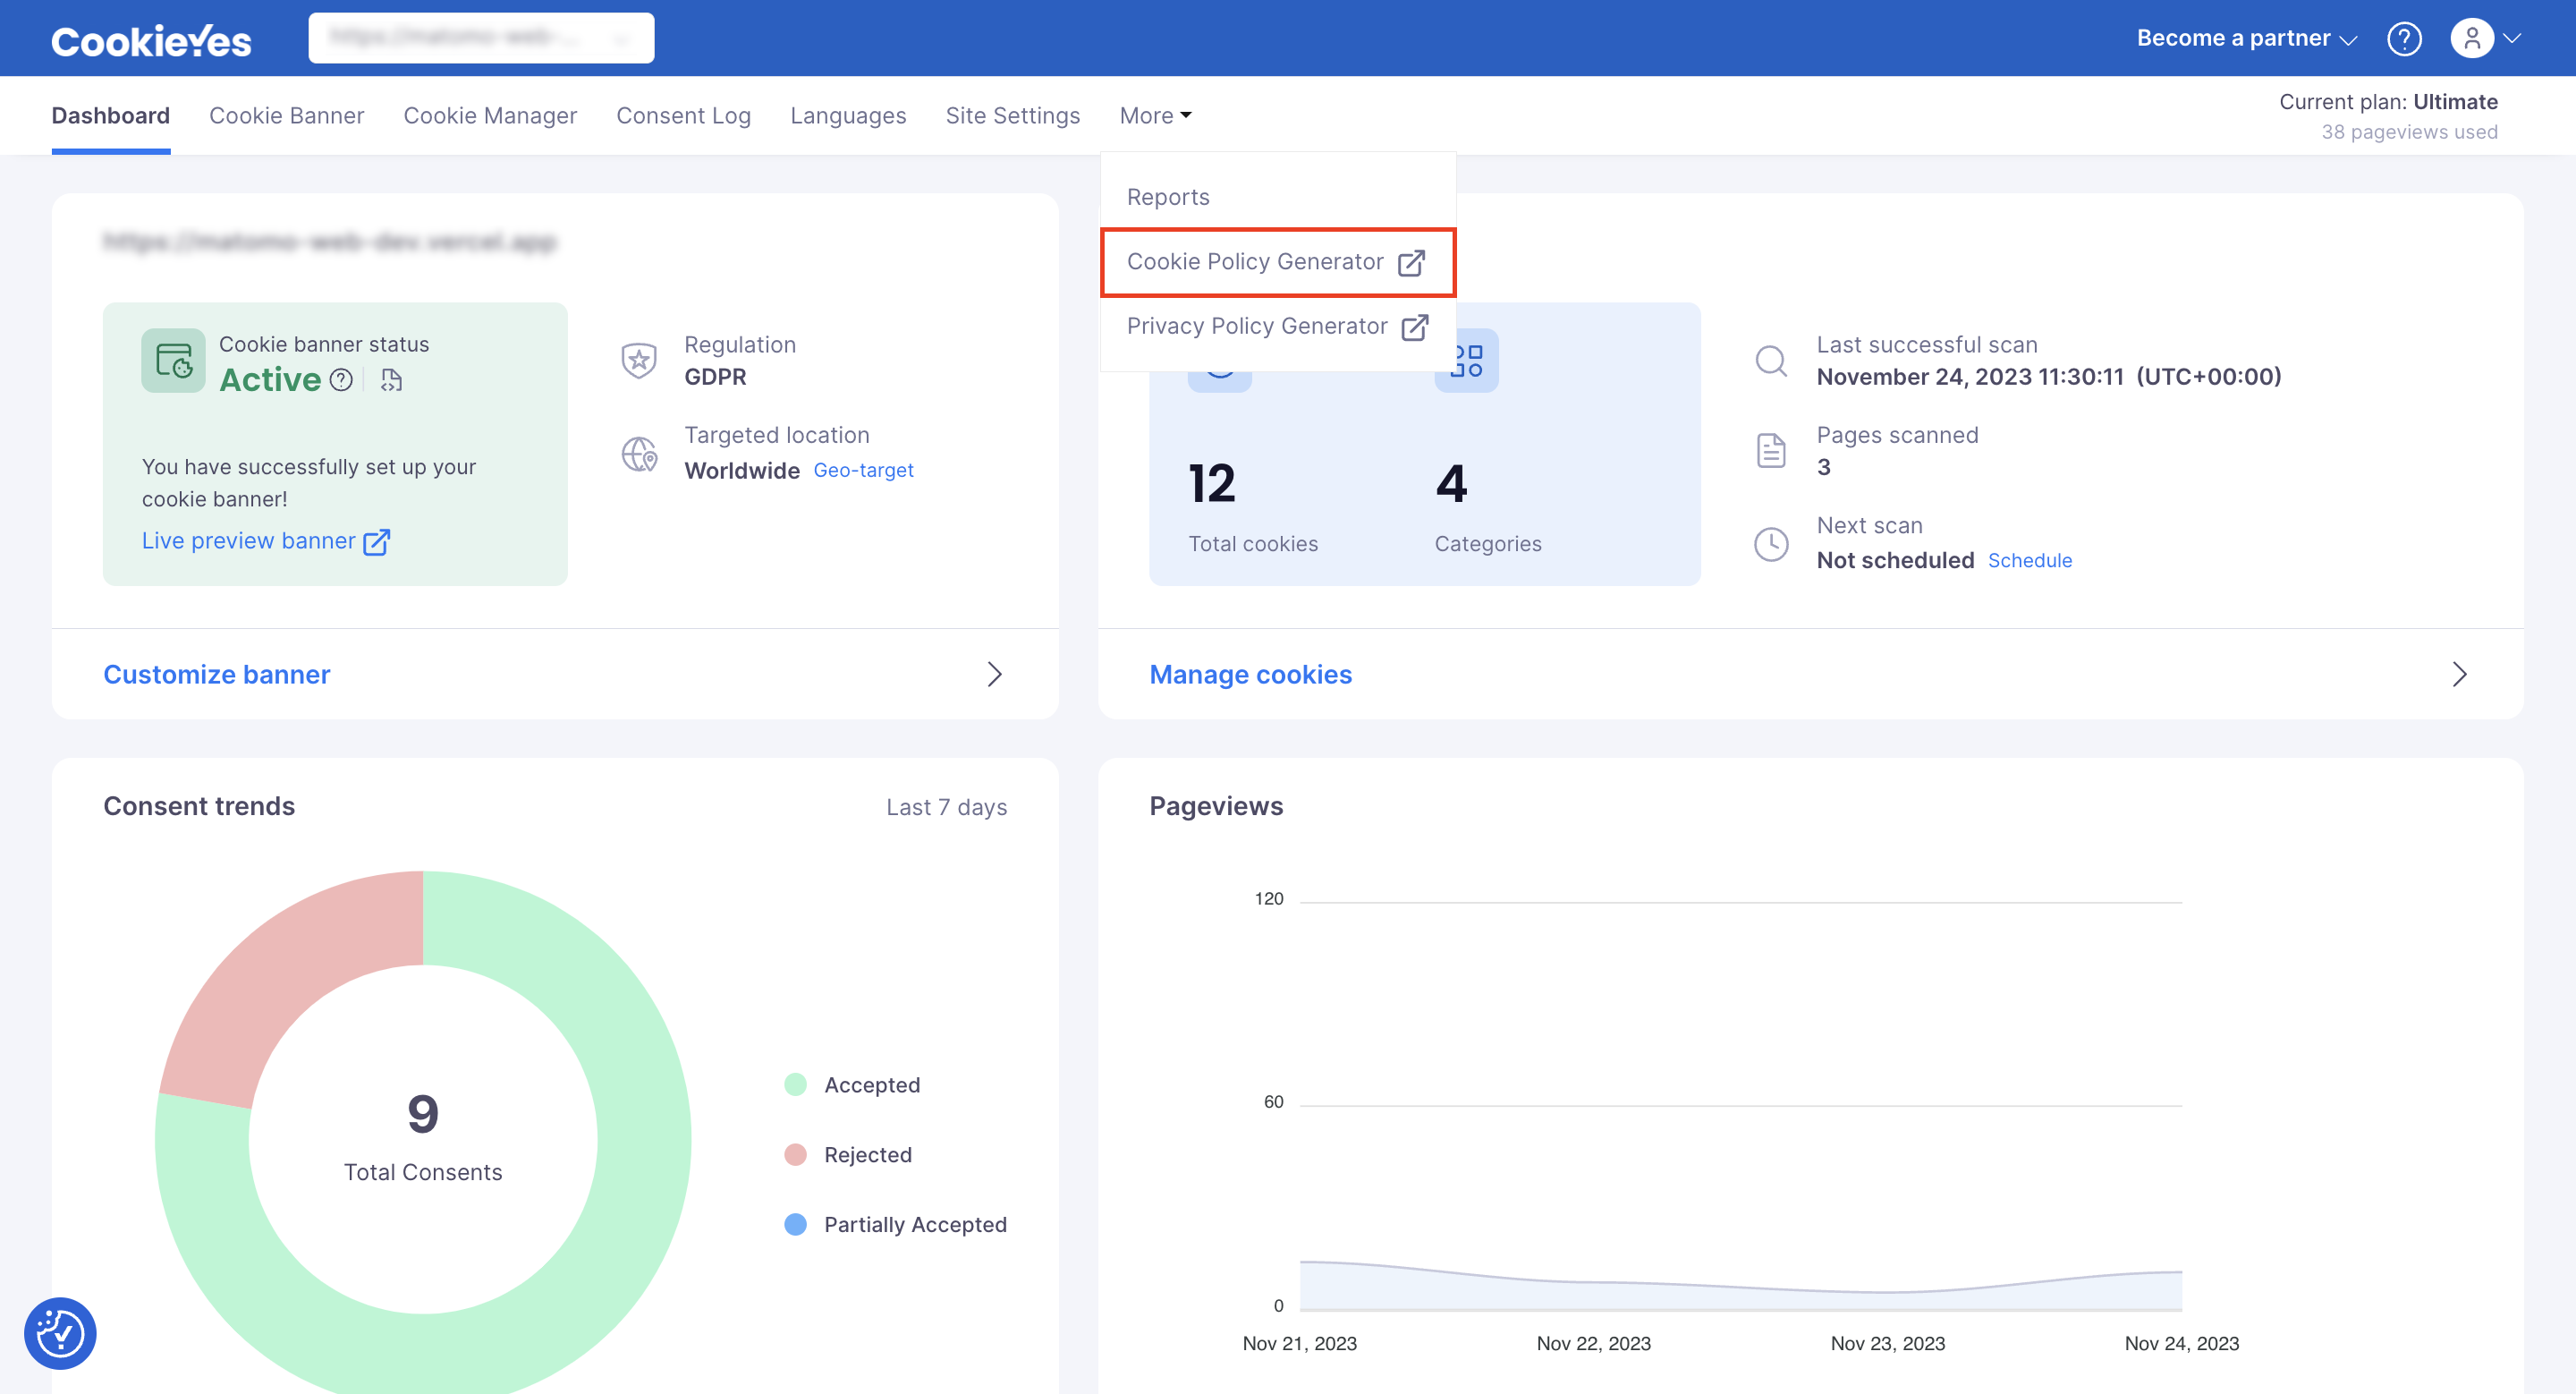
Step 1. From your app’s navigation bar, click on More and select Cookie Policy Generator.
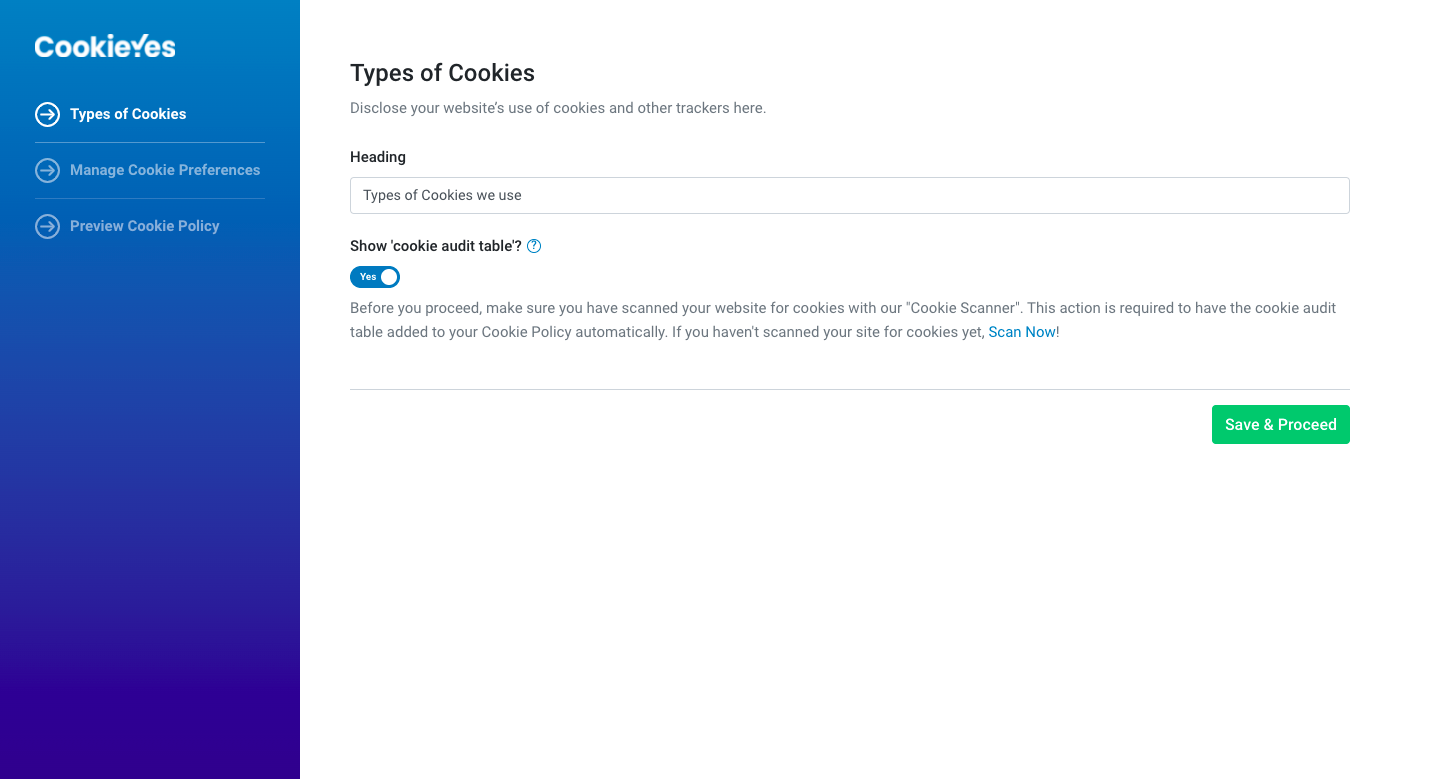
Step 2. You can edit the Heading under the ‘Types of Cookies’ section. The setting to Show ‘Cookie audit table’ is enabled by default. This will add a detailed cookie list to your policy. Now, click Save & Proceed.
Step 3. In this section, you can edit details, including the Heading, Description and Effective date of your cookie policy.
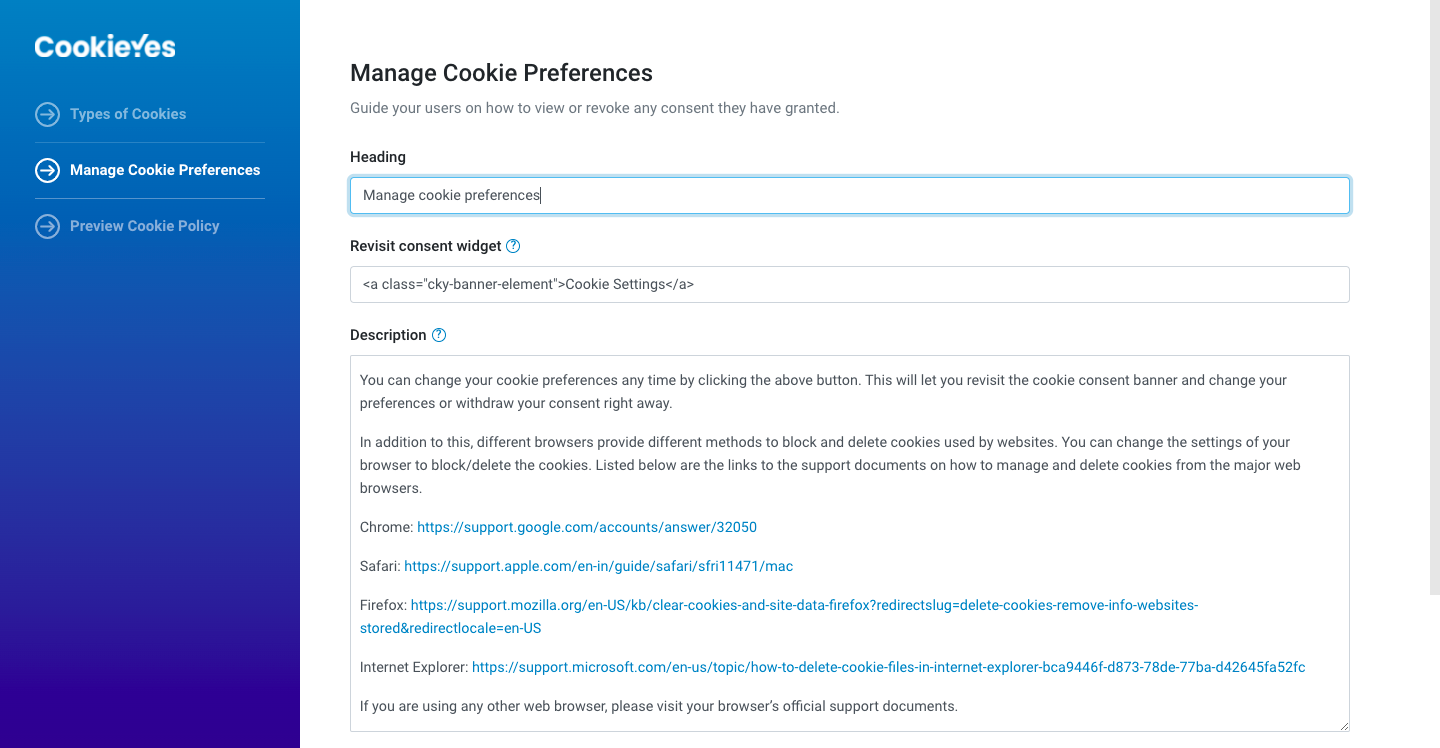
Note: The ‘Revisit consent widget’ is a widget that will enable your website visitors to manage their cookie preferences. You can remove the code in the field if you don’t want a widget to be displayed.
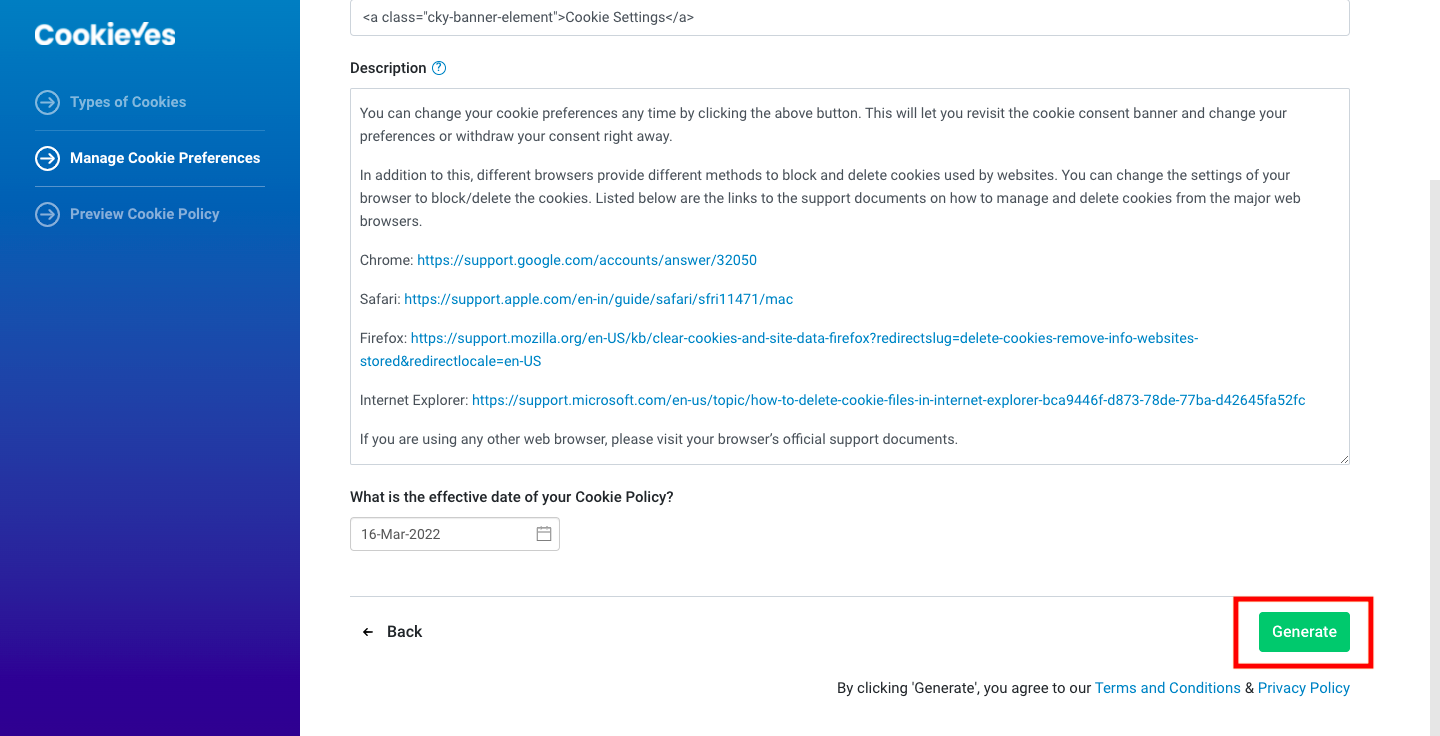
Step 4. Now click Generate to see your final cookie policy.
Step 5. You can see your Cookie Policy (Preview). Select Copy text or Copy html to copy the cookie policy.
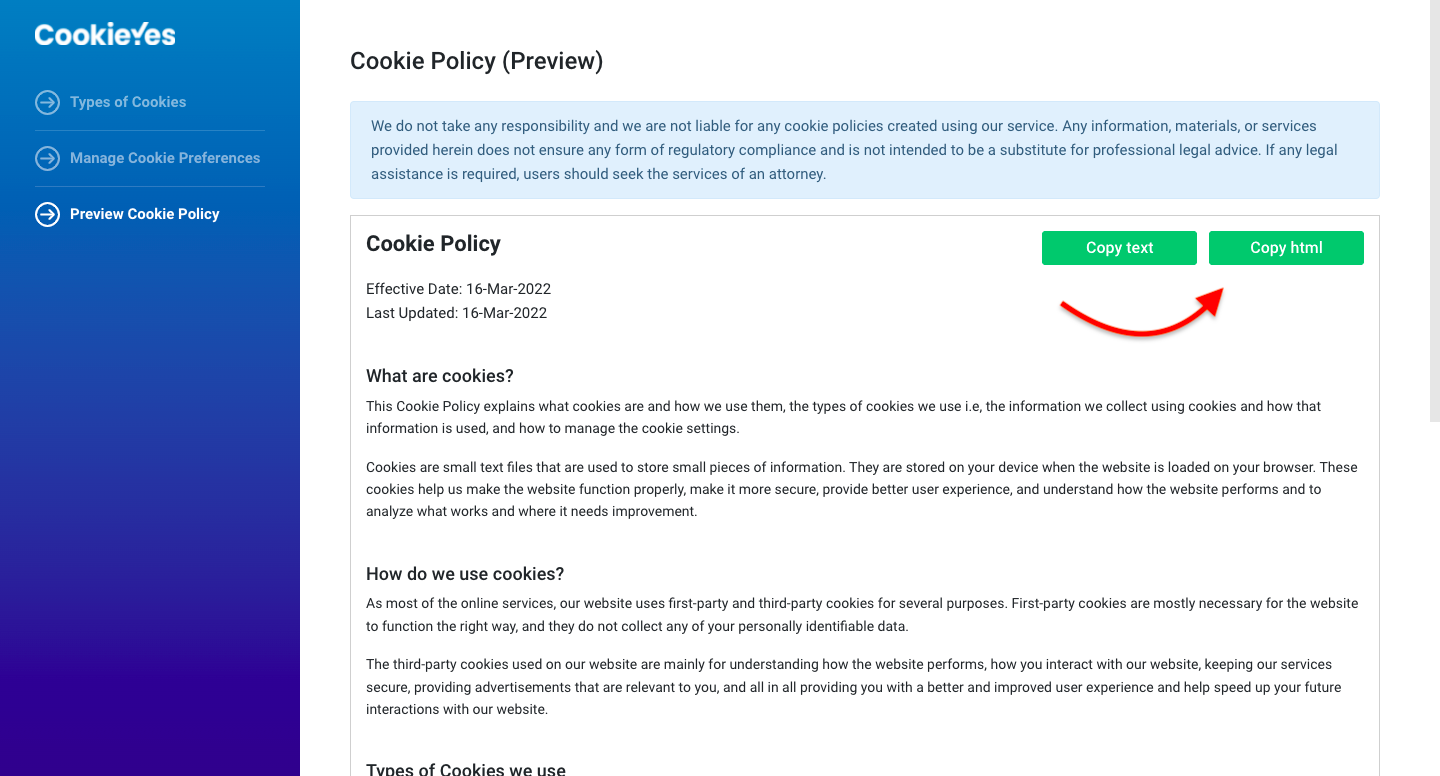
Note: Your cookie audit table will be visible in your cookie policy after you paste the copied HTML code on your website.
You can go ahead and paste the HTML or text on a new cookie policy page or add it as a section within your privacy policy page.
Your cookie policy will now be auto-updated every time you scan your website on CookieYes.
To be GDPR compliant for your use of cookies, you should install a cookie banner on your website and obtain consent before deploying cookies on your visitor’s devices.
To install the banner, from the top navigation bar, click on More > Site Settings > Installation Code > Copy code
How to add a cookie policy page on the Wix website
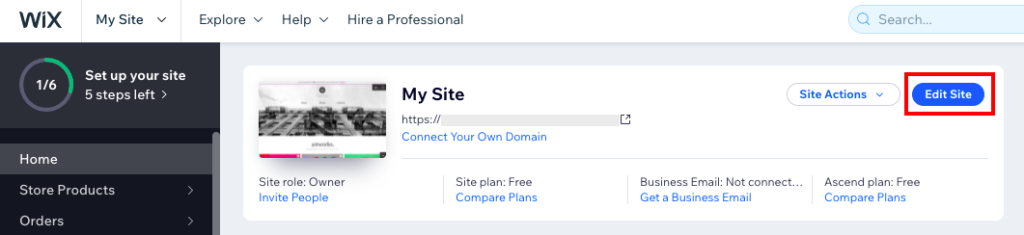
Step 1: Head to your Wix account and open your site’s Dashboard. Then select Edit Site.
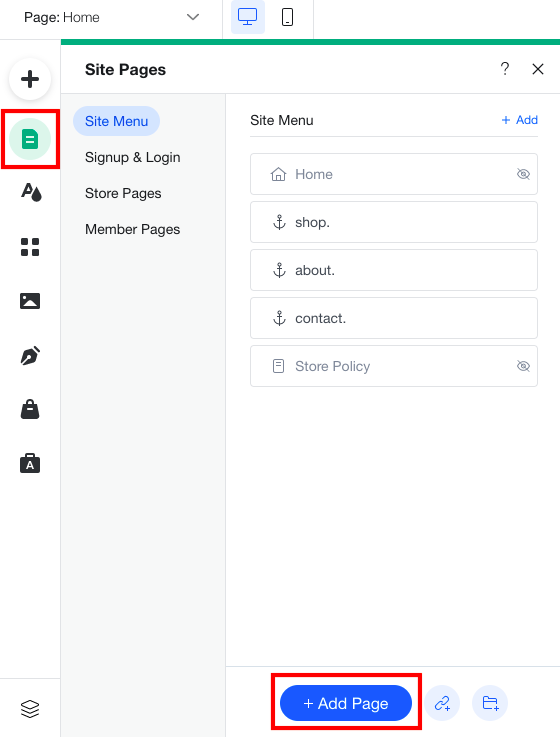
Step 2: To add a new page to your site, select Menu & Pages icon from the side panel. Now click +Add Page.
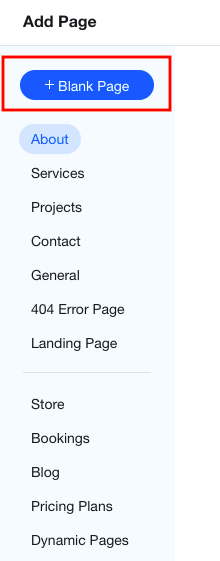
Step 3: Select +Blank Page and add the name as ‘Cookie Policy’ in the title field and click Done.
Step 4: In the newly created page, click on the ‘Add‘ (plus icon) from the side panel and then select Embed code > Embed HTML.

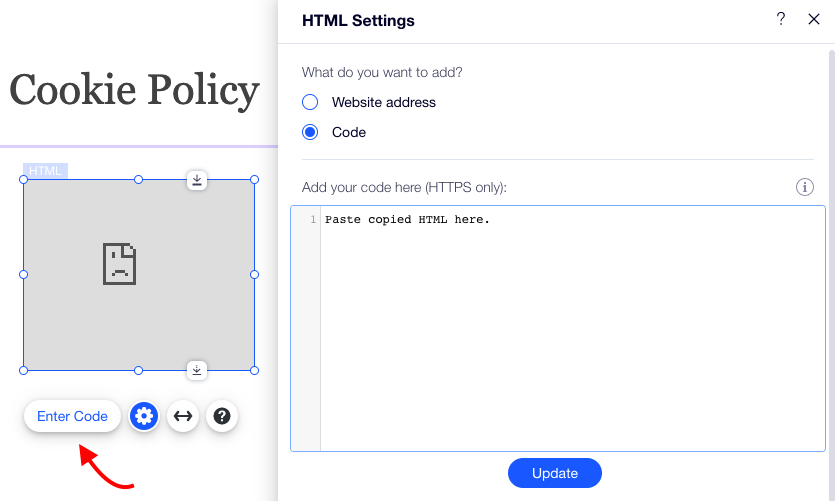
Step 5: Select the HTML block, click on Enter Code and add the copied HTML here.
To activate the Cookie Setting button, follow the below steps:
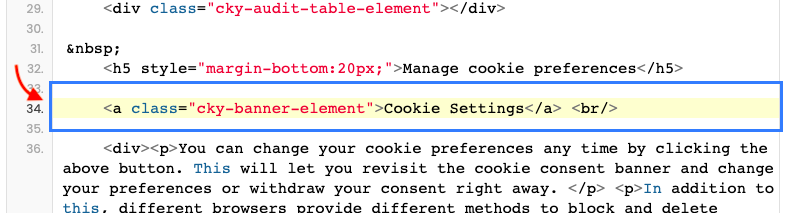
- Locate the anchor element with the inner text “Cookie Settings” within the HTML code of your Cookie Policy page.
- Replace that anchor element with the below-provided code snippet.
- In the provided code, replace “https://parent-domain.com” with your website domain.
- Click the “Update” button to apply the changes.
<a class="cky-banner-element" onclick="window.parent.postMessage({message:'cookieyes-settings'}, 'https://parent-domain.com/')">Cookie Settings</a>
Step 6: To display the cookie Audit table under the “Types of cookies we use“, follow the below steps:
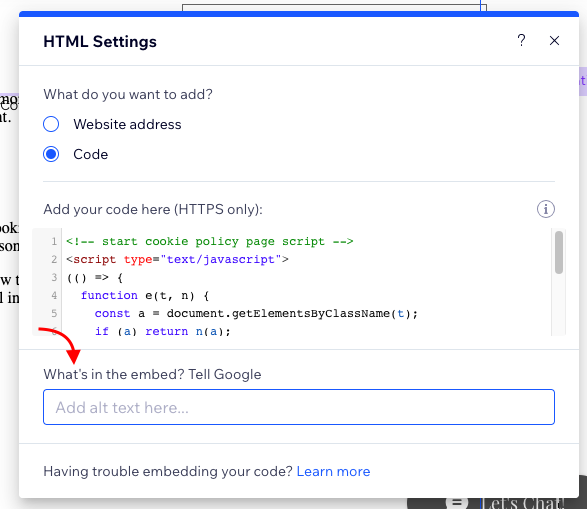
- Add the following script at the top of the cookie policy page. Replace the “https://parent-domain.com“ with your domain and click Update.
<!-- start cookie policy page script -->
<script type="text/javascript">
  (() => {
    function e(t, n) {
      const a = document.getElementsByClassName(t);
      if (a) return n(a);
      setTimeout(() => {
        e(t, n);
      }, 500);
    }

    window.addEventListener &&
      window.addEventListener("load", () => {
        e("cky-audit-table-element", () => {
          window.parent.postMessage(
            { message: "get-audit-table" },
            "https://parent-domain.com"
          );
        });
      });

    window.addEventListener(
      "message",
      (e) => {
        if (
          "https://parent-domain.com" !== e.origin &&
          "audit-table-content" !== e.data.message
        )
          return;

        document.getElementsByClassName(
          "cky-audit-table-element"
        )[0].innerHTML = e.data.html;
        document.head.insertAdjacentHTML(
          "beforeend",
          `<style id="cky-audit-table-style">${e.data.style}</style>`
        );
      },
      false
    );
  })();
</script>
<!-- end cookie policy page script -->

2.1. Add the following custom code in the Wix Settings. Replace the “https://iframe-domain.filesusr.com“ with your iframe domain.
<script>
(() => {
function e(t, n, i = false, o = false) {
const s = o ? document.getElementById(t) : document.querySelector(t);
if (s && !i || (s && i && ["", " ", " "].indexOf(s.innerHTML) === -1)) return n(s);
setTimeout(() => {
e(t, n, i, o);
}, 500);
}
window.addEventListener("load", () => {
document.body.insertAdjacentHTML(
"afterBegin",
'<div class="cky-audit-table-element" style="display: none;"></div>'
);
});
window.addEventListener("message", (t) => {
if ("https://iframe-domain.filesusr.com" !== t.origin) return;
if (t.data.message === "cookieyes-settings") {
window.revisitCkyConsent();
return;
}
if (t.data.message === "get-audit-table") {
e('[title="Embedded Content"]', (t) => {
e(".cky-audit-table-element", (n) => {
e("cky-audit-table-style", (e) => {
t.contentWindow.postMessage(
{
html: n.innerHTML,
style: e.innerHTML,
message: "audit-table-content",
},
"https://iframe-domain.filesusr.com"
);
}, true, true);
}, true);
});
}
}, false);
})();
</script>

To get your iframe domain from the Wix website, refer.
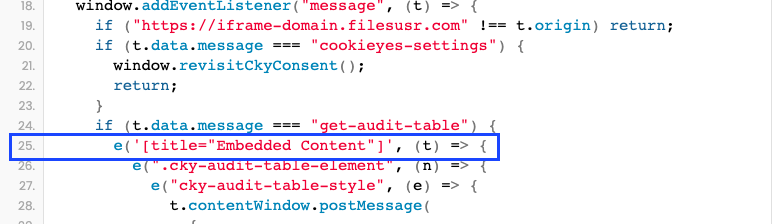
2.2. If you have provided any text in the field “What’s in the embed?” of HTML Settings where you have inserted the cookie policy code, you need to replace the attribute value of title="Embedded Content" conditional check within the event listener (line 25) of the above code snippet.
For example, if you have entered “Demo Content” in the field “What’s in the embed?“, modify the code as shown below:
<script>
(() => {
function e(t, n, i = false, o = false) {
const s = o ? document.getElementById(t) : document.querySelector(t);
if (s && !i || (s && i && ["", " ", " "].indexOf(s.innerHTML) === -1)) return n(s);
setTimeout(() => {
e(t, n, i, o);
}, 500);
}
window.addEventListener("load", () => {
document.body.insertAdjacentHTML(
"afterBegin",
'<div class="cky-audit-table-element" style="display: none;"></div>'
);
});
window.addEventListener("message", (t) => {
if ("https://iframe-domain.filesusr.com" !== t.origin) return;
if (t.data.message === "cookieyes-settings") {
window.revisitCkyConsent();
return;
}
if (t.data.message === "get-audit-table") {
e('[title="Demo Content"]', (t) => {
e(".cky-audit-table-element", (n) => {
e("cky-audit-table-style", (e) => {
t.contentWindow.postMessage(
{
html: n.innerHTML,
style: e.innerHTML,
message: "audit-table-content",
},
"https://iframe-domain.filesusr.com"
);
}, true, true);
}, true);
});
}
}, false);
})();
</script>
Step 7: Now you can Preview your cookie policy page and click on Publish.
Your cookie policy page will be live on your Wix website. You can then link your cookie policy to your website footer or link it within your cookie banner.
If you are facing issues with the Cookie Policy Generator, then contact technical support.