How to Install and Setup CookieYes in the Shopify Store?
Last updated on August 31, 2026
On this page
CookieYes offers a straightforward cookie consent solution that lets you display a cookie banner or pop-up asking users to accept or decline cookies.
To add and configure a cookie banner to your website, follow these steps:
- Install CookieYes
- Enable Shopify Customer Privacy Settings
- Configure your CookieYes settings
Step 1: Install and Activate CookieYes
Install CookieYes
Start by installing the CookieYes App from the Shopify Store directly. Refer to our guide for detailed instructions.
Initial Setup
Upon successful installation, you will have one of the following scenarios:
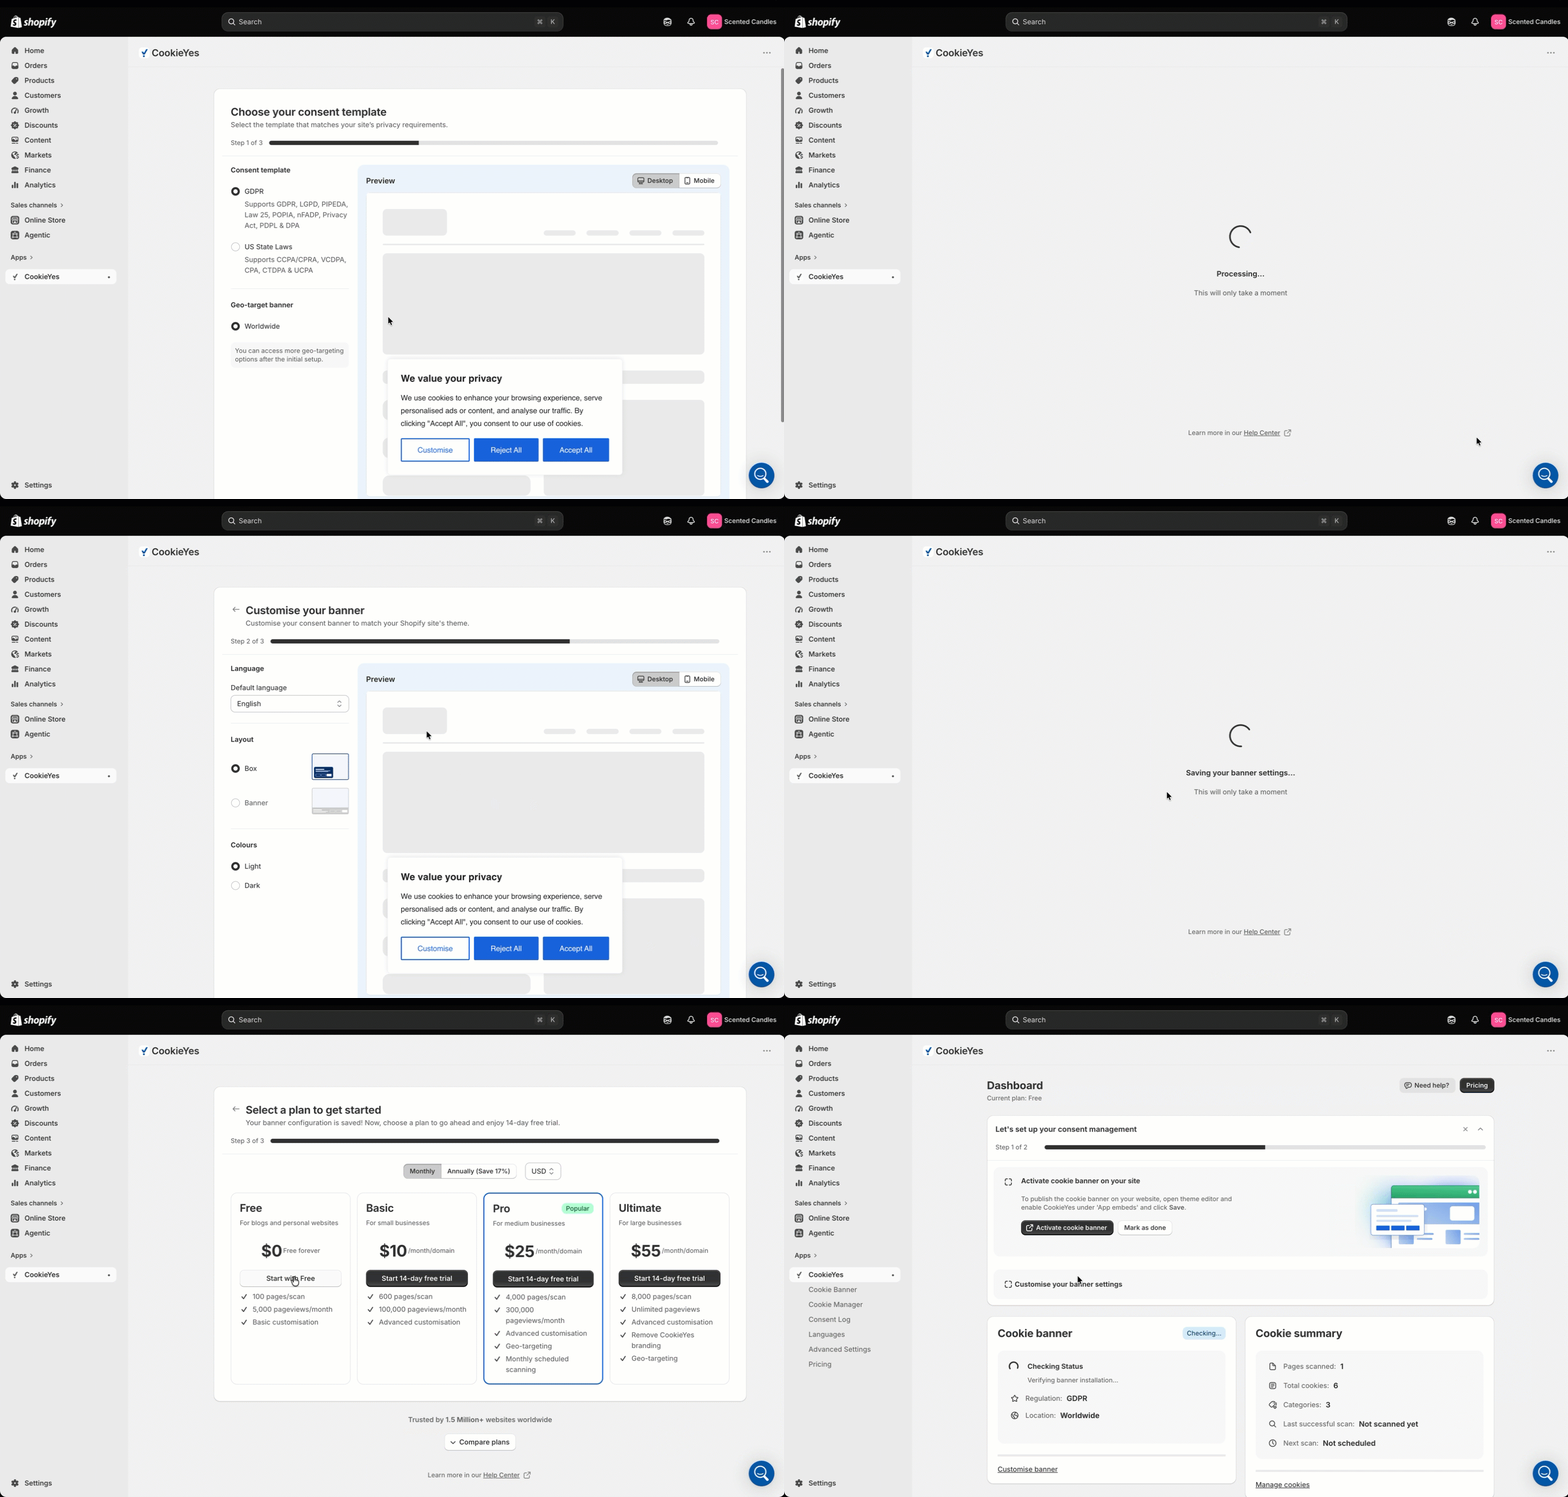
- New CookieYes account: In your Shopify admin dashboard, go to Apps and select CookieYes. The onboarding screen opens, where you choose a consent template, customise your cookie banner, and select a subscription plan.
- Existing CookieYes account: In your Shopify admin dashboard, go to Apps and select CookieYes. On the login screen, enter the email address and password for your CookieYes account, then select Log in to CookieYes.
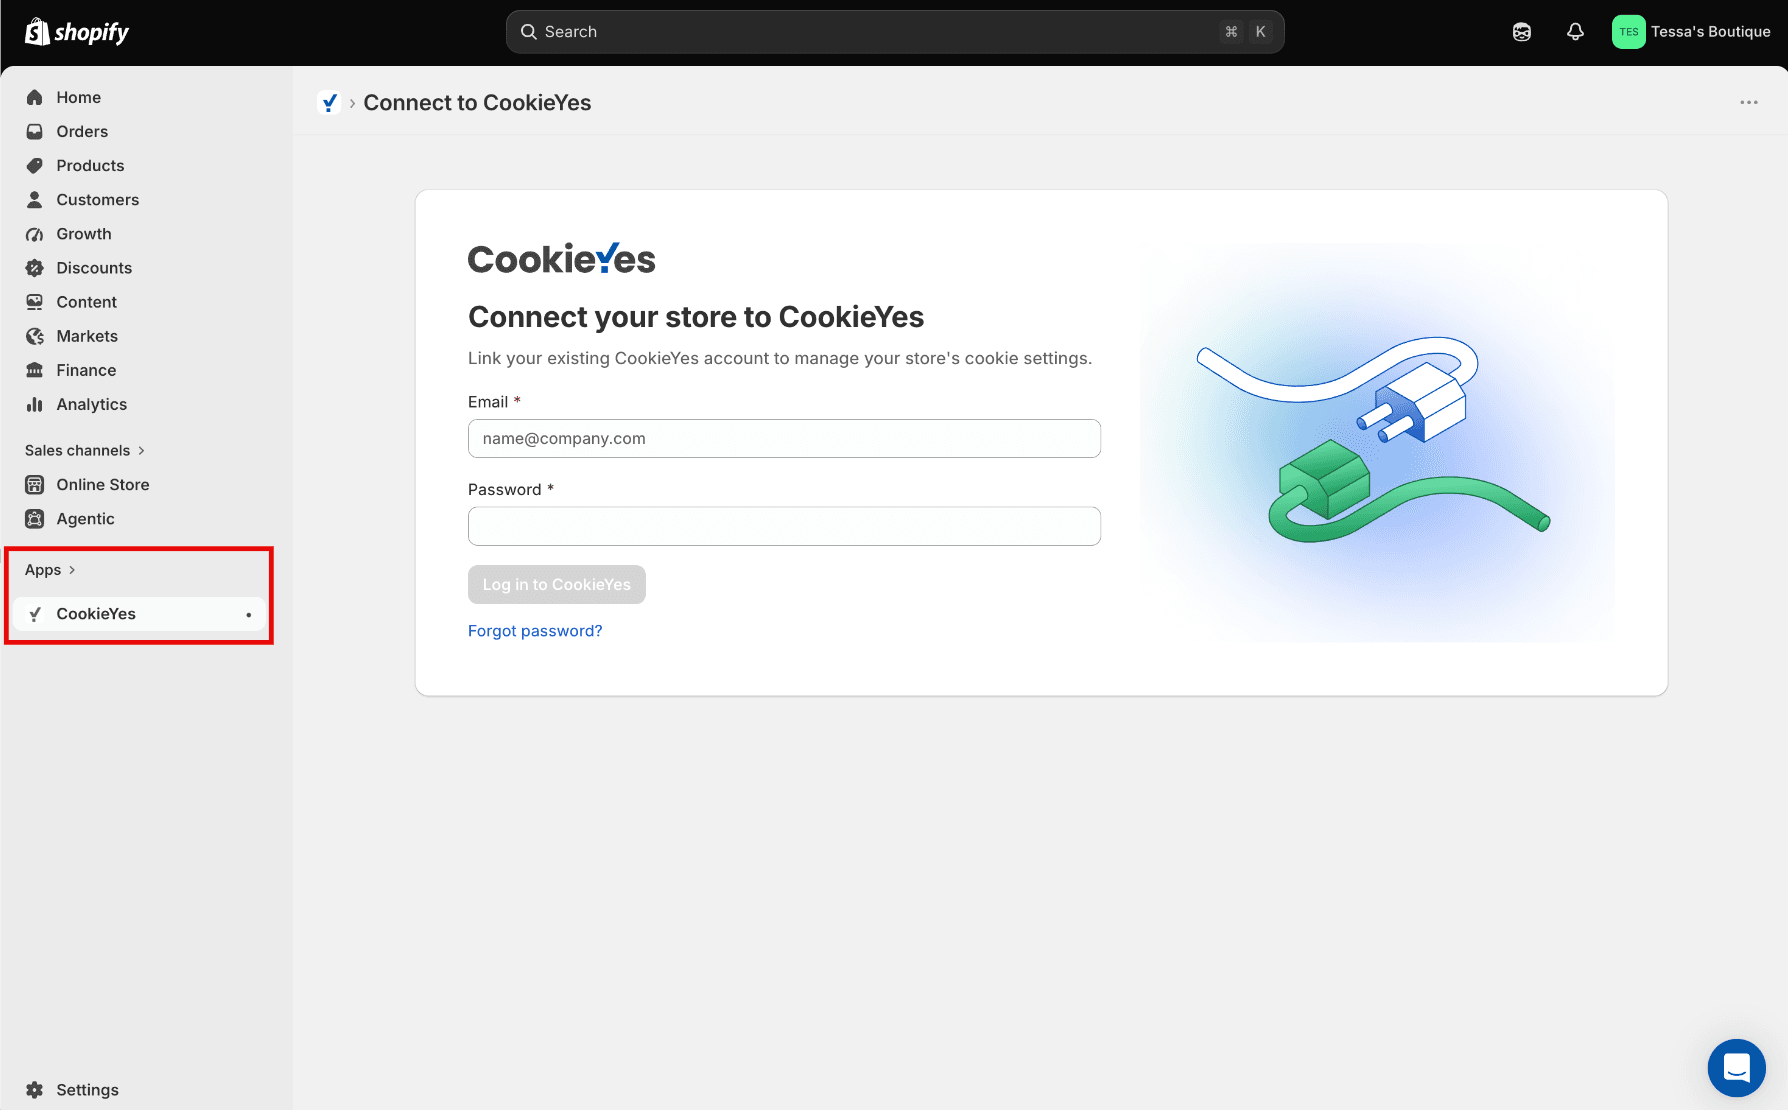
If you have an existing CookieYes account for your Shopify store, logging in to your existing account will automatically redirect you to the CookieYes dashboard.
Activation
After creating an account, to activate CookieYes, follow the below instructions:
On the CookieYes screen, select Activate cookie banner. You are redirected to your Shopify theme editor.
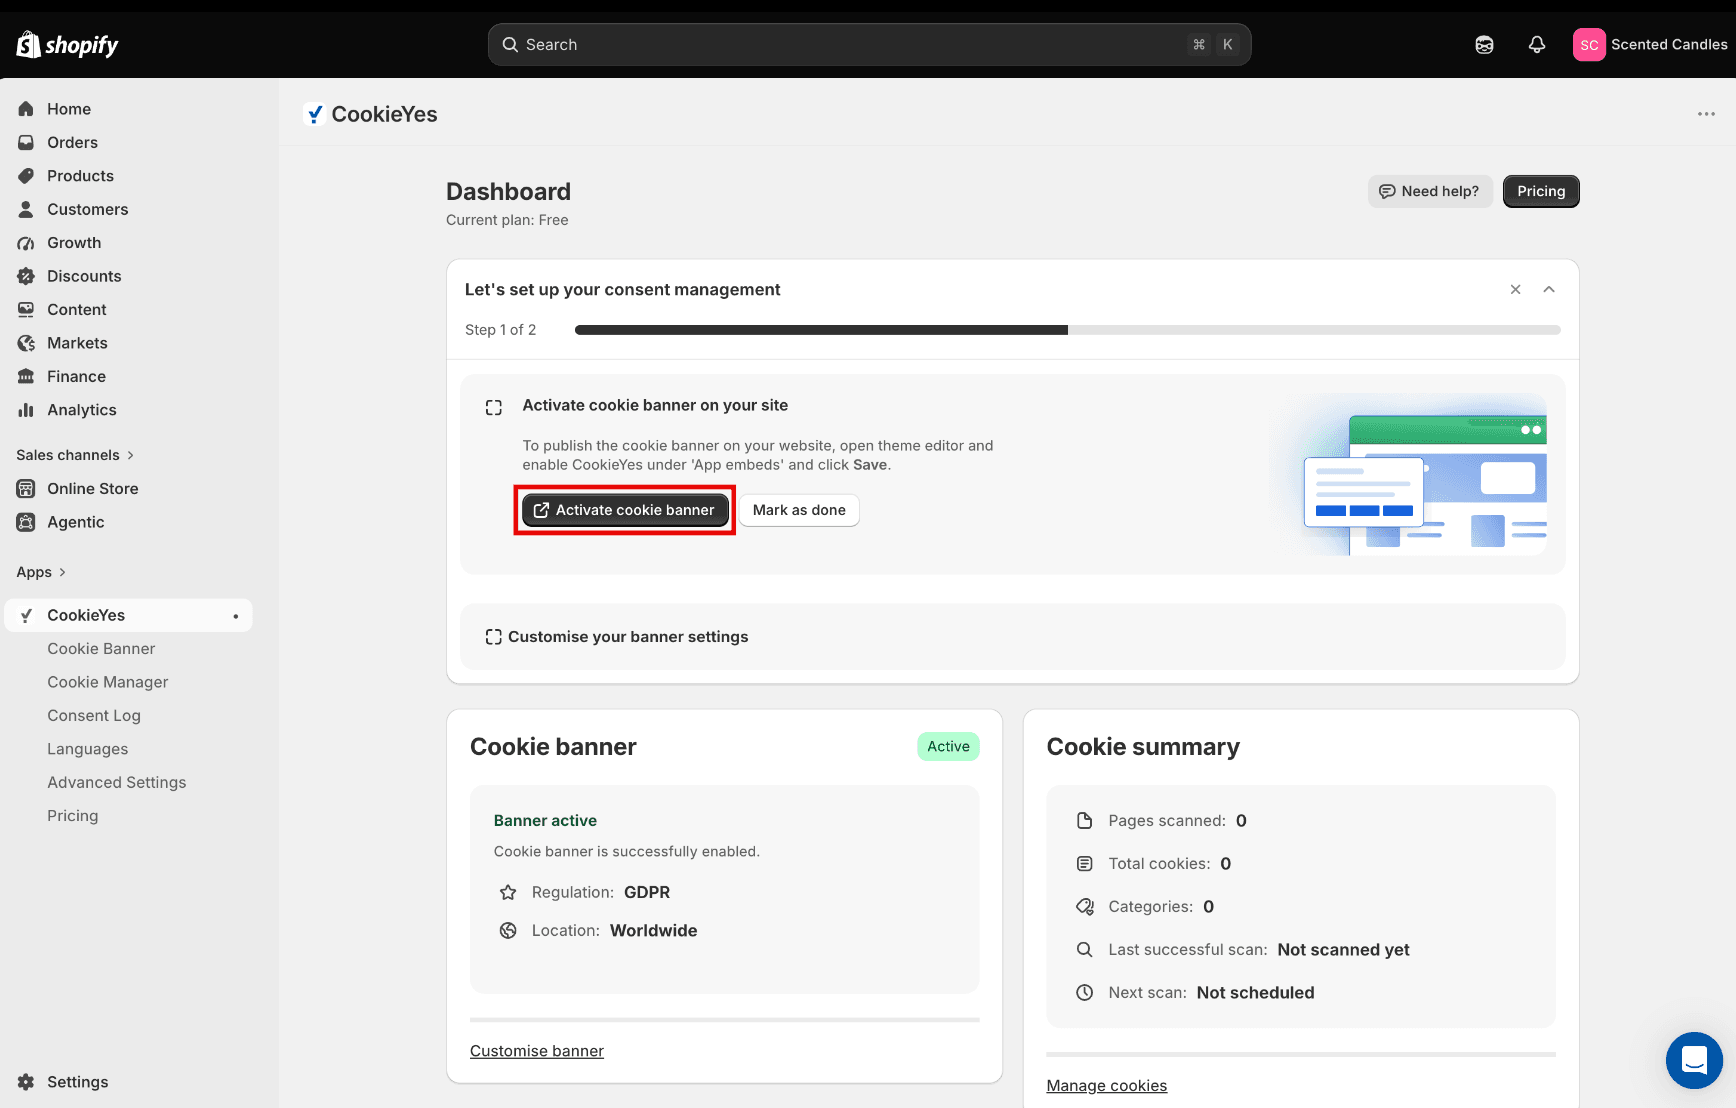
- In the theme editor, under App embeds, enable CookieYes.
- Select Save.
Now, your cookie consent banner is live on your Shopify website! You can explore more options and features from within the CookieYes app.

Step 2: Enable Shopify Customer Privacy Settings
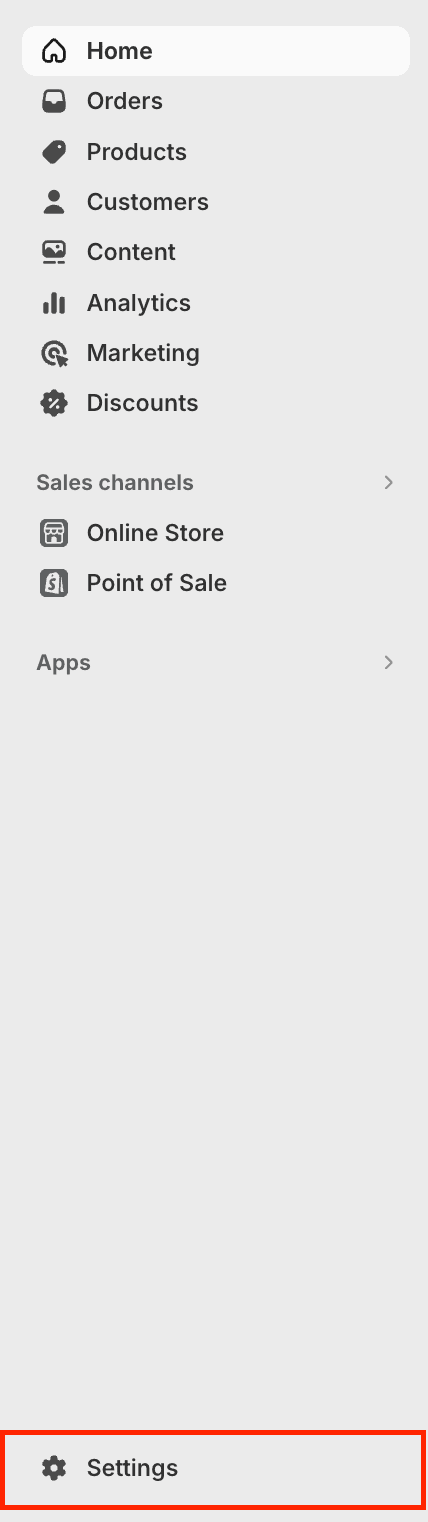
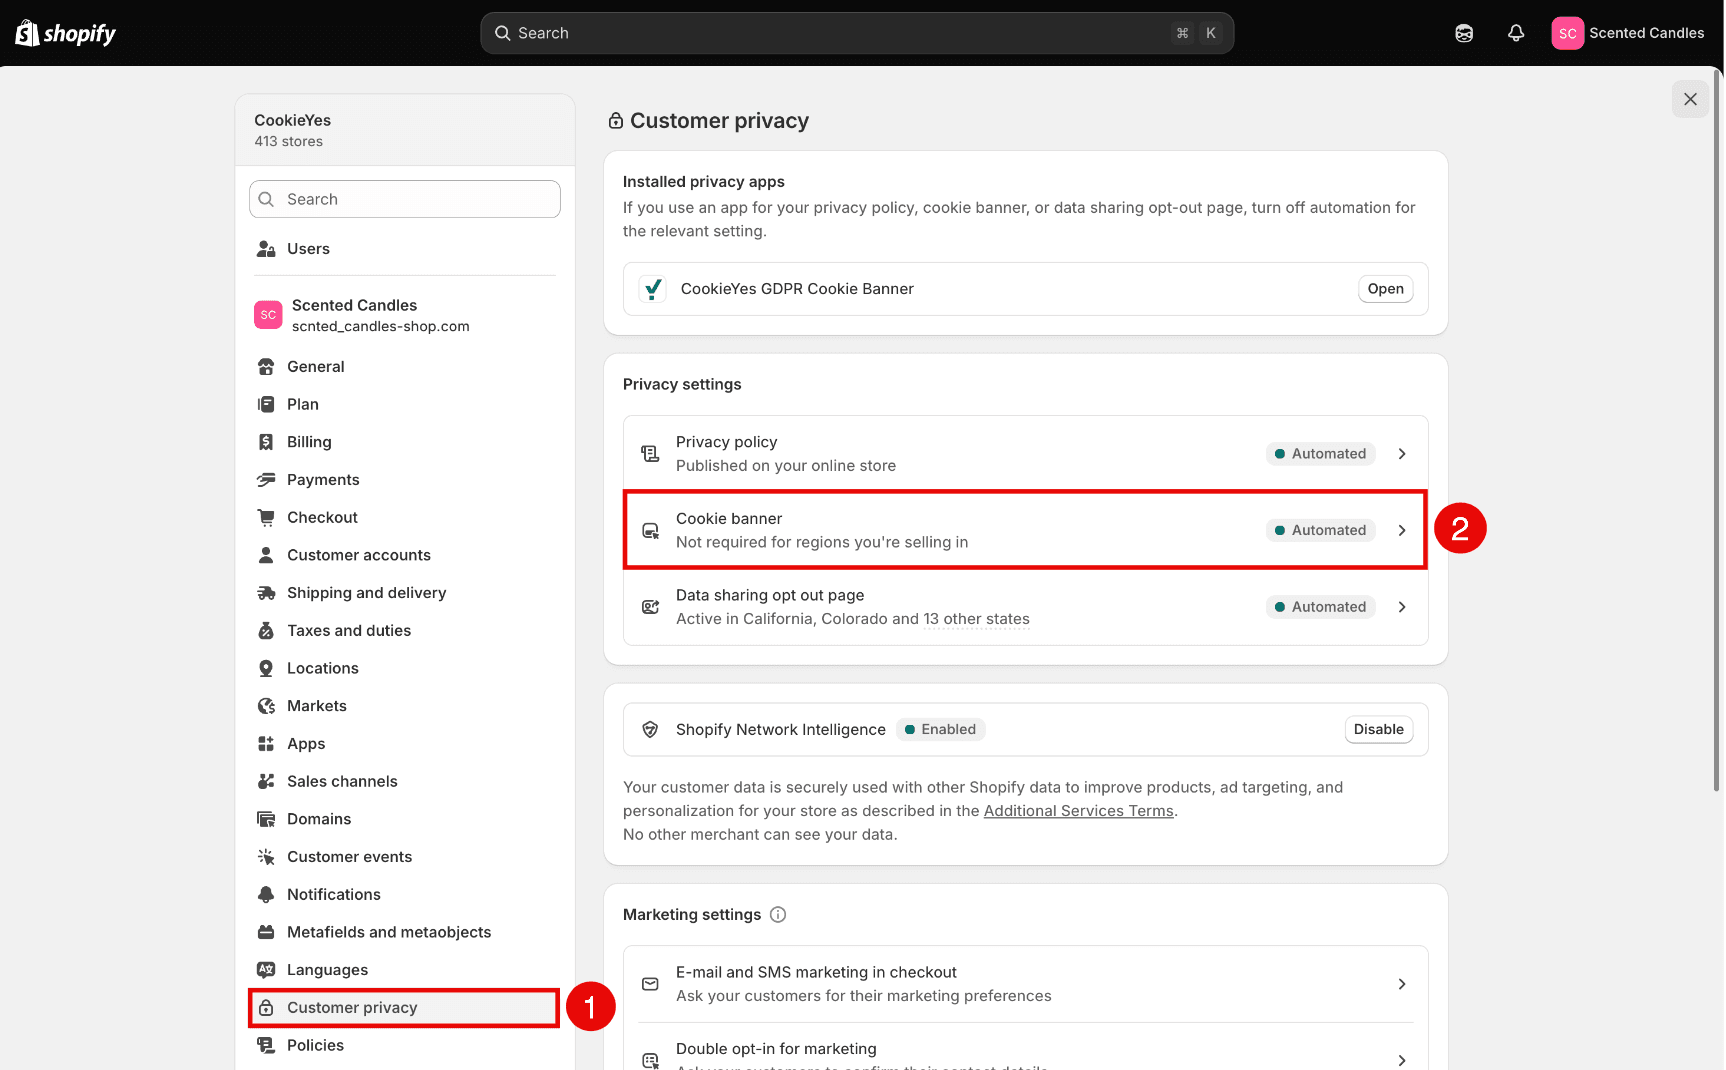
- Navigate to Settings of your Shopify Admin Dashboard.
- Select Customer Privacy from the left sidebar and click Cookie banner. Ensure ‘CookieYes GDPR Cookie Banner’ is present in Installed privacy apps.
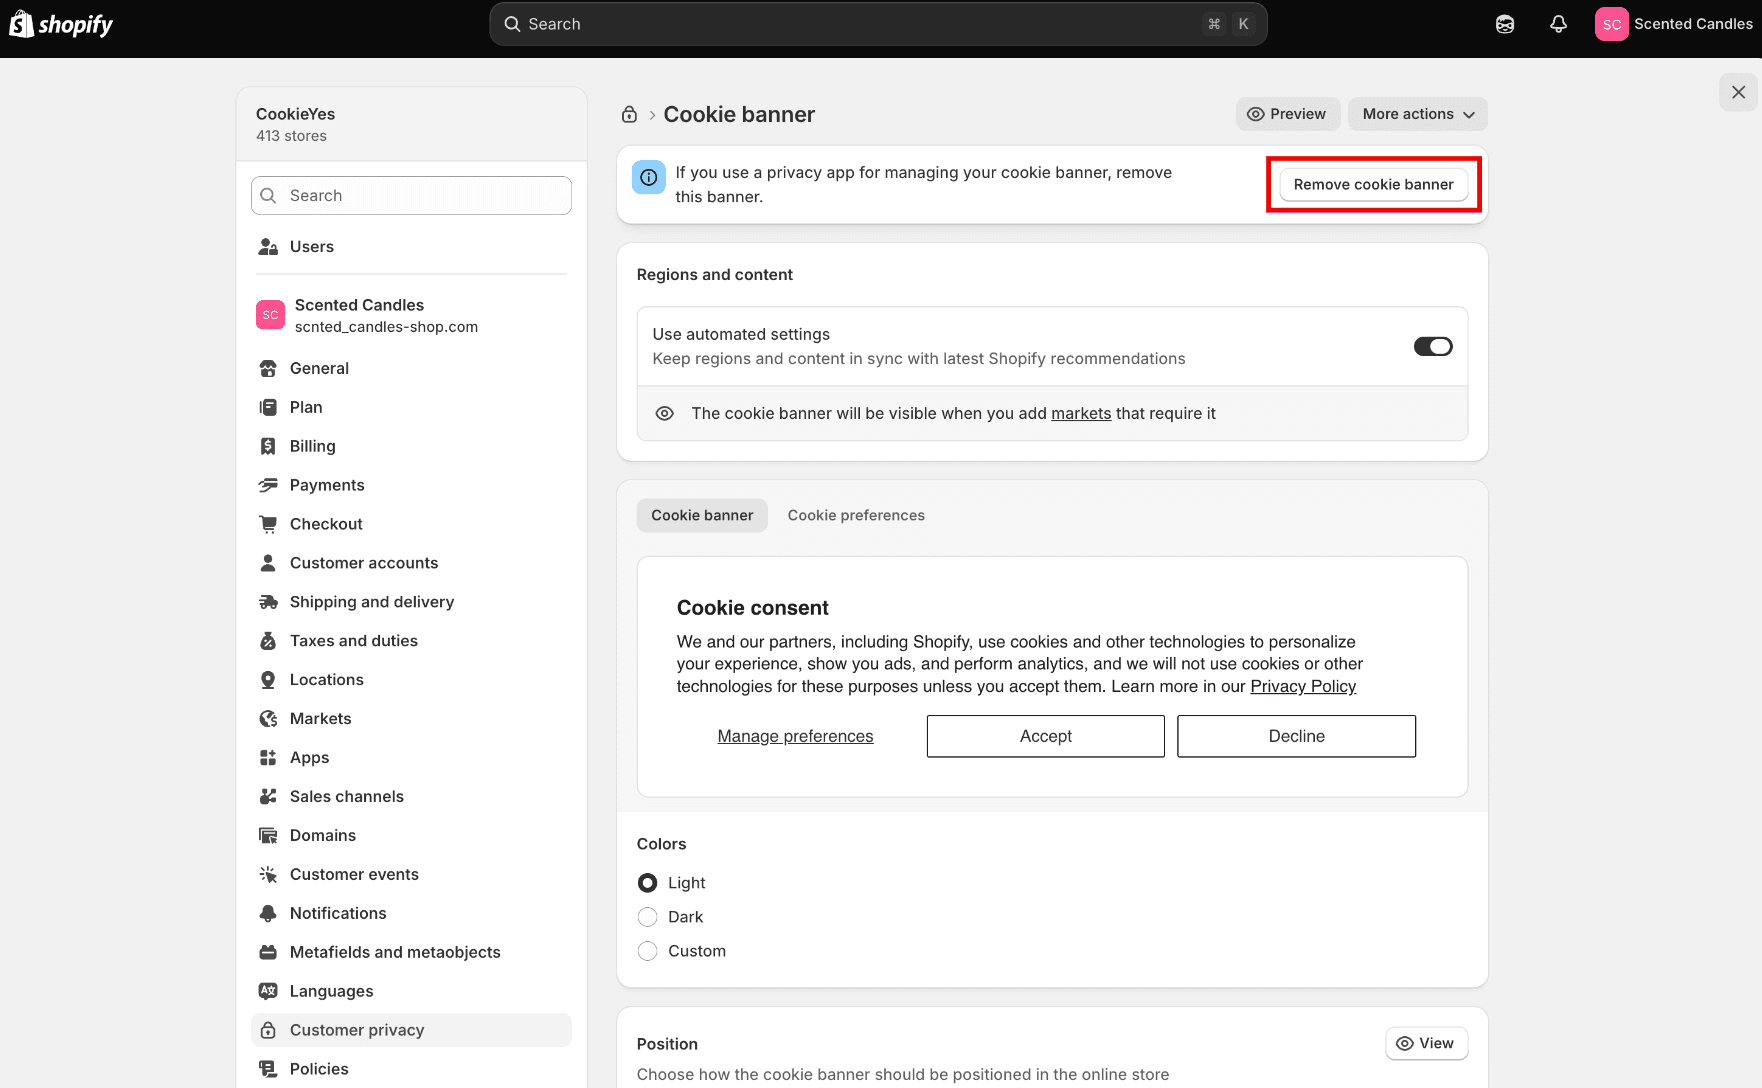
- On the Cookie Banner page, locate and click the Remove cookie banner and then click Remove in the confirmation modal to delete the banner.
- To set regions for cookie banner, follow the below steps:
- Under the Cookie banner settings, locate and click the Edit button next to Regions.
- In the Edit regions popup modal, choose the desired countries/regions by checking the boxes next to their flags and click the Done button.
- After selecting your regions, click the Save button in the top right corner of the screen to confirm your changes.
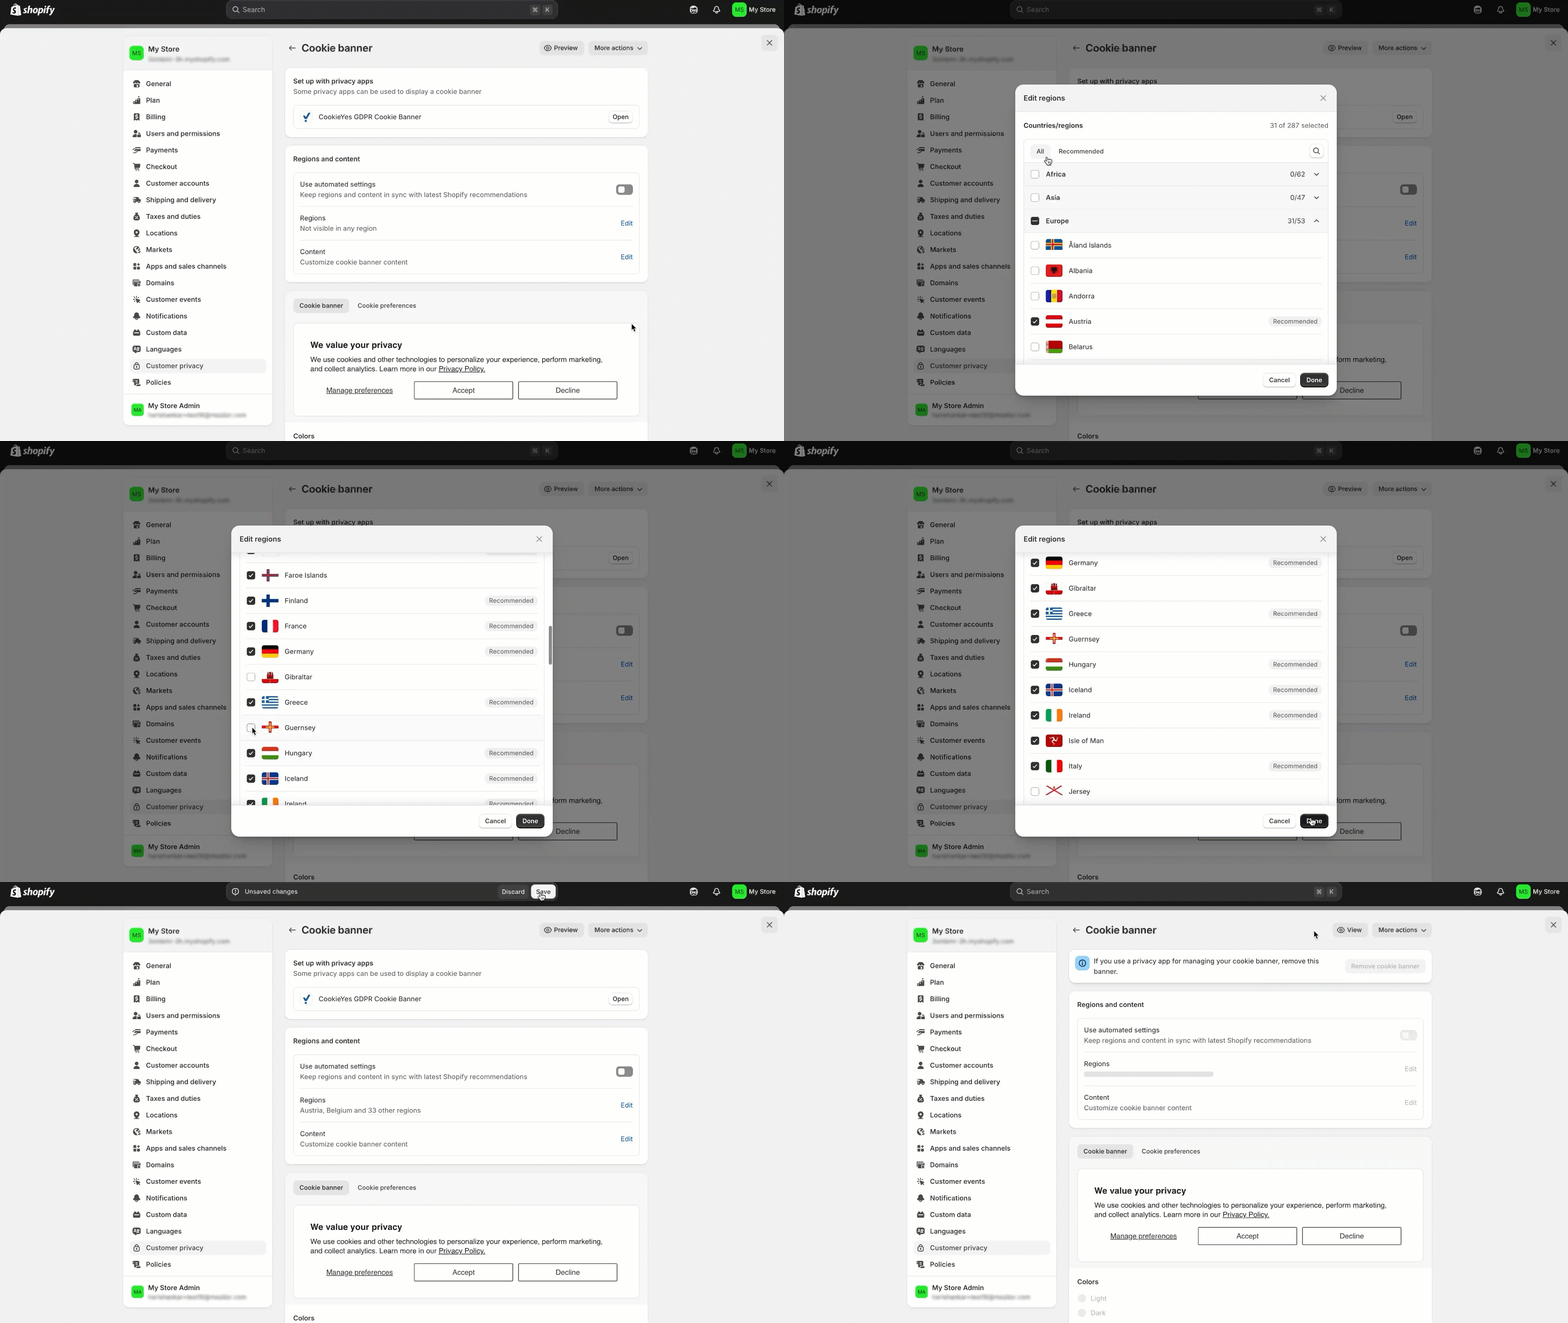
Shopify will collect marketing and analytics data solely upon obtaining consent within the specified regions.
Before further configuration and customisation, make sure you have verified the email and completed cookie scanning.
Step 3: Configure your CookieYes settings
CookieYes offers a wide range of customisation options that you can use to tailor the platform to your specific needs by connecting to the CookieYes web app.
Cookie Banner
The following customisations are available on the Cookie Banner tab:
- General settings – the law you want to follow, geo-targeting, consent expiration, reloading the page after consent action and IAB TCF v2.2.
- Layout settings – the layout of the cookie banner.
- Content Settings – the content of the cookie banner, preference centre, cookie list, revisit consent button and blocked content; and also add/alter buttons
- Colour settings – the colour of the cookie banner.
- Custom CSS setting – add a customised CSS script for unique styles or elements.
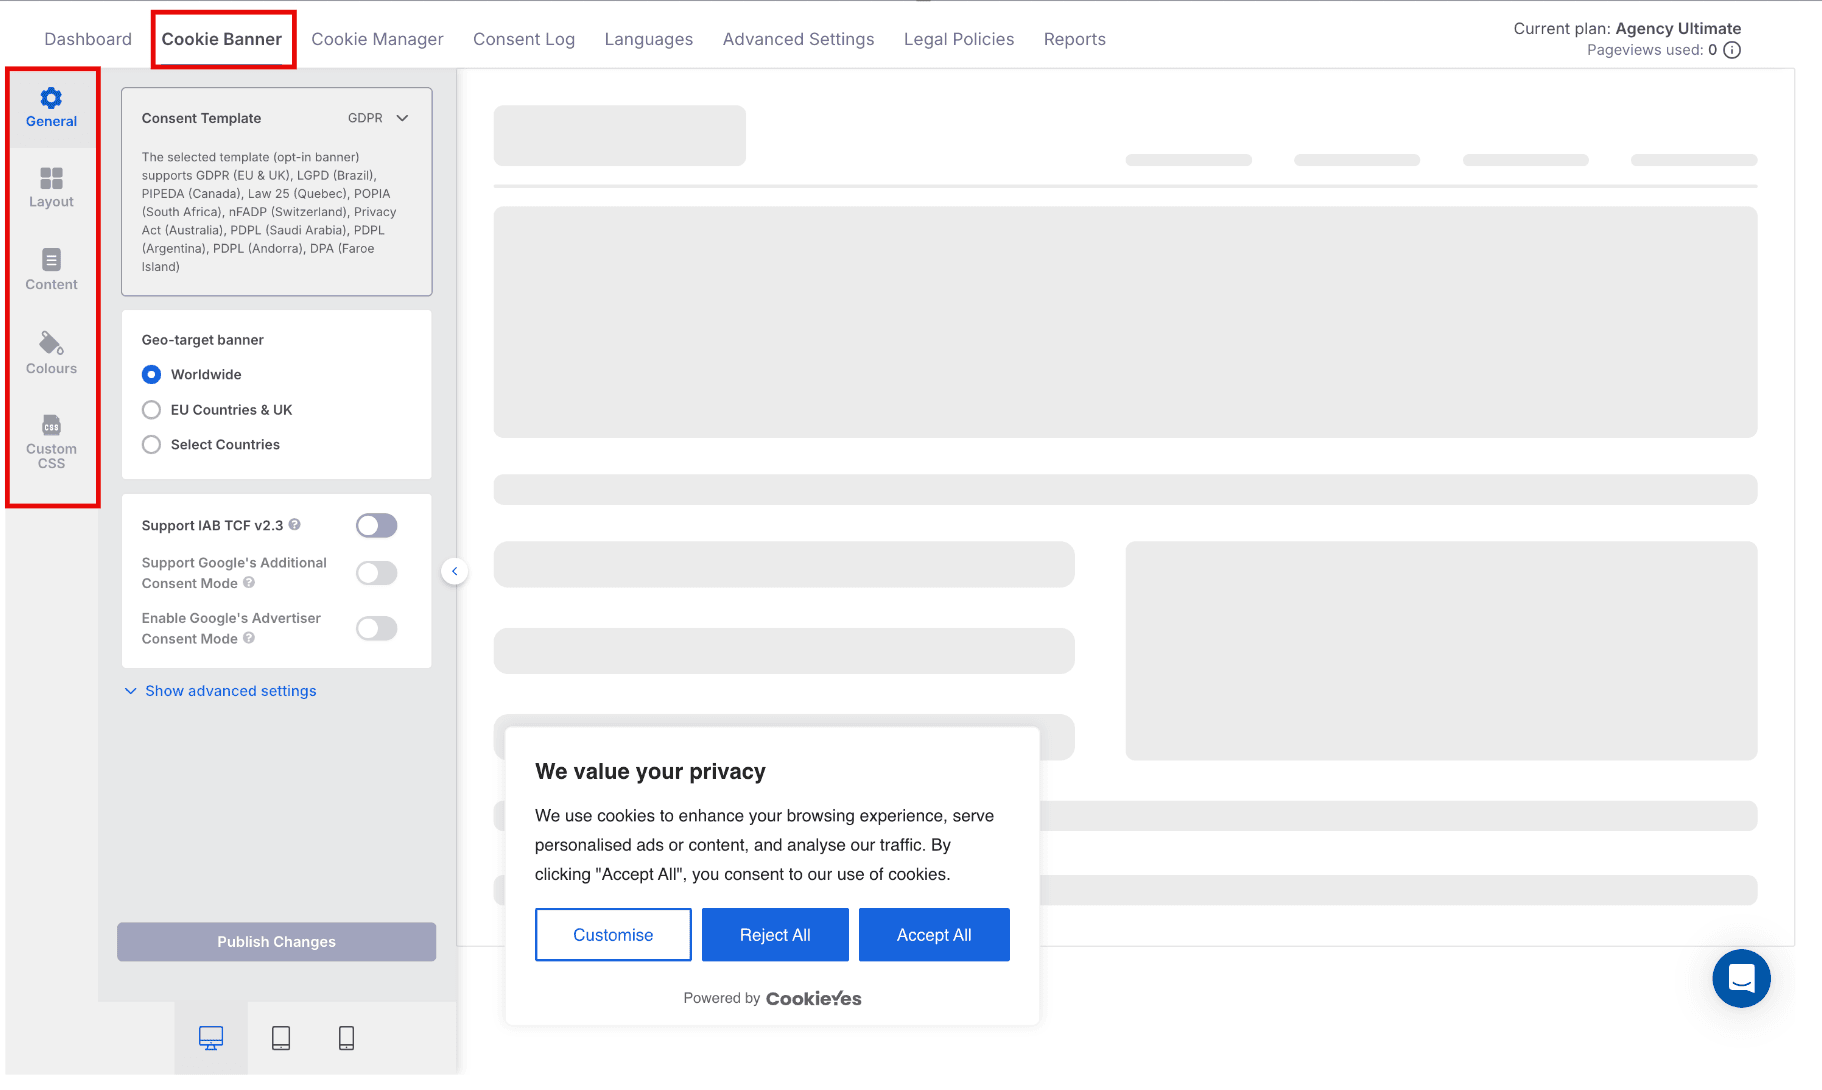
For detailed instructions on the customisation of cookie banner, check our guide.
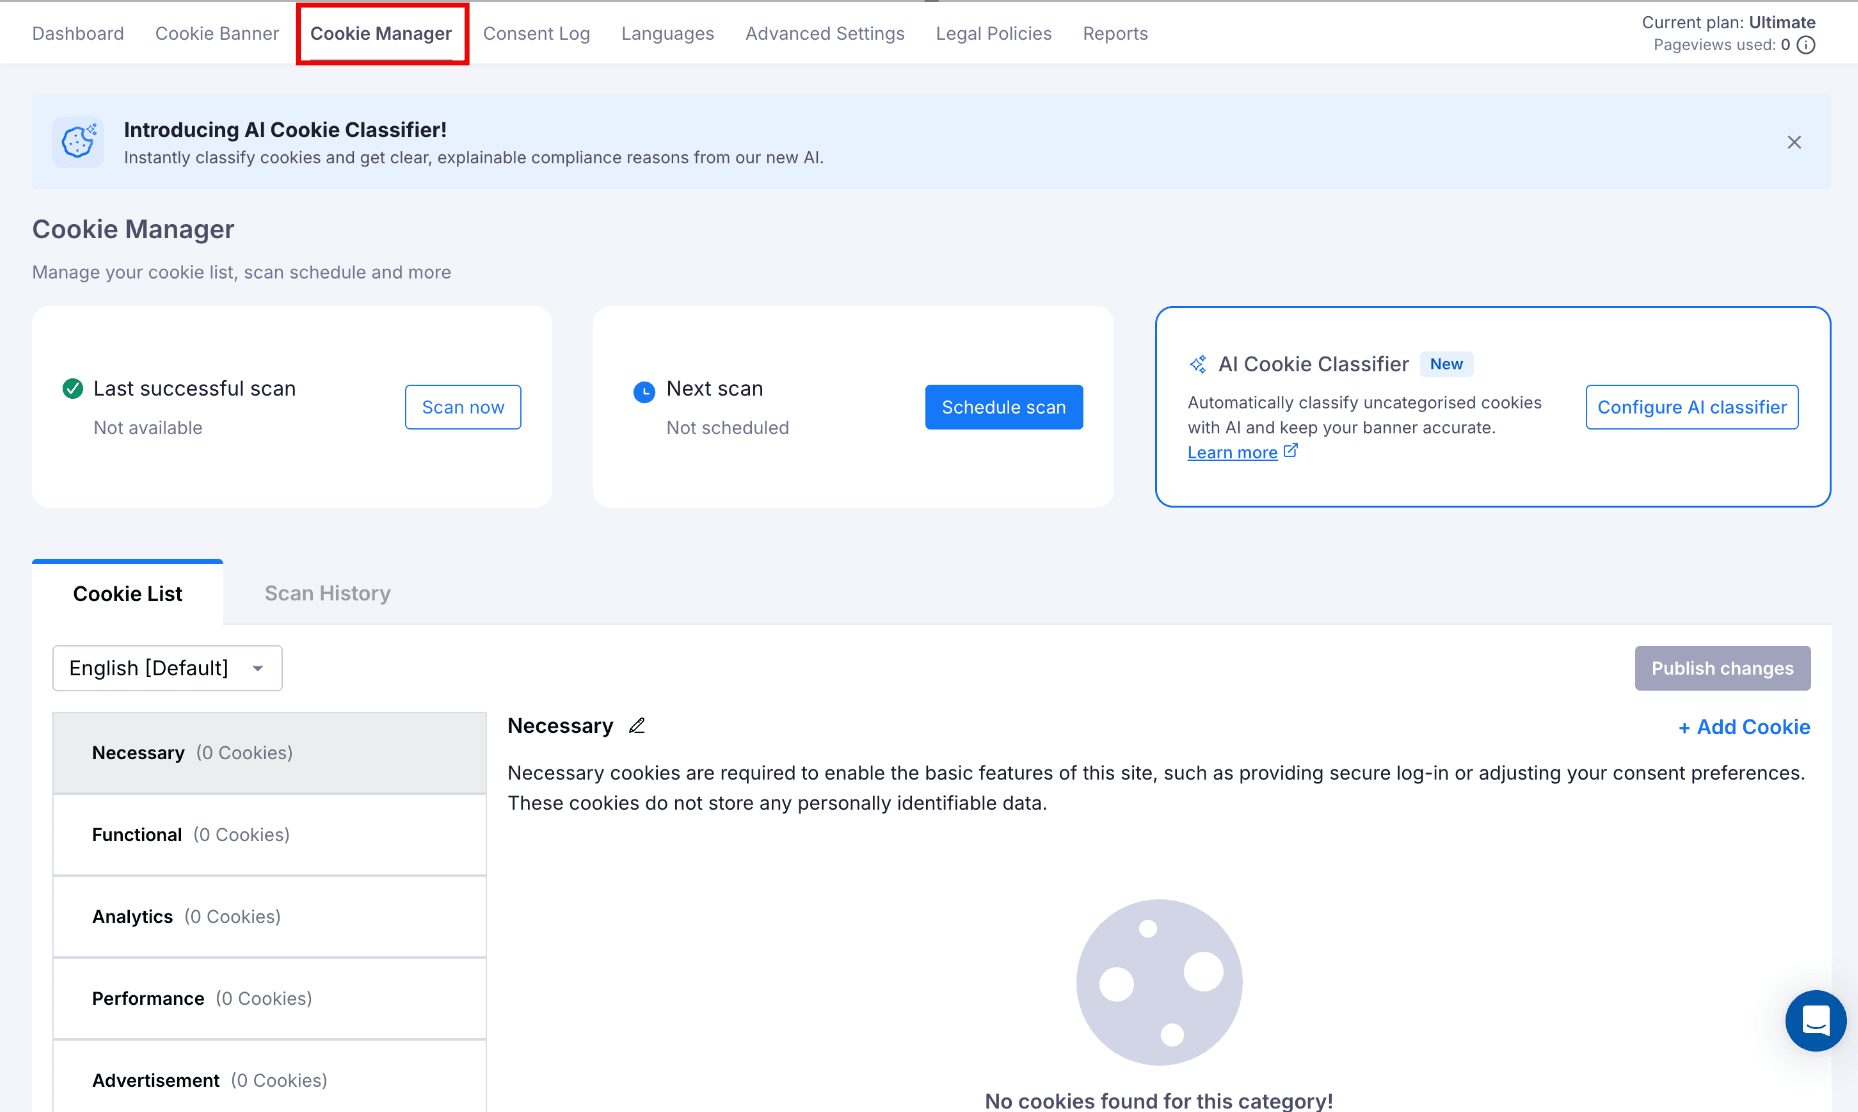
Cookie Manager
The Cookie Manager tab provides options to add new cookies under each cookie category, an overview of the cookie list and the scan history of the website.
For customisation, navigate to CookieYes Dashboard > Cookie Manager.
Please refer to our guide for details on how to:
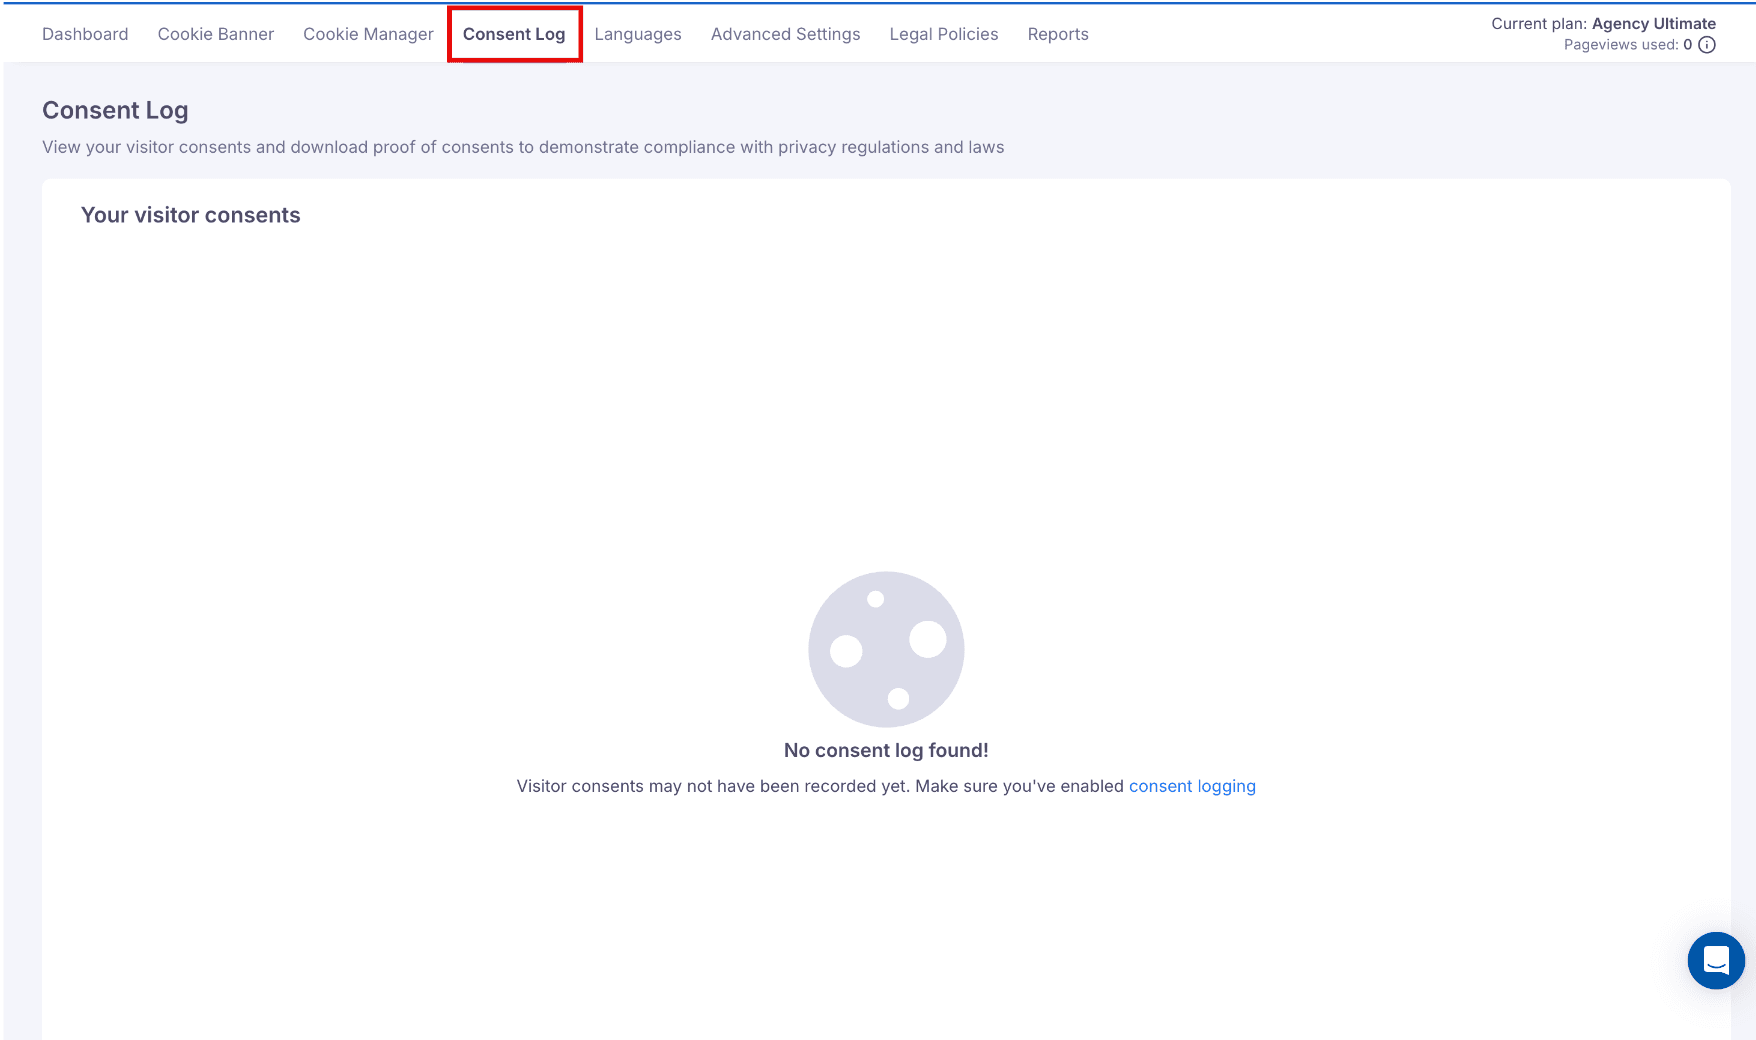
Consent Log
The Consent Log tab provides a detailed record of the user’s consent history. Enable the consent log to record the user consent and display the details such as consent ID, consent status, date/time and a search bar under the Consent Log tab. You can download the entire consent log by clicking the Export as CSV button on the top right side of the Consent log page.
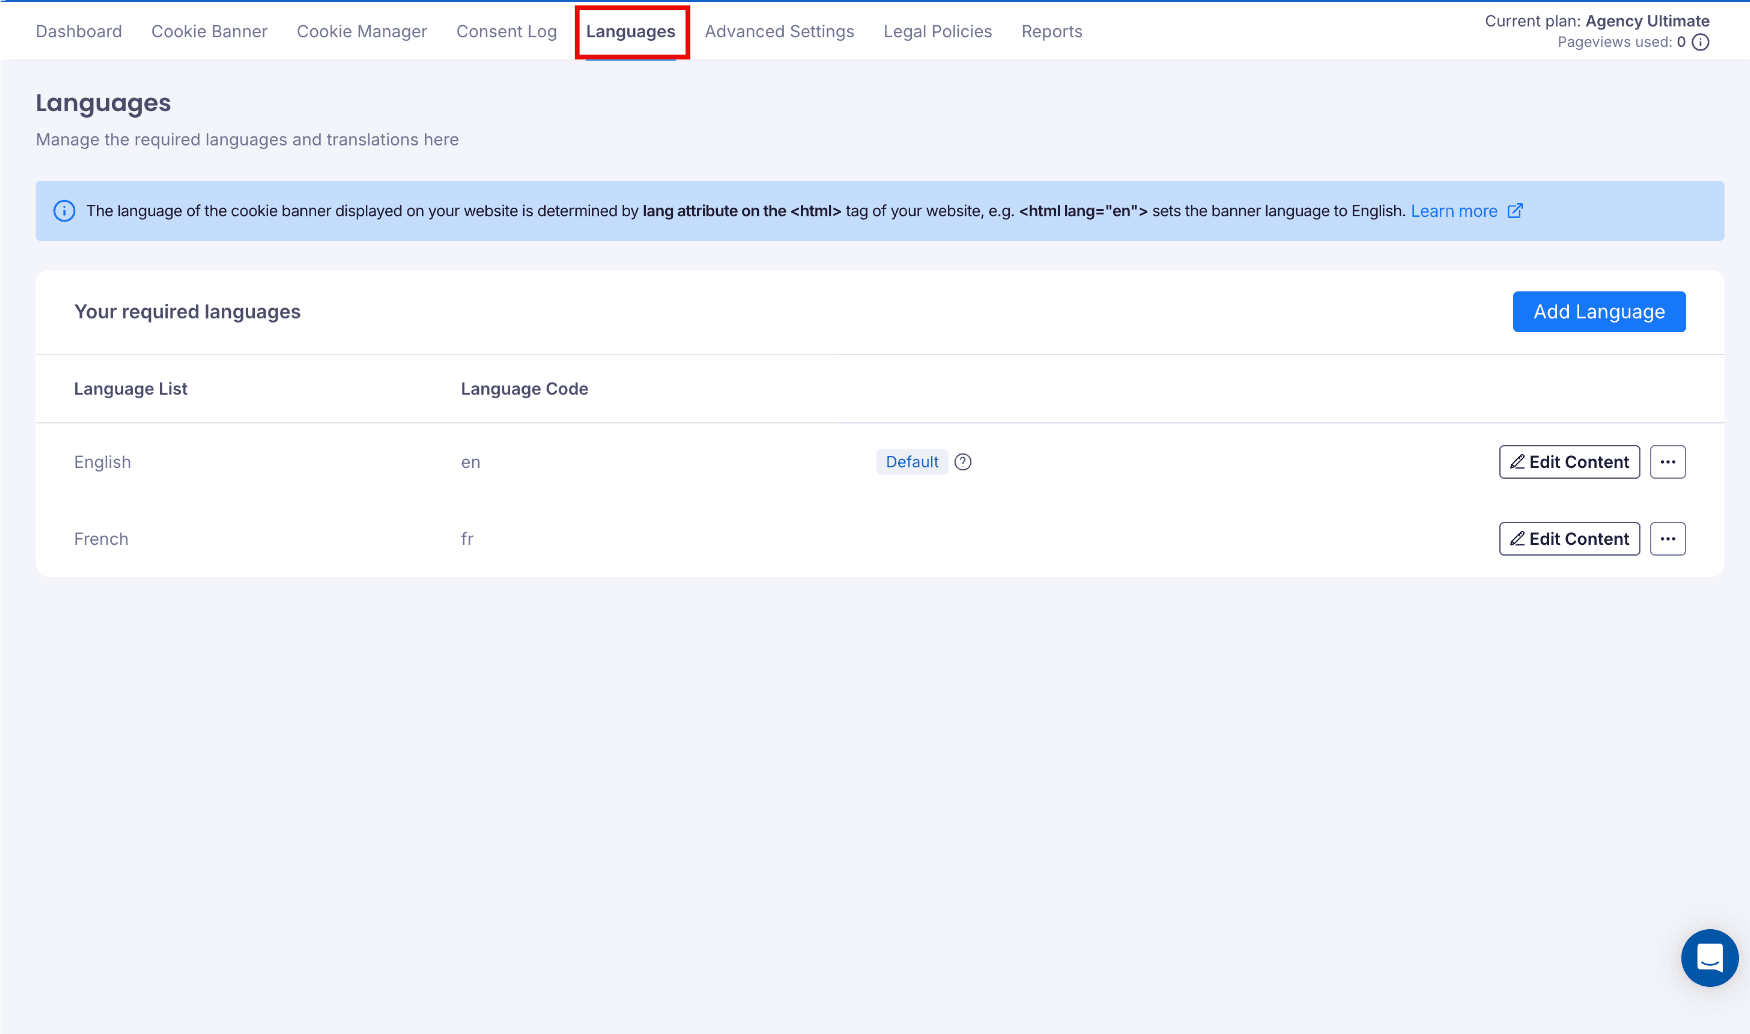
Languages
The Language tab allows you to customise the language used in their cookie consent banner and preference centre, ensuring website visitors can view and understand cookie-related information in their preferred language.
To customise the languages of the cookies consent banner, navigate to CookieYes Dashboard > Languages. For more information about customisation, check our guide.
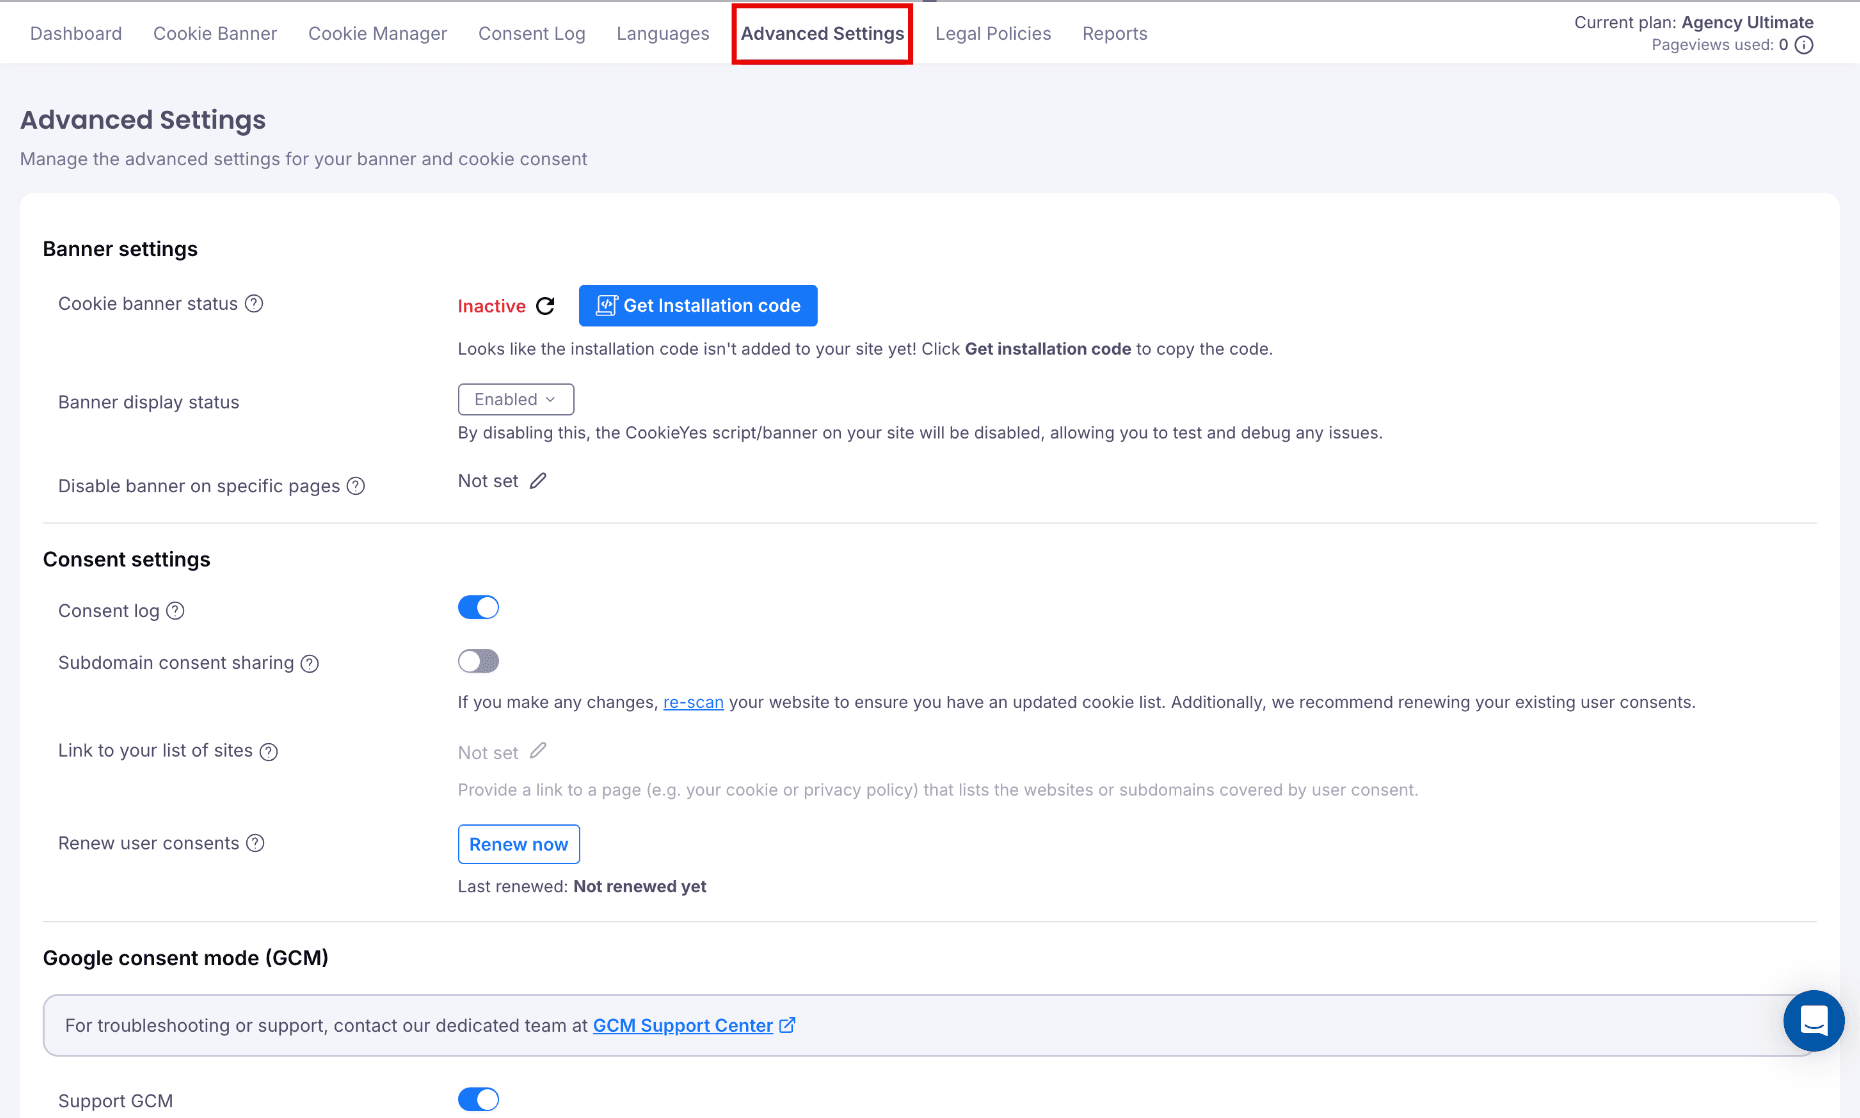
Advanced Settings
The Advanced Settings tab allows you to manage your banner settings, enable/disable Consent Log, Subdomain Consent sharing, Google Consent Mode, Renew User Consents and preview banner status.
Refer to our guide for details on how to:
Privacy Policy Generator
To create a privacy policy that accurately reflects your data collection practices:
- In the CookieYes dashboard, select Legal Policies from the top navigation bar.
- In the Privacy Policy section, select + Generate.
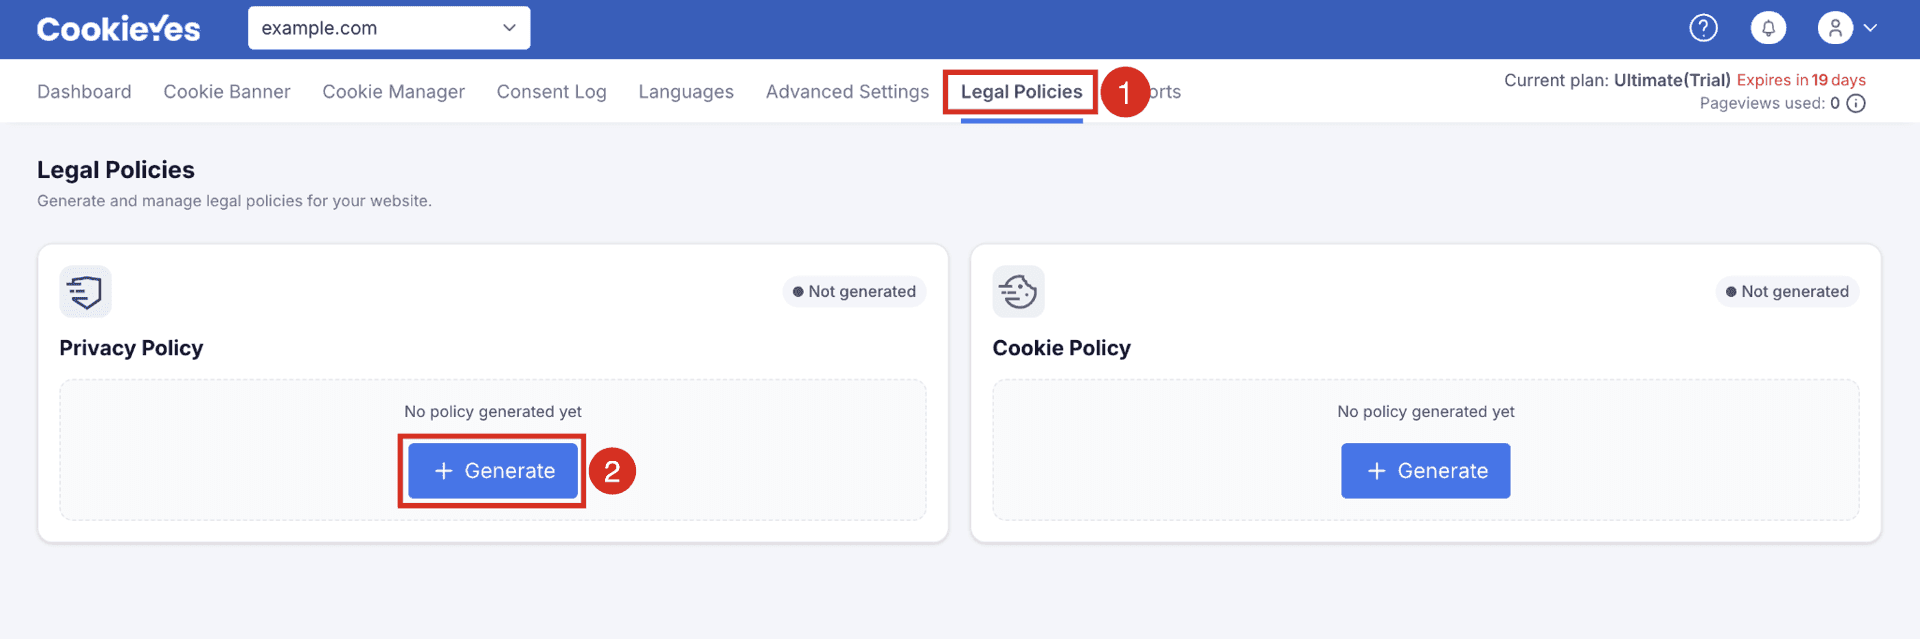
You can easily create a privacy policy by answering and submitting a few questions. For more details, check our guide.
Cookie Policy Generator
To generate a Cookie Policy tailored to your website's cookie usage:
- In the CookieYes dashboard, select Legal Policies from the top navigation bar.
- In the Cookie Policy section, select + Generate.
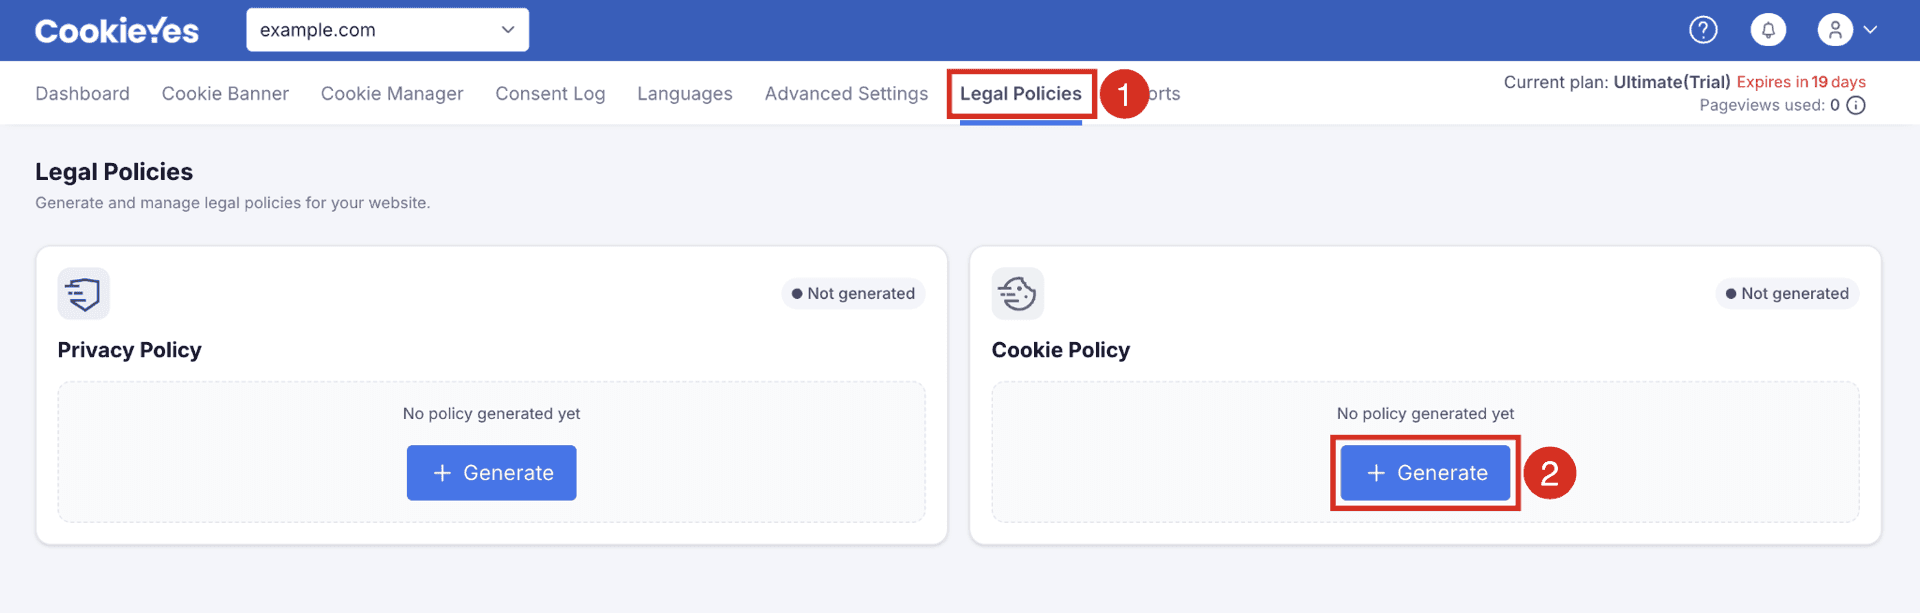
By answering and submitting a few questions, you can quickly develop a privacy policy. Check out our guide for additional information.