How to Add a Cookie Policy to Shopify

Last updated on June 23, 2026

This guide will walk you through how you can generate and add a cookie policy page on your Shopify store. A cookie policy is a document that provides detailed disclosure about the types of cookies used on a website and their purposes. It can help your website meet transparency requirements under privacy laws such as the GDPR and the ePrivacy Directive.

To begin with, sign up on CookieYes and try it for free.

Note

After you sign up, you will be directed to the installation screens. You can install the cookie banner to support GDPR compliance for your cookie usage. If you prefer to create a cookie policy first, skip the installation and go directly to the CookieYes Dashboard.

You can also follow the step-by-step instructions below to easily add a cookie policy to your Shopify website.

Generate a Cookie Policy in CookieYes

Step 1: Access the cookie policy generator

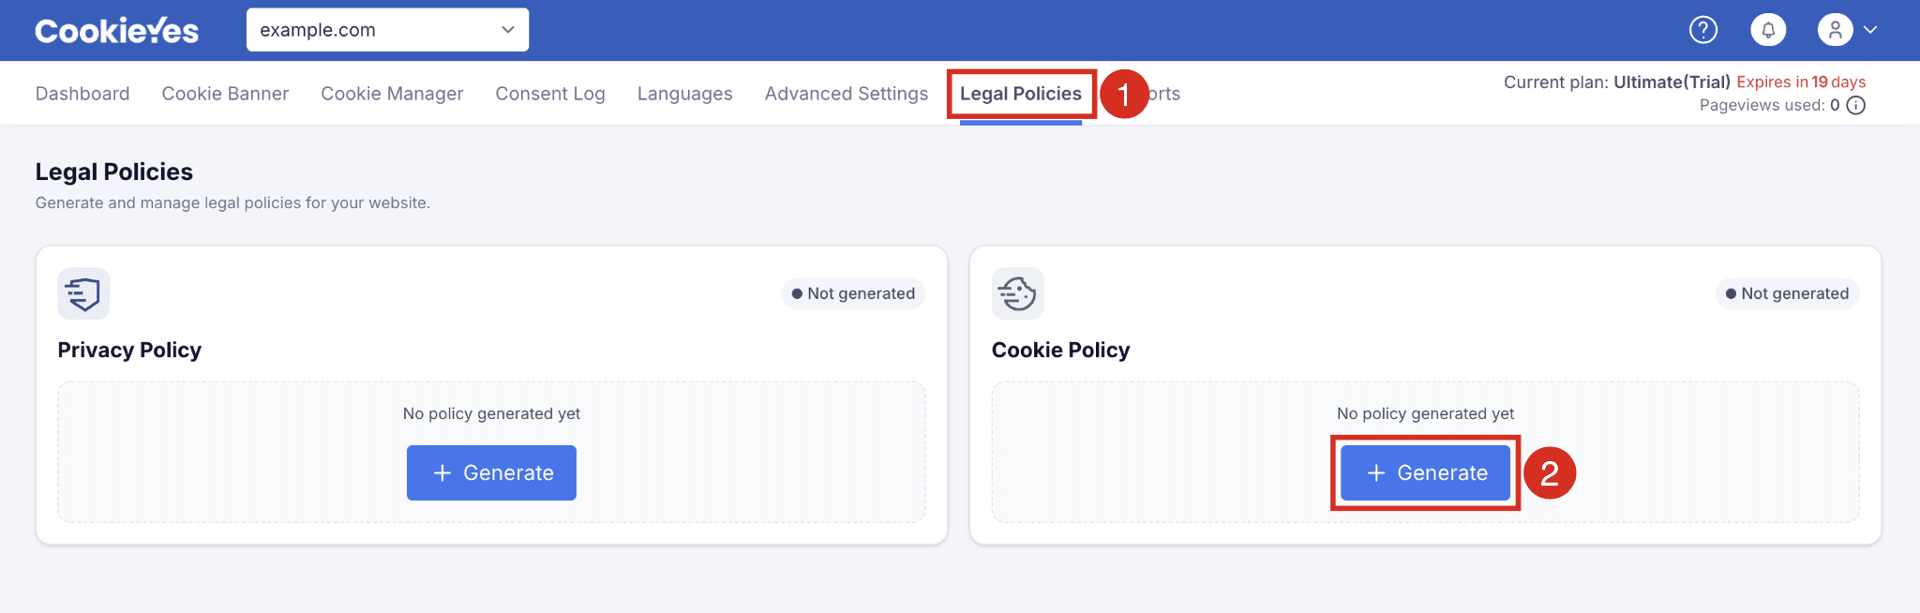
From your app’s top navigation bar, click on Legal Policies and select Cookie Policy Generator from the dropdown menu.

legal-policies

Step 2: Configure language settings

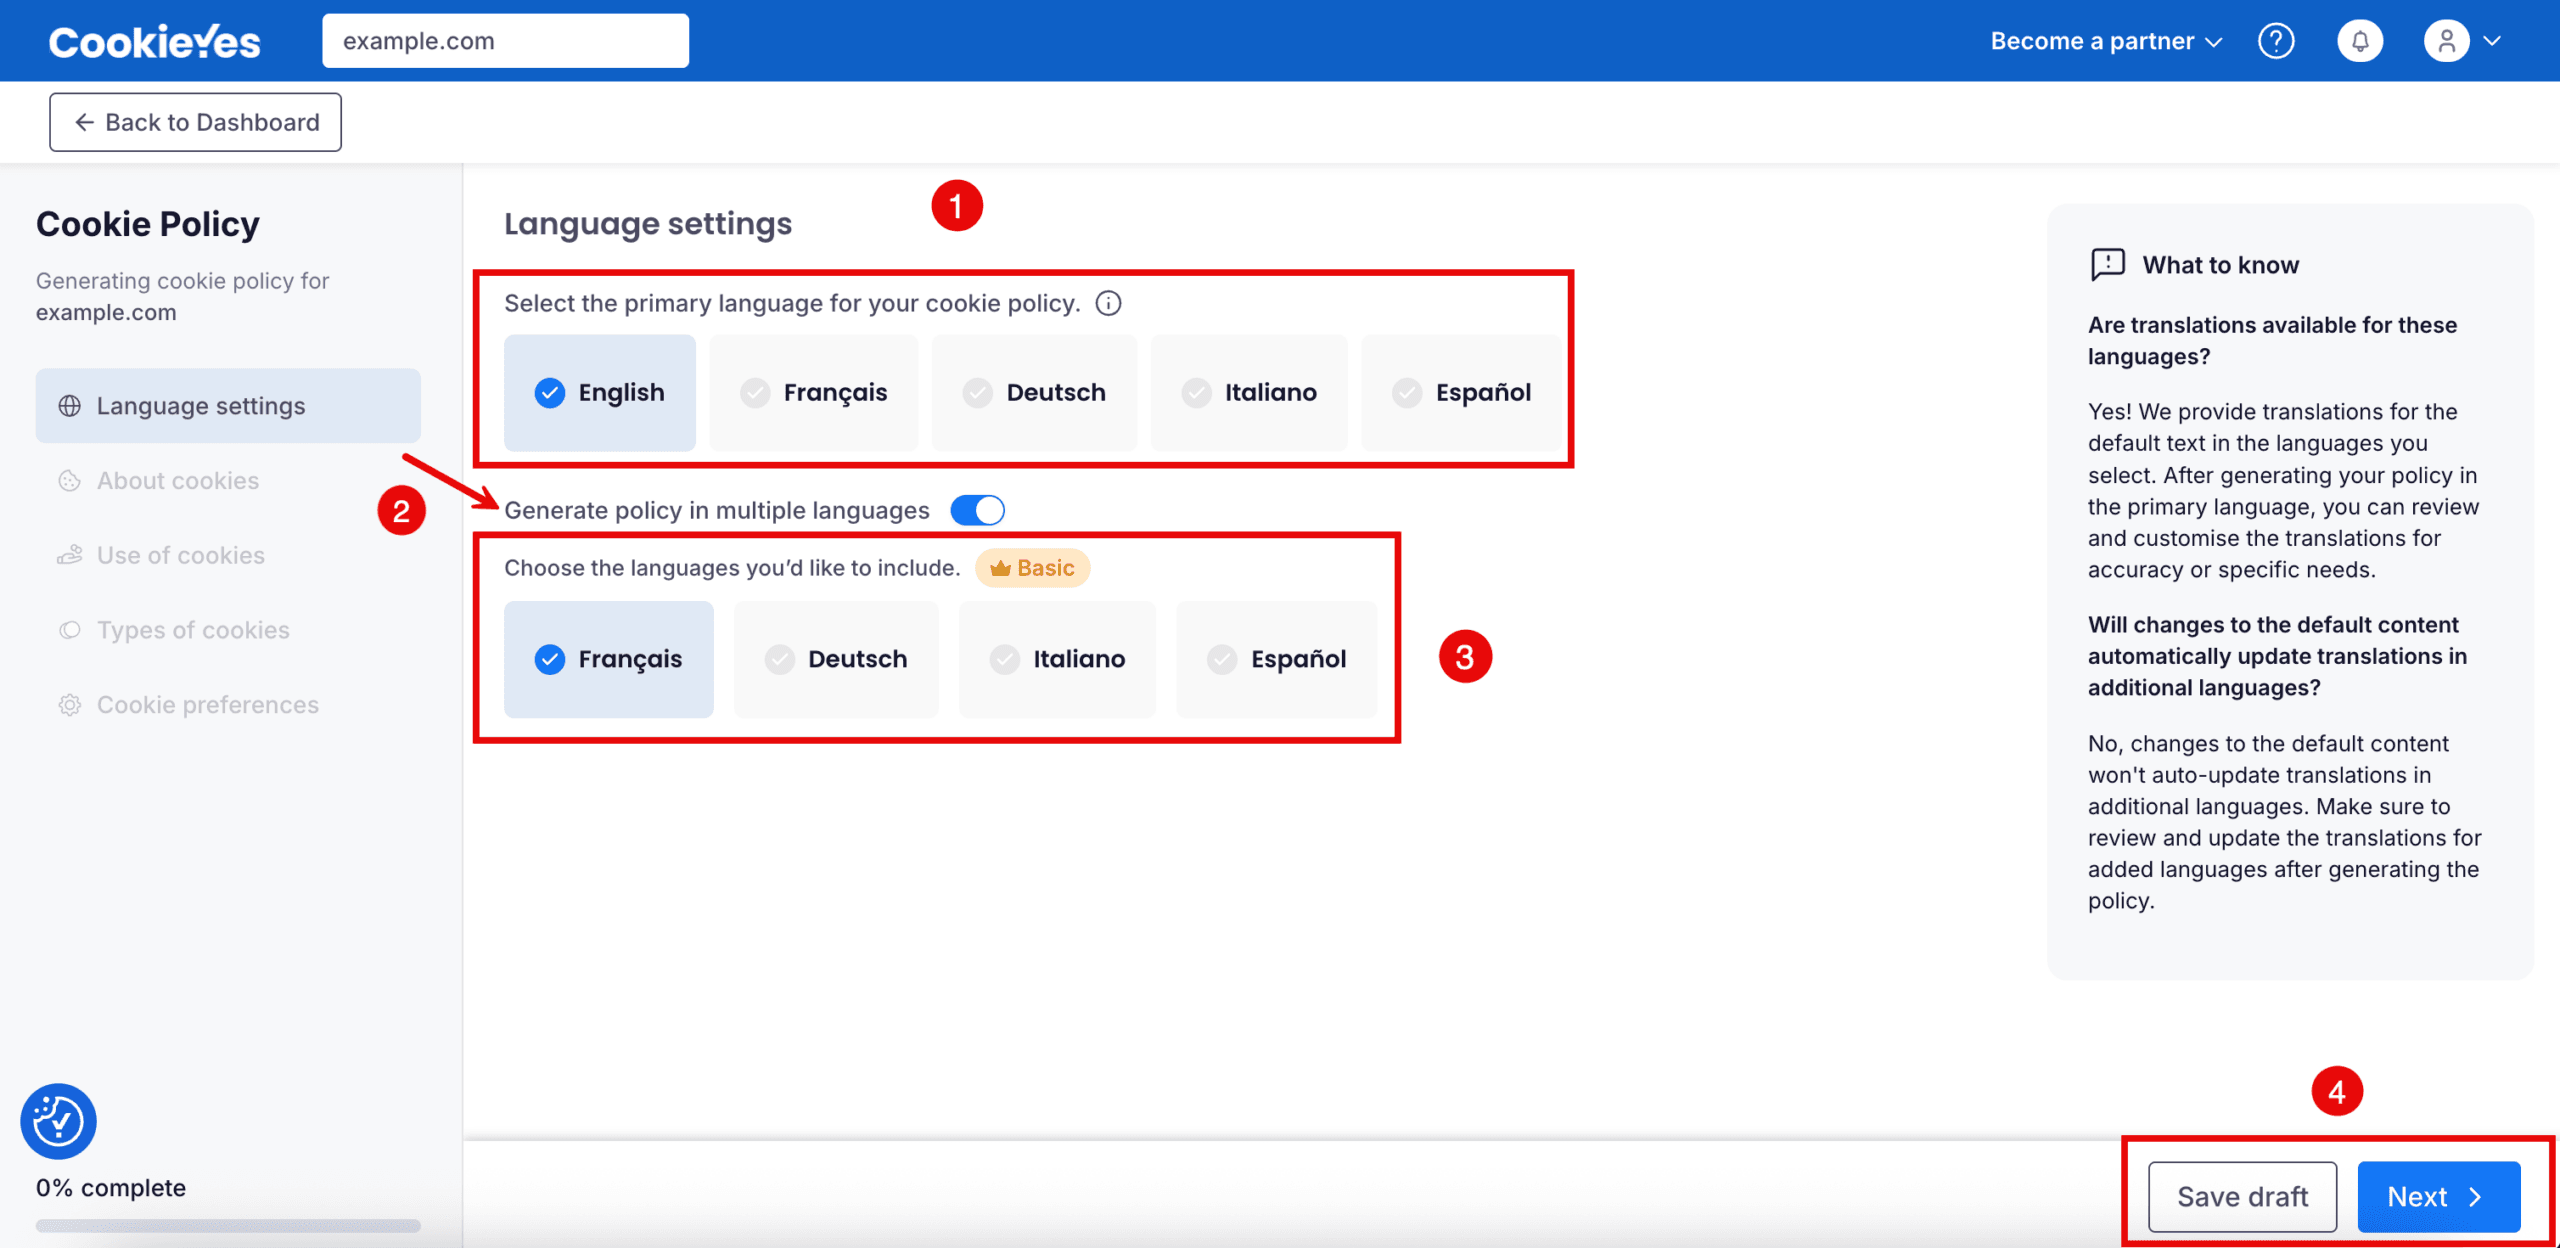
  • Select your primary language. The chosen language will be highlighted with a checkmark.
  • (Optional) Enable Generate policy in multiple languages to add more languages. This feature is available on Basic, Pro and Ultimate plans.
  • Click “Save draft” to save your progress or “Next” to continue.
Language settings

Step 3: Add about cookies details

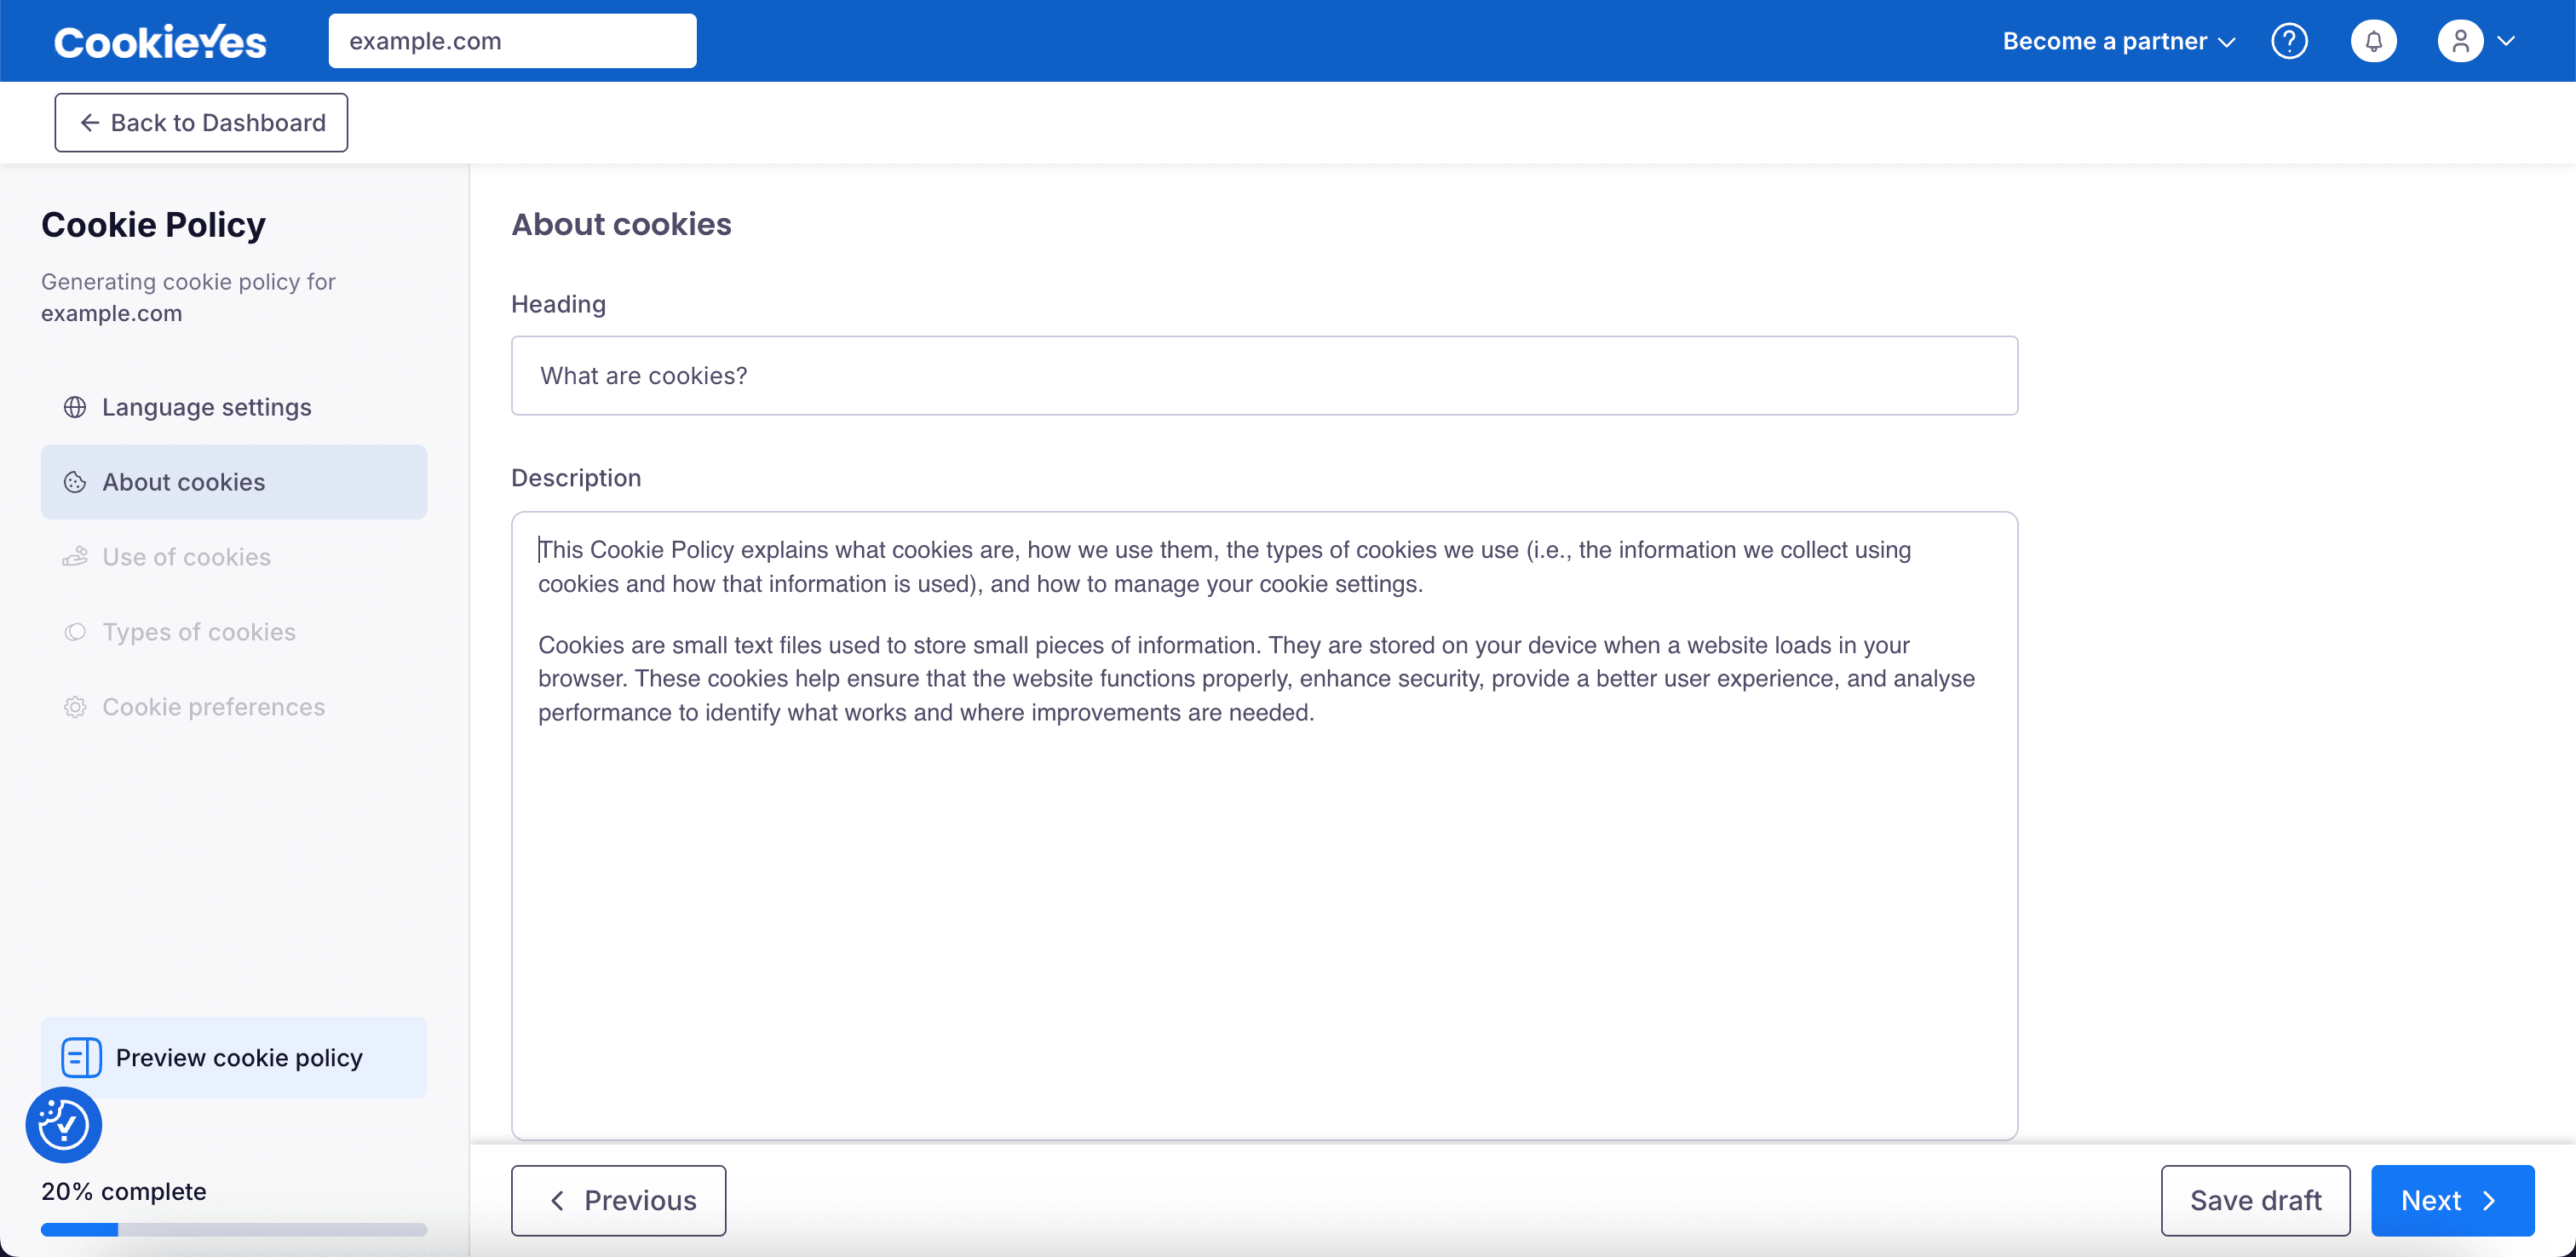
In the About cookies section, edit the heading and description to explain what cookies are and why your website uses them, either by keeping the default text or customising it to better match your website’s practises.

About Cookies

Step 4: Add use of cookies details

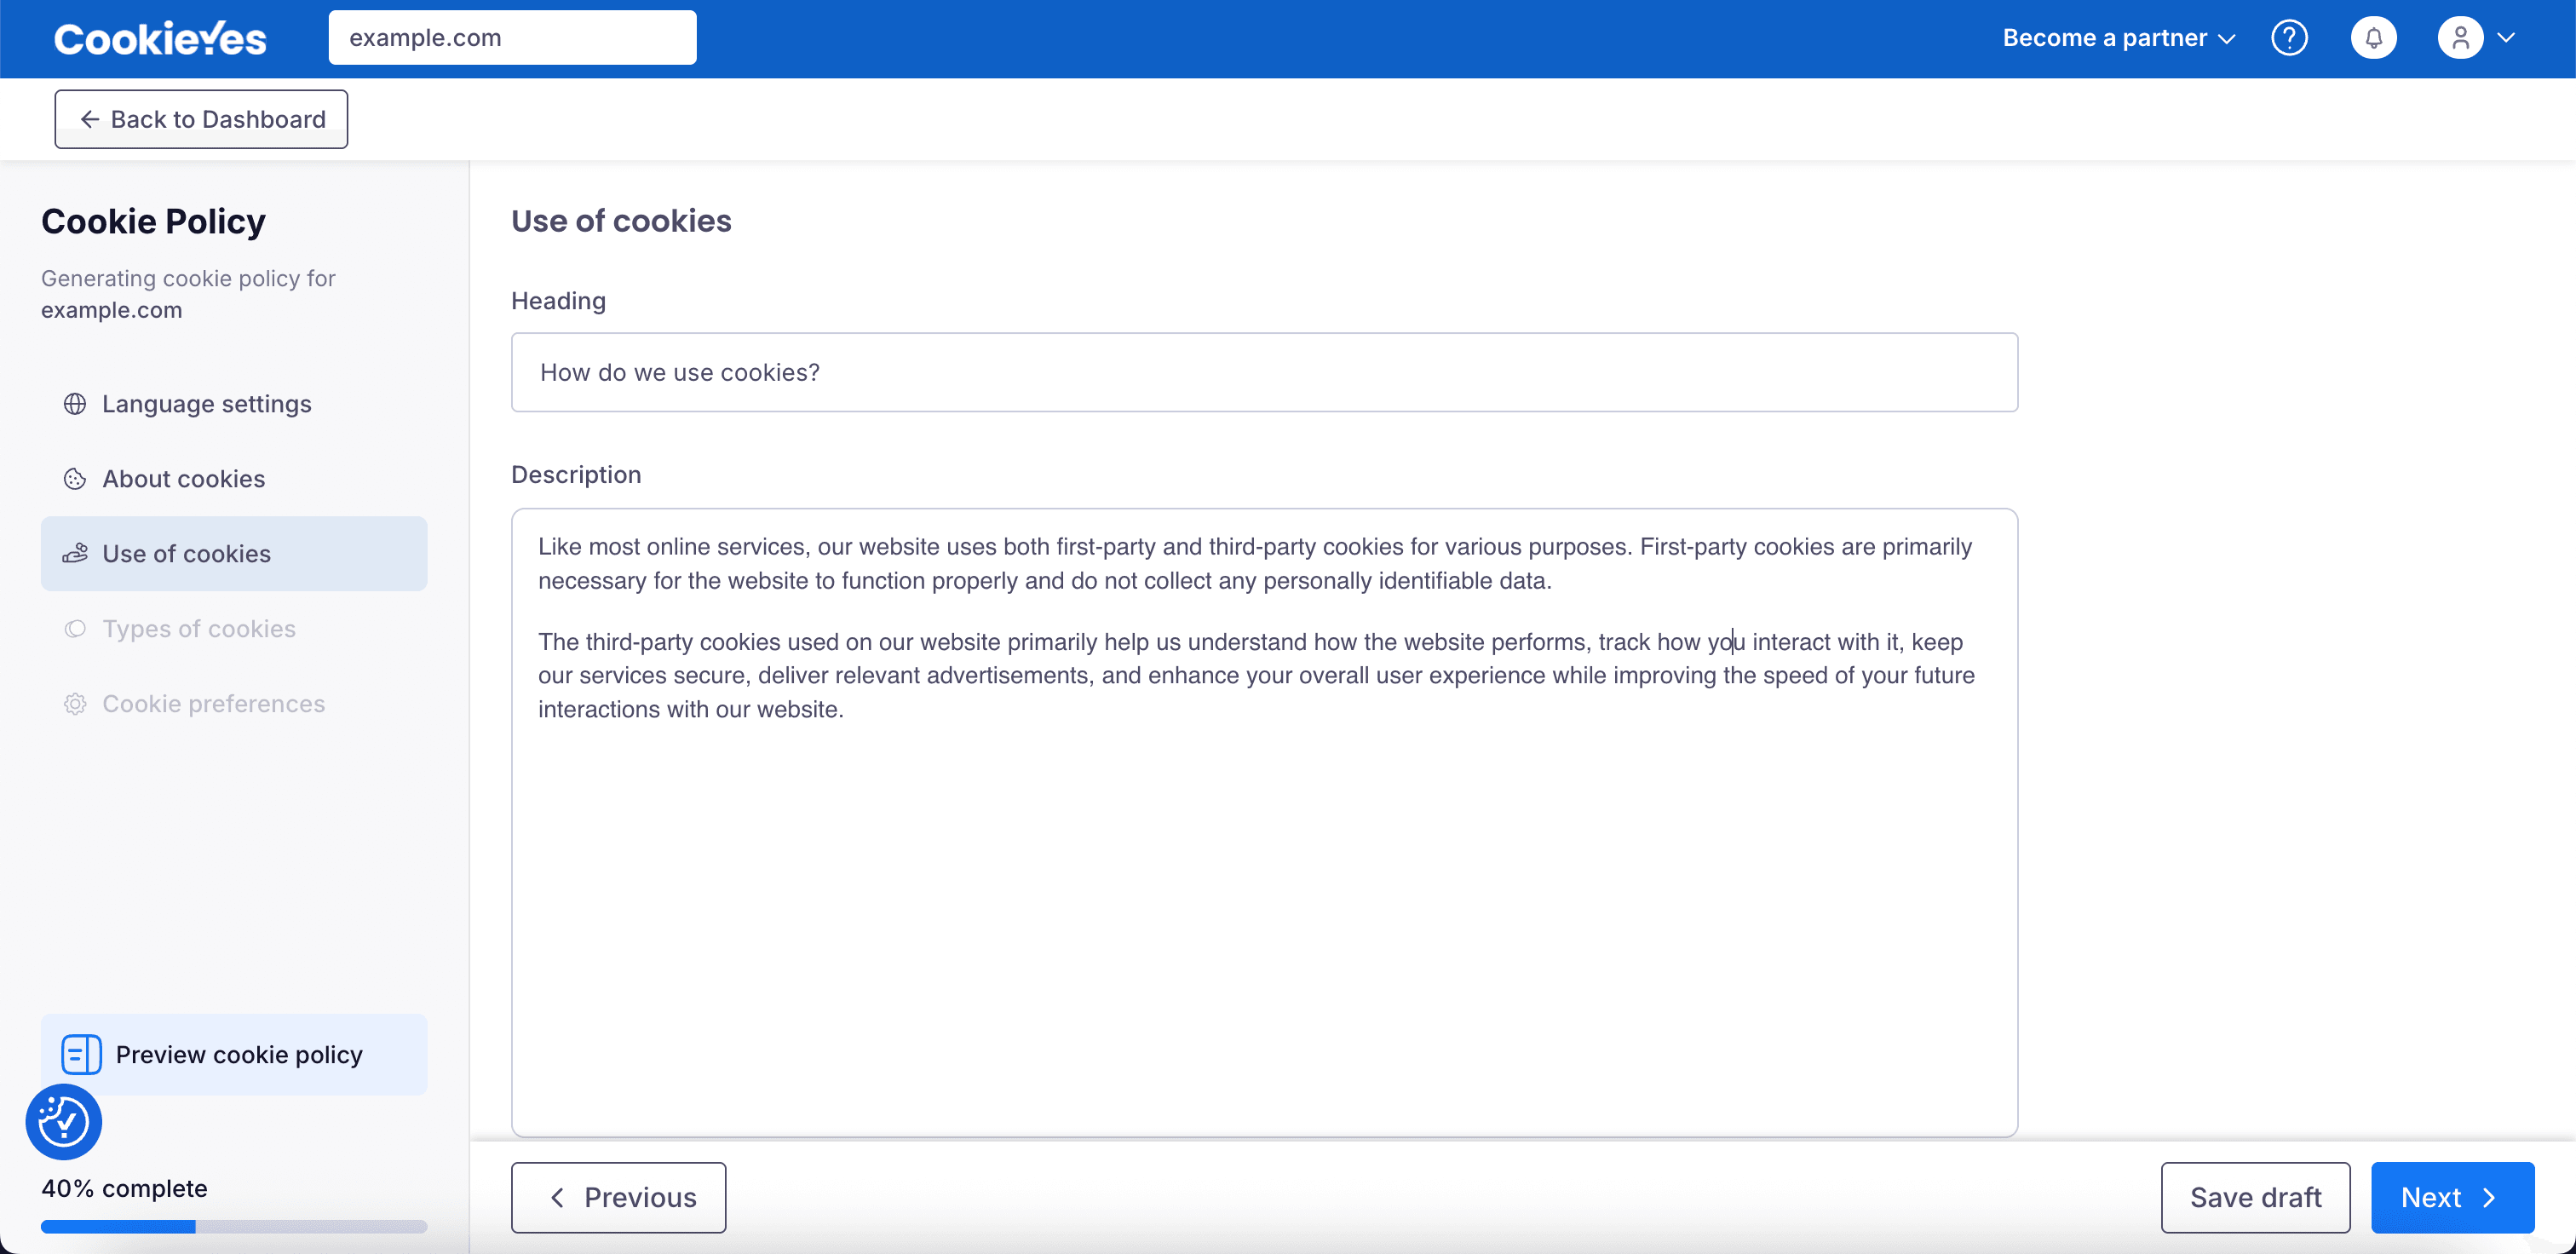
In the Use of cookies section, describe how your store uses cookies, such as for functionality, analytics, performance, or advertising. You can keep the default text if it is suitable, or update it for accuracy. Once done, use the Preview cookie policy to review the formatting and tone before proceeding.

Use of cookies

Step 5: Review and edit types of cookies

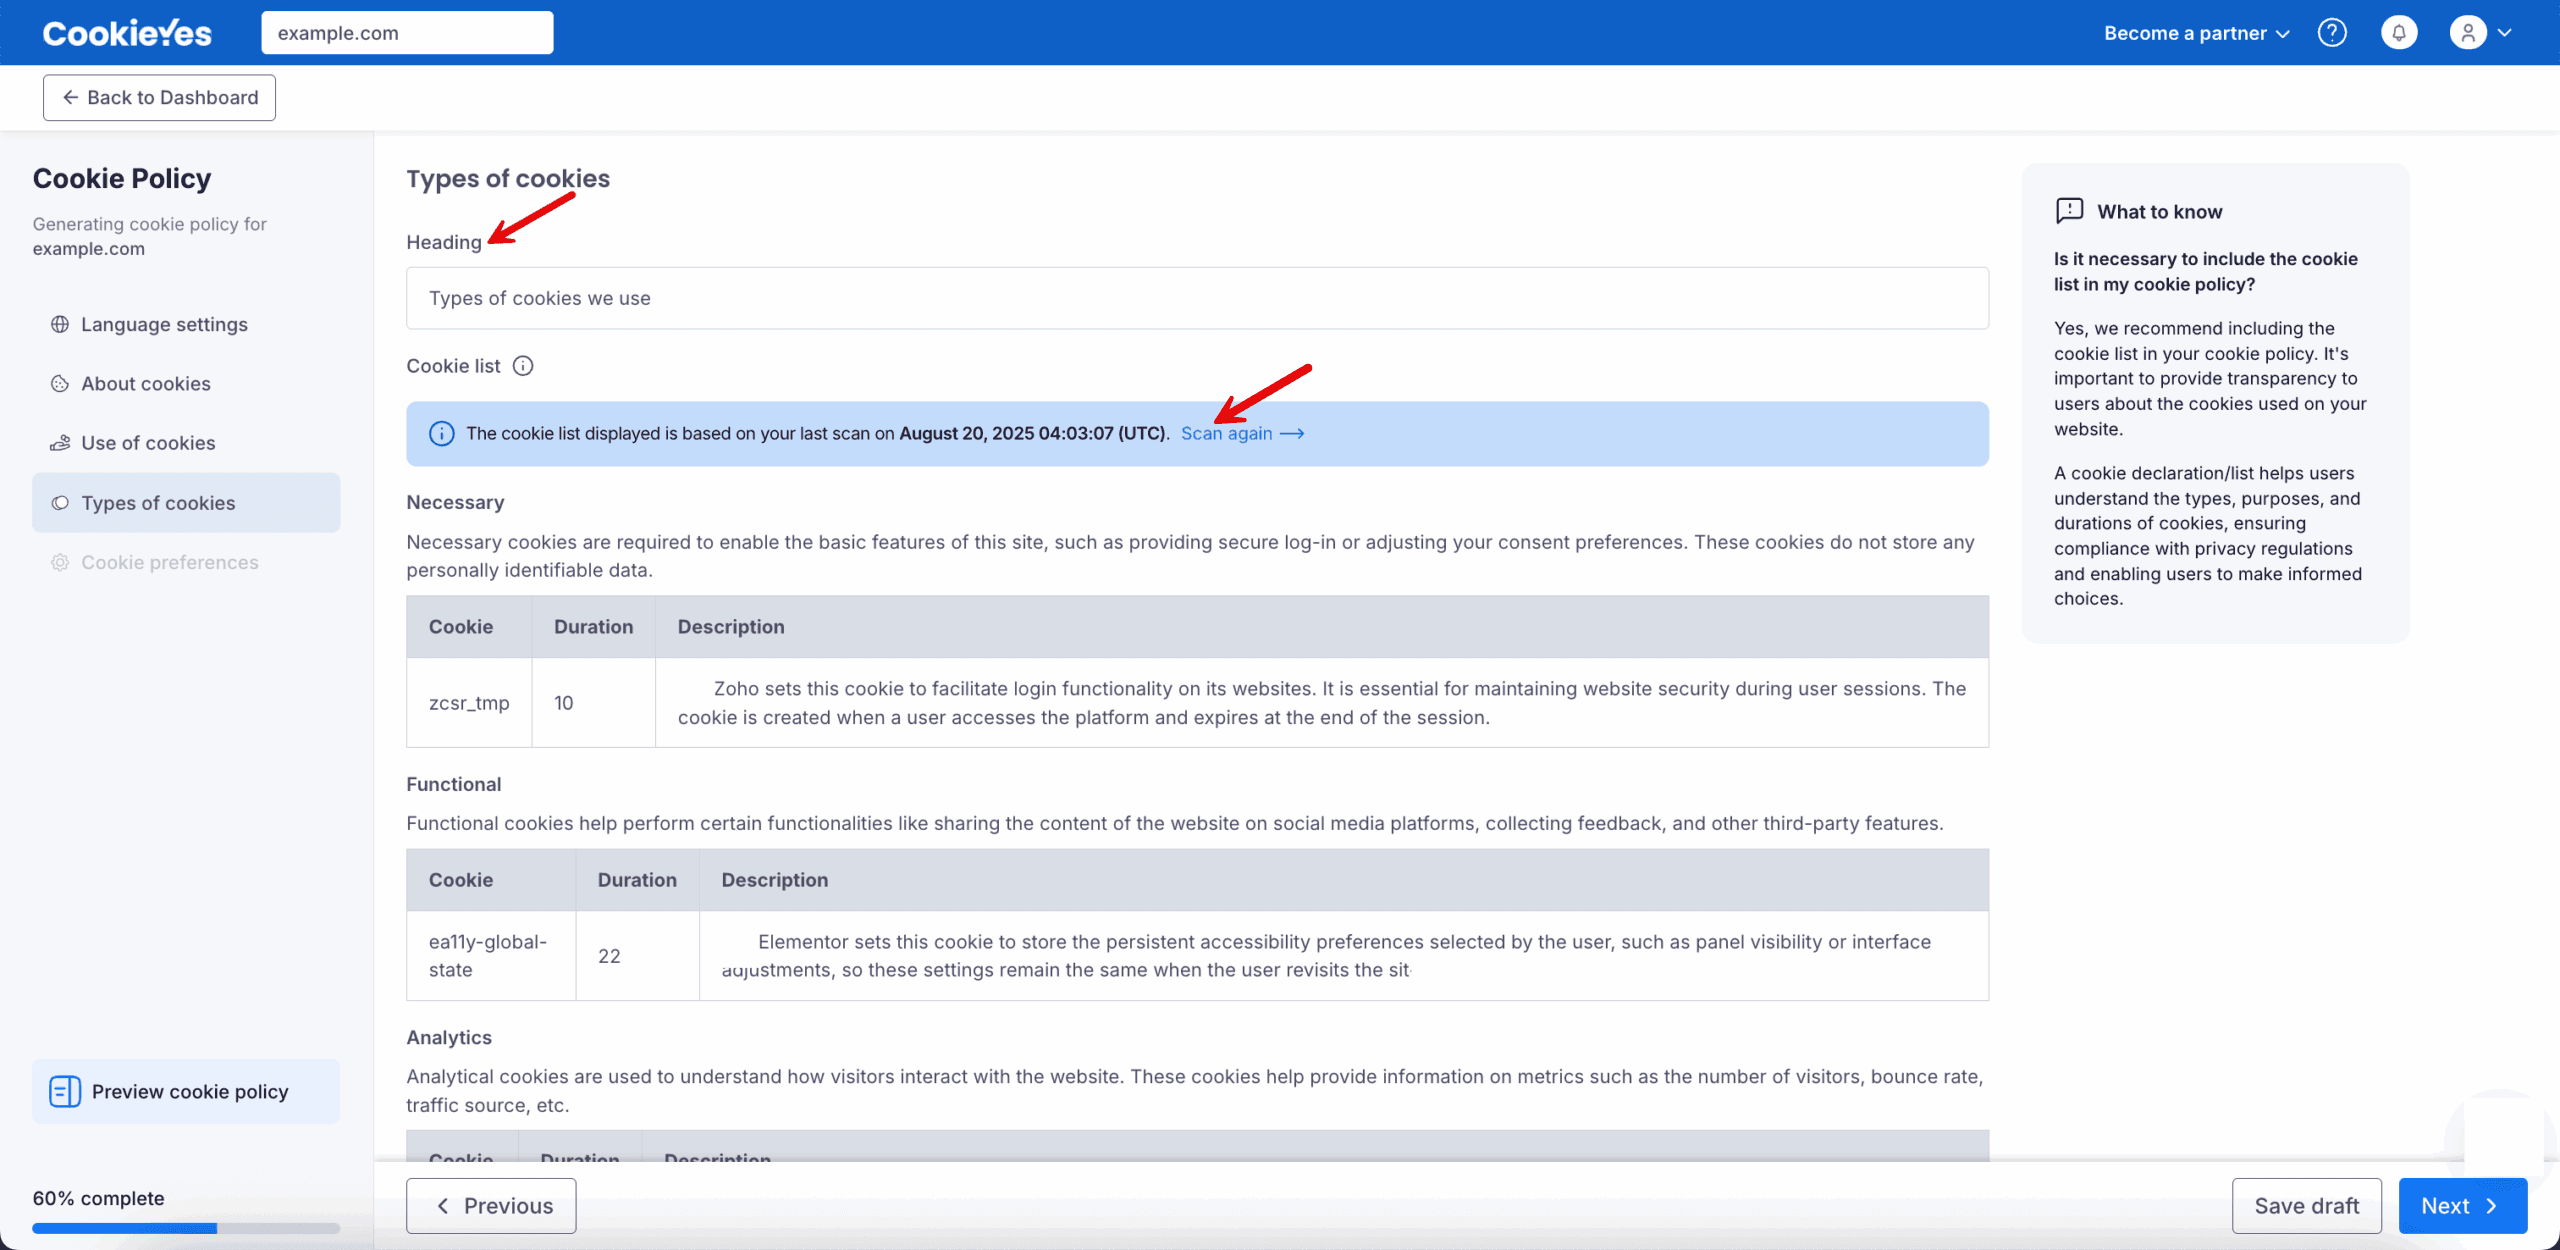
In the Types of cookies section, you will see a list of cookies from your most recent website scan. If needed, you can refresh the list by clicking Scan again to capture any new cookies. The cookies are organised into categories such as Necessary, Functional, Analytics, Performance and Advertisement. Review each entry carefully to verify the cookie name, duration, and purpose for accuracy.

Types of cookies

Step 6: Set cookie preferences and generate the policy

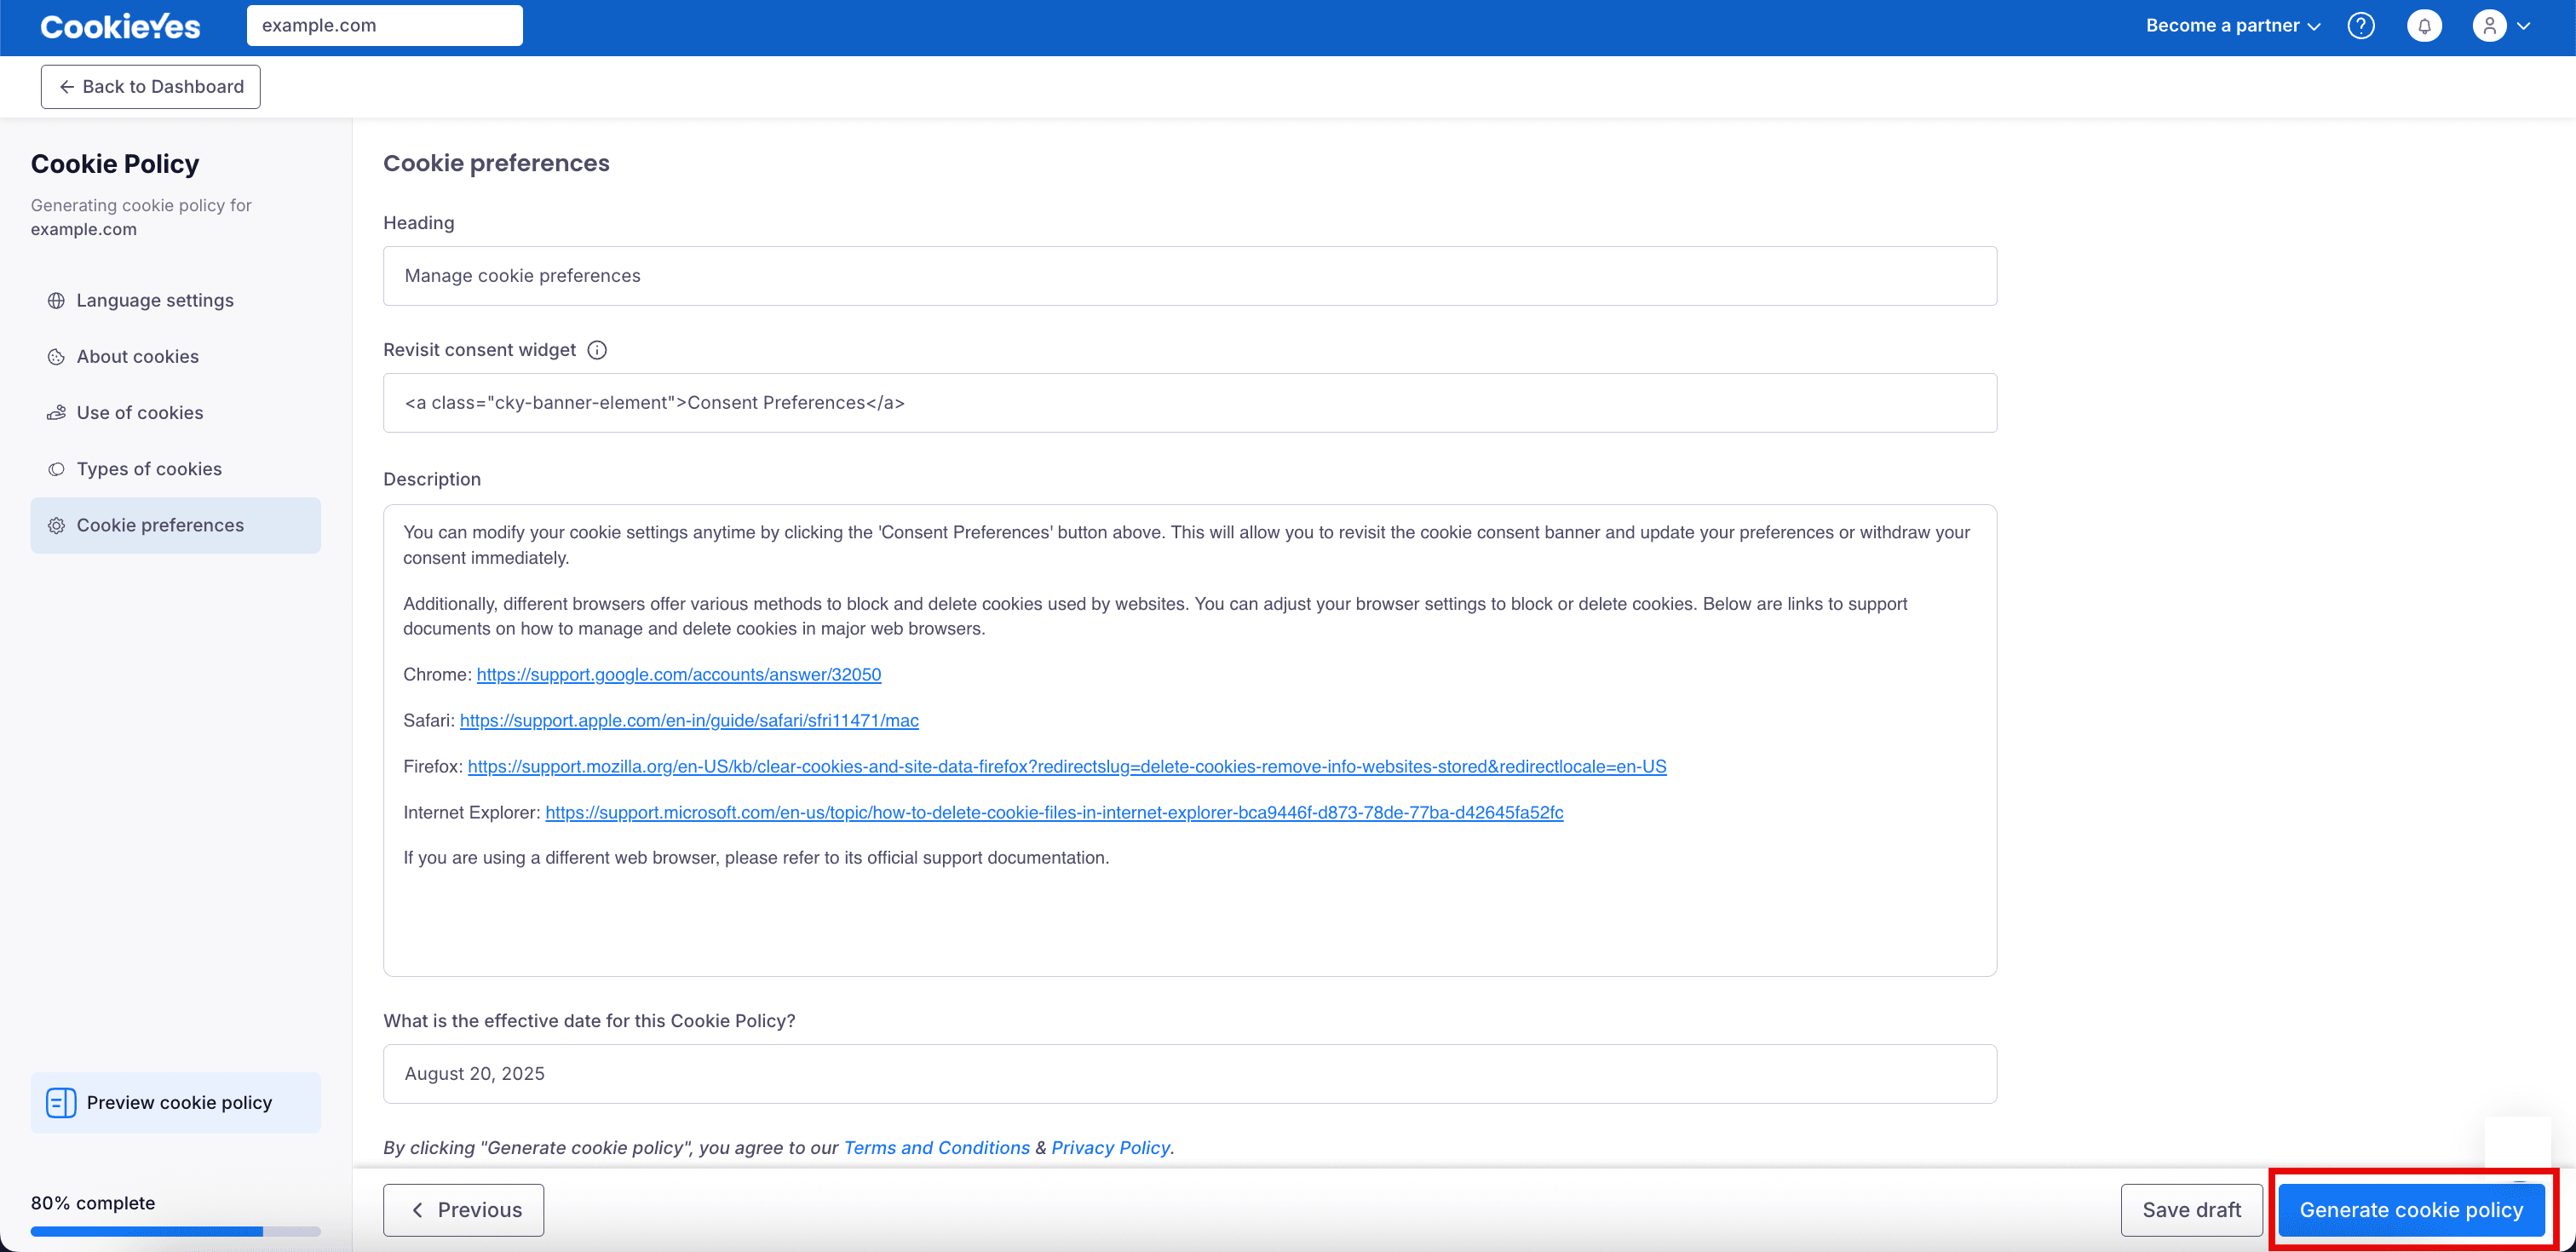
In the Cookie preferences section, keep the default heading (Manage cookie preferences) and description, or update them with instructions specific to your users. Set the effective date for the cookie policy. Preview the policy to verify the details and when confirmed, click Generate cookie policy to generate the policy.

Cookie preferences

The Revisit consent widget enables your website visitors to manage their cookie preferences. You can remove the code in the field if you don’t want a widget to be displayed.

GDPR Compliance

To be GDPR compliant for your use of cookies, you should install a cookie banner on your website and obtain consent before deploying cookies on your visitor’s devices.

To install the banner, from the top navigation bar, click on Advanced Settings > Banner Settings > Installation Code > Copy code

Refer: How to add cookie banner on Shopify

Add the Cookie Policy to Shopify

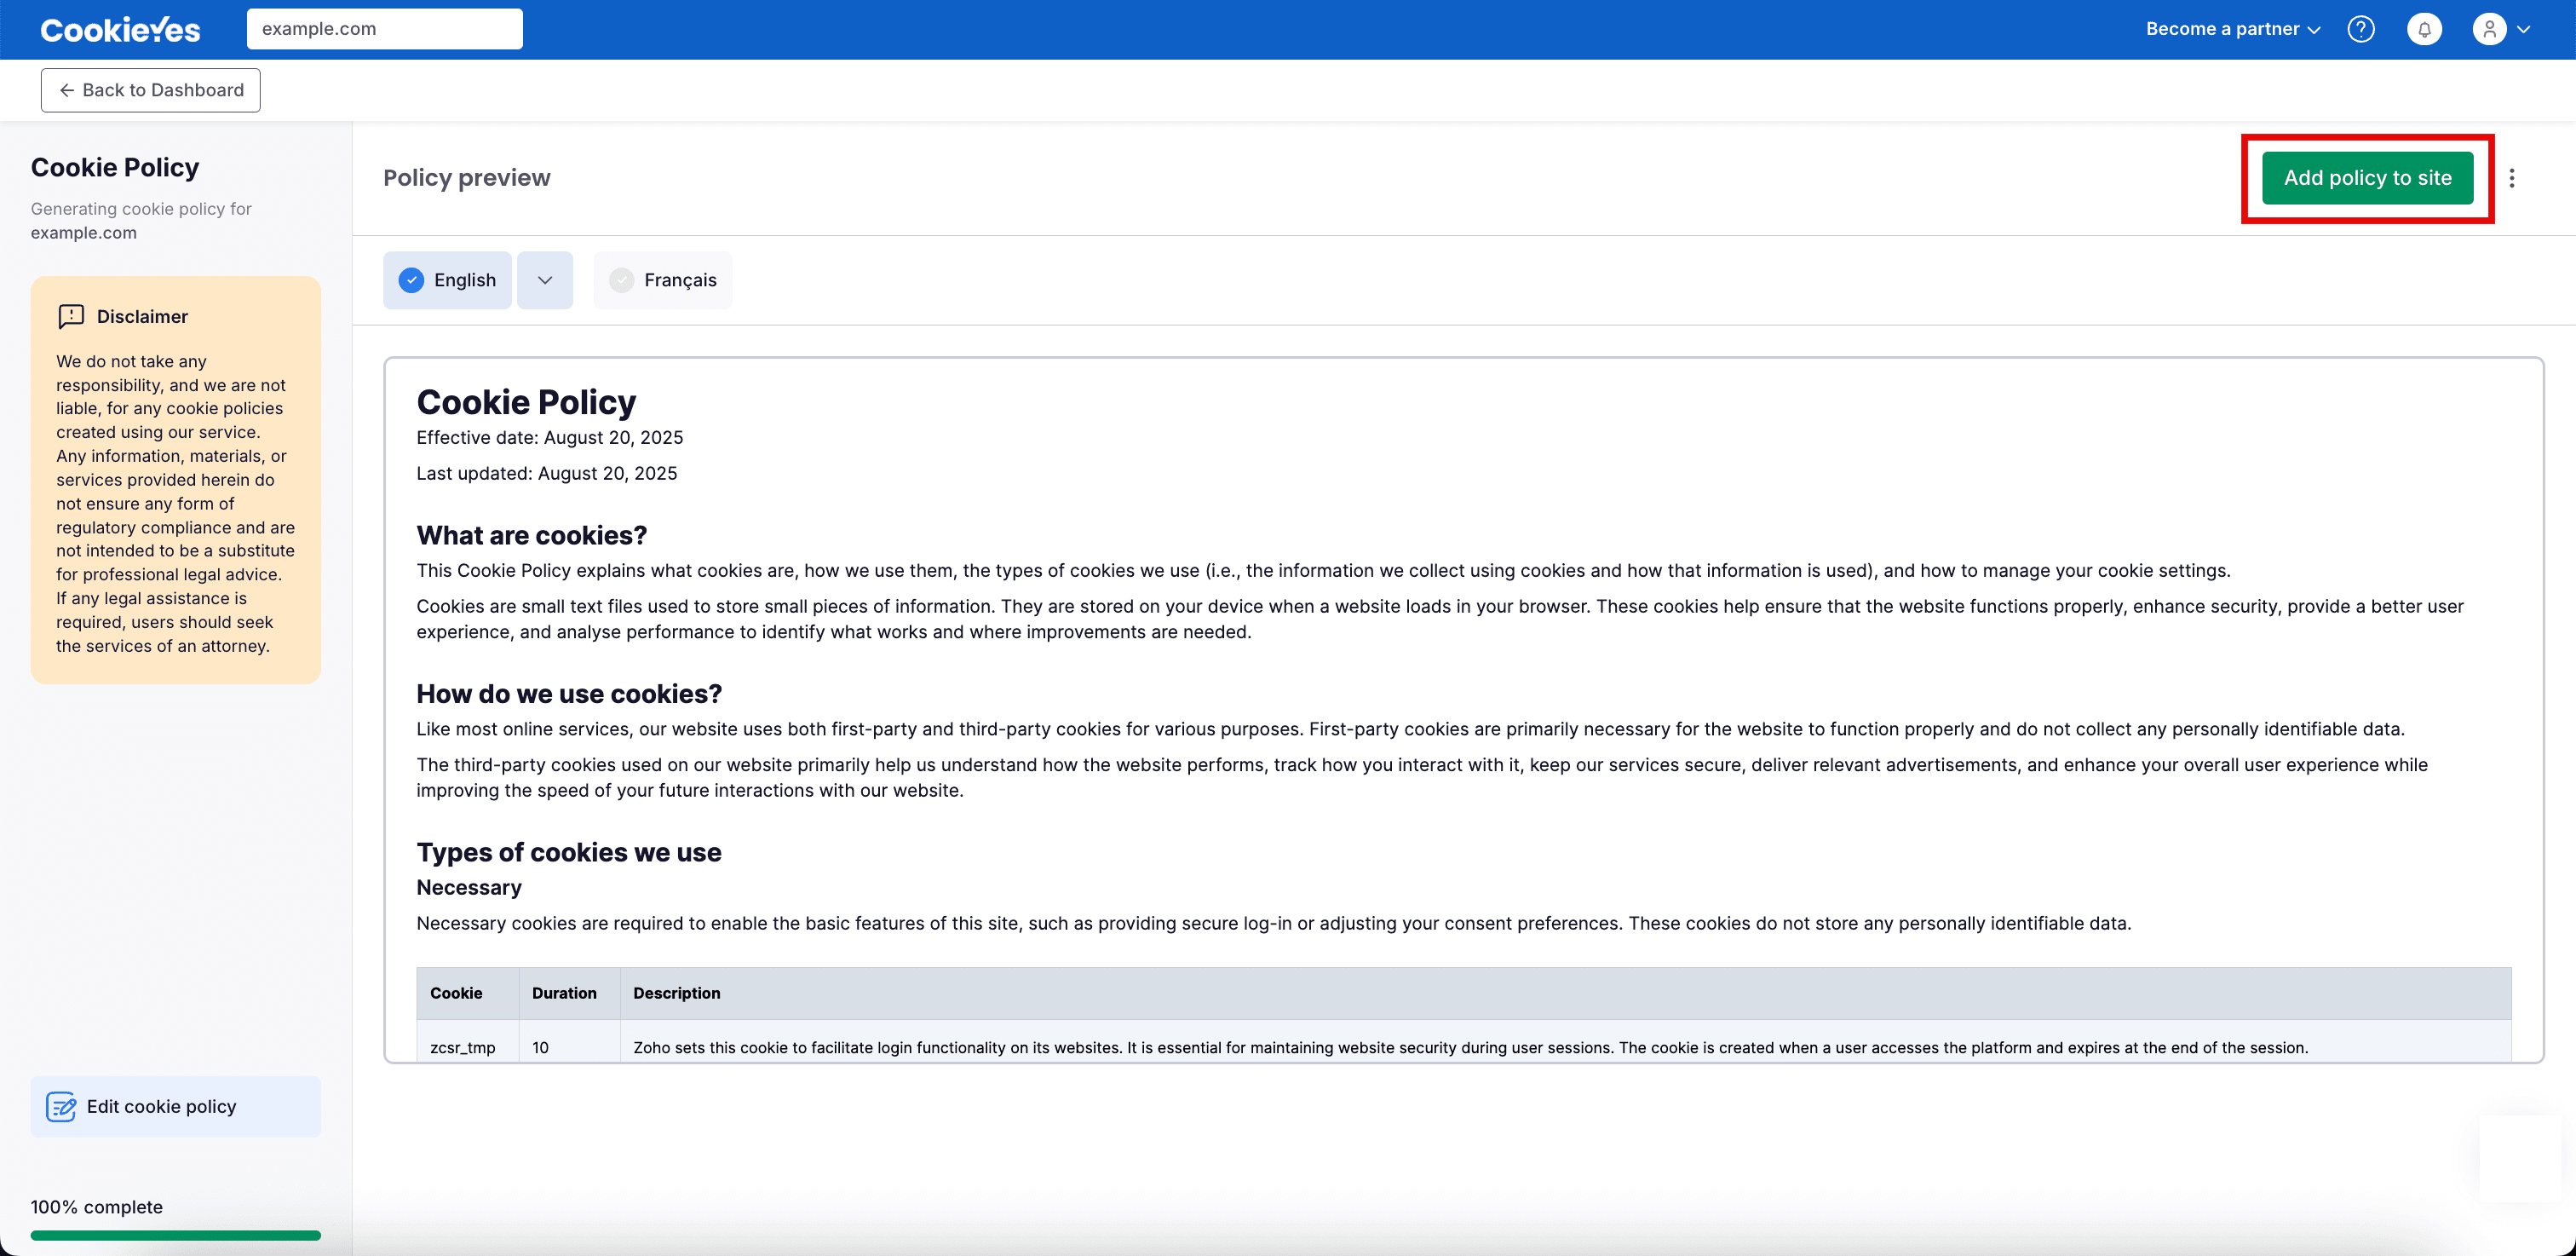
After generating your cookie policy, review the preview in your selected language(s). When ready, click Add policy to site in the top-right corner.

Add policy to site

A modal window will appear. Follow the steps below to add your policy:

Step 1: Choose your policy installation method

Choose your preferred method for adding the cookie policy to your Shopify website:

  • Option A: One-click install (Recommended): Add your cookie policy in one click using your cookie banner script. It automatically updates the policy whenever changes are made.
  • Option B: Code snippet: Keeps your cookie policy automatically updated.
  • Option C: HTML format: Requires manual updates whenever the cookie policy changes.
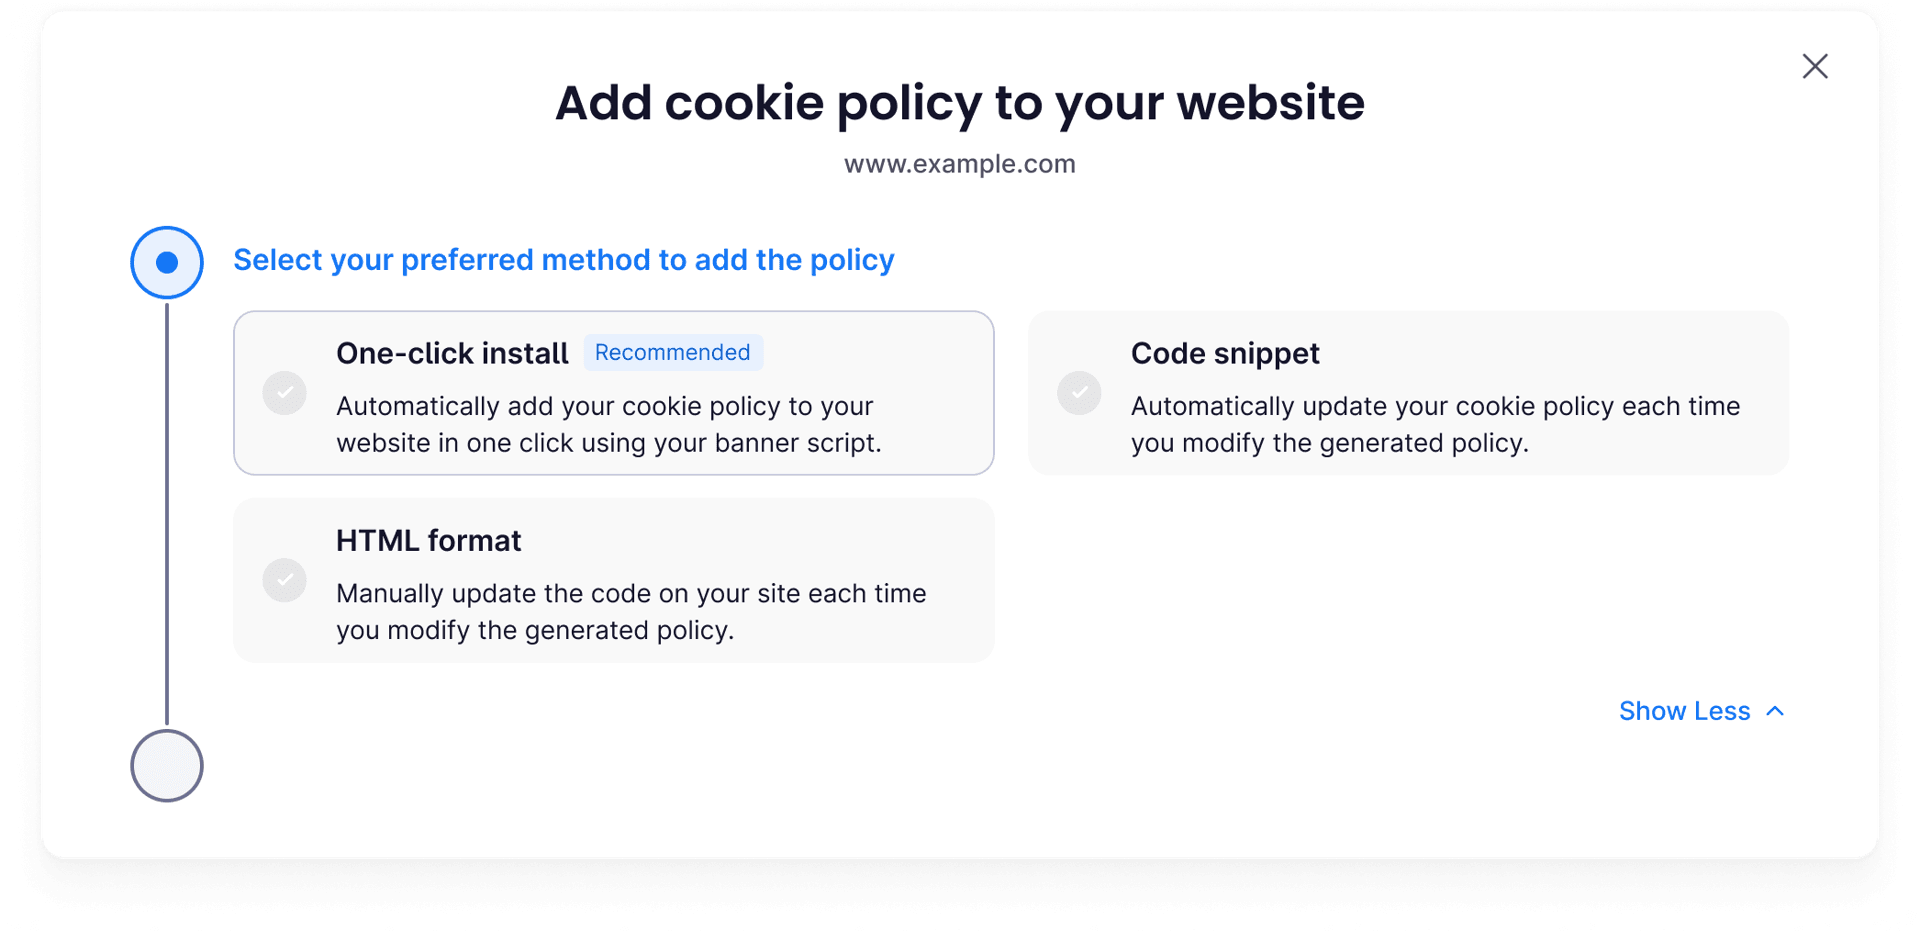
    policy-installation-methods

If you chose Option B or C:

  1. Select your preferred language.
  2. Click Copy code.

Use the Send code to a teammate option if someone else manages your website content.

Note

If you chose Option A (One-click install), there’s no code to copy here. Continue to Step 2.

Step 2: Create a policy page in shopify

  1. Log in to your Shopify account.
  2. Go to Online Store > Pages.
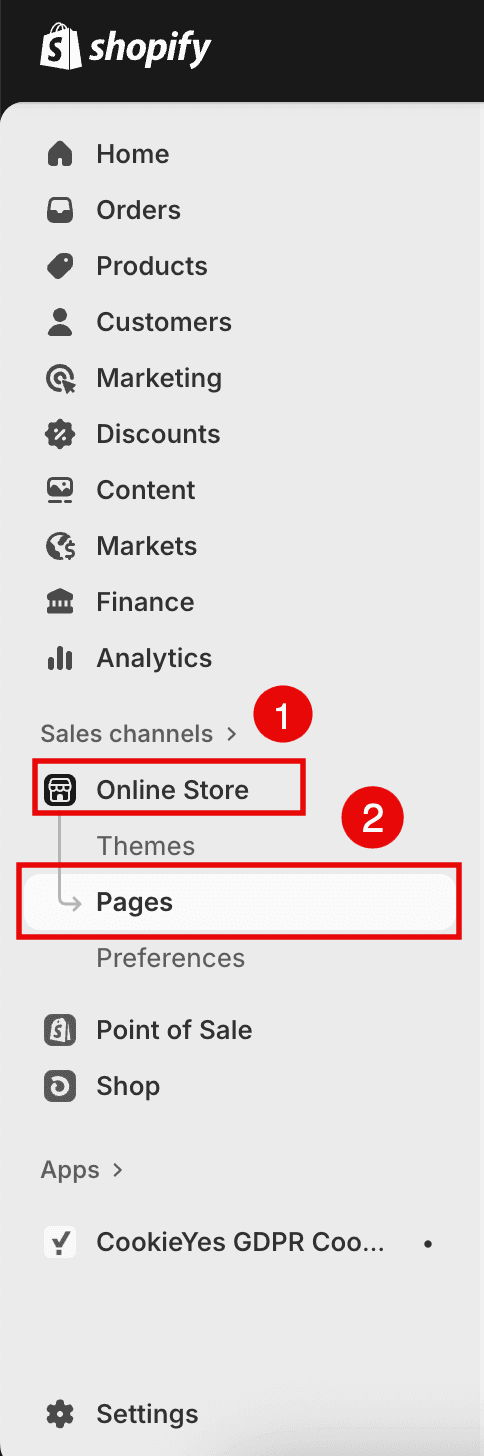
    Online store in shopify
  3. Click Add Page. Enter the Title for the page and click Save.
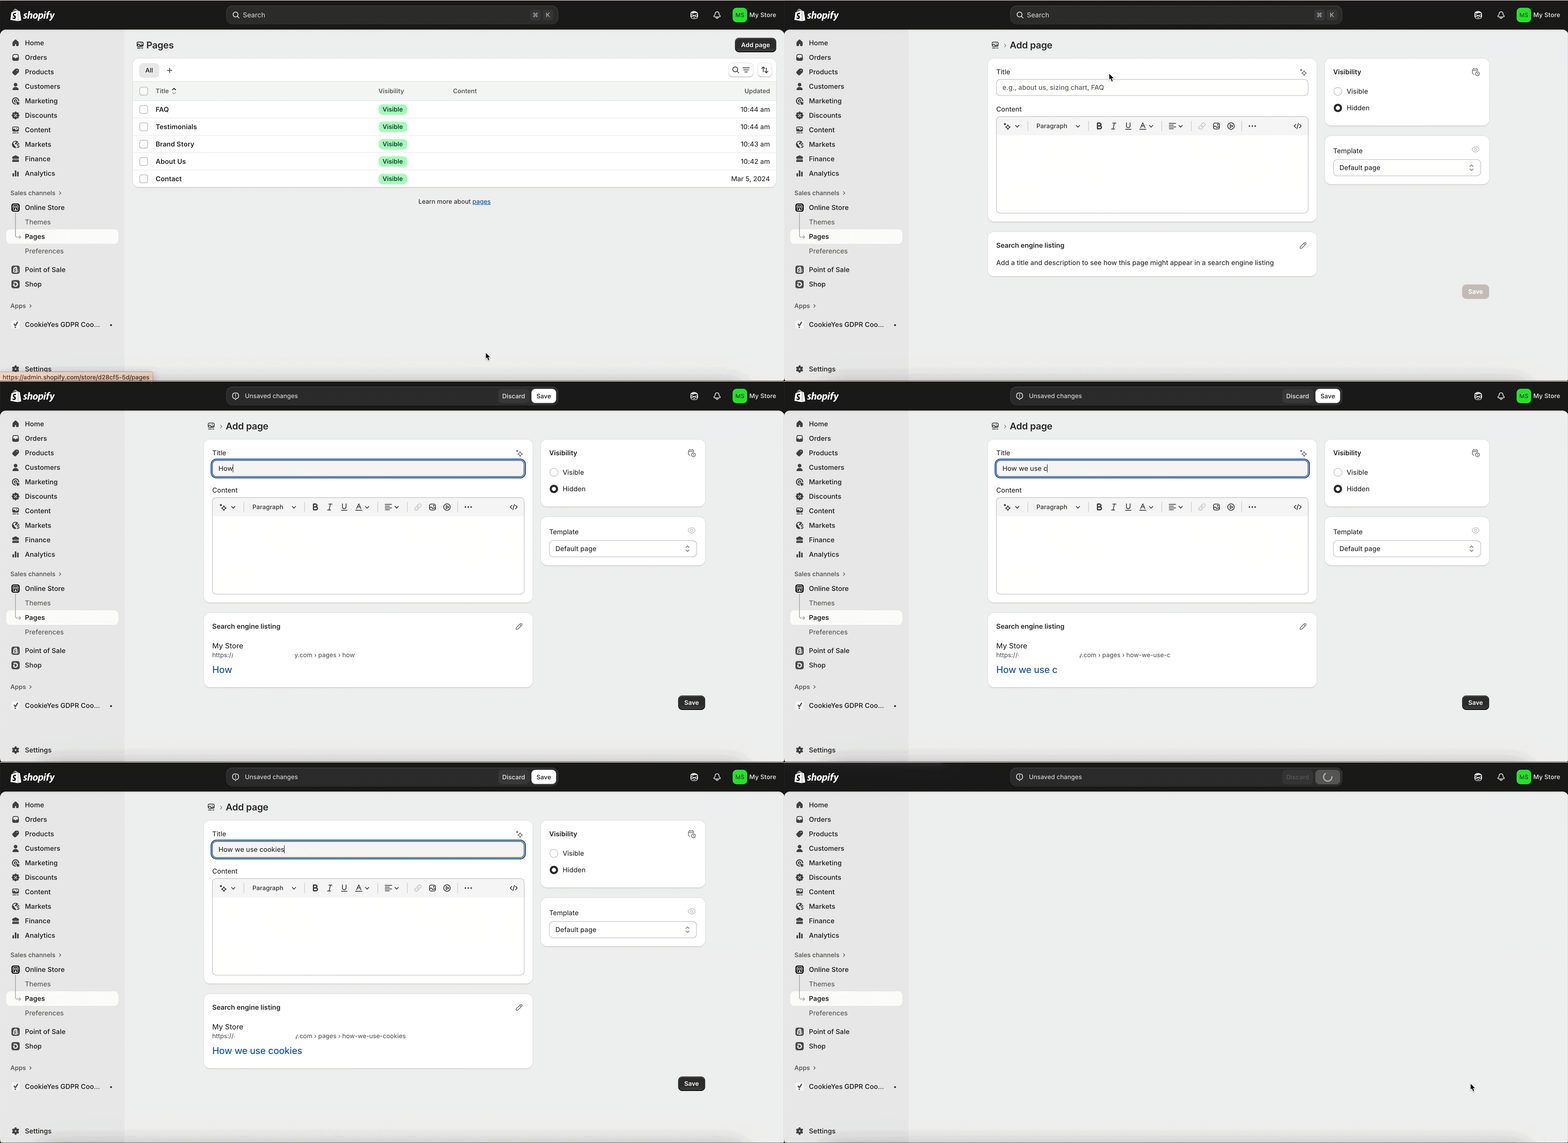
If you chose Option A (One-click install):

  1. Copy the URL of your cookie policy page and paste it into the CookieYes web app.
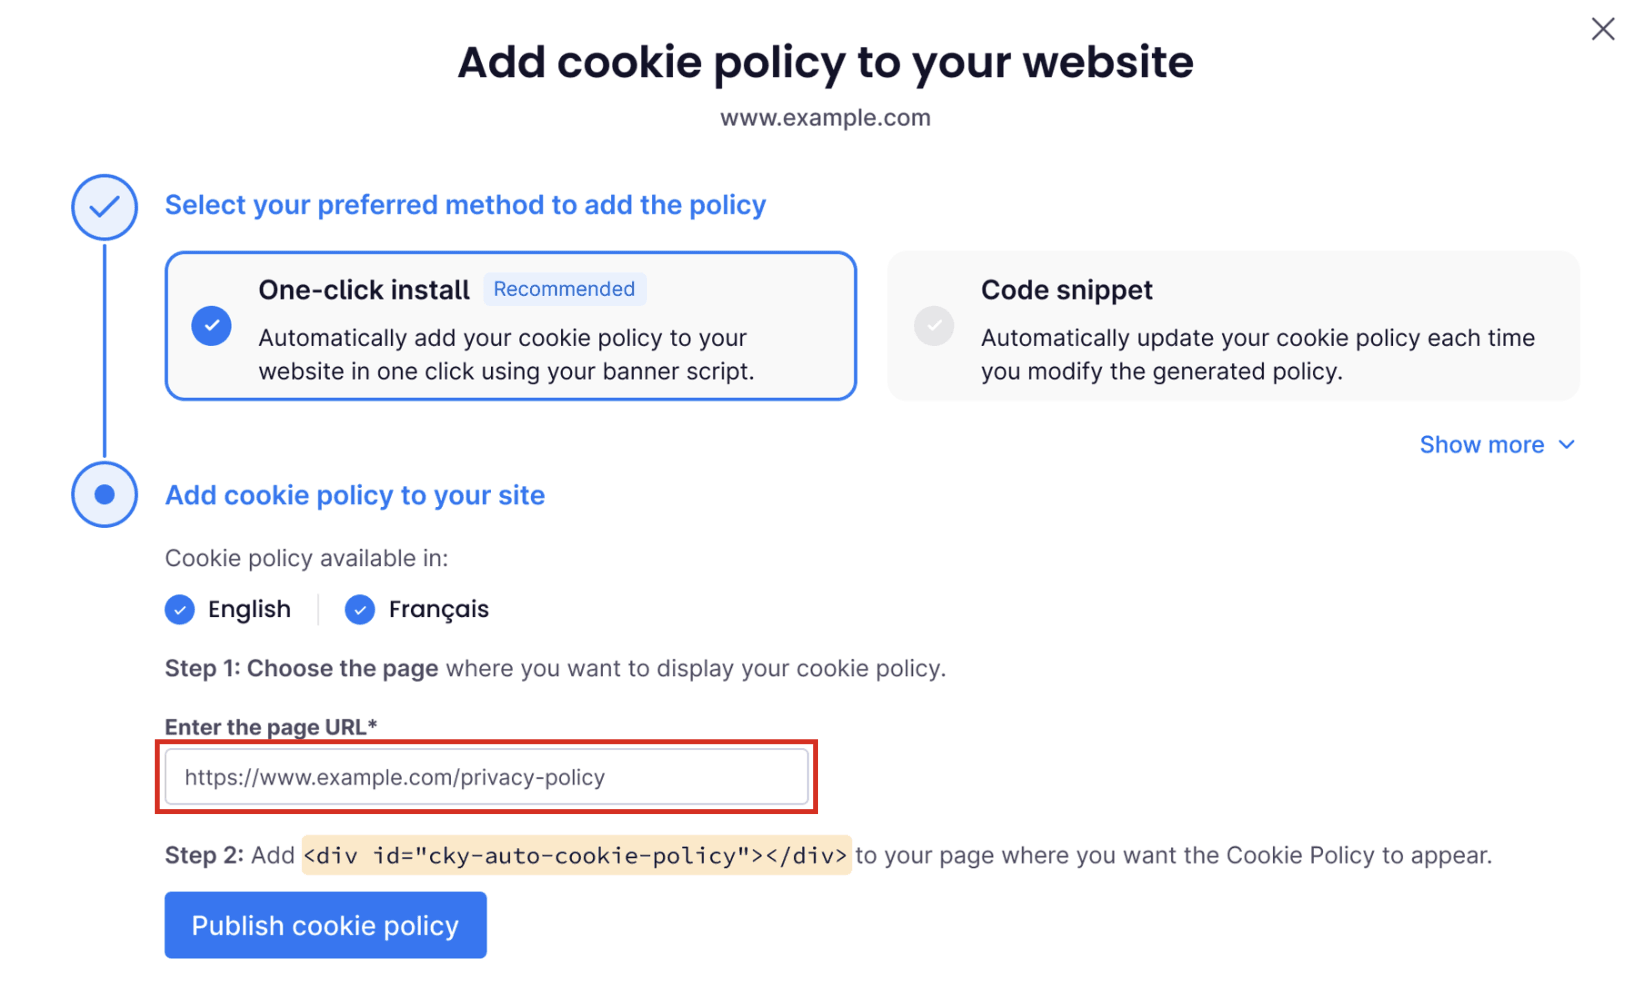
    paste-the-url

Step 3: Embed the policy code

Option A: One-click install Method

If you selected the One-click install method, follow the steps below:

  1. In the right panel of the Pages section, click the View template (eye icon) for the cookie policy page.
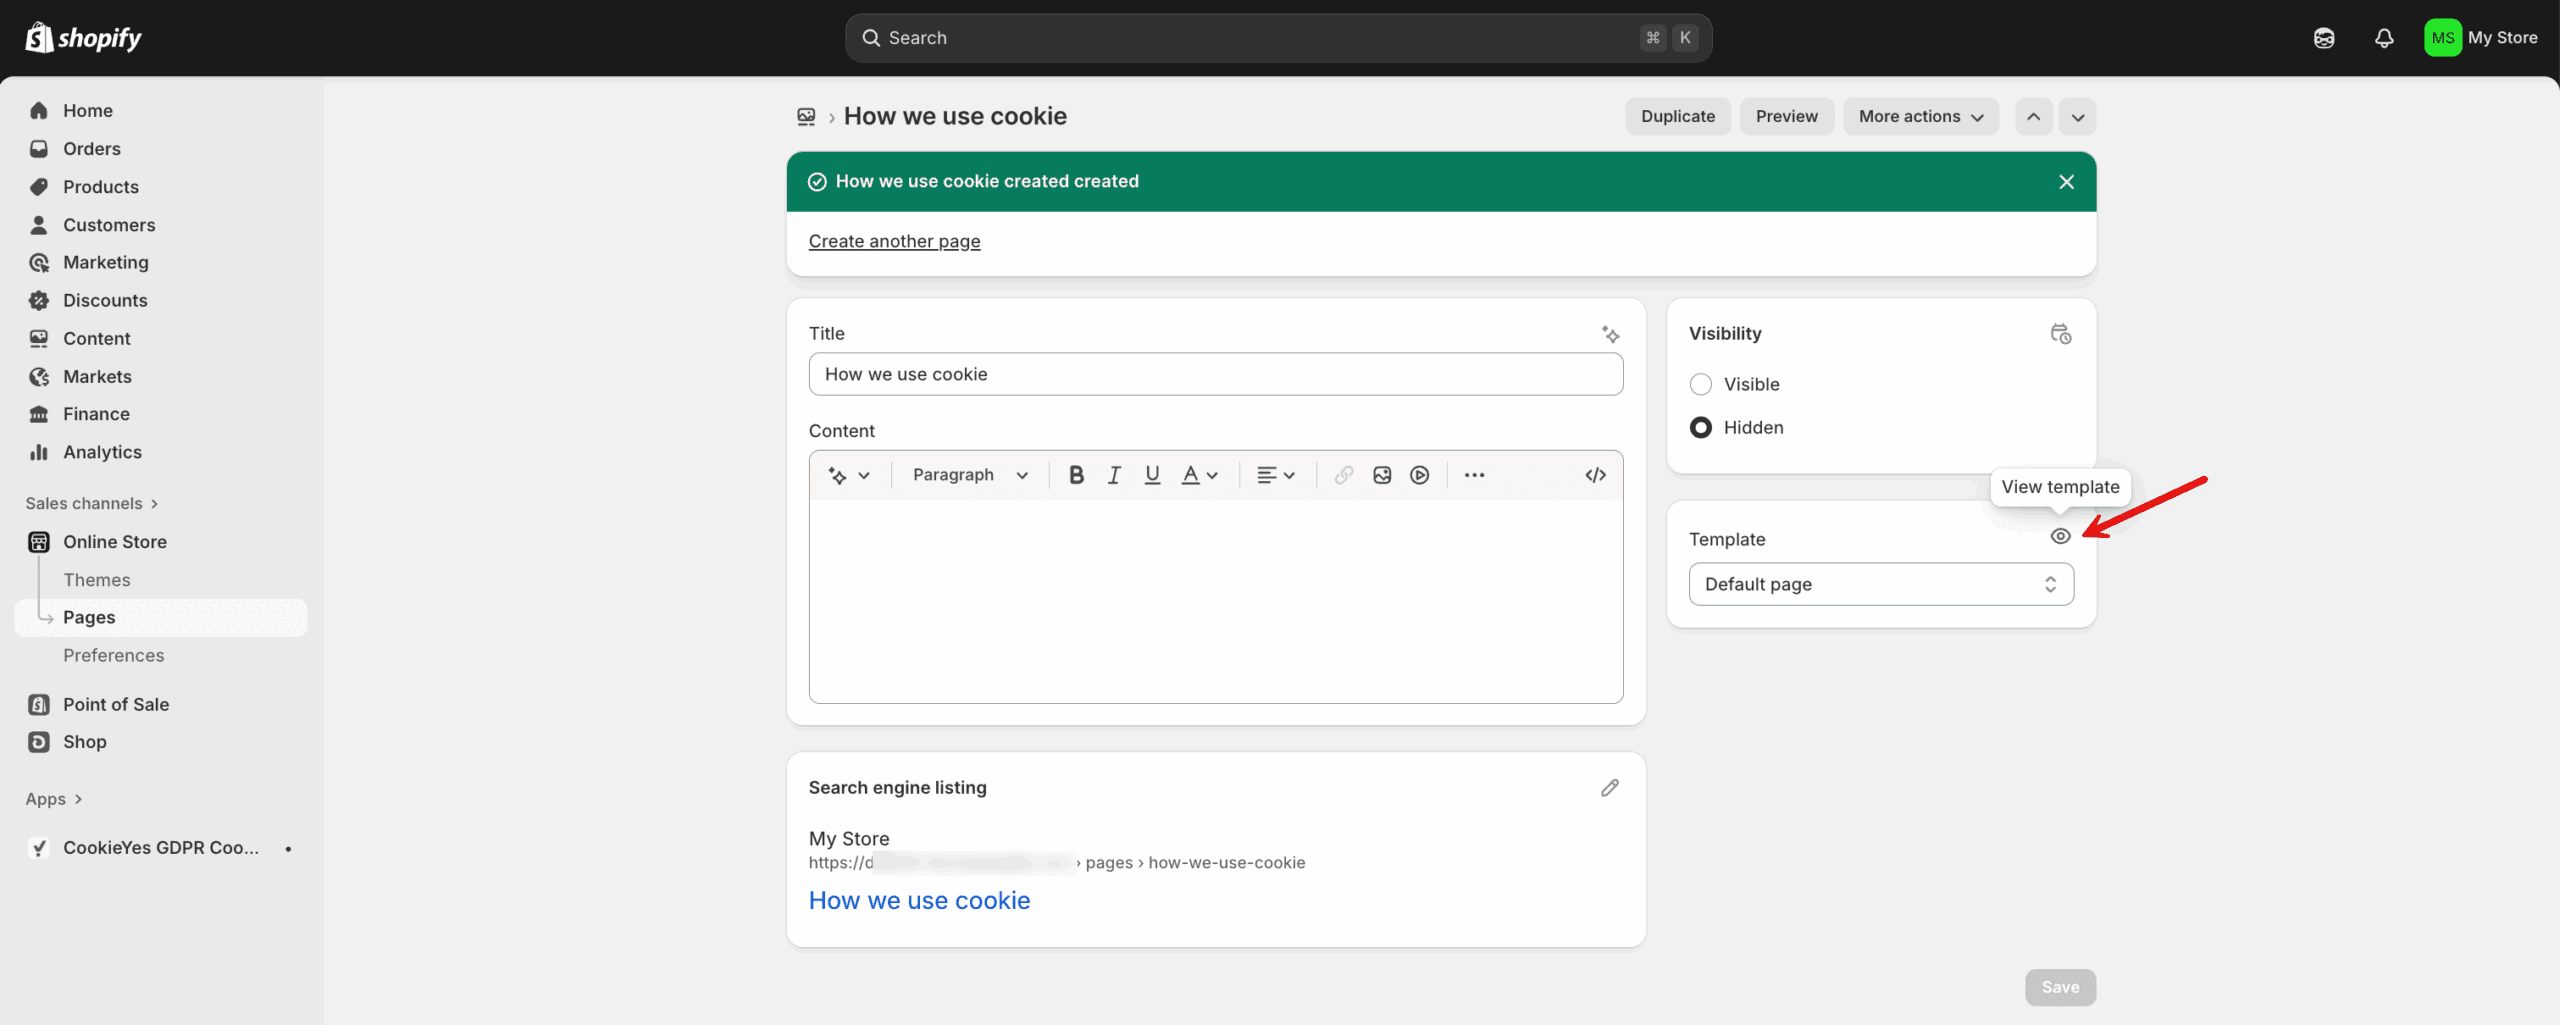
    view template option
  2. In the theme editor, go to Template > Add section and select </> Custom Liquid from the left panel.
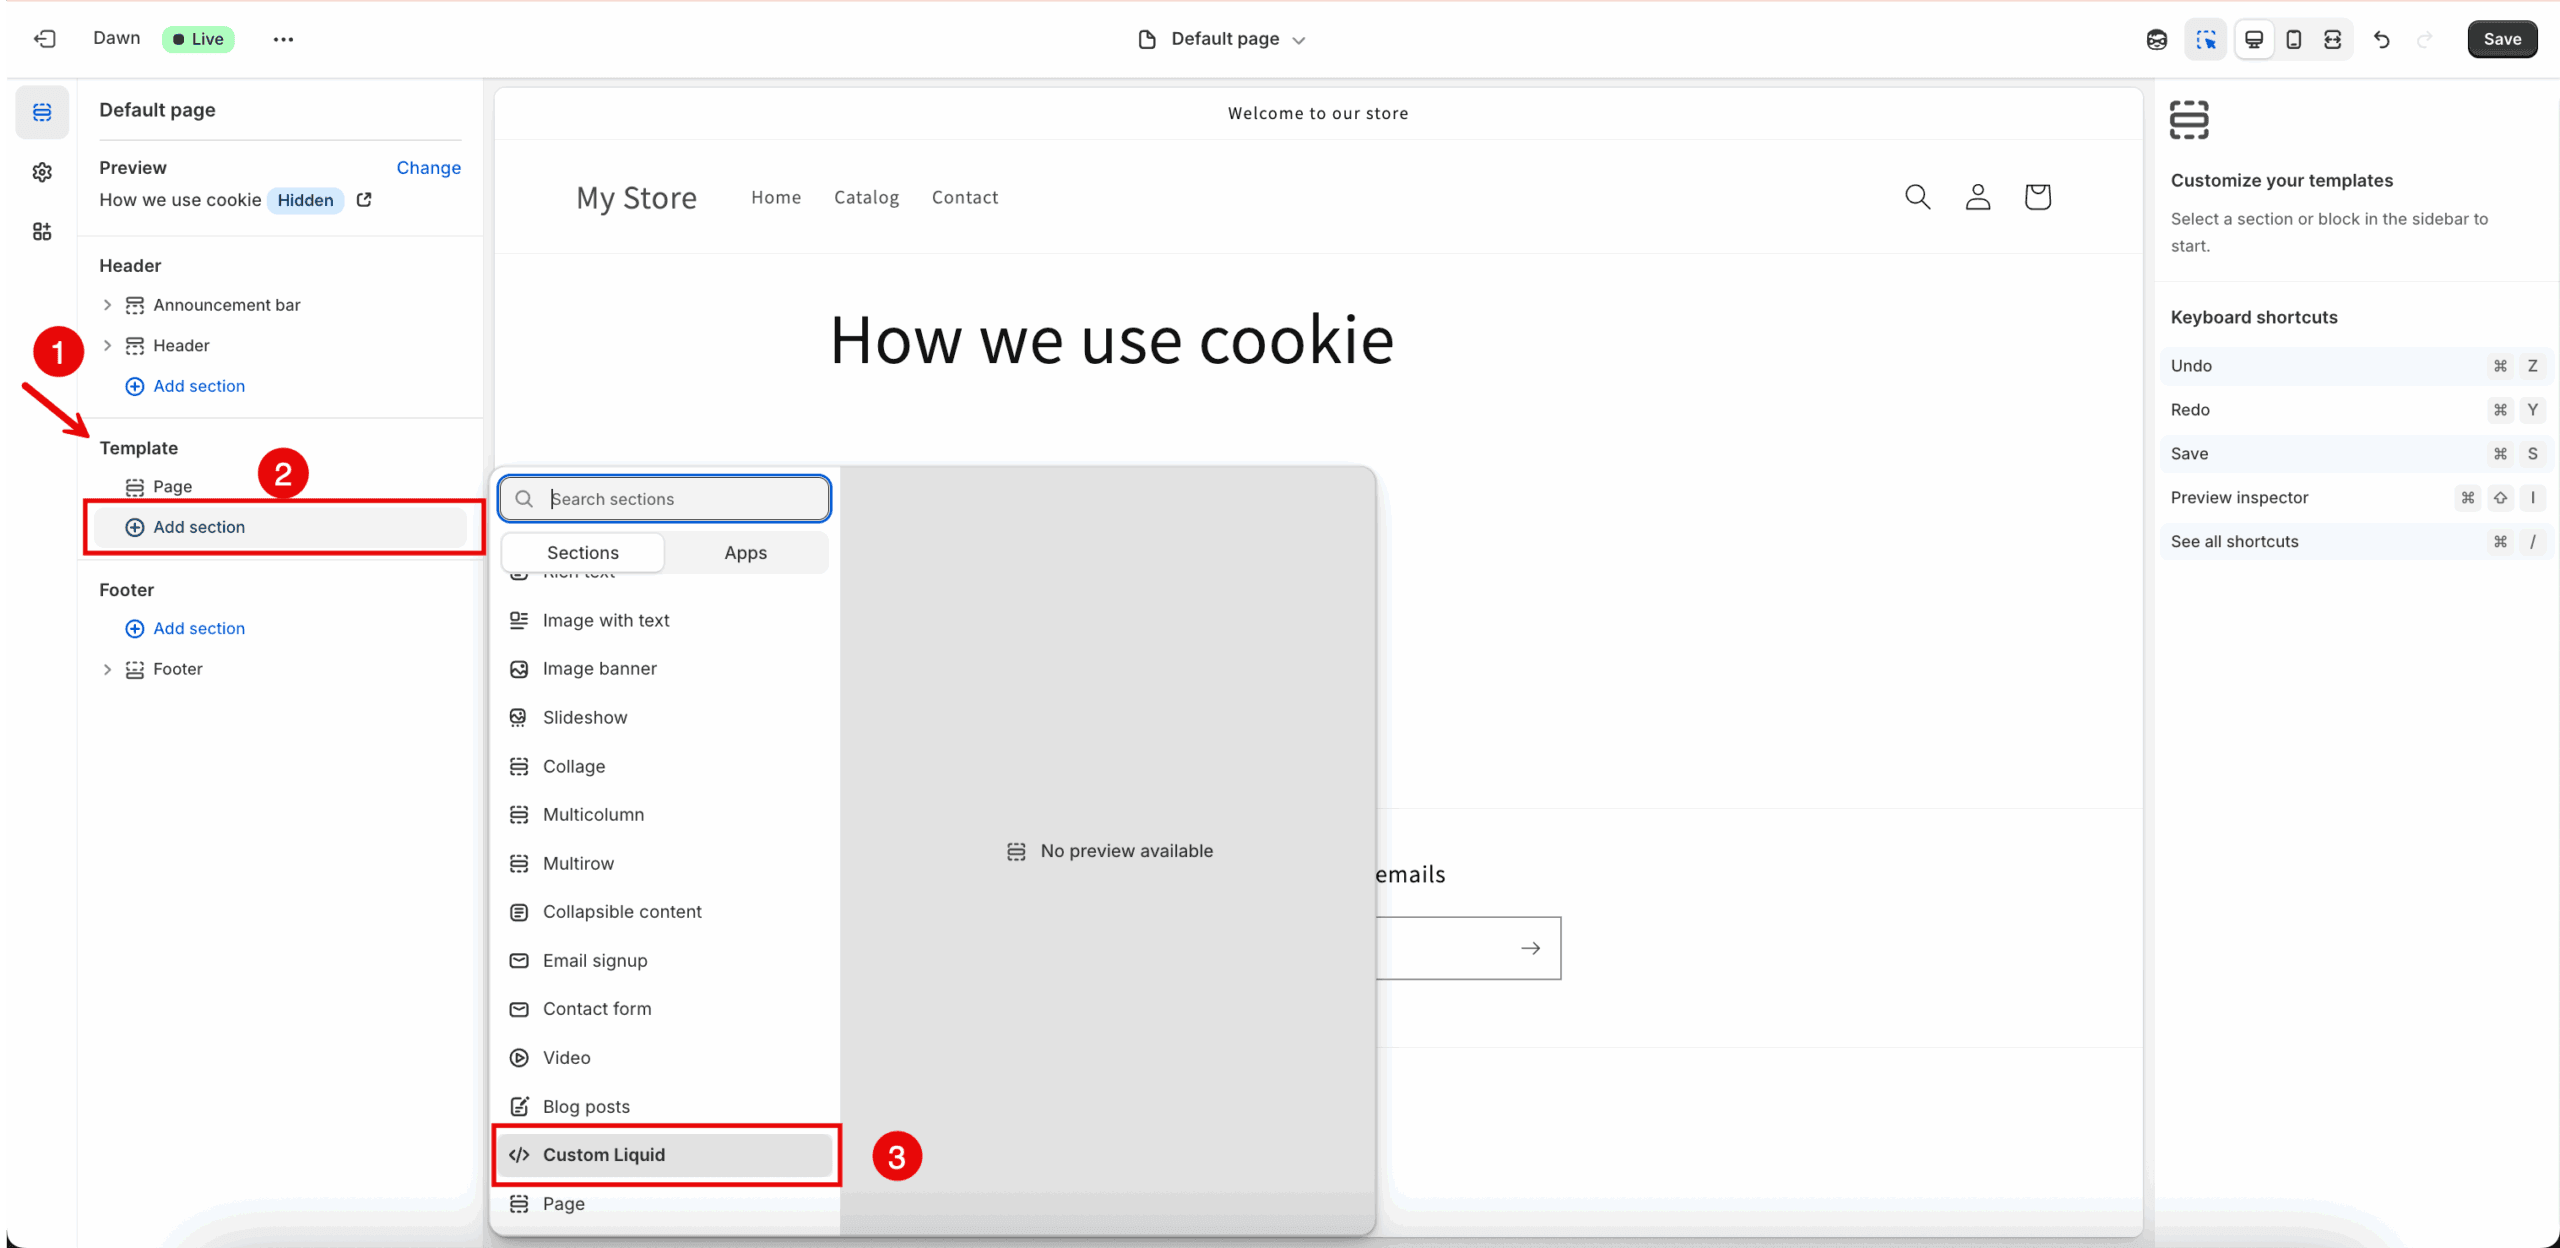
    Custom Liquid
  3. Paste <div id="cky-auto-cookie-policy"></div> into the Liquid code section and click Save.
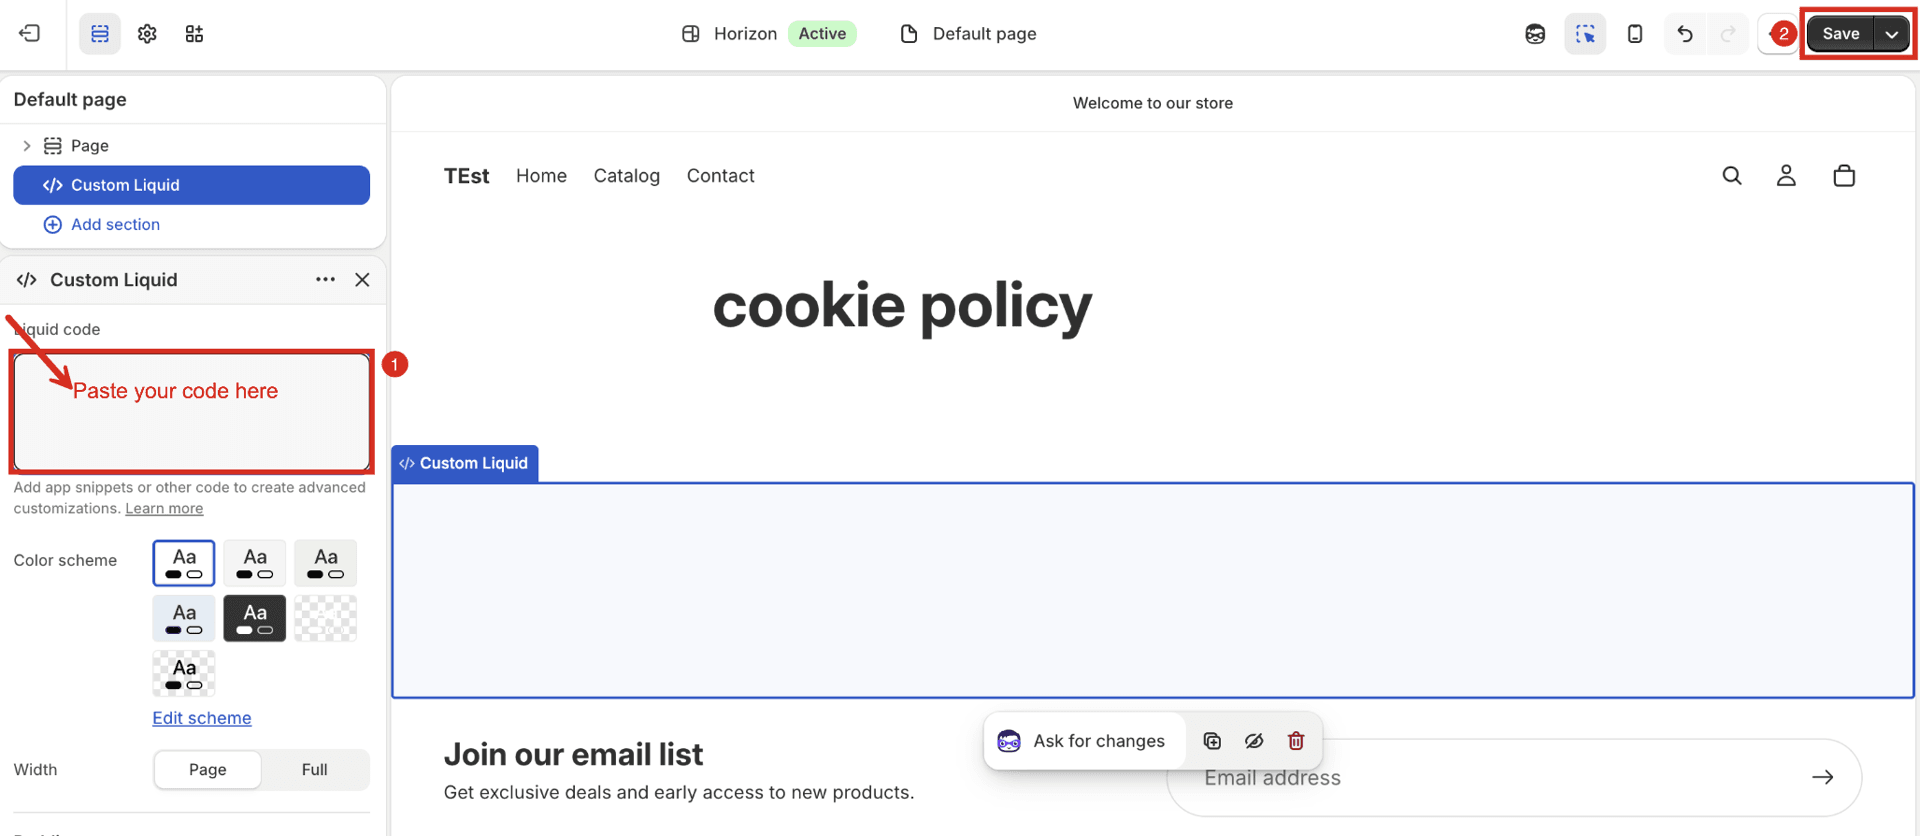
    paste-the-code
  4. Return to the CookieYes web app and click Publish cookie policy to publish it. You can also preview the cookie policy.
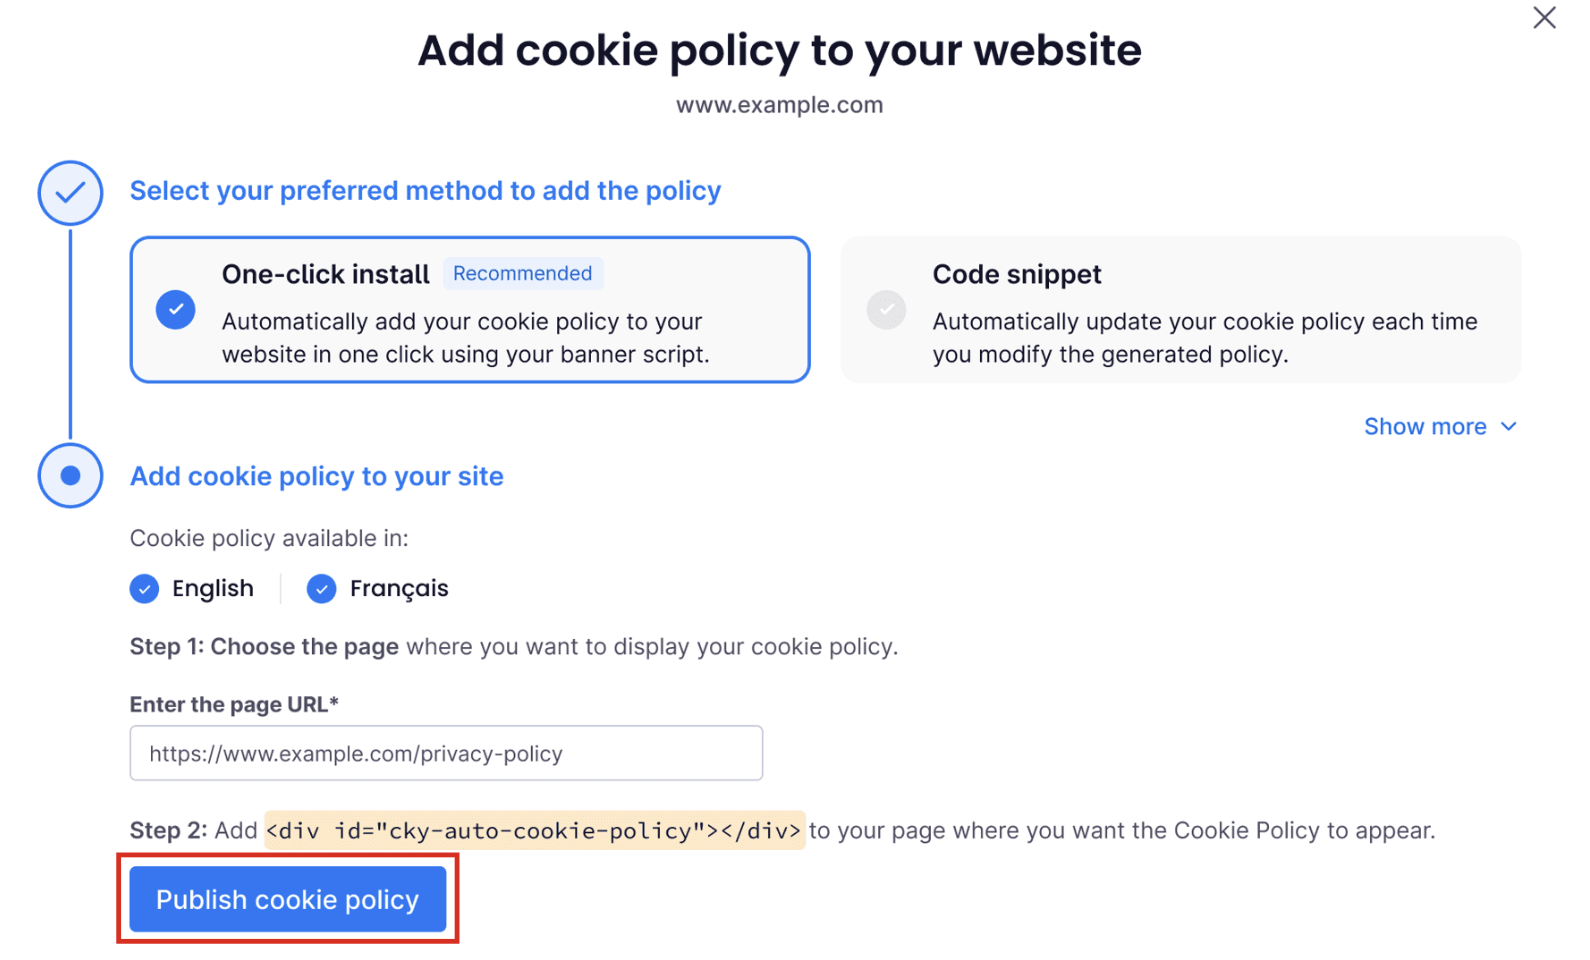
    paste-the-url

Option B: Code Snippet Method

If you selected the Code Snippet Method, follow the steps below:

  1. In the right panel of the Pages, click the View Template (eye icon) for the new page.

    view template option
  2. In the theme editor, go to Template > Add Section and select </> Custom Liquid from the left panel.

    Custom Liquid
  3. Paste the JavaScript snippet into the Liquid code section and click Save.
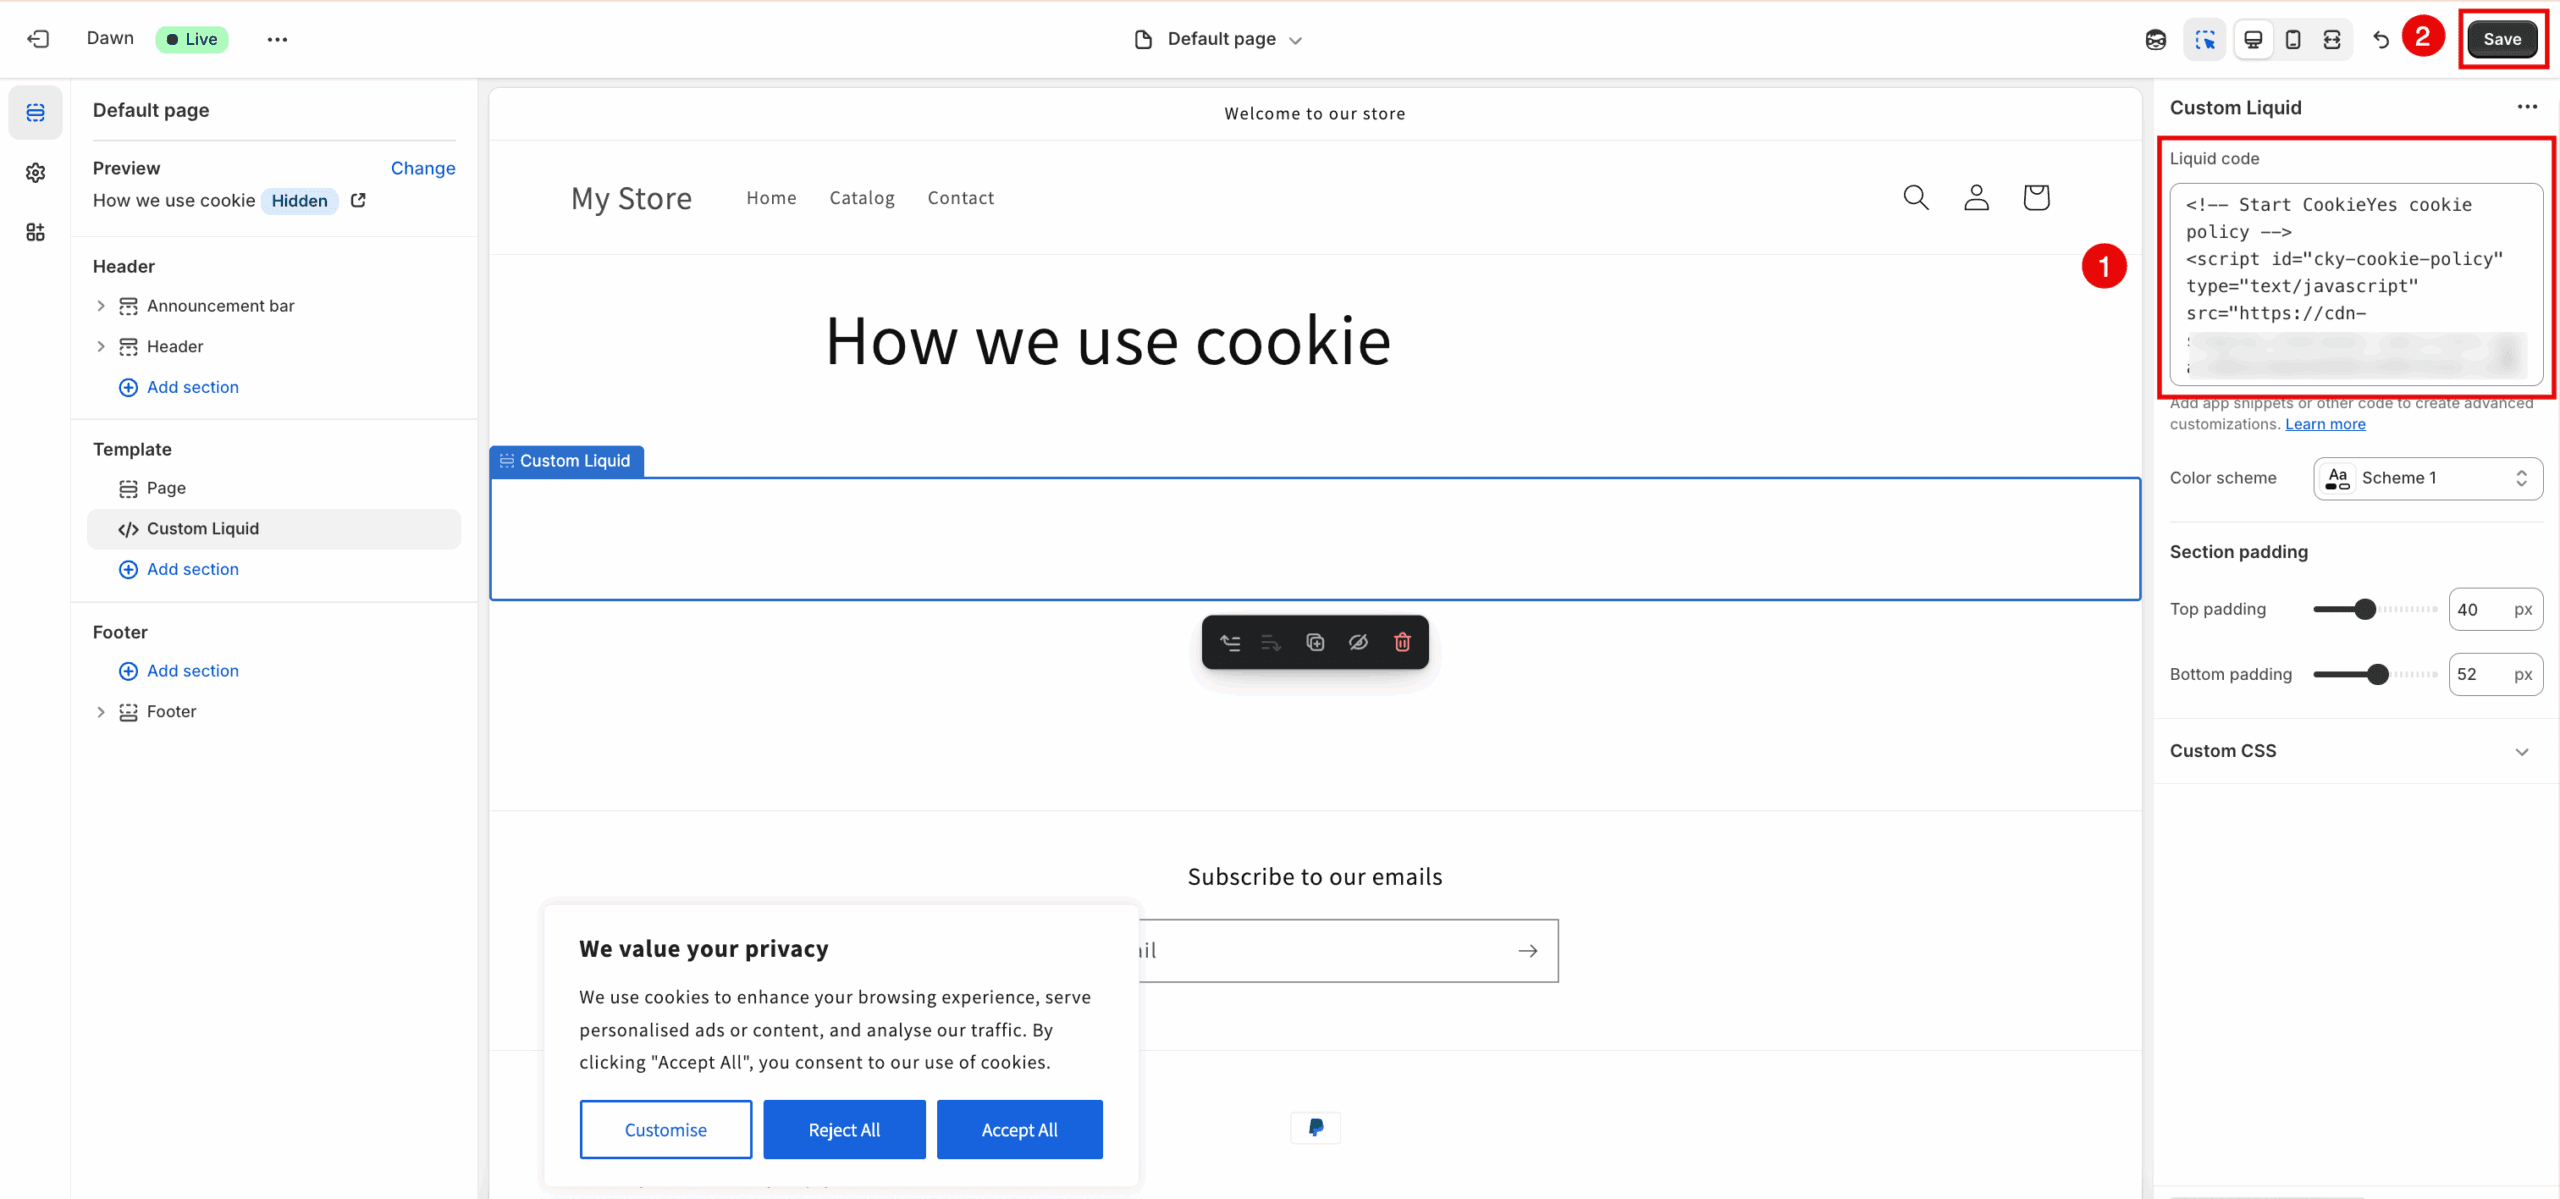
    paste the code

Option B: HTML Format Method

If you selected the HTML Format Method, follow the steps below:

  1. In the page editor, click the </> (Show HTML) icon in the toolbar.
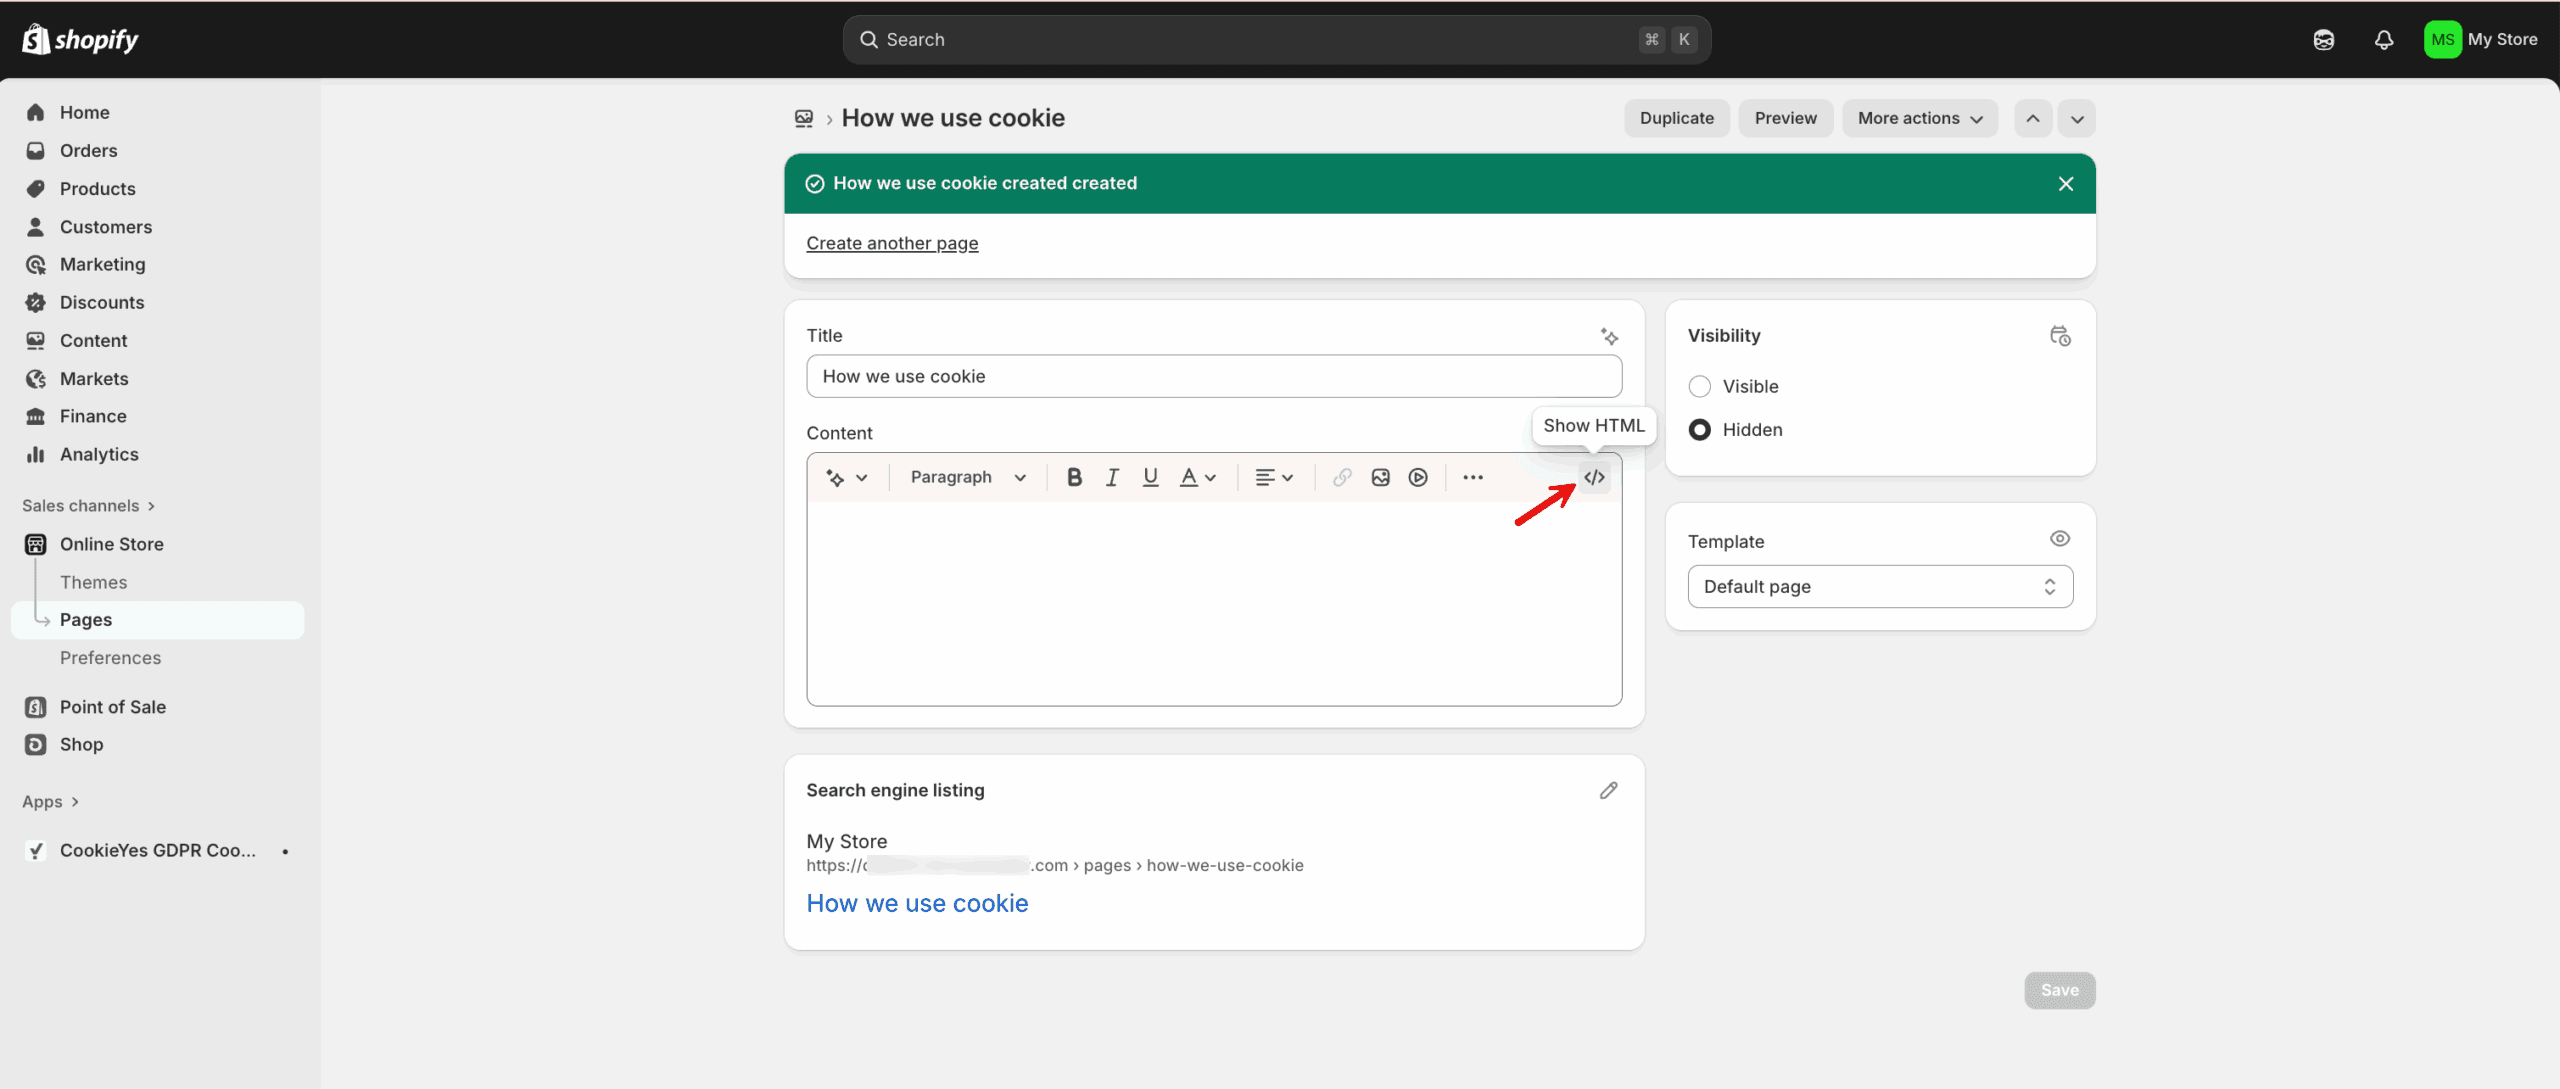
    Show HTML
  2. Paste the HTML into the Content field and click Save.
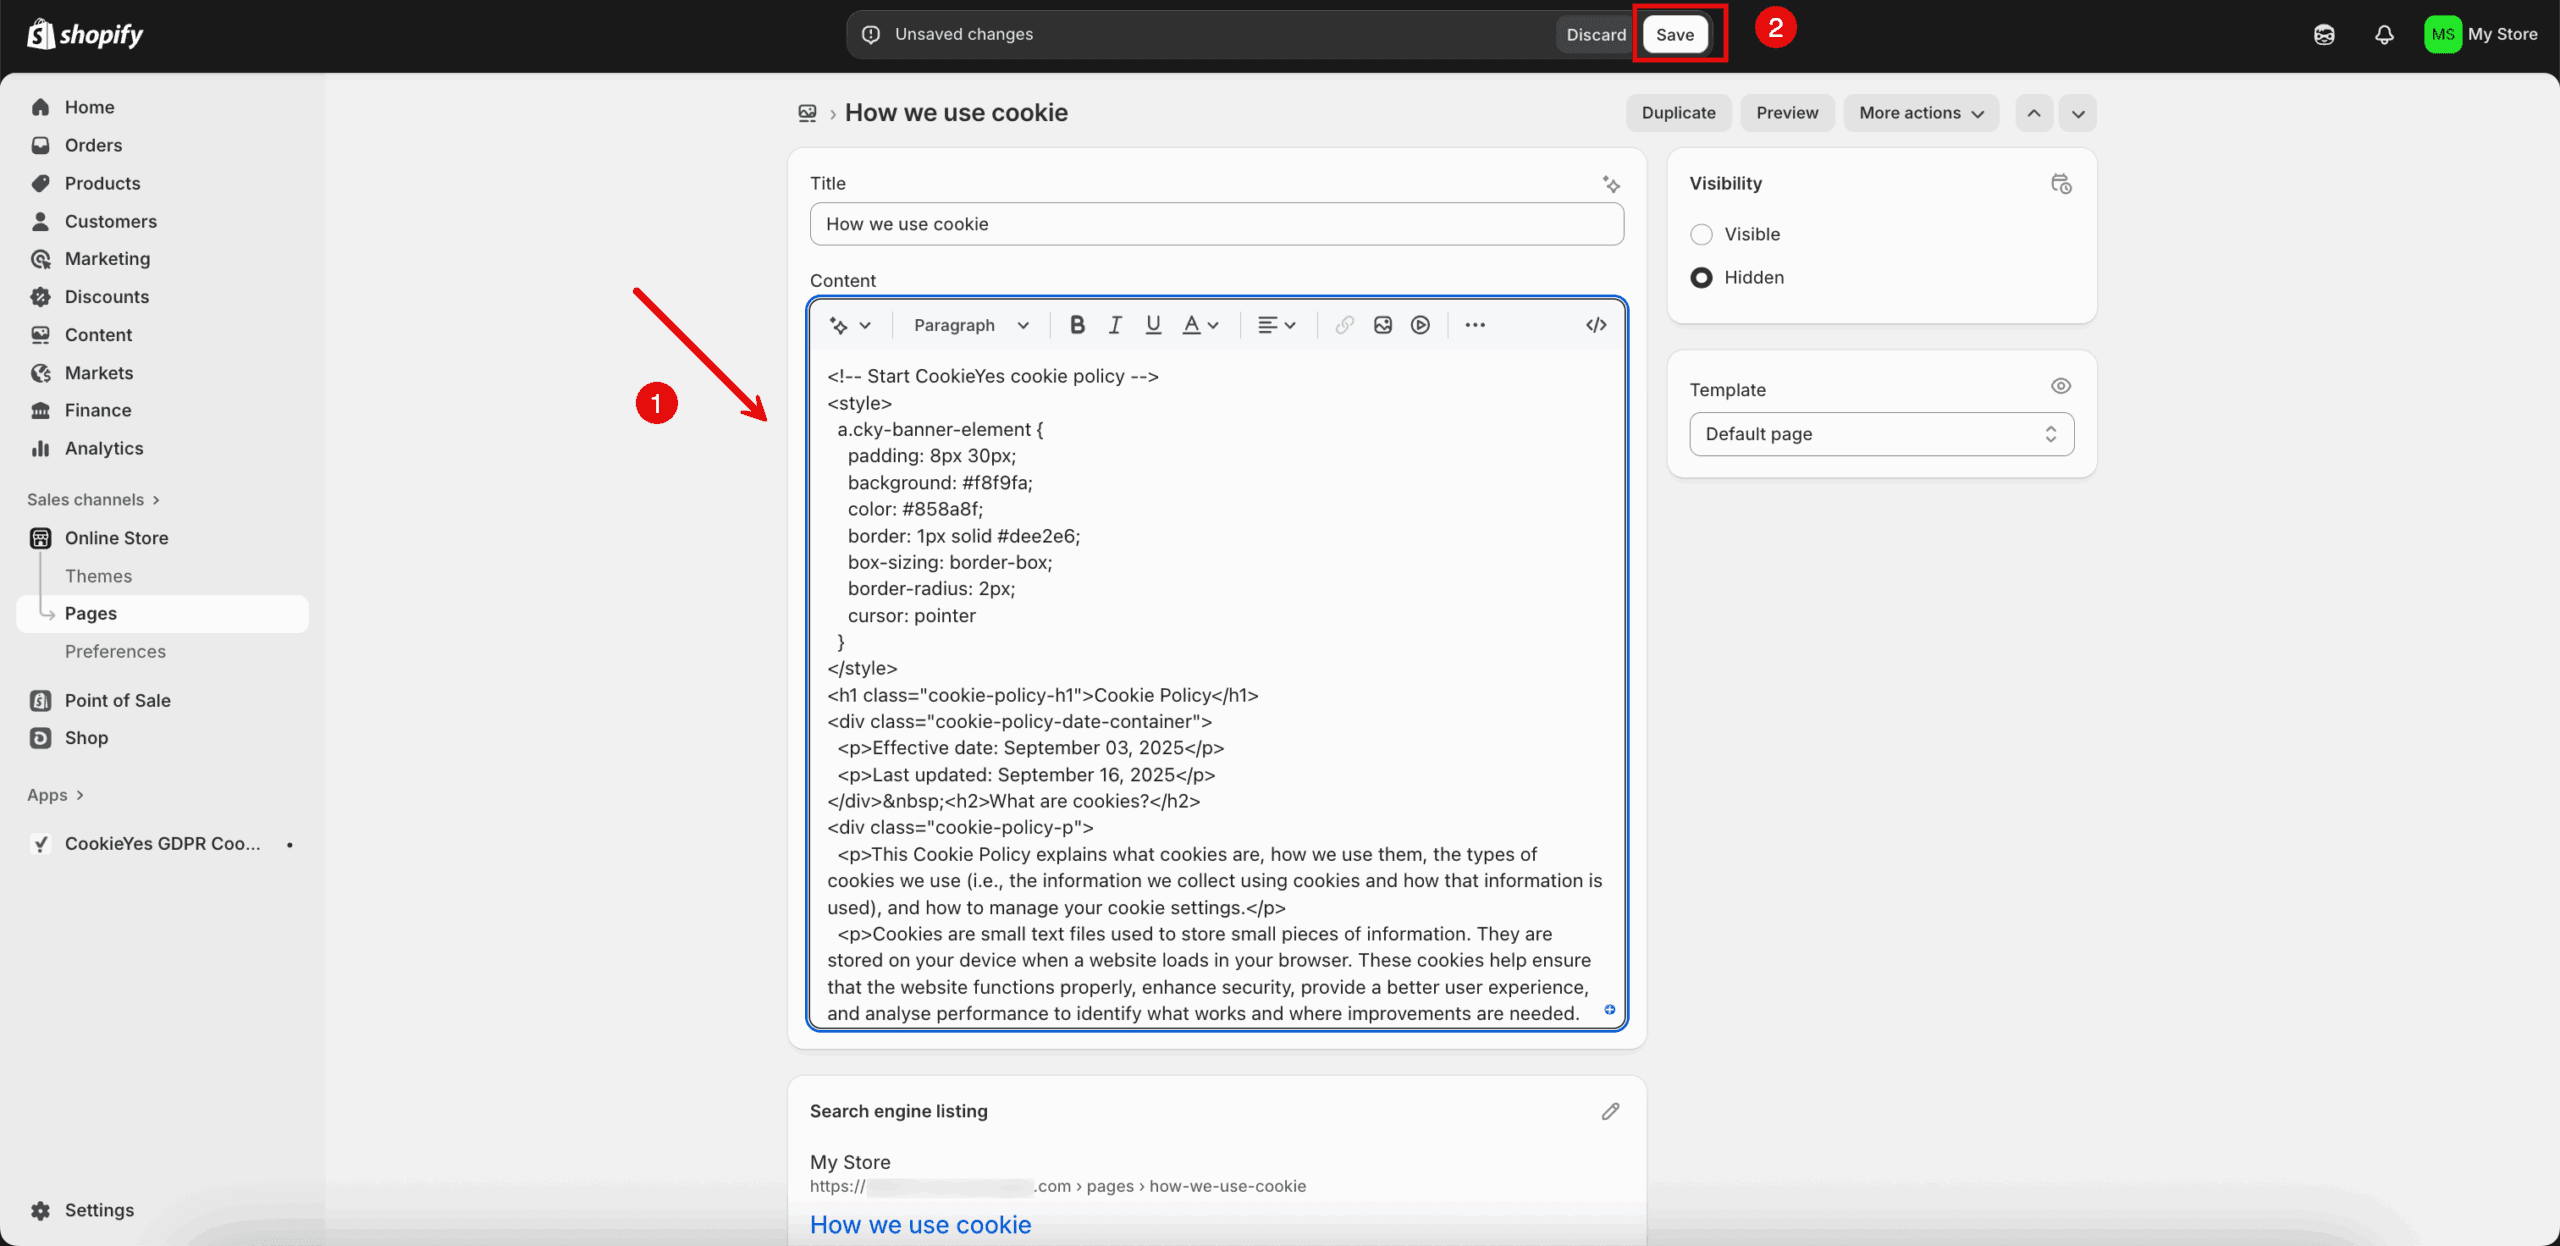
    Paste html format

Note

If you want to remove the “Cookie Policy” heading that appears at the top of the page, delete the following line from the HTML code:

<h1 class="cookie-policy-h1">Cookie Policy</h1>

Your cookie policy page will be live on your Shopify store. You can then link your cookie policy to your website footer or link it within your cookie banner.

Conclusion

By following this guide, you can easily generate a cookie policy in CookieYes and publish it on your Shopify store. A properly configured cookie policy not only builds trust with your customers but also helps your store meet privacy requirements such as the GDPR and ePrivacy Directive.

With CookieYes, you have a flexible, compliant and up-to-date solution to manage cookies and privacy transparency on your Shopify store.

Was this article helpful?

Have more questions?

Reach out to us and we'll answer them.

Contact us