Getting Started
Chapter 1:
How to Add a Cookie Banner to Your Website
Welcome to CookieYes! This guide will walk you through everything you need to know about creating a cookie banner, customizations, and implementing it on your website.
If you signed up on CookieYes before 15 March 2022, refer to this setup guide to implement a cookie banner on your website.
To get started with CookieYes, create your account.
After you sign up, you will be directed to a setup screen. Follow the instructions below to add a cookie banner to your website.
Step 1. Choose a cookie banner layout
Select a cookie banner template from the options available: Box, Banner and Popup.
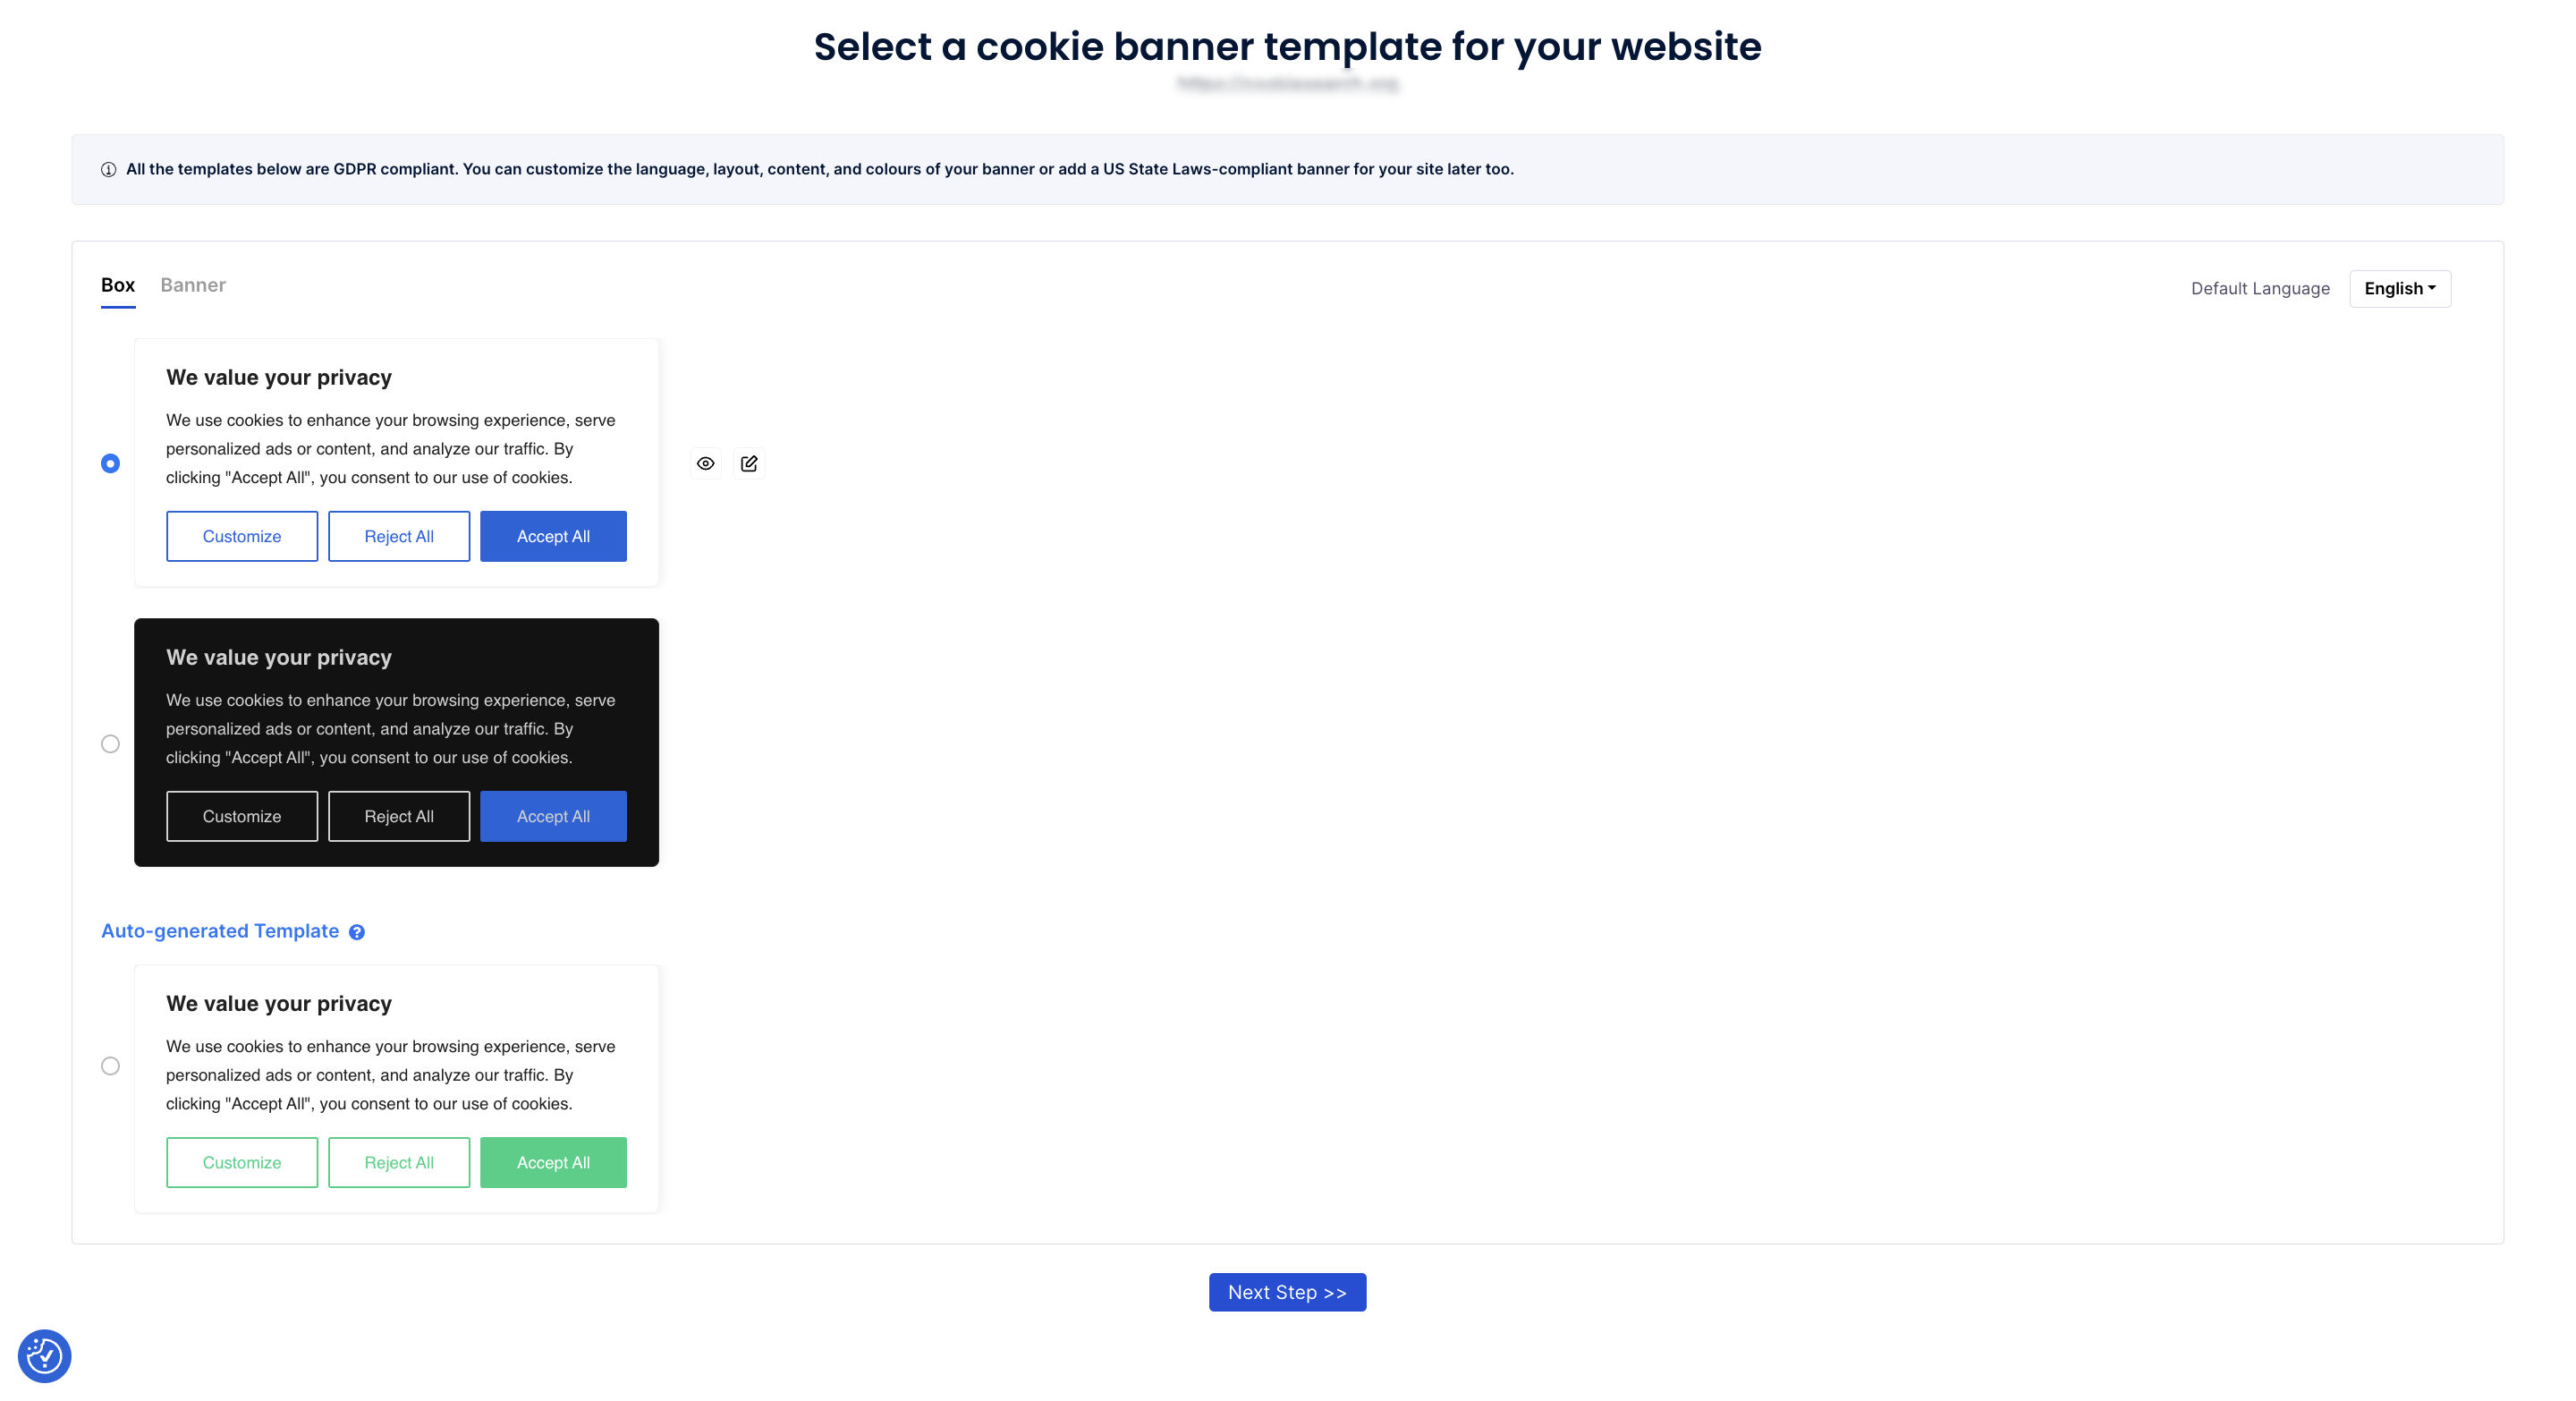
- You can choose any banner template in both the default light and dark themes.
- You can also select the Default Language of your cookie banner. You will be able to edit this and add multiple languages later.
- You may choose the Auto-generated Template layout which is auto-recommended based on your website’s colour scheme.
- If you want to customize your cookie banner, you can select the edit icon next to the selected layout.
To implement your cookie banner faster, you can simply proceed to Step 3 with the default layout that you have chosen. You can customize the cookie banner at any time later via the Dashboard > Cookie banner. You can refer to Step 2 in this guide to do the customizations.
Step 2. Customize your cookie banner
When you click on Customize a panel will appear where you can customize the banner as per your liking. Below, find the step-by-step instructions on how to customize your cookie banner layout, content, colour and add custom CSS.
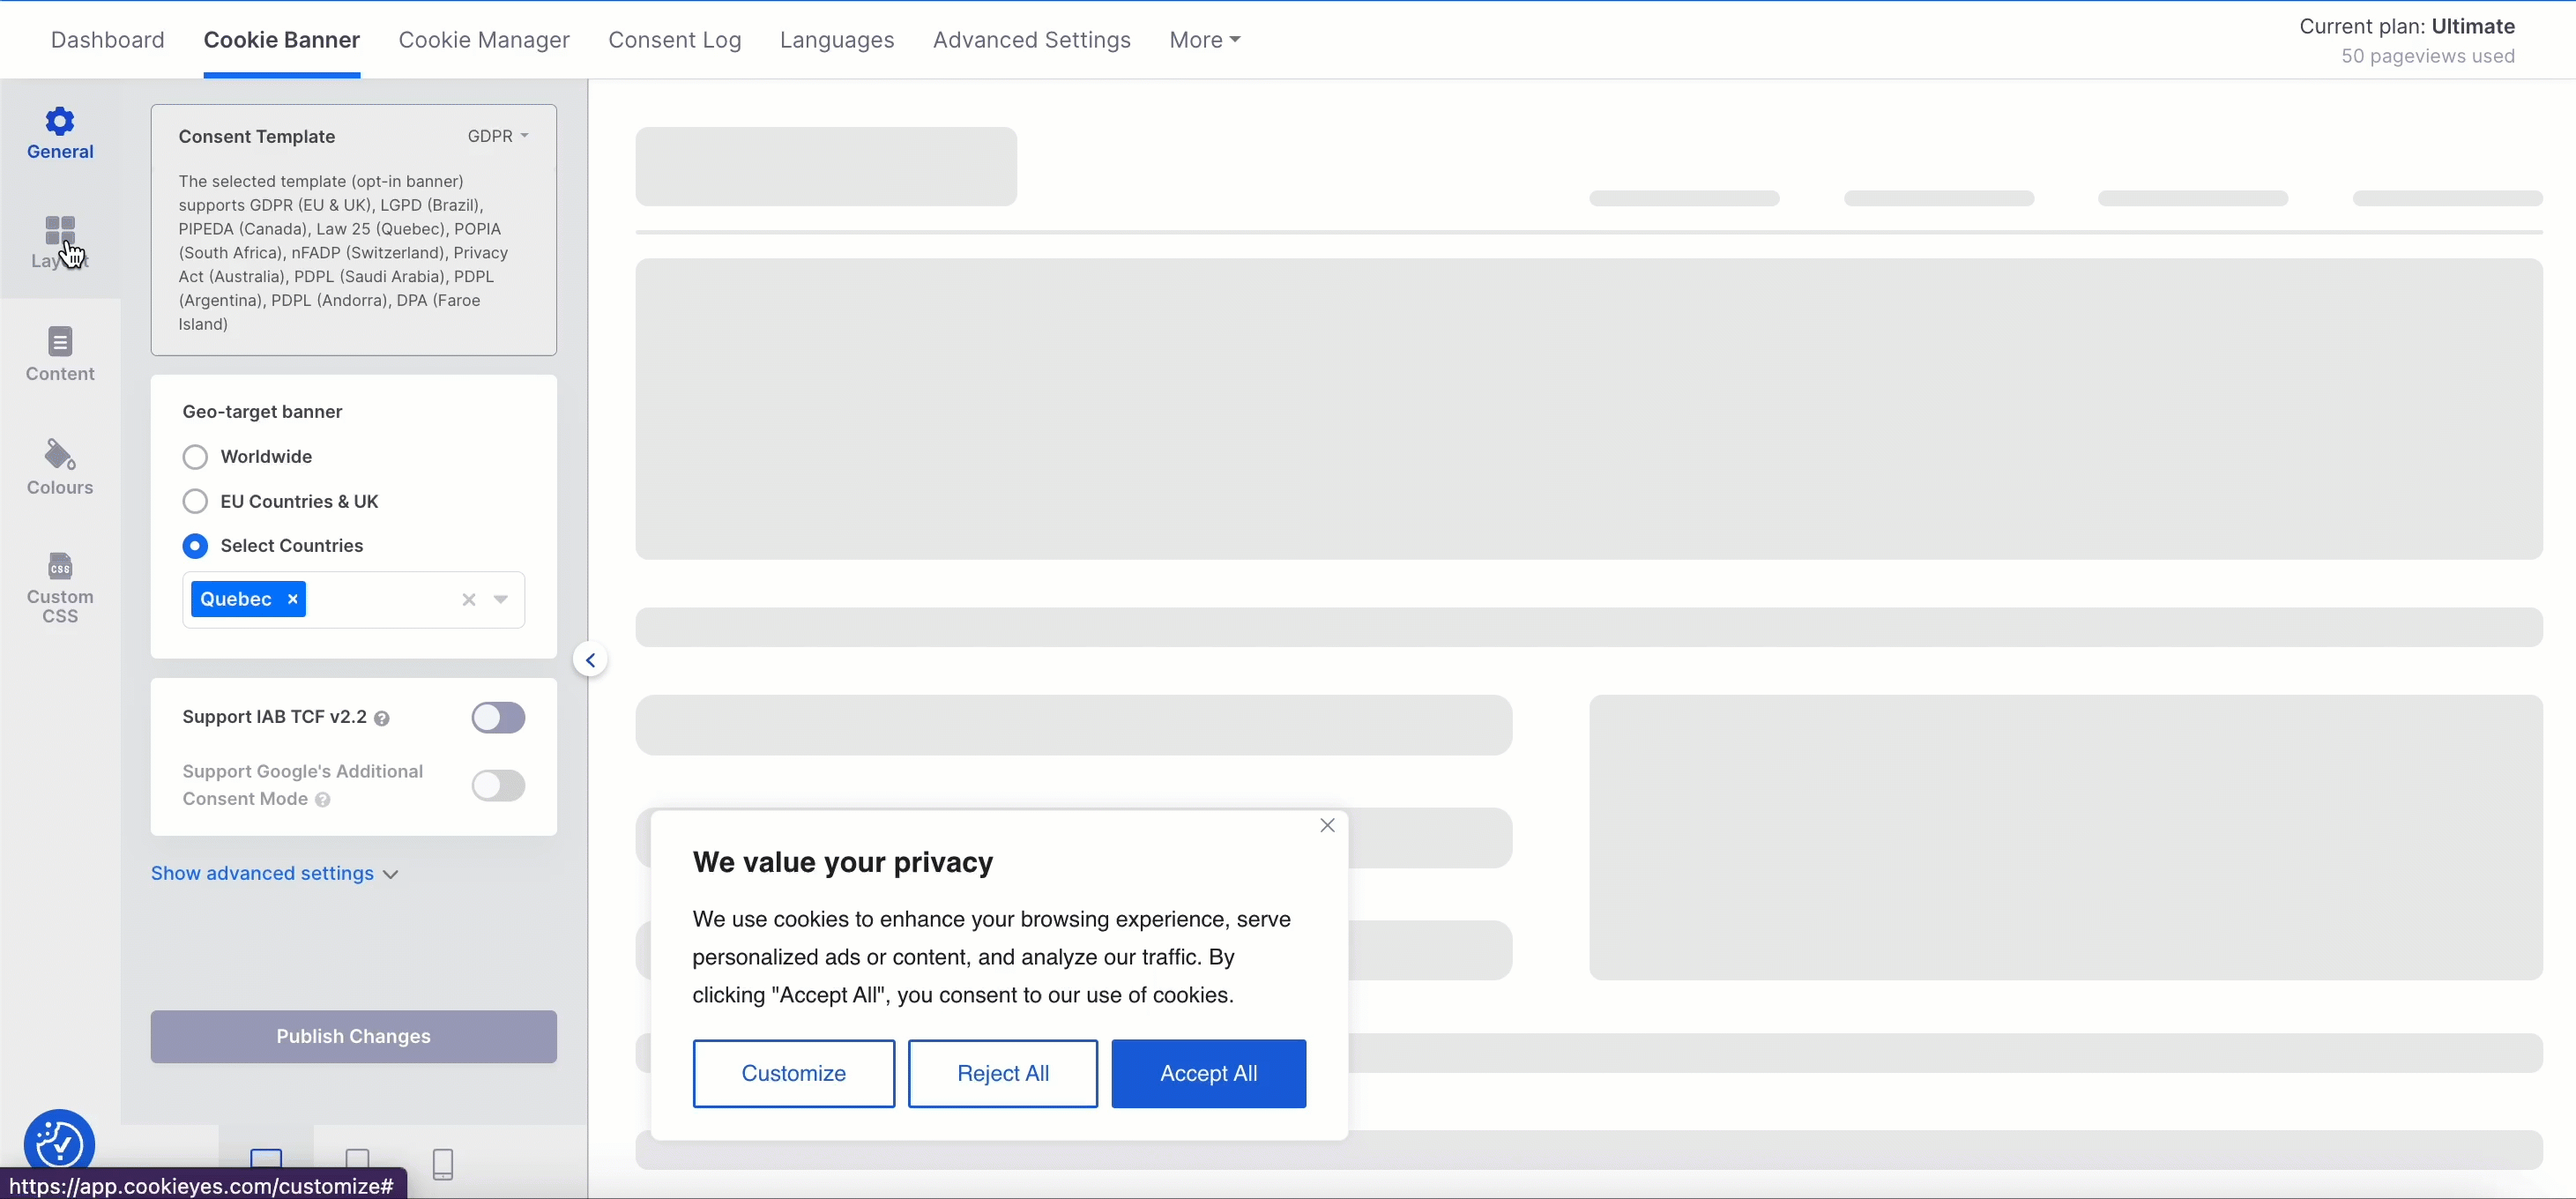
In the General tab, you can set the Consent Template. You can choose the consent template for your website: GDPR, US STATE LAWS or GDPR & US STATE LAWS.
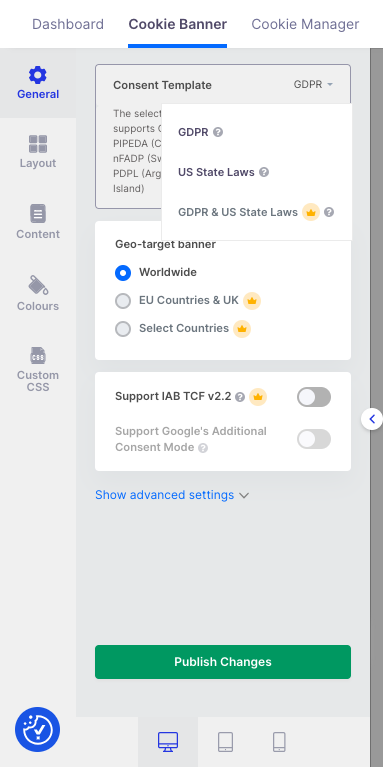
Note: You may choose the GDPR & US STATE LAWS Consent Template if you want to comply with both laws at the same time. This feature is available only on Pro and Ultimate plans.
- Under the Geo-target GDPR banner, you can set your geo-targeting rules for your cookie banner.
- For GDPR Consent Template, you can enable Support IAB TCF v2.2 (Available only on Pro and Ultimate plan) if you run ads on your website. When enabled, a banner will appear on your site, allowing visitors to set granular advertising tracking preferences.
- You can click on Show advanced settings to see advanced options.
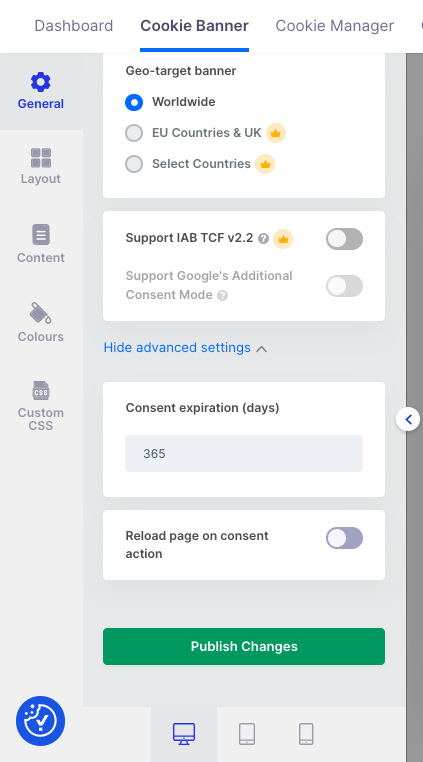
- Under the Consent Expiration, you can set the time after which your website’s visitors will be shown a consent banner again.
- Enable Reload page on consent action if you want your web page to reload after the visitor accepts or rejects consent.
Note: By default, CookieYes sets 365 days as the expiration time for cookie consent. Visitors of your site who have given consent will be shown the cookie banner again after this duration.
Select Layout from the left panel to edit/change your banner type. There are currently three banner layouts available: Box, Banner, Popup.
Box
There are four available positions: Bottom left, Bottom right, Top left, and Top right.
Banner
There are two available positions: Bottom and Top.
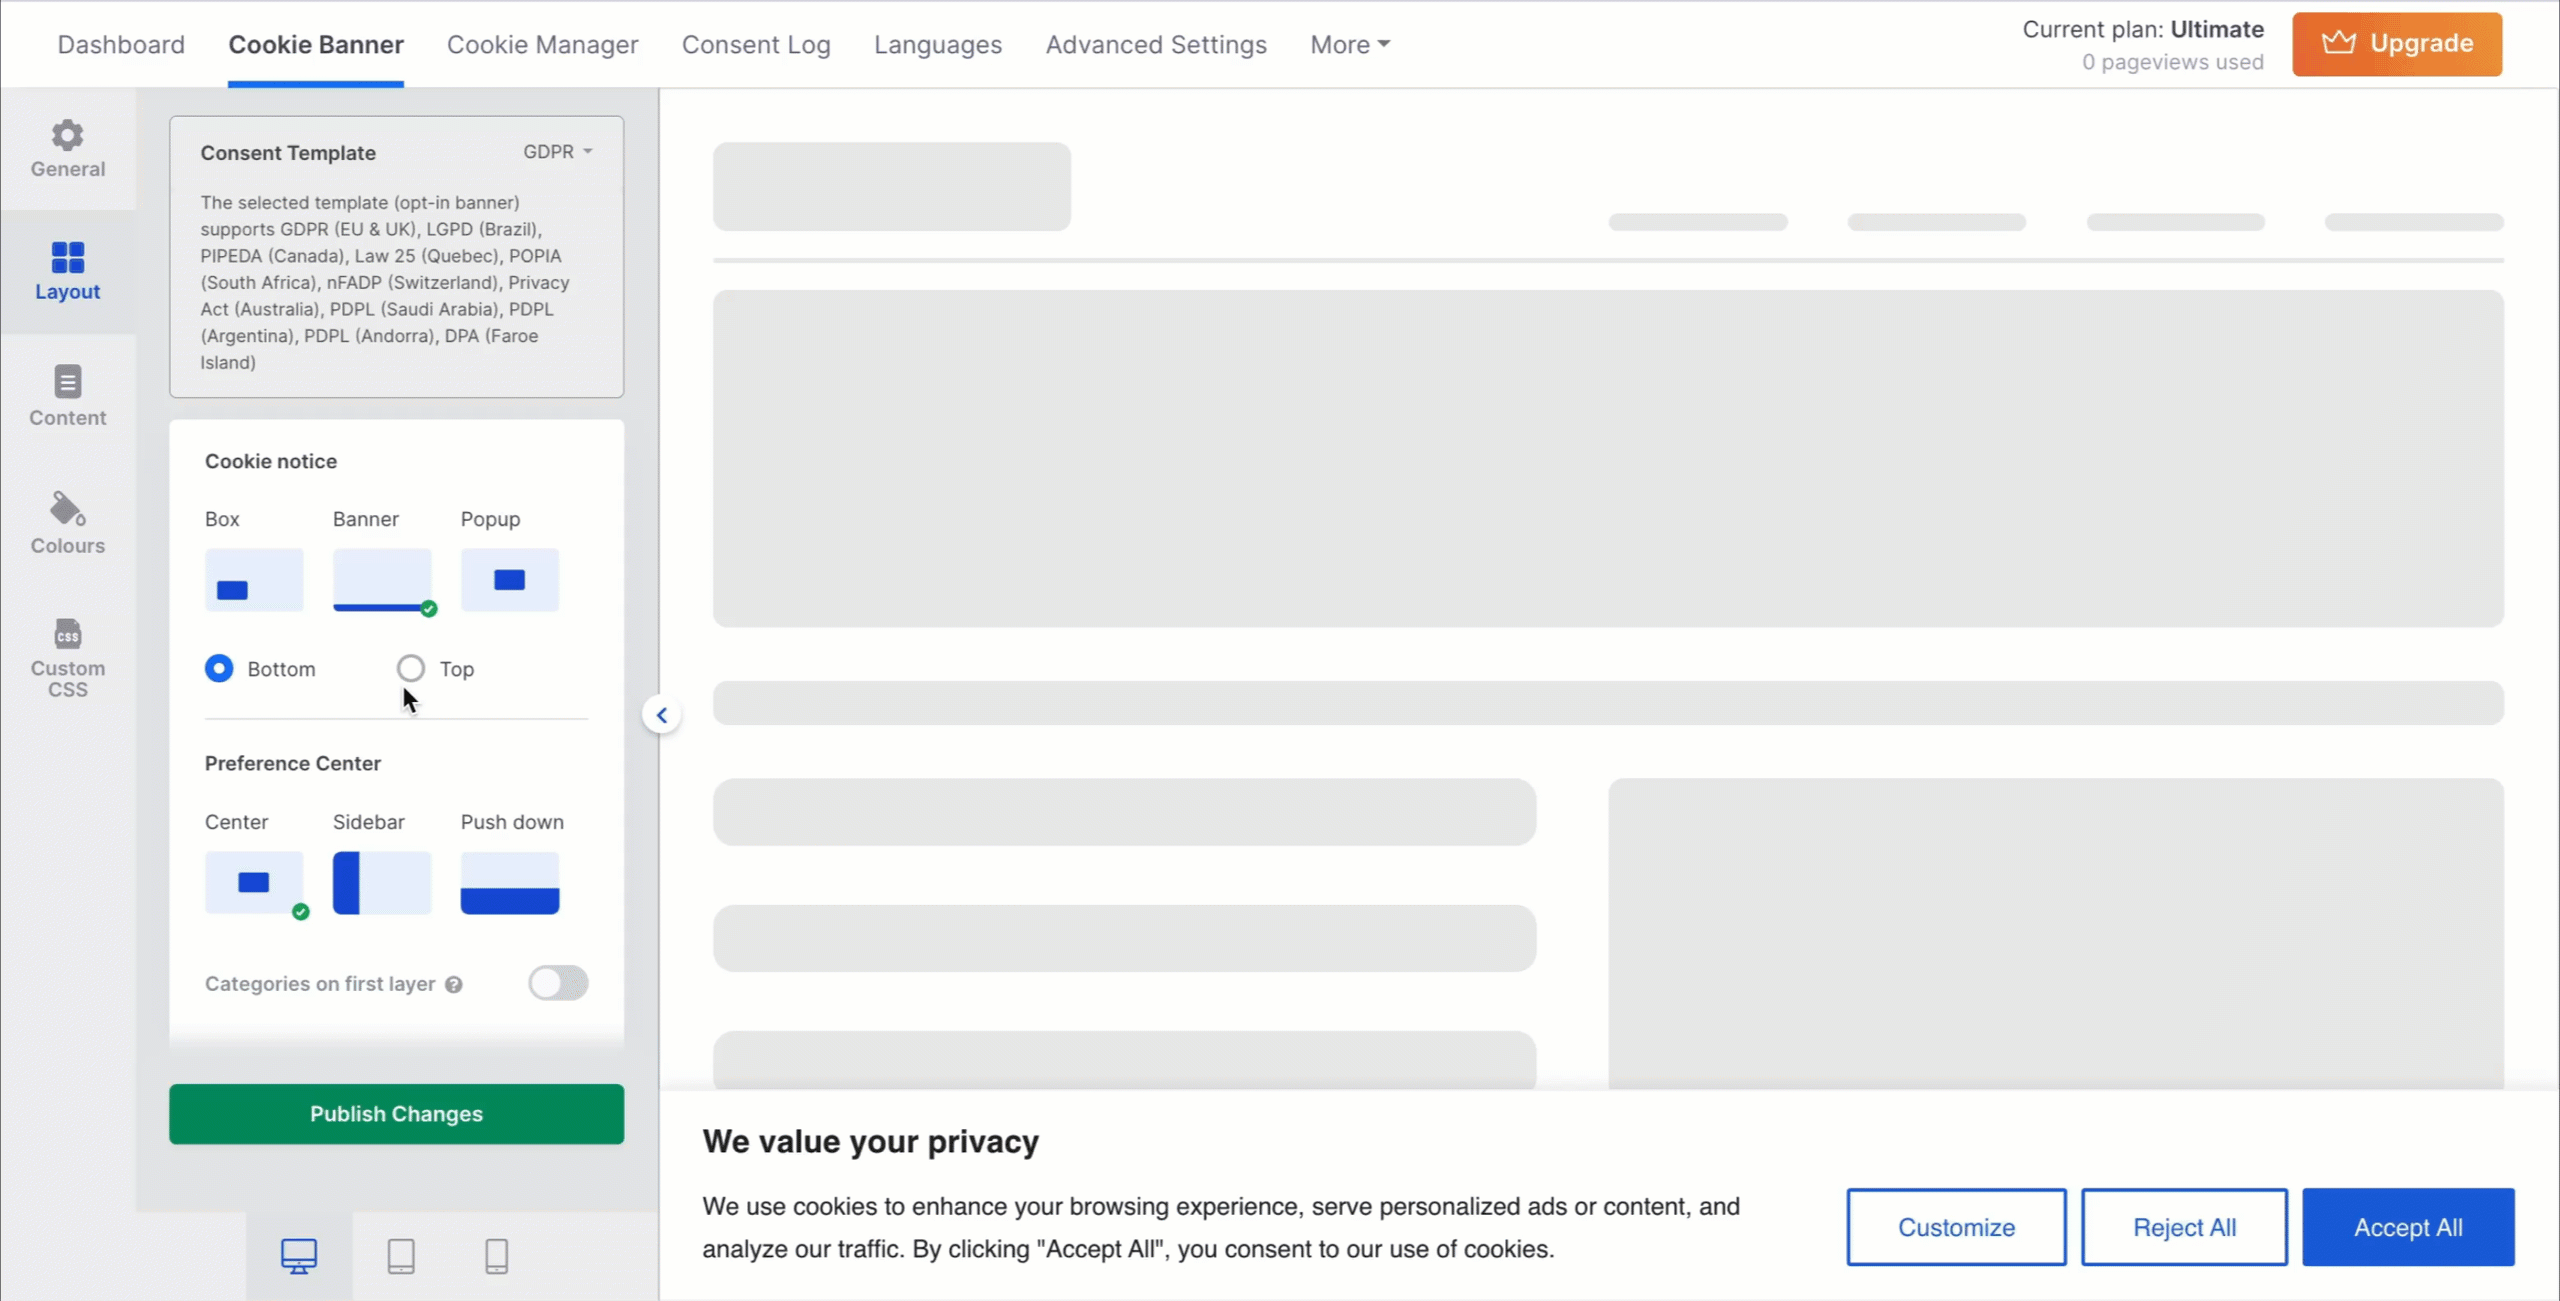
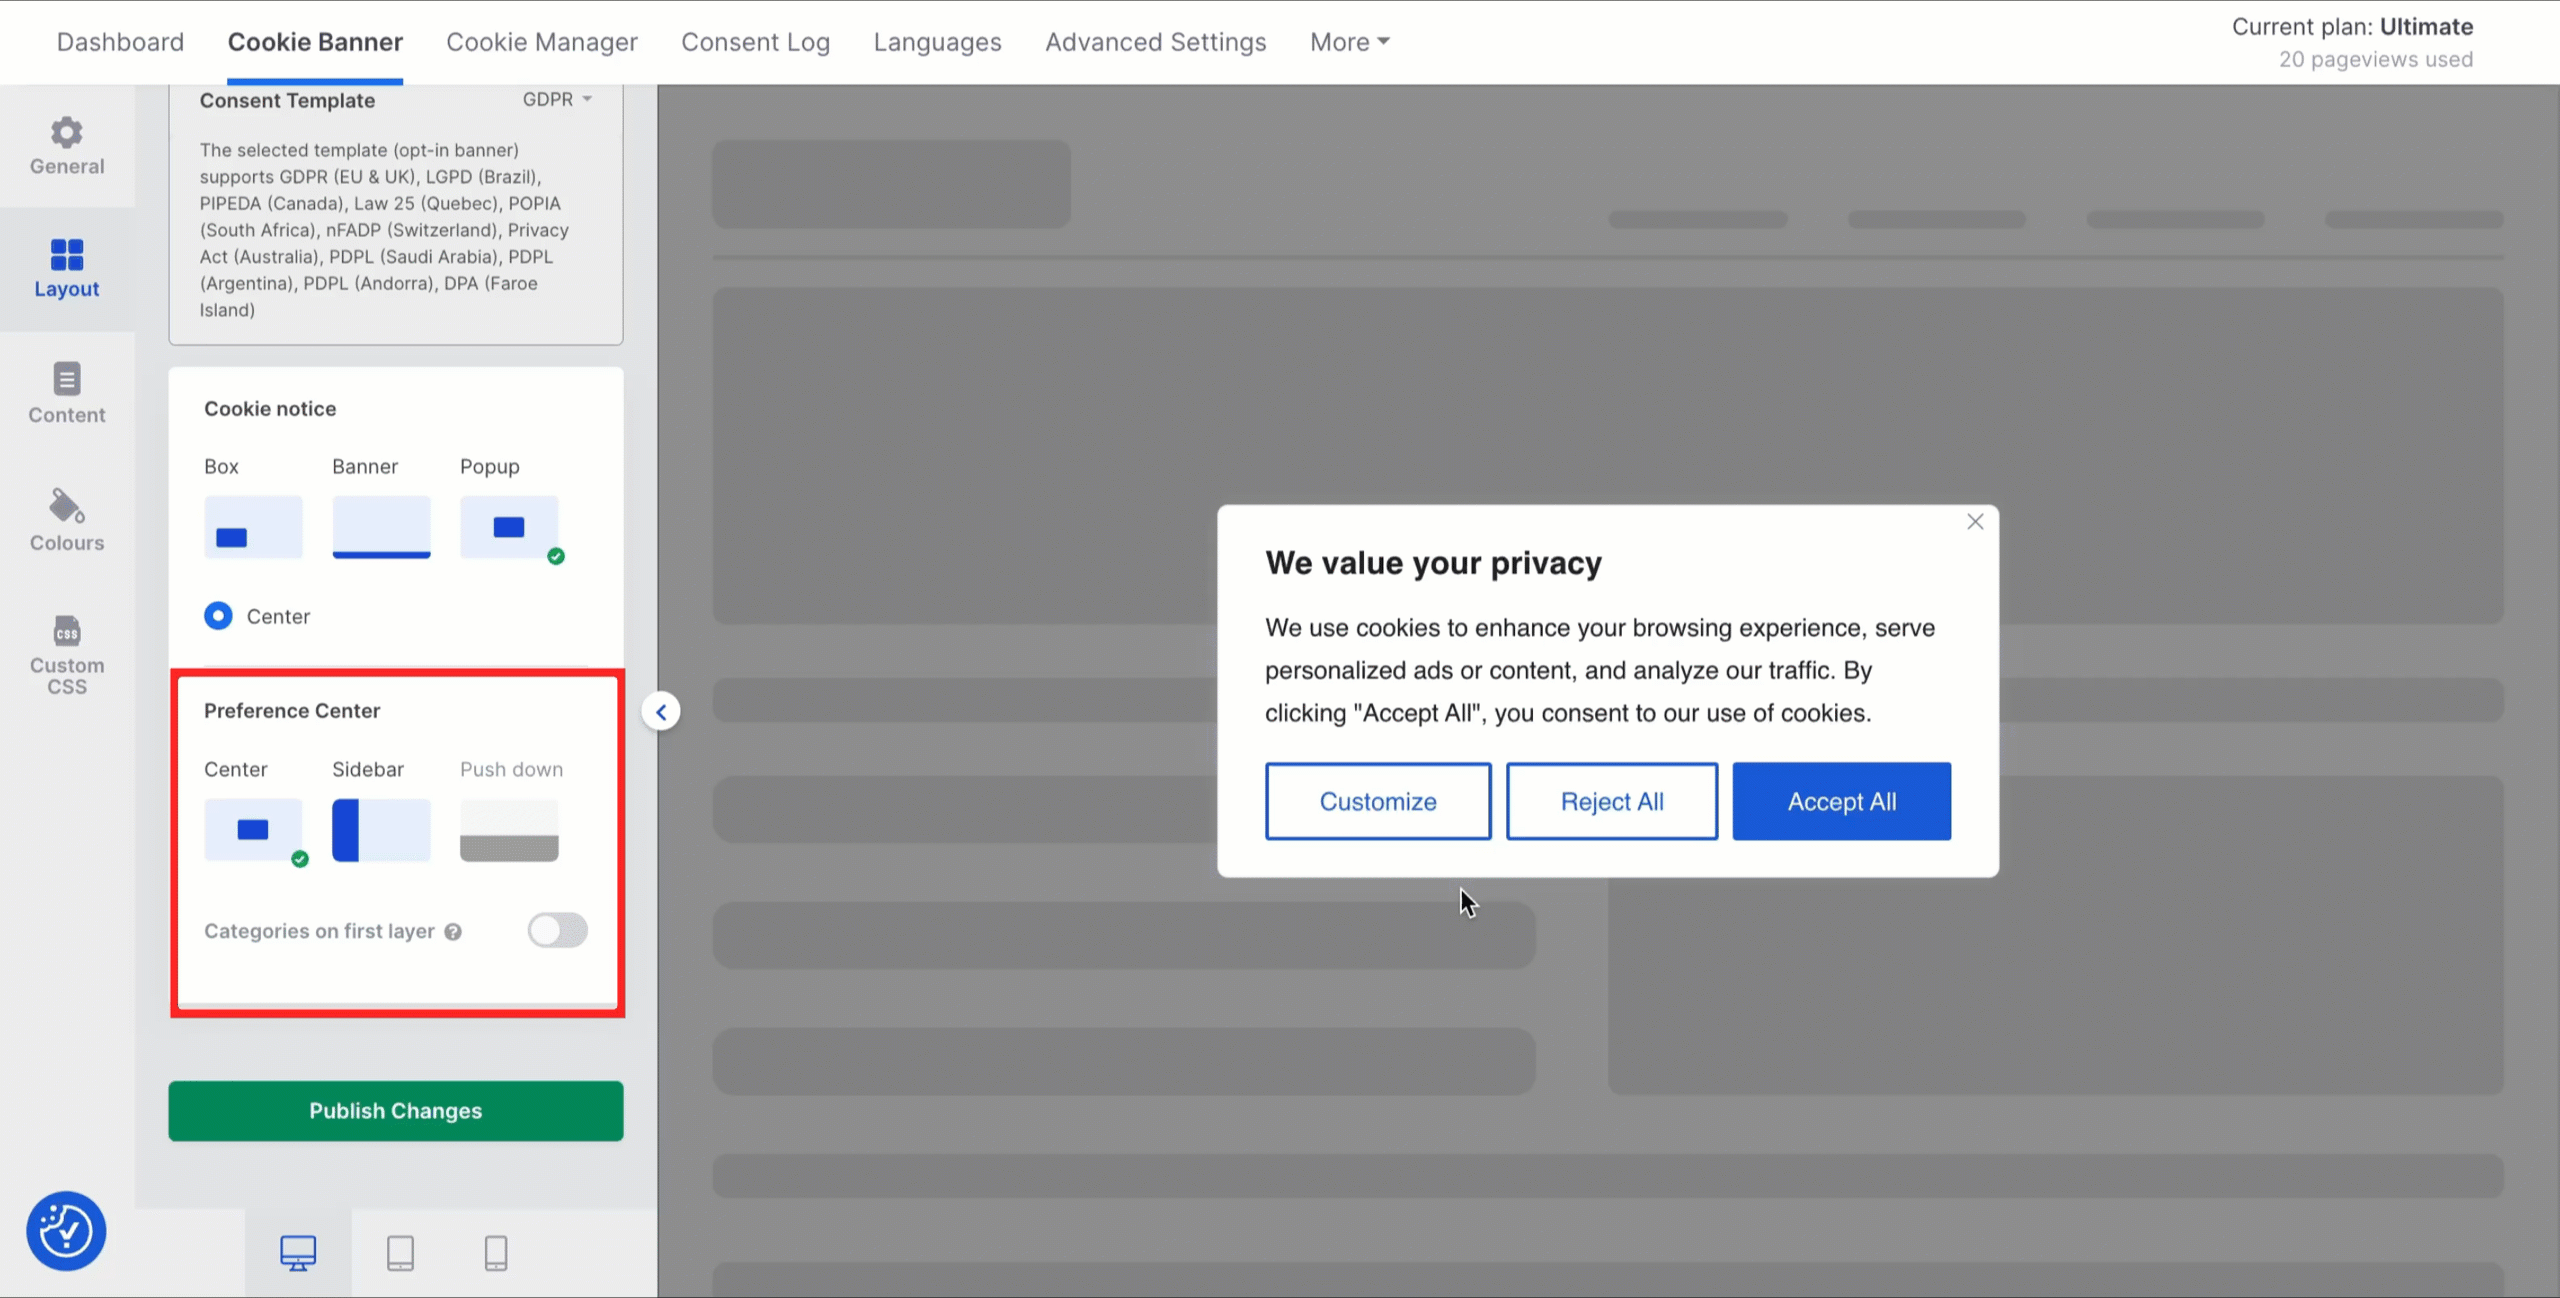
Popup – Center.

Preference Center
Box – There are 2 options available: Center and Sidebar.
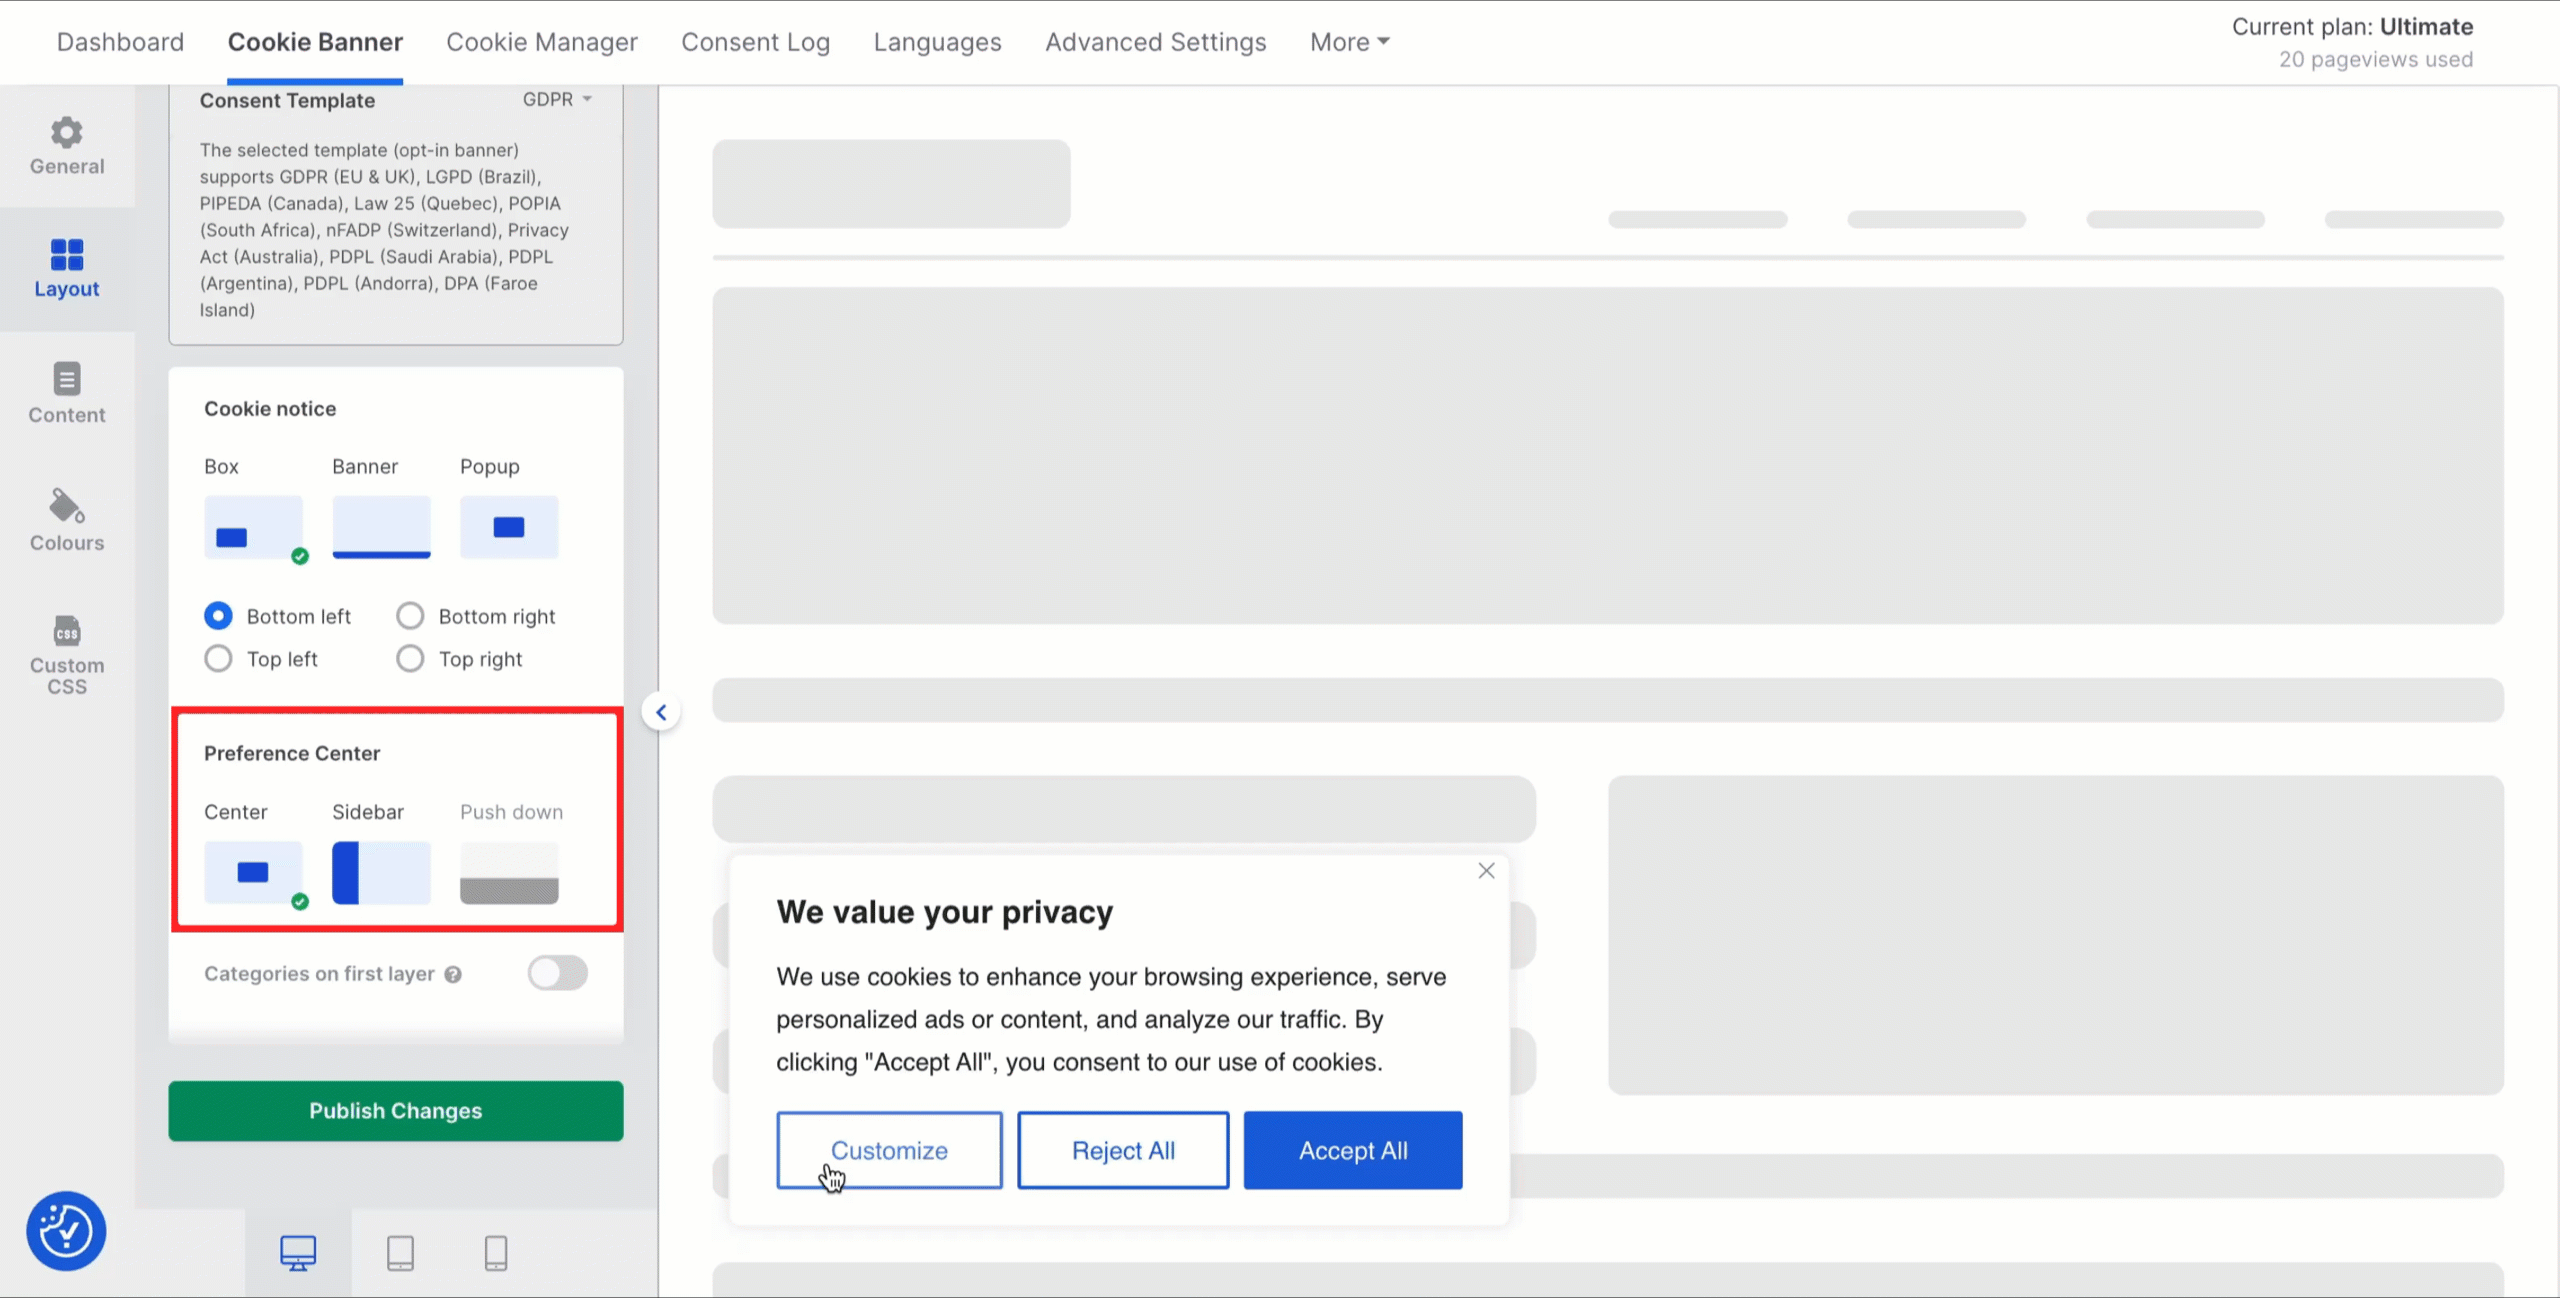
Banner – The three configurations are Centre, Sidebar, and Push down.
The Categories on first layer feature is available with Banner + Push down layout only.

Popup – There are 2 options available, Center and Sidebar.
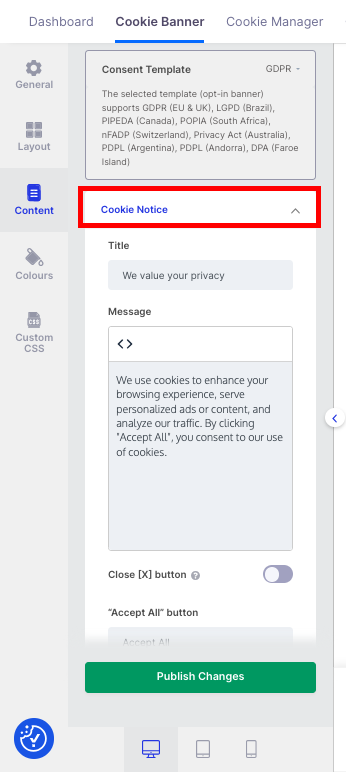
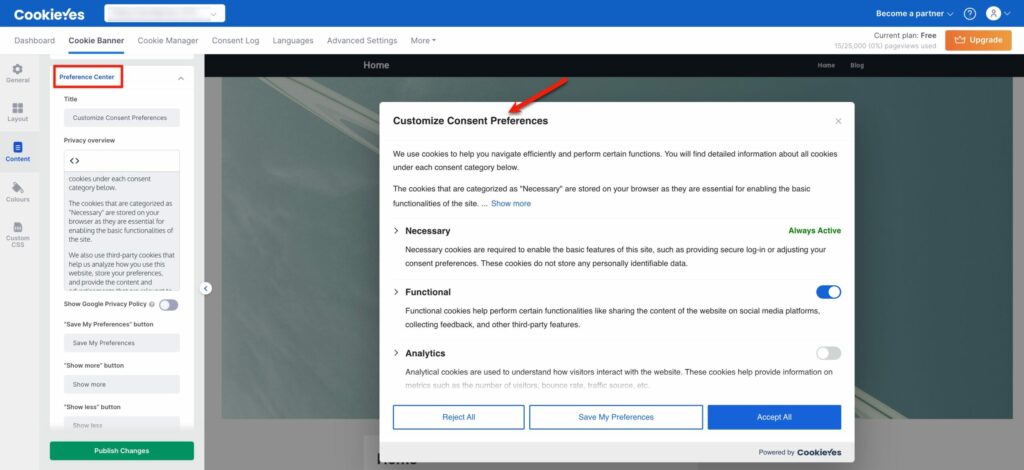
Select Content from the left panel to customize the content of the banner and all banner elements including title, banner text, button texts, and the preference centre.
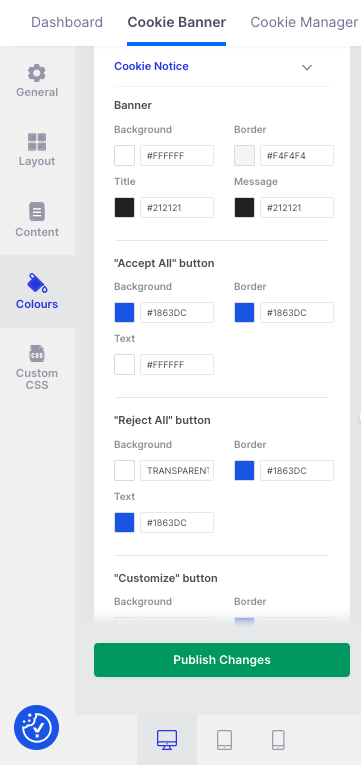
- To edit the message on your banner, select the Cookie Notice. You can edit or change the content of the Title and Message.
- You can enable the Close [X] button if you want the banner to have a close button.
- You can edit the button labels that appear on your banner – “Accept All”, “Reject All” and “Customize”.
- You can enable the “Read More” link and provide the URL to your privacy policy page or cookie policy page. You can also change the label name.
- To personalize your banner, you can add your Brand logo (Available only on Basic, Pro, and Ultimate plan).
- Select Disable CookieYes branding to hide the ‘Powered by CookieYes’ logo that appears on the banner. (Available only on the Ultimate plan)
- To edit the content of the second layer of your banner, select Preference Center. Here you can edit or change the content of the Title, Privacy overview, and the text of the “Save my preferences” button.
- You can enable the Show Google Privacy Policy option, which ensures that the Google Privacy Policy is displayed on the second layer of your banner. This is necessary if you use services provided by Google, such as AdSense, Firebase and Analytics on your website, as mandated by the Digital Markets Act (DMA).
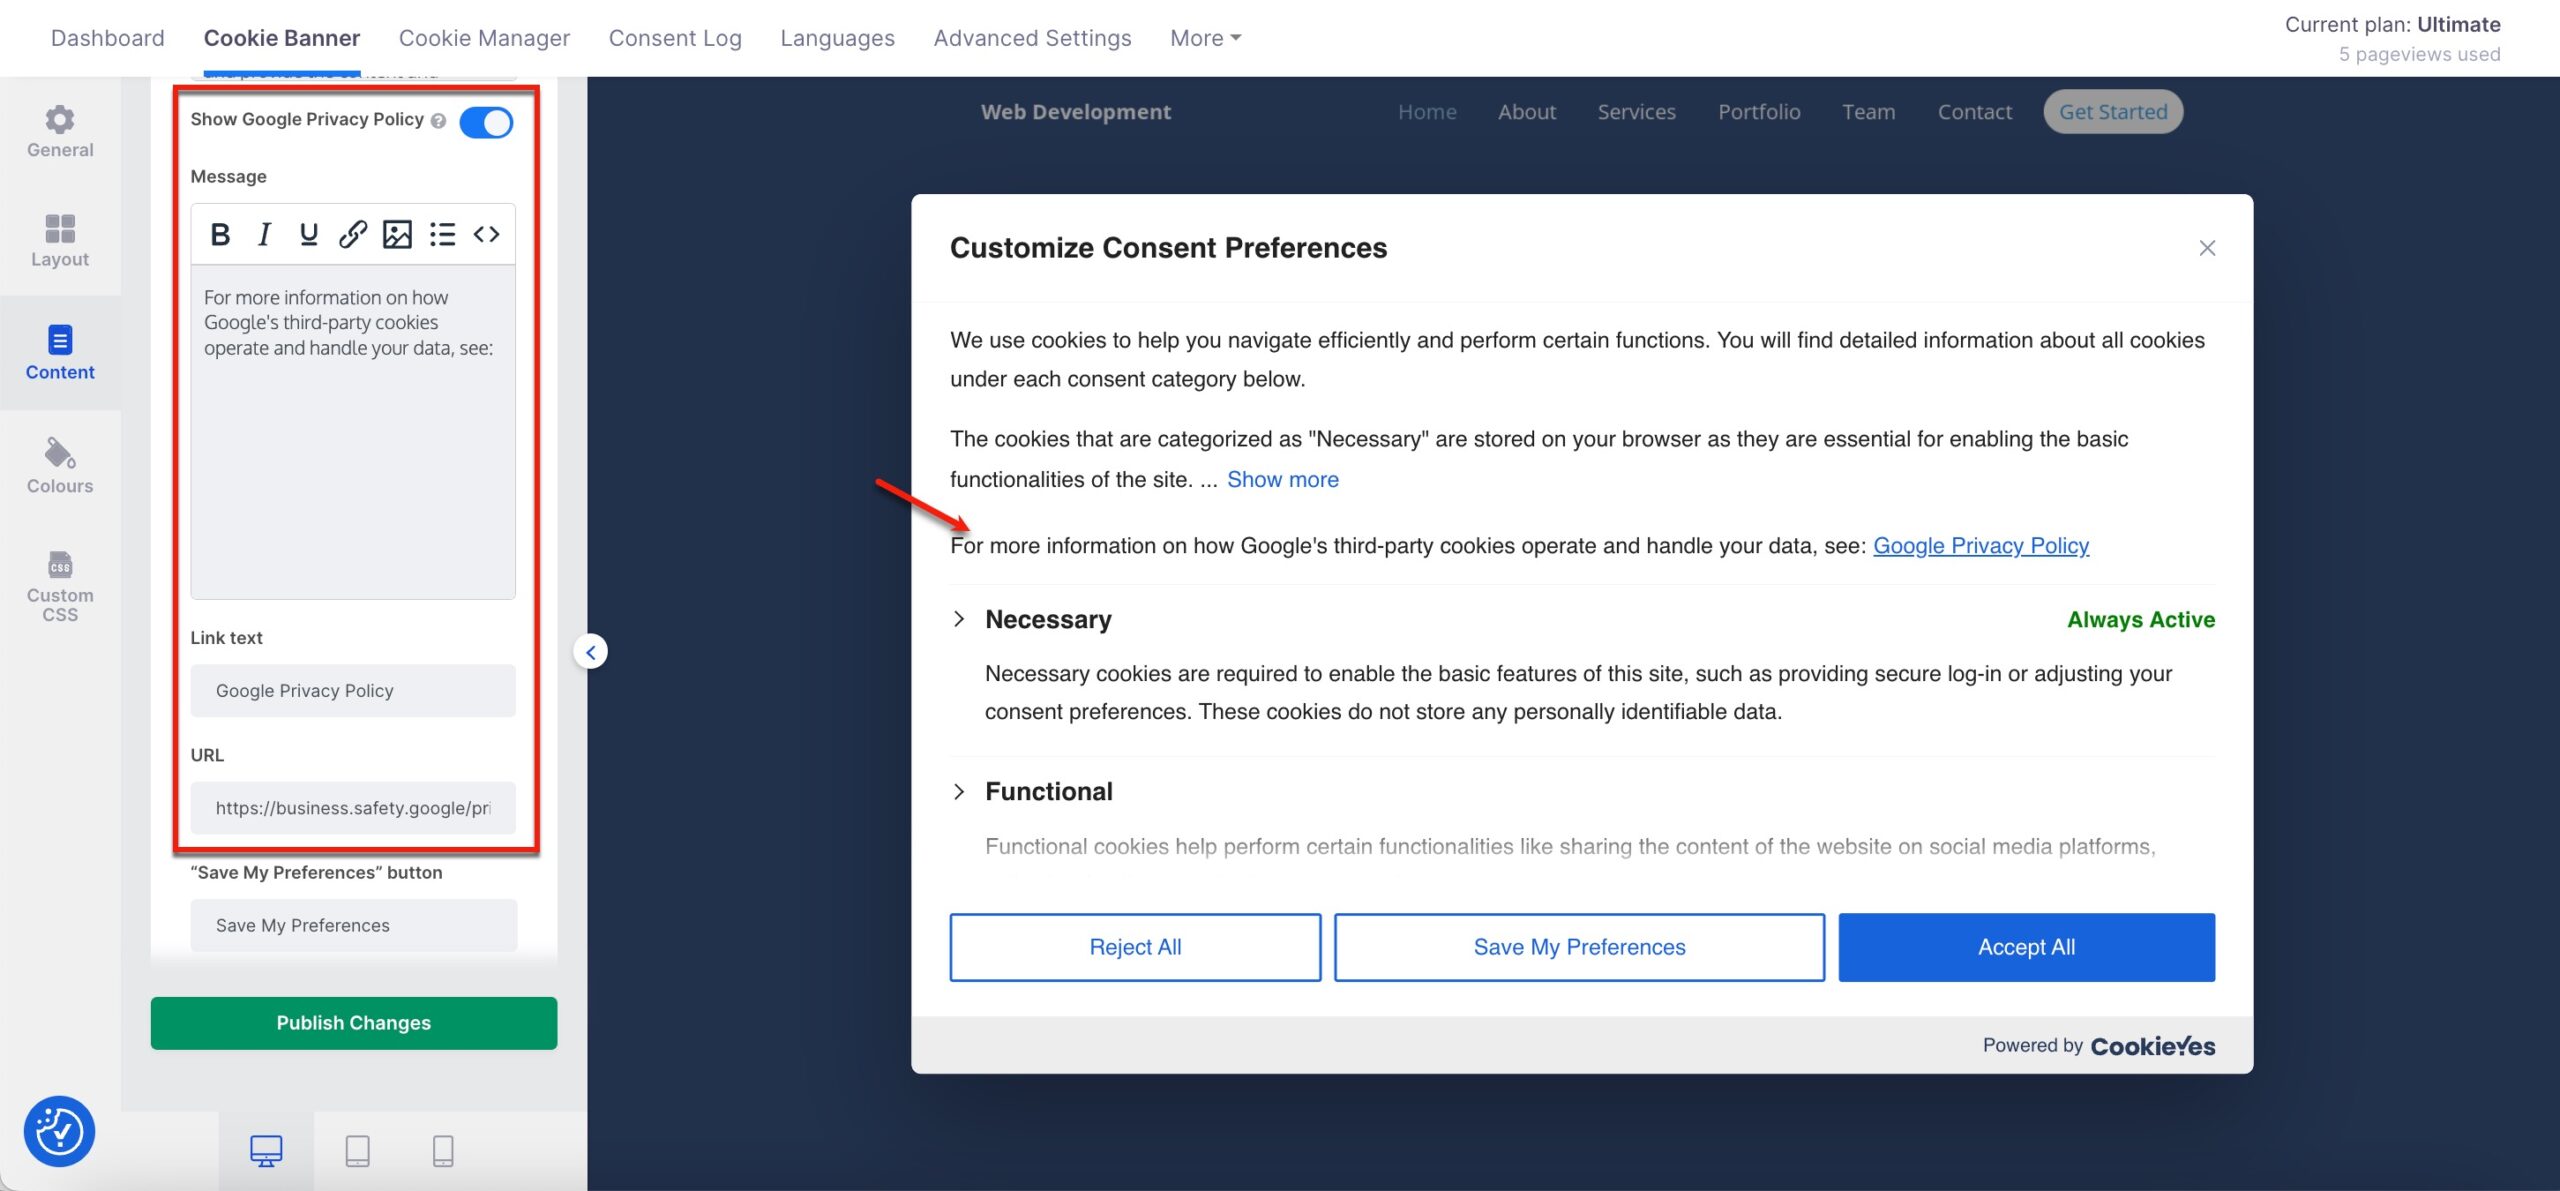
- You can also edit/change the content of the Message, Link Text and URL of the Google Privacy Policy.
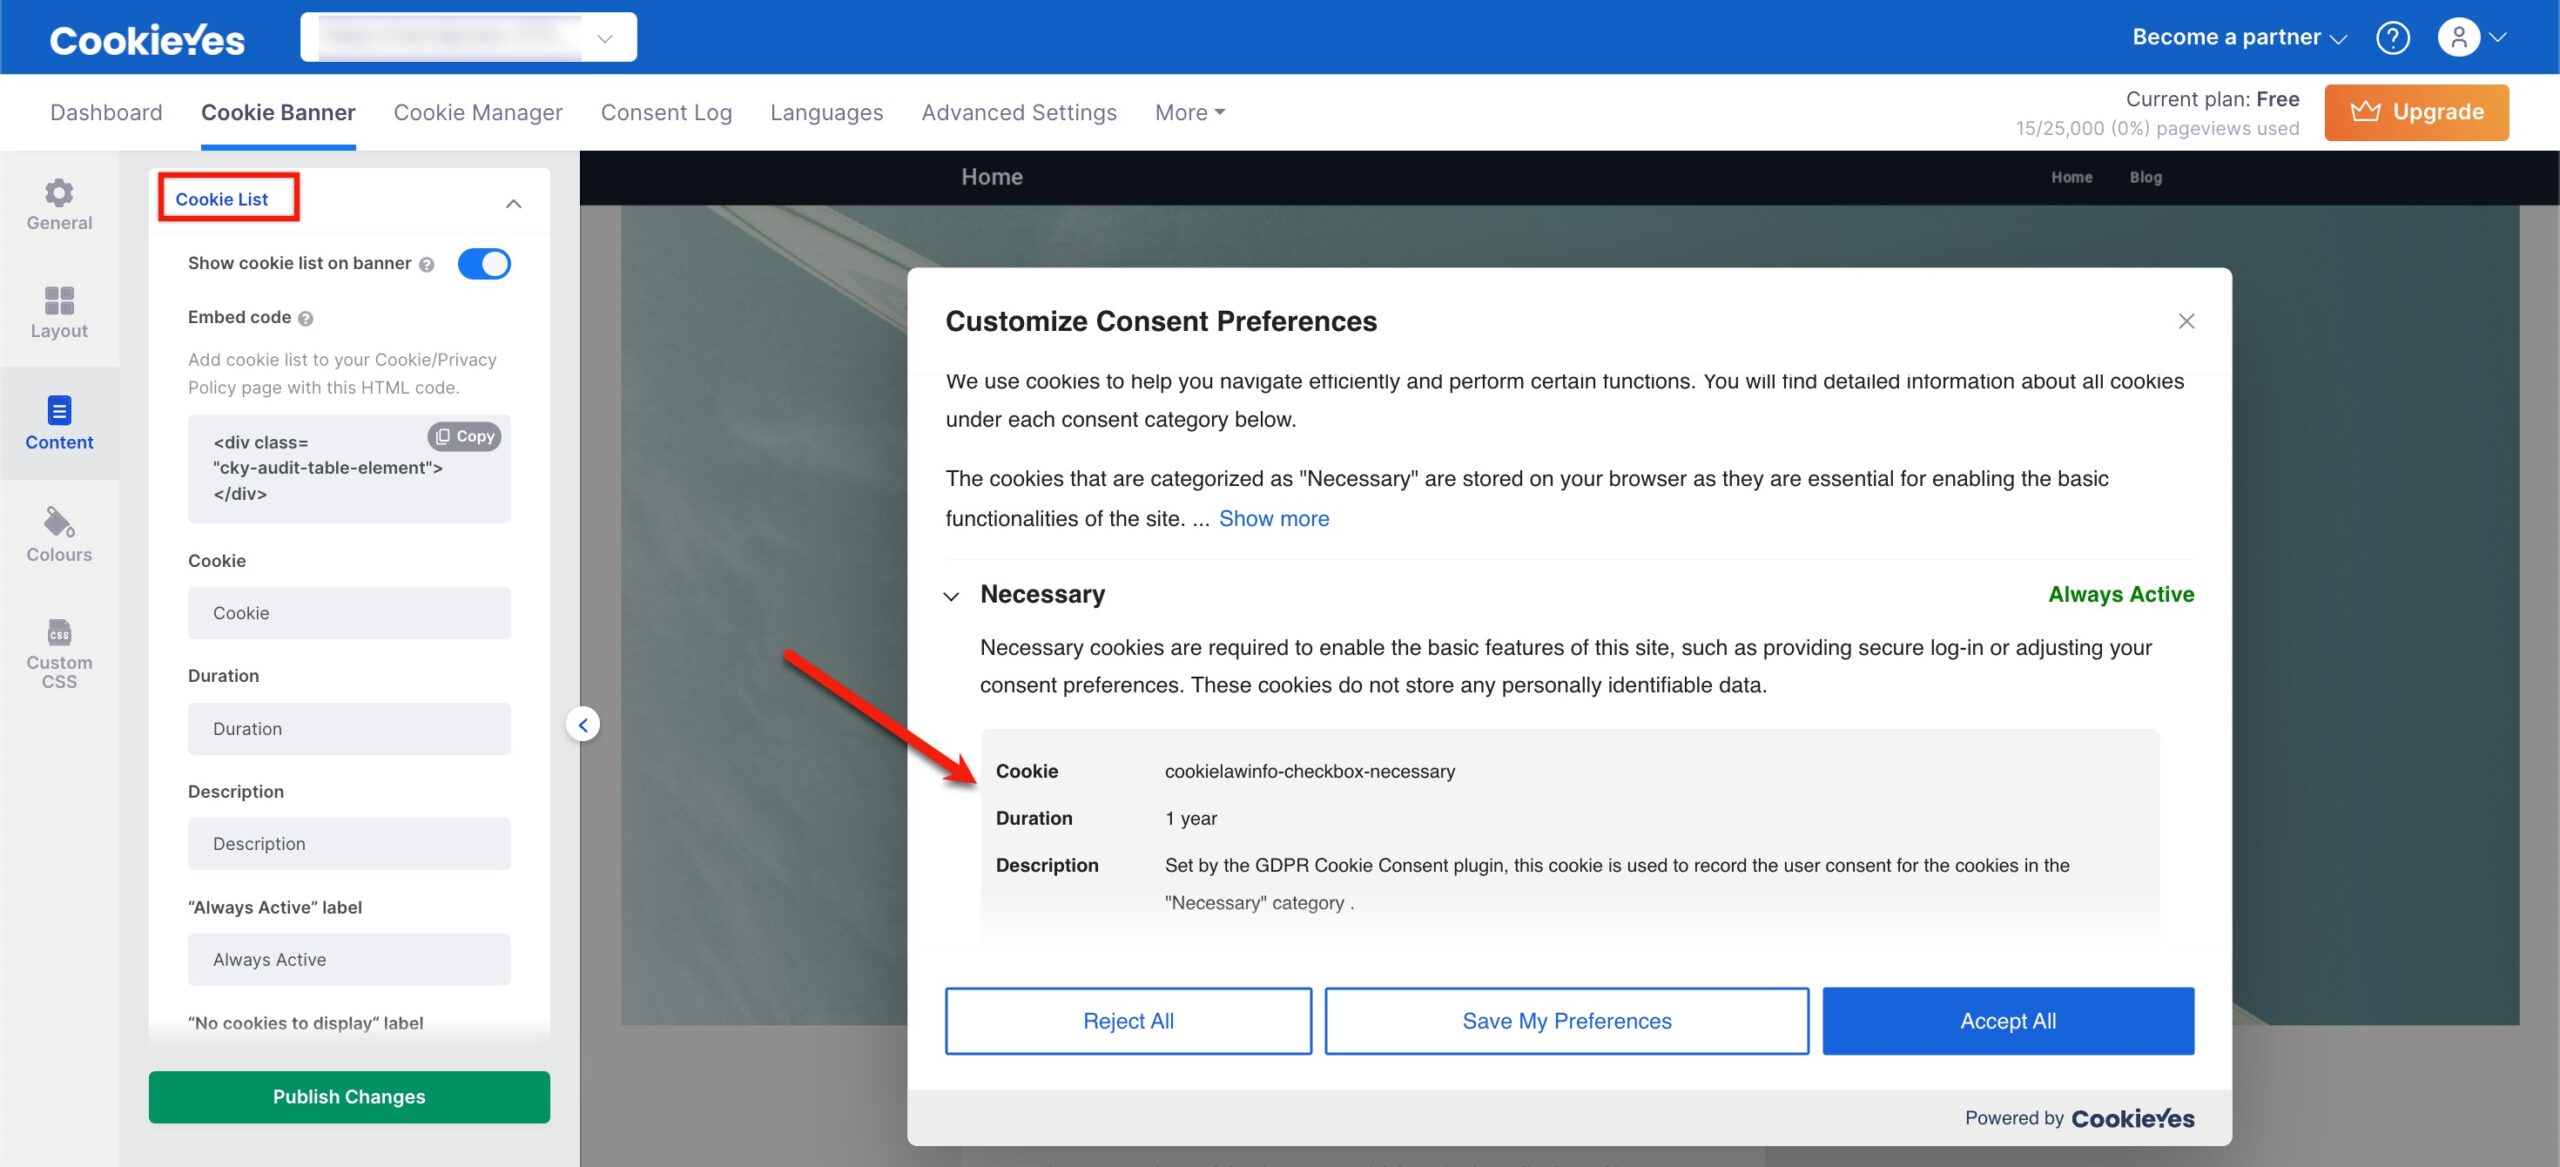
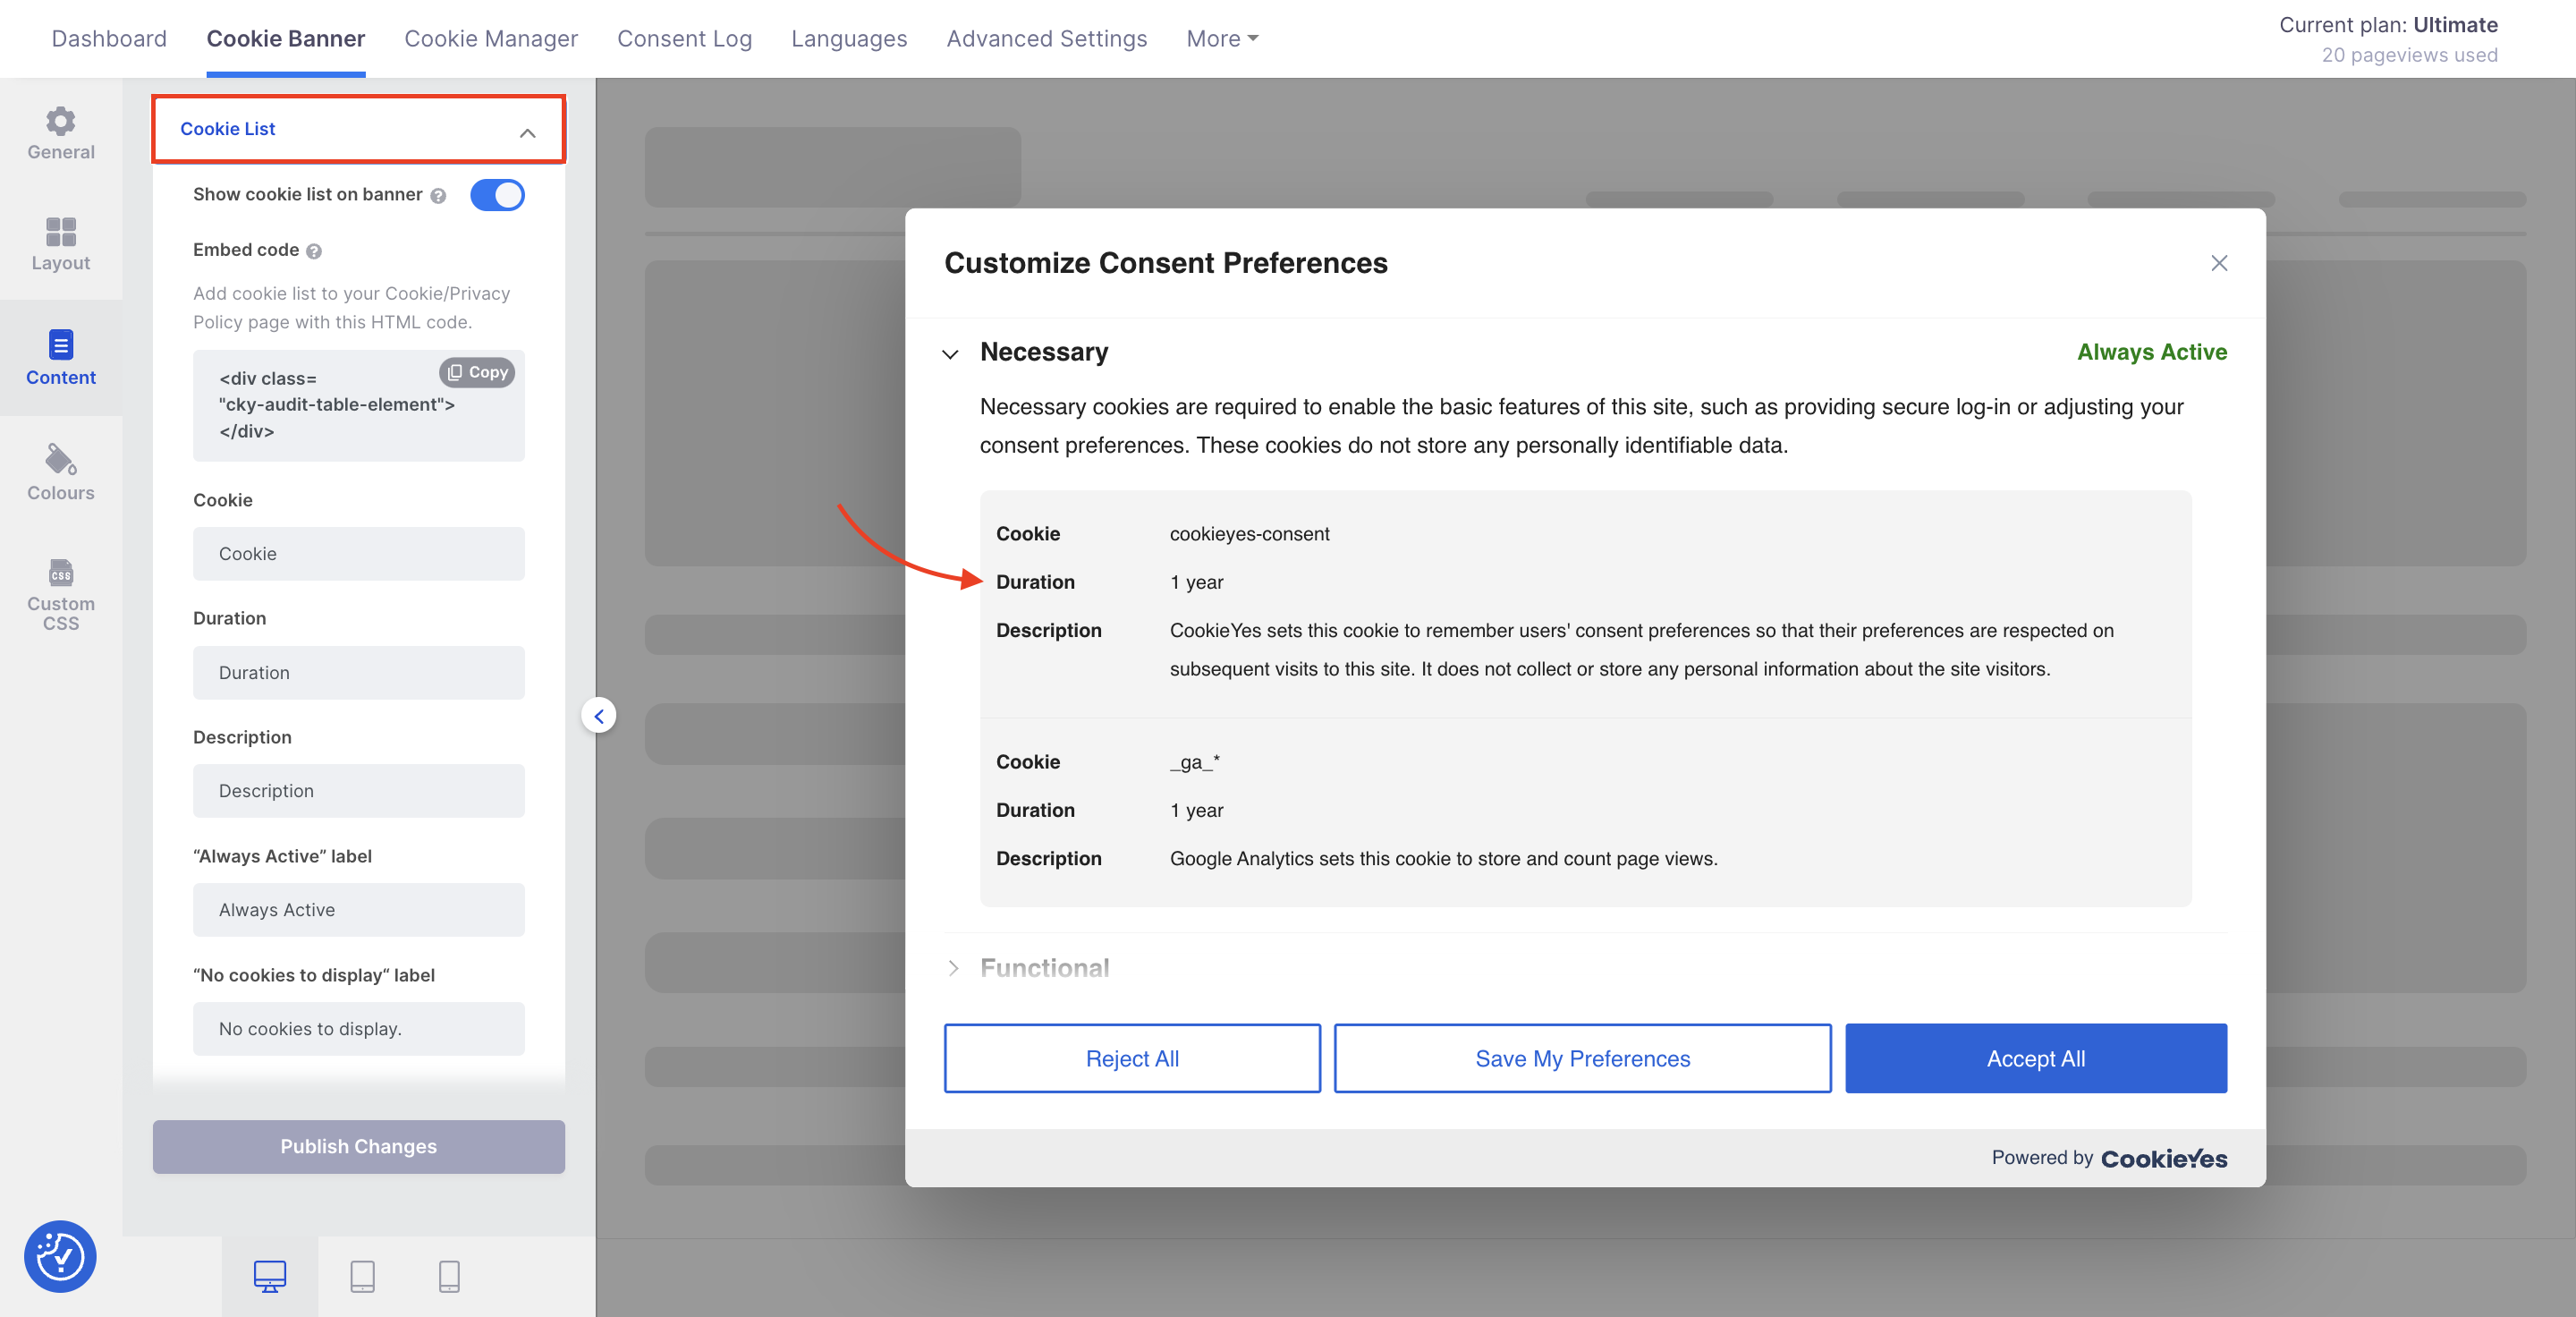
- To edit the content of the cookie list displayed in the second layer of your banner, select Cookie List and enable Show cookie list.
- You can also edit headings within the list for – Cookie, Duration, and Description.
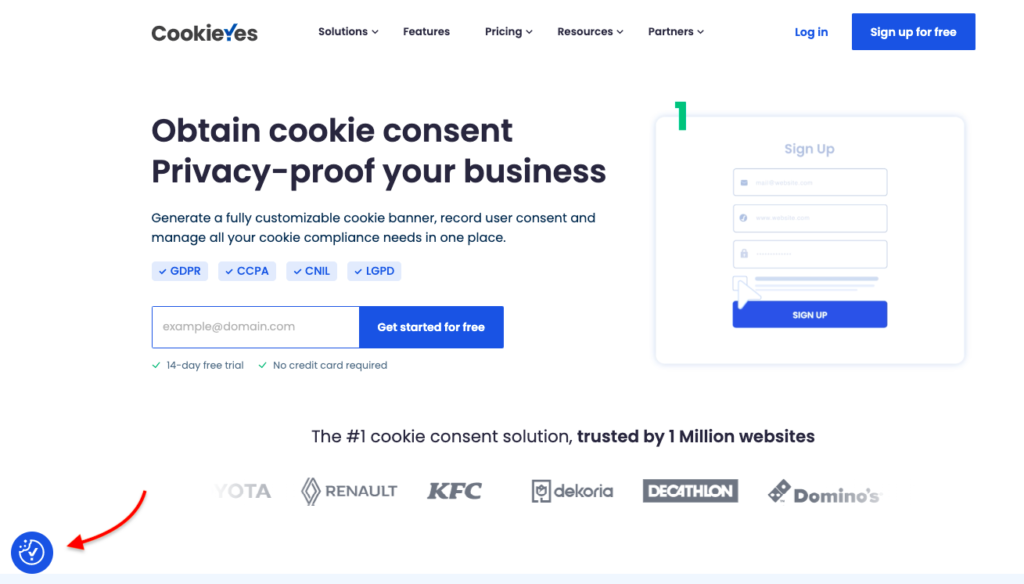
- Select the Revisit Consent option to edit the settings of the consent callback button.
- The Revisit Consent Button will enable your website users to change/withdraw consent easily.
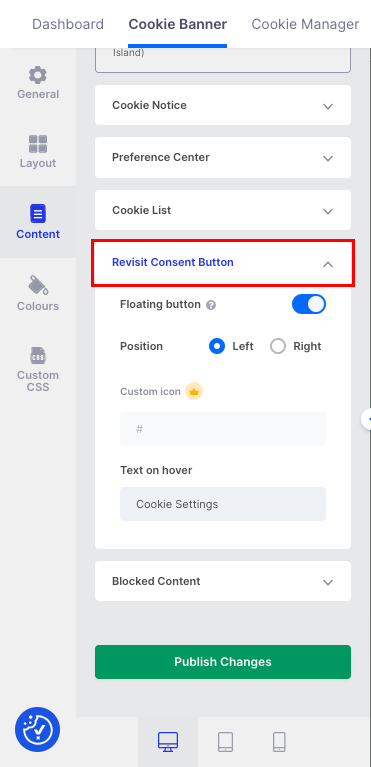
- You can change the position of the Floating Button, set Custom icon (Available only on the Ultimate plan) and also the Text on hover. Here’s what the button will look like.
- In the Blocked Content, you can edit the Alt Text for Blocked Content. This is the content that will be displayed over embedded videos (Youtube, Vimeo etc.) in case the website visitor has rejected certain cookies that are required for the video to play.
Select Colours on the left panel to customize the colour of the banner and all banner elements including background, buttons and text.
- Choose from the different colour themes for the banner: Light, Dark, Custom, and Recommended.
- Under Customize colors, you will find options to customize the colours of the Cookie Notice, Preference Center, Revisit Consent Button, and Alt Text for Blocked Content.
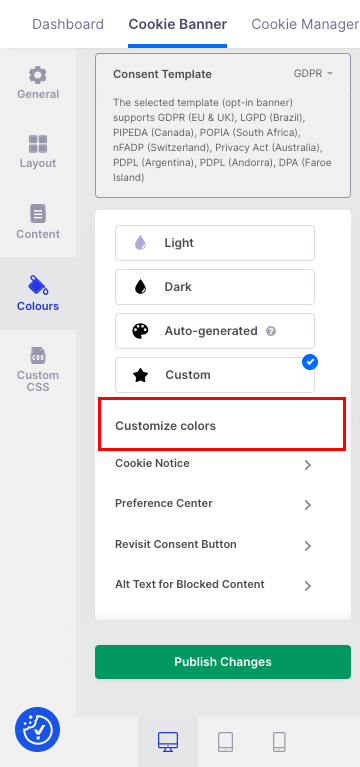
- You can customize the colour of the background, border, title, and text under each of these options.
Select Custom CSS on the left panel to add advanced CSS to personalize your banner style.
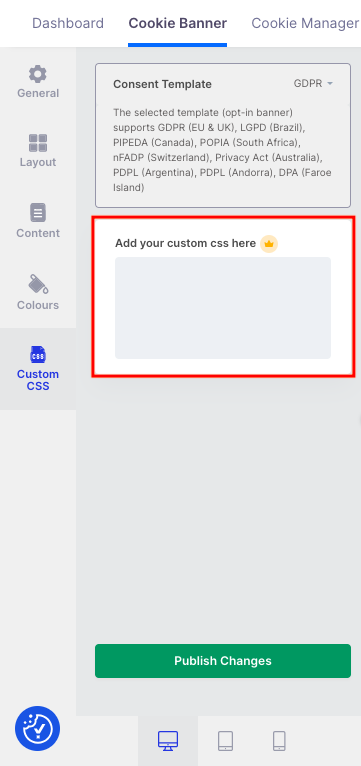
- Enter the custom CSS code in the given box (Available only on Basic, Pro, and Ultimate plan).
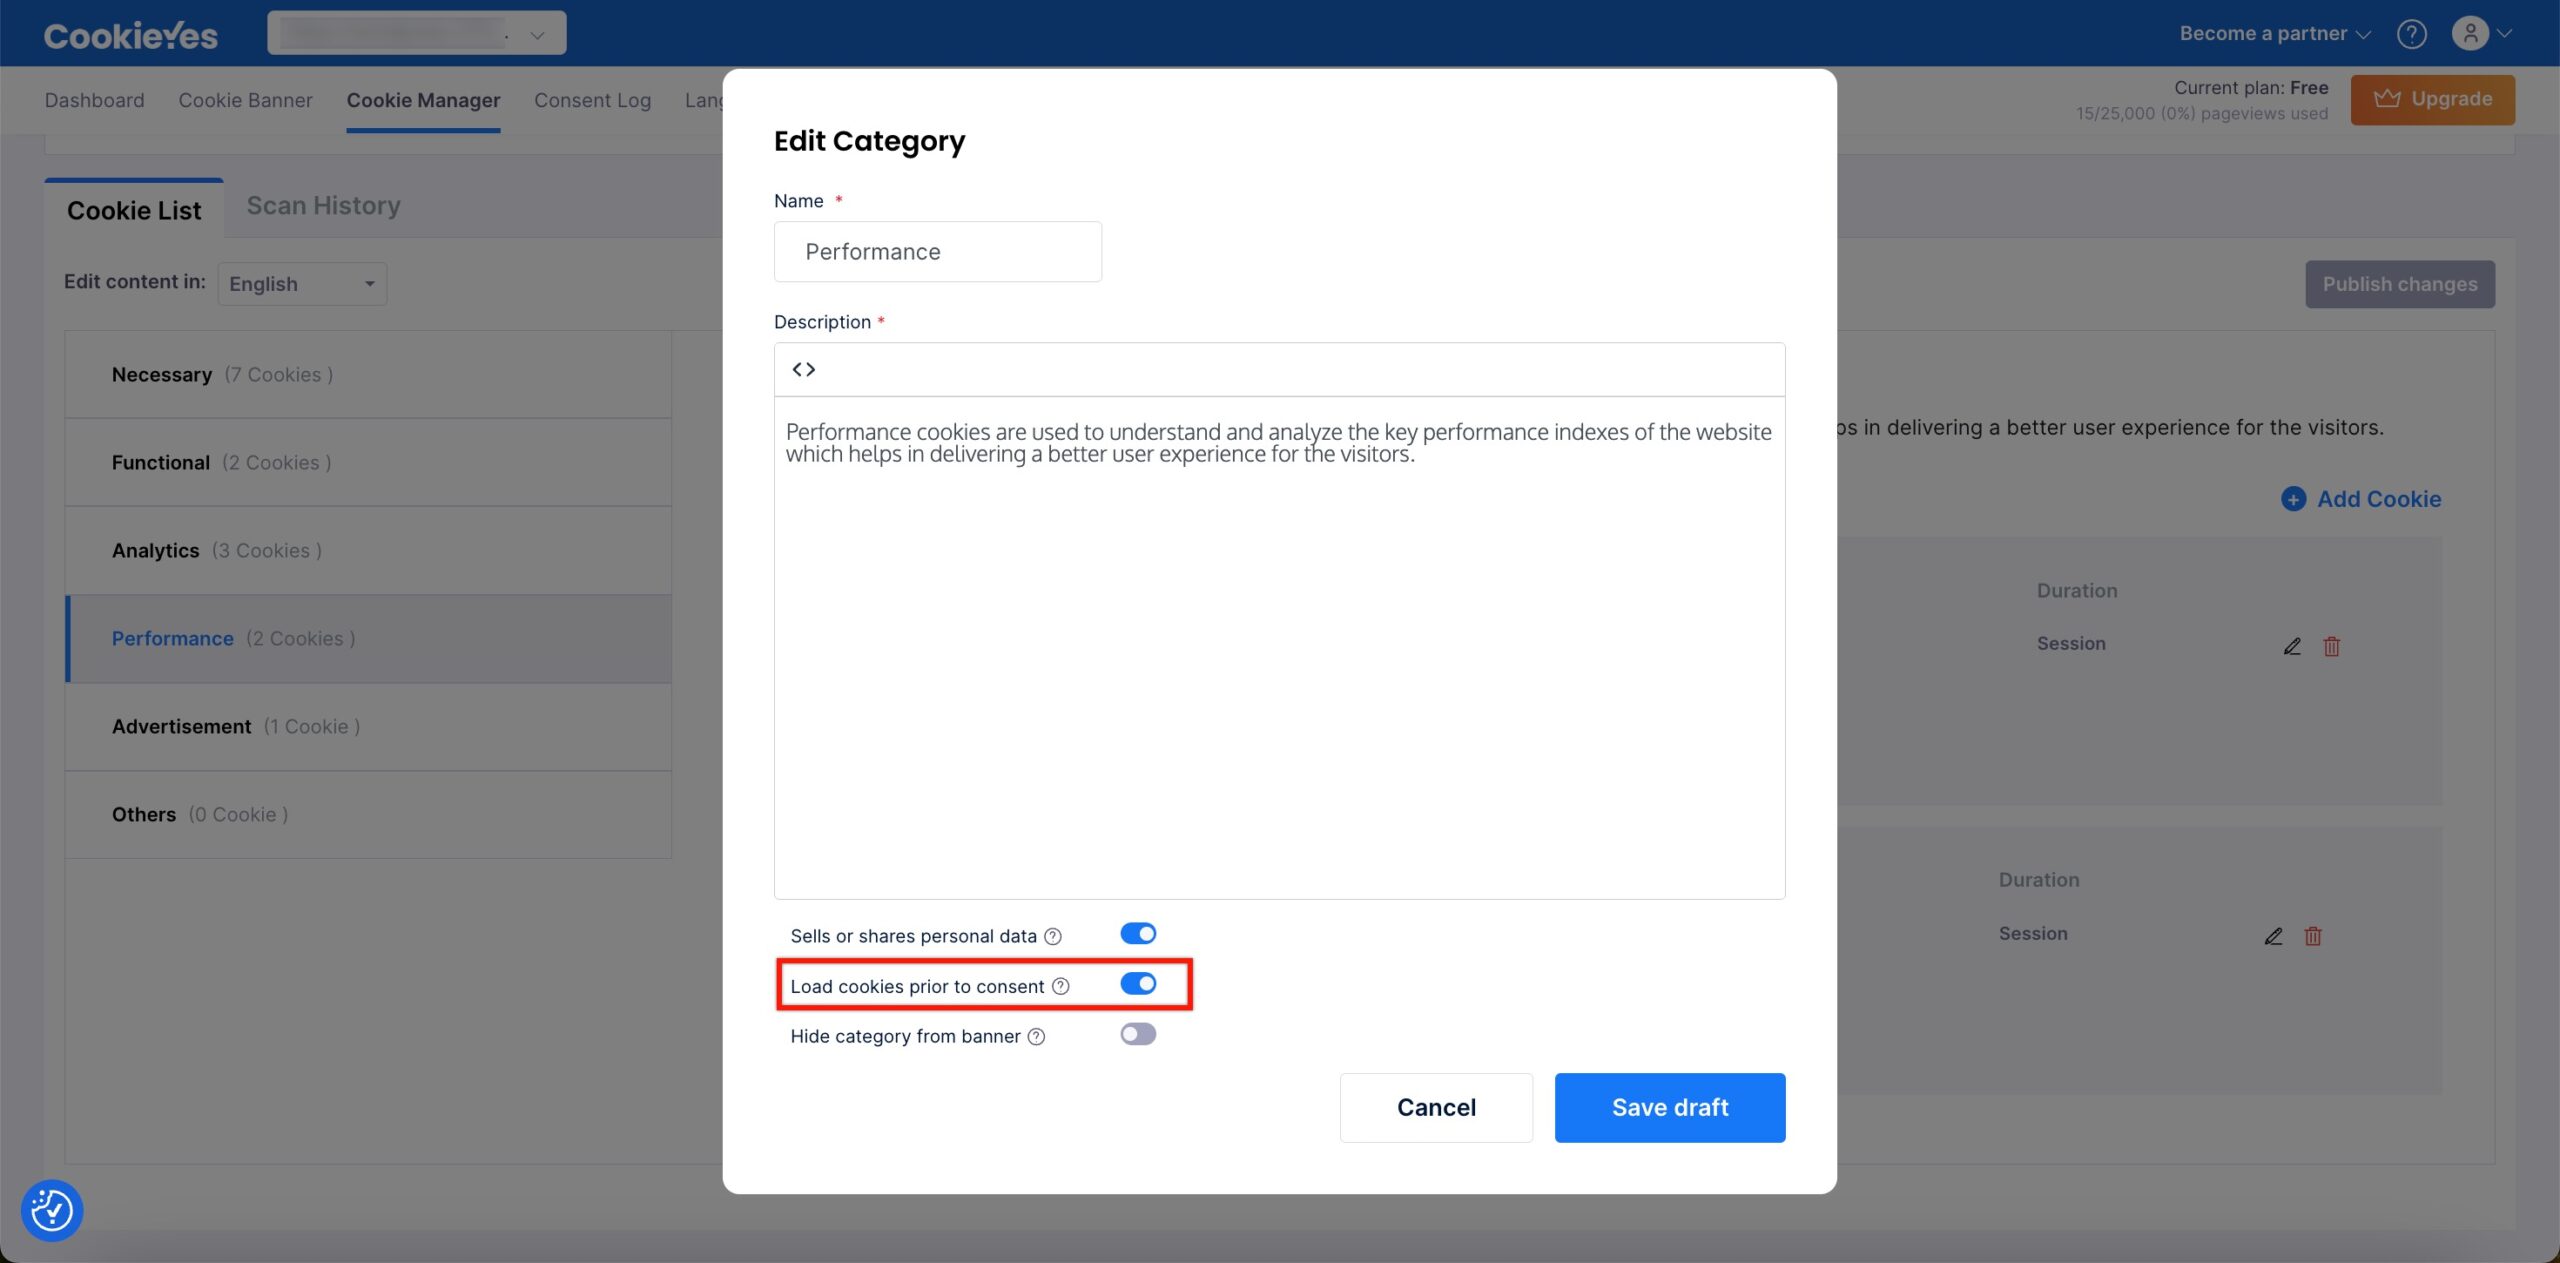
You can load cookies of each category on a user’s browser before receiving user consent. To enable this feature, follow the below steps:
- Navigate to the Cookie Manager > Cookie Category.
- Click the edit icon.
- Toggle the button (to the right) labelled “Load cookie before consent”.
- Click the Save Draft button to save the change made.
- Now, click the Publish Change button.
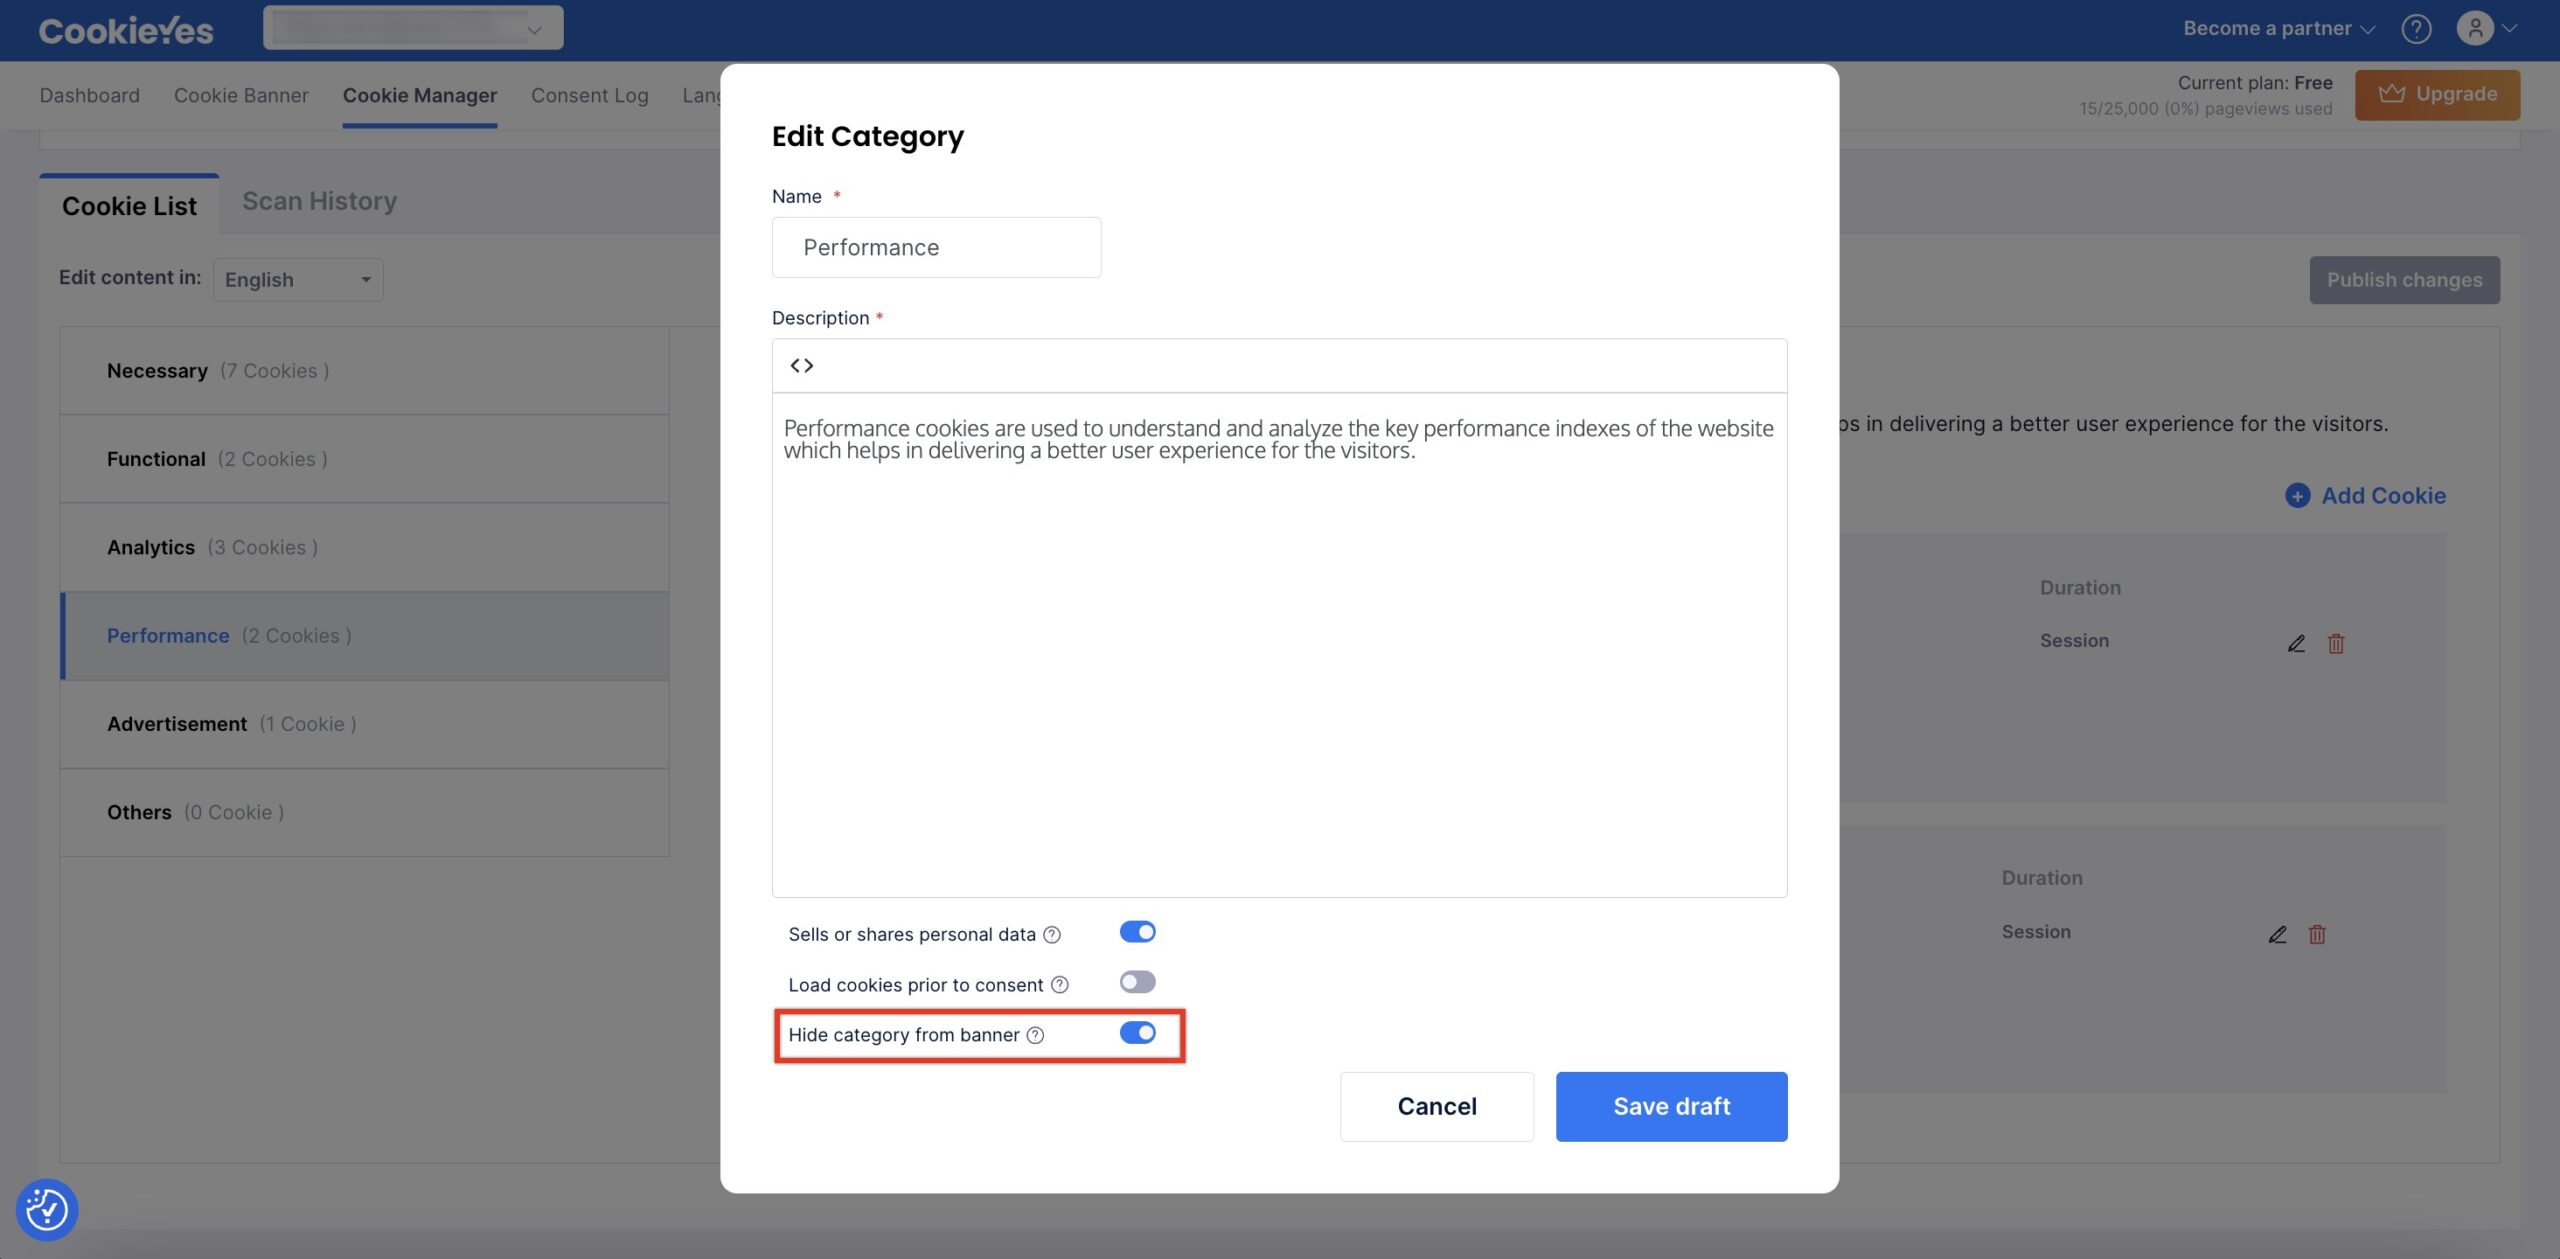
You can hide categories from the banner so that it does not appear on your banner’s second layer. To enable this feature, follow the below steps:
- Navigate to the Cookie Manager > Cookie Category.
- Click the edit icon.
- Toggle the button (to the right) labelled “Hide category from banner”.
- Click the Save Draft button to save the change made.
- Now, click the Publish Change button.
- After you have done the required customizations and enabled features, you can click on Save & Publish.
- Click Next Step to proceed to the next part of the setup.
Step 3. Copy cookie banner code
When you click Next Step, a popup appears that has the CookieYes installation code.
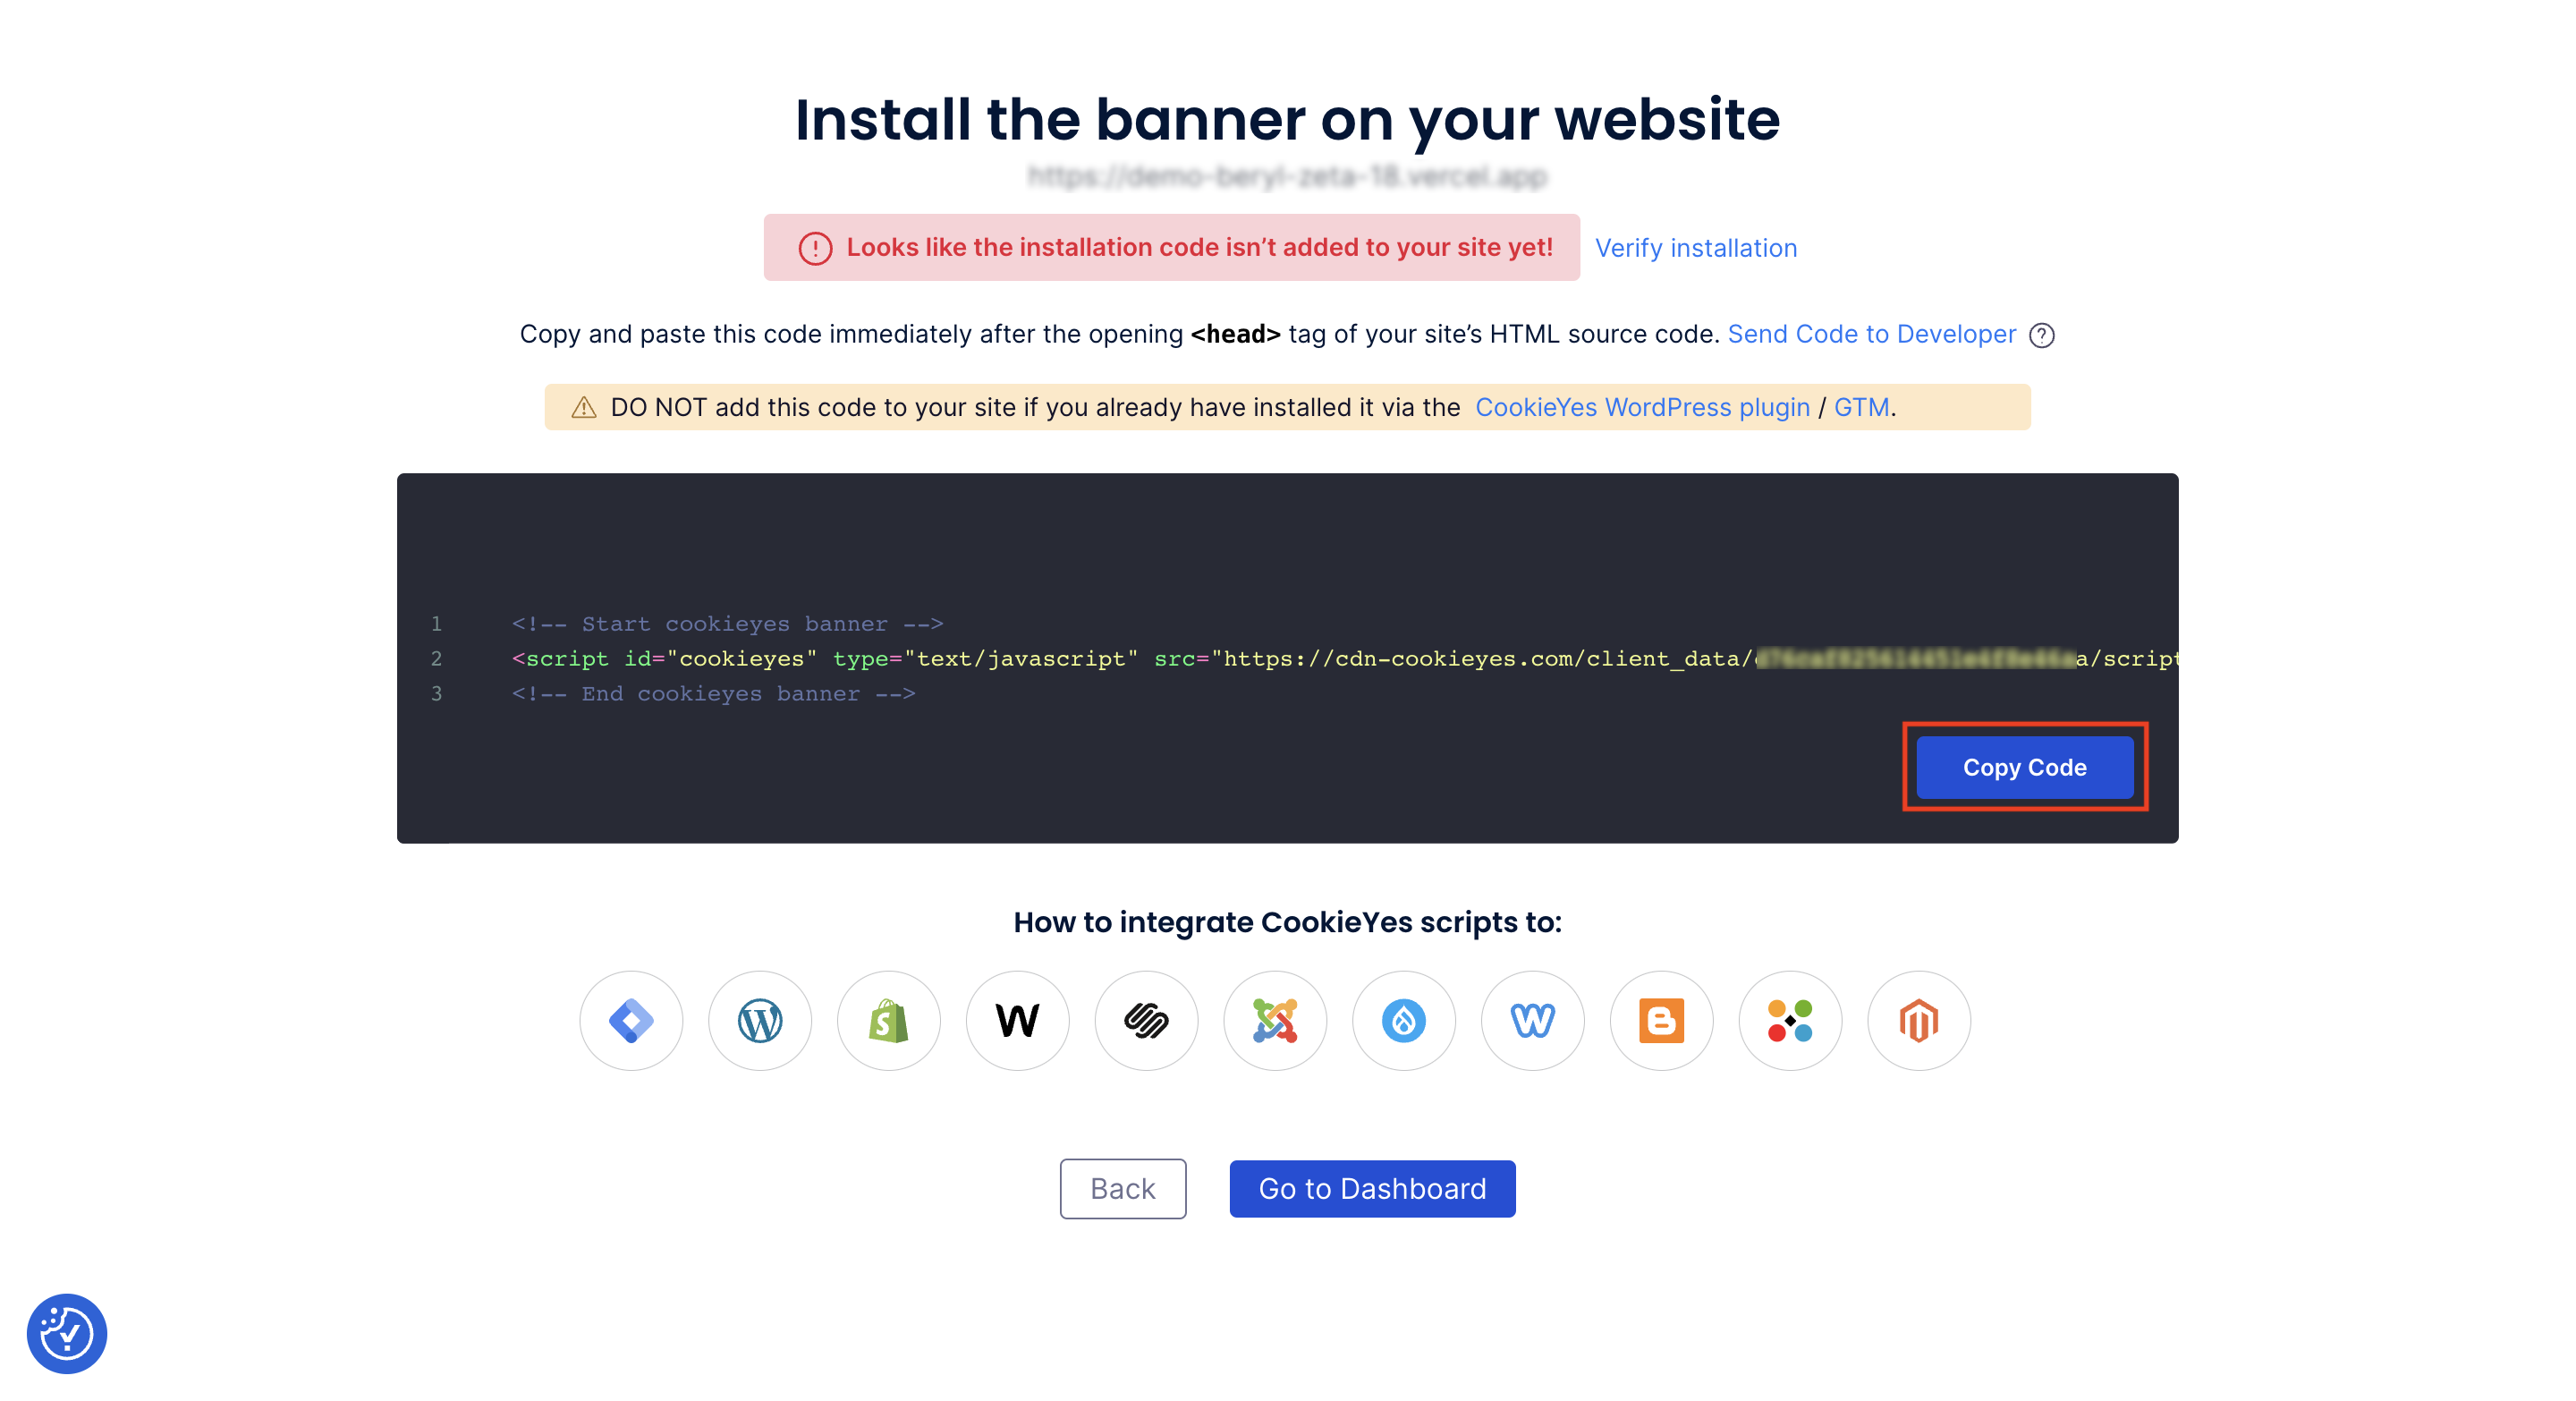
- Click on Copy Code to copy the CookieYes installation code to add it to your website.
Note: You can share the code with a developer or your team by clicking on Send code to Developer link. Enter the email address and then click on Send Instructions. The recipient will get the code and instructions via email.
Next Step. Install cookie banner on your website
- Now you have to paste the CookieYes installation code on your website.
- Select the CMS or website builders listed below to get the step-by-step instructions to add the code to your website.
Note: Don’t see your CMS in the list?
CookieYes can work on all major CMS platforms and custom-coded sites. Add the installation code between the <head> and </head> tags of your website’s source code before any other script. Save changes, refresh your site and check if the banner is active on your website. If you are facing any issues, please get in touch with technical support.