How to Add Cookie Banner on Blogger Website
Welcome to CookieYes! This guide will walk you through how you can install a cookie banner on your Blogger website. A cookie banner will help your website stay compliant with privacy laws like the GDPR and ePrivacy Directive.
- To begin with, Sign up on CookieYes for free
- Then, complete the steps in How to create a cookie banner
In case you have already signed up on CookieYes, without taking any action on the initial setup screens, head to the CookieYes Dashboard.
- To customise the cookie banner, select the Cookie Banner from the top navigation panel.
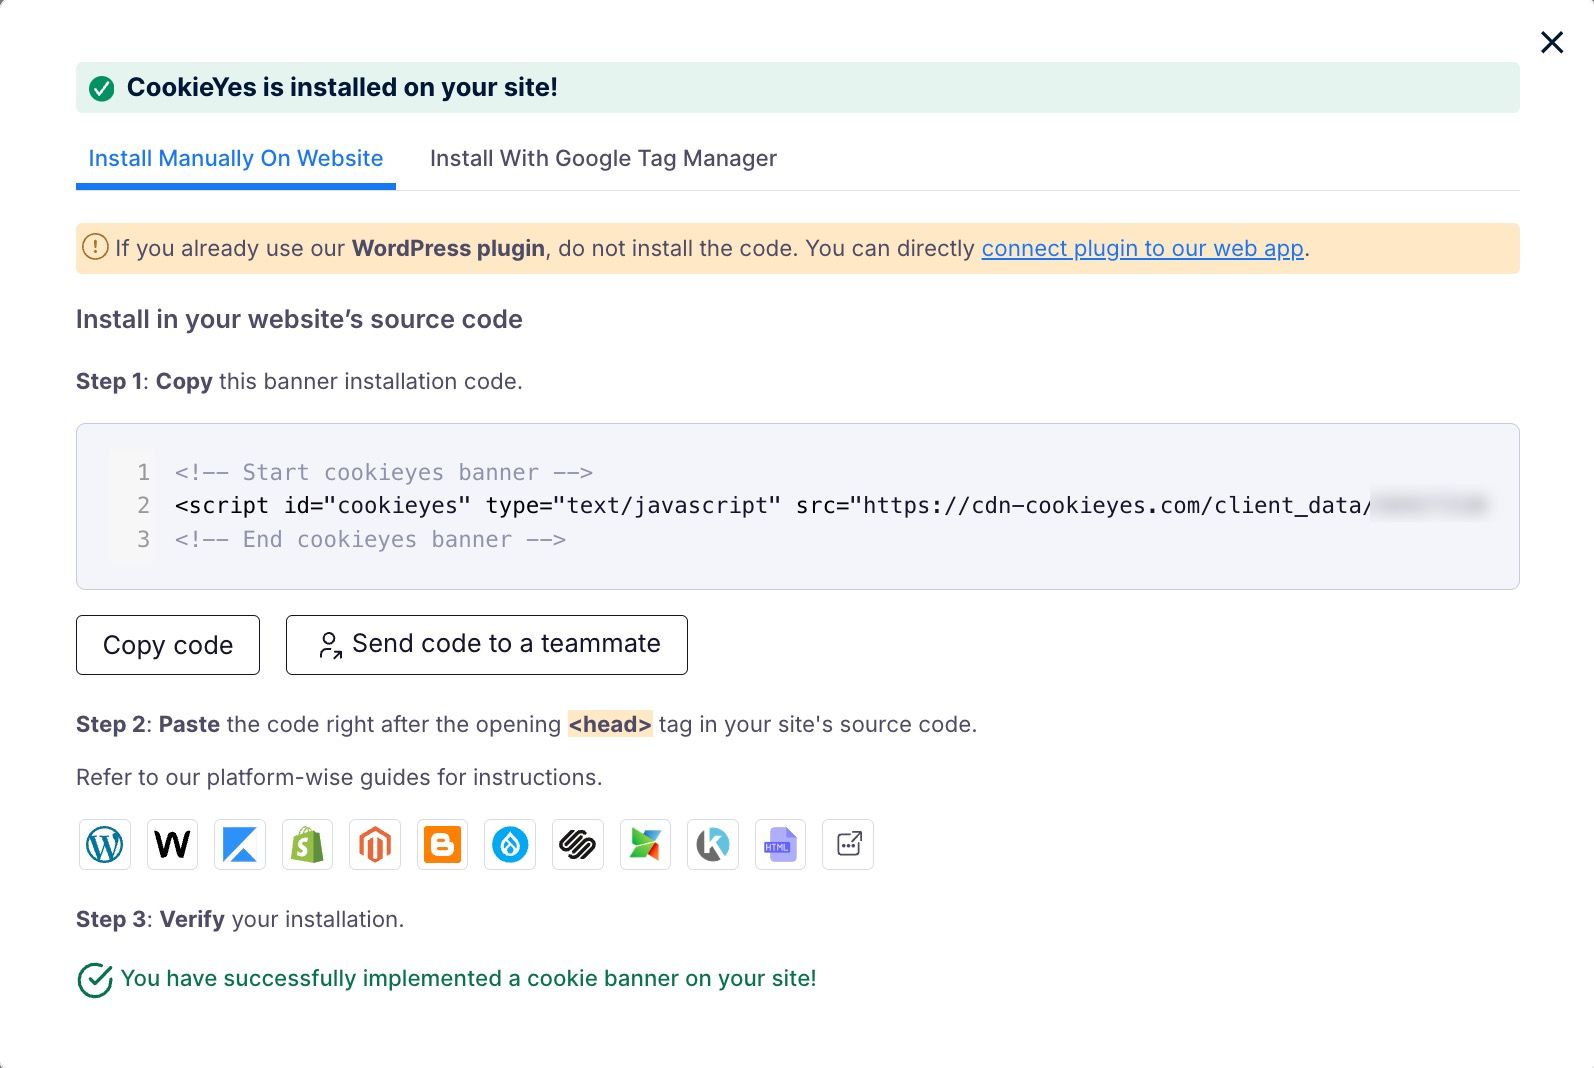
- To get the banner installation code, head to Site Settings and click on the Get installation code button on the right side of the URL.
- Now click on Copy code button to get the CookieYes installation code.
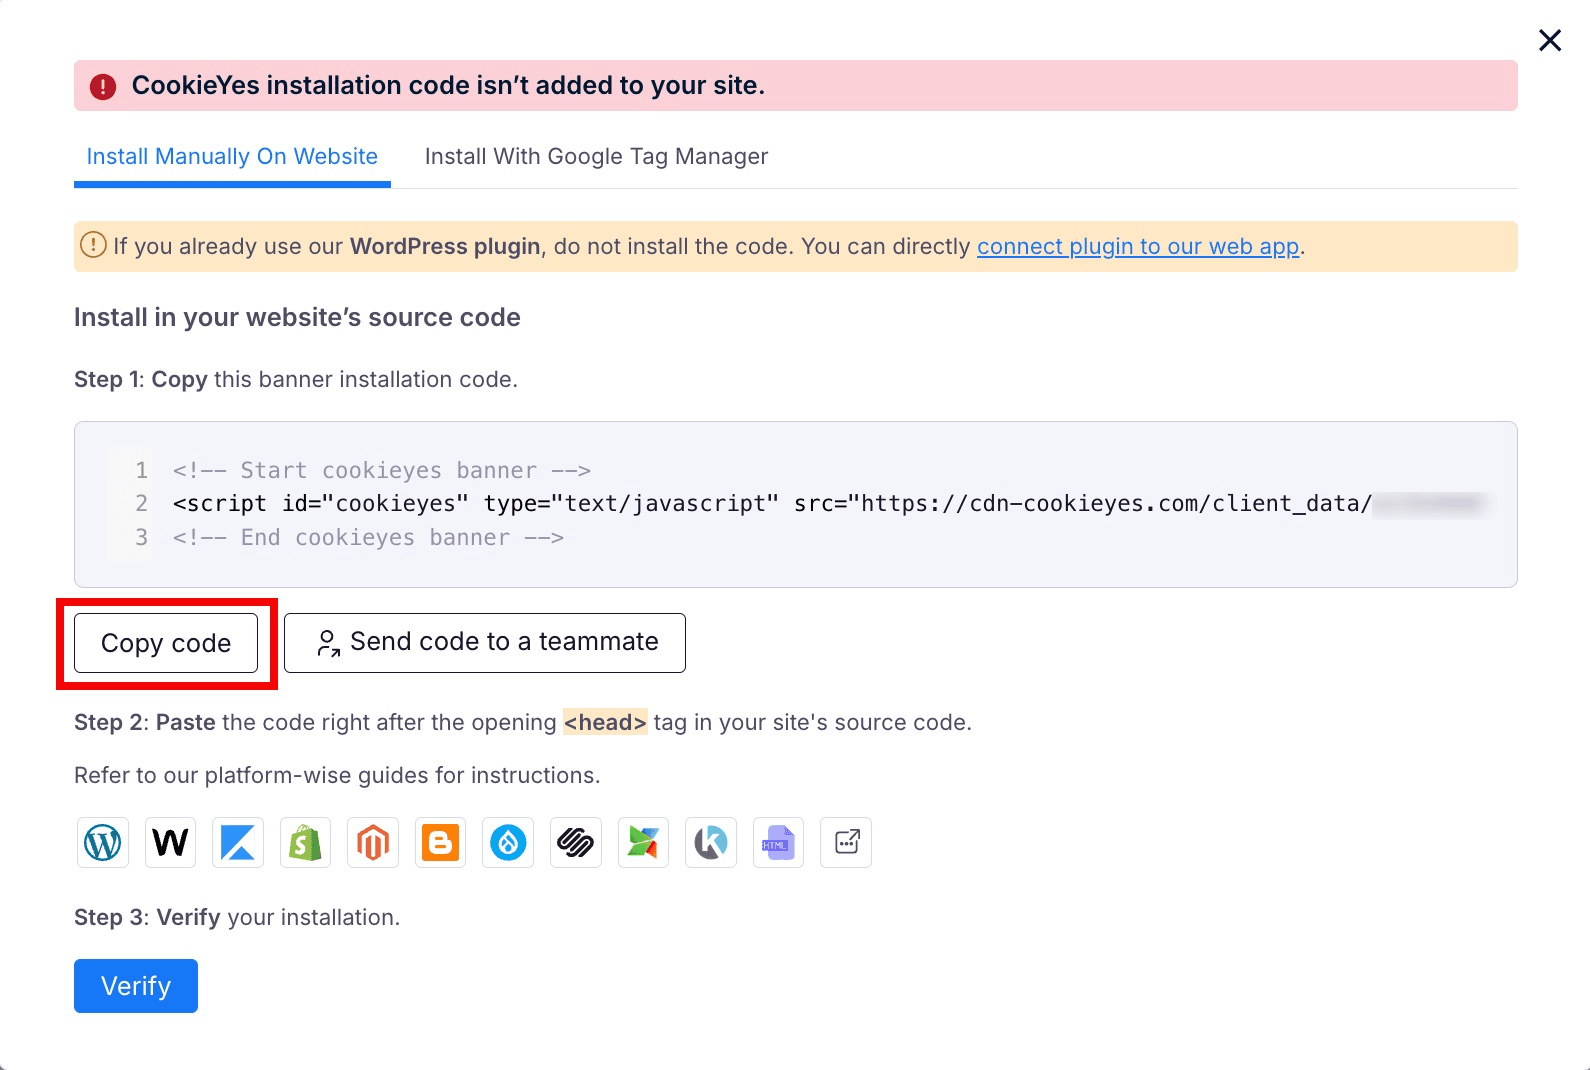
You can share the code with a developer or your team by clicking on Send code to a teammate button. Enter the email address and then click on Send email. The recipient will get the code and instructions via email.
Steps to add a cookie consent banner on Blogger
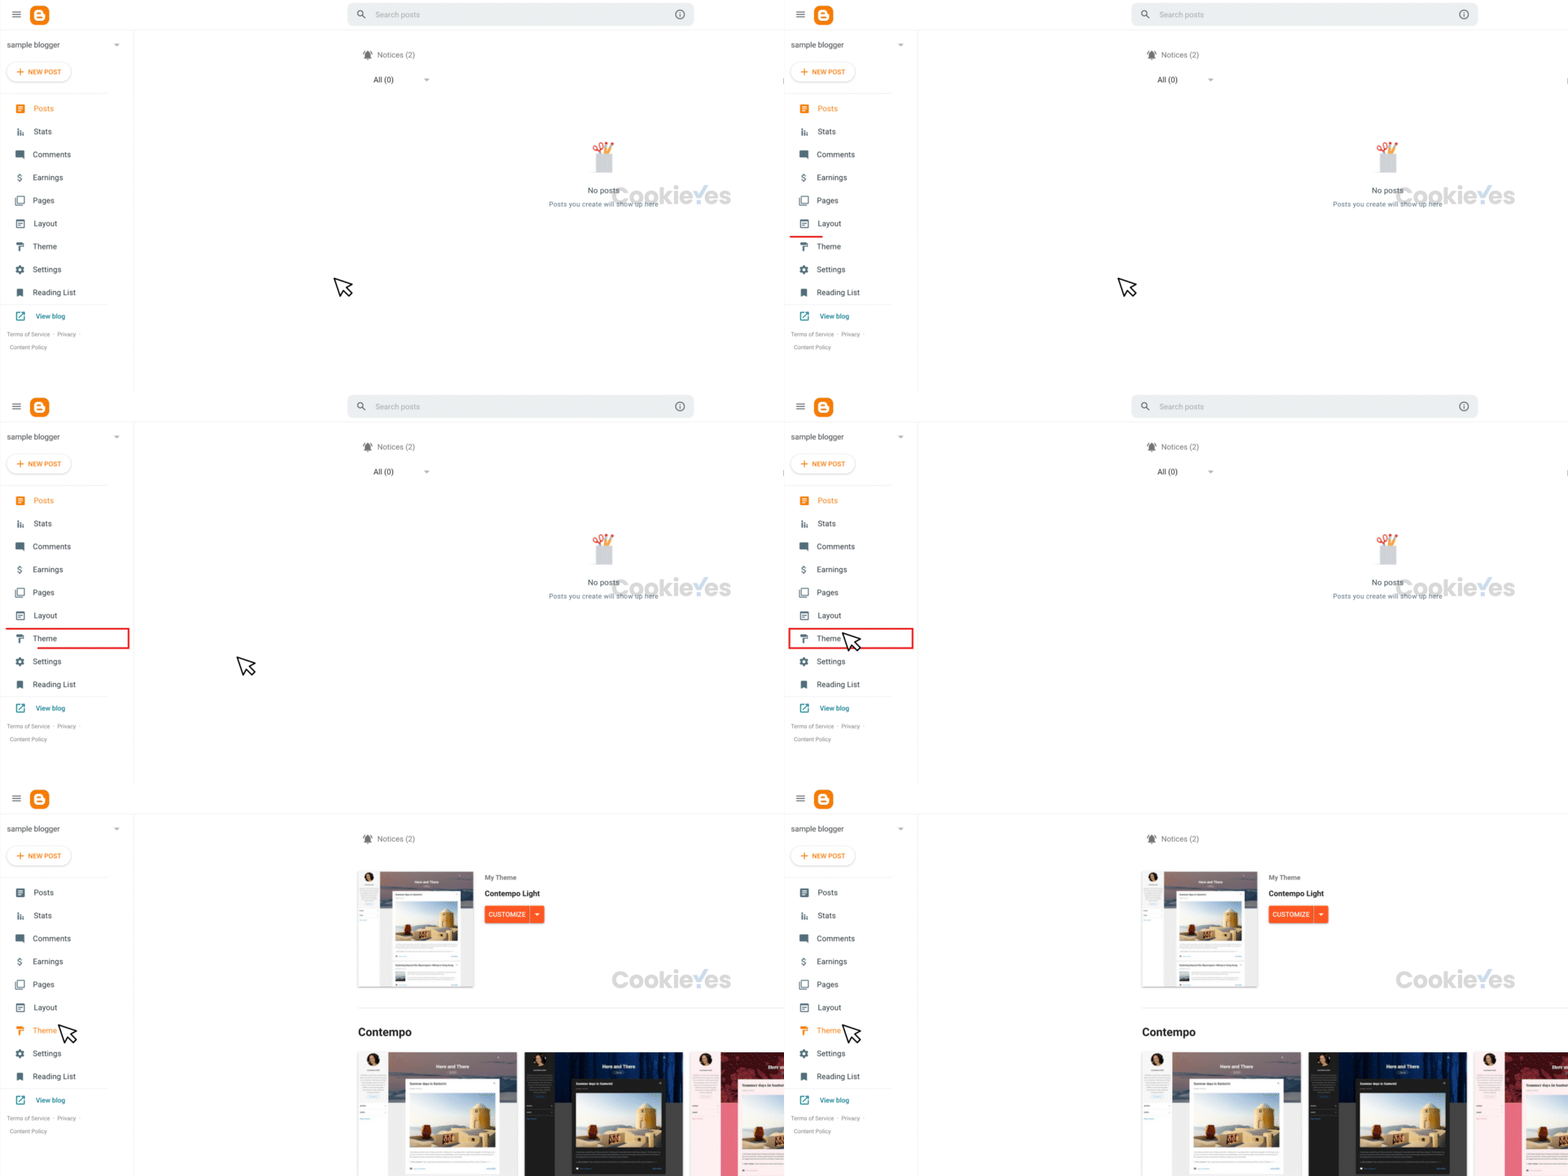
Step 1. Head to your Blogger Dashboard and select Theme.
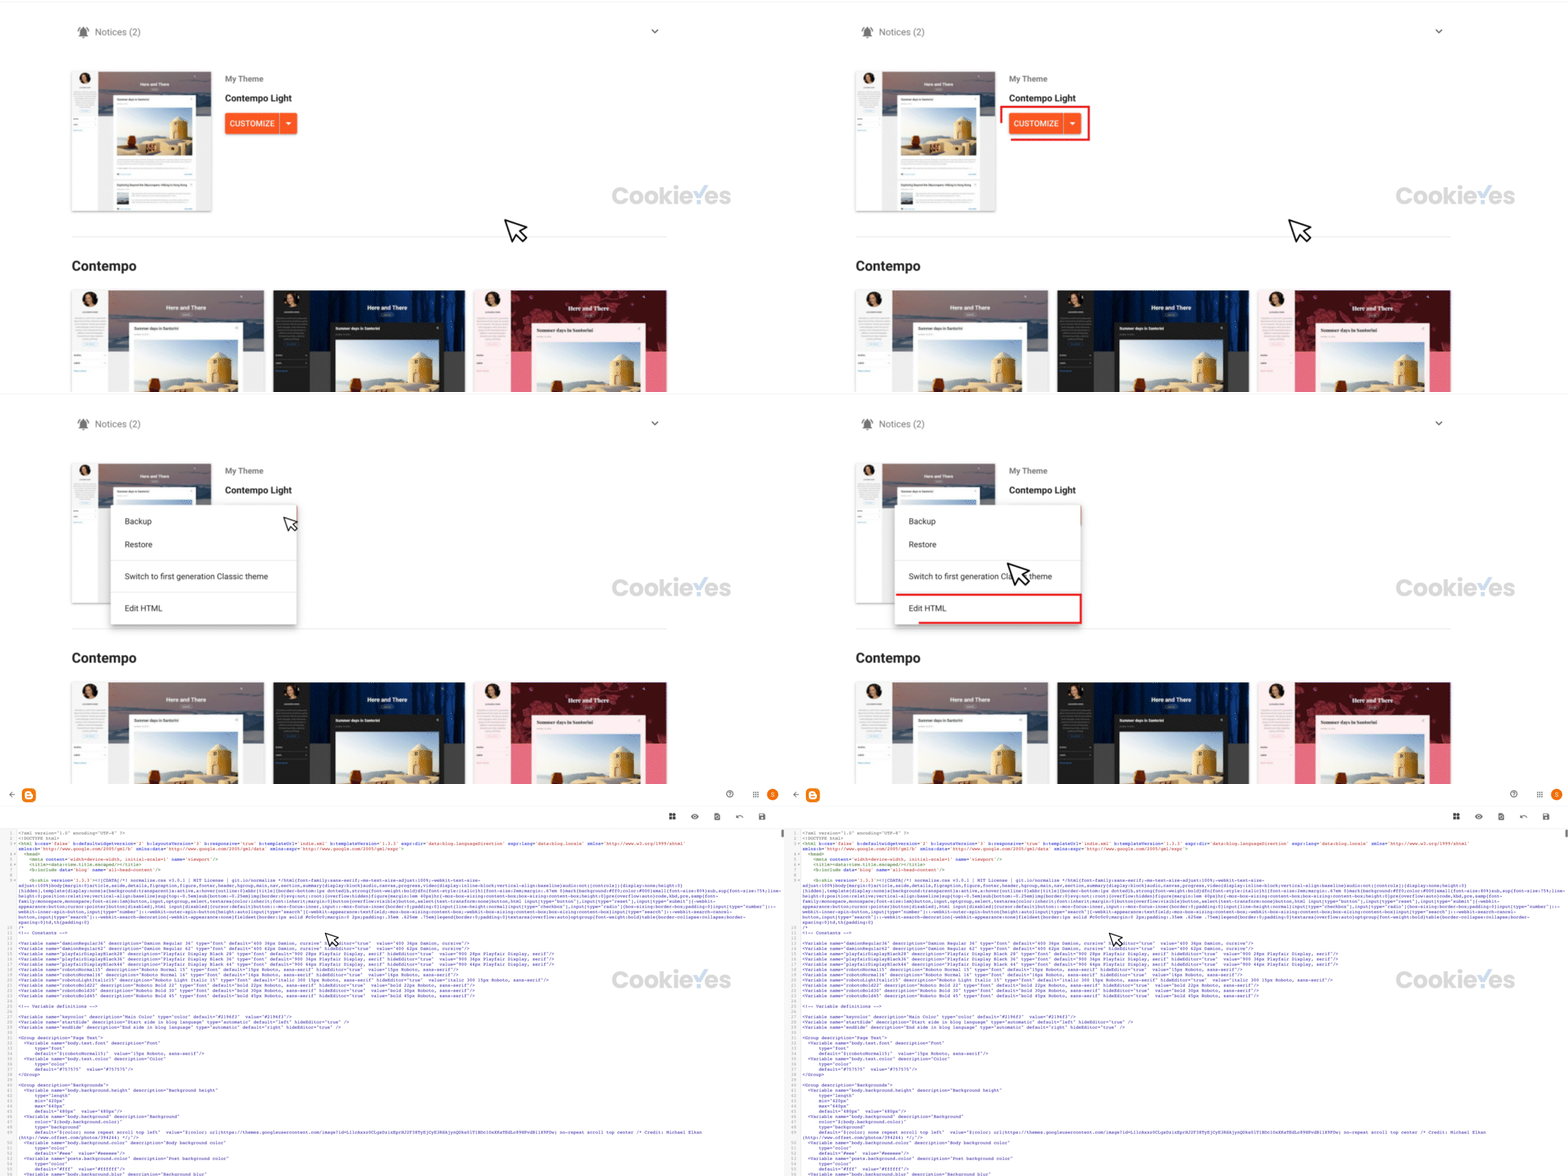
Step 2. In the theme section, click on the Customise dropdown and select Edit HTML.
Step 3. Paste the code between the <head> </head> tags of your website before any other scripts and click on the Save icon in the upper right corner.
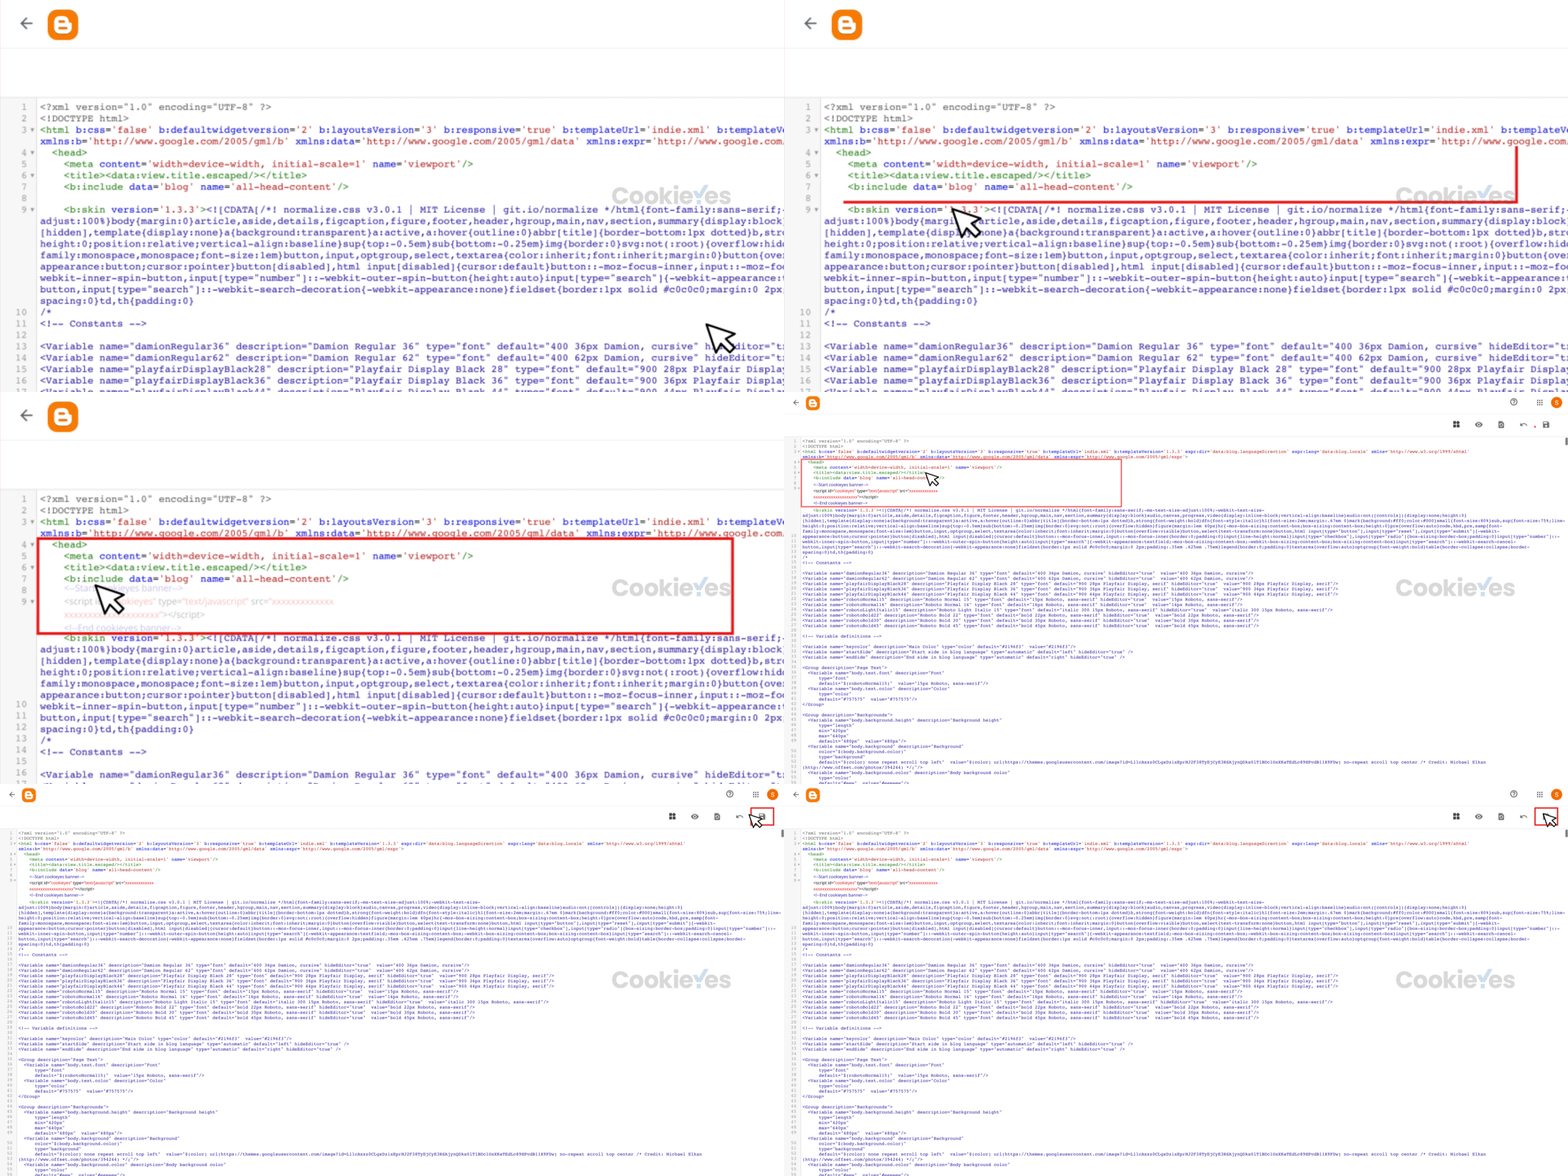
If you add the CookieYes installation code after other custom scripts, the auto-blocking function may not work as intended.
Step 4. Head back to the setup screen and click on the Verify button. You will see a success message that your banner is active.
The cookie consent banner will be live on your Blogger website! Now, you can complete your website scanning from the CookieYes Dashboard and explore further customizations and features.
Still have questions or facing issues? Contact technical support