How to Install and Setup CookieYes WordPress Plugin
Last updated on May 28, 2025
On this page
Overview
Get started
Setup options
There are two methods to configure and use the CookieYes plugin:
Method 1: Use the plugin by connecting to the CookieYes web app
This method is the recommended setup option if you don’t bother connecting to an external service for better features and faster updates.
Method 2: WordPress plugin only
This method is ideal if you prefer to keep everything inside the WordPress dashboard but may limit some of the features only available on the CookieYes Web app.
Use the plugin by connecting to the CookieYes Web app
Step 1:
Connecting to the CookieYes web app.
To connect a new account
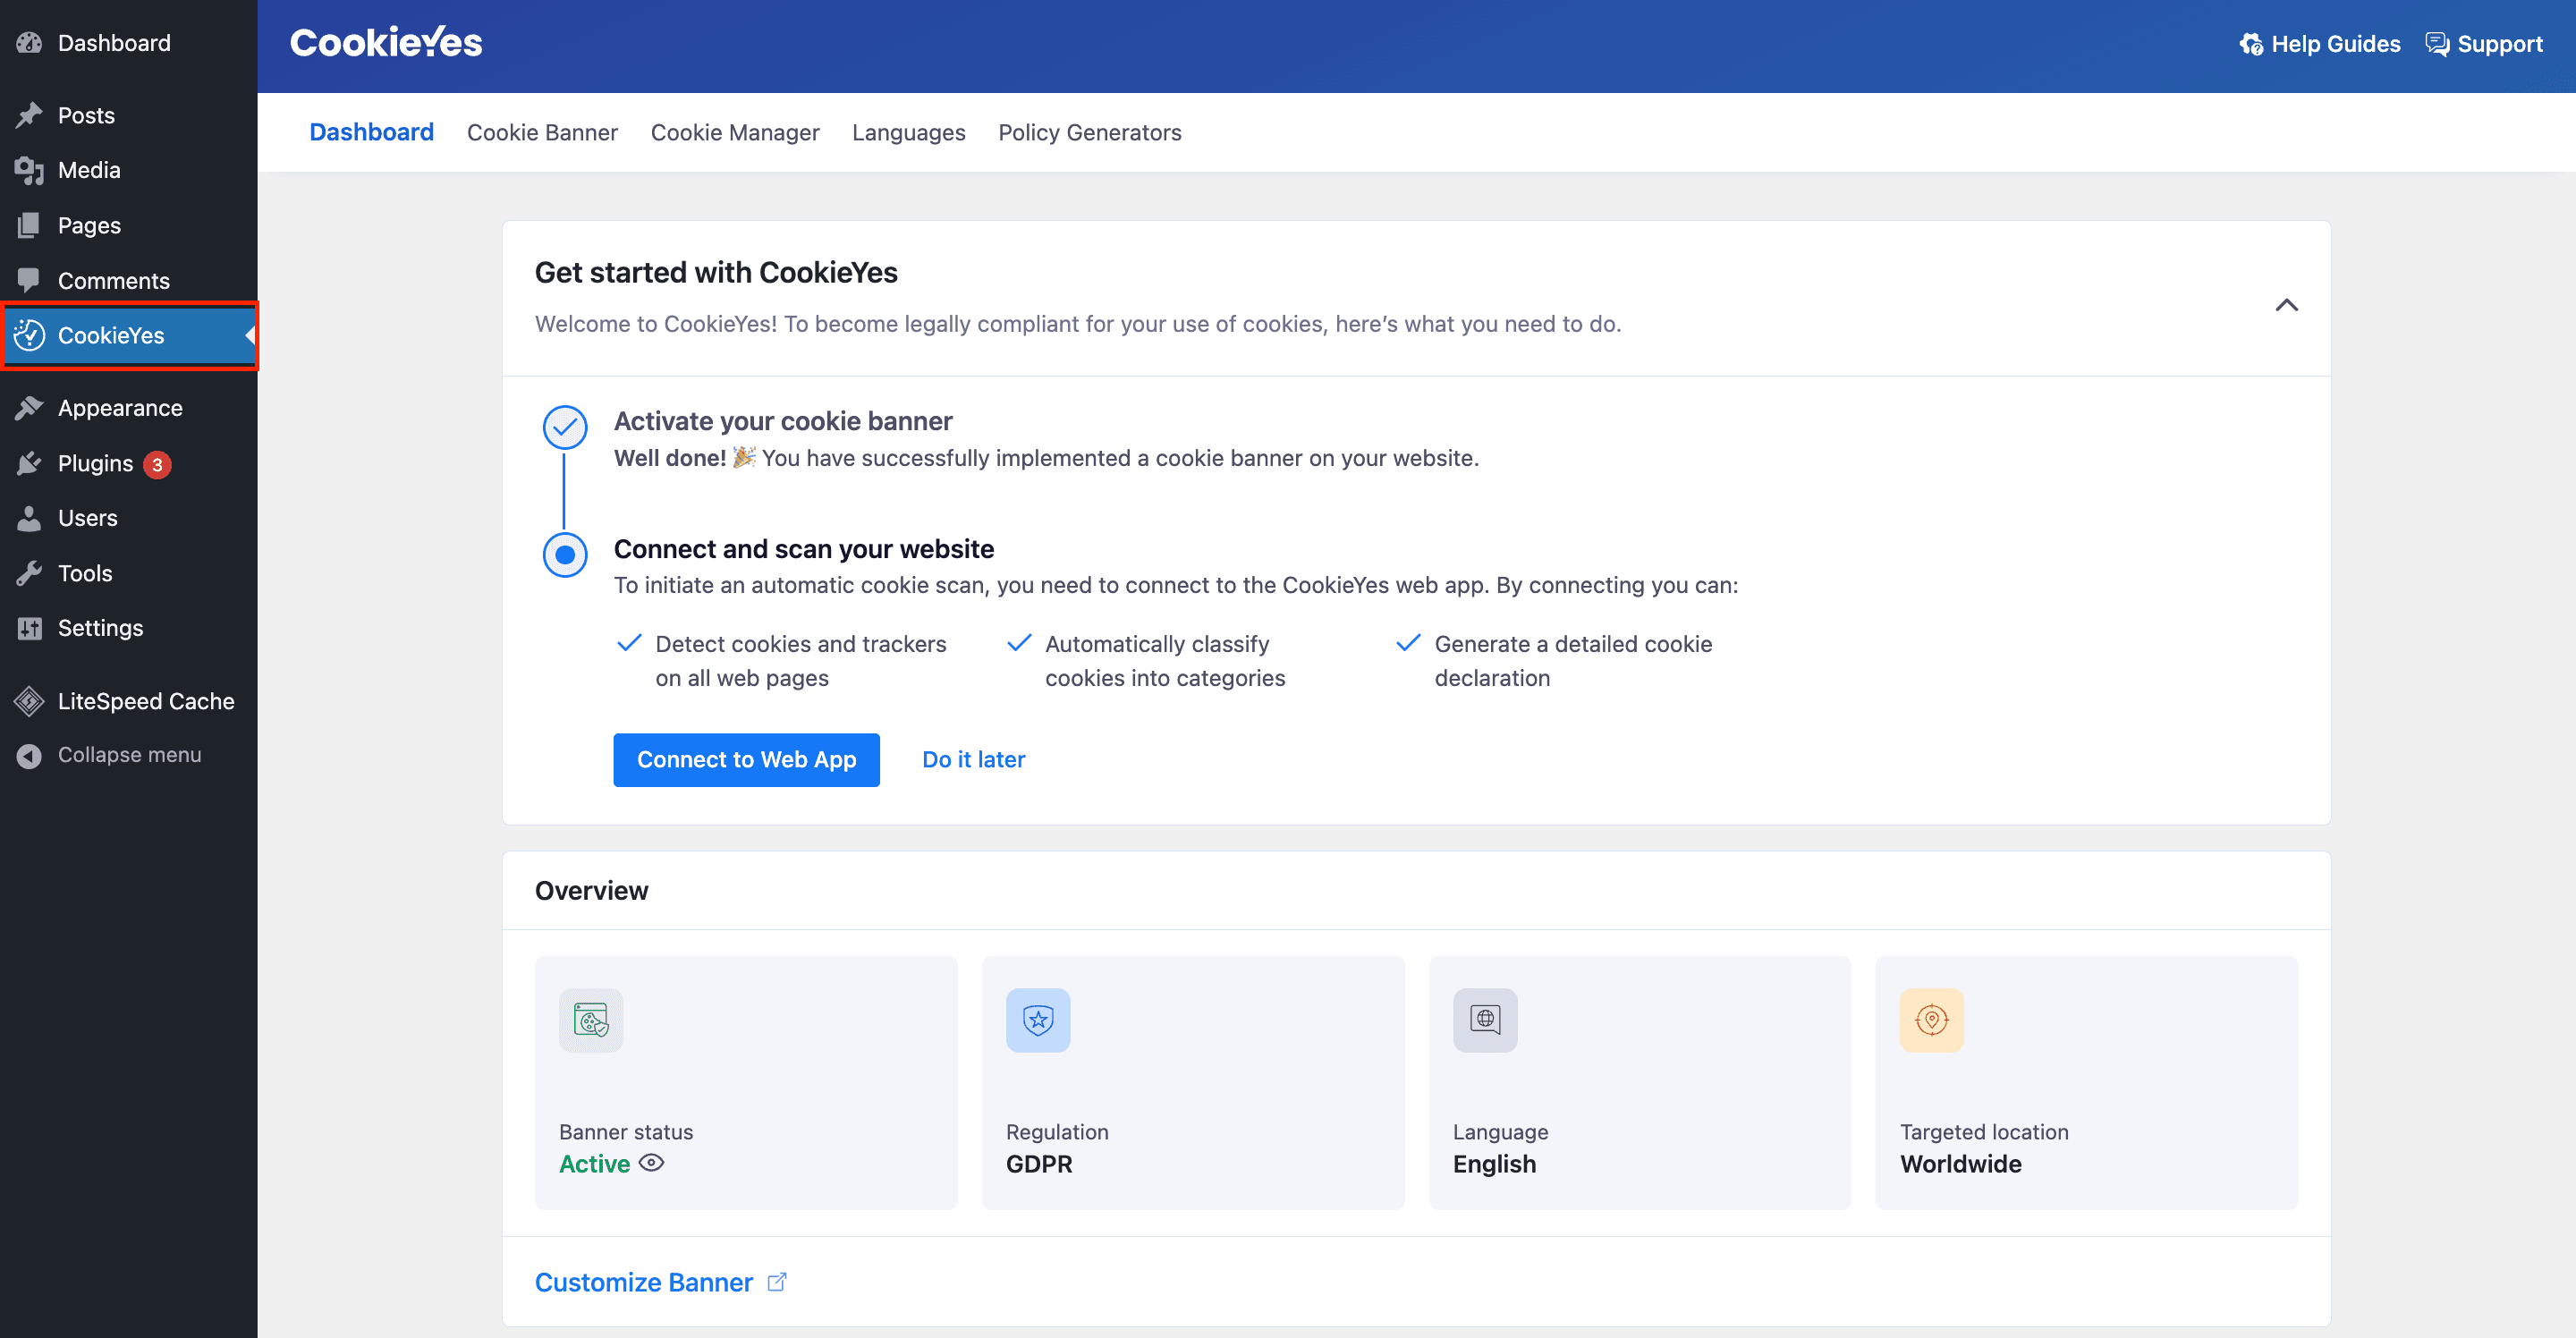
- Navigate to CookieYes > Dashboard.
- Click the Connect to Web App button.
- Select Create a new account and connect.
- Select a plan (Free, Basic, Pro, Ultimate) according to your requirements.
For Free plan:- Click the Connect for free button.
- In the popup modal, enter the credentials and click Sign Up & Connect to CookieYes.
For Basic, Pro or Ultimate plan:
a. Select Connect & Subscribe.
b. Enter the credentials to create your account and click the Signup & Proceed to Payment button.
c. Provide your billing details and click Subscribe.
Once connected, you’ll be taken back to the CookieYes section within WordPress, where you can easily access and review the consent trends and pageviews data for the last 7 days.
To connect your existing account
- Navigate to CookieYes > Dashboard.
- Click the Connect Your Existing Account button.
- In the popup modal, enter the credentials and click the Log In & Connect to CookieYes button.
- After logging in, you can keep the current configurations or replace them with plugin settings and click Continue.
After connecting, you’ll be taken back to the CookieYes section within WordPress, displaying the success message ” Your website is connected to the CookieYes web app”. You will also be able to view the Consent trends and Pageviews for the last 7 days.
Step 2:
Modify the plugin Configurations.
The different tabs of the CookieYes Web App allow you to customise all the elements and behaviour of the cookie consent bar.
Cookie Banner
To customise the main elements of the Cookie banner, head over to the Dashboard > Go to the Web App.
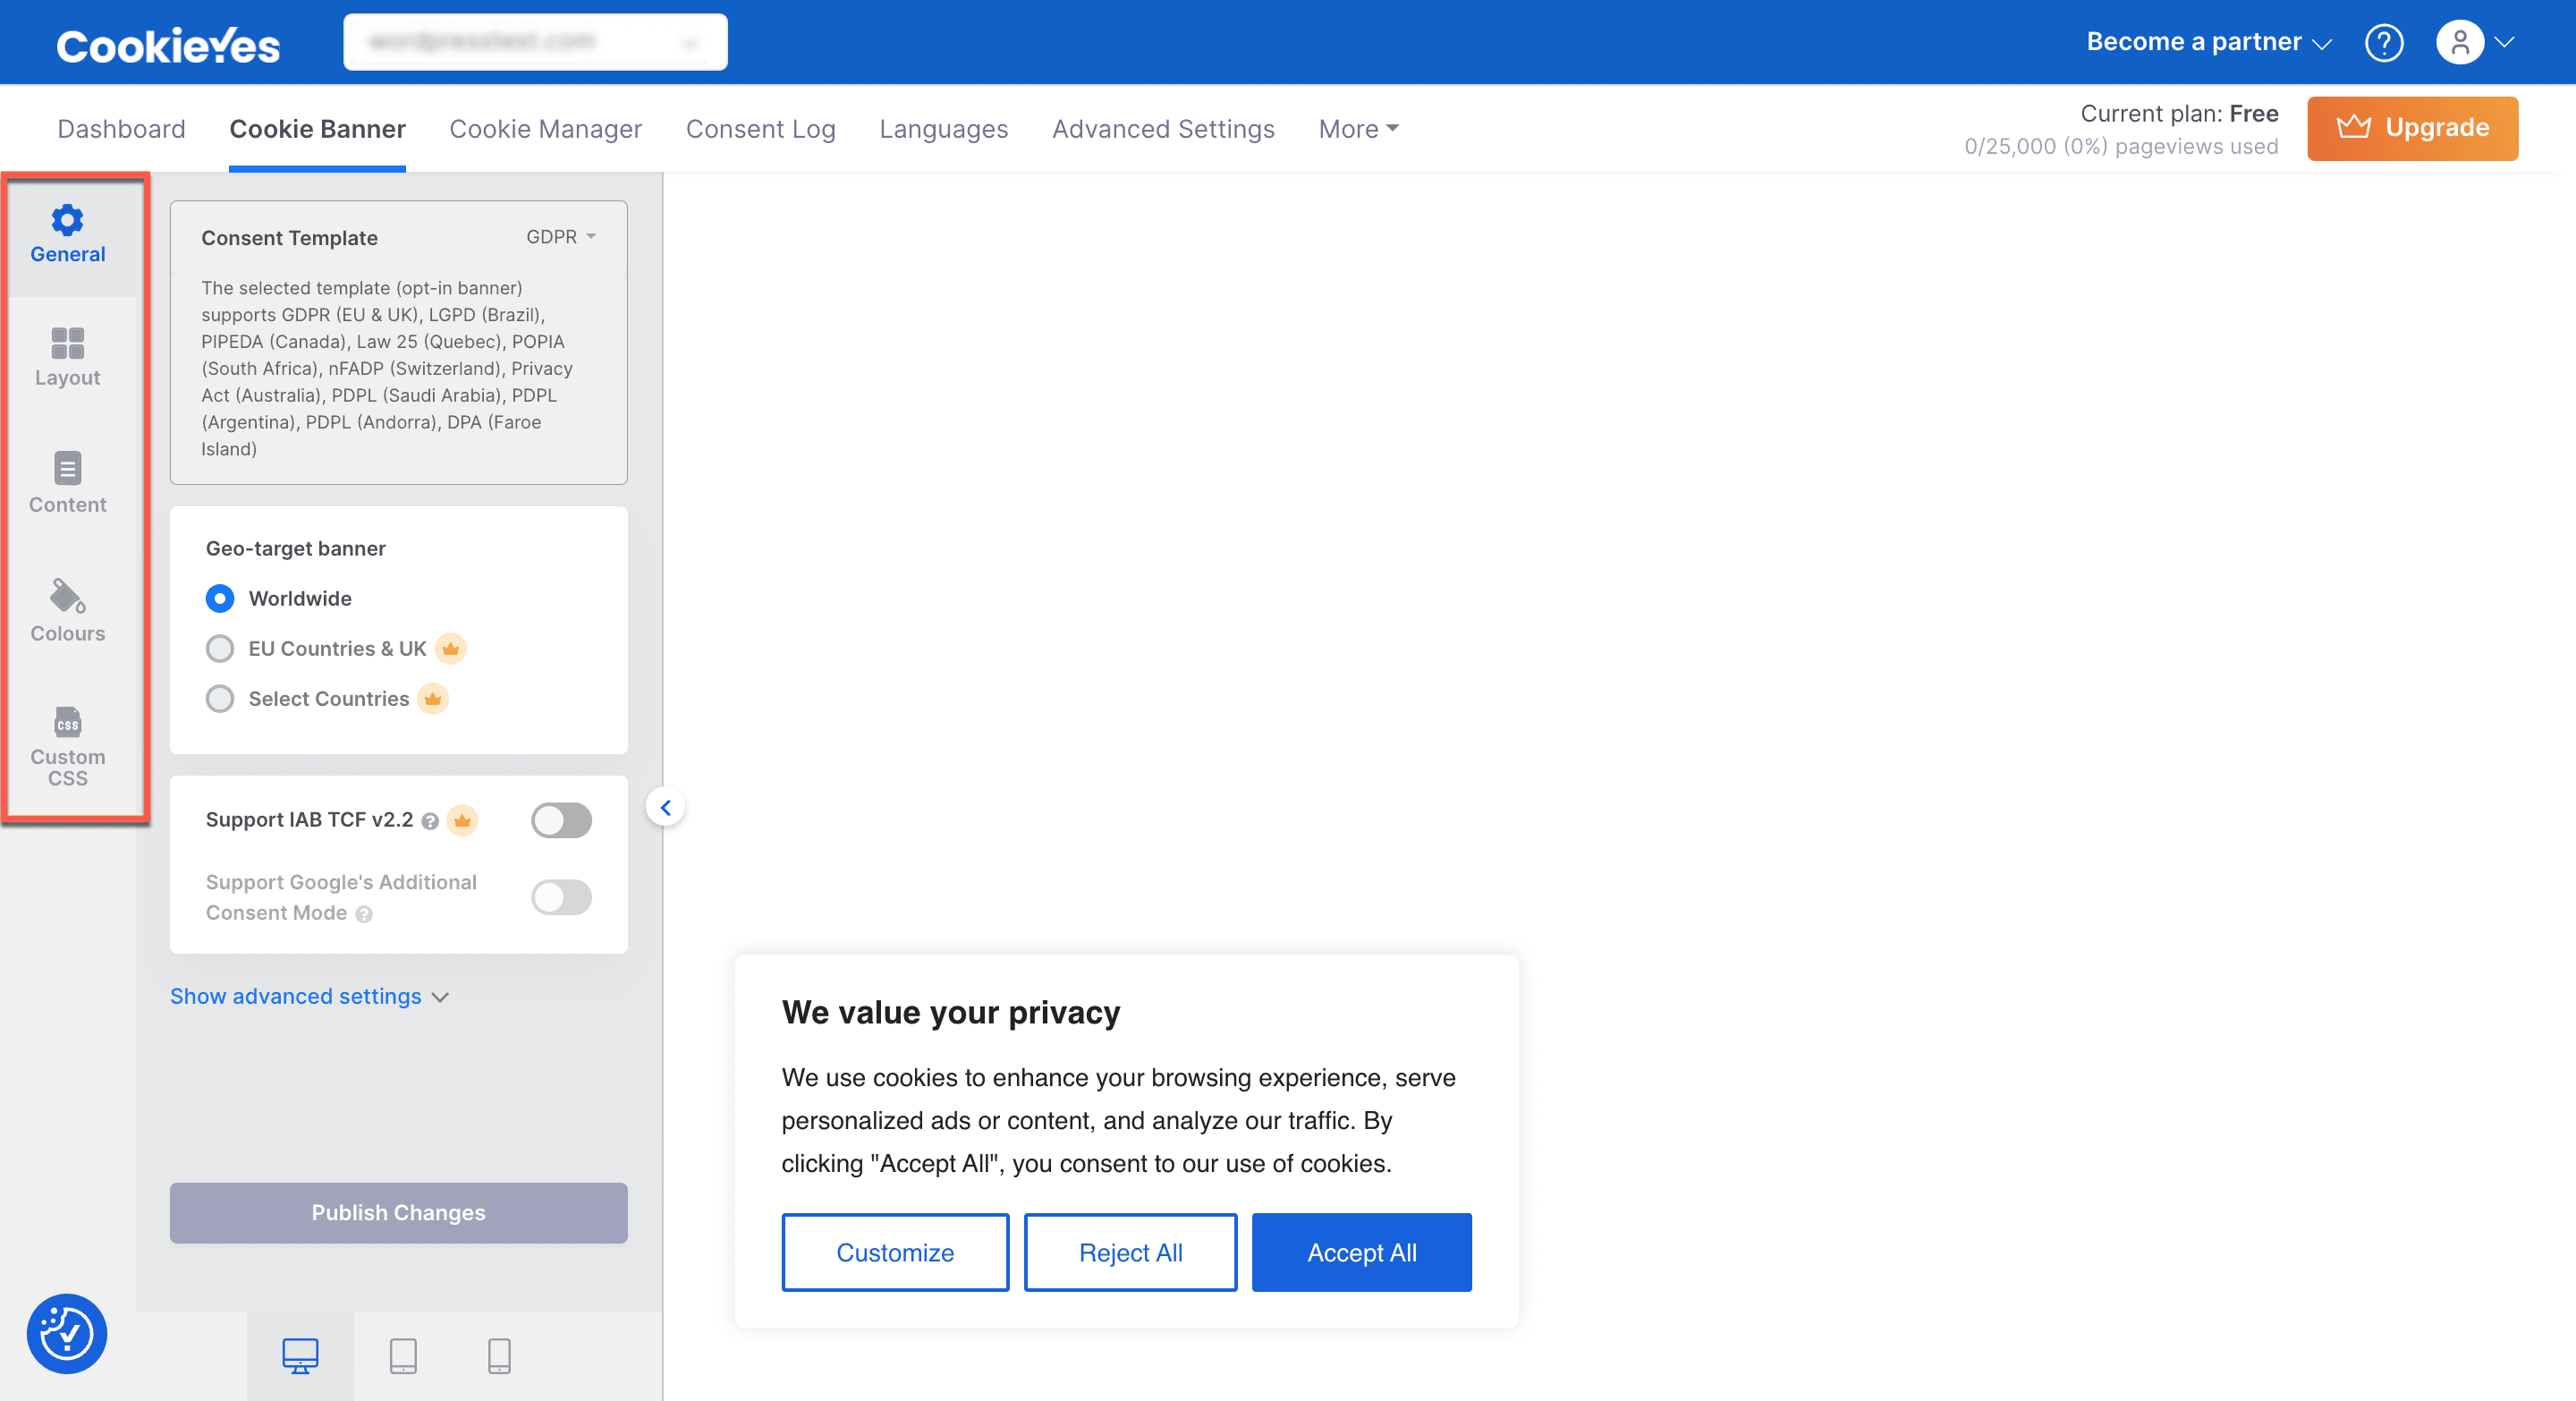
The following customisations are available:
- General settings – The type of law you want to comply with, set the IAB TCF v2.2, geo-target for banner, consent expiration and reload the page on consent action.
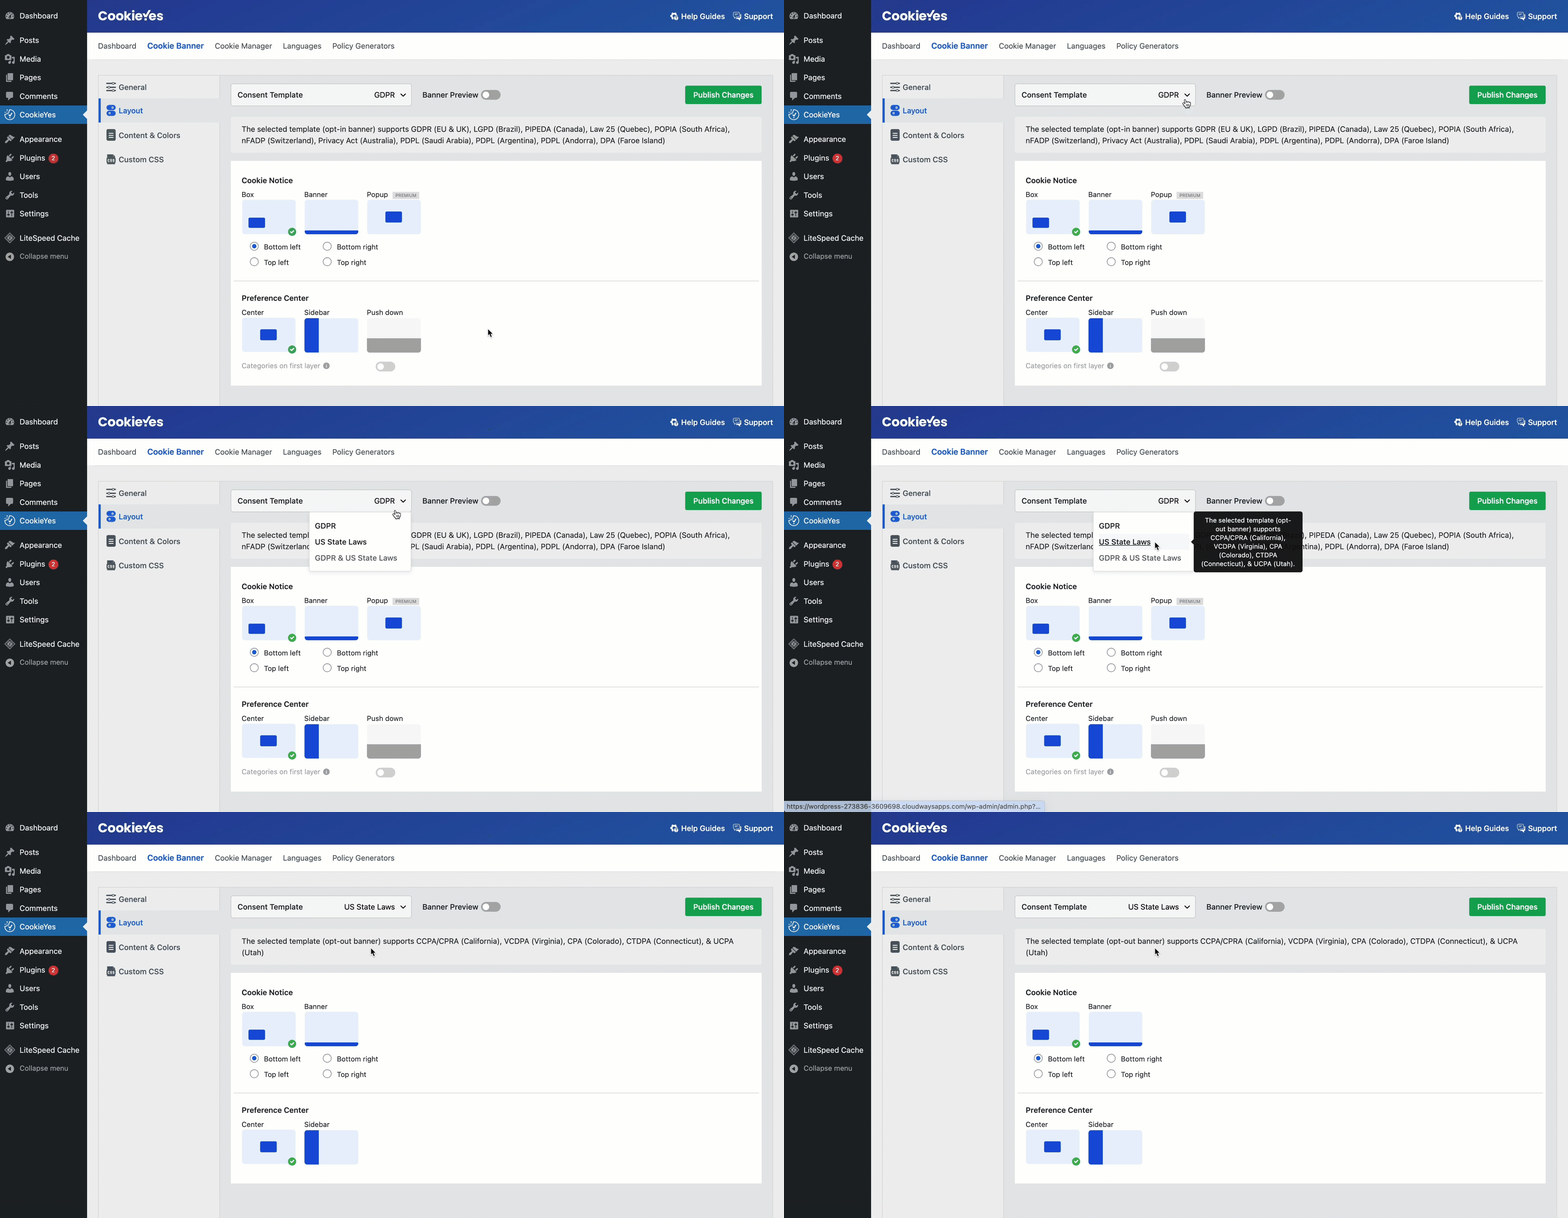
- Layout settings – Banner and preference centre layouts. There are currently three banner layouts available: Box, Banner and Popup.
- Content setting – The default title and message of the Cookie Notice, add/ alter buttons and the cookie list and set the Google Privacy Policy if you use services provided by Google, such as AdSense, Firebase and Analytics on your website.
- Colour settings – The colour of the cookie banner.
- Custom CSS setting – Add a custom CSS script for unique styles or elements.
For detailed instructions, refer to our guide.
Cookie Manager
In Cookie Manager, you can add new cookies under different categories, scan your website, view scan history, set load cookies prior to consent, hide from the banner and edit the name and description of categories.
For customisation, navigate to CookieYes Dashboard > Cookie Manager.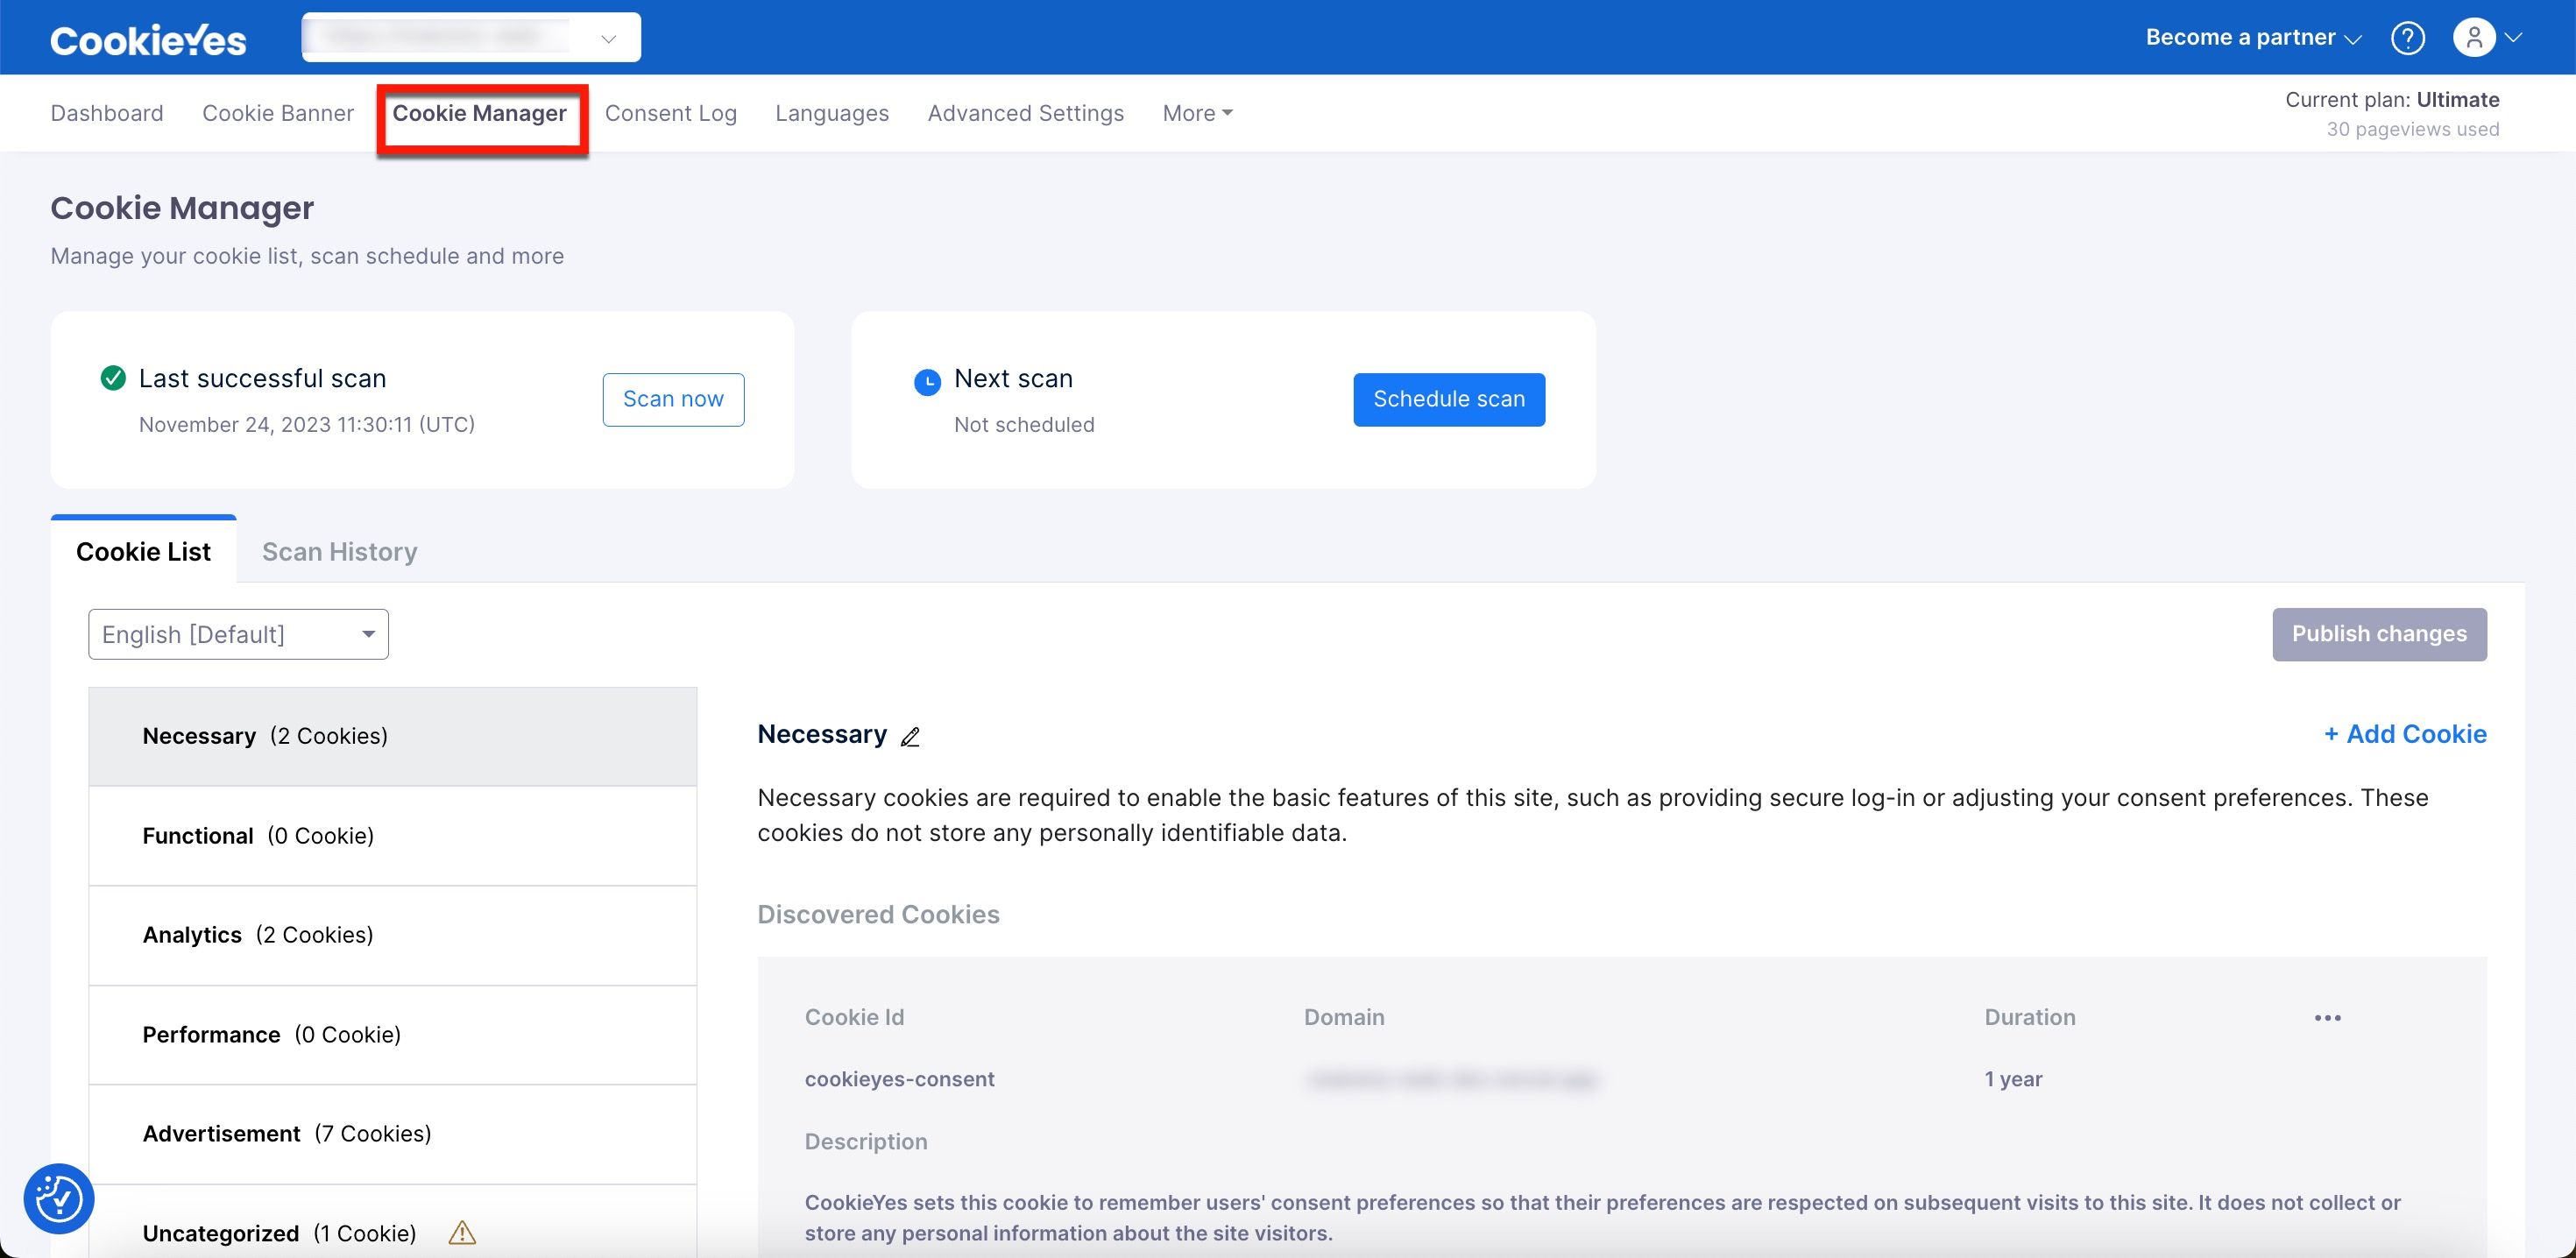
Refer to our guide for instructions on the following:
Consent Log
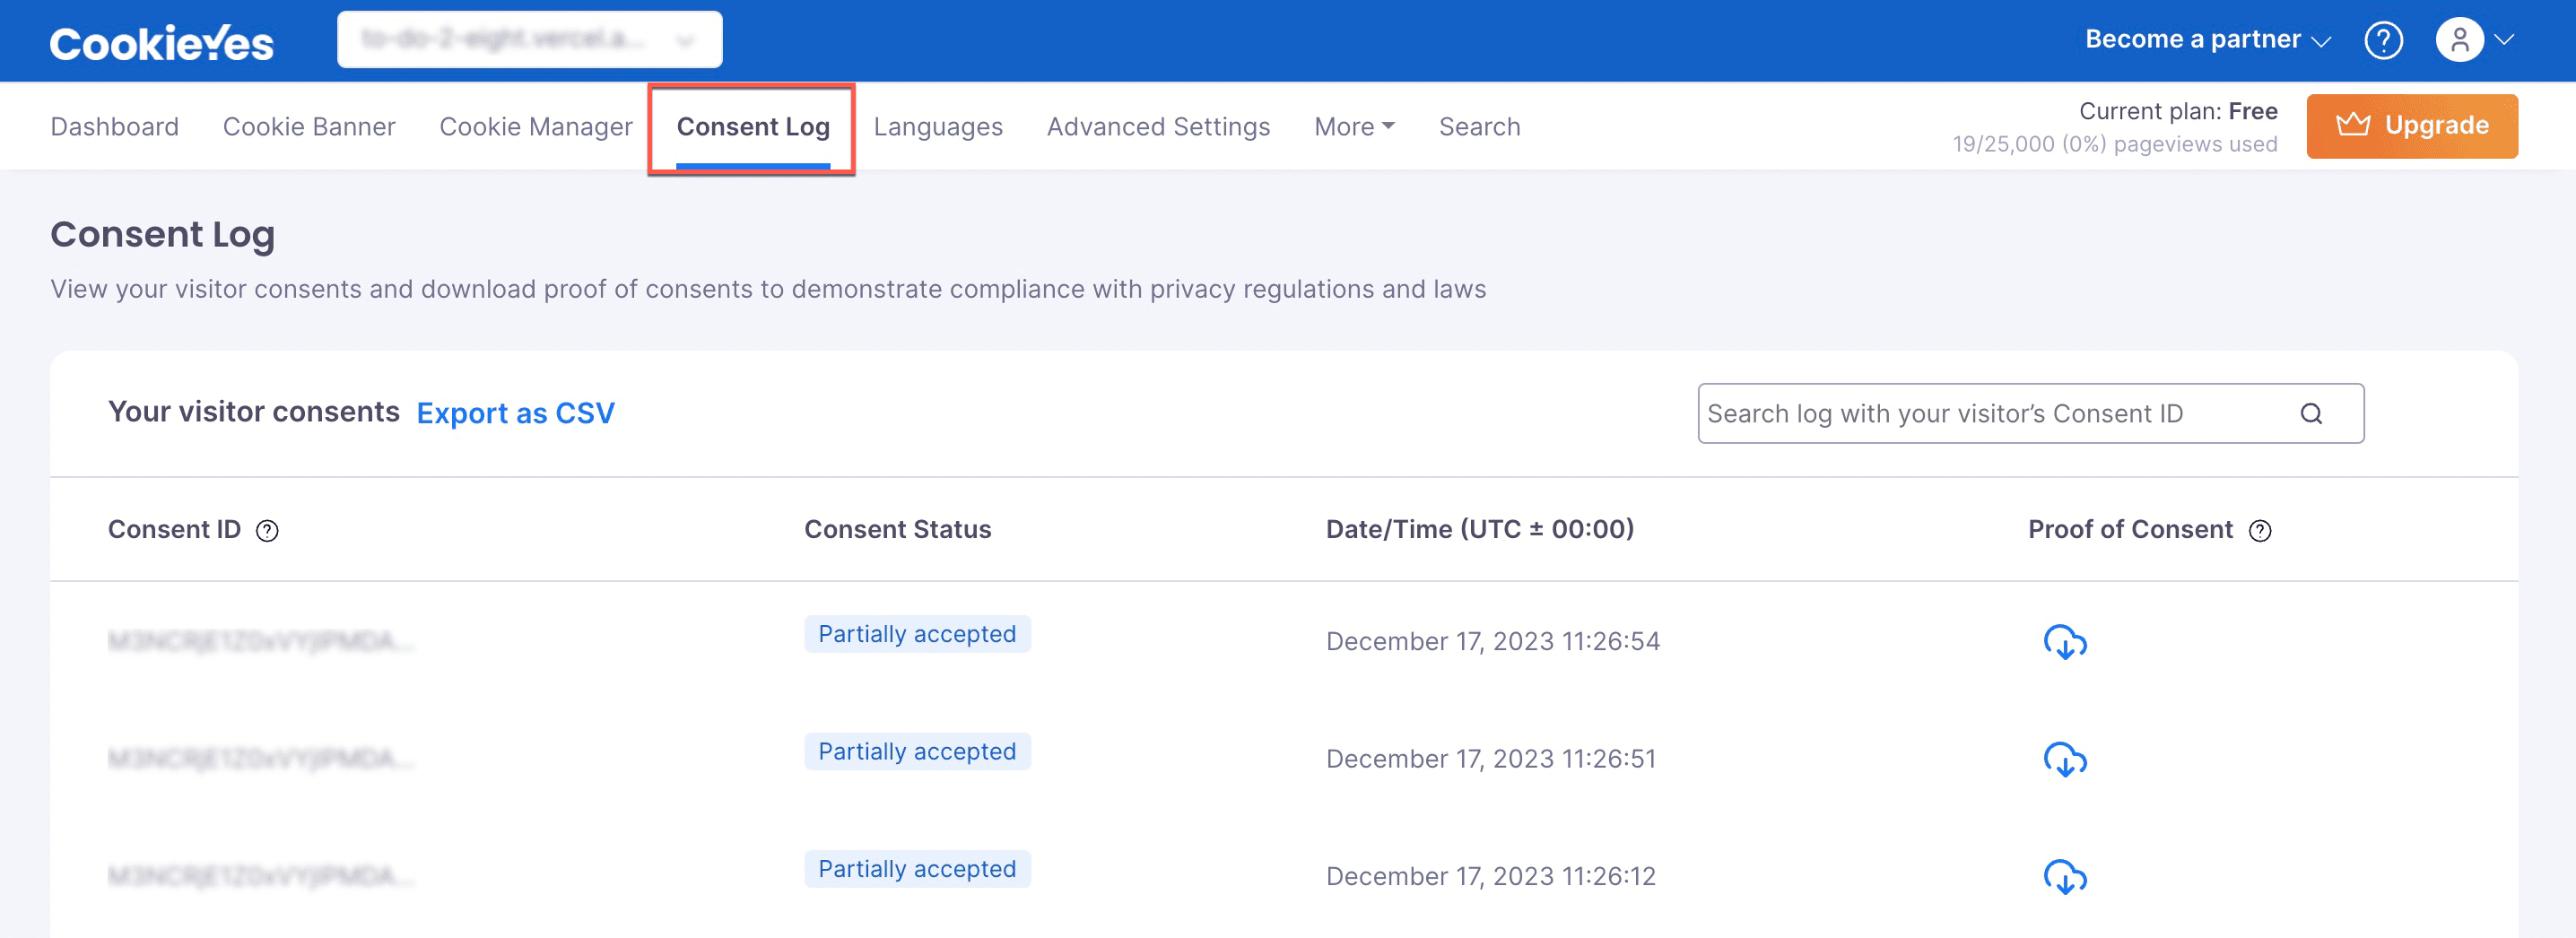
CookieYes has a feature that allows you to keep the user consent log registered through a cookie notice or banner. Also, you can download this consent log by clicking the Export as CSV button.
To toggle the Enable consent log on and off, navigate to the CookieYes Dashboard > Advanced Settings. If enabled, the user consent will be recorded and display the consent Id, consent status and date/time under the Consent Log section.
You can also download Proof of Consent for each user consent; for more details, refer to our guide.
Languages
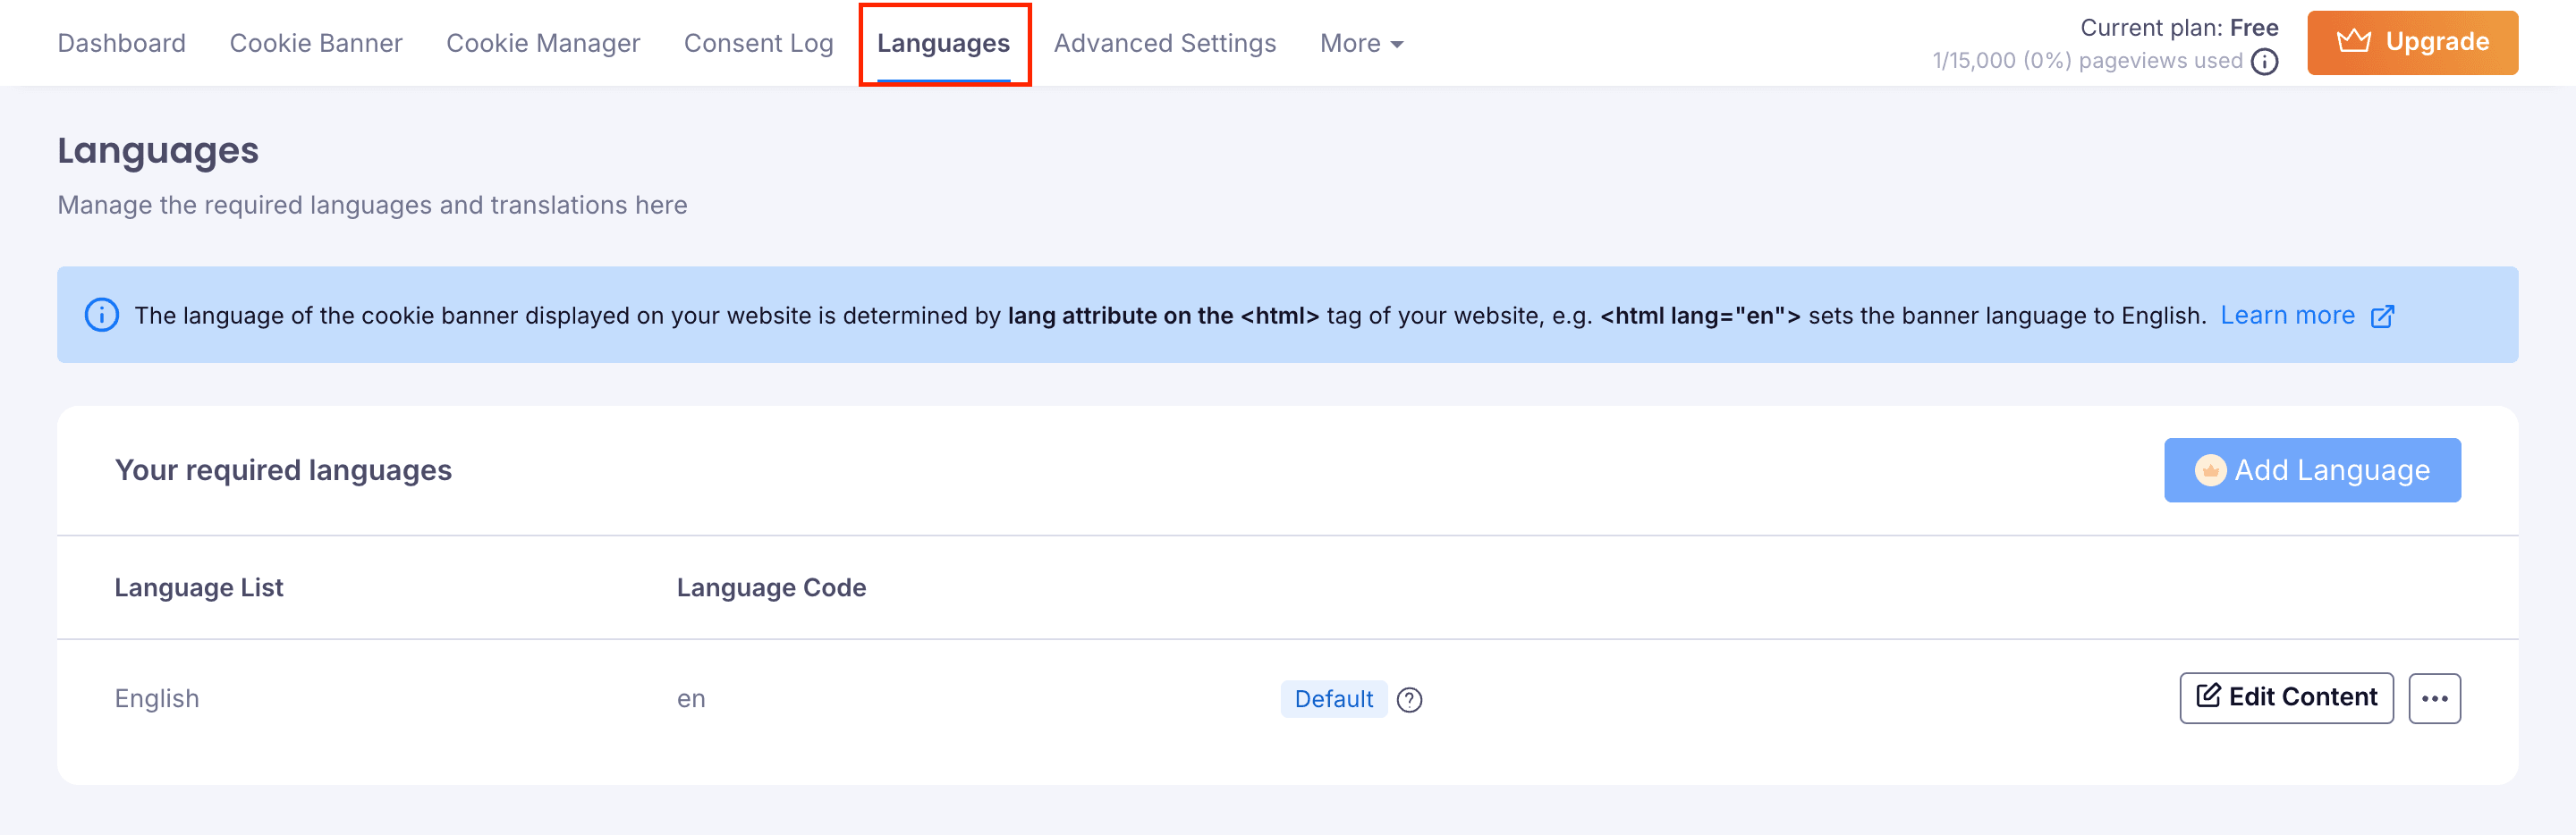
In language settings, you can add new languages and change the cookie banner language by setting any language as the default for your cookie banner.
To customise the languages of the cookies consent banner, head over to CookieYes Dashboard > Languages. Check here to learn more about detailed customisation.
Users on the free plan can use only one language at a time. However, the default language can be changed as needed.
To implement a multilingual cookie banner, follow the practical instructions in our configuration guide.
Privacy Policy Generator
To create a custom privacy policy for your website, go to CookieYes Dashboard > More > Privacy Policy Generator.
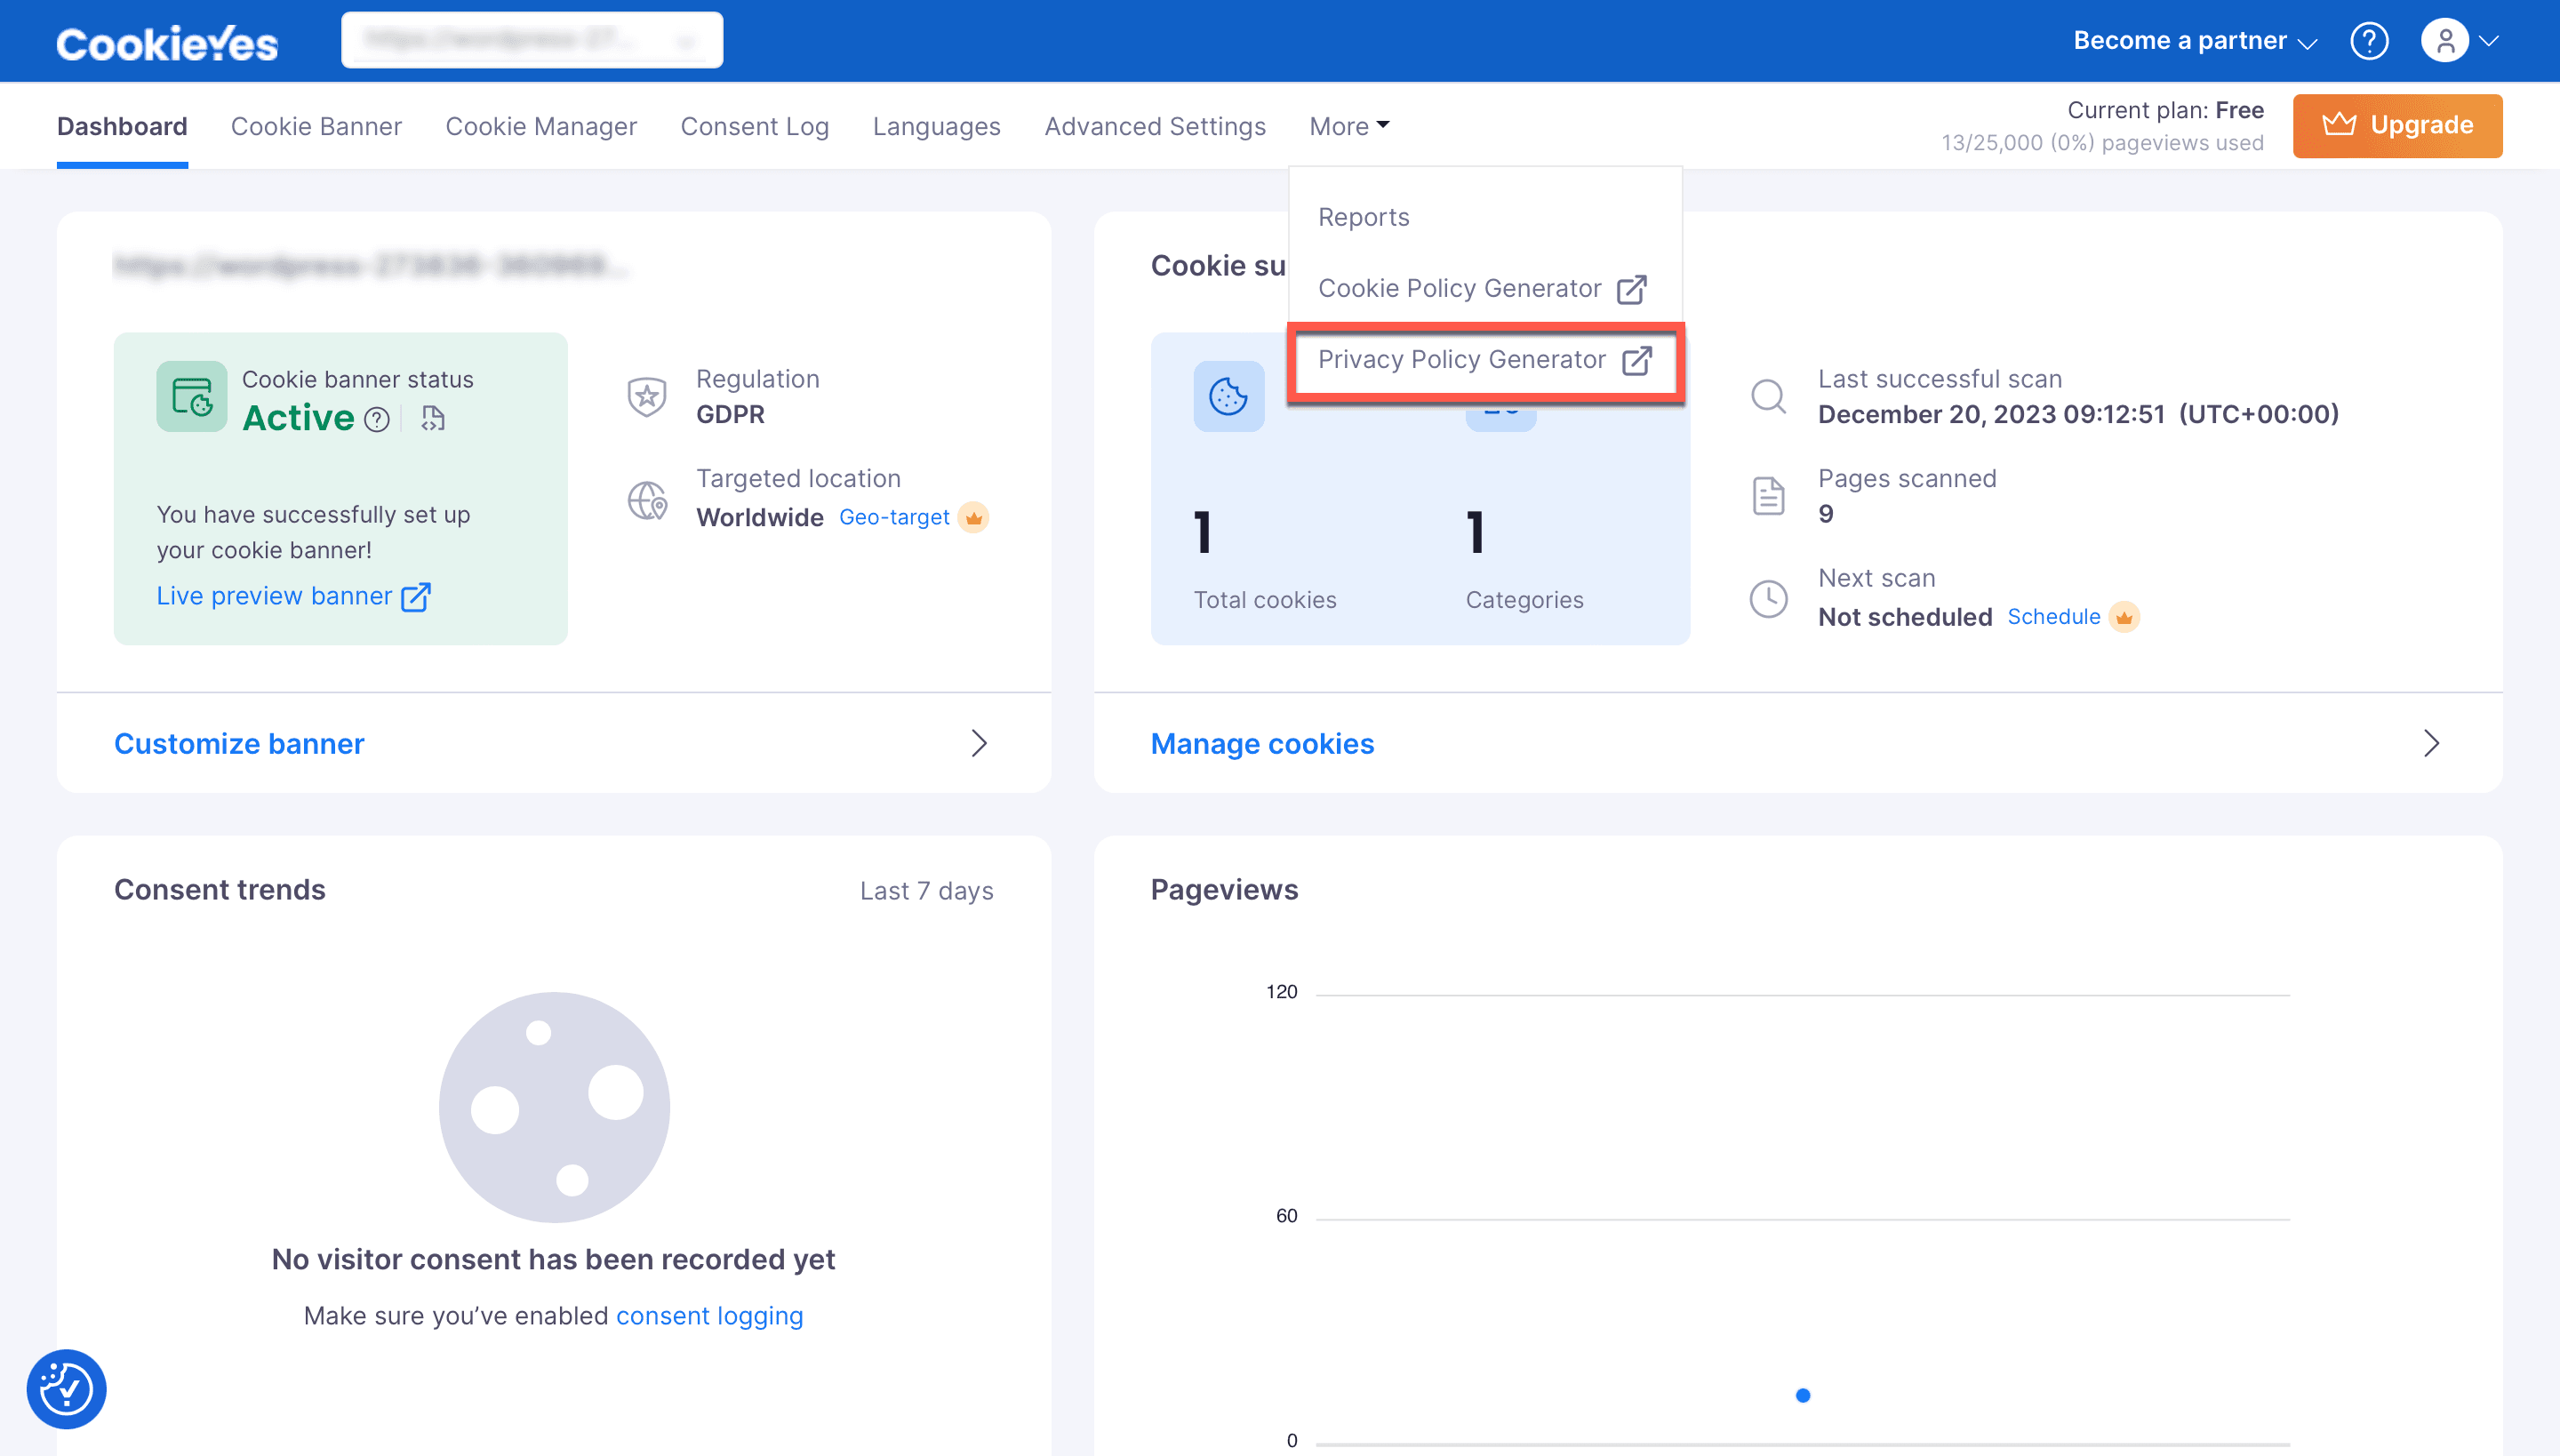
It’s easy to generate the content of the privacy policy by answering a few questions and submitting it. For detailed instructions, check our guide.
Cookie Policy Generator
To generate the Cookie Policy:
- Navigate to CookieYes Dashboard > More > Privacy Policy Generator.
- In the Type of Cookies section, make your desired modifications.
- Head to the section Manage Cookie Preferences.
- Make your desired modifications.
- Click the Generate button.
Google Consent Mode
CookieYes supports Google Consent Mode, which helps manage Google tags based on the user’s consent preferences.
If you’ve enabled Google Consent Mode in Site Kit, ensure that Google Consent Mode is disabled in CookieYes web app and plugin.
Disable Google Consent Mode on Web app:
- Navigate to CookieYes Dashboard > Advanced Settings.
- In Advanced Settings, disable Support GCM (toggle button to the left).
Disable Google Consent Mode on WordPress plugin:
- Navigate to Google Consent Mode (GCM) tab.
- Ensure that the feature is disabled.
Step 3:
Publish Changes.
WordPress plugin only
Cookie Banner
Cookie Manager
The following configuration/customization are available in Cookie Manager:
- Add and edit cookies under different cookie categories in the cookie list.
- Edit the content of the Cookie Manager in your preferred language.
- Edit the description and name of the cookie category.
How to add and edit cookies manually in the cookie list?
To add a cookie manually, follow these steps:
- Navigate to CookieYes > Dashboard > Cookie Manager > Cookie List.
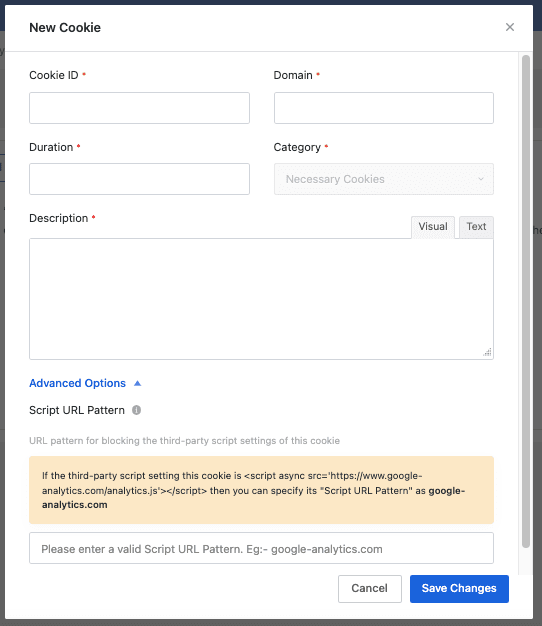
- Click the Add Cookie button.
- Enter the following fields:
- Cookie ID – Add the name of the cookie.
- Domain – Domain that sets this cookie.
- Duration – The time duration the cookies will be active on the browser.
- Category – Enter the cookie category to which the cookie belongs.
- Description – Specifying the purpose for which cookie will be used.
- Script URL Pattern – Enter a valid script URL pattern for blocking the third-party script setting of the cookies.
- Click the Save Changes button.
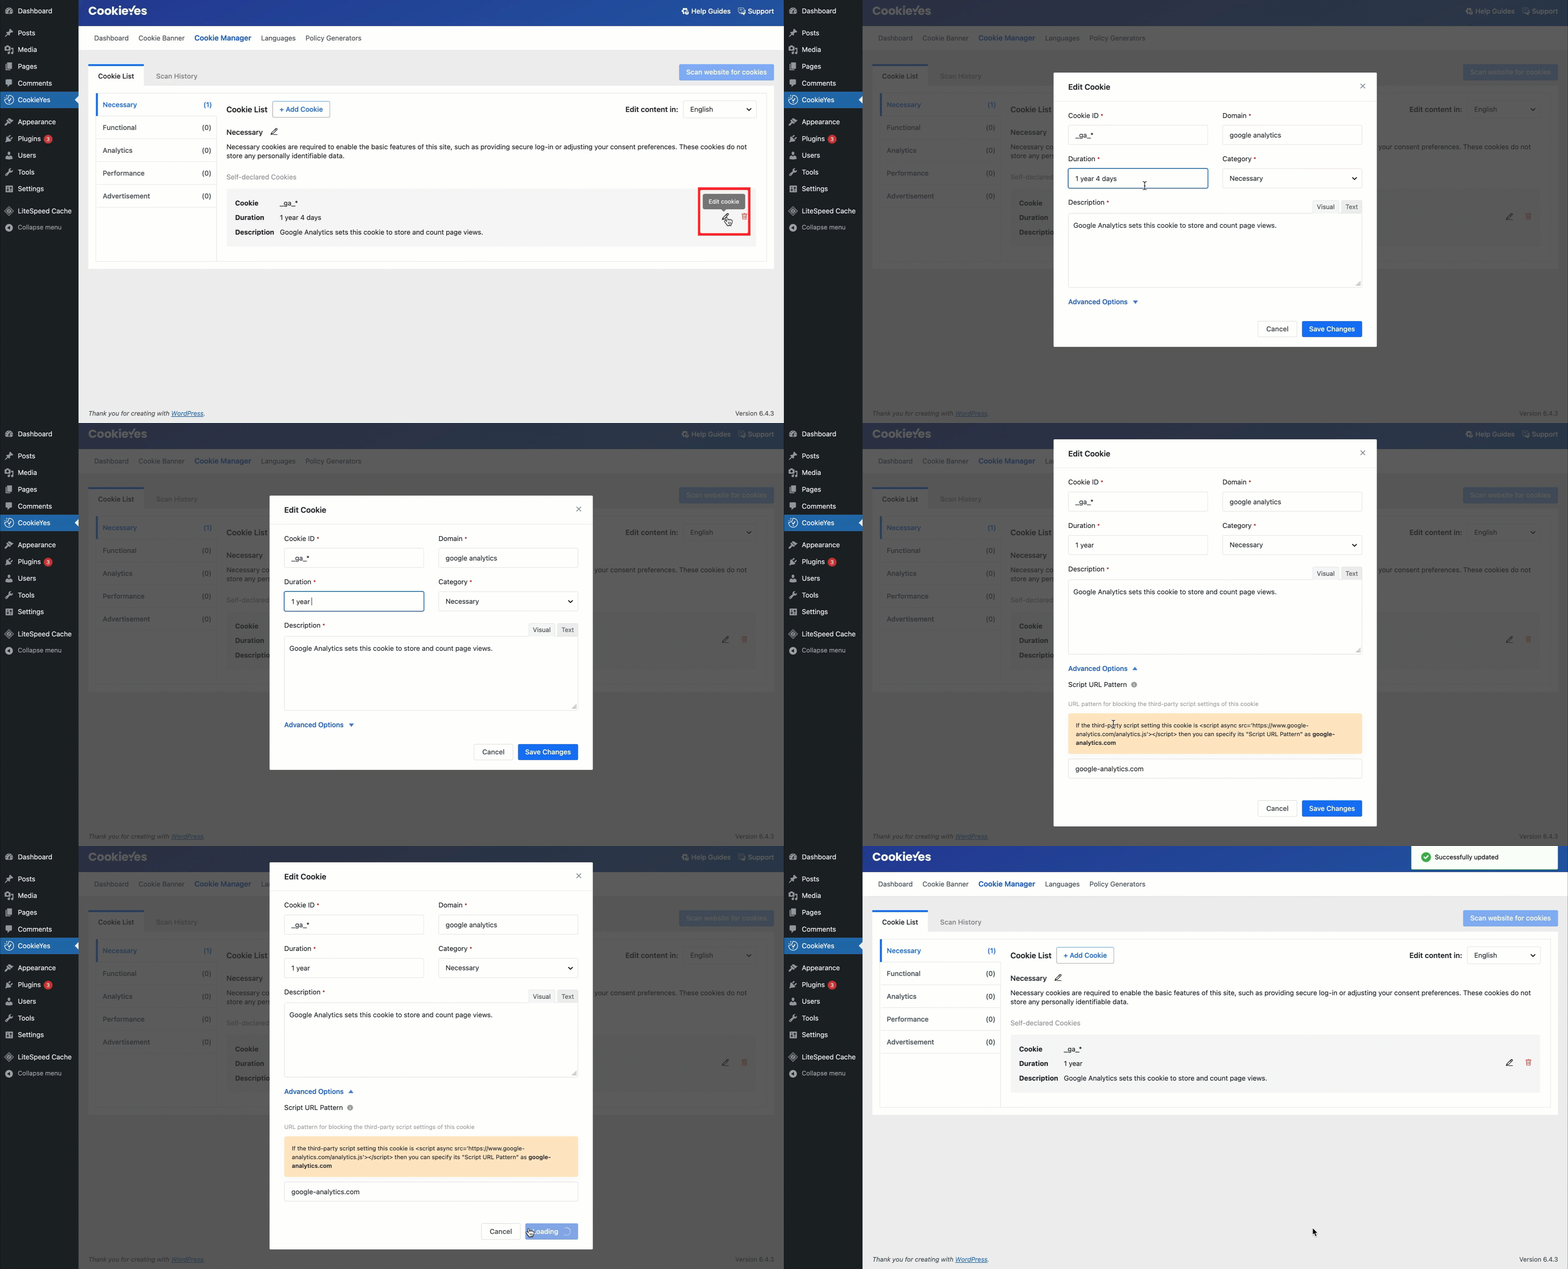
To edit the existing cookie:
- Click the edit icon.
- Make your desired modifications.
- Click the Submit button.
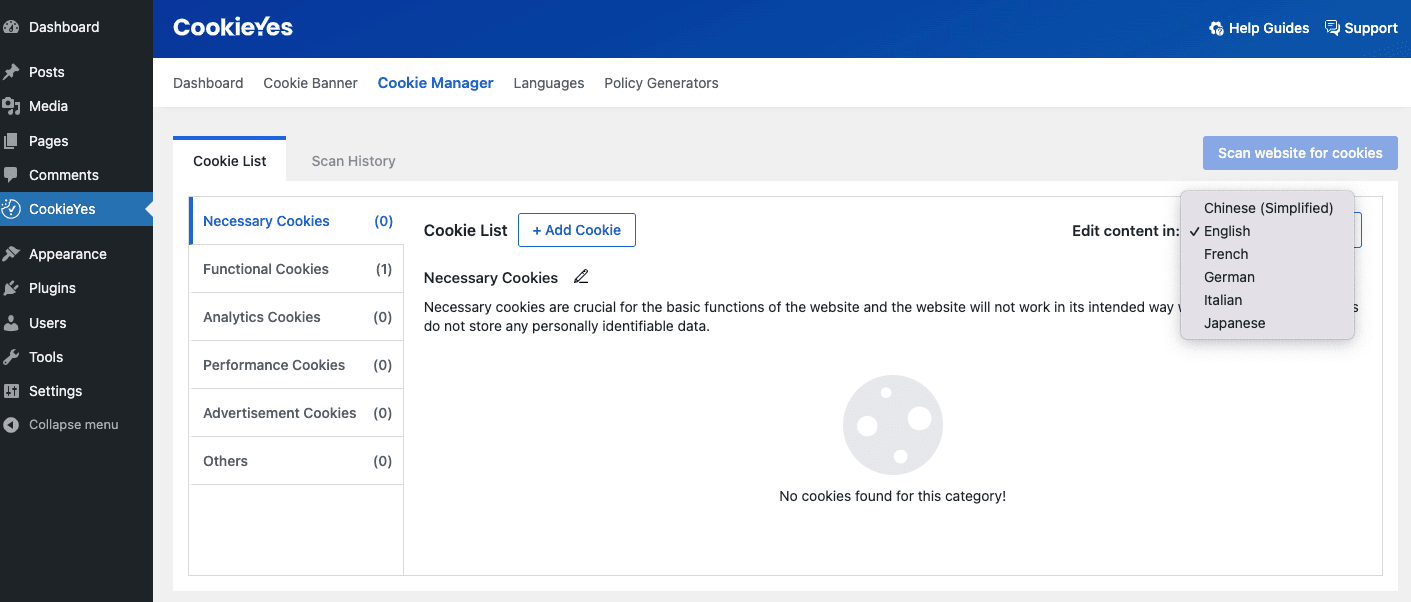
How to edit the content of the Cookie Manager in your preferred language?
To edit the content of the cookie manager in your preferred language, select the language from the drop-down menu of Edit content. The contents of the Cookie Manager will automatically translate into the language you selected.
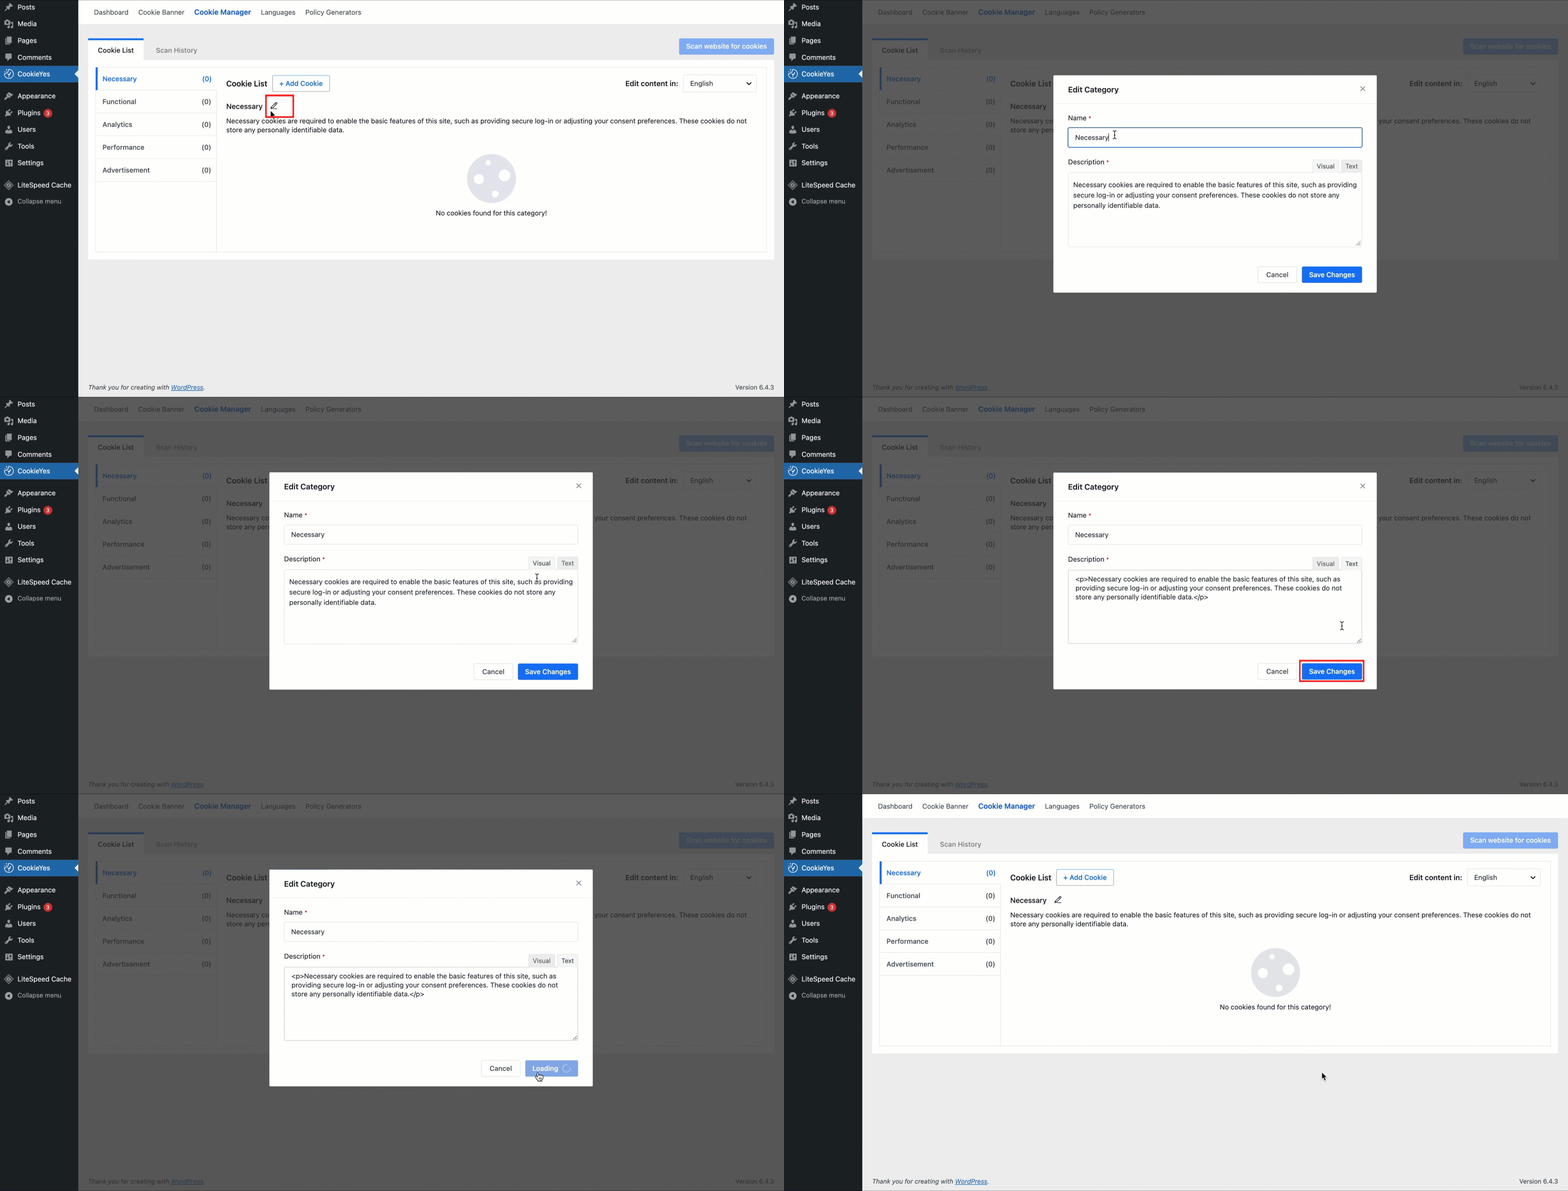
How to edit the name and description of the category?
To edit the name and description:
- Click the edit icon displayed near the cookie category name.
- Make your desired modifications.
- Click the Save Changes button.
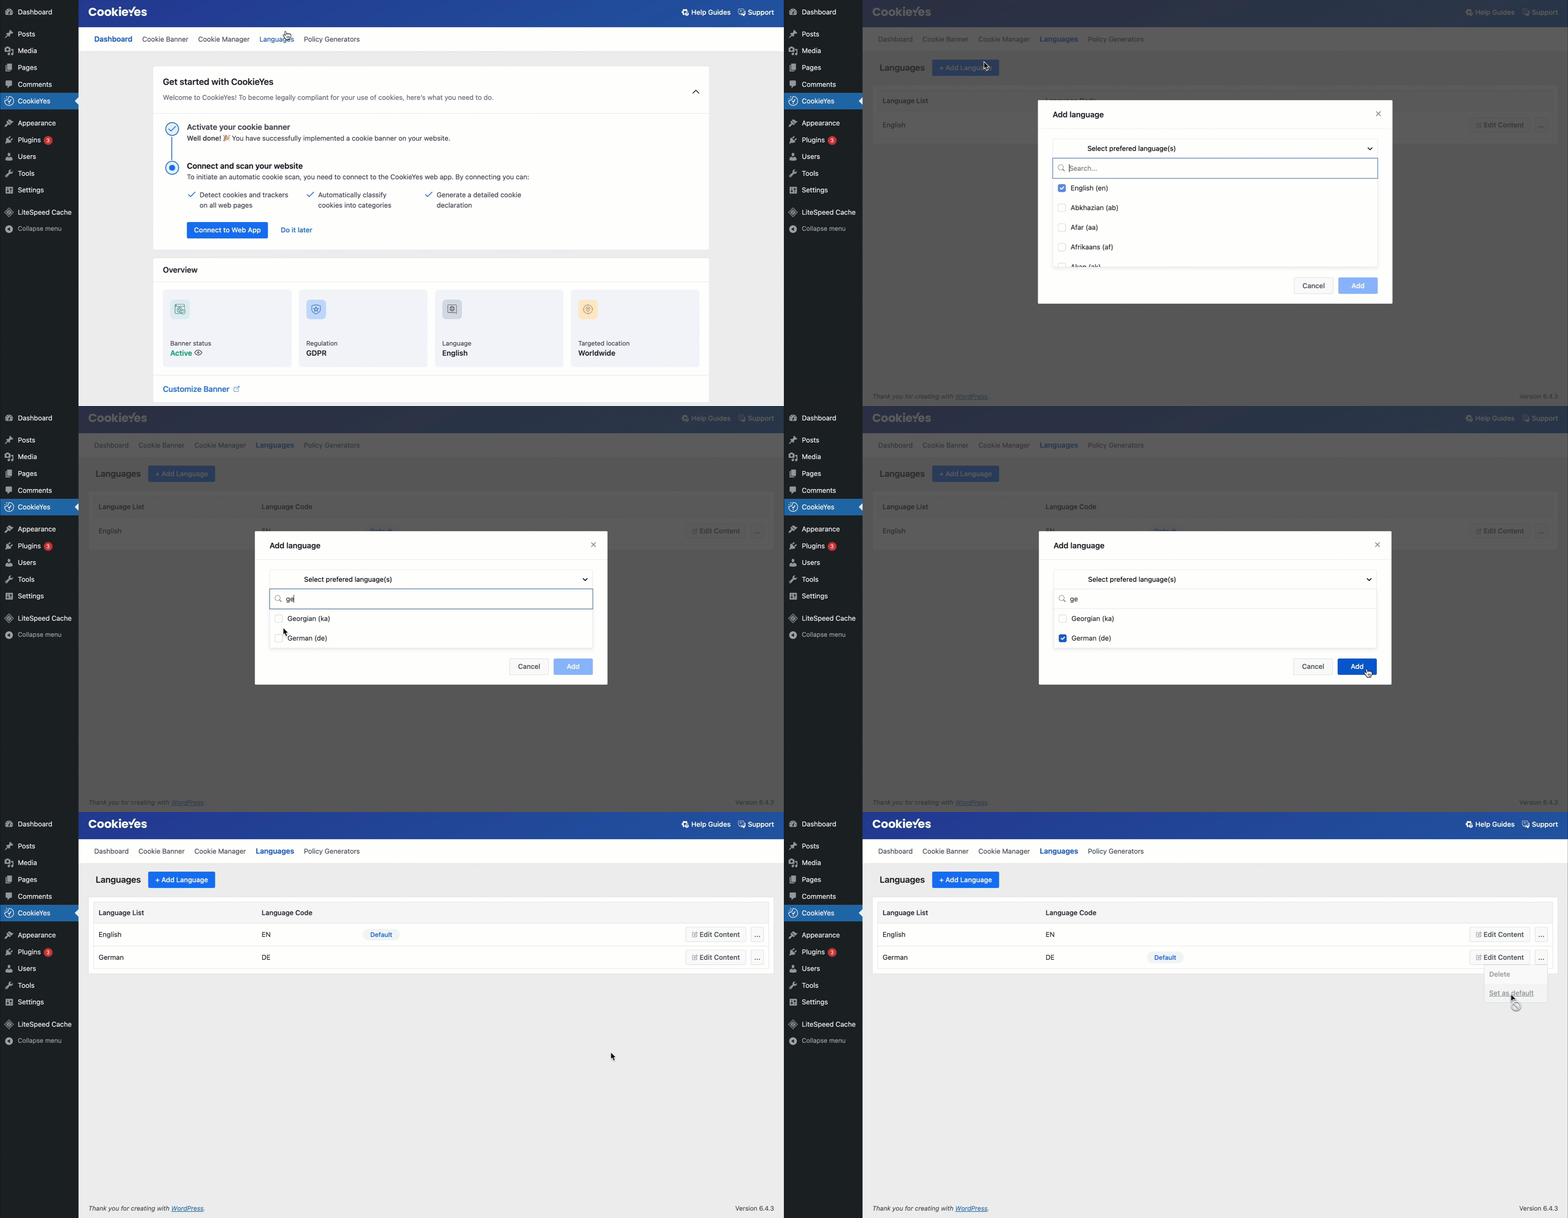
Language
The user can add only one additional language besides the default language. To add more than two languages connect to the CookieYes Webapp.
How to add a new Language to the language list?
To add a new language to the language list:
- Head over to CookieYes > Dashboard > Language.
- Click the + Add Language button.
- Select the preferred language you want to add from the dropdown list.
- Click the Add button.
How to Change the Language of cookie banner?
To change the language of your cookie banner:
- Navigate to CookieYes > Dashboard > Language.
- Click the + Add Language button.
- Choose the language you prefer from the dropdown list.
- Click the Add button.
- Hover the mouse over the three dots menu and click the Set as default option.
How to add a Multilingual Cookie Banner?
To manage a website with a multilingual cookie banner, follow the steps below:
- Navigate to CookieYes > Dashboard > Language.
- Add the language you prefer.
- To change the content of the cookie banner, click the Edit Content button.
- Make your desired modifications.
- Click the Publish Change button.
Policy Generator
With the help of the Policy Generator, you can easily and quickly create content for your privacy and cookie policy page. To generate your custom cookie policy, Sign Up/ Log In to CookieYes.
How to generate a privacy policy for your website?
To generate a privacy policy, follow these steps:
- Head over to CookieYes > Dashboard > Policy Generator.
- Click the Generate Privacy Policy button.
- Under Company & Website Info, enter the details and click the Save & Proceed button.
- Under Collection of Data, answer the questionnaire by selecting the Yes/No option and clicking the Save & Proceed button.
- Under Use & Disclosure of Data, choose the options for “Purpose for which acquired data will be used?” answer the other questions and click the Save & Proceed button.
- Under Tracking Technologies, add the link to your cookie policy and click the Save & Proceed button.
- Under the Data Protection section, add the information for your Data Protection Officer (DPO) or the person in charge of privacy-related concerns and the effective date of the privacy policy.
- Click the Generate button.