Customize Your Cookie Banner
Last updated on June 2, 2025
The three components of the cookie notice are easily customizable: the banner, the preference center, and the revisit consent. This guide will walk you through the process of customizing the cookie banner layout, content, colour, adding custom CSS and hide cookie category as well as Load Cookies before Consent
General
In the General tab, the following customisations are available:
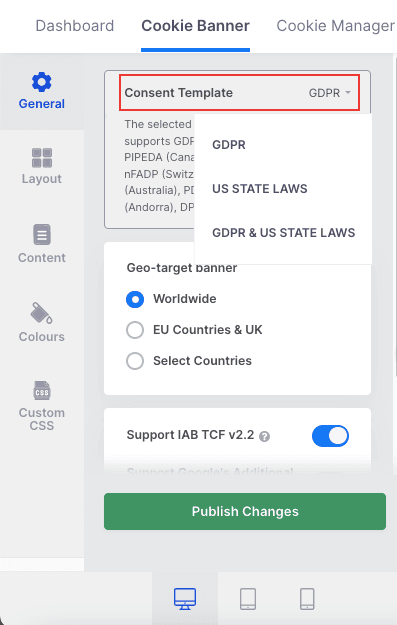
- Consent Template – (GDPR / US STATE LAWS / GDPR & US STATE LAWS) Select the type of law against which your website will accept cookies.
- Support IAB TCF v2.2 – (Enable/Disable) If enabled, a banner will appear on your website, allowing visitors to set granular advertising tracking preferences (Only for GDPR Consent Template).
- Geo-target GDPR/CCPA Banner – Geo-targeting enables you to target users based on their current location and displays the consent banner only to visitors from the selected countries and regions.
By default, CookieYes sets 365 days as the expiration time for cookie consent. Visitors of your site who have given consent will be shown the cookie banner again after this duration.
Click on Show advanced settings to see advanced options.
- Consent Expiration (days) – Specify how many days the user’s cookie consent is stored in their browser before the cookie banner appears again.
- Reload page on consent action – (Enable/Disable) If enabled, the webpage will reload after the visitor accepts or rejects consent.
Loading cookies prior to consent or hiding cookie categories are not GDPR-compliant practices.
Layout
Select Layout from the left panel to edit/change your banner type. There are currently three banner layouts available: Box, Banner, Popup.
Pro and Ultimate plan users will have access to the Popup template.
Box
There are four available positions: Bottom left, Bottom right, Top left and Top right.
Banner
There are two available positions: Bottom and Top.
Popup – Center.
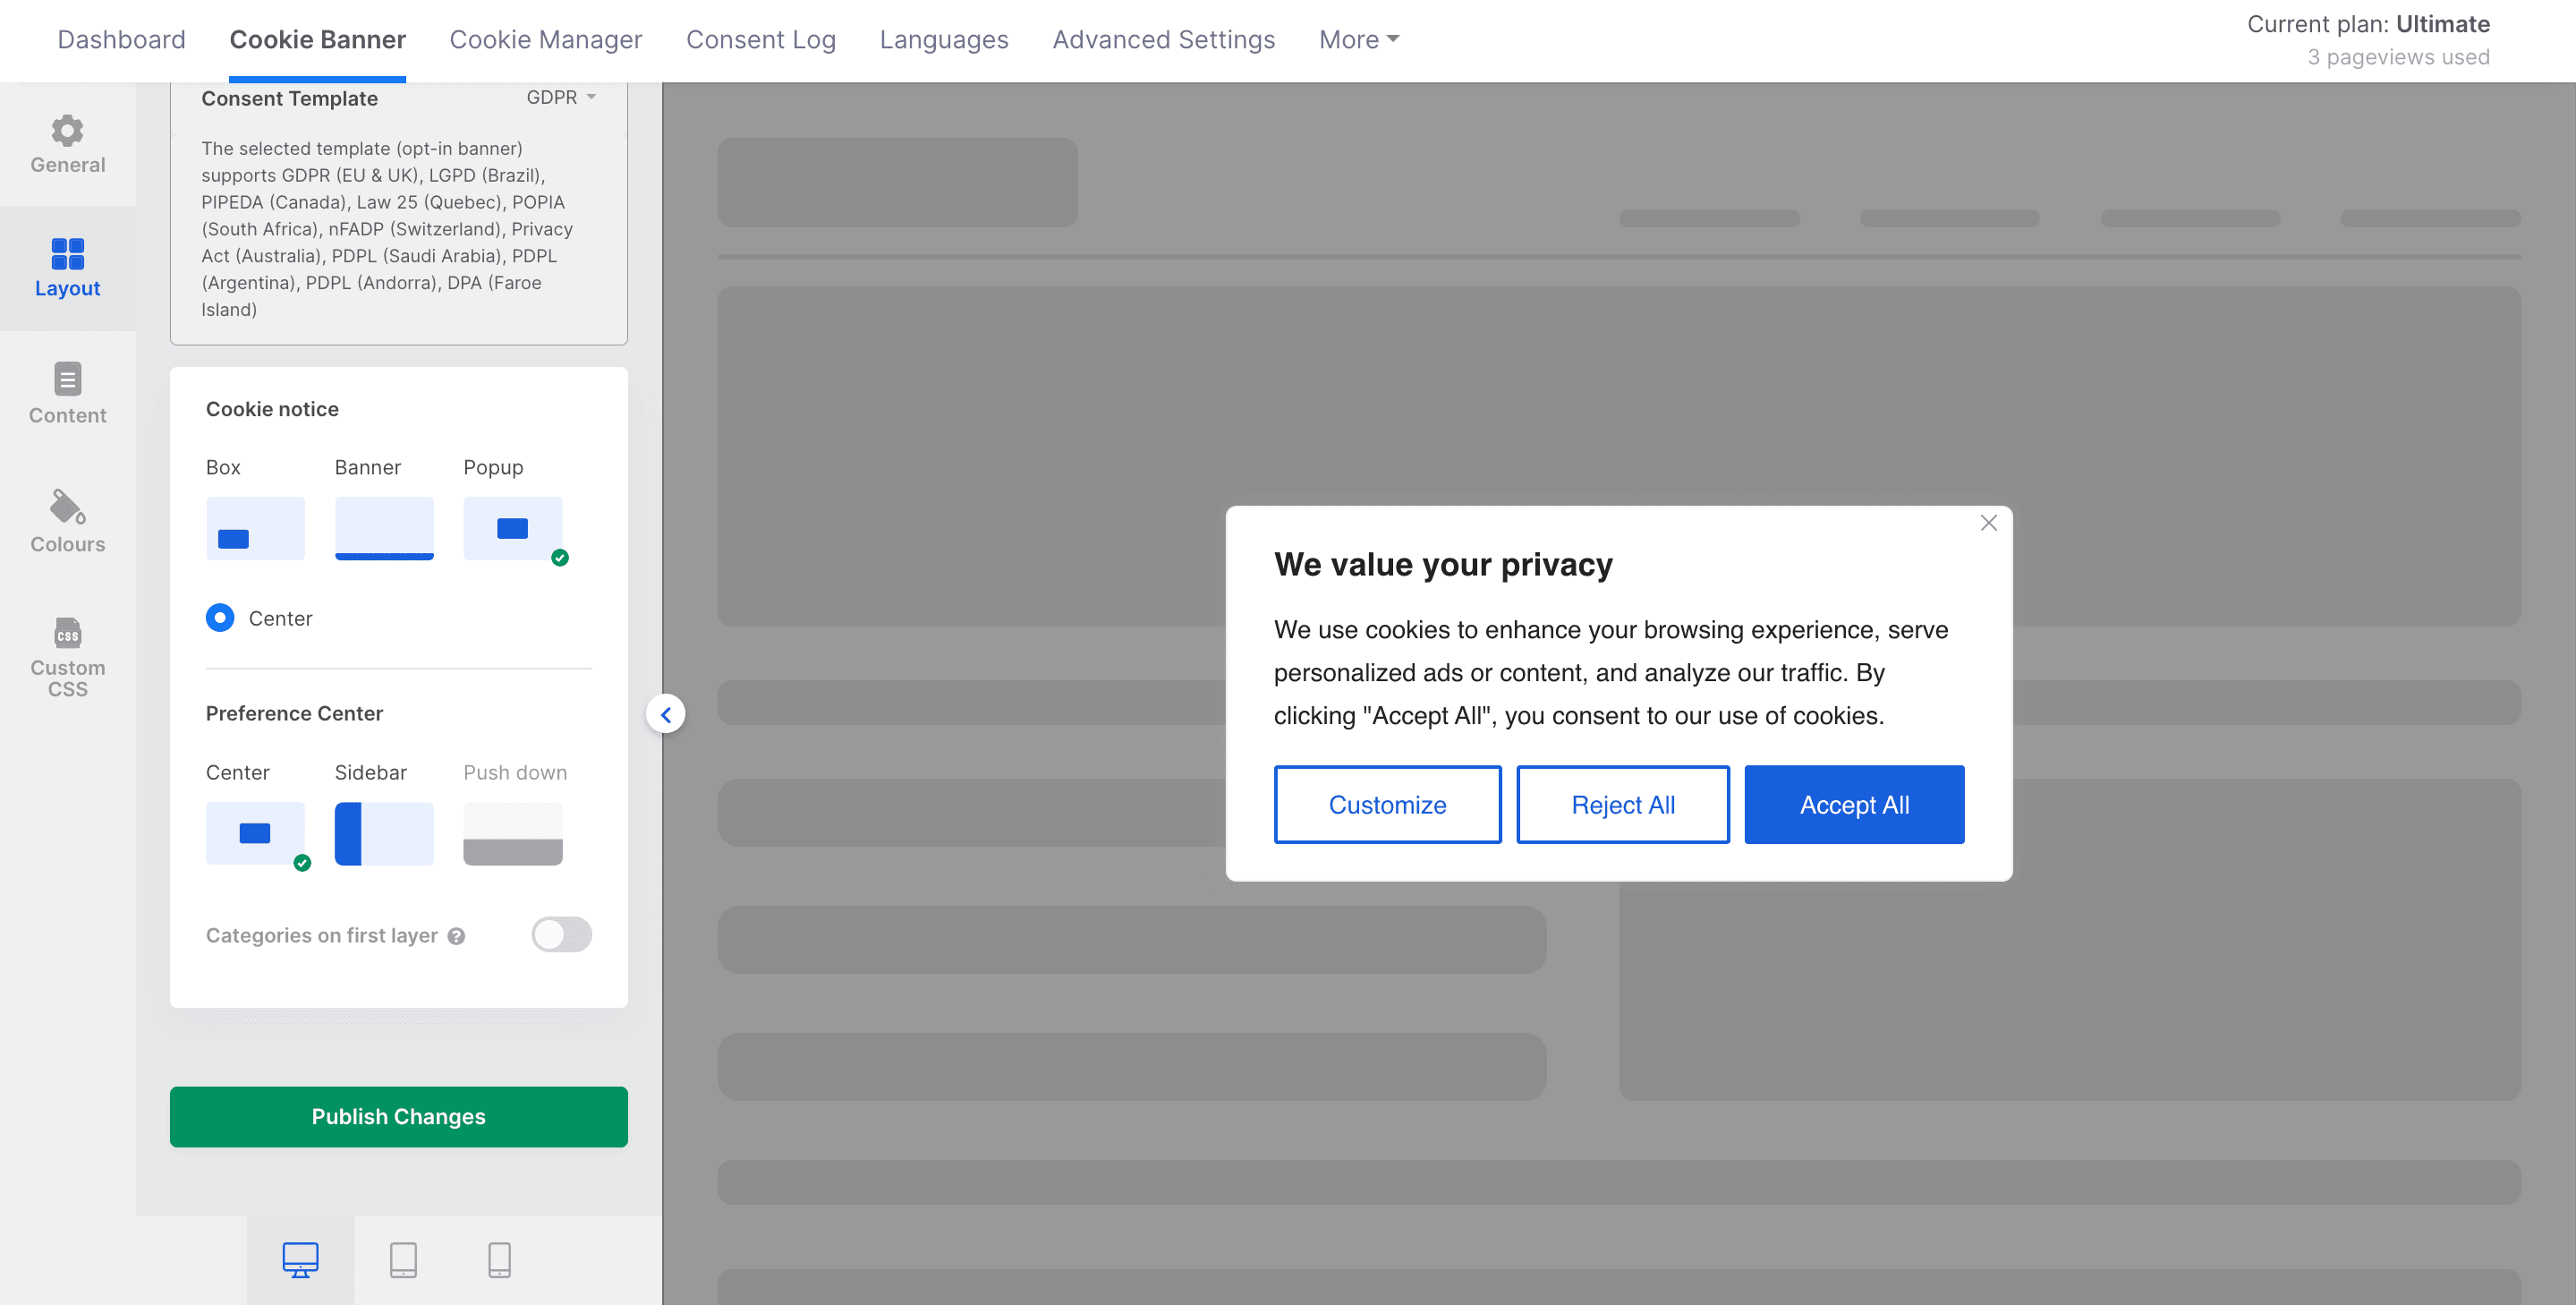
Preference Center
Box – There are 2 options available: Center and Sidebar.

Banner – The three configurations are Centre, Sidebar, and Push down.
The Categories on first layer feature is available with Banner + Push down layout only.
Popup – There are 2 options available, Center and Sidebar.
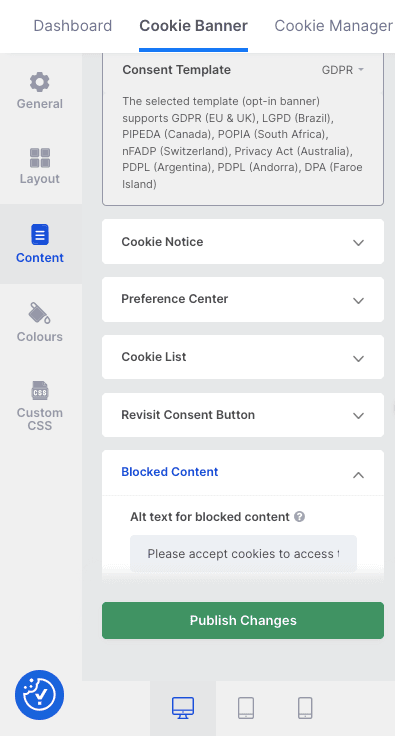
Content
Select Content from the left panel to customize the content of the banner and all banner elements including the title, banner text, button texts, and the preference center.
- Cookie Notice – To edit the message on your banner, edit/change the content of the Title and Message.
- Close [X] button – (Enable/Disable) If enabled, a close button is displayed in the cookie banner, allowing the user to close the banner and keep browsing the website without responding
- Accept All button – Edit the button labels that appear on the banner.
- Reject All button – Edit the button labels on the banner and enable/disable the button; if enabled, the button appears on the cookie banner.
- Customise button – Edit the button labels on the banner and enable/disable the button; if enabled, the button appears on the cookie banner.
- Read More link – (Enable/Disable) If enabled, the Read More link will appear and provide the URL of the privacy or cookie policy page. You can also edit the label name.
- URL – Enter the URL of the cookie policy.
- Categories on the first layer – (Enable/Disable) If enabled, the cookie categories are displayed on the first layer of your banner.
- Custom logo – To personalise your banner, you can add your Brand logo (Available only on the Ultimate plan).
- Disable CookieYes branding – (Enable/Disable) The Powered by CookieYes logo will disappear from the banner if enabled. (Available only on the Ultimate plan)
Even if the Categories on the first layer option are disabled, the categories will be displayed on the preference center (second layer).
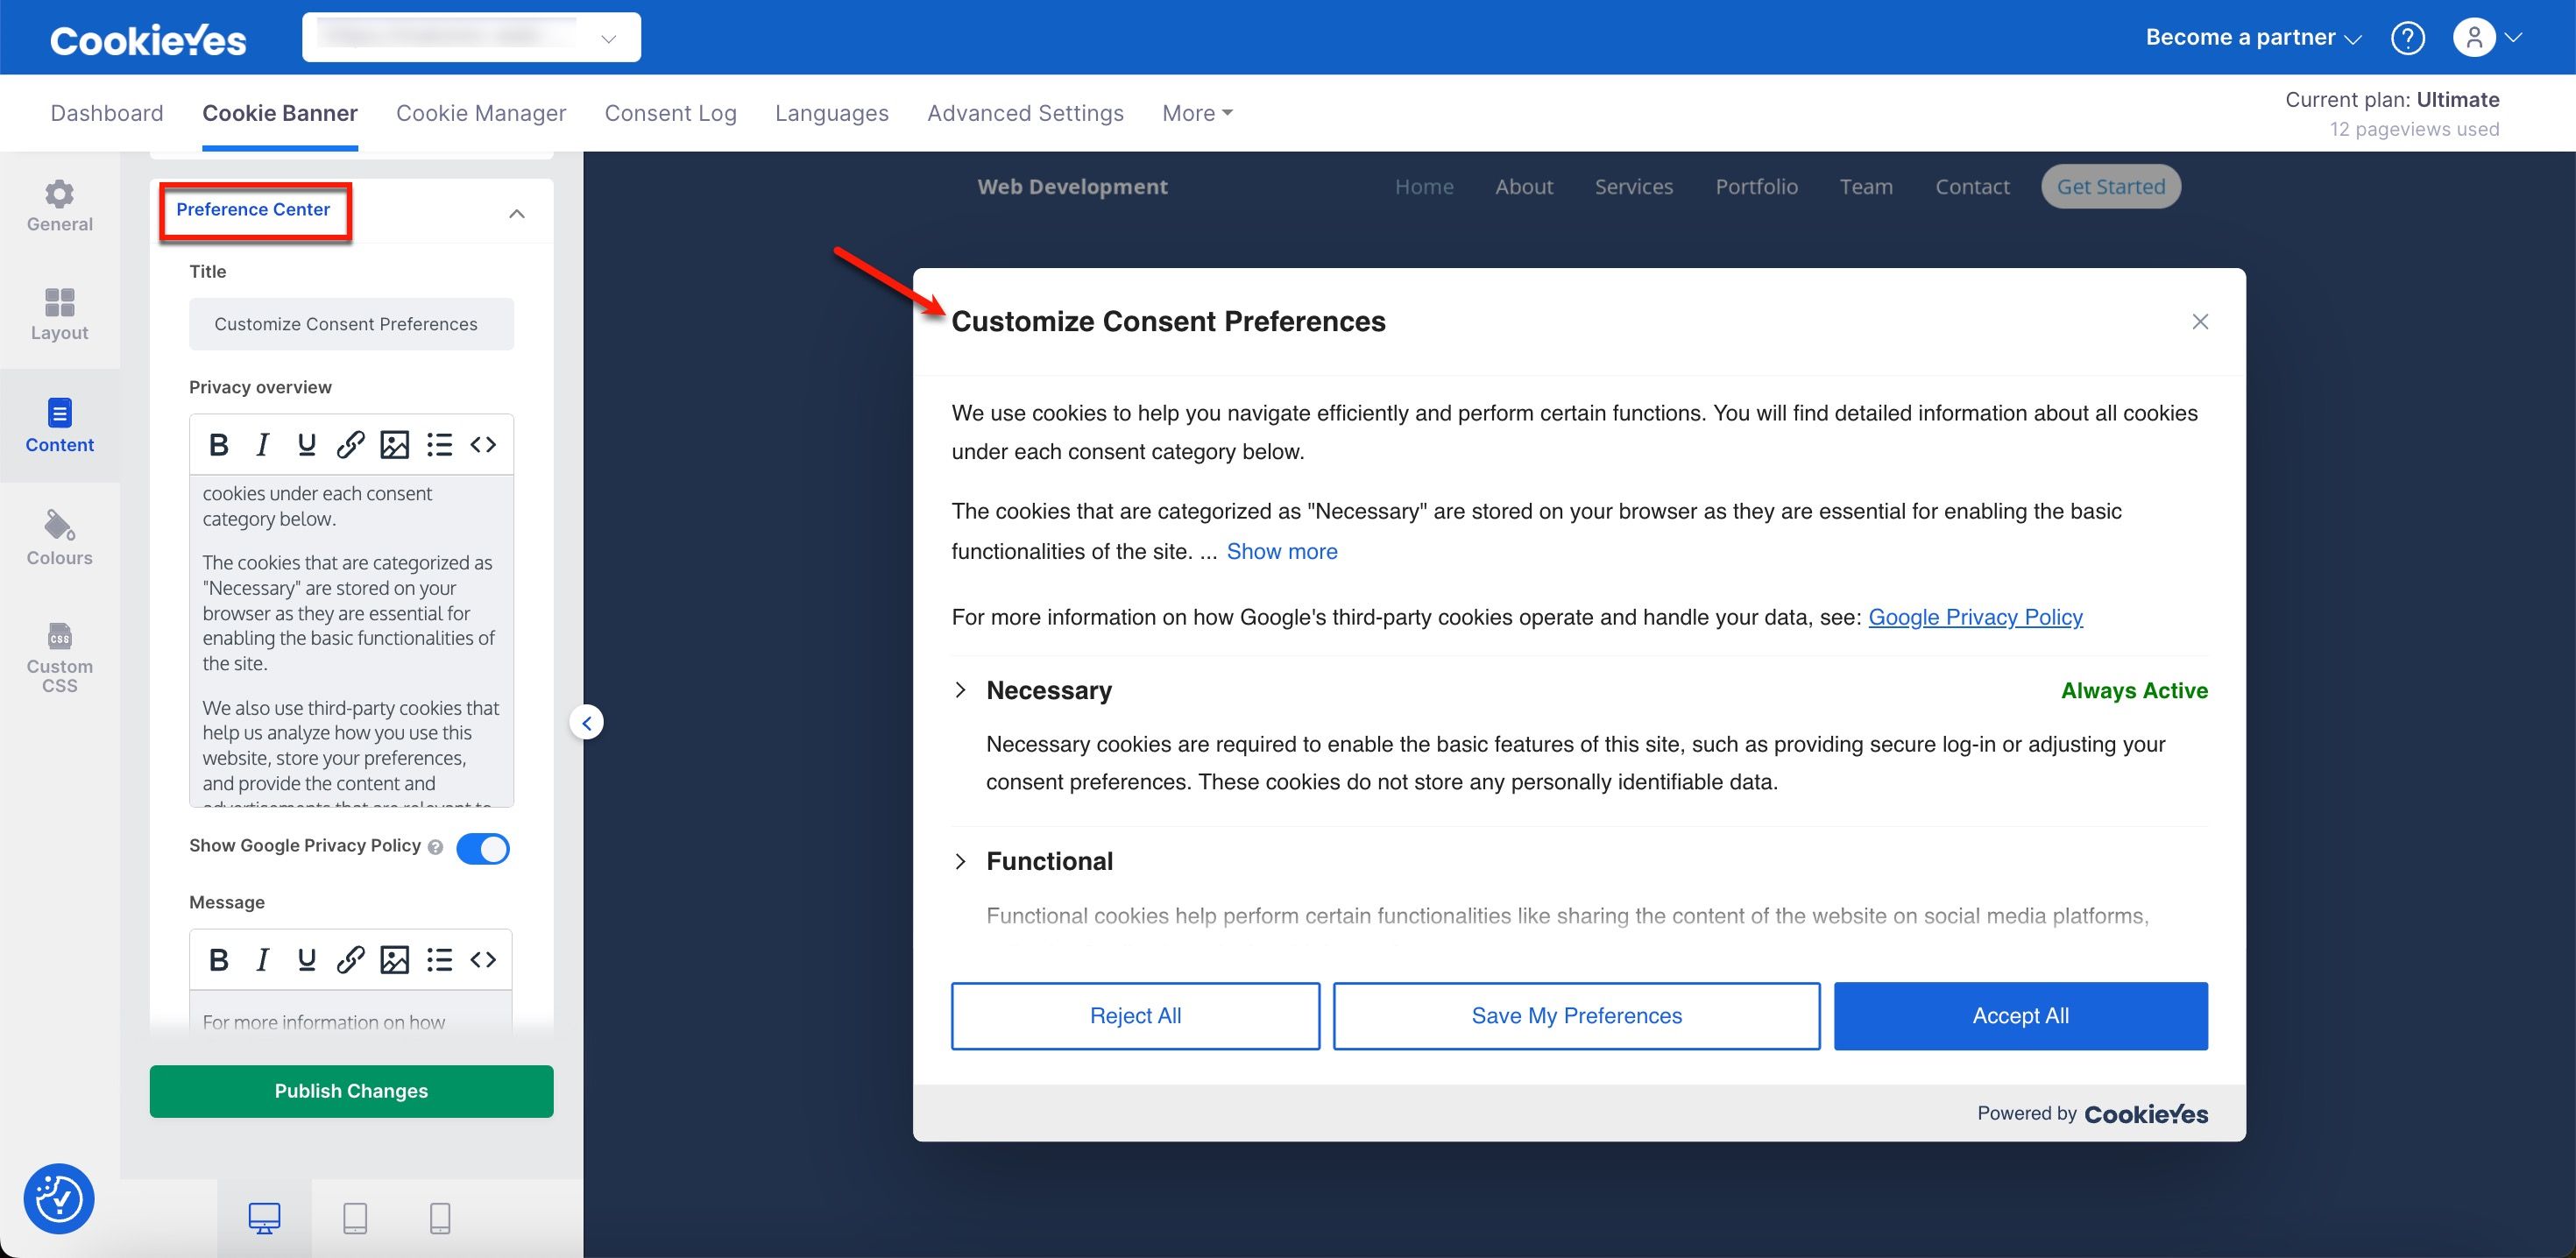
- Preference Centre – To edit the content of the second layer of the banner, edit/change the content of the Title, Privacy overview and the text of the Save my preferences button, Show more button and Show less button.
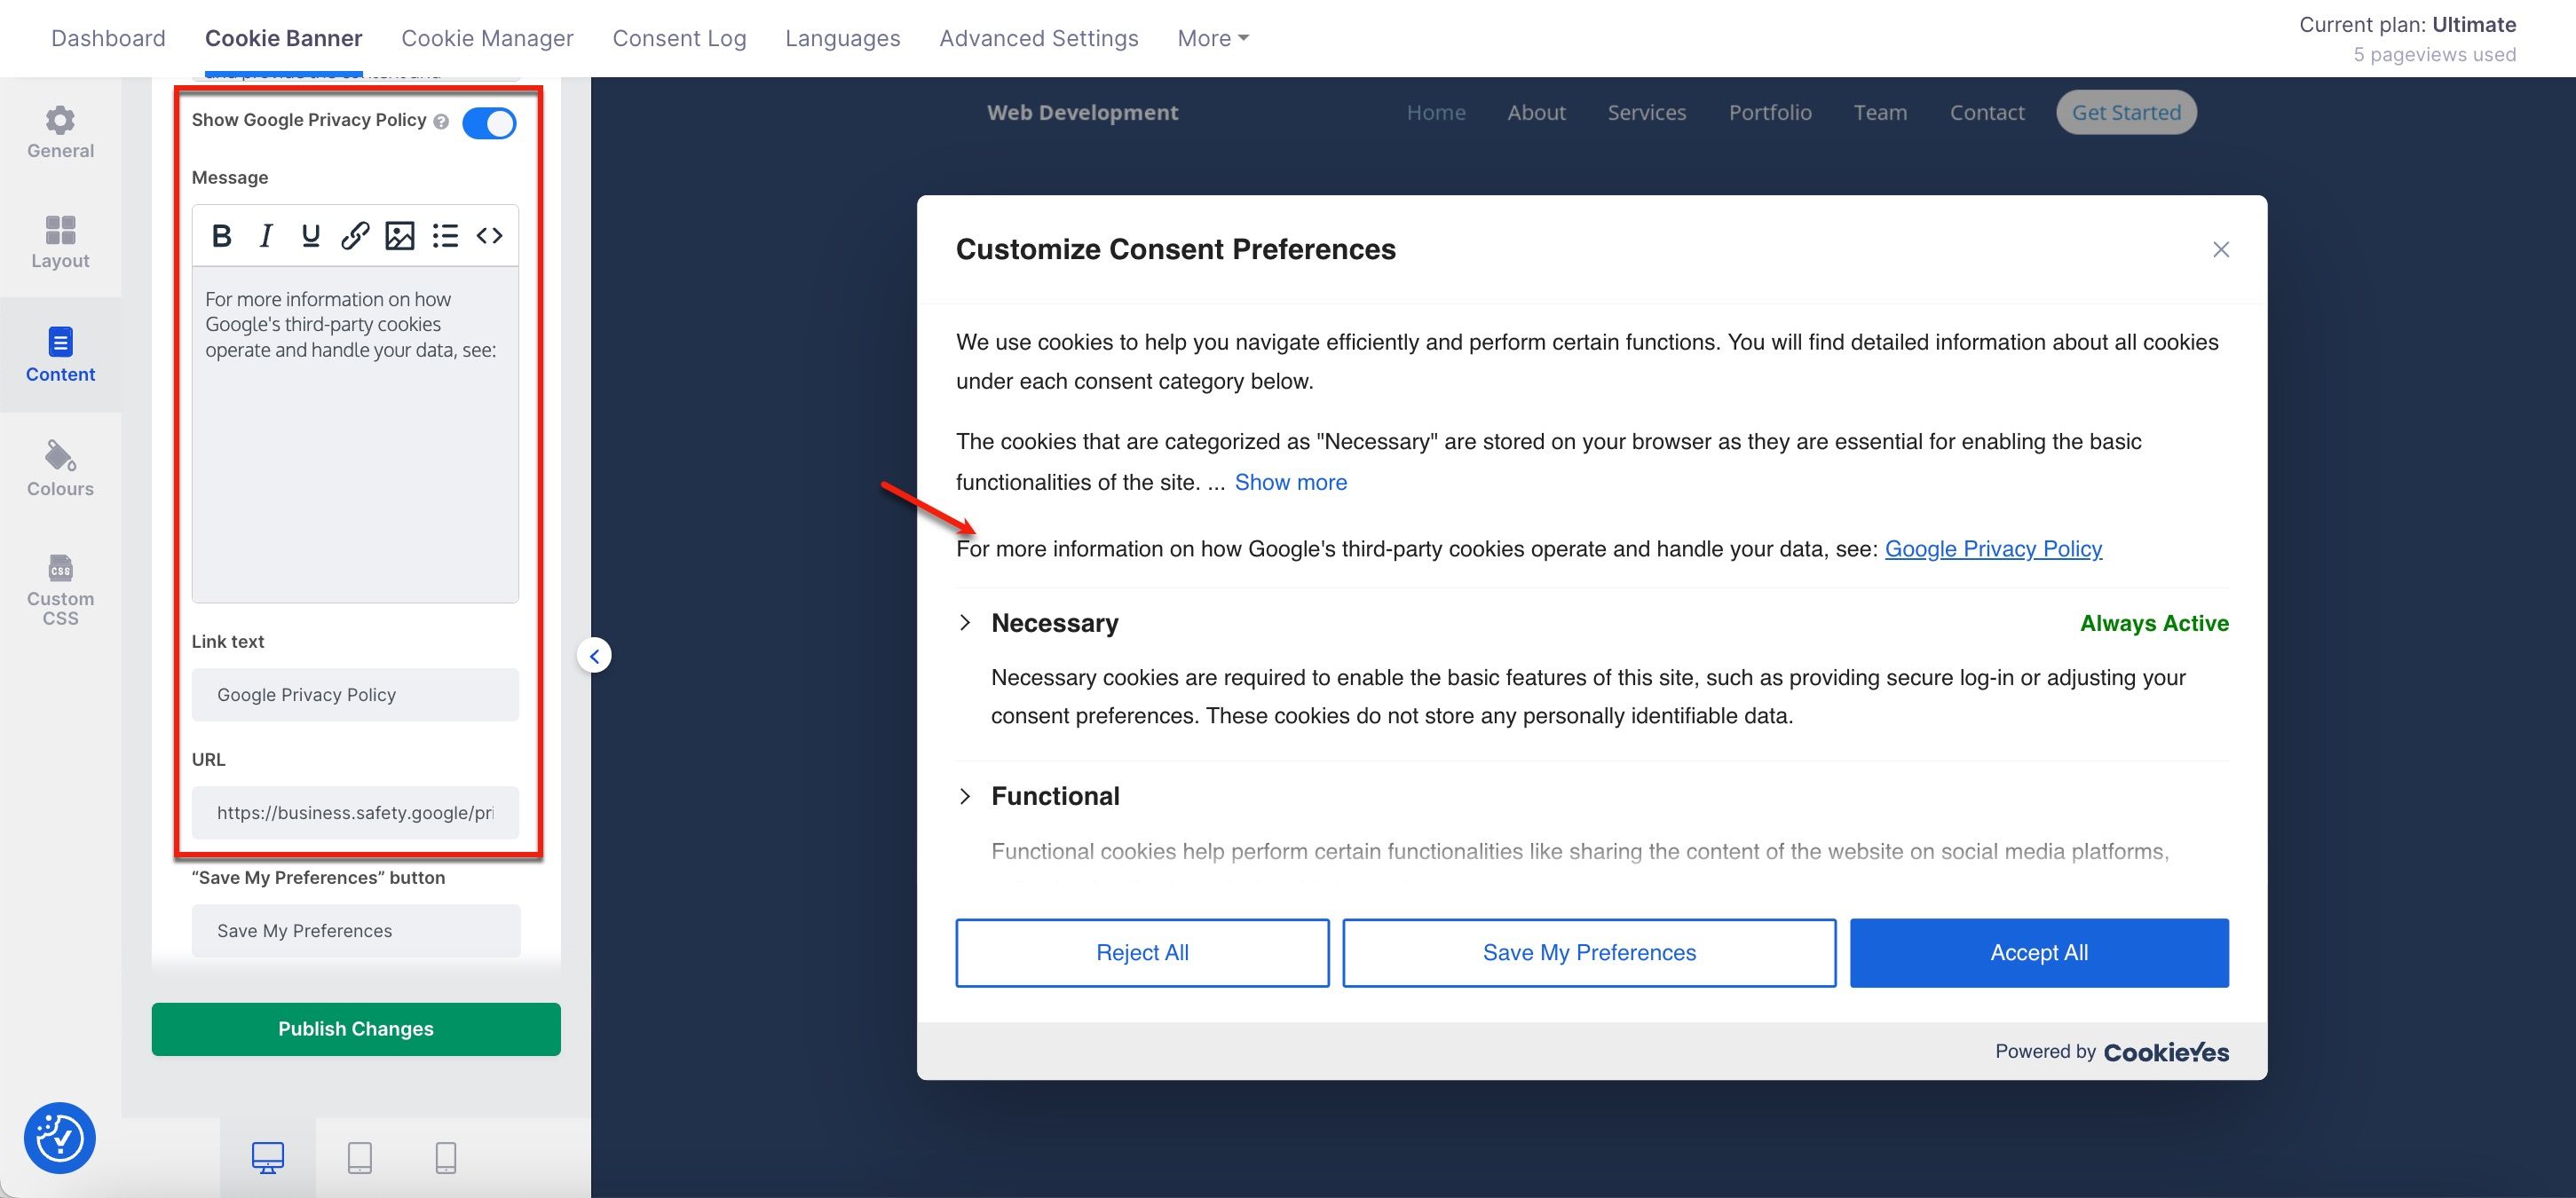
- Show Google Privacy Policy – (Enable/Disable) If enabled, this option will ensure that the Google Privacy Policy is displayed on the second layer of your banner. This is necessary if you use services provided by Google, such as AdSense, Firebase and Analytics on your website, as mandated by the Digital Markets Act (DMA). You can also edit/change the content of the Message, Link Text and URL of the Google Privacy Policy.
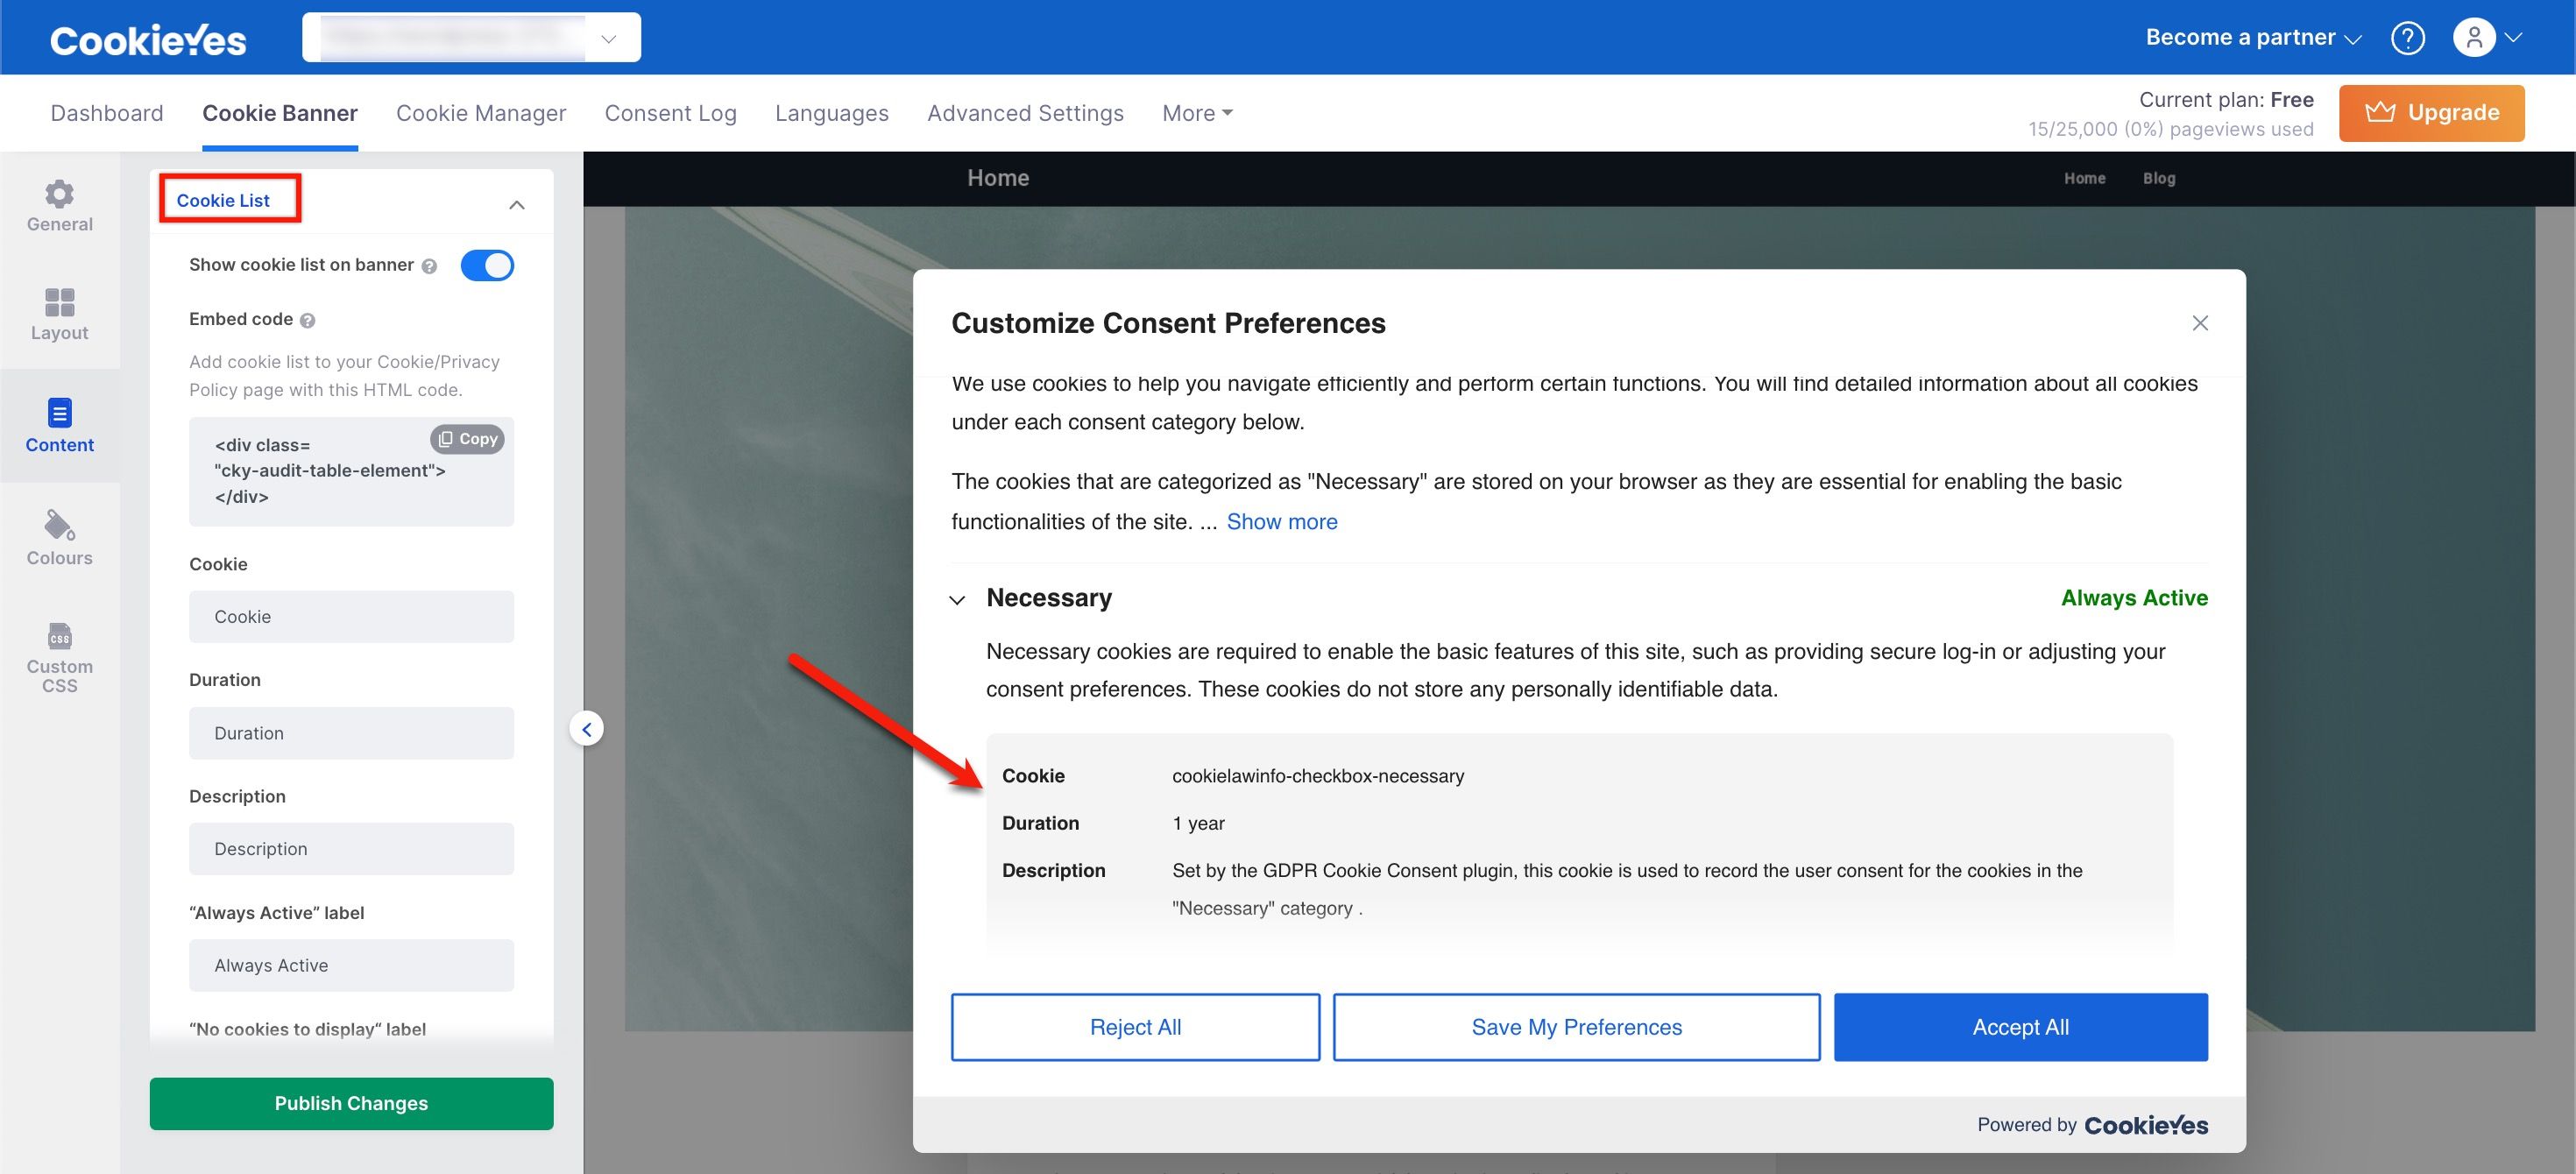
- Cookie List
- Show cookie list – (Enable/Disable) If enabled, the cookie list will display in the second layer of the banner.
- Cookie – Edit the label ‘cookie’ in the cookie list.
- Duration – Edit the label ‘duration’ in the cookie list.
- Description – Edit the label ‘description’ in the cookie list.
- Always Active – Edit the label ‘Always Active’ in the cookie list.
- No cookies to display – Edit the label ‘No cookies to display’ in the cookie list.
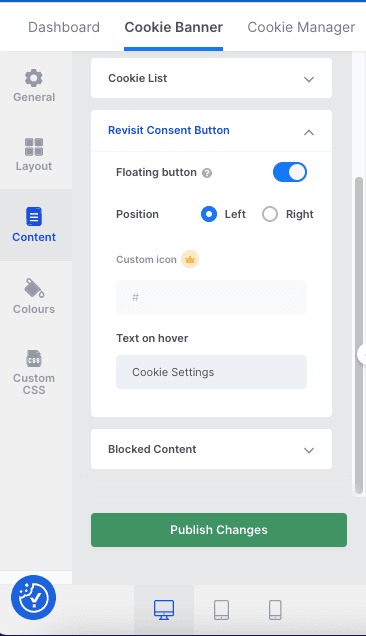
- Revisit Consent Button
- Floating Button – (Enable/Disable) If enabled, a small widget will appear at the bottom of the website, allowing the users to change/withdraw consent easily.
- Position – (Left / Right) Select the spot of the button on the website.
- Text on hover – Edit the text to display when hovered over the Revisit consent button.
Blocked Content – Edit the text that will appear over embedded videos (Youtube, Vimeo etc.) in case the website visitor has rejected certain cookies that are required for the video to play.
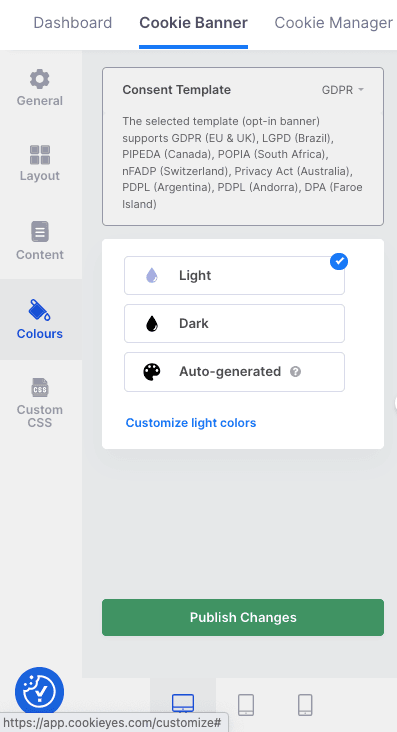
Colours
Select Colours on the left panel to customize the colour of the banner and all banner elements, including background, buttons and text.
Choose from the different colour themes for the banner: Light, Dark, Auto-generated and Custom.
For the Auto-generated theme, the colour of the banner will be based on the website colour scheme.
Under CustomiSe colours, the following customizations are available:
- Cookie Notice – (Colour palette/HEX code) Select colour for the background, border, title and message of the banner and buttons on the cookie notice.
- Preference Center – (Colour palette/HEX code) Select colour for the background, border, text and toggle switch.
- Revisit Consent Button – (Colour palette/HEX code) Select the background colour for the floating button.
- Alt Text for Blocked Content are available – (Colour palette/HEX code) Select colour for the background, border and text.

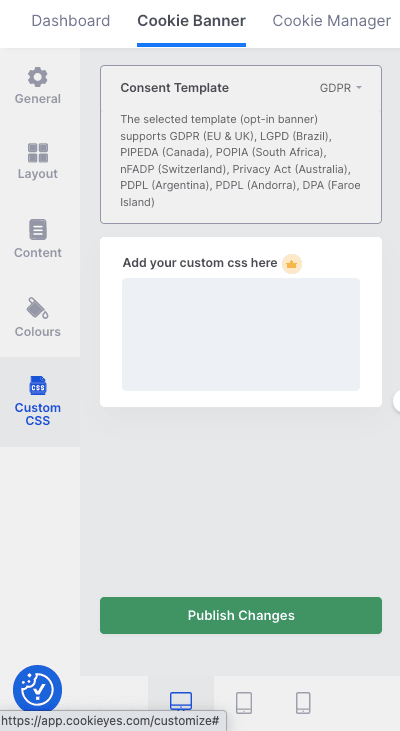
Custom CSS
Select Custom CSS on the left panel and add the custom CSS code in the given box to personalise the banner style (Available only on Basic, Pro and Ultimate plan).
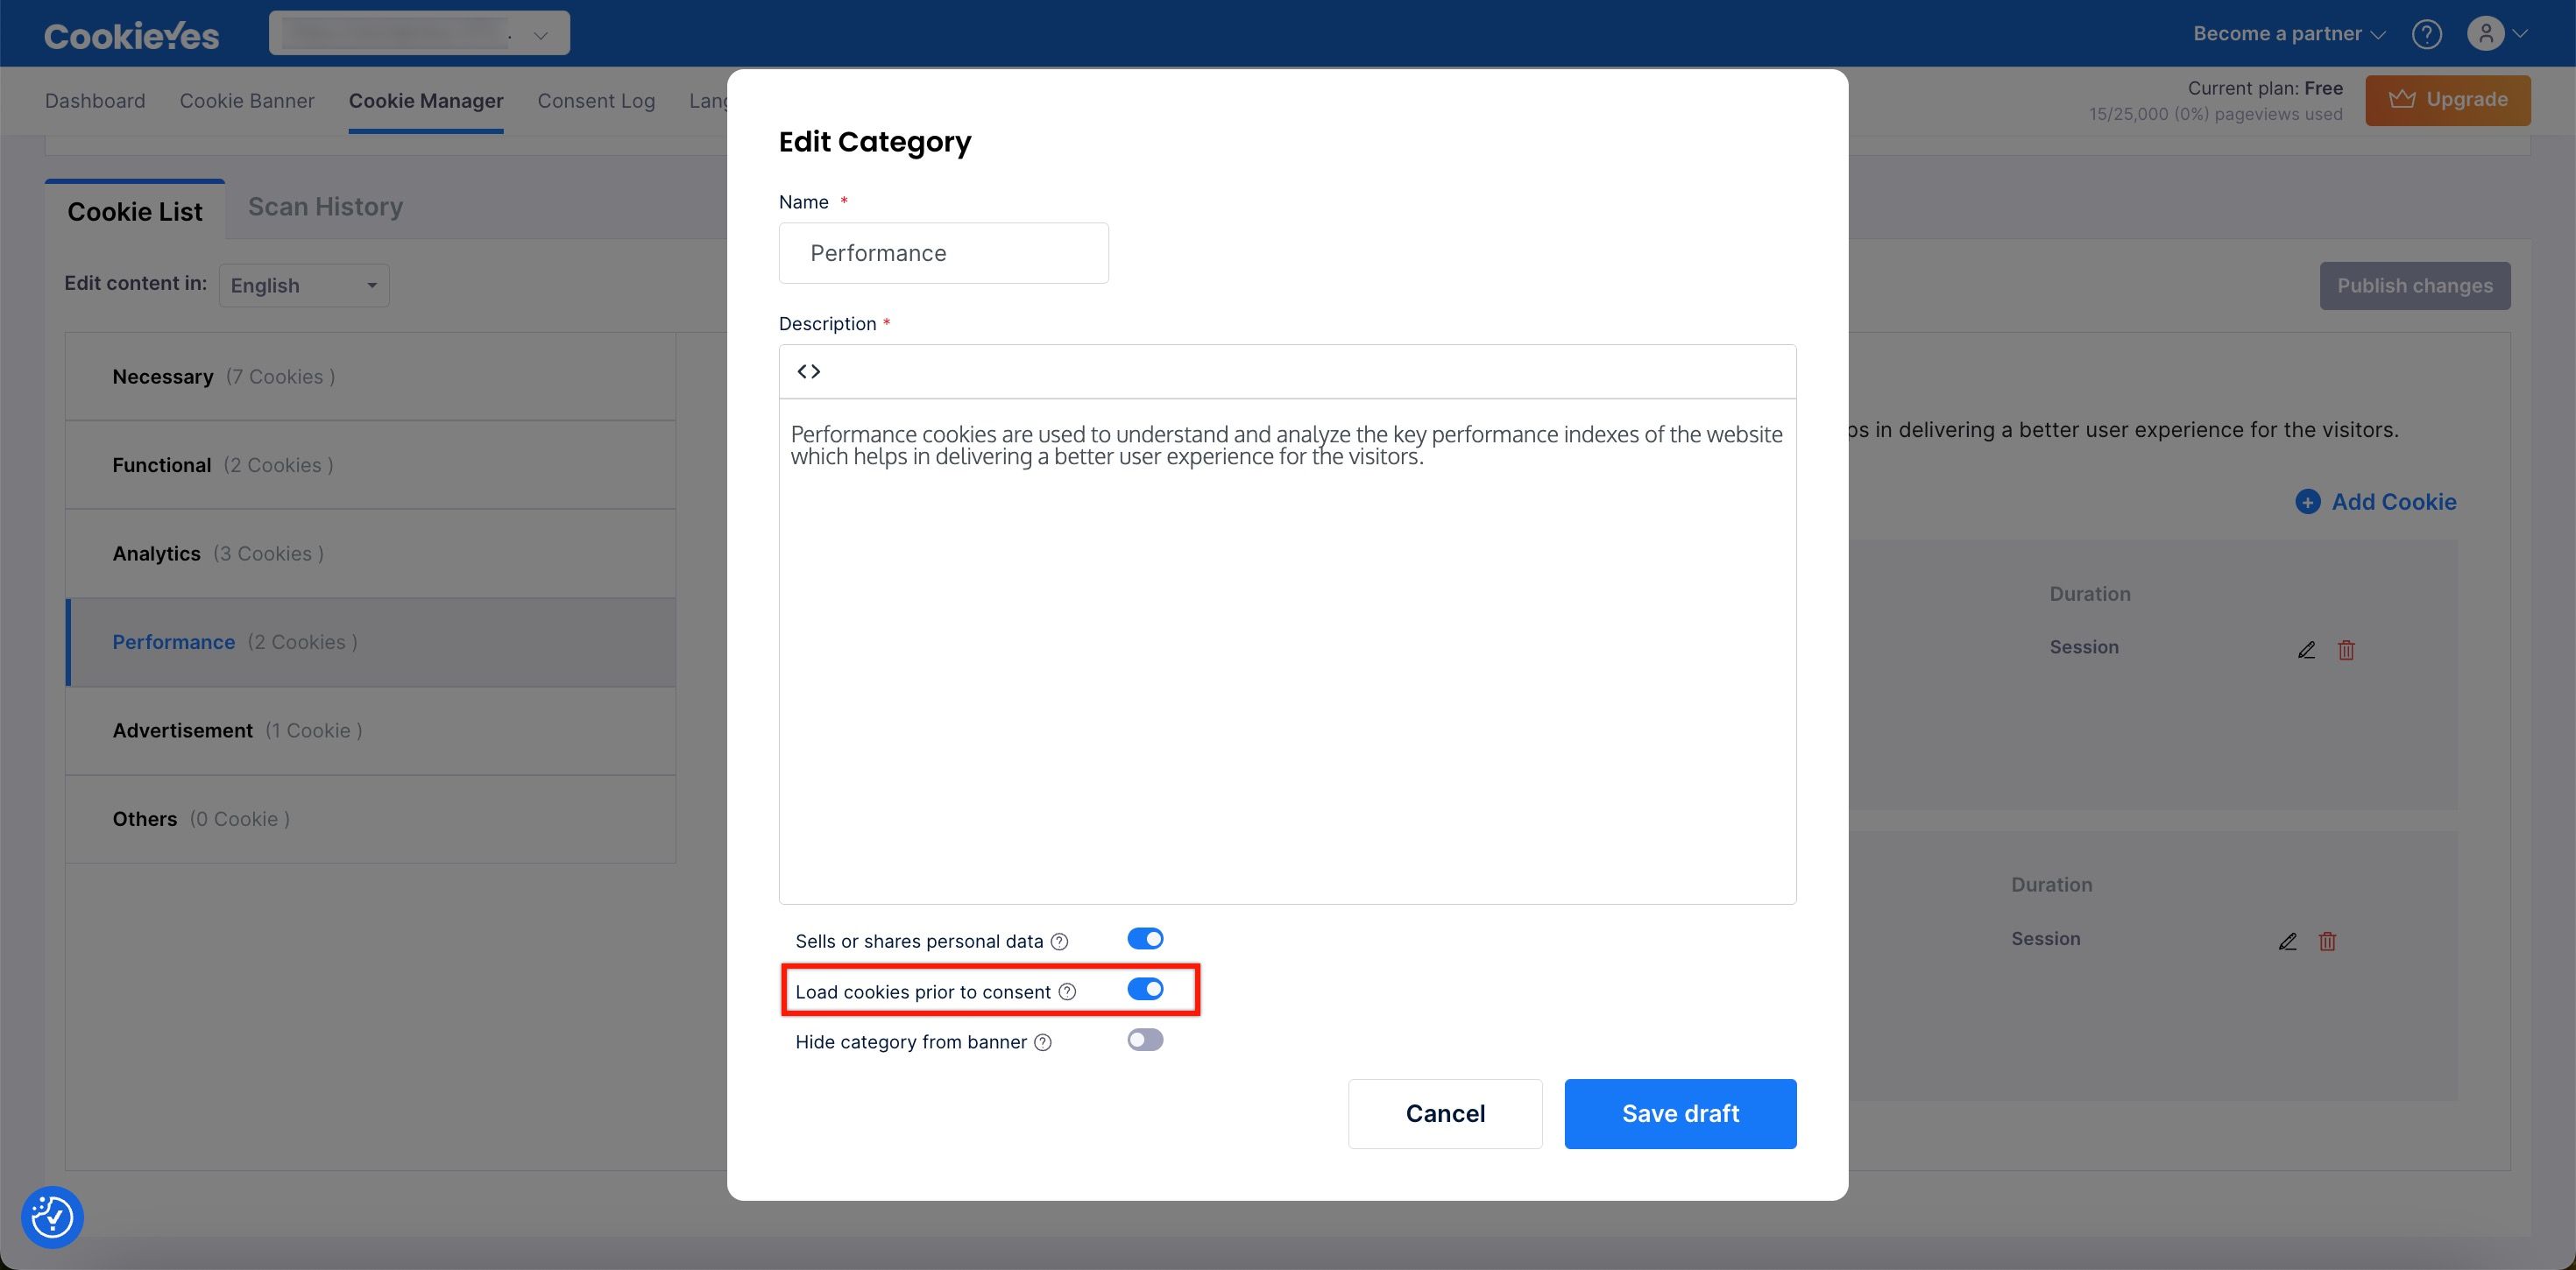
Load Cookies before Consent
You can load cookies of each category on a user’s browser before receiving user consent. To enable this feature, follow the below steps:
- Navigate to the Cookie Manager > Cookie Category.
- Click the edit icon.
- Toggle the button (to the right) labelled “Load cookie before consent”.
- Click the Save Draft button to save the change made.
- Now, click the Publish Change button.
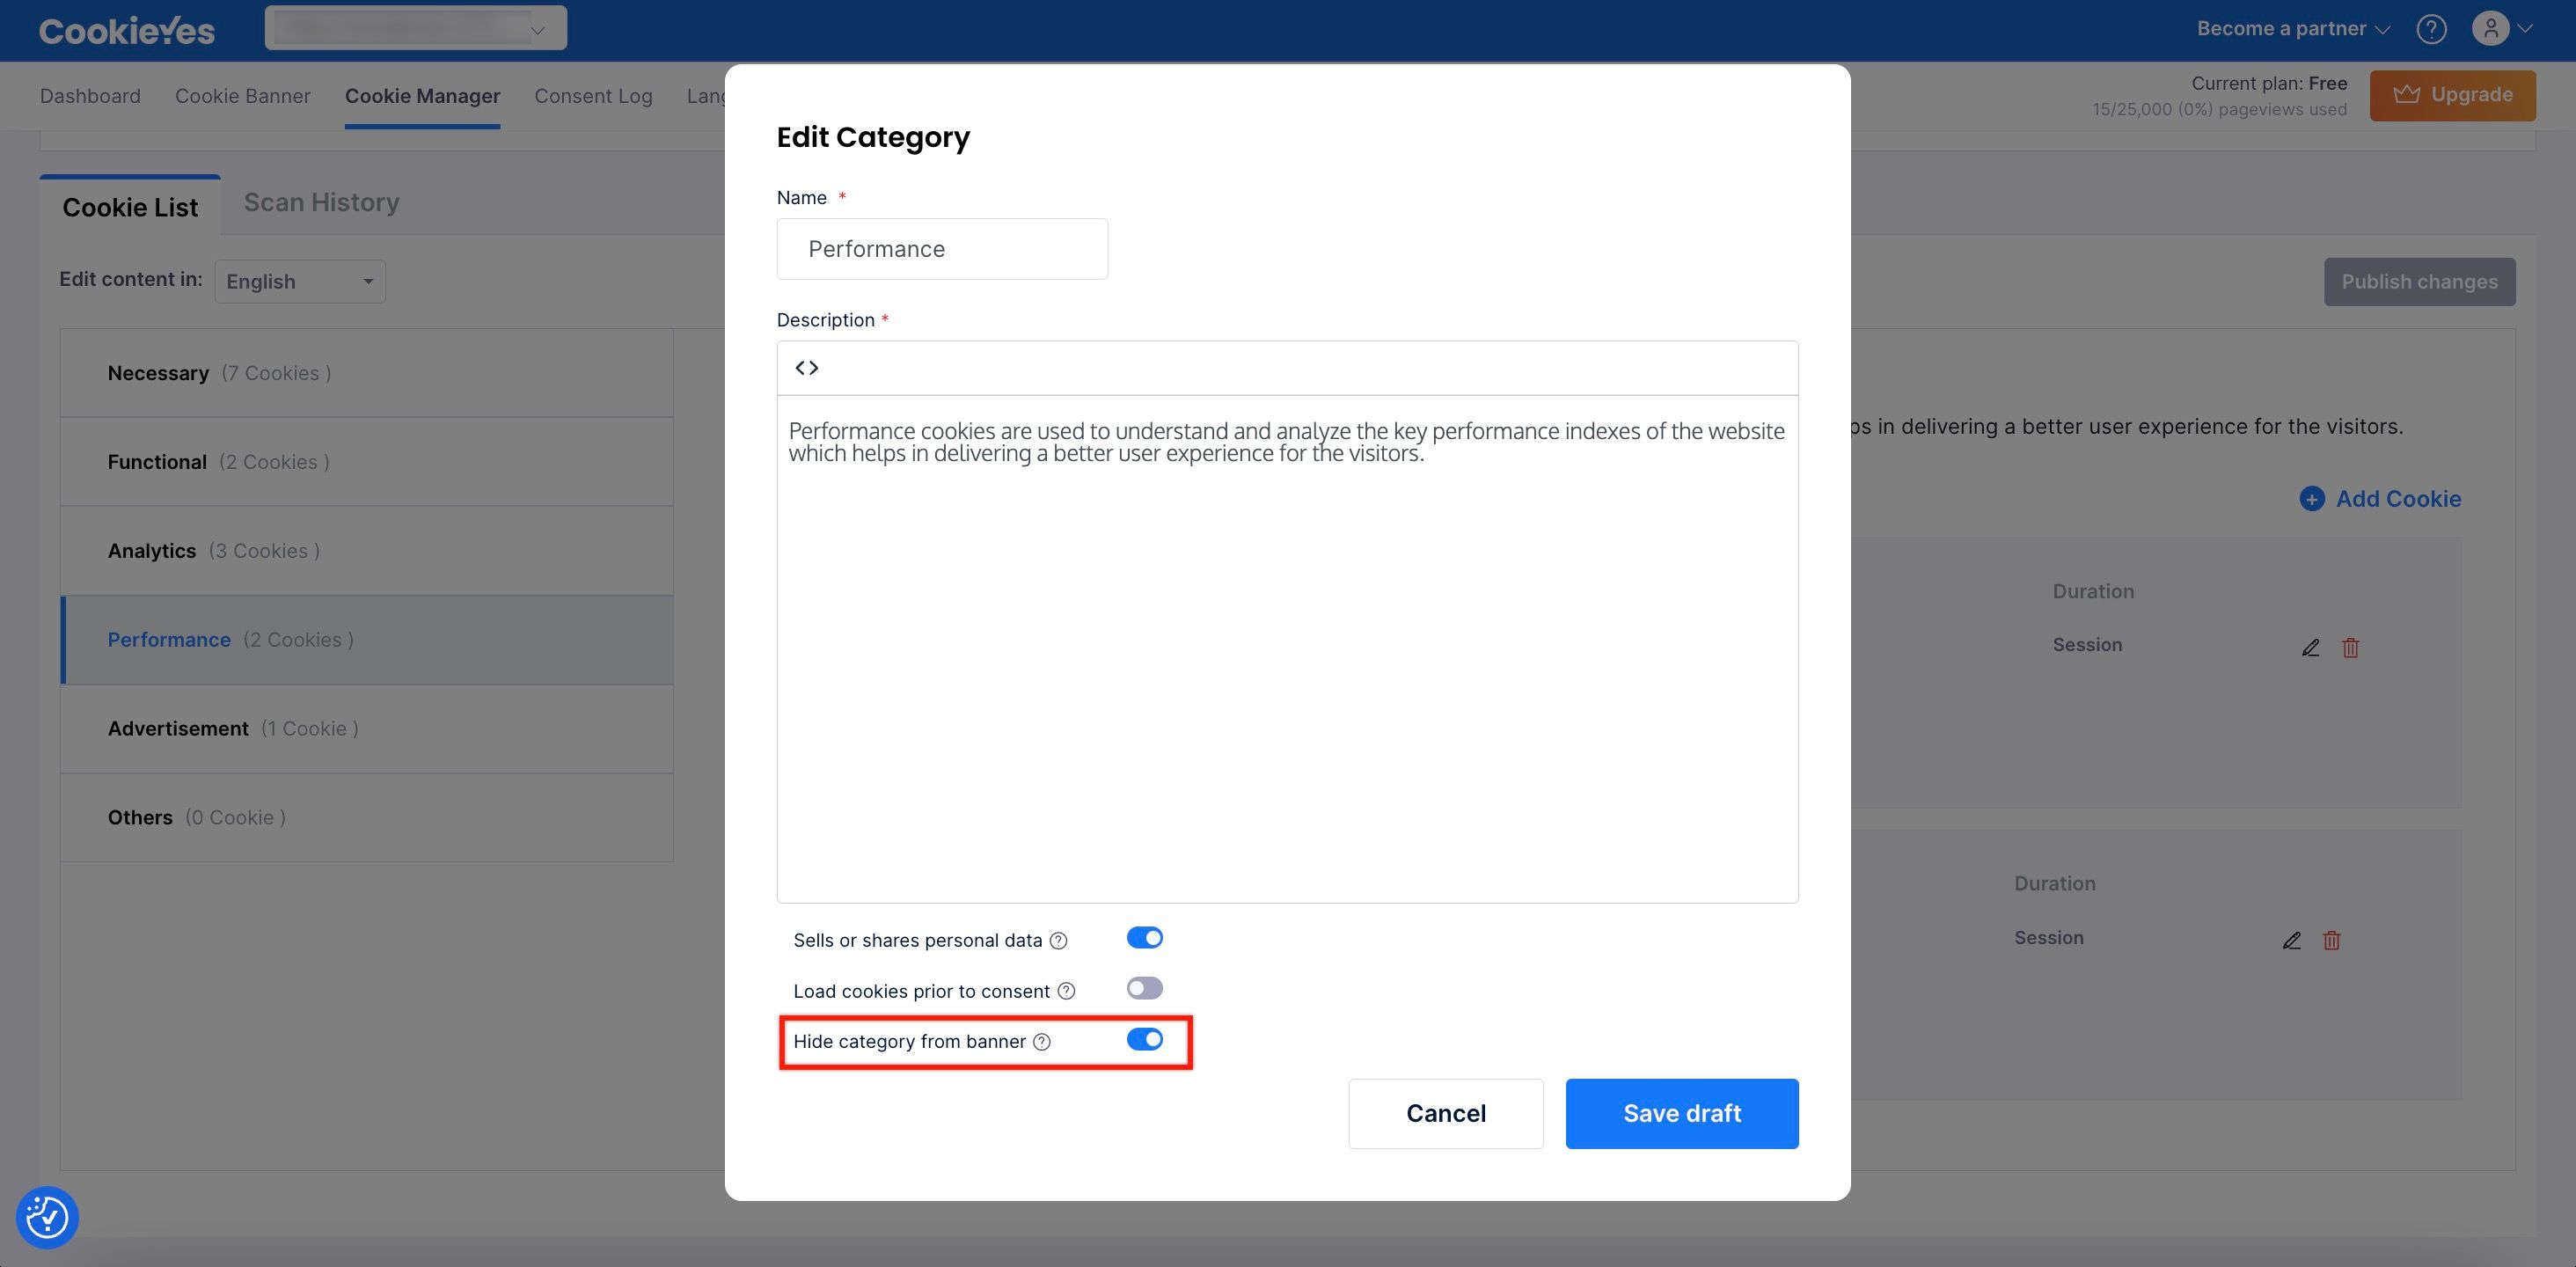
Hide Category from Banner
You can hide categories from the banner so that it does not appear on your banner’s second layer. To enable this feature, follow the below steps:
- Navigate to the Cookie Manager > Cookie Category.
- Click the edit icon.
- Toggle the button (to the right) labelled “Hide category from banner”.
- Click the Save Draft button to save the change made.
- Now, click the Publish Change button.
Loading cookies prior to consent or hiding cookie categories are not GDPR-compliant practices.