Getting Started
Chapter 2:
How to Add Cookie Banner on WebFlow Website
Welcome to CookieYes! This documentation will guide you through setting up CookieYes on a WebFlow website. By following the steps, you can easily integrate CookieYes into your WebFlow website and enable a cookie consent banner.
Video tutorial: Implement cookie consent on the WebFlow website
You can also follow the step-by-step instructions given below to easily implement a cookie banner on your WebFlow website.
Step 1: Sign Up on CookieYes and Create a Cookie Banner.
To begin, follow the below steps:
- Sign up on CookieYes for free.
- Once you have created the account, create a cookie banner for your website.
In case you have already signed up on CookieYes, without taking any action on the initial setup screens, head to the CookieYes Dashboard.
- To customize the cookie banner, select the Cookie Banner from the top navigation panel.
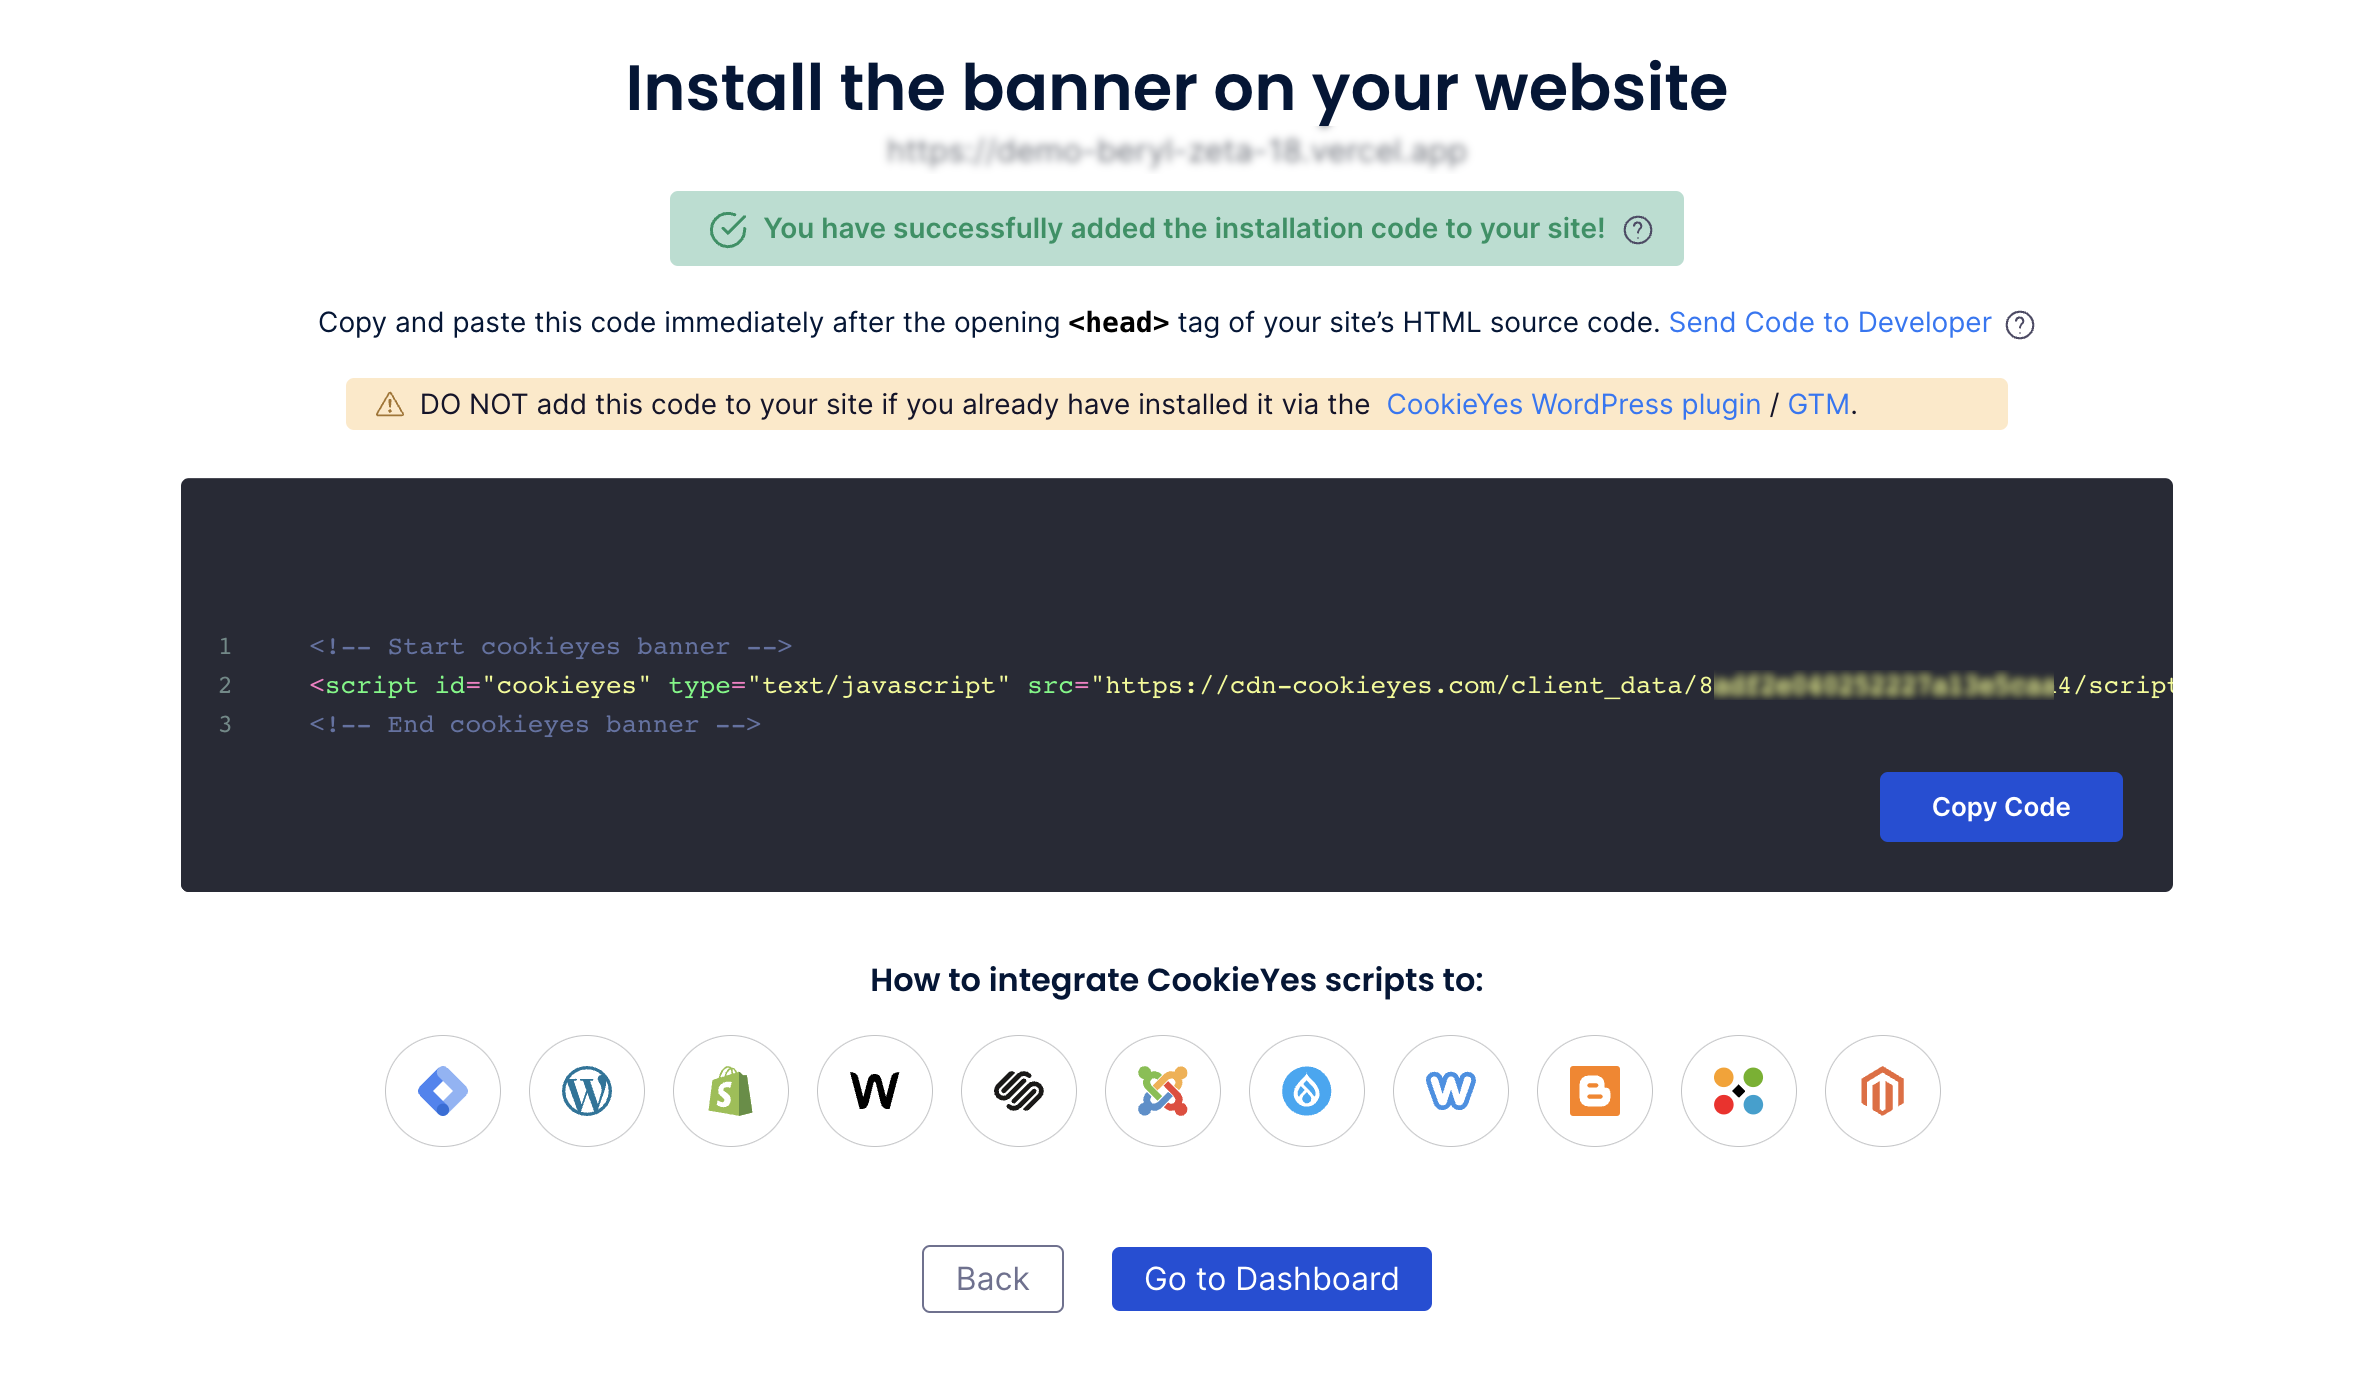
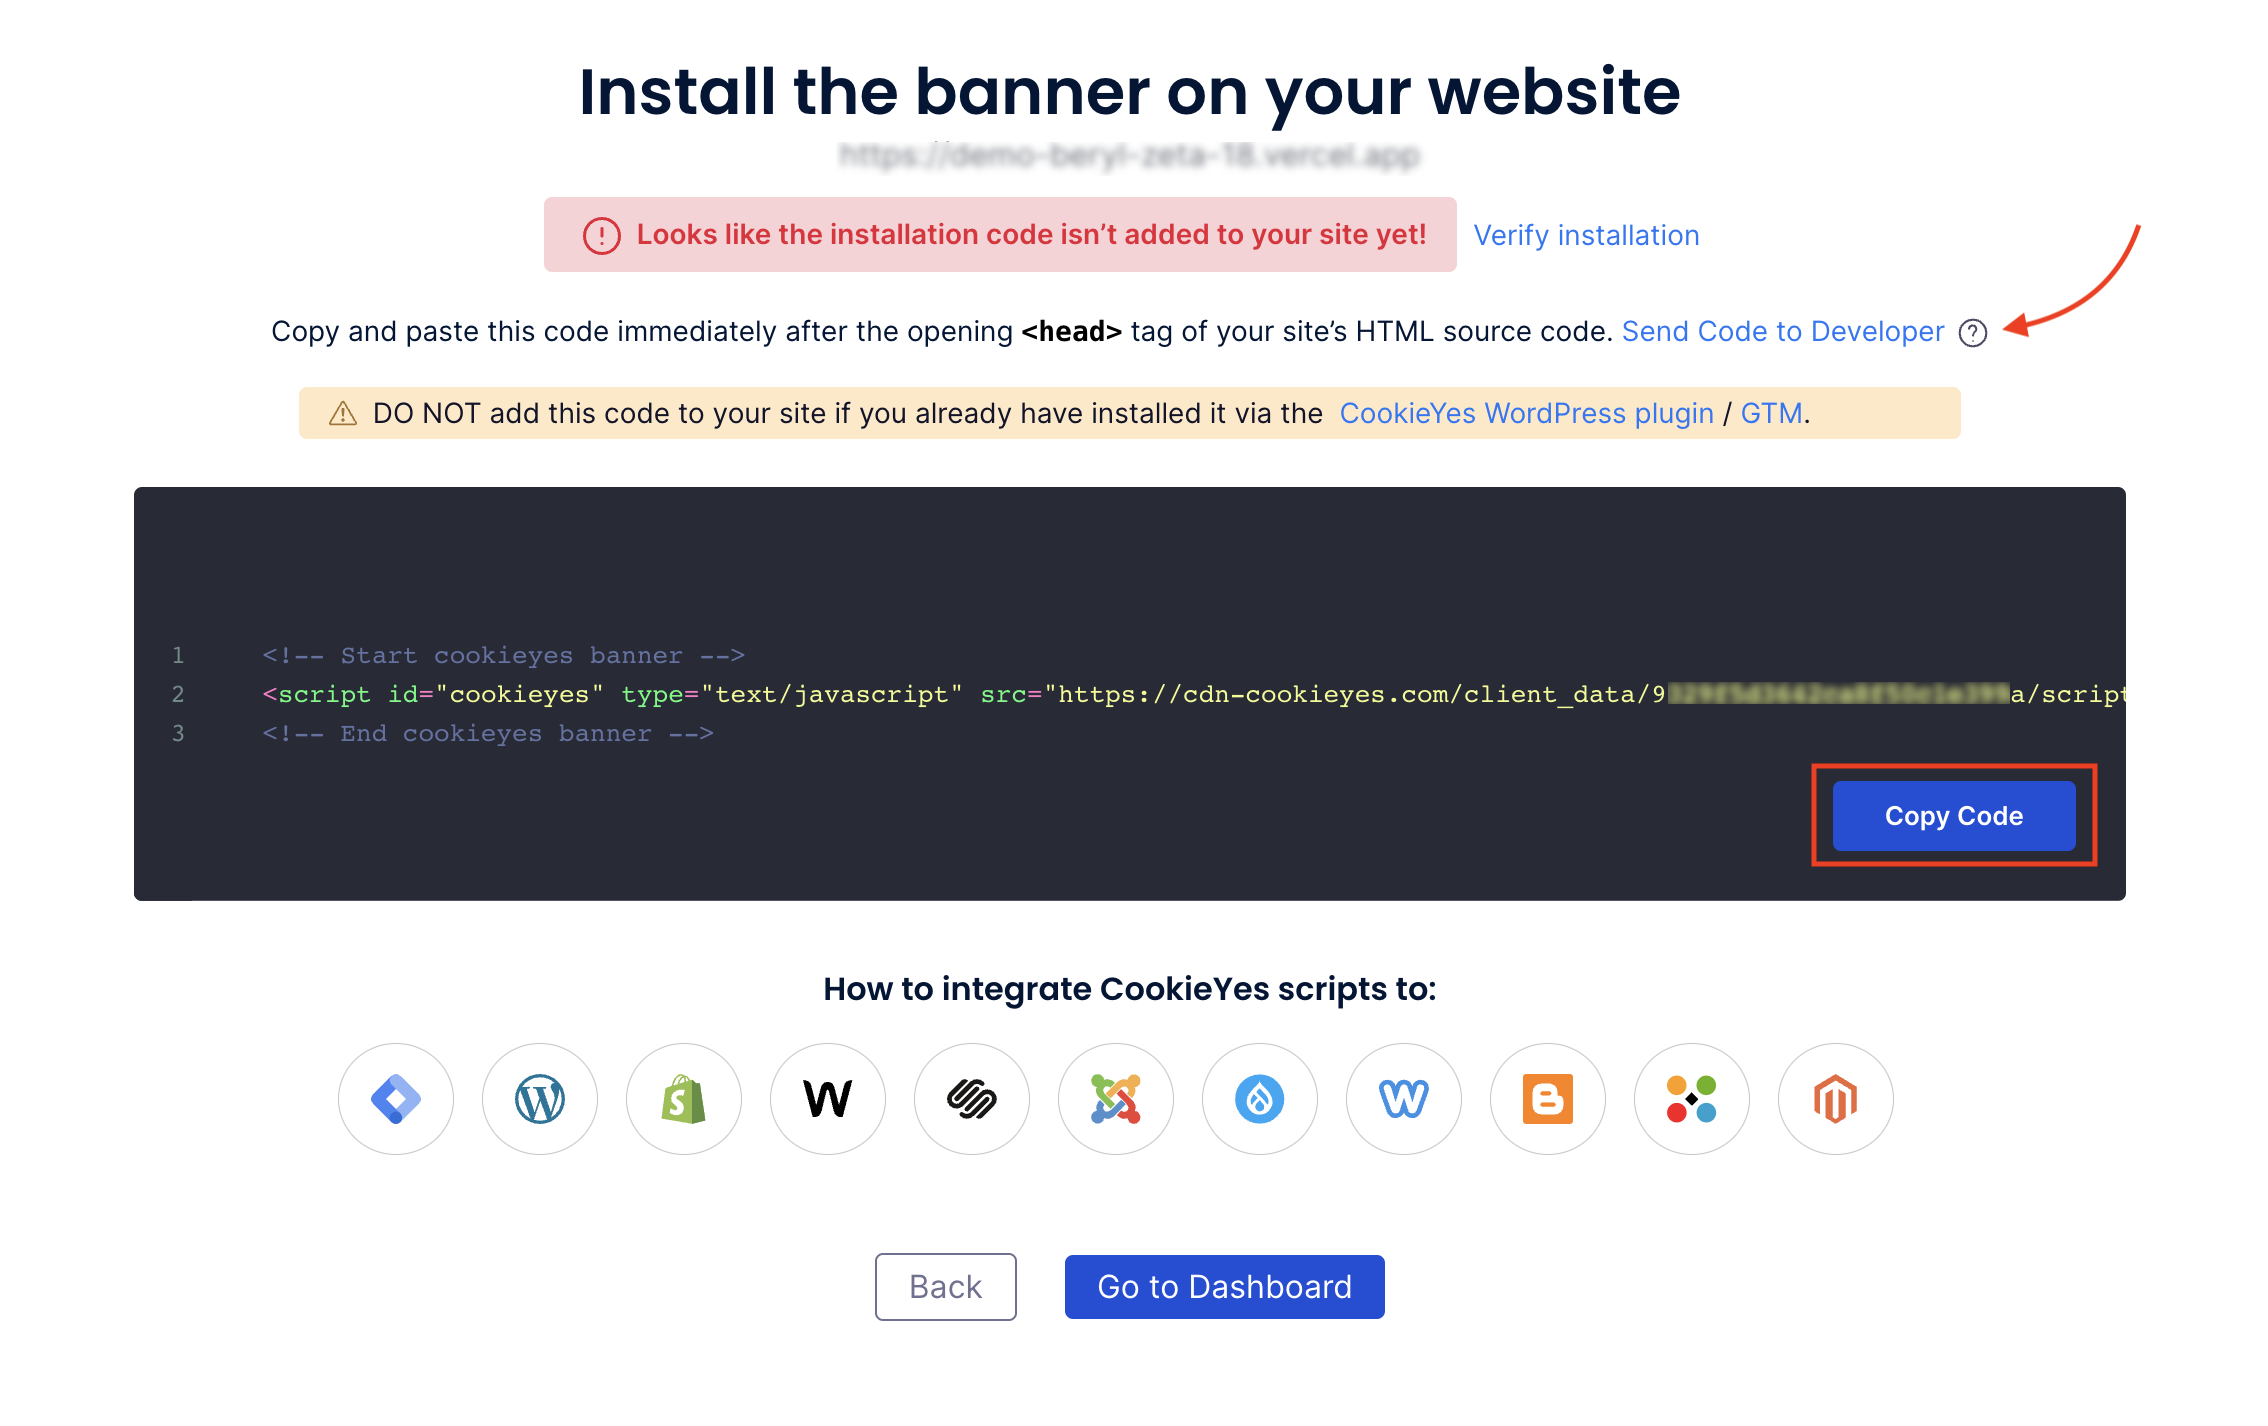
- To get the banner installation code, head to Advanced Settings and click on the Get Installation Code button on the right side of the URL.
- Now click on the Copy code button to get the CookieYes installation code.
You can share the code with a developer or your team by clicking on Send code to Developer link. Enter the email address and then click on Send Instructions. The recipient will get the code and instructions via email.
Step 2: Add CookieYes consent banner on the WebFlow website
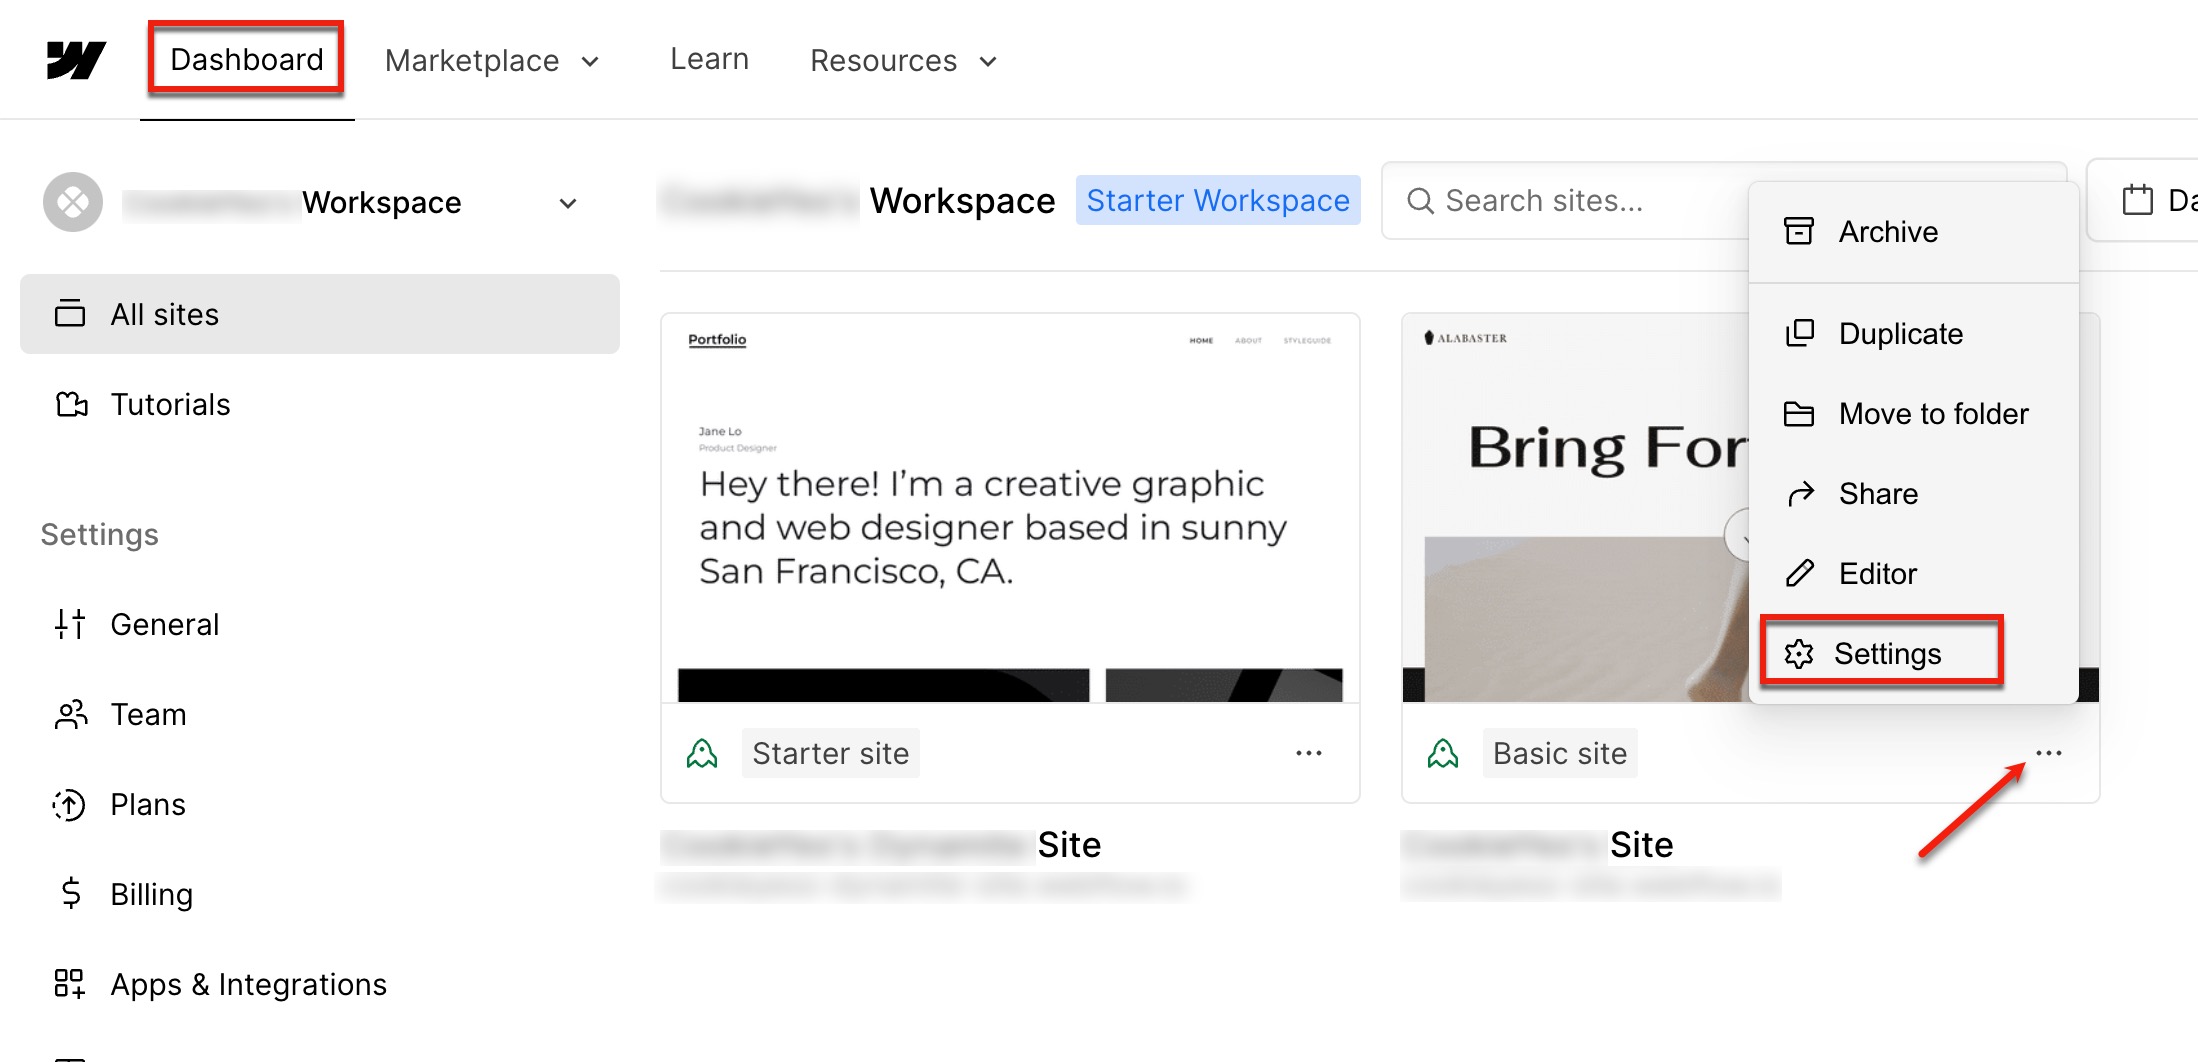
Step 1: Head to your WebFlow Dashboard > Project Workspace and select your project Settings.
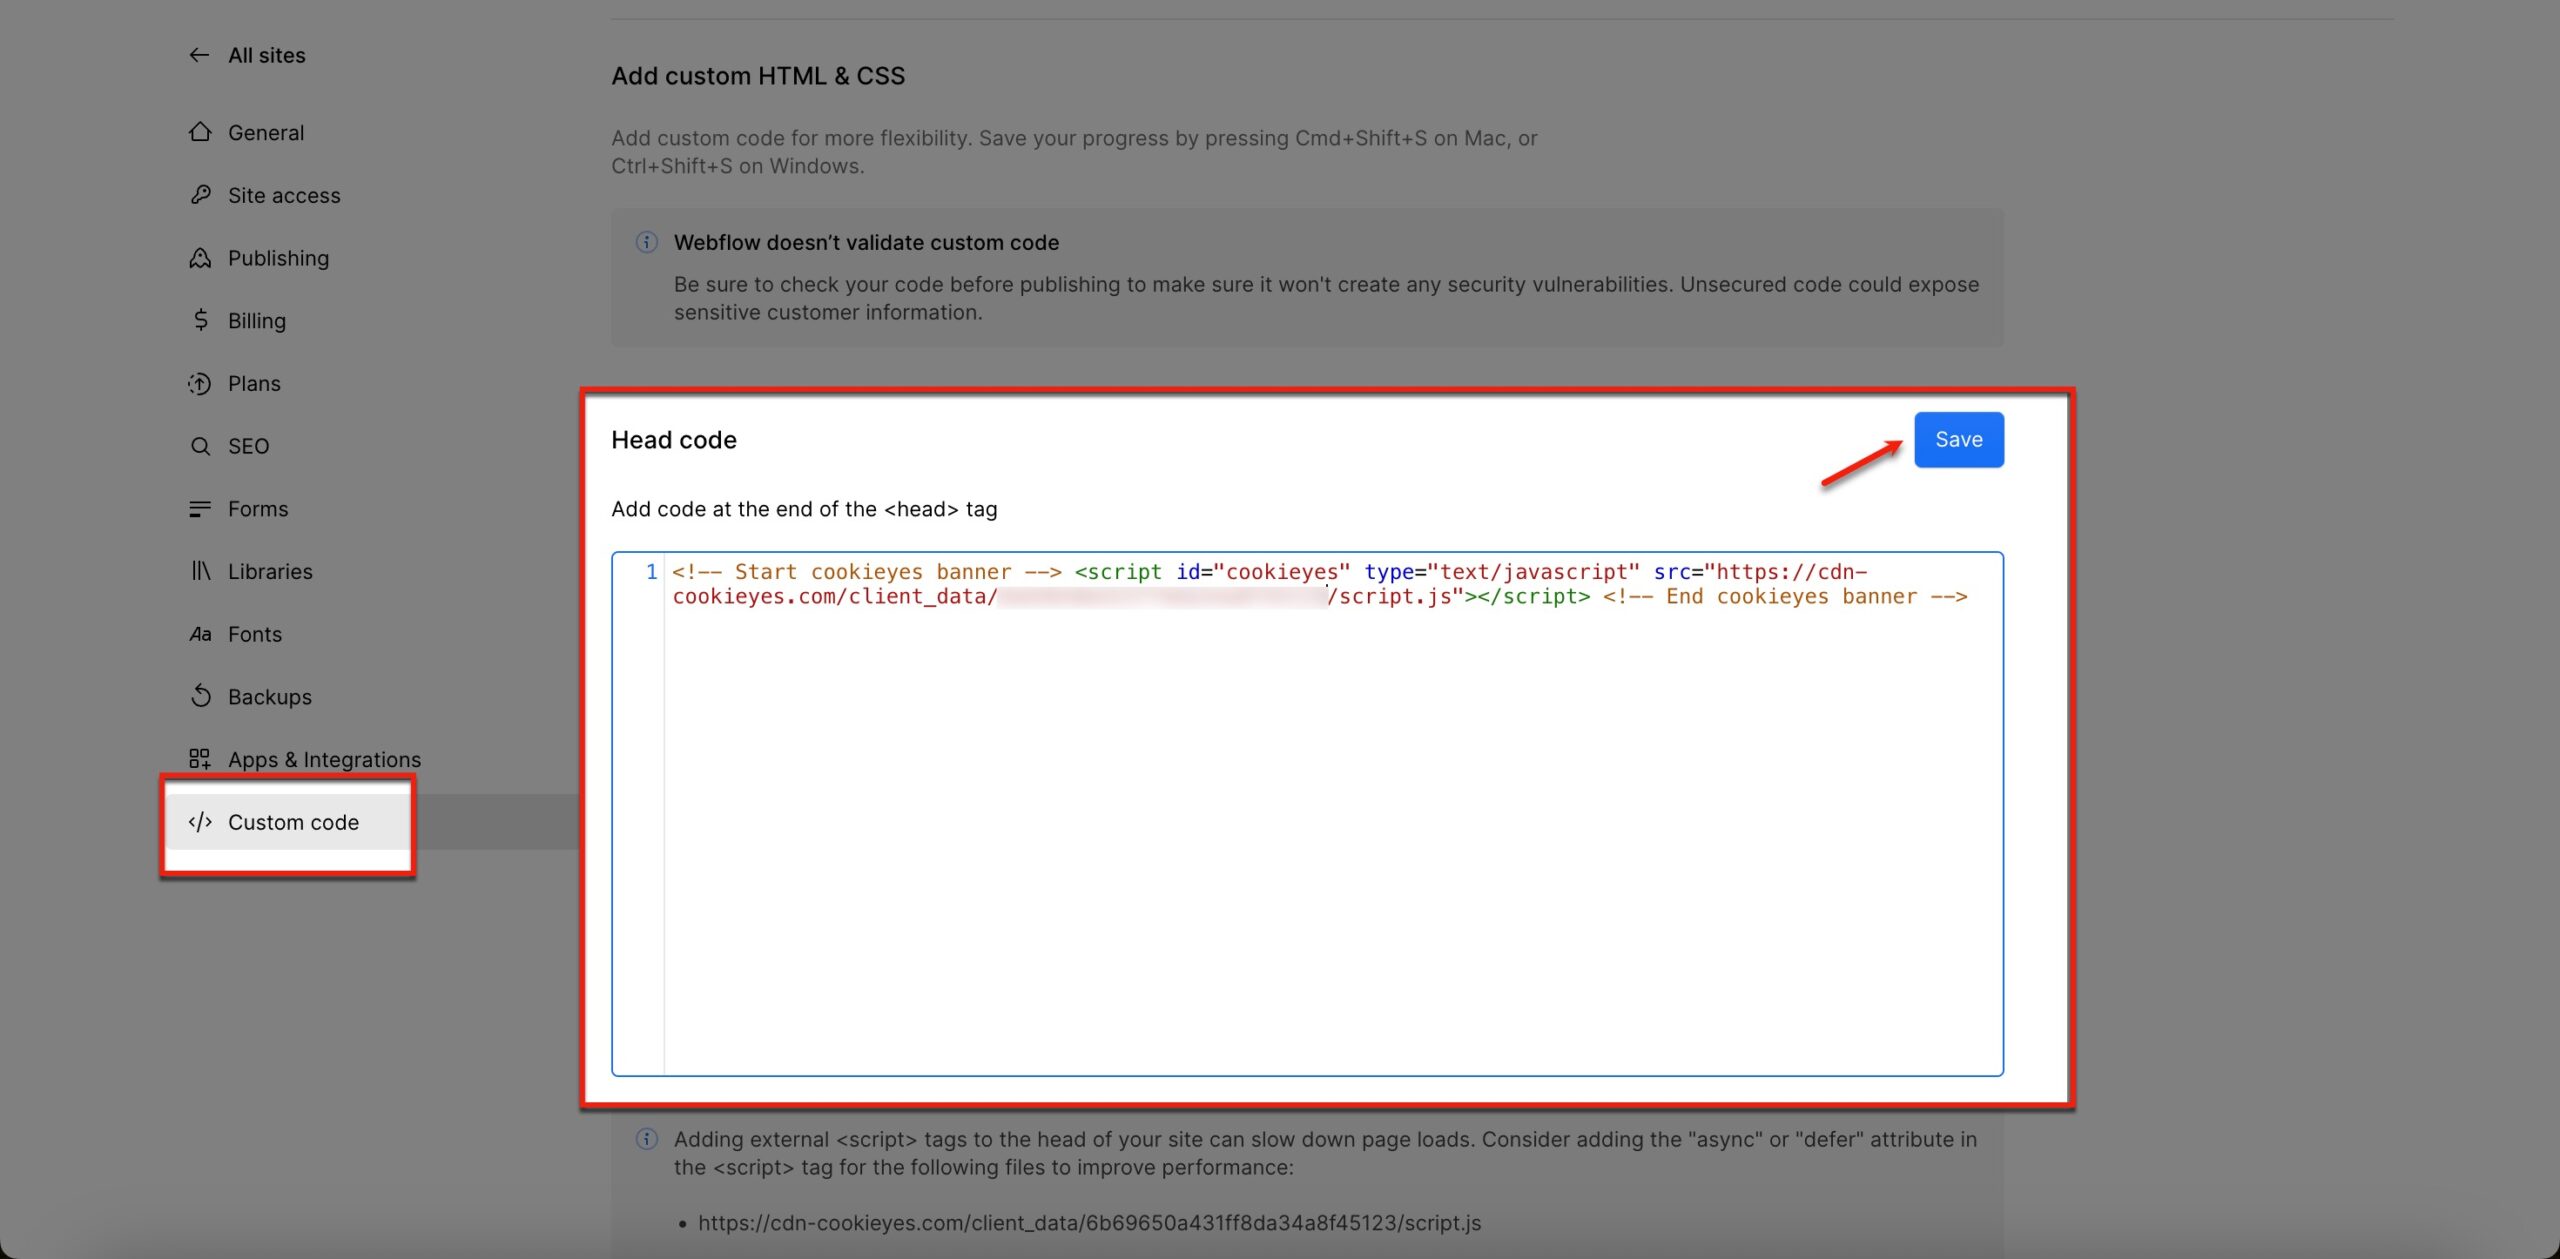
Step 2: On the Setting page, click on the Custom Code tab.

Step 3: Paste the installation code in the Head Code section and click on Save Button.
Step 4: To reflect the cookie banner on your website, click the Publish button.
Step 5: Head back to the setup screen and click on the Verify button. You will see a success message that your banner is active.