Integrate GCM v2 on Wix using CookieYes GTM Template
Last updated on June 2, 2025
On this page
Setup CookieYes Account
For New Users:
- Create a CookieYes Account:
Create a CookieYes account using your Wix website’s URL. - Customise Your Cookie Banner:
- Select your Banner Language.
- Choose a Layout and Colour that suits your website design.
- Click Next Step to proceed.
- Choose Installation Method:
On the setup screen, select Install with Google Tag Manager as your installation method.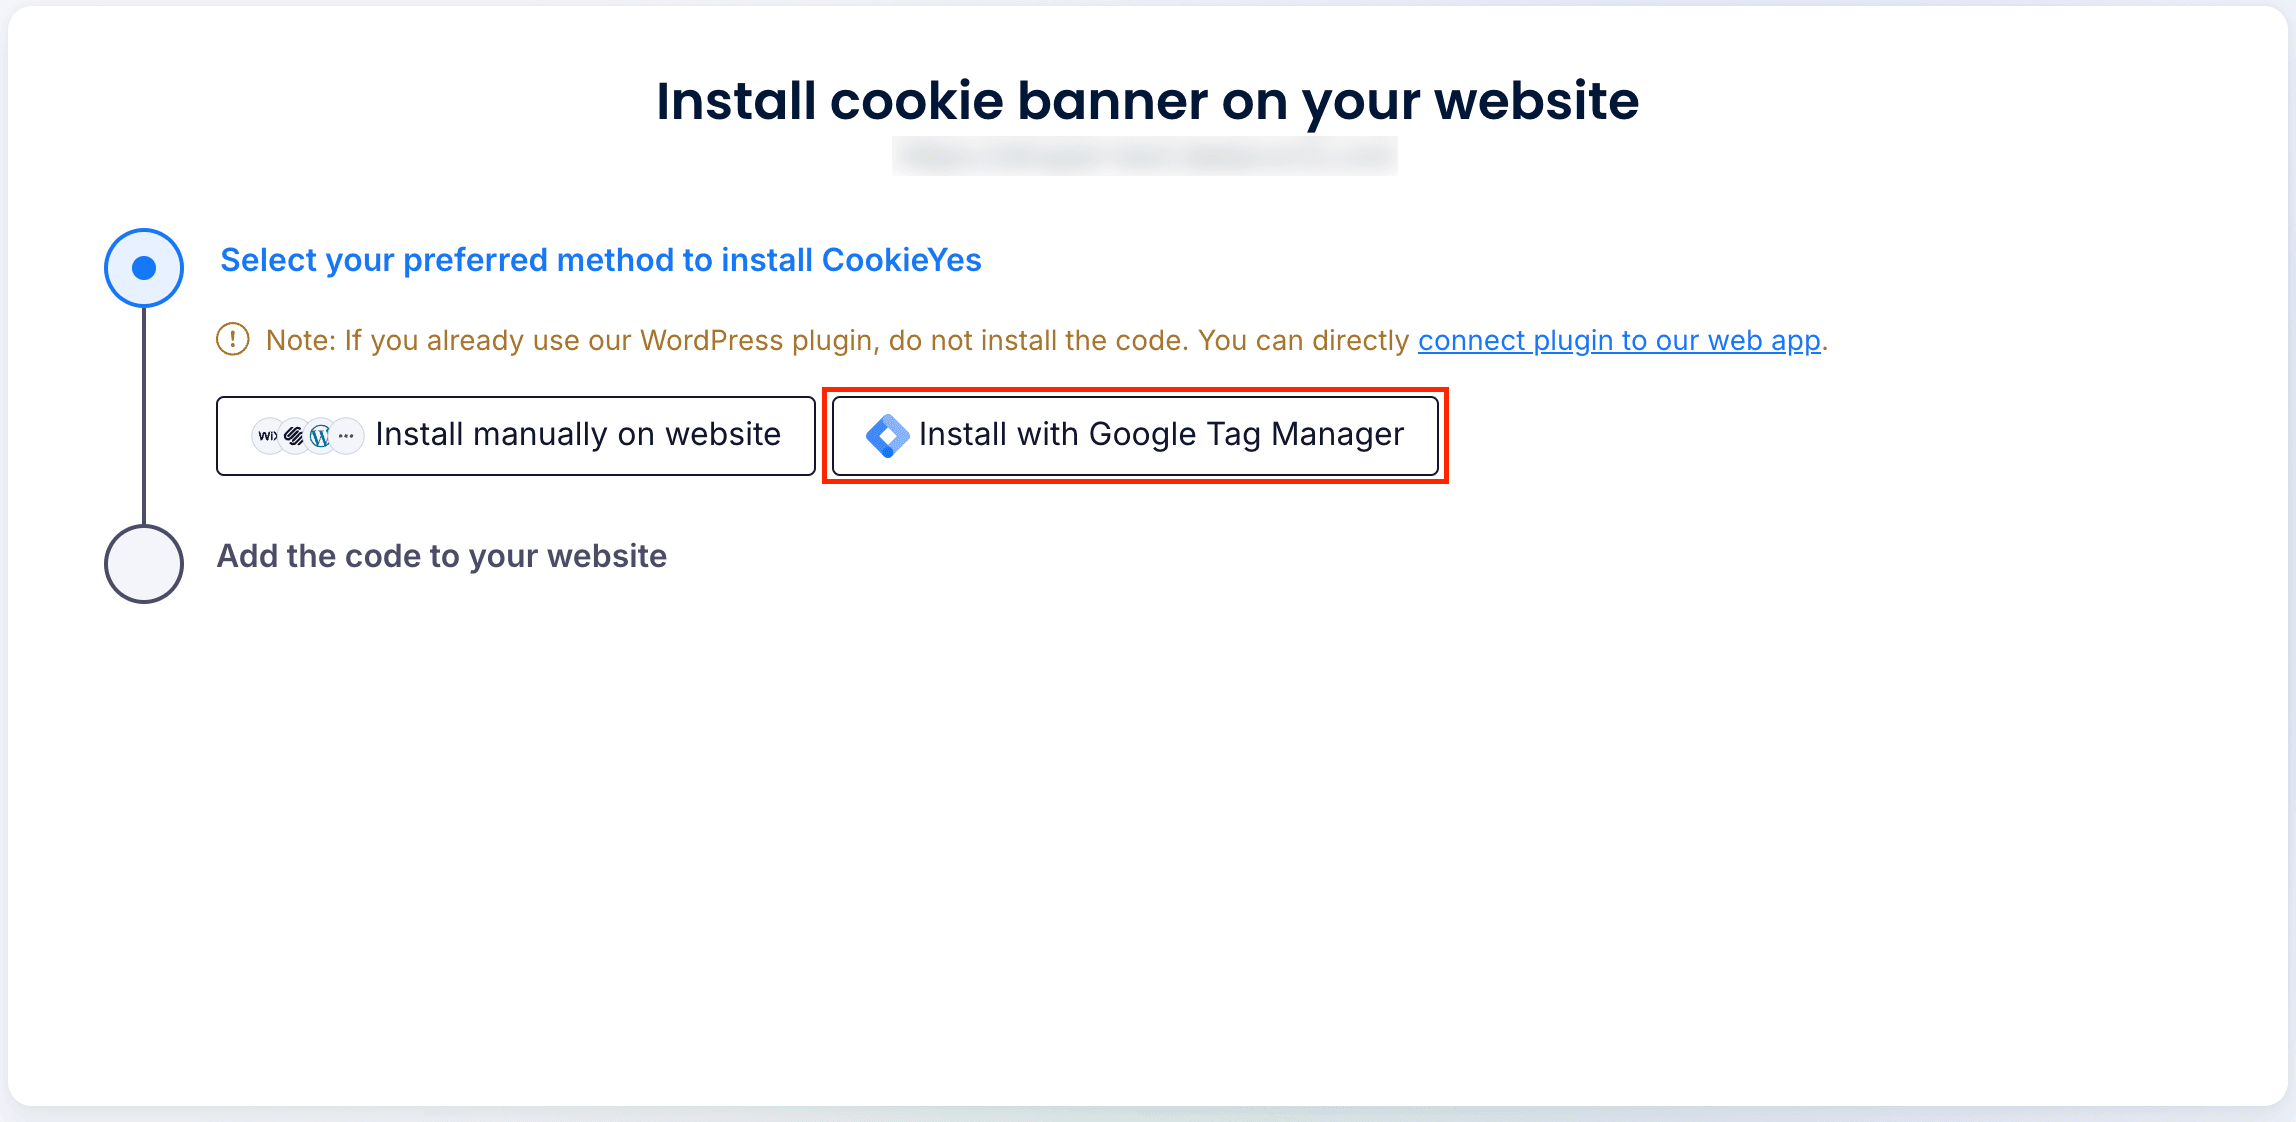
You can customise the cookie banner according to your website’s requirements.
For Existing Users:
- Log in to CookieYes:
Log in to your CookieYes account using your existing credentials. - Remove the CookieYes Script:
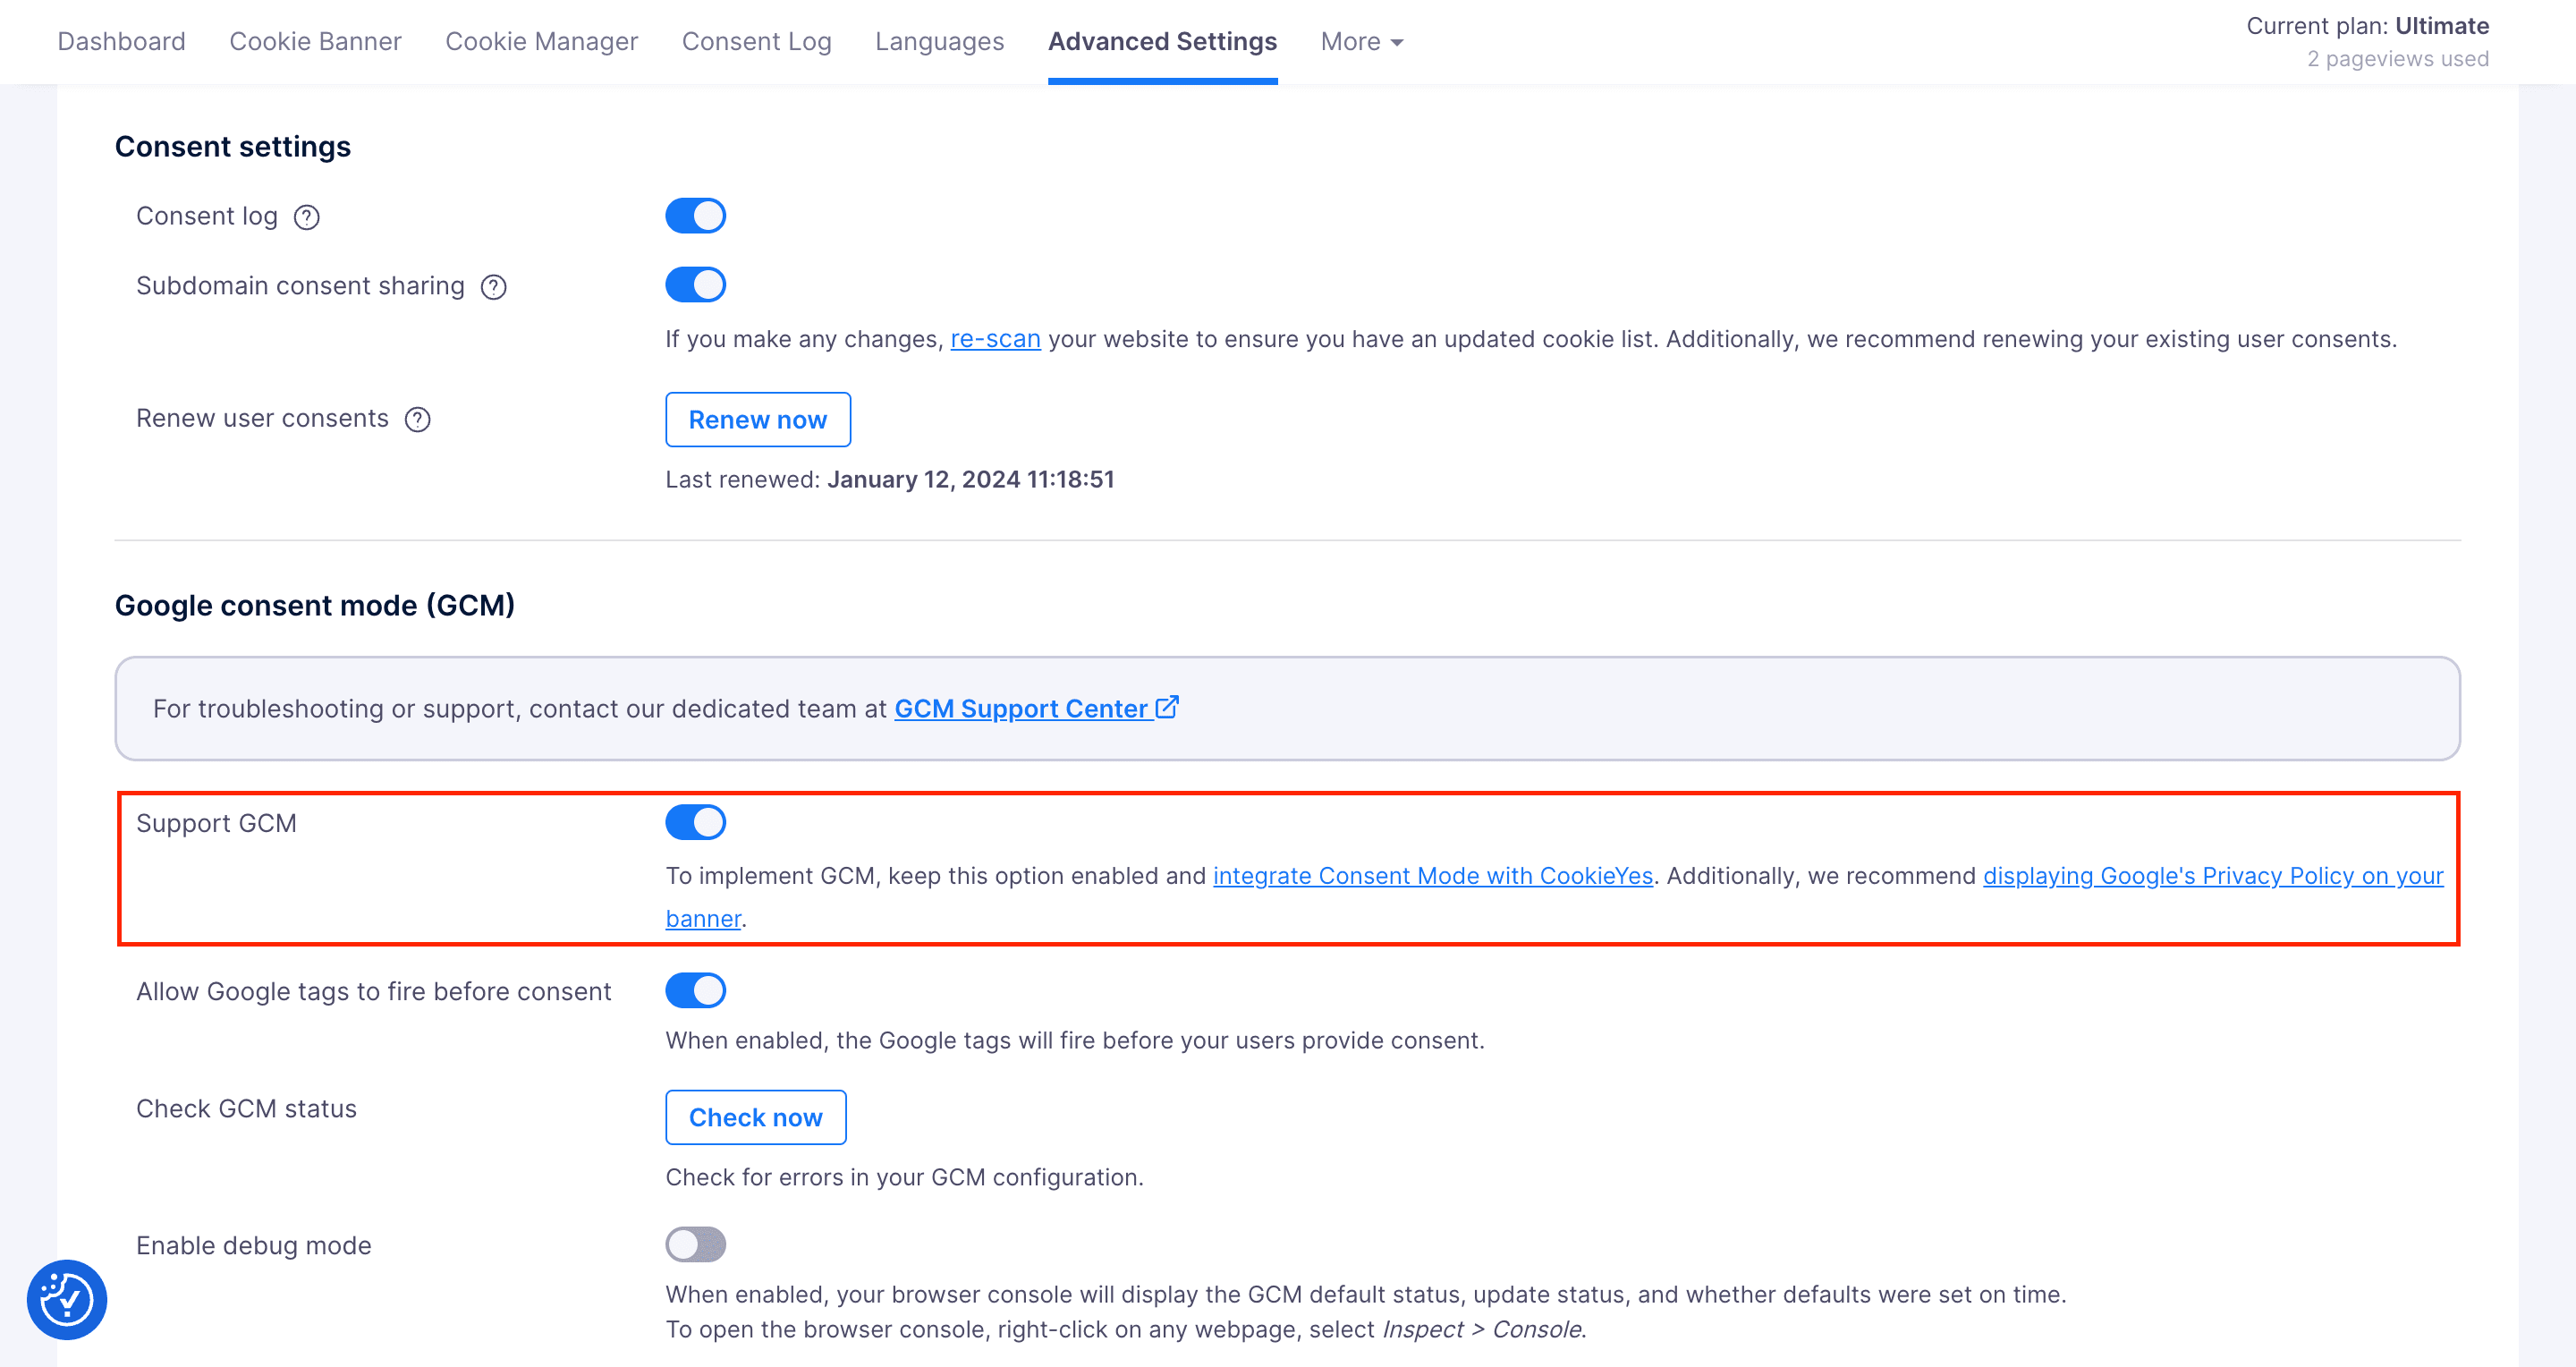
Ensure you remove the existing CookieYes script from your website. - Ensure Google Consent Mode is enabled.
By default, the Basic Consent Mode feature is enabled. If you have previously disabled it, follow these steps to turn it back on:- Navigate to CookieYes Dashboard > Advanced Settings.
- In Advanced Settings, toggle the button (to the right) labelled “Support GCM“ to enable the Basic Consent Mode.
Setting Up the CookieYes GTM Template
Step 1:
Create an Account
- Sign Up for a Google Tag Manager account
- Set up a container for your website.

Step 2:
Add CookieYes CMP Template
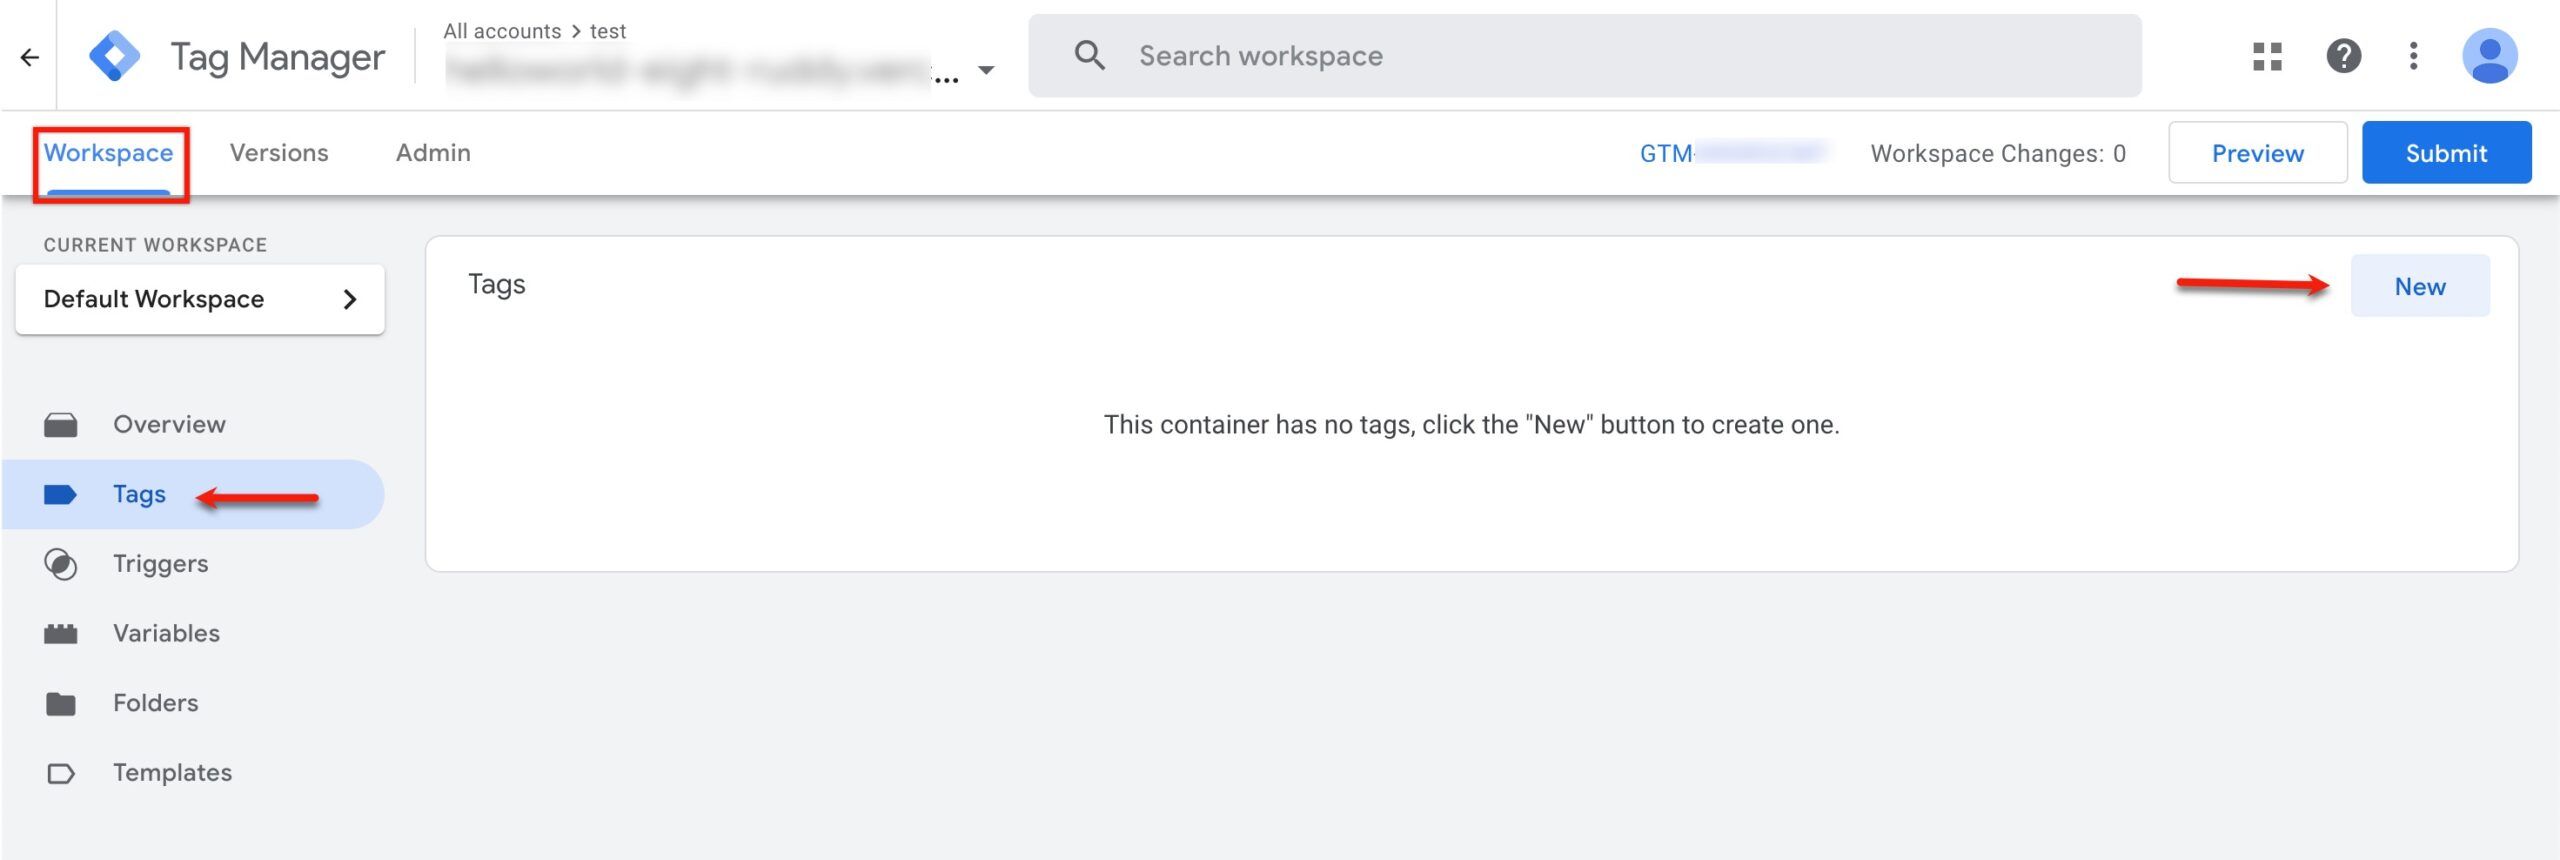
- Navigate to the container Dashboard and click Tags > New to create a new tag.
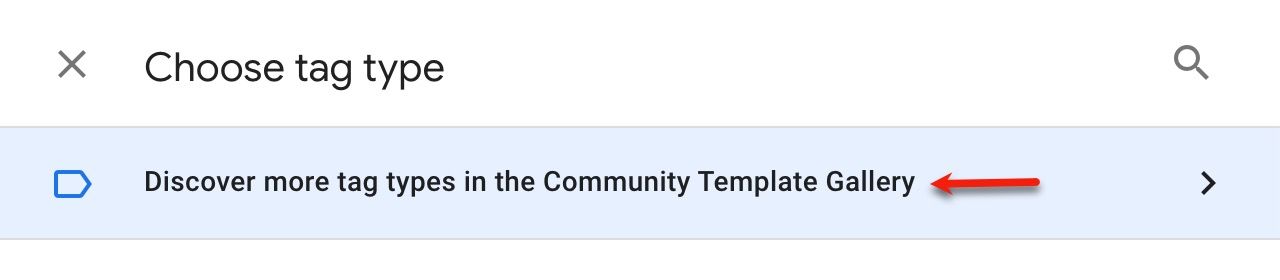
Name the tag, then click Tag Configuration > Discover more tag types in the Community Template Gallery.
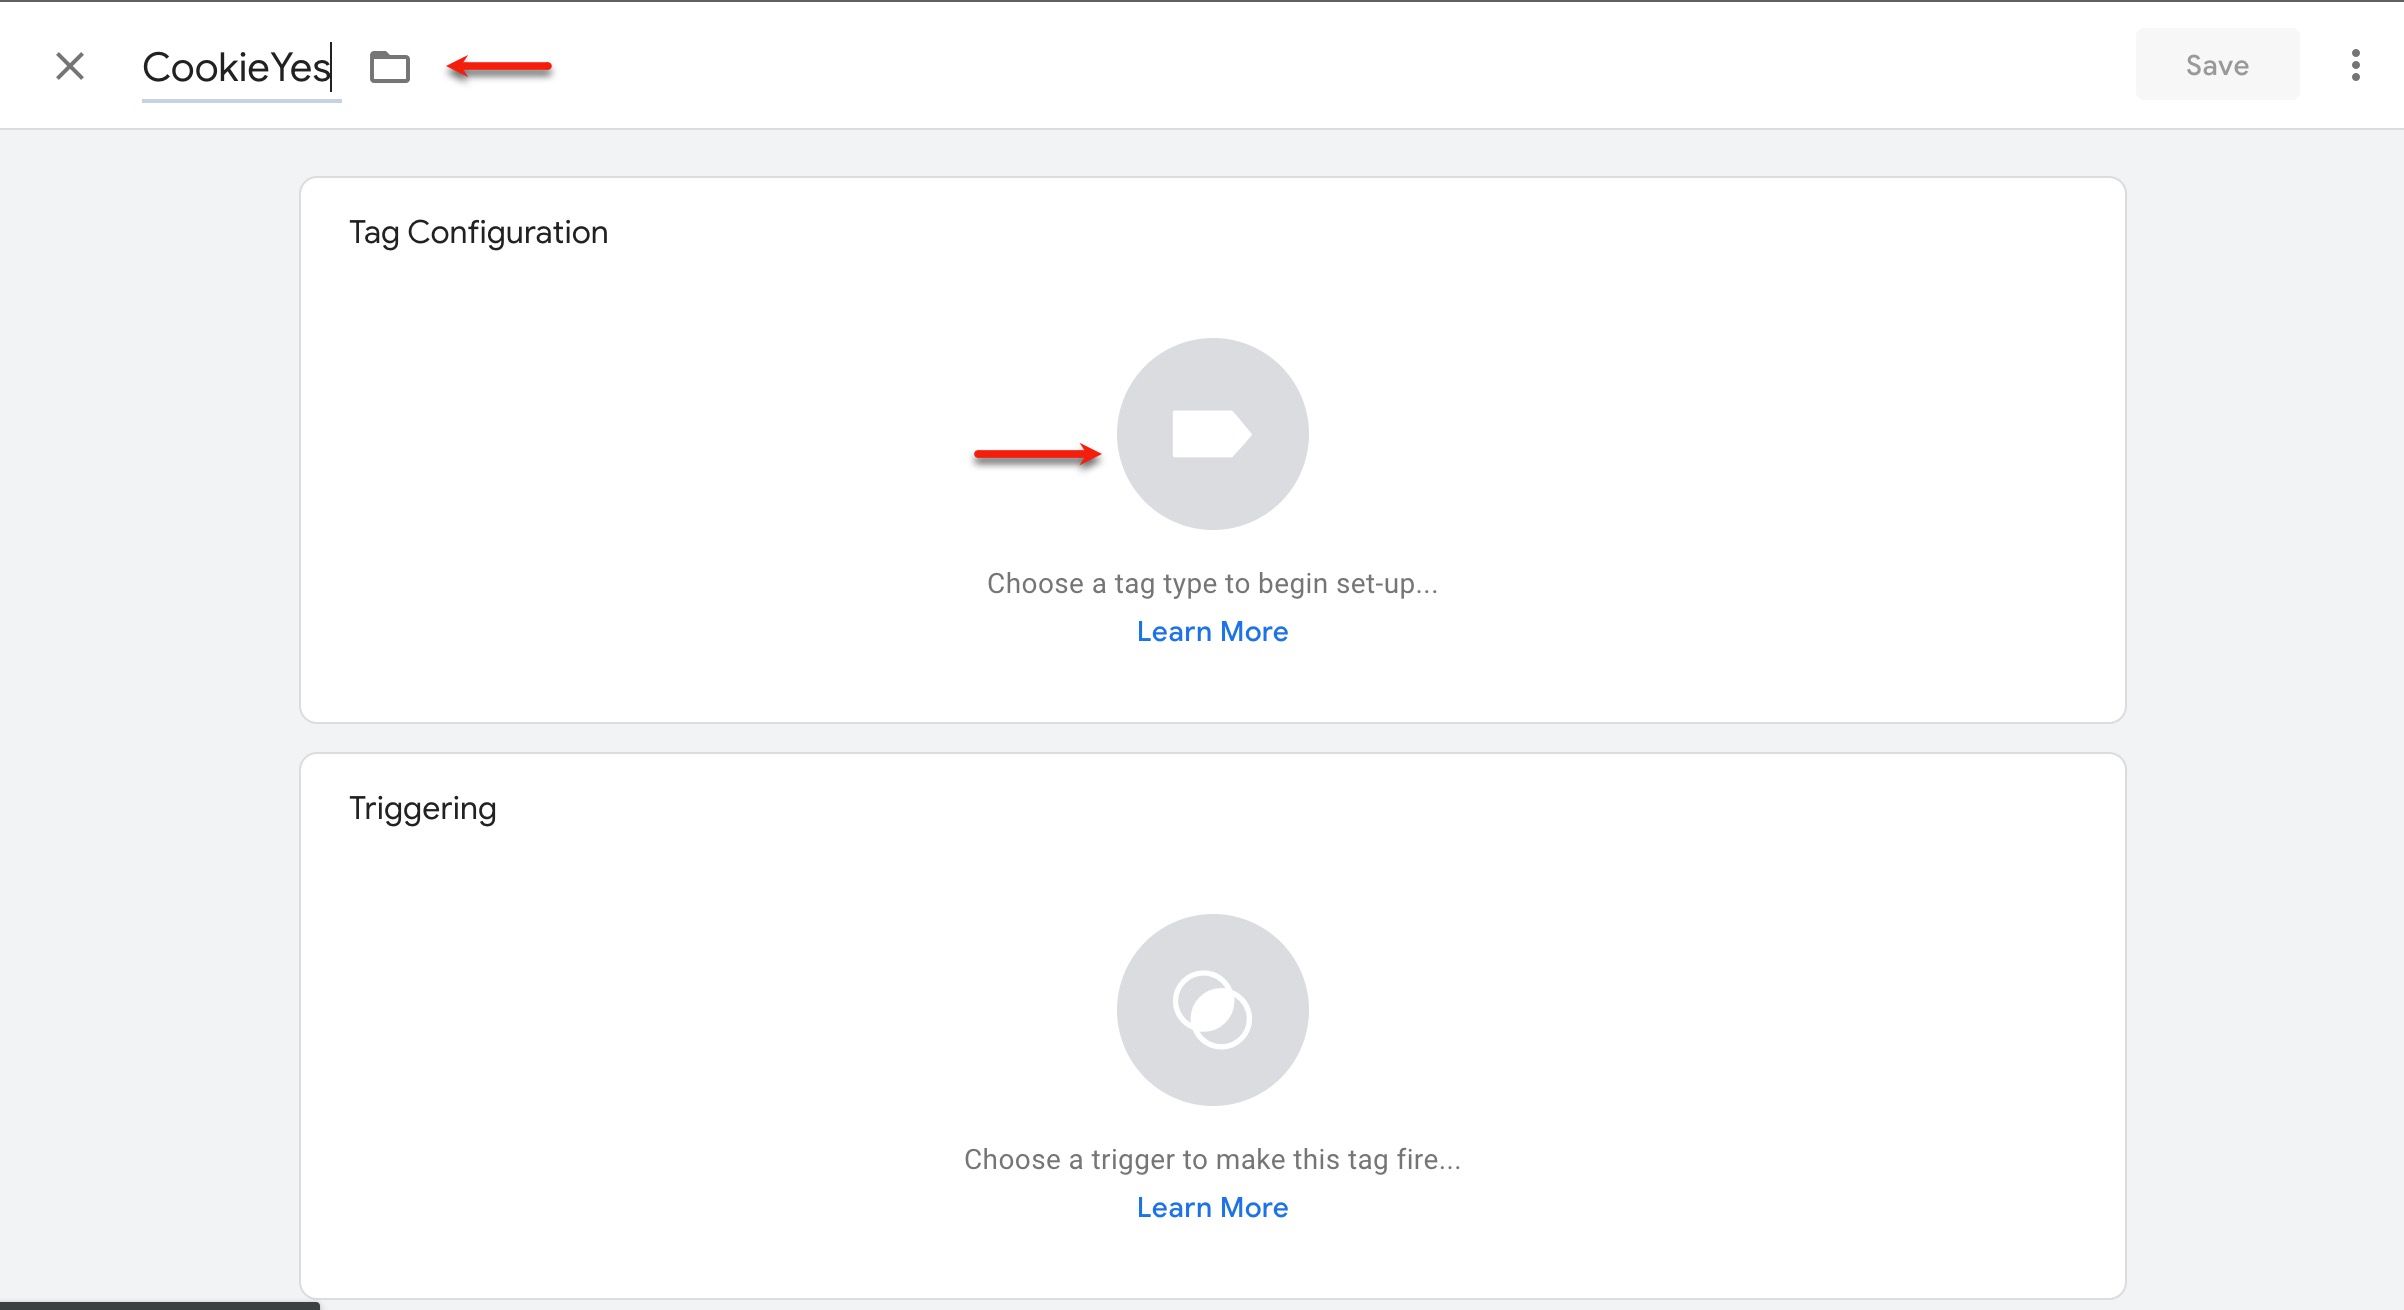
- Search for CookieYes CMP.
- Select the CookieYes CMP template and click Add to workspace > Add to add it to your GTM installation.

Step 3:
Configure CookieYes Tag
Insert the CookieYes website key, set other fields to appropriate values, and save the tag after naming it.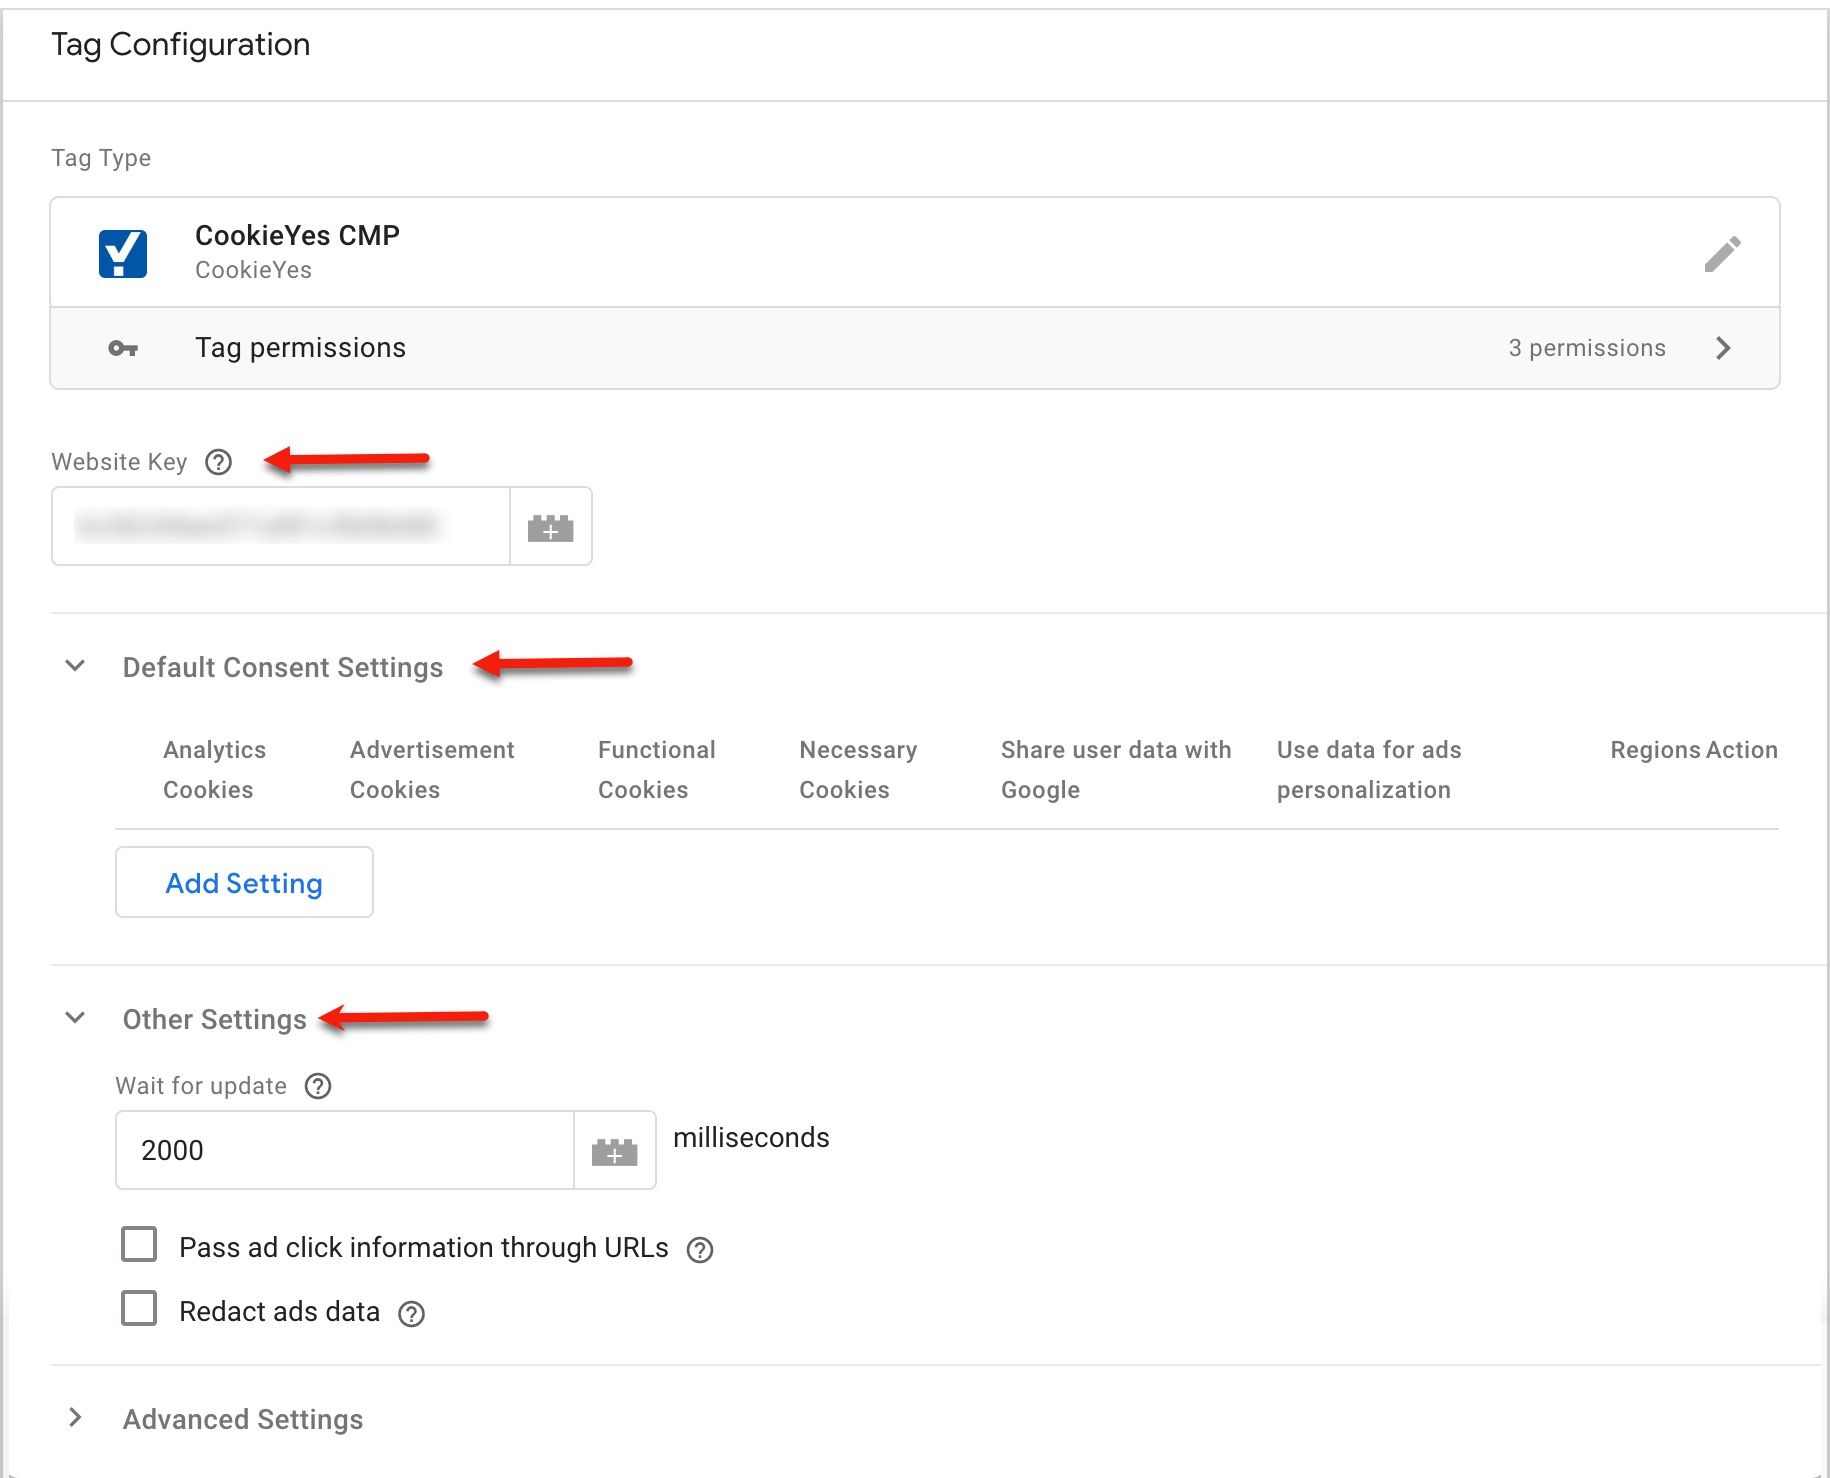
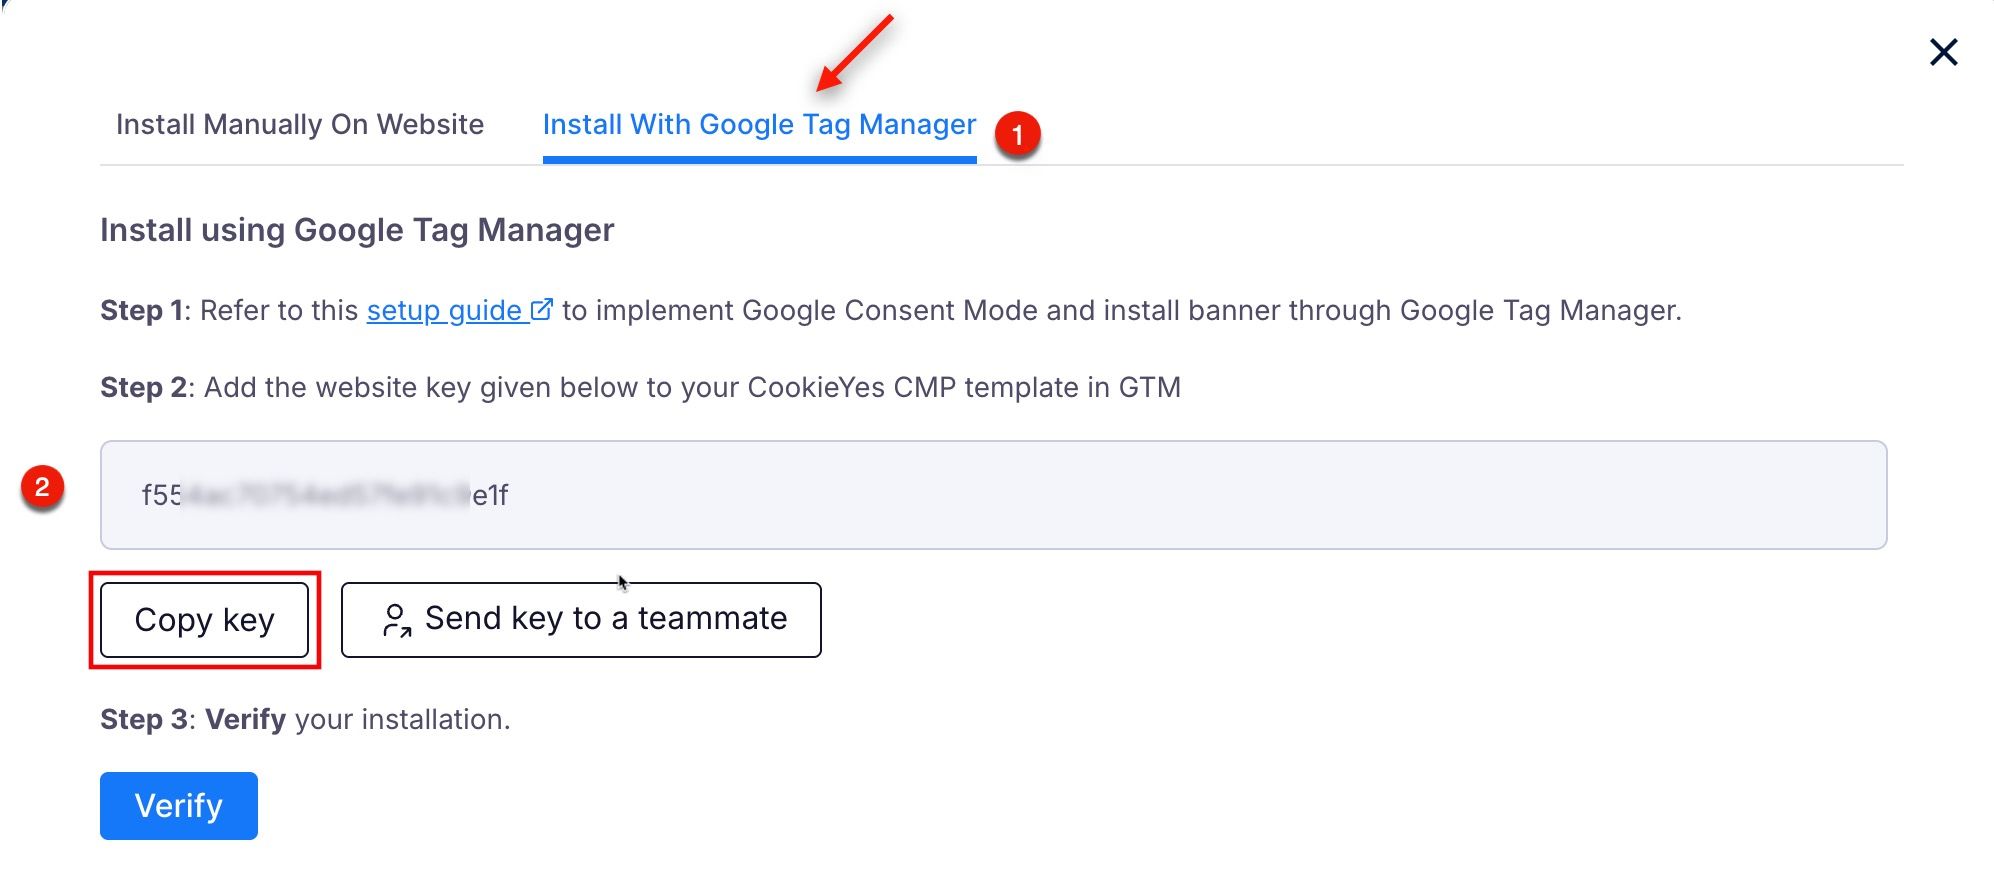
Insert the CookieYes Website Key
For New User:
- Head back to the CookieYes setup screen and locate the Website Key.
- Click the Copy key button to copy the Website Key to your clipboard.
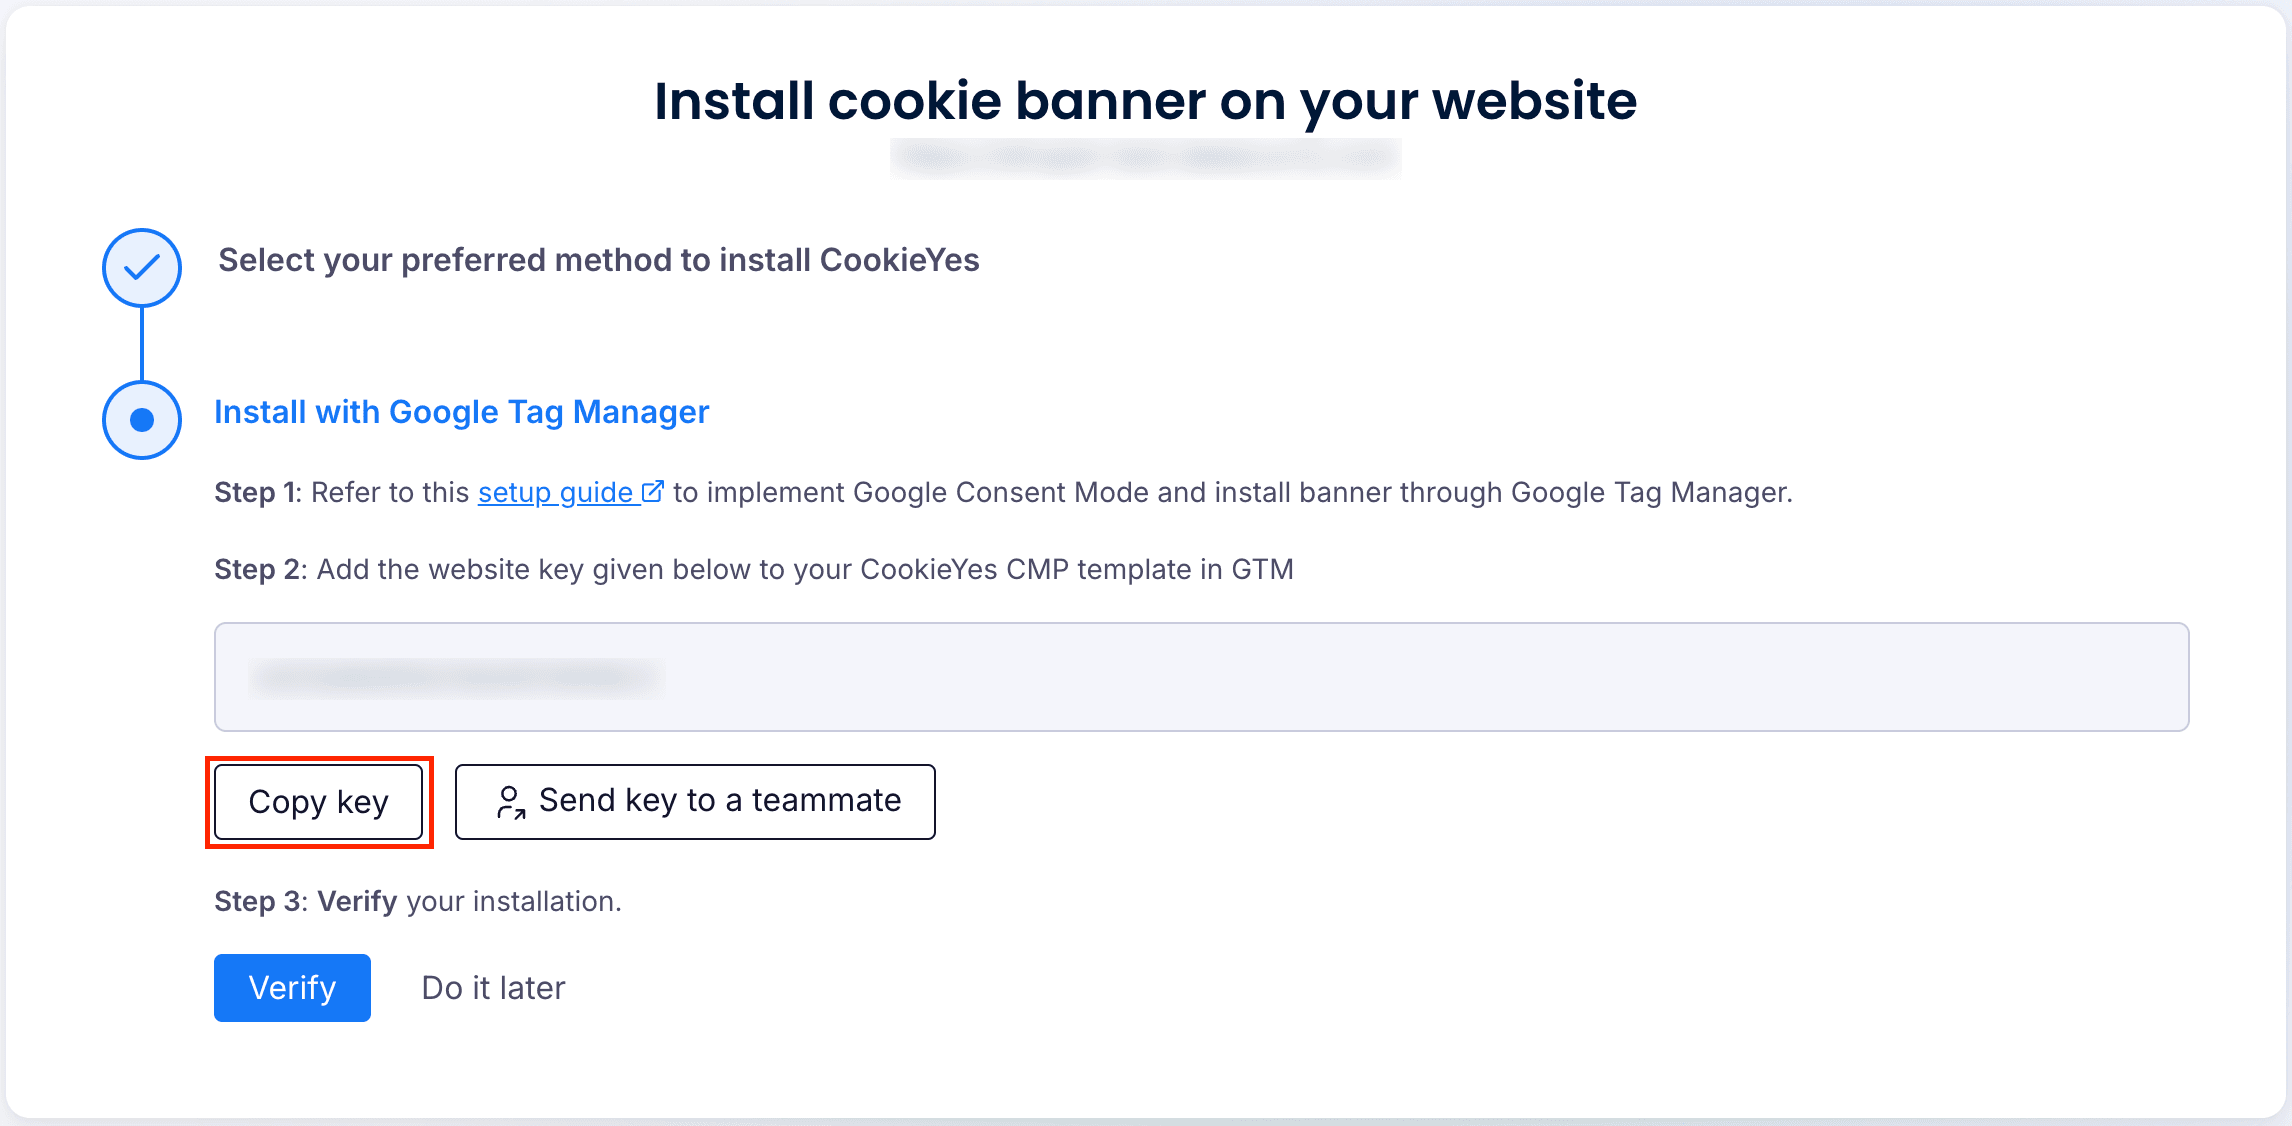
- In GTM, paste the copied key into this field labelled Website Key.
For Existing User
- Head back to the CookieYes account.
- Go to Advanced Settings and click Get Installation Code.
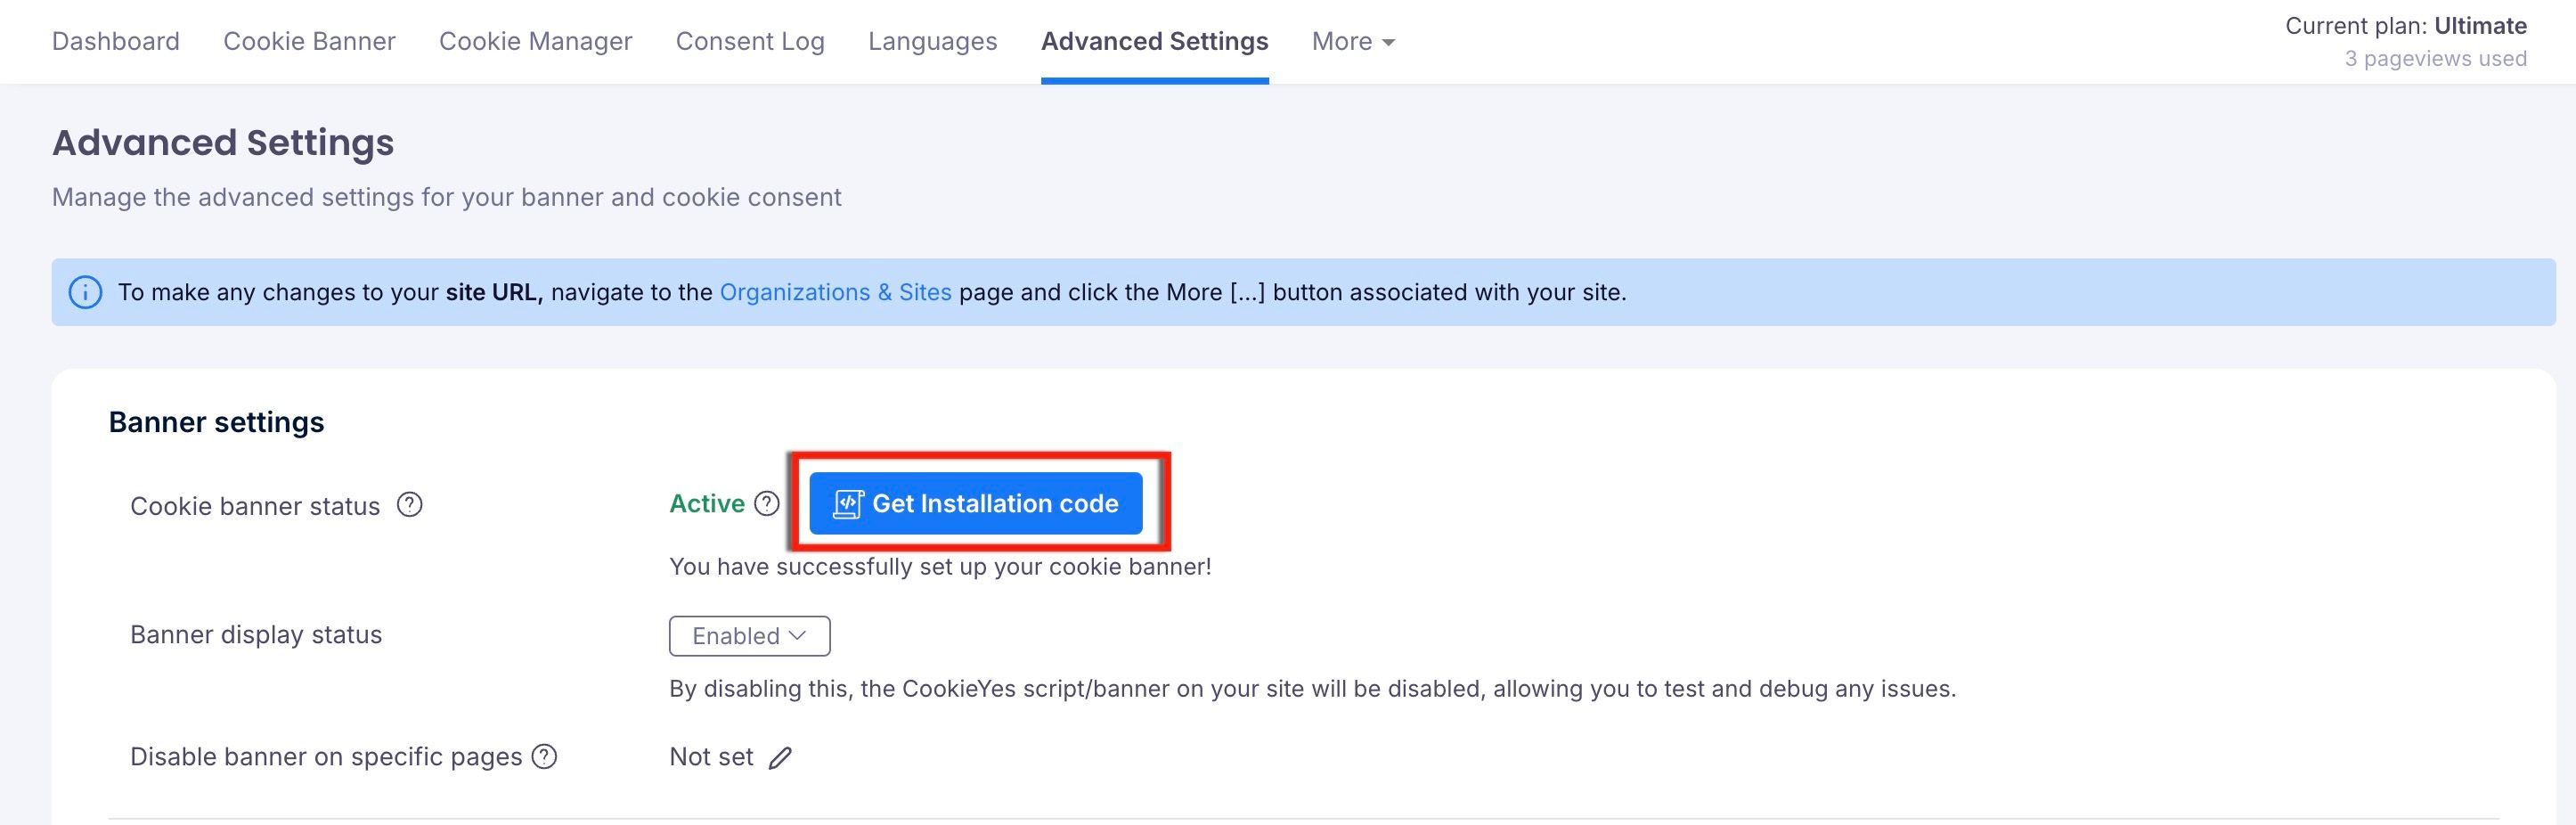
- In the modal, click Install with Google Tag Manager > Copy code.
- In the GTM account, paste the copied key into this field labelled Website Key.
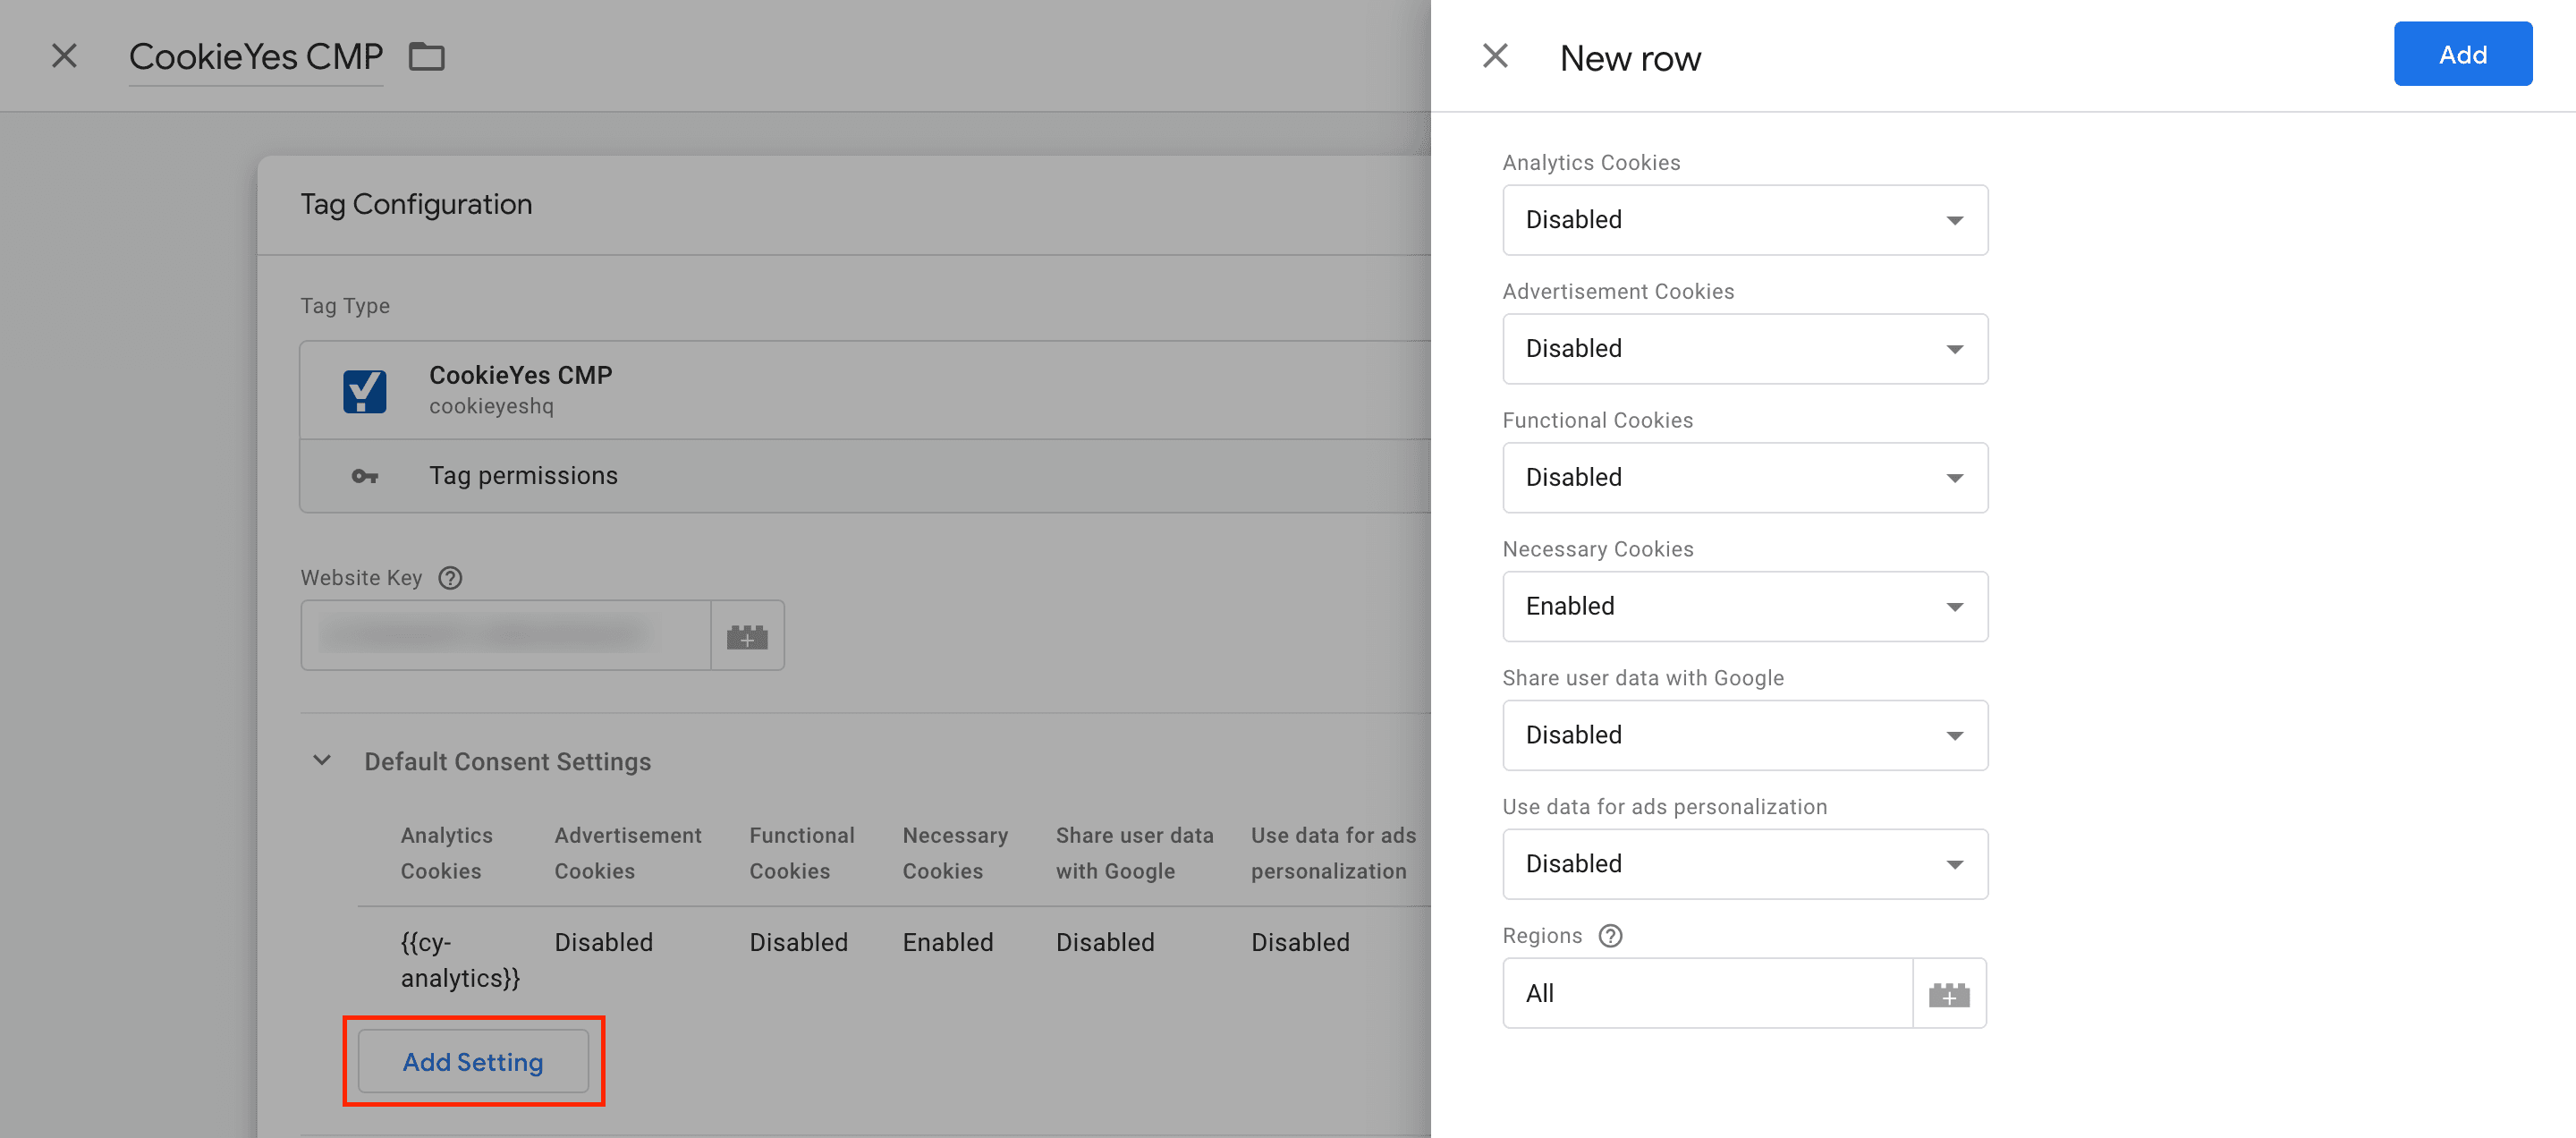
Set Default Consent Settings
- Click Add Setting.
- Select Enabled/Disabled from the drop-down for each cookie category based on your requirements.
- Set the Region by entering the ISO-standardized (ISO 3166-2) codes for the regions you intend to geo-target. If you do not want to geo-target specific regions, enter All in the Regions field. Refer to the ISO 3166-2 standard for appropriate region codes.
- Click Add.
Set the trigger
- Choose Consent Initialisation – All Pages as the firing trigger. This ensures the tag activates before any other tags.
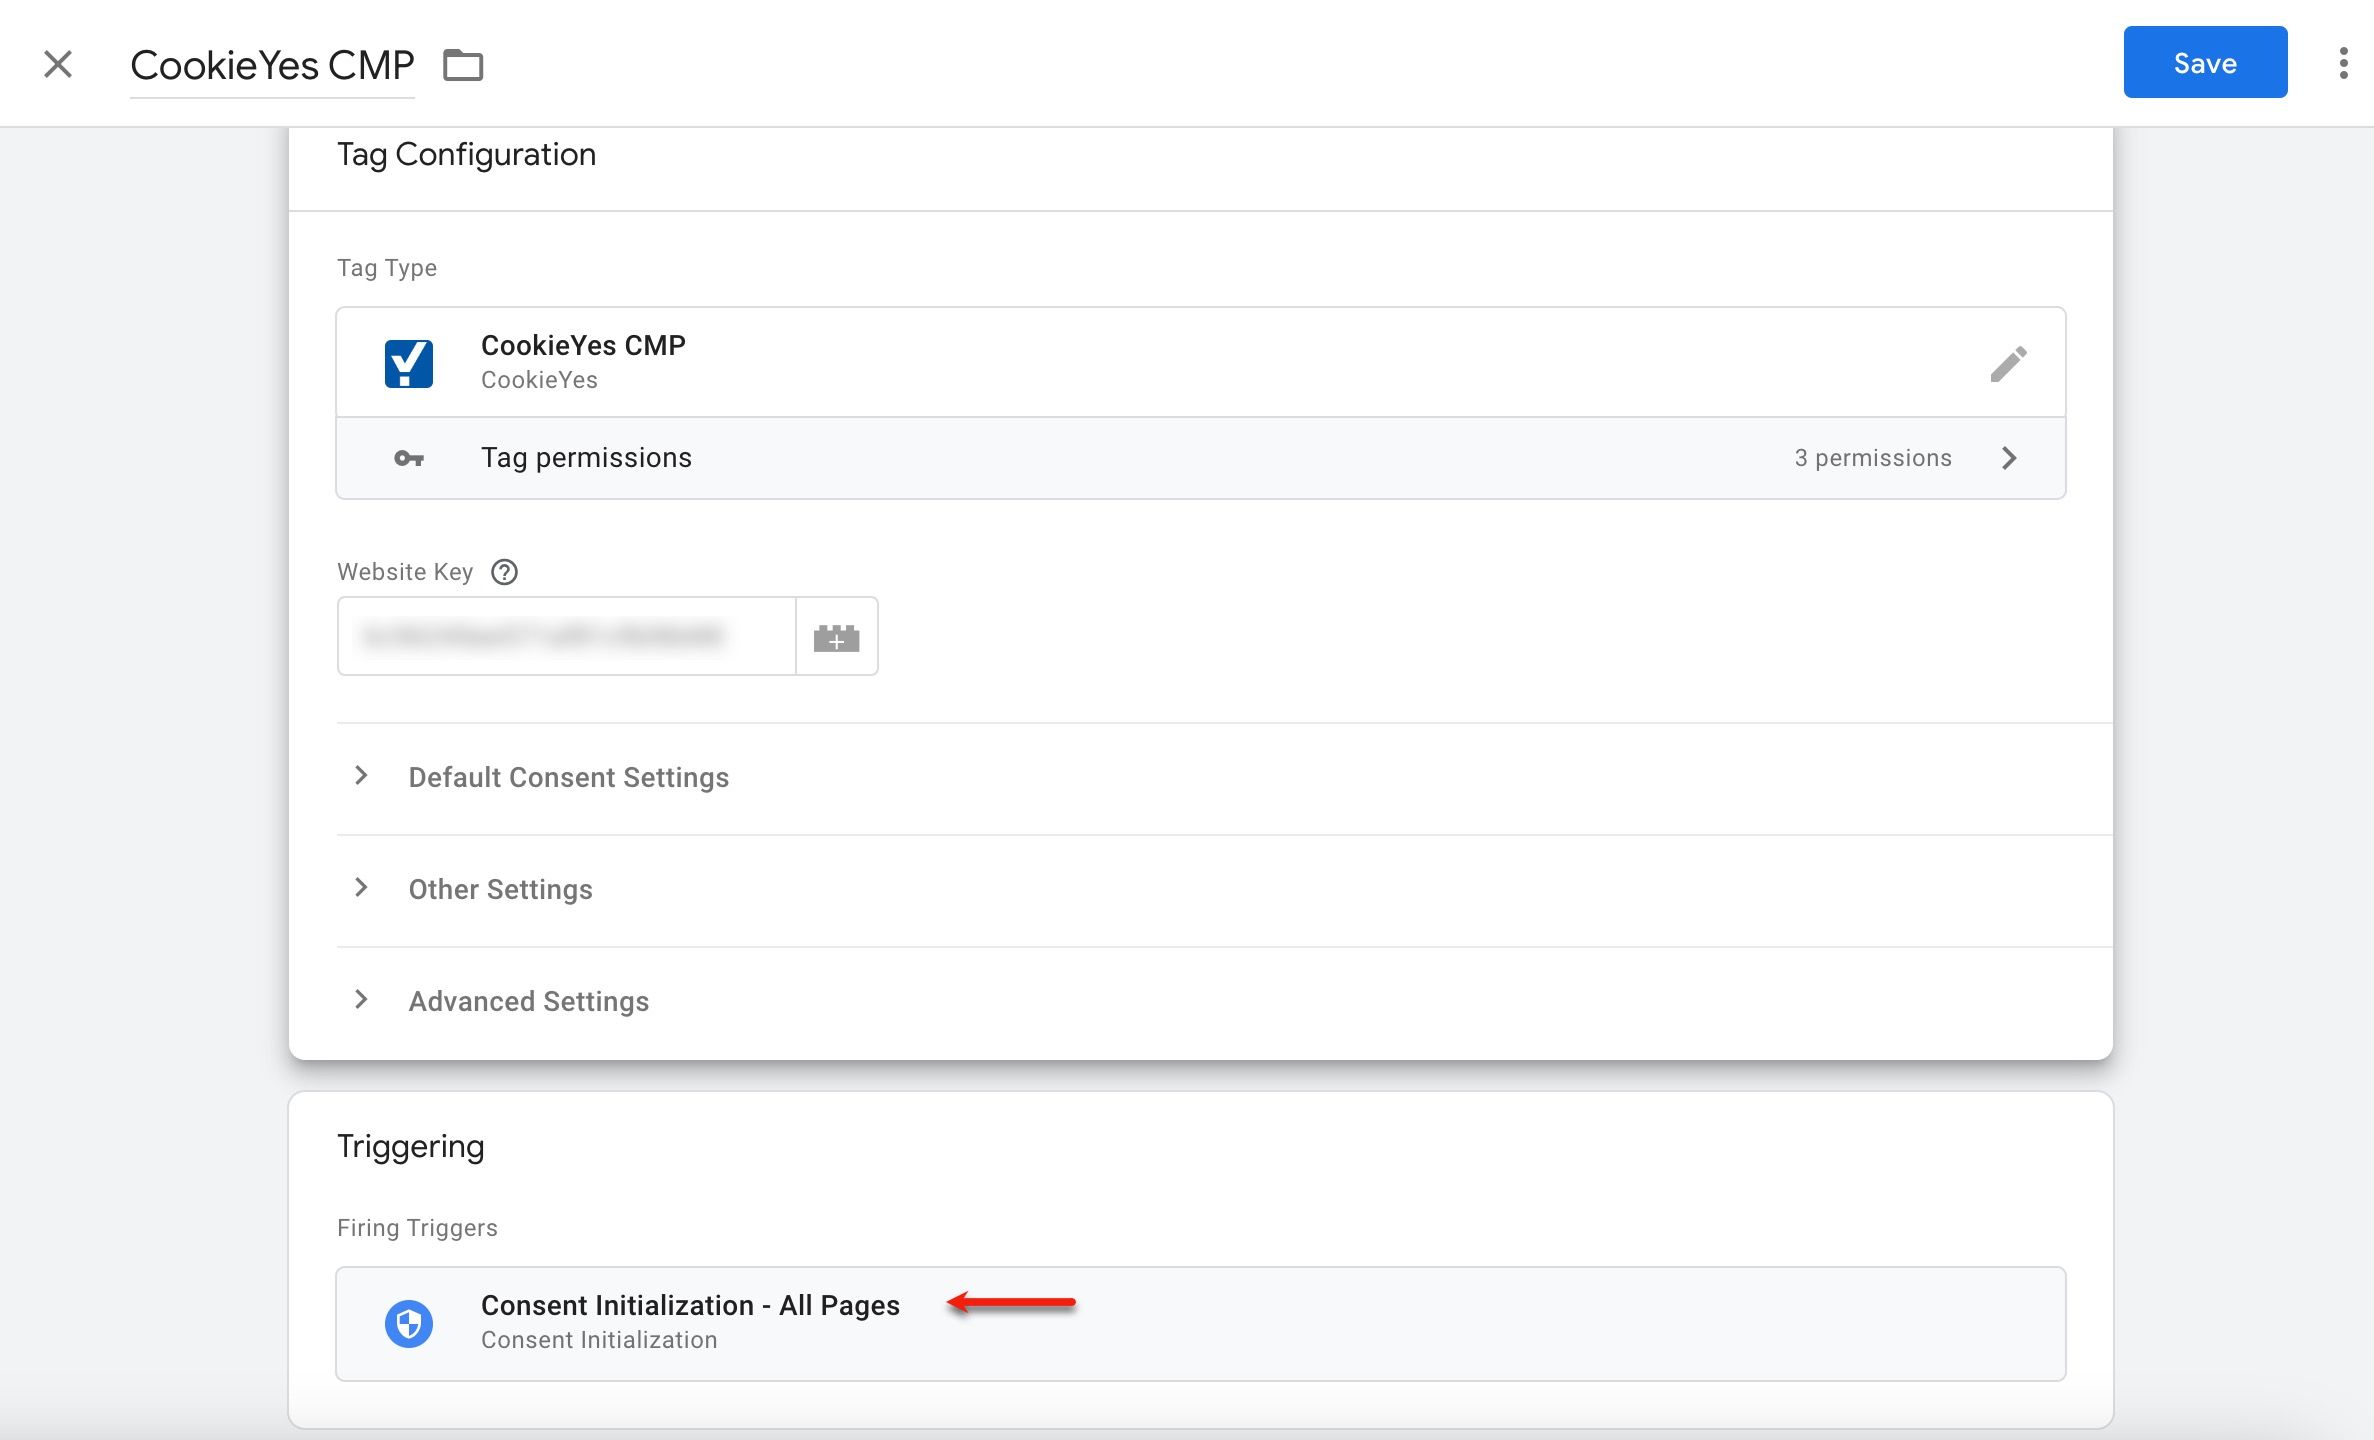
- Click Save.
Step 4:
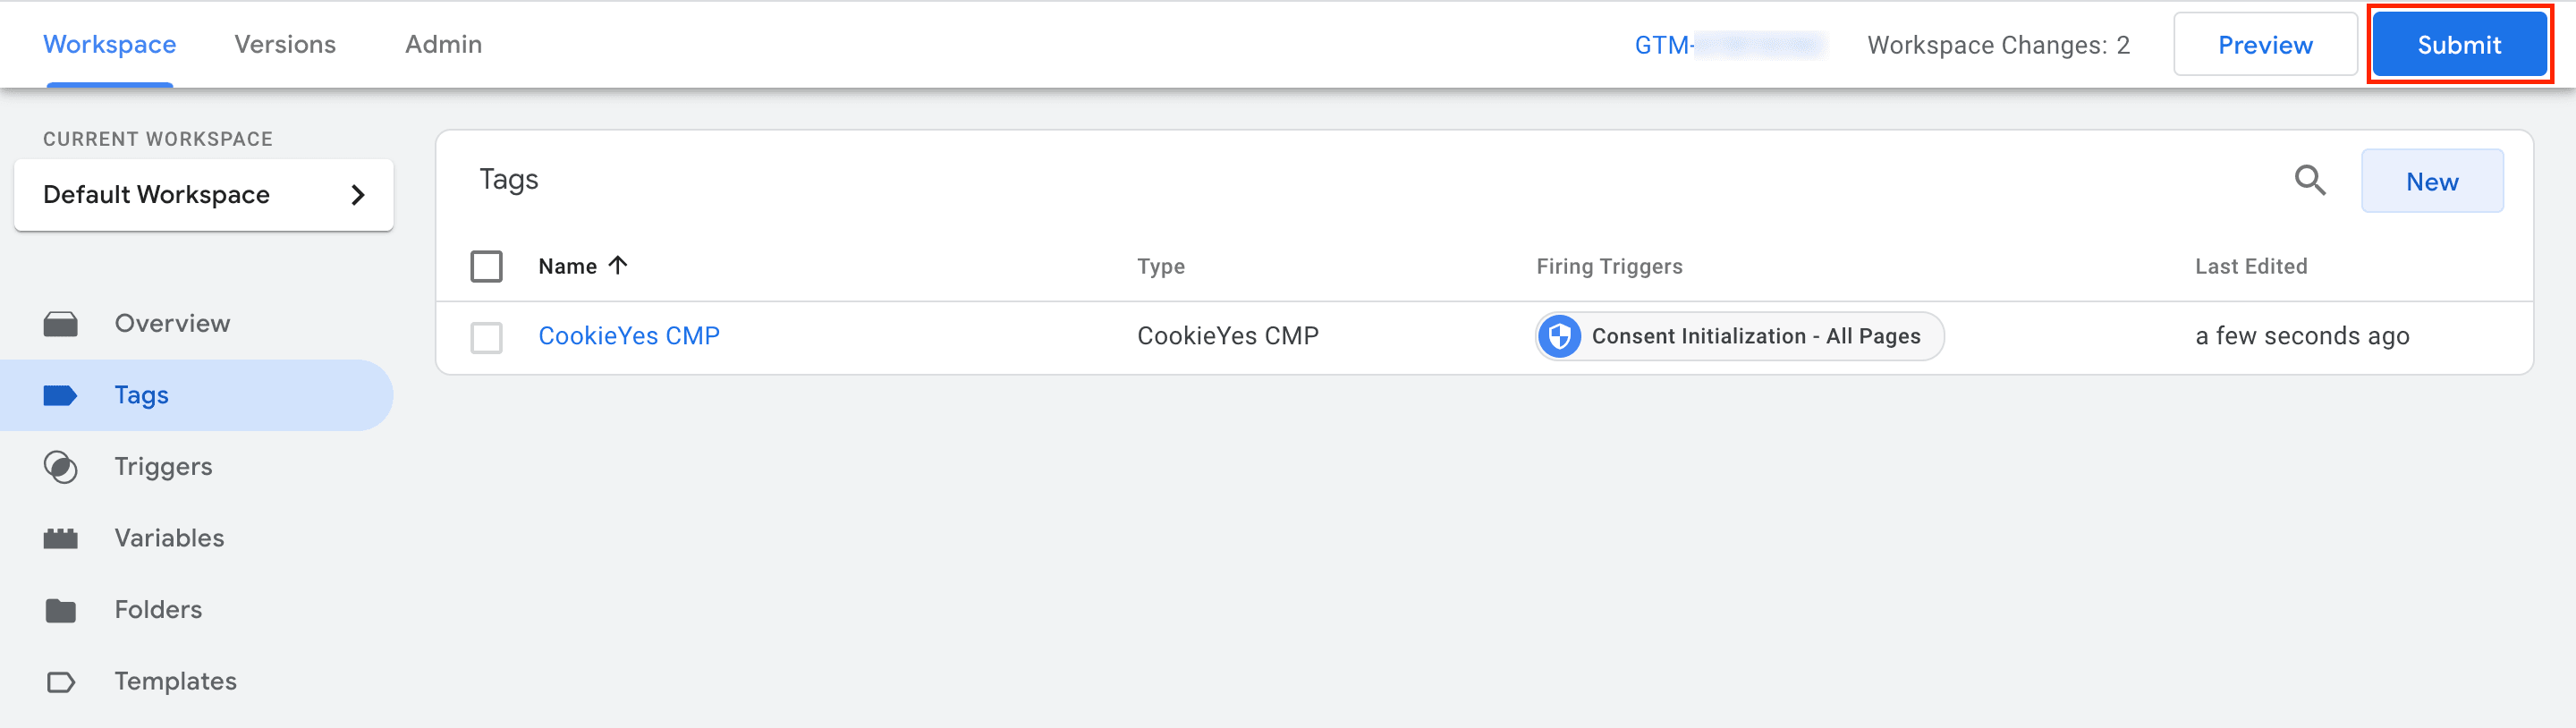
Publish Changes
- Click Save to complete the integration of CookieYes with the Google Consent Mode.
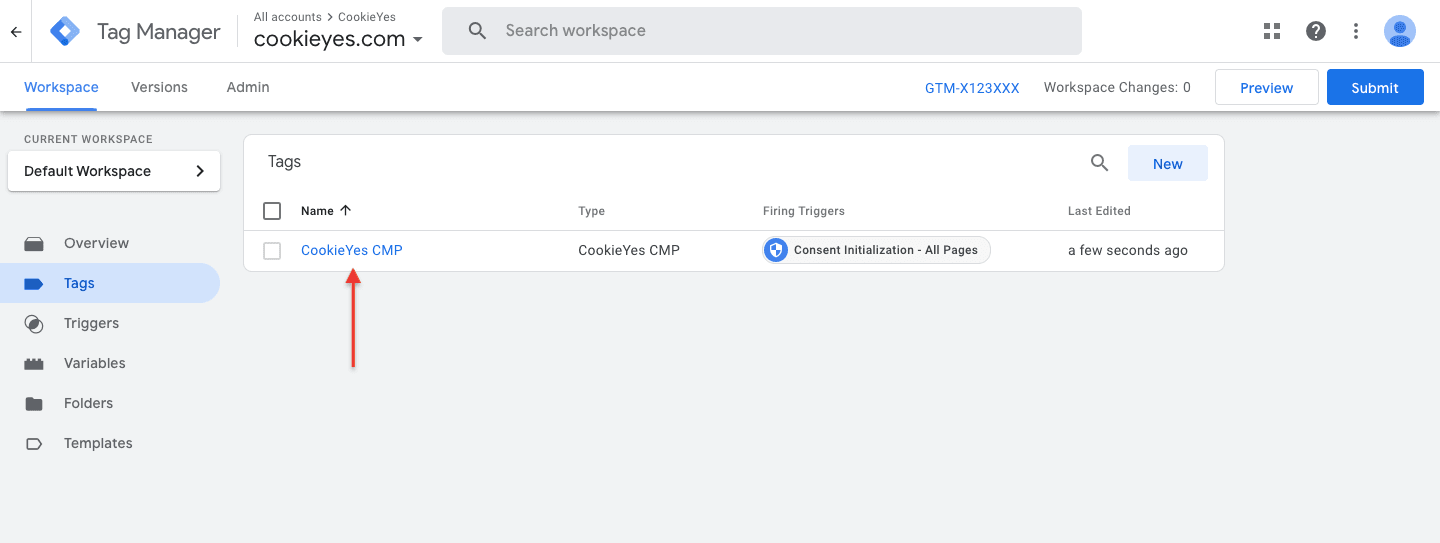
- Click Submit and Publish to publish your Container version.
Integrate GCM In Wix
Step 1:
Access Wix Dashboard
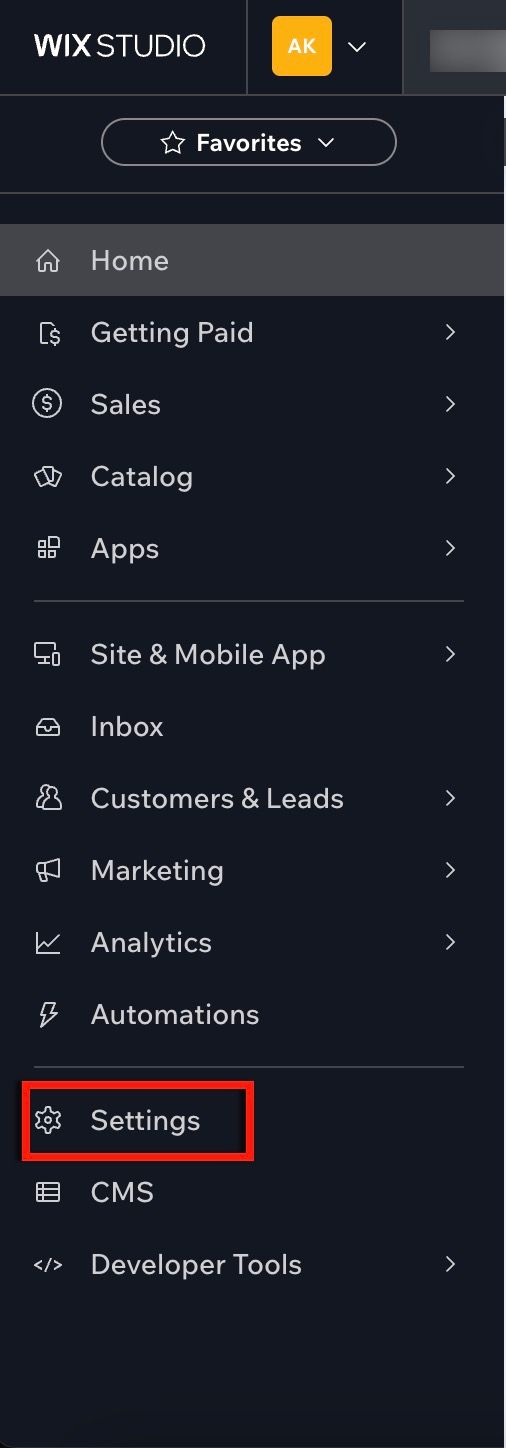
- Log in to your Wix Account.
- Navigate to the Wix Dashboard < Settings in the left sidebar.
Step 2:
Add Custom Code
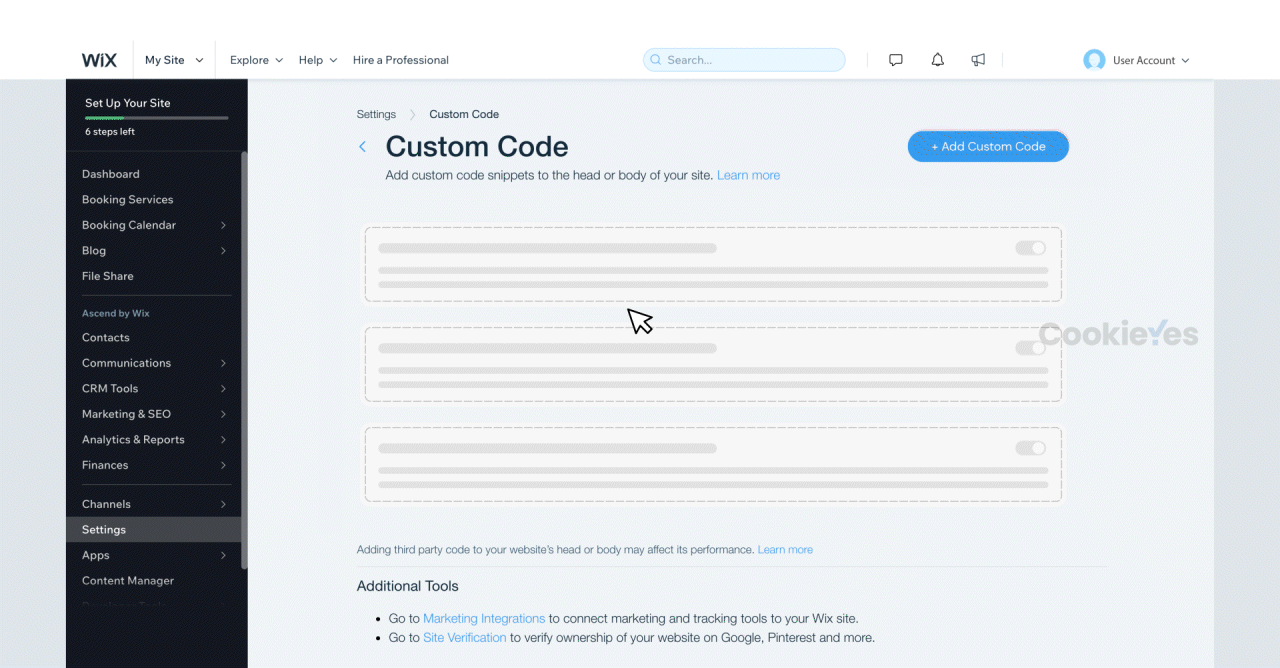
- Scroll down to the Advanced section and click on Custom Code.

- In the top right corner, click + Add Custom Code.
Step 3:
Insert GTM Code
- Obtain the GTM Script.
- Head back to the Google Tag Manager Account and Click the Container ID.
- Copy the script.
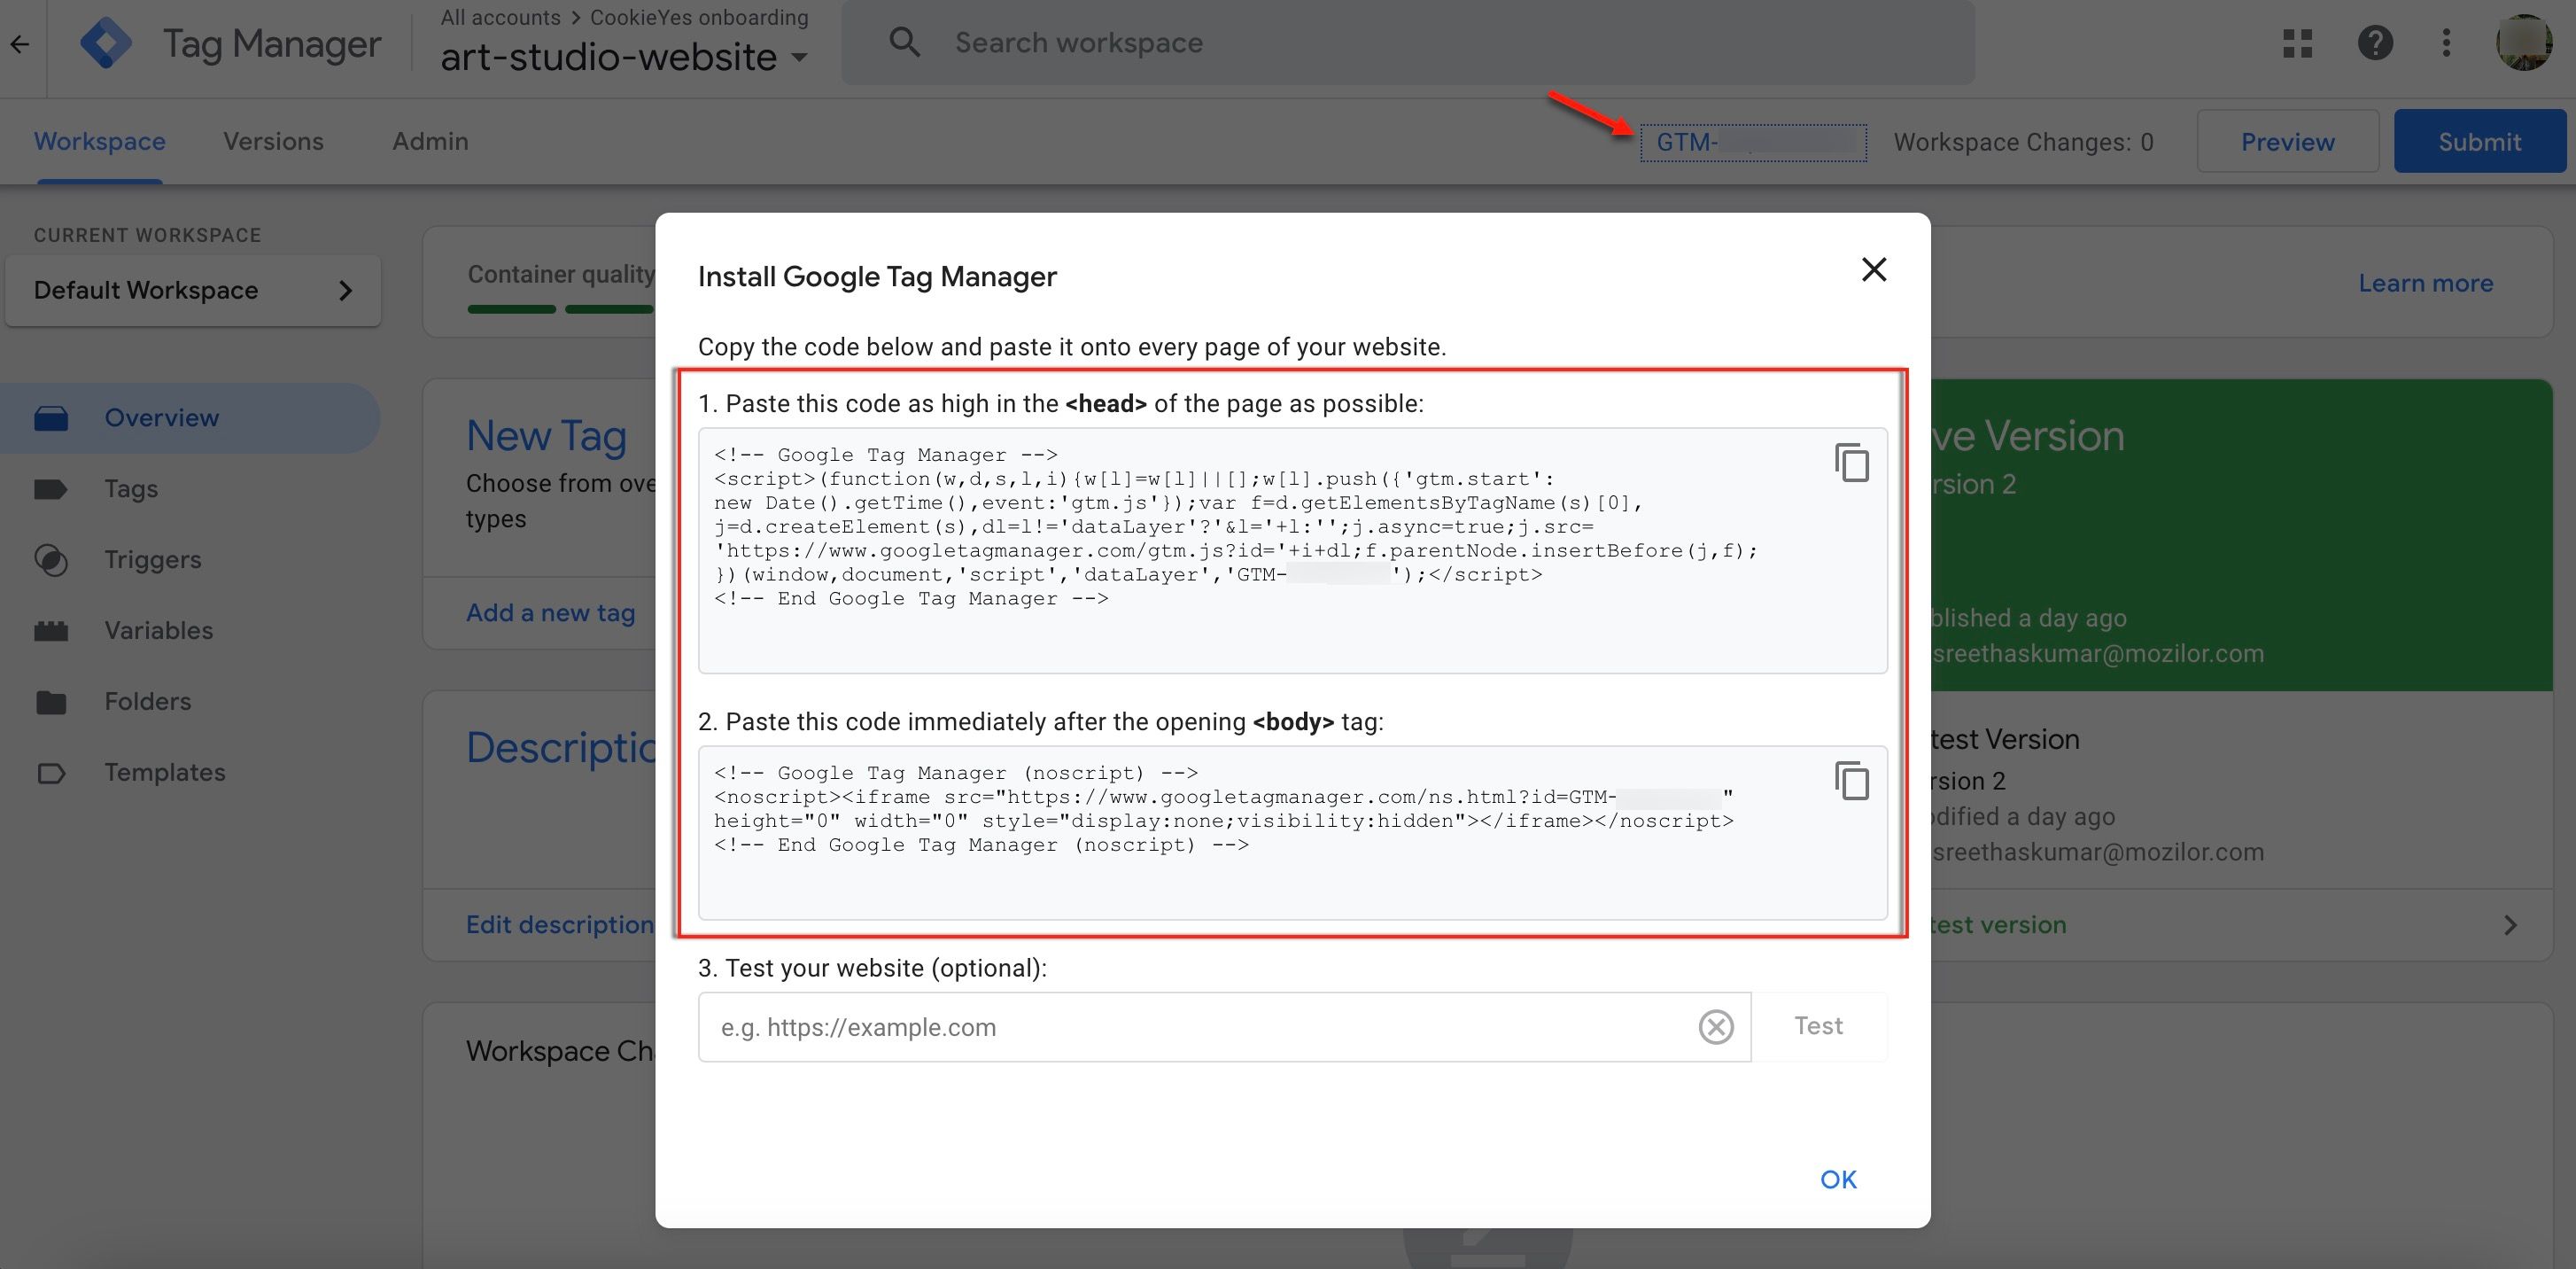
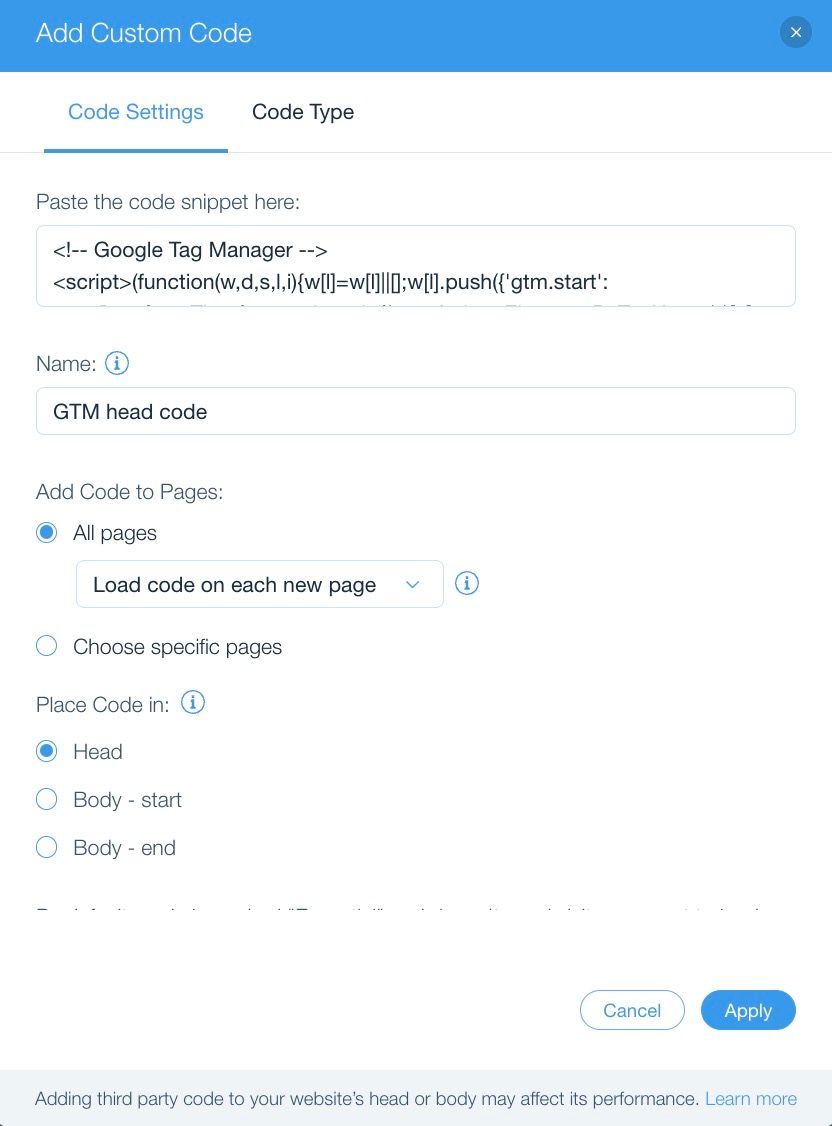
- Paste the first part of the GTM code (the one that goes into the
<head>section) into the code box - Set Place code to Head.
- Set “Add code to” to All pages.
- Name your code (e.g., “GTM head Code”) and click Apply.
Step 4:
Add the Second Part of the GTM Code
- Click on + Add Custom Code again.
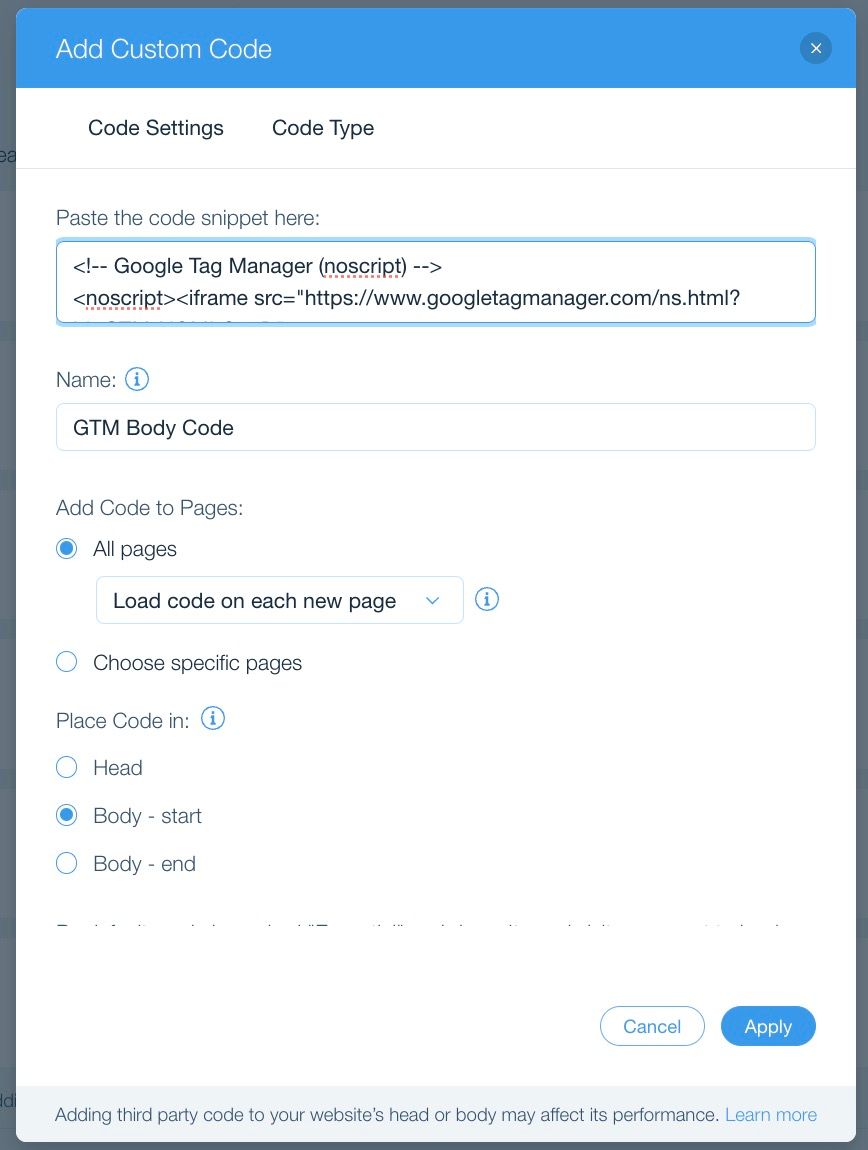
- Paste the second part of the GTM code (the one that goes after the opening
<body>tag). - Set Place code in to Body – start.
- Set Add code to to All pages.
- Name your code (e.g., “GTM Body Code”) and click Apply.
Step 5:
Save and Publish
- Save your changes in the Wix Editor.
- Publish your website to make the changes live.
Step 6:
Finalize the Setup in Google Tag Manager
Verify GCM Integration
For both new and existing users, follow these steps to verify GCM integration on your website:
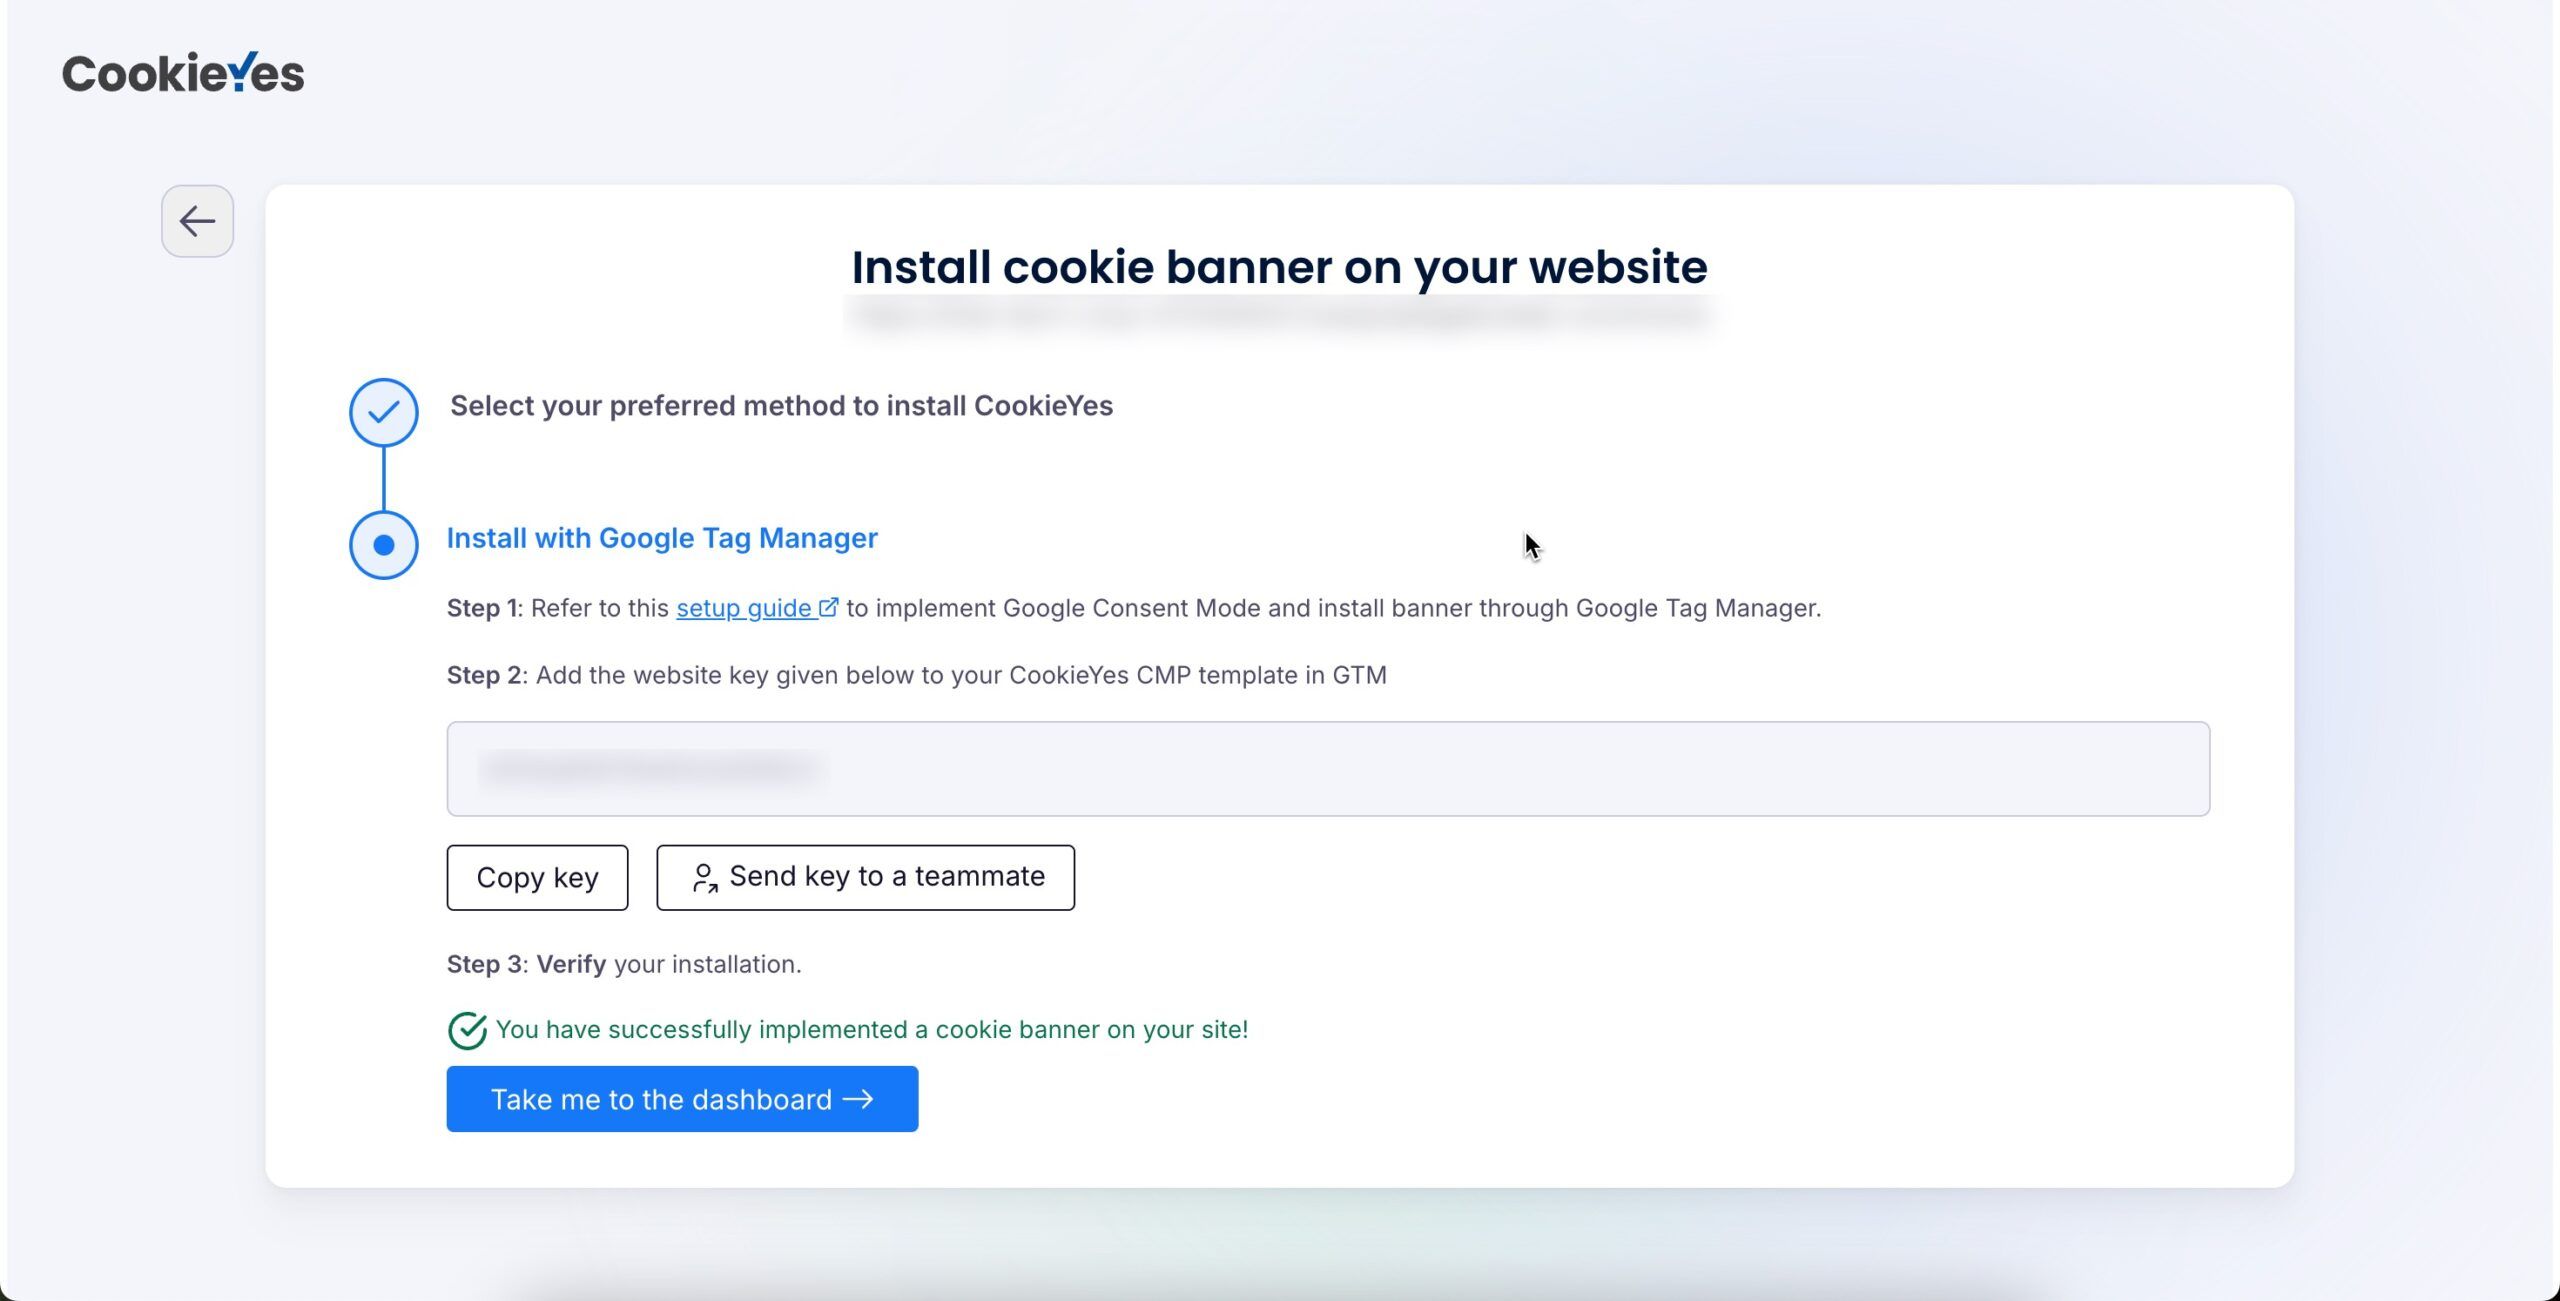
- If you are a new user, first verify the cookie banner installation:
- Go to the CookieYes setup screen and click Verify.
- You will see the message: “You have successfully implemented a cookie banner on your site!”
After verifying the banner or if you’re an existing user, proceed to verify GCM:
- Navigate to Advanced Settings in the CookieYes Dashboard.
- Scroll to the Google Consent Mode (GCM) section.
- Click the Check Now button against Check GCM status. If the configuration is correct, you will see a success message stating, ‘No error detected’.
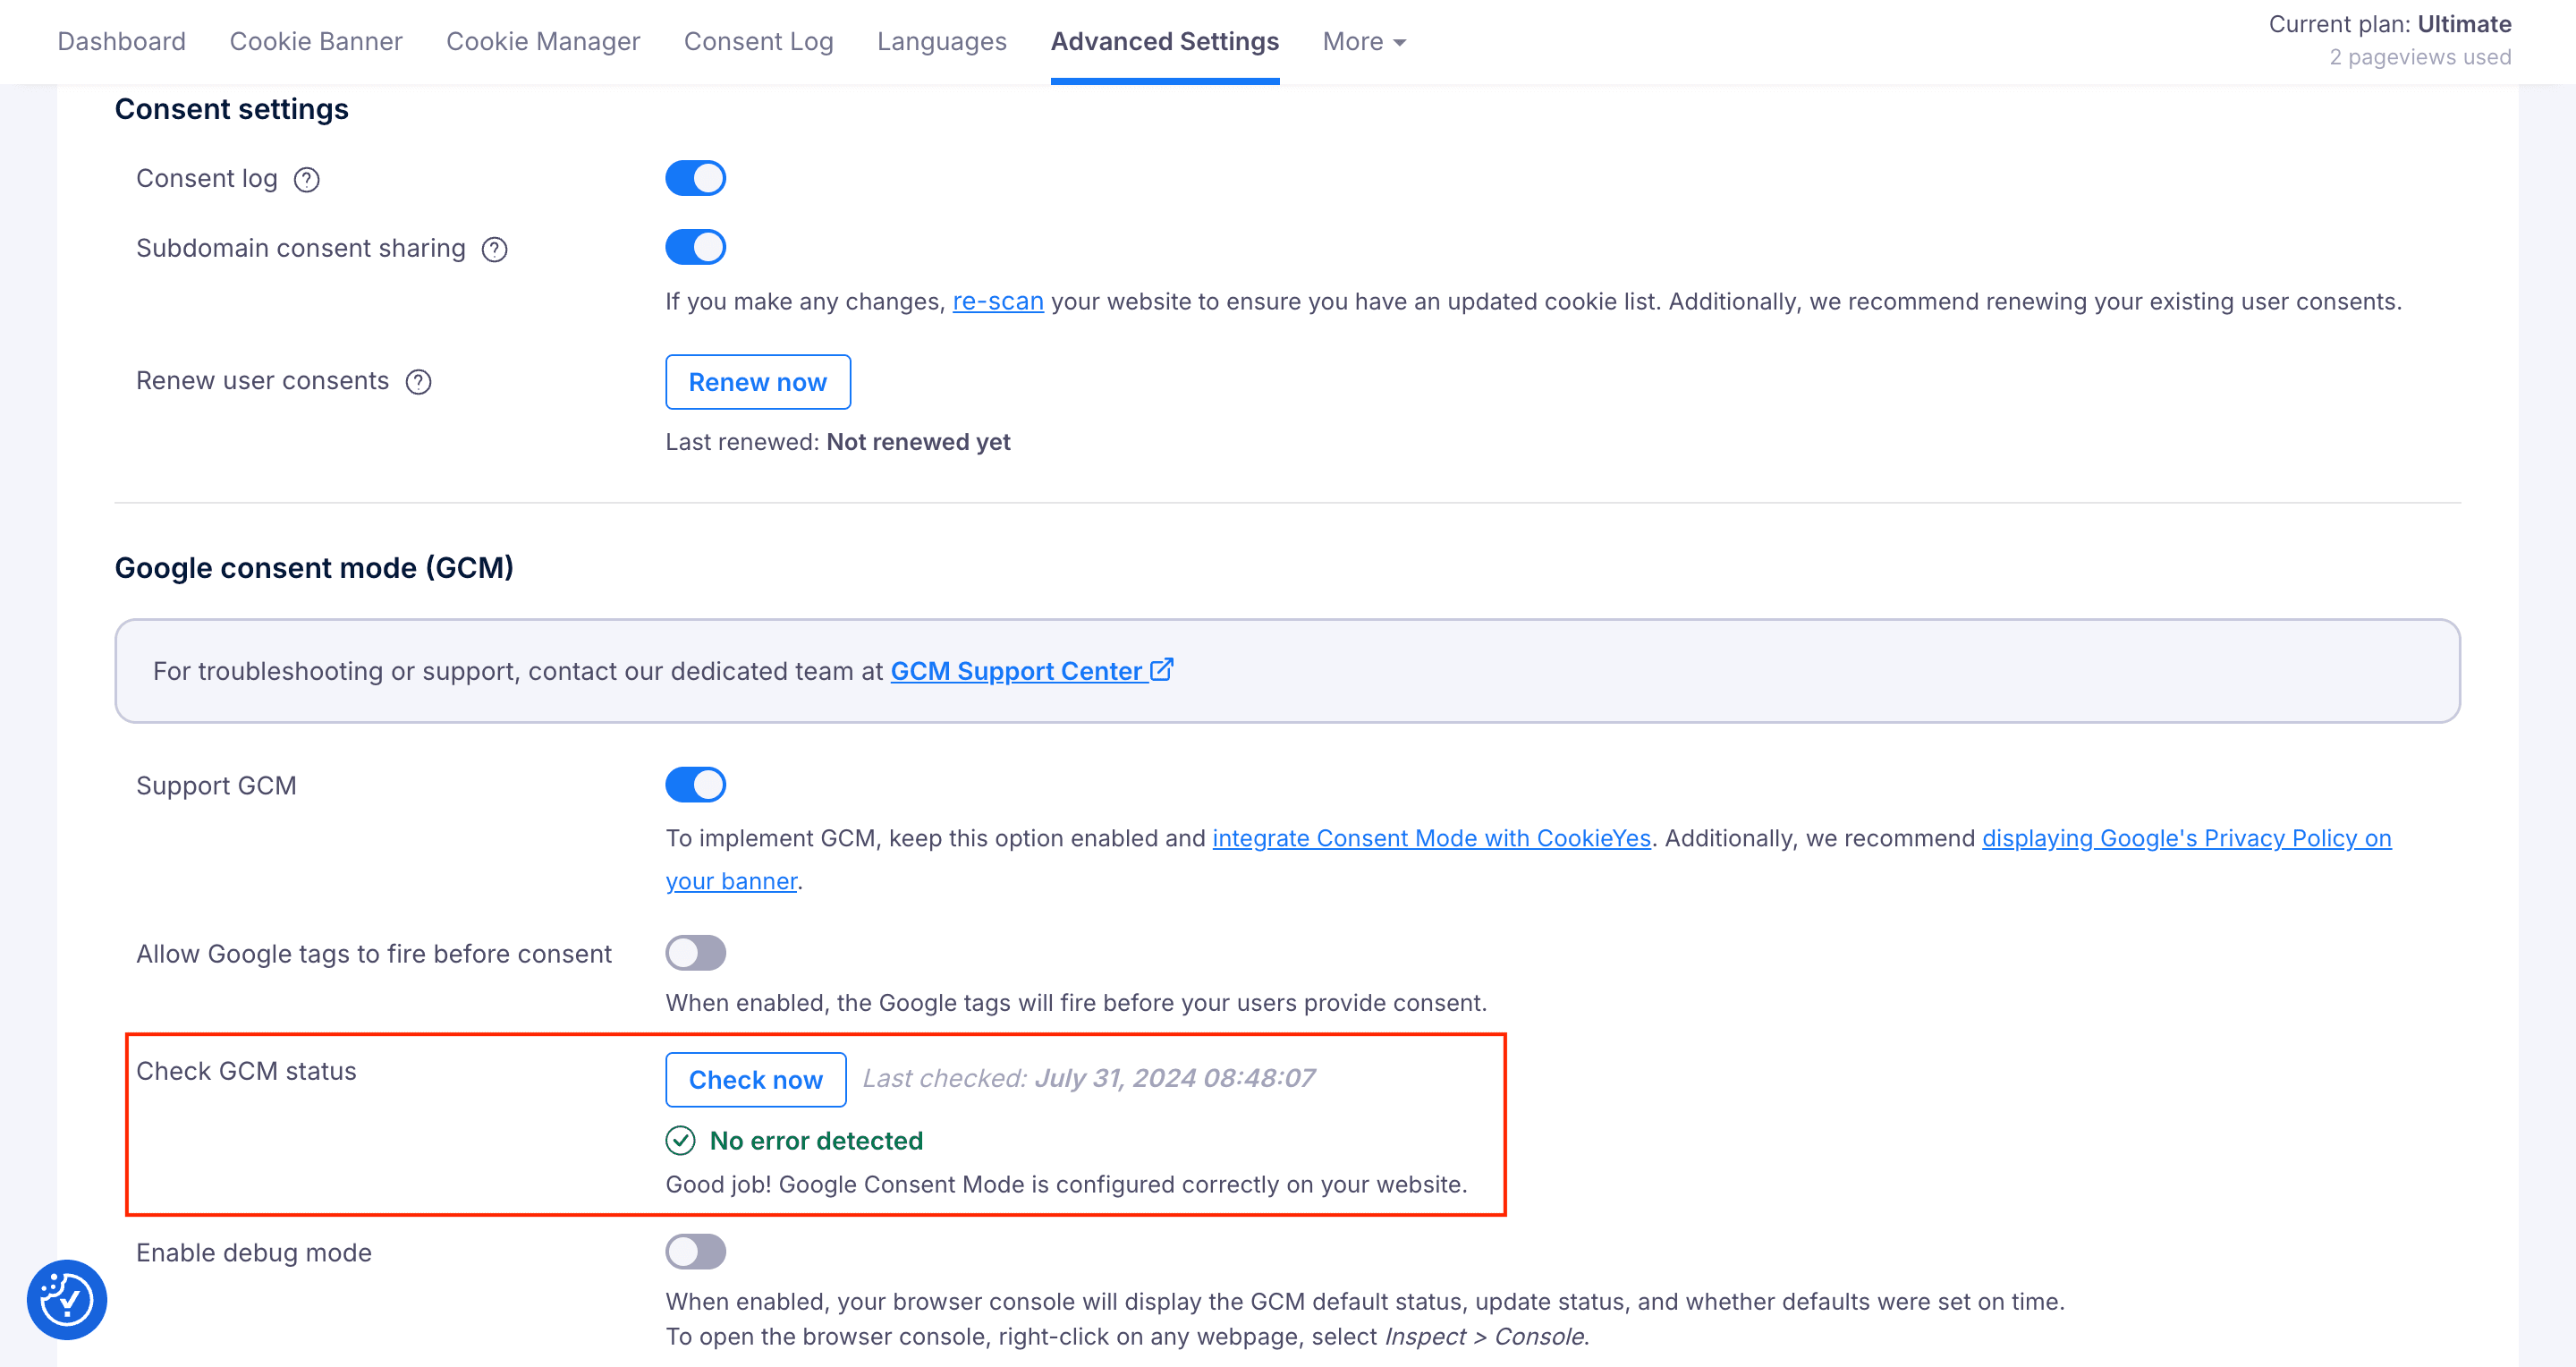
If the configuration is correct, you will see a success message stating, ‘No error detected’. If you encounter any error after running this check, refer to our GCM Troubleshooting Guide to resolve them and check again.
To further confirm the setup is correct, follow the steps in our Verification Documentation.
Setting Advanced Consent Mode in GCM
To set Advance Consent Mode, follow the below set:
- Navigate to CookieYes Dashboard > Advanced Settings.
- To set up Advanced Consent Mode in GCM, toggle the button (to the right) labelled Allow Google tags to fire before consent.
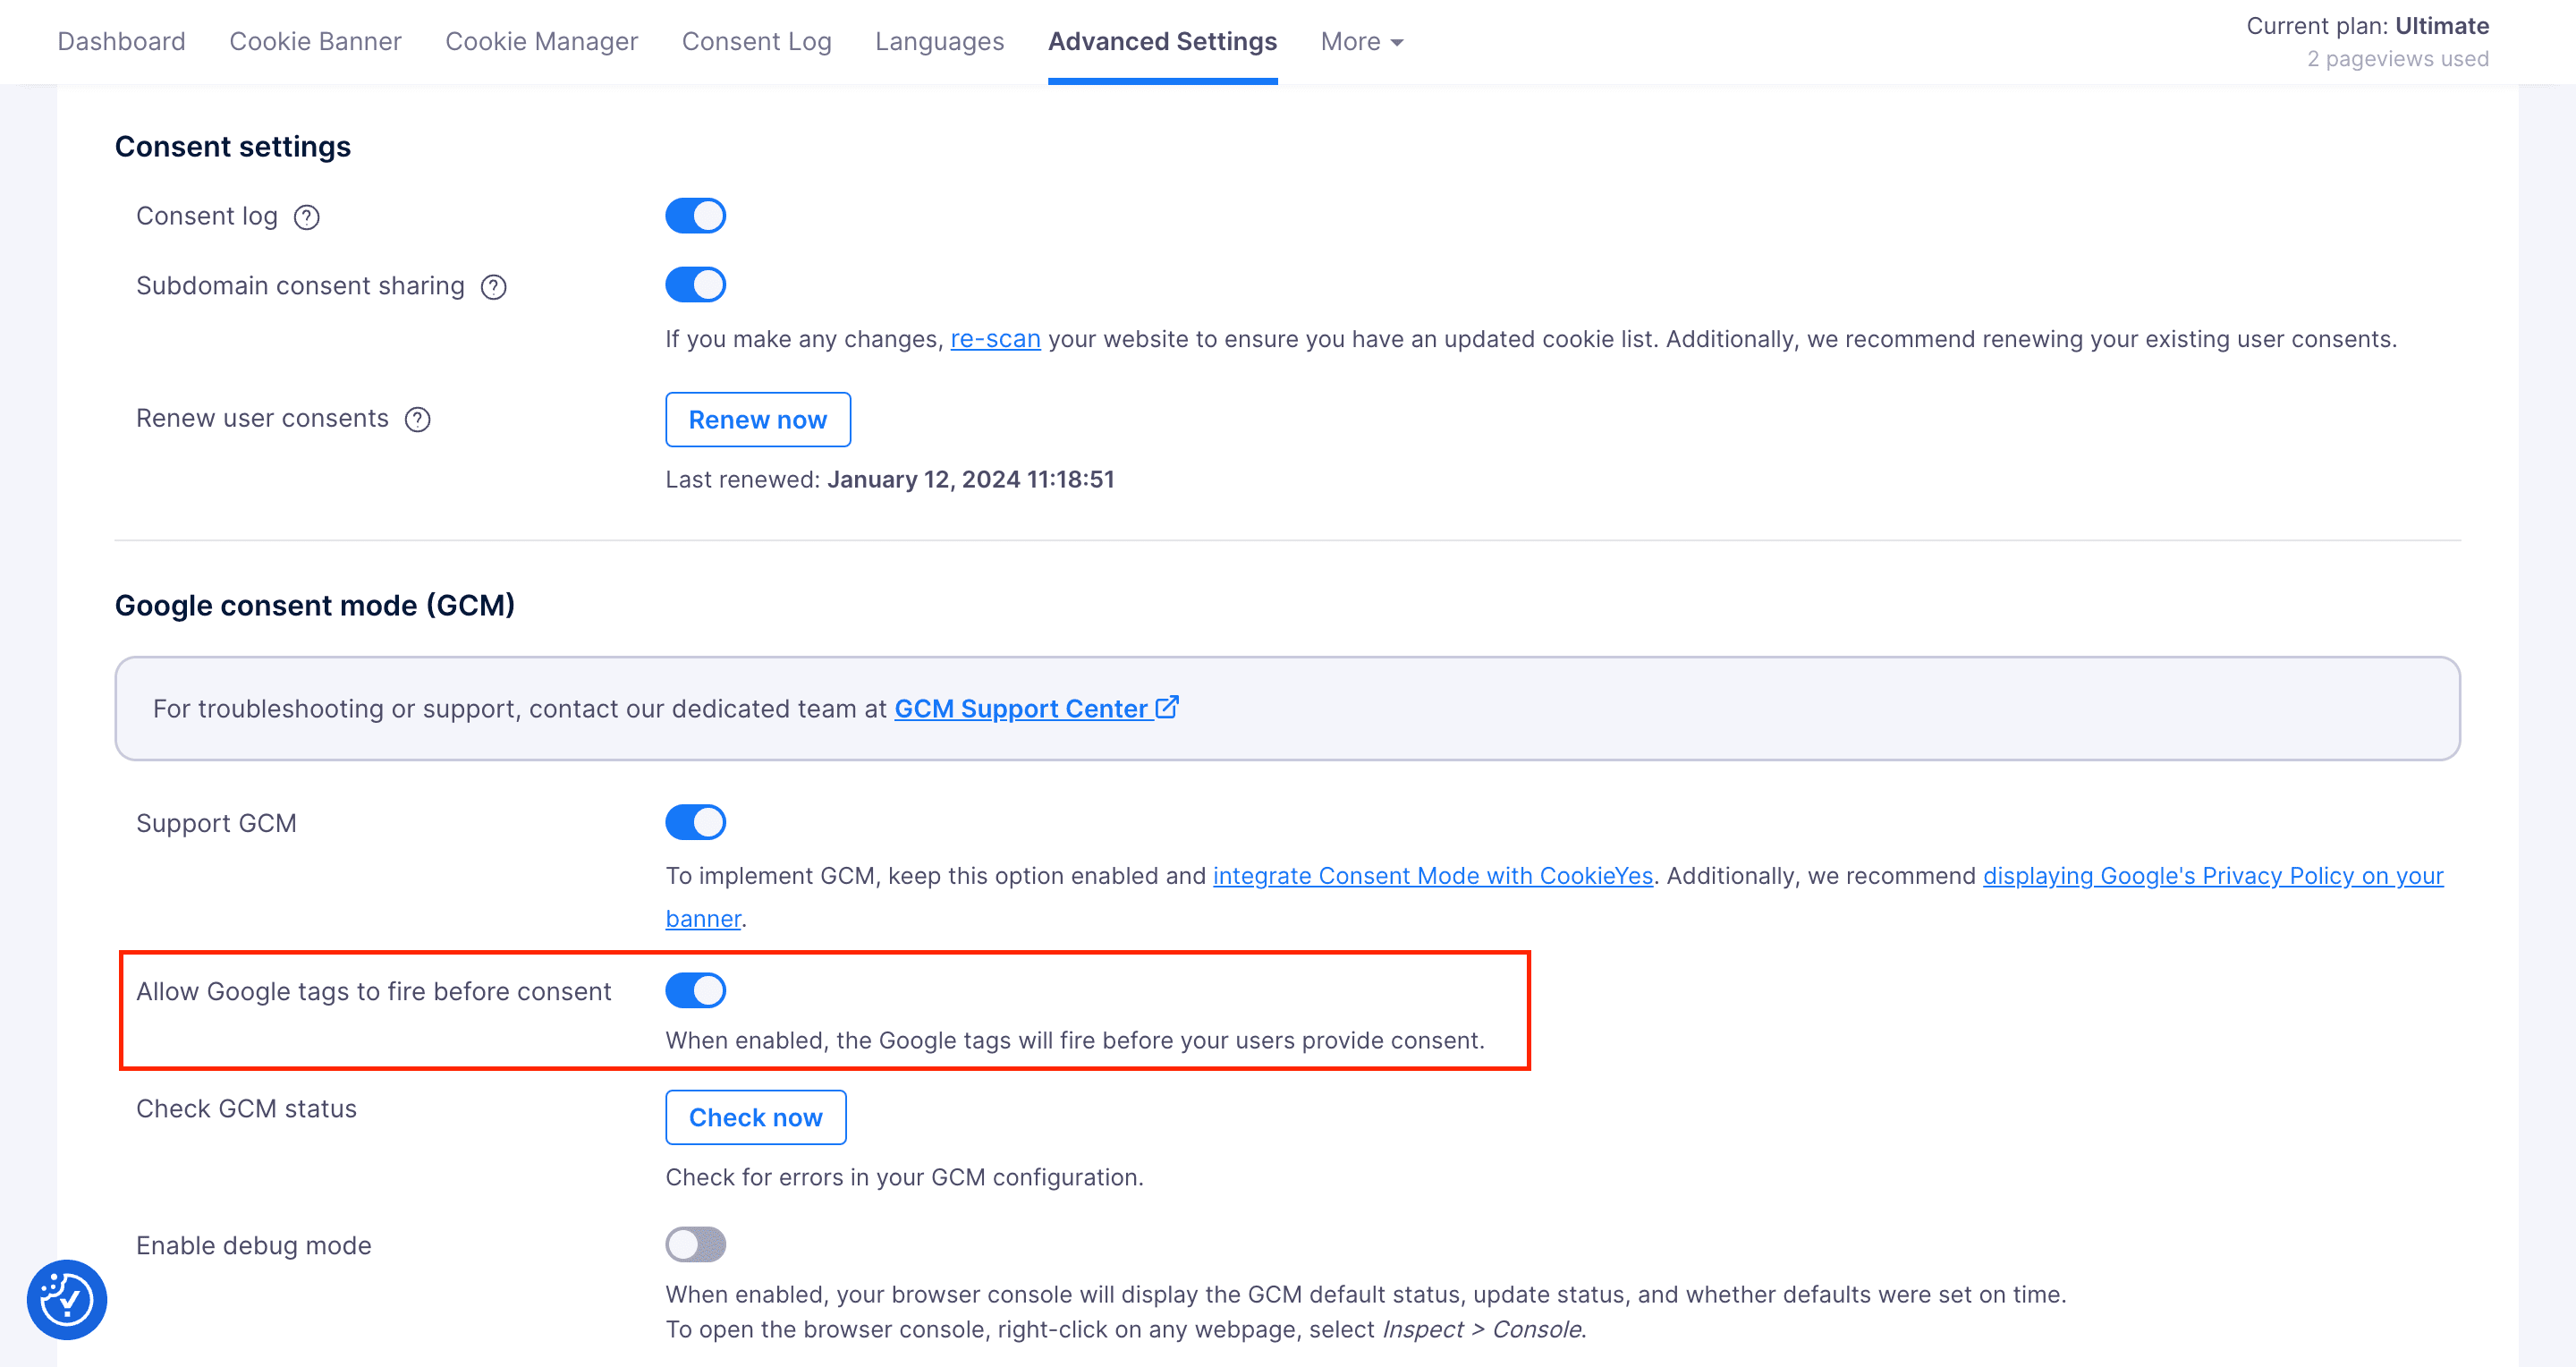
- Now, go back to your GTM account, click Submit, and then Publish to reflect the change on your website.
Enabling only the Support GCM option implements basic functionality, firing only allowed tags based on user consent. When you also activate Allow Google tags to fire before consent, it ensures Google tags fire even before the user consents to the banner, but they operate without setting cookies until the user provides consent. This balance allows for some data collection while respecting user privacy choices.
For detailed information on the Basic and Advanced Consent Mode v2 in CookieYes, refer to the Basic vs Advanced Consent Mode v2 documentation.
Conclusion
By following these steps, you will successfully integrate Google Consent Mode with your Wix website using CookieYes CMP. Once the integration is complete, you can perform a website scan directly from the CookieYes Dashboard and explore additional customisations and features.
For further assistance, our dedicated GCM support team are here to assist you.