Implementing Google Consent Mode Using CookieYes
Last updated on April 3, 2024
CookieYes now supports Google’s Consent Mode, an API that integrates Google tag behaviour with the user’s consent tool. Consent Mode has consent types for ads, analytics, functional, personalization and security cookies when using the global site tag or Google Tag Manager. You can use them to control tag behaviour based on user consent.
The CookieYes integration enables you to leverage Consent Mode v2 to better manage consent across Google tags. This update allows CookieYes customers using Google ads to integrate seamlessly with the CookieYes CMP. Here is a guide to how to integrate CookieYes with the Consent Mode v2.
If you don’t have an account with CookieYes, sign up and try for free.
Use Cases
- Google Consent Mode v1:
- Migration to Consent Mode v2: Guide for Existing Users to Upgrade from Consent Mode v1 to v2.
- Integration in WordPress Plugin:
- Activate and Integrate GCM v2: Enable consent mode v2 within CookieYes and integrate it using the custom consent mode script
- Integration in Shopify:
- New user implementations:
- Enable Consent Mode v2 in CookieYes: How to activate the feature on the CookieYes platform.
- Consent Mode Integration: Integrating Google Consent Mode v2 with CookieYes
- Setting Up Google Tag Manager with CookieYes for Beginners:
- Guide for Beginners: Integrating CookieYes with Google Tag Manager
What is Google’s Consent Mode v2?
Google Consent Mode v2 is an enhanced version of Google Consent Mode, aiding website publishers and advertisers in obtaining explicit user consent for web tracking, aligning with privacy regulations like GDPR. This updated version introduces standardised banners and user controls, streamlining the consent-gathering process for setting cookies and utilising tracking technologies. By implementing Consent Mode v2, advertisers can receive consent from users that can be integrated with Google advertising services, enabling granular reporting on campaign performance and conversion tracking. Consent Mode v2 provides the capabilities to acquire user consent specifically for advertising and analytics cookies in a legally compliant way under privacy laws.
What’s new in Consent Mode v2?
Google introduced Consent Mode v2 as an update to its existing Consent Mode platform to continue alignment with privacy regulations and provide users enhanced transparency and control. Two notable new parameters have been added:
ad_user_data
This parameter includes the user’s consent preference for sharing their data with Google’s ad services. The possible values are “granted” or “denied” based on user choice collected through the site’s cookie consent banner. If consent is denied, Google advertising tags will avoid collecting or sending identifiable user data.
ad_personalization
This parameter indicates if a user has opted-in to ad personalisation and remarketing. Like ad_user_data, it reflects user preferences captured through the consent UI. A value of “denied” will turn off personalised ad functionality such as remarketing or interest-based targeting.
How to enable Google Consent Mode v2 in CookieYes?
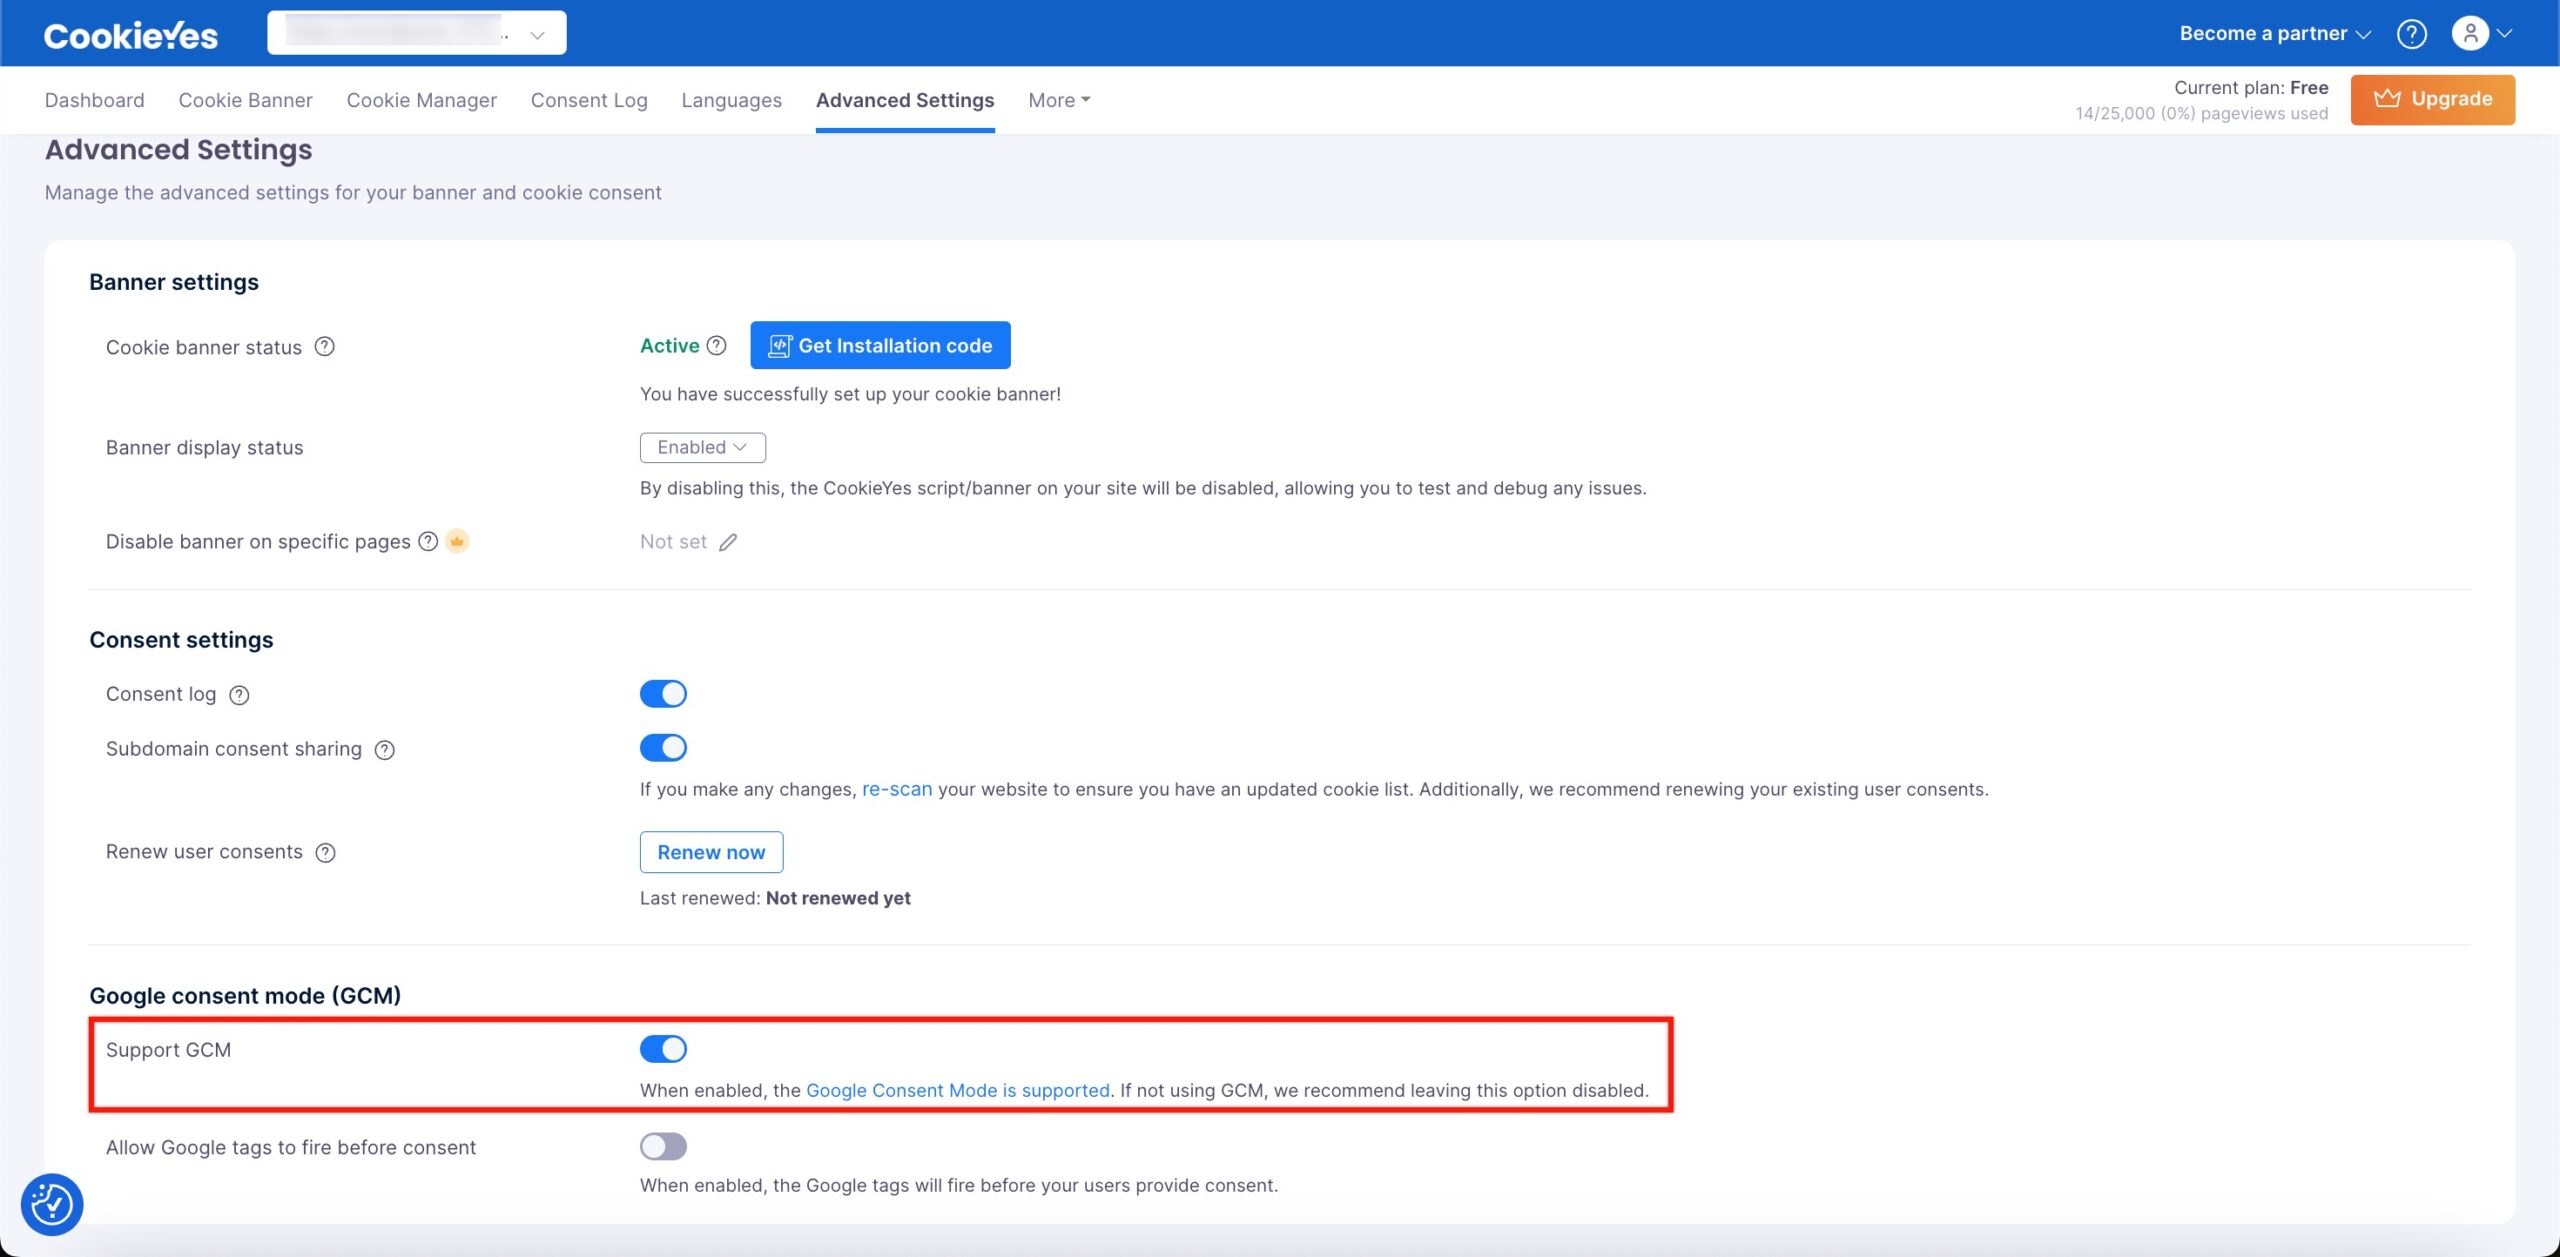
The first and most important step in implementation is to enable the Google Consent Mode v2 feature on the CookieYes platform. By default, this feature should be enabled, but if you have disabled it at any point, follow these steps to turn it back on:
- Log in to your CookieYes web app account.
- Navigate to CookieYes Dashboard > Advanced Settings.
- In Site Settings, toggle the button (to the right) labelled “Support GCM“.
CookieYes Consent Mode integration
If you use Consent Mode with CookieYes, every time the website users give their consent choice, CookieYes will signal Google to modify the tag behaviour based on the user’s choice. Therefore, the website will stop collecting or using any personally identifiable information and use aggregated information for its services.
There are two methods to integrate Consent Mode v2 with CookieYes — with and without using the Google Tag Manager Template.
Method 1: Implementation using Google Tag Manager template
First, you need to set up Google Tag Manager for your website. You can refer to the help guide for detailed instructions.
Caution
Prior to implementing Google Consent Mode through our Google Tag Manager template:
- For existing CookieYes users, ensure the removal of the CookieYes Script from the head tag of your website.
- New users need not add the CookieYes script to the head tag of your website.
Note: For Shopify users, ensure that the code <script src="https://cdn-cookieyes.com/common/shopify.js"></script> is present on your website.
Now, follow these steps:
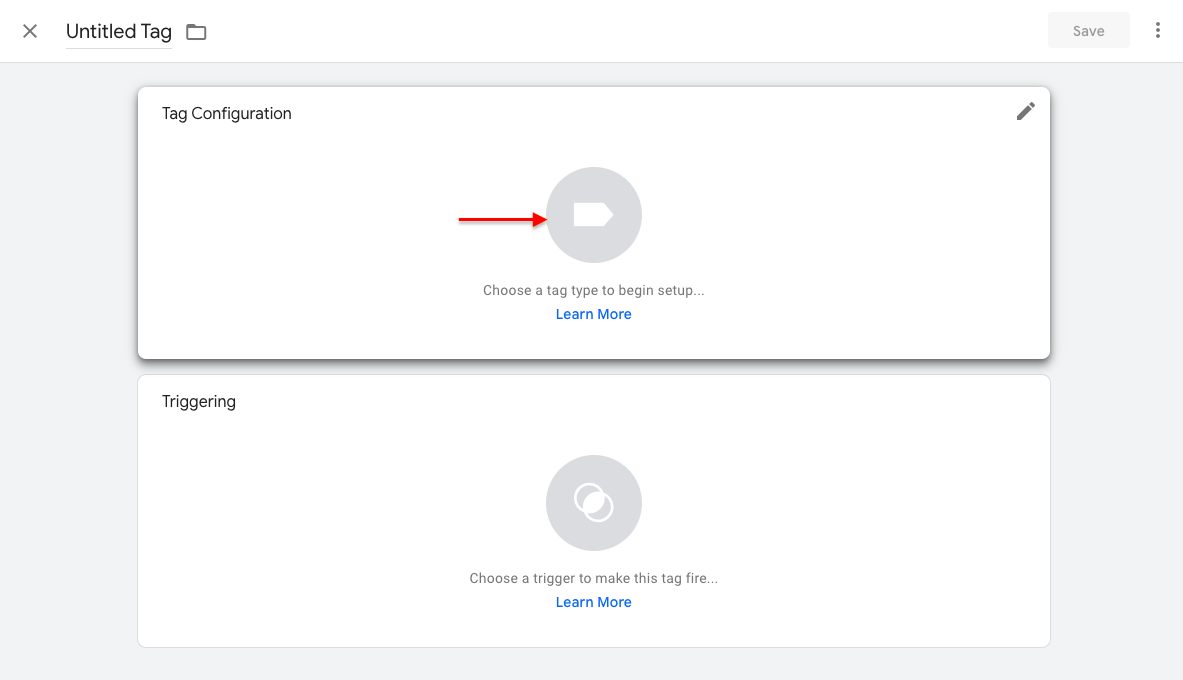
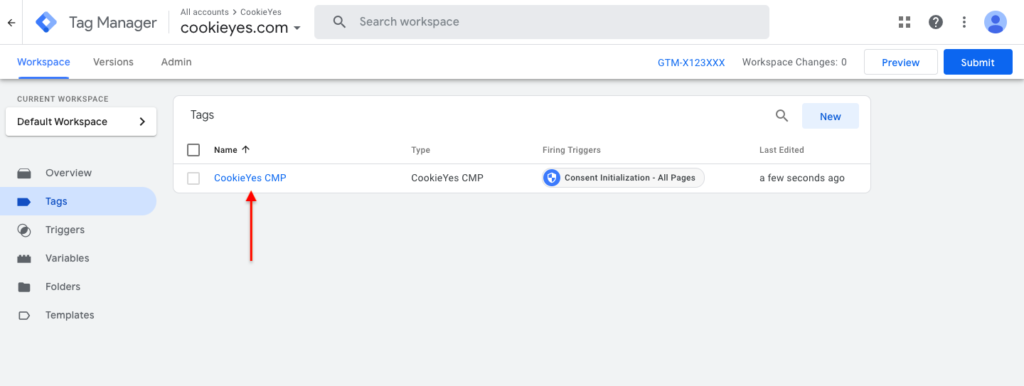
Step 1. First, you need to create a new tag. Click Tags in the left sidebar, and then New as shown.

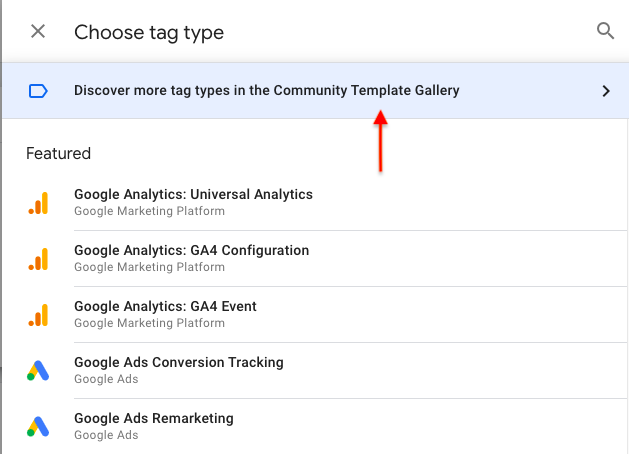
Step 2. Click on Tag Configuration > Discover more tag types in the Community Template Gallery and search for CookieYes CMP. Alternatively, you can get the template from here and skip to step 3.
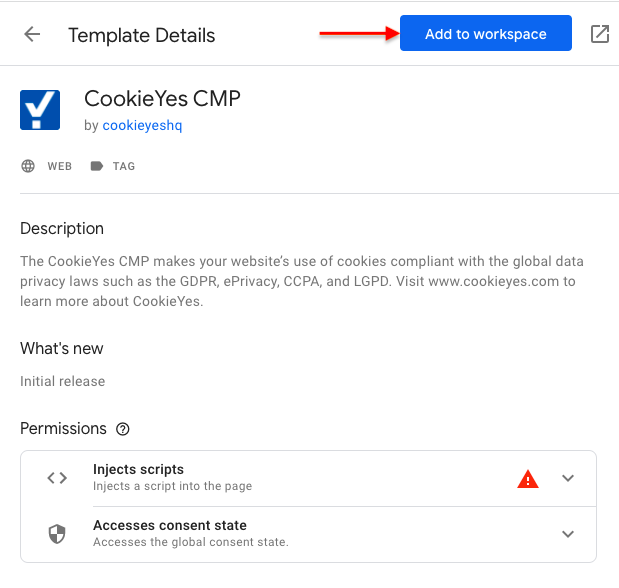
Step 3. Choose the CookieYes template and click Add to workspace > Add to add the tag.
Step 4. Insert the CookieYes website key, set other fields to appropriate values, and save the tag after naming it.
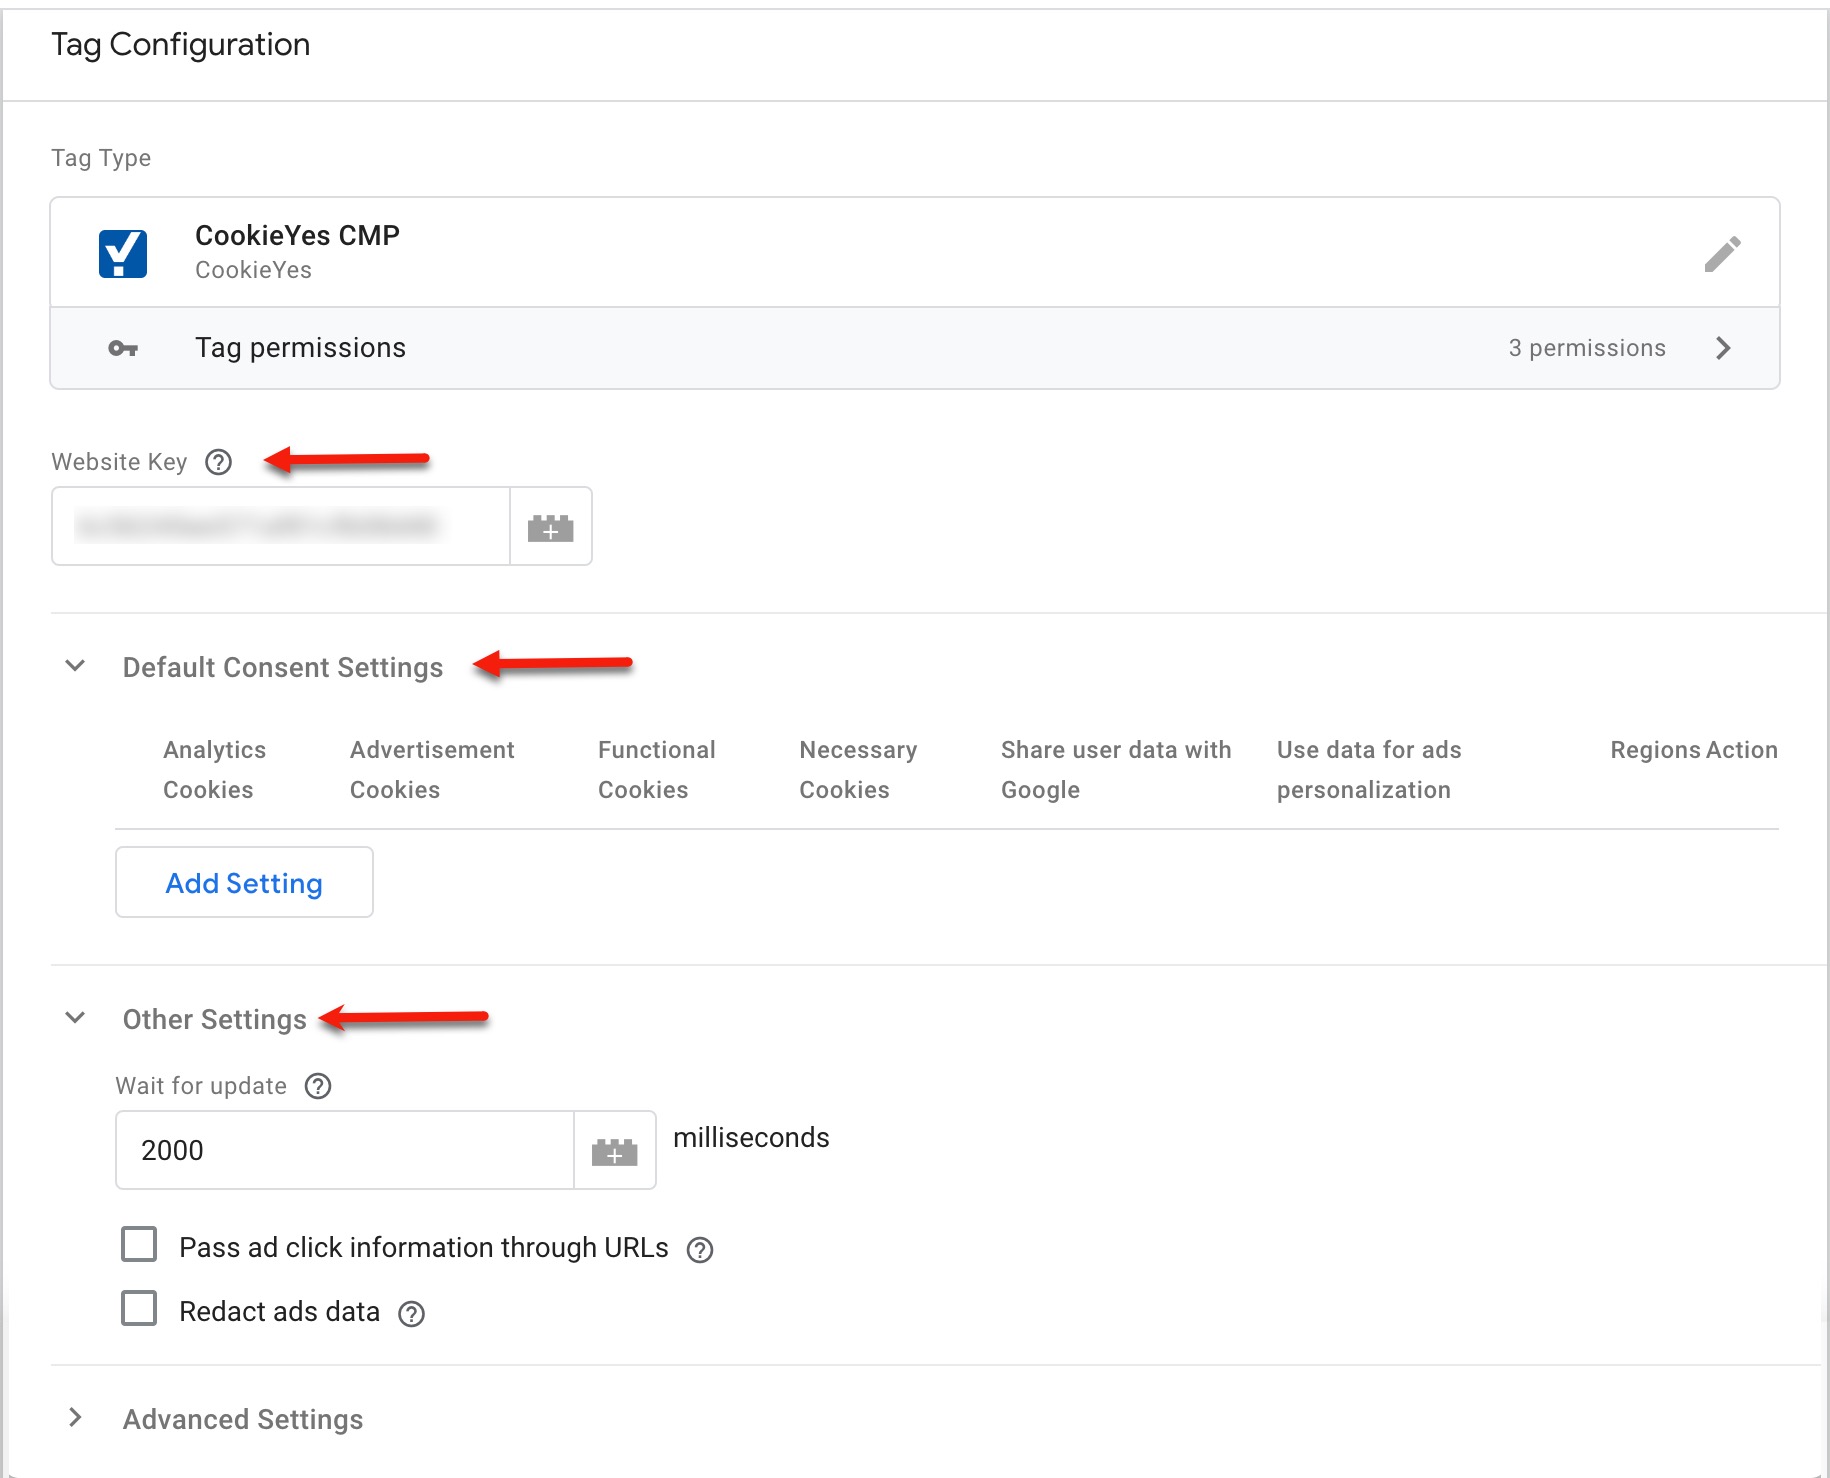
Get Installation Code > Copy Code.
Copy the website key from the src attribute (e.g. src=”https://cdn-cookieyes.com/client_data/YOUR_WEBSITE_KEY/script.js”).
Note: When entering the Website Key, do not include the entire src in the website key field.
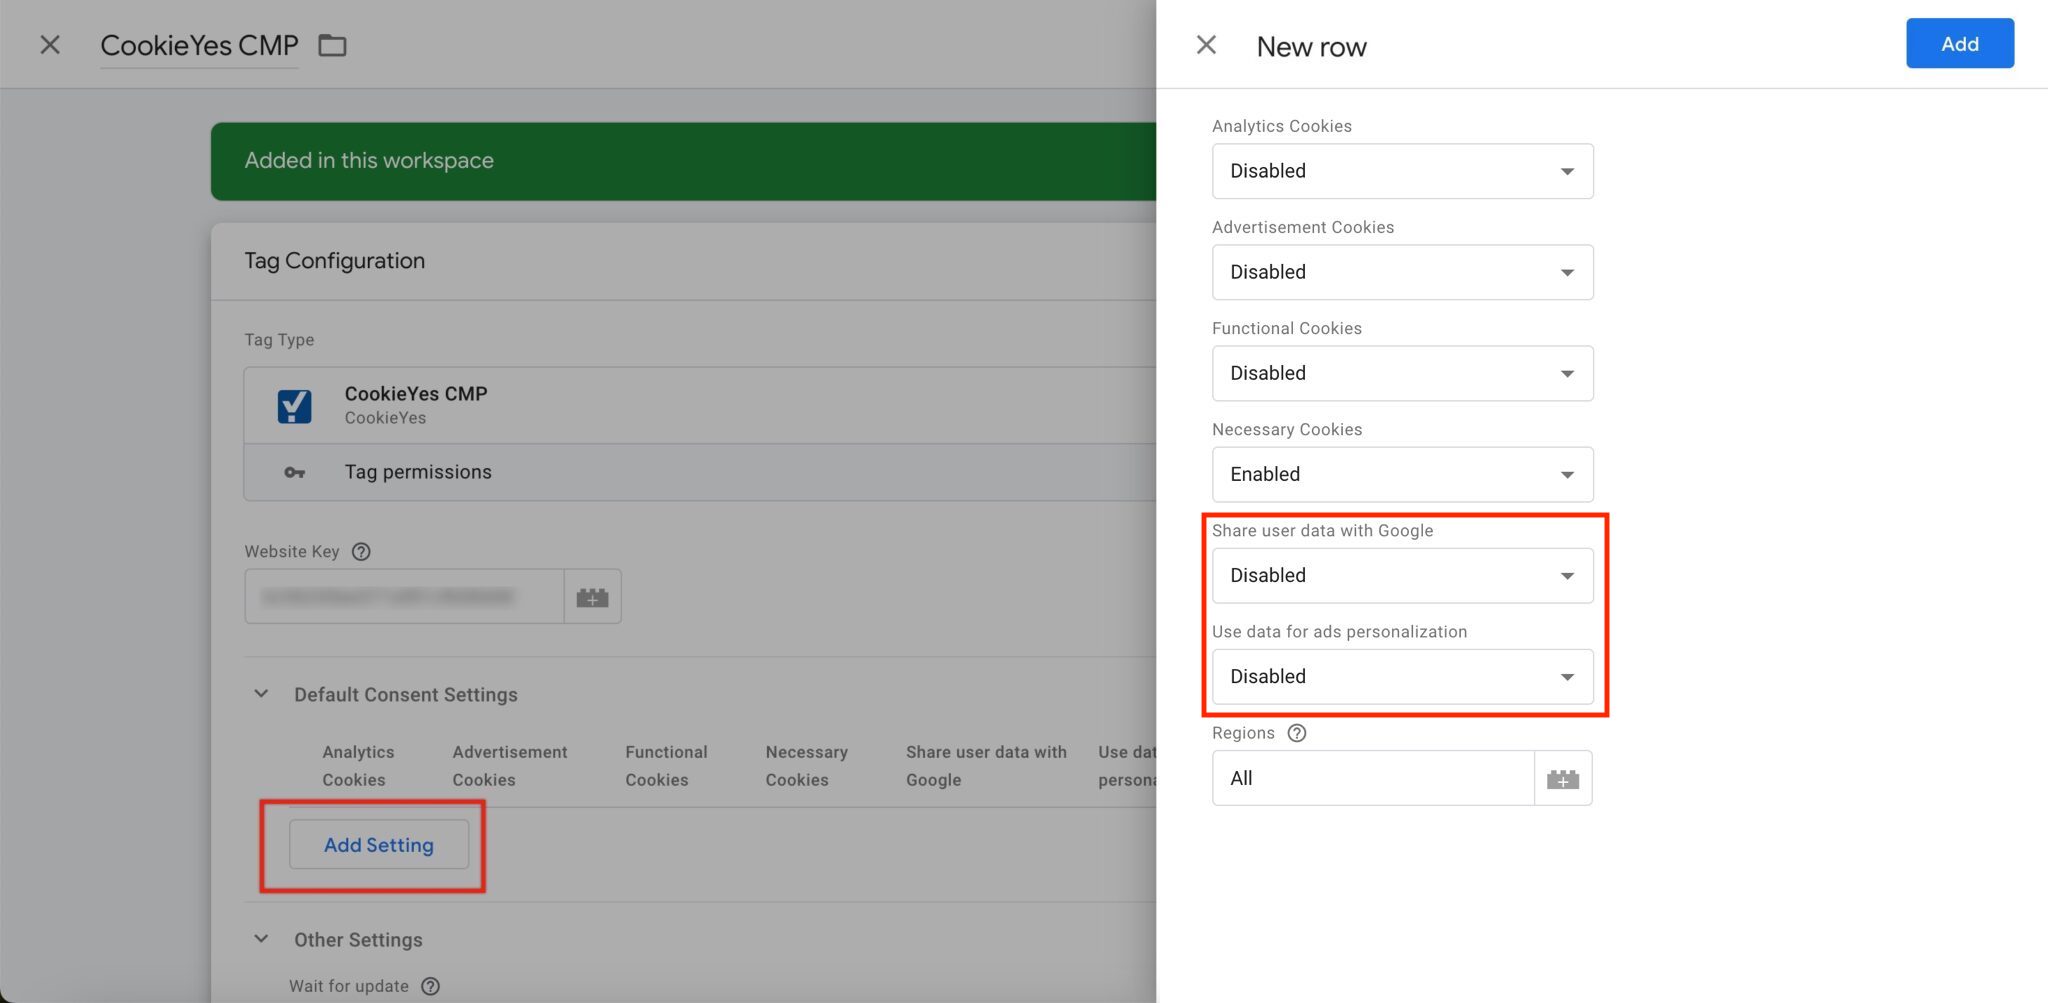
To add Default Consent Setting:
- Click Add Setting.
- Select Enabled/Disabled from the drop down for each cookie category based on your requirements.
- Set the Region by entering the region’s ISO-standardised (ISO 3166-2) codes for the specific regions you intend to Geo-target with your banner. If you prefer not to Geo-target your banner to specific regions around the globe, enter All in the Regions field. Refer to the ISO 3166-2 standard for the appropriate region codes.
- Click Add.
You can add multiple regions by entering the comma-separated region codes.
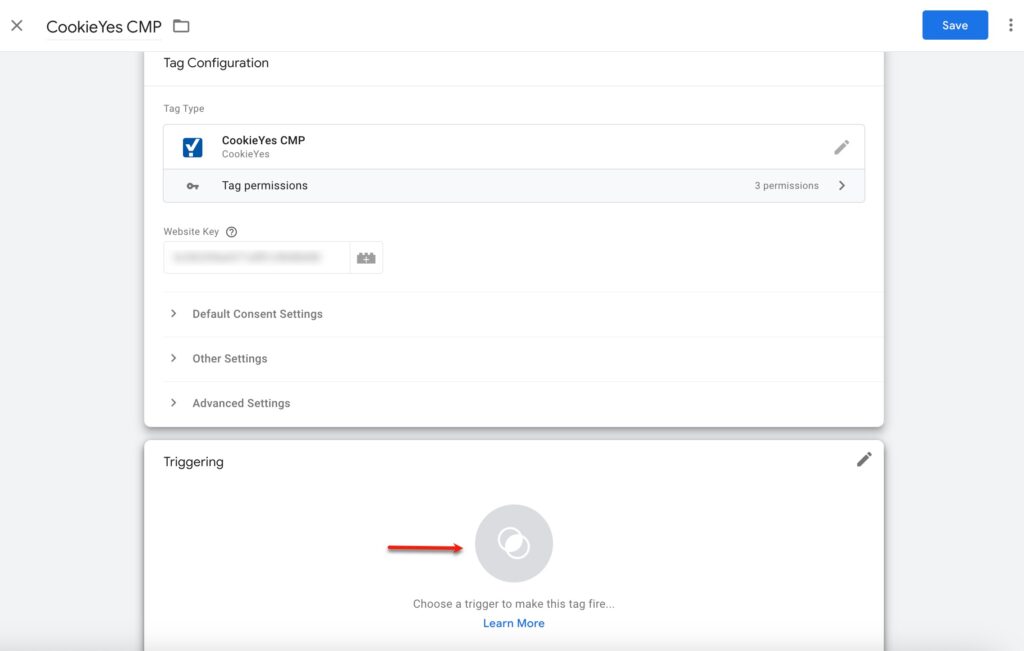
Step 5. Select Consent Initialization – All Pages as the trigger for the tag.
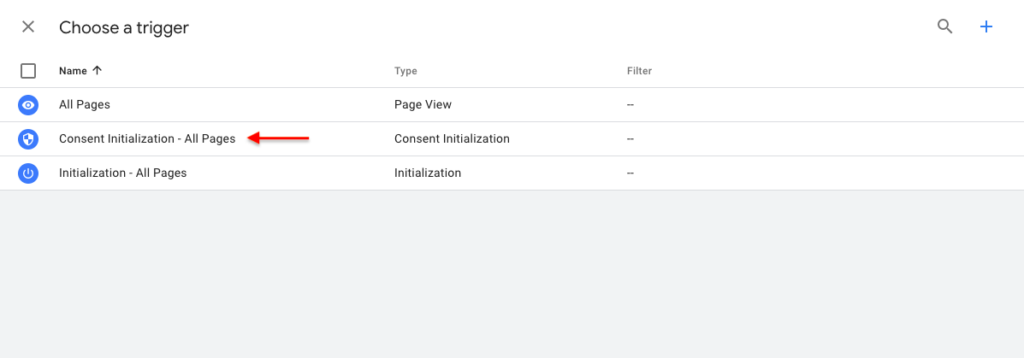
Step 6. Click Save to complete the integration of CookieYes with the Google Consent Mode.
If you’re using Google Tag Manager to add third-party scripts to your website, you may want to block cookies set via GTM that have not been consented to use. For detailed instructions on configuring third-party scripts in GTM with CookieYes, refer to our documentation: Block Third-Party Cookies with Google Tag Manager and CookieYes.
Method 2: Implementation using the custom script
To integrate CookieYes with Consent Mode without the use of CookieYes GTM template:
Step 1. Copy the custom script and paste above the Google Tag Manager script and CookieYes script :
<script>
    window.dataLayer = window.dataLayer || [];
    function gtag() {
        dataLayer.push(arguments);
    }
    gtag("consent", "default", {
        ad_storage: "denied",
        ad_user_data: "denied",
        ad_personalization: "denied",
        analytics_storage: "denied",
        functionality_storage: "denied",
        personalization_storage: "denied",
        security_storage: "granted",
        wait_for_update: 2000,
    });
    gtag("set", "ads_data_redaction", true);
    gtag("set", "url_passthrough", true);
</script>
Note: The values in the code are changeable as per your requirements. e.g.
 gtag("set", "ads_data_redaction",false);
 gtag("set", "url_passthrough",false);
Step 2. If your website already has Google Tag Manager installed, ensure that you position the GTM script directly below the Custom Consent Mode Script and above the CookieYes script.
If GTM is not installed on your website, follow the below steps:
- Sign Up/ Create a Google Tag Manager Account and set up a container.
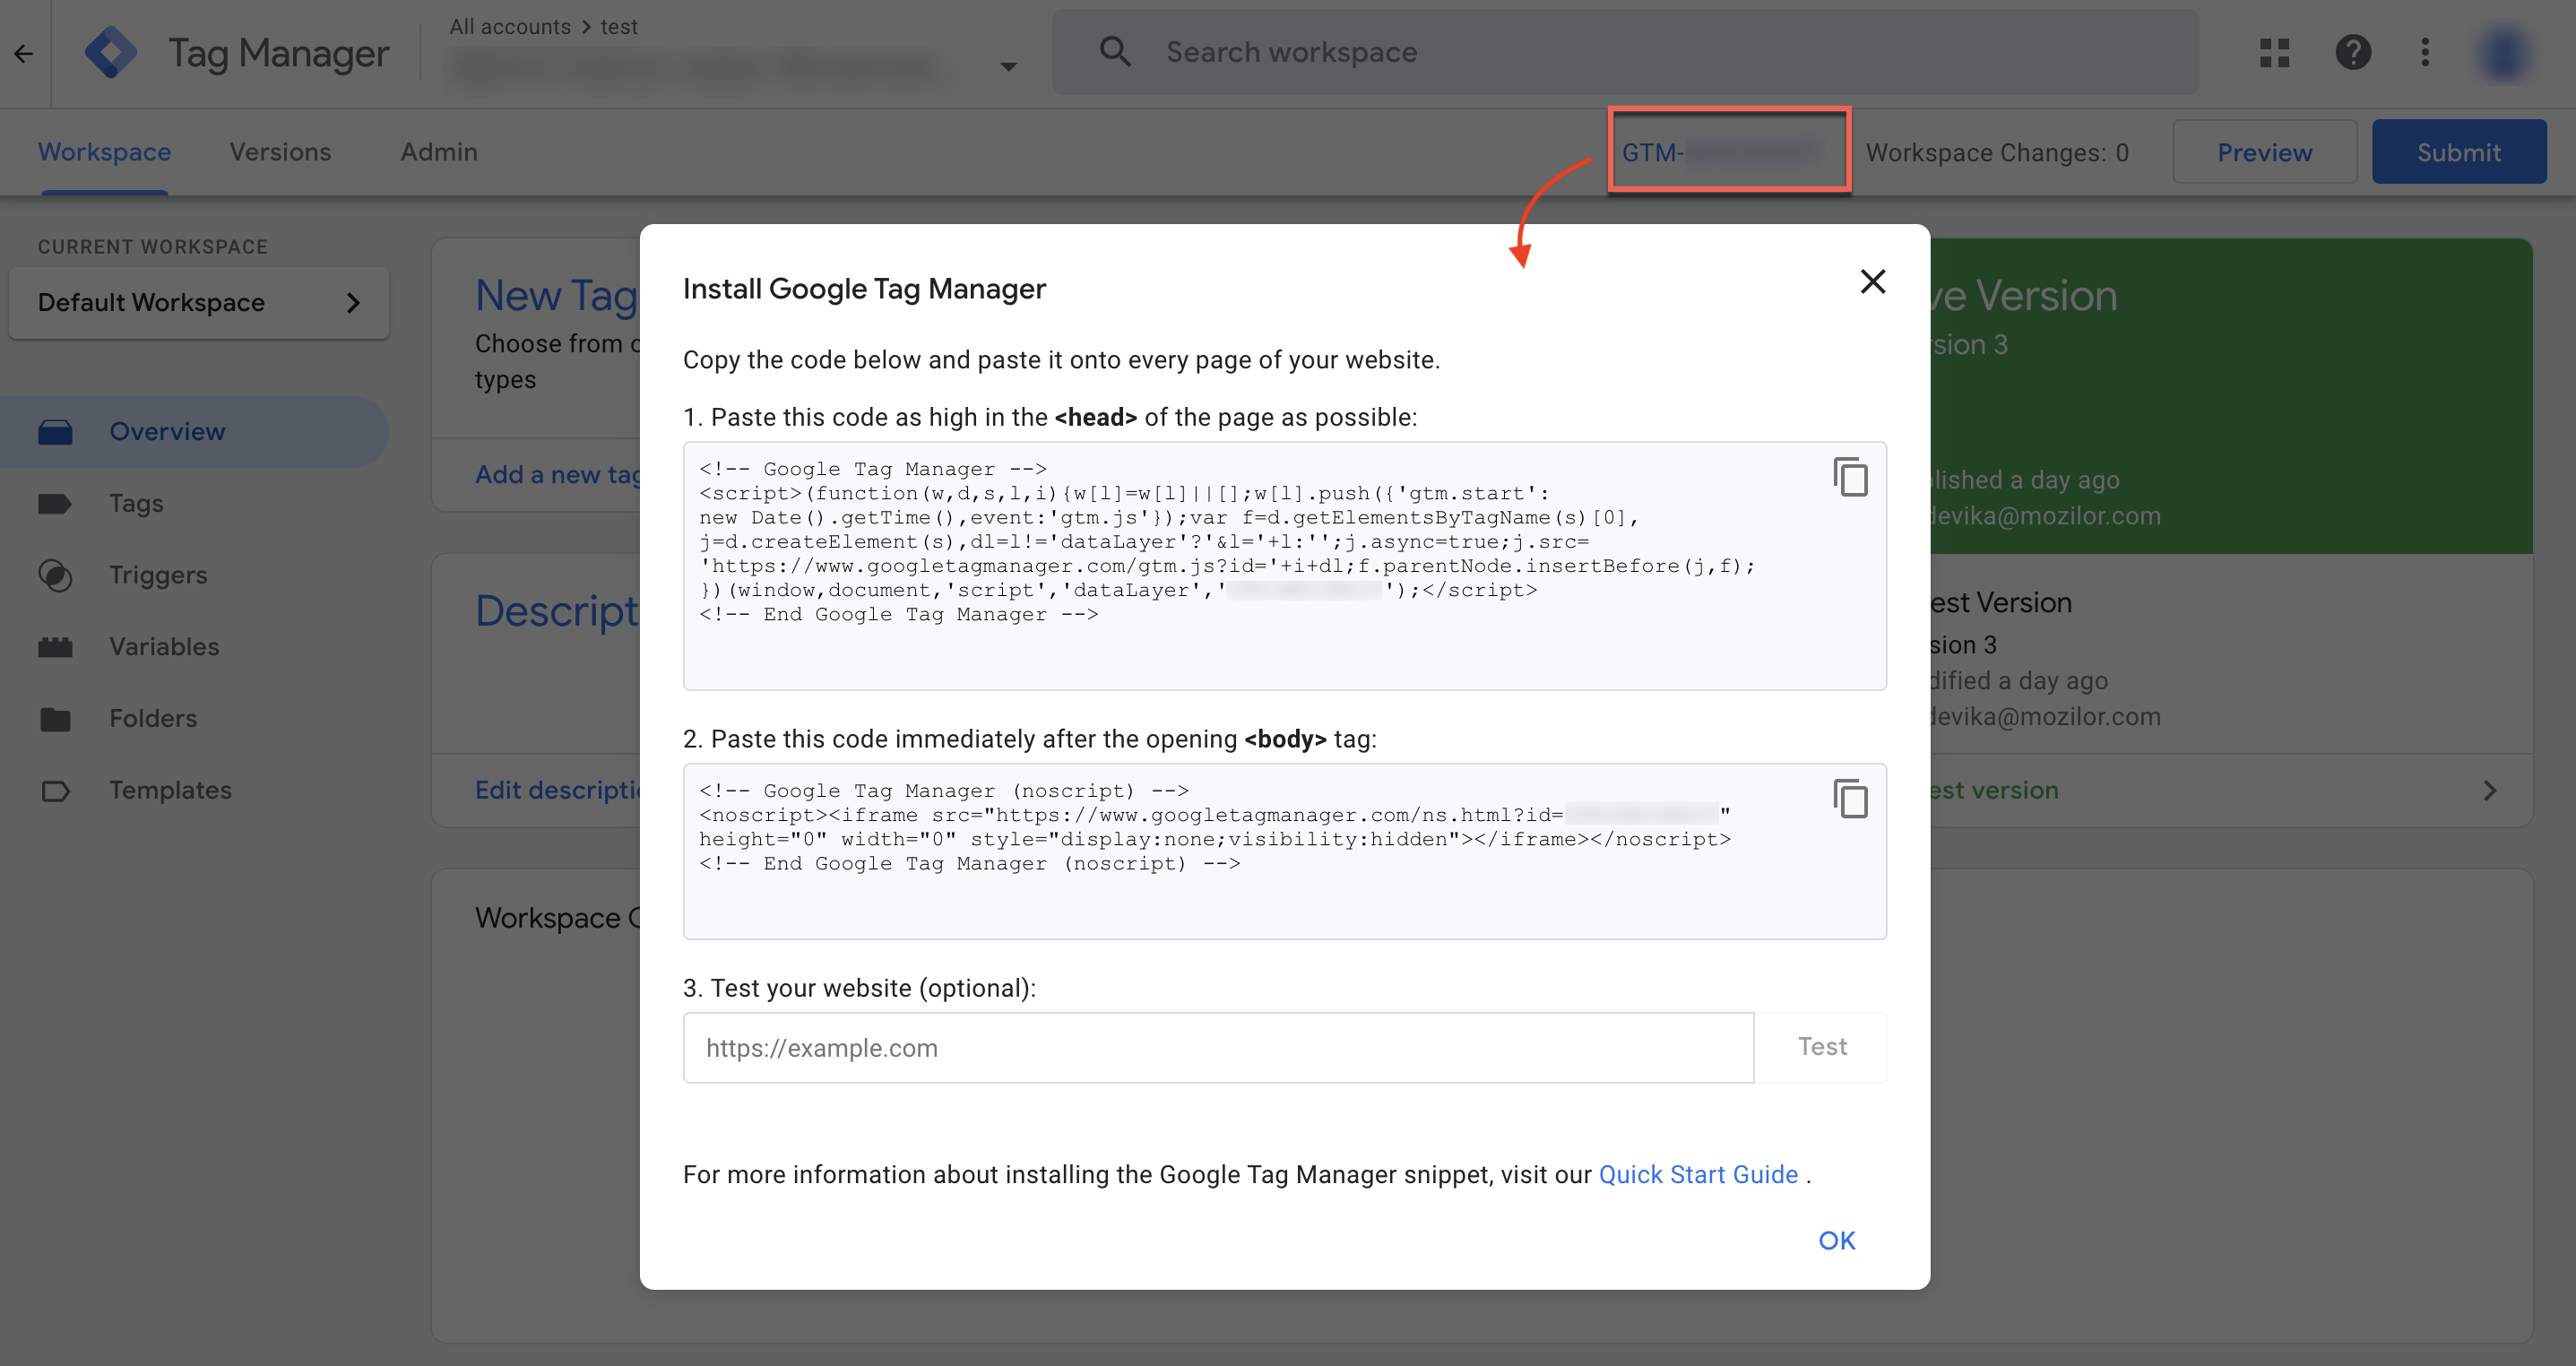
- Navigate to the Google Tag Manager Dashboard and click on the Container ID in the top navigation Panel.
- Copy and paste the GTM script between the custom script and the CookieYes script. Additionally, ensure to insert the <noscript> element immediately after opening the <body> tag.
Step 3. Ensure that the order of the scripts is as follows:
- Custom Consent Mode script
- gtag / GTM script
- CookieYes script
Loading the scripts in this specific order is necessary for their proper functionality.
CookieYes Plugin user need not add CookieYes script again.
Google Consent Type
CookieYes CMP maps all seven Google consent types into 4 categories:
| Google consent type | CookieYes consent type | Purpose |
| ad_storage | advertisement | To enable advertisement cookies. |
| analytics_storage | analytics | To enable analytics cookies. |
| functionality_storage | functional | To enable functional cookies for website functionality and settings. |
| personalization_storage | functional | To enable functional cookies for user personalization. |
| security_storage | necessary | To enable necessary cookies for website security and protection, user UI preferences, etc. Such cookies do not require consent. |
| ad_user_data | advertisement | To enable advertisement cookies to set consent for sending personal data to Google core platform service. |
| ad_personalization | advertisement | To enable advertisement cookies to use data for ad personalisation such as remarketing. |