Getting Started with Google Tag Manager and CookieYes
Last updated on March 14, 2024
This document provides implementation guidance on deploying the CookieYes consent management platform using Google Tag Manager container tagging for CookieYes web app users. It outlines creating a GTM account, installing the tracking code and importing and configuring the CookieYes tag template. Customization of consent banner values, mapping of key triggers, and blocking of third-party scripts loaded via GTM are covered.
The integration method described in this documentation is incompatible with the CookieYes WordPress plugin. To integrate consent mode with the CookieYes WordPress plugin, follow the guide.
How to install CookieYes on your site with GTM?
When employing Consent Mode with CookieYes, user consent choices trigger adjustments in tag behaviour, signalling Google to cease collecting personally identifiable information. Instead, aggregated data is utilized, ensuring privacy compliance and enhancing user control over data collection and utilization on the website.
Prior to commencing integration procedures, first verify that you have enabled the configuration setting Support GCM within the appropriate Cookieyes Web Application account settings. If you have not enabled this setting, enable it now to ensure full Cookie banner functionality.

Follow the below steps for integration of CookieYes with Google Tag Manager:
Step 1:Sign Up/ Create a Google Tag Manager AccountIf you don’t have a Google Tag Manager account, sign up for one by visiting Google Tag Manager and following the account creation process.
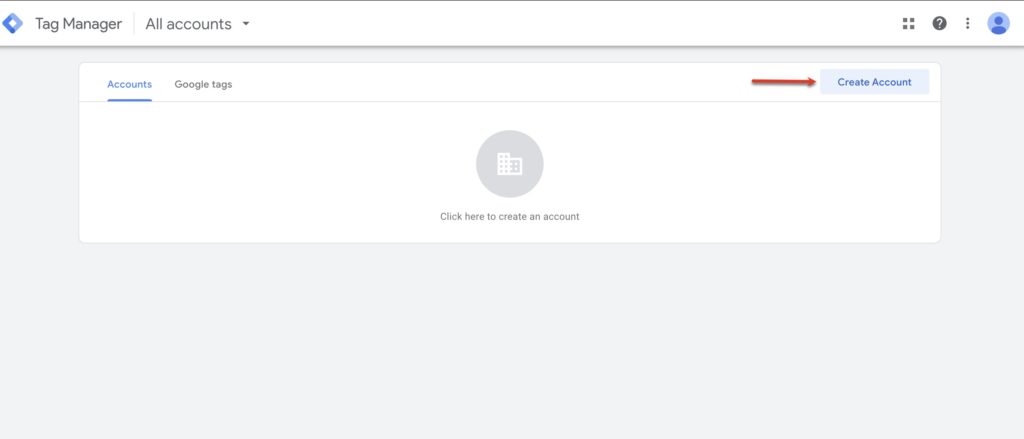
Step 2:Create a new containerThe Container is where you’ll manage and deploy your website’s tags, triggers, and variables. Follow the below steps to create and install a new container:
- In Tag Manager, click the Accounts tab > Create Account.
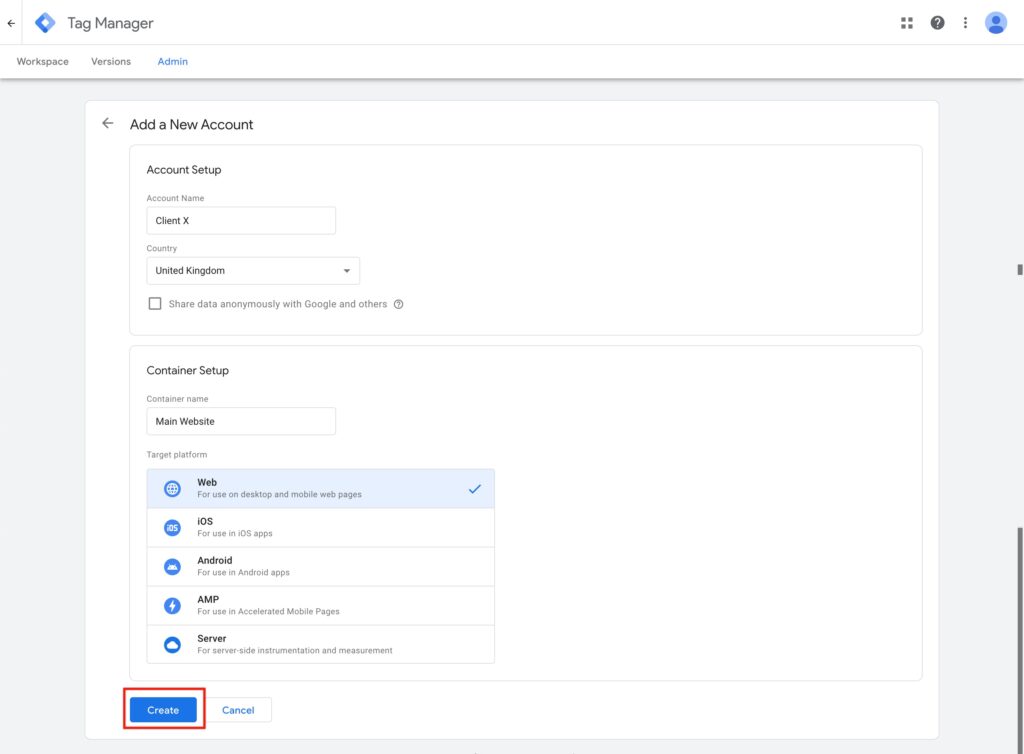
- Enter an Account Name and select the Country for the account.
- Enter the Container name and select the container type.
- To create your container, click Create and agree to the Terms of Service.
Upon container creation, a modal containing two code snippets to install on your website will appear.
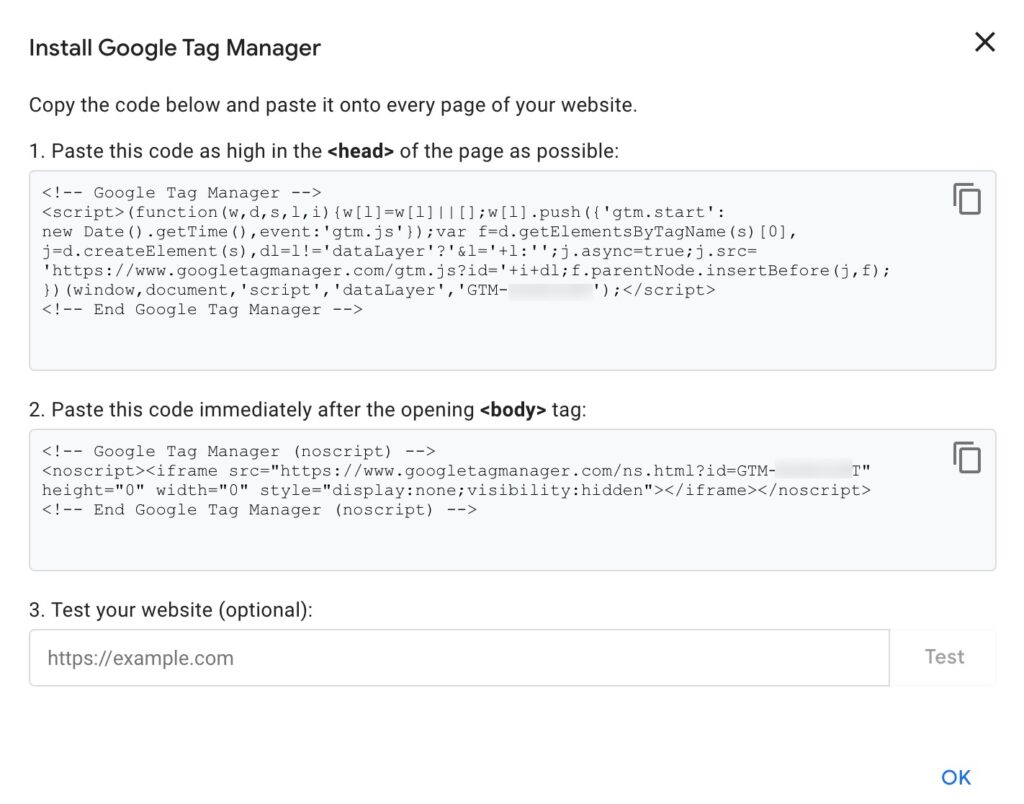
Copy and paste the first part of the container tag immediately after opening the <head> tag of your website and the second part of the second iframe part immediately after the opening of the <body> tag.
Step 4:Adding CookieYes CMP TemplateThe CookieYes Google Consent Mode functionality handles injecting the required CookieYes script within GTM automatically. Manually adding the CookieYes script to the head tag of your website can cause tag conflicts with the built-in consent workflow in Google Tag Manager.
To add the CookieYes CMP template to your workspace, follow the below steps:
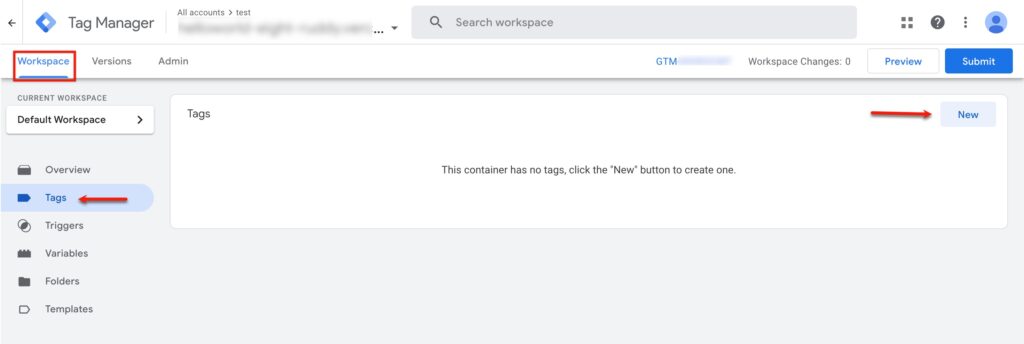
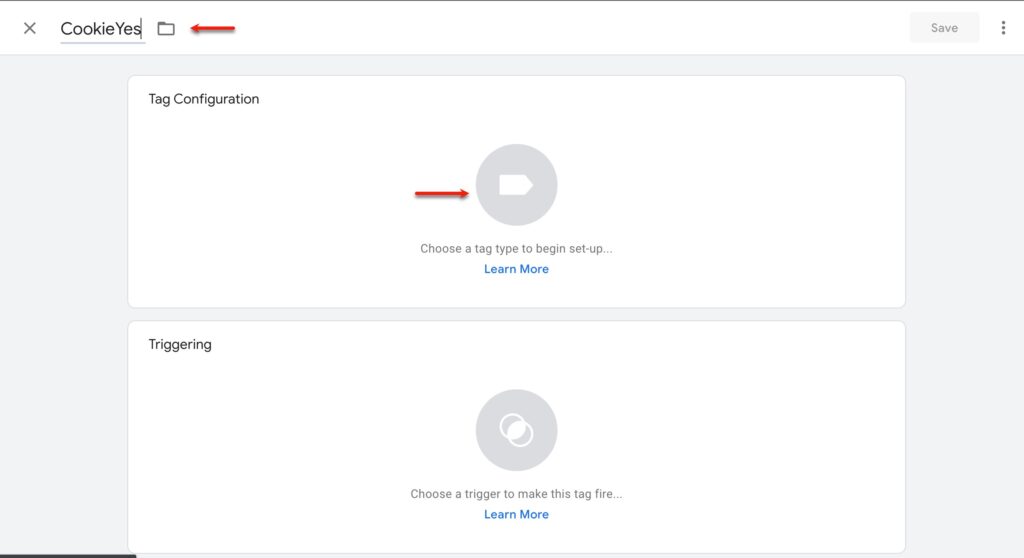
- In your Workspace, click Tags.
- To add a tag, click New.
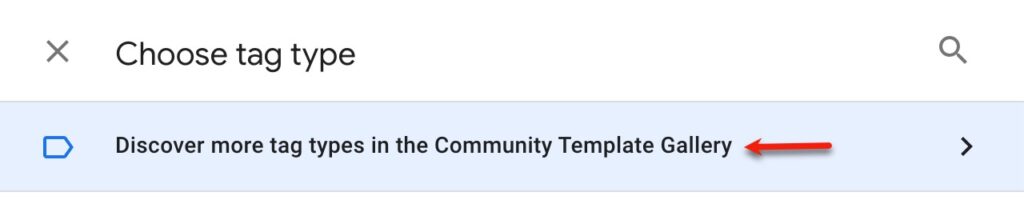
- Enter the tag name and Click on Tag Configuration > Discover more tag types in the Community Template Gallery and search for CookieYes CMP.
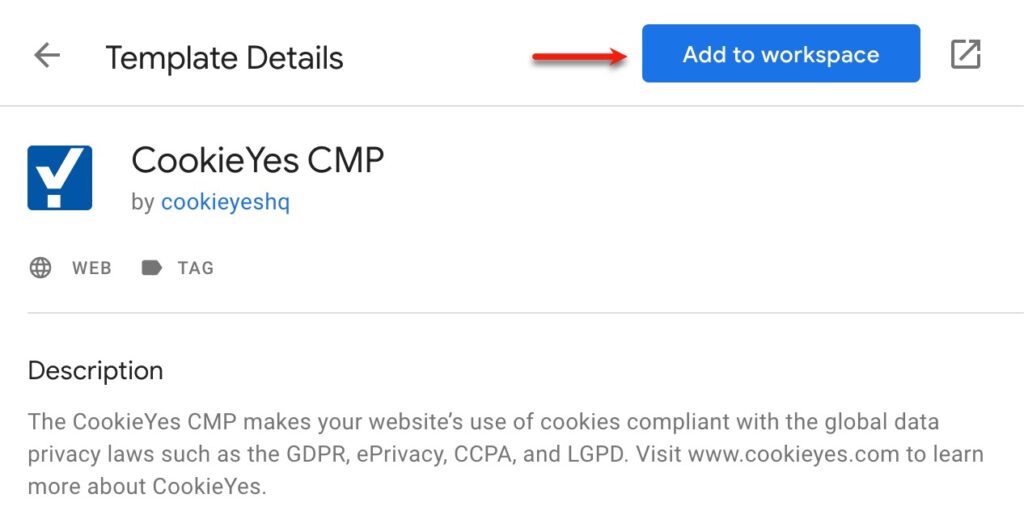
- Choose the CookieYes CMP template and click Add to workspace > Add to add it to your GTM installation.
- Choose the banner configuration according to your needs by configuring the tag. Enter your Website key, set the Default Consent Settings (which is applied before the user consents) and Other Settings.
Where to find your Website Key?
Log into your CookieYes account and go to Advanced Settings, then Get Installation Code > Copy Code.
Copy the website key from the src attribute:(e.g. src=”https://cdn-cookieyes.com/client_data/YOUR_WEBSITE_KEY/script.js”).
Note: It is not necessary to include the entire src in the website key field.
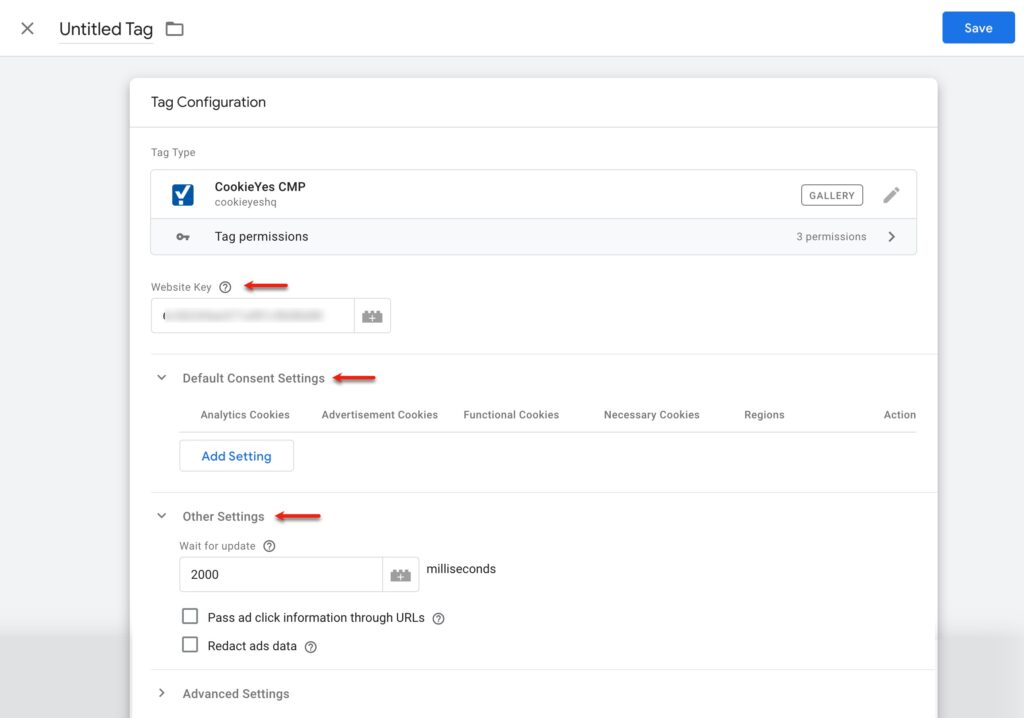
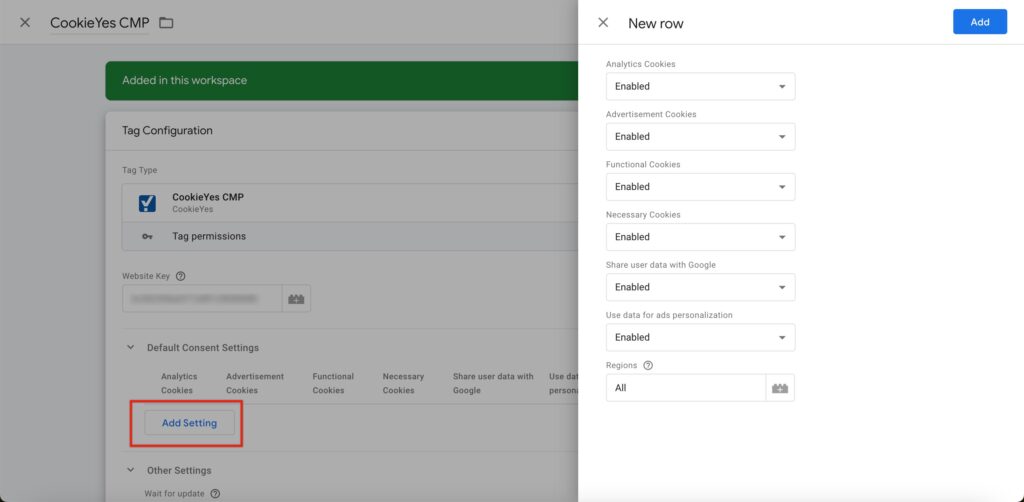
To add Default Consent Setting:
- Click Add Setting.
- Select Enabled/Disabled from the drop down for each cookie category based on your requirements.
- Set the Region by entering the region’s ISO-standardised (ISO 3166-2) codes for the specific regions you intend to Geo-target with your banner. If you prefer not to Geo-target your banner to specific regions around the globe, enter All in the Regions field. Refer to the ISO 3166-2 standard for the appropriate region codes.
- Click Add.
- Select the Consent Initialization – All Pages as the firing trigger. This specific trigger is crucial, as it activates before any other tags, ensuring the proper functionality of the Tag.
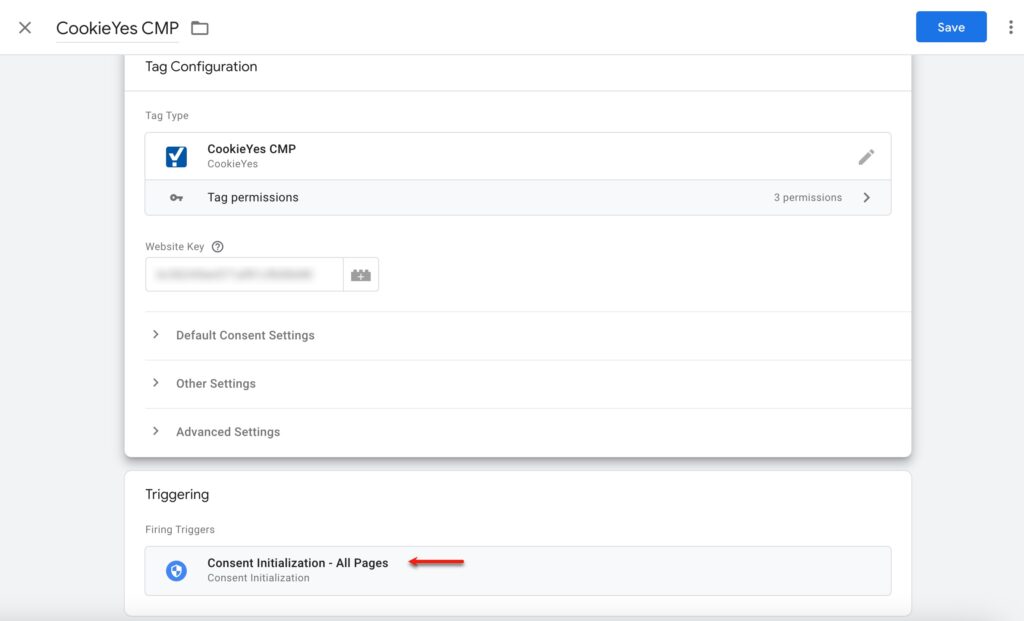
- Finally, click Save to add CookieYes CMP to your Workspace.
Your banner has been configured successfully. Publish the changes and you’re good to proceed.
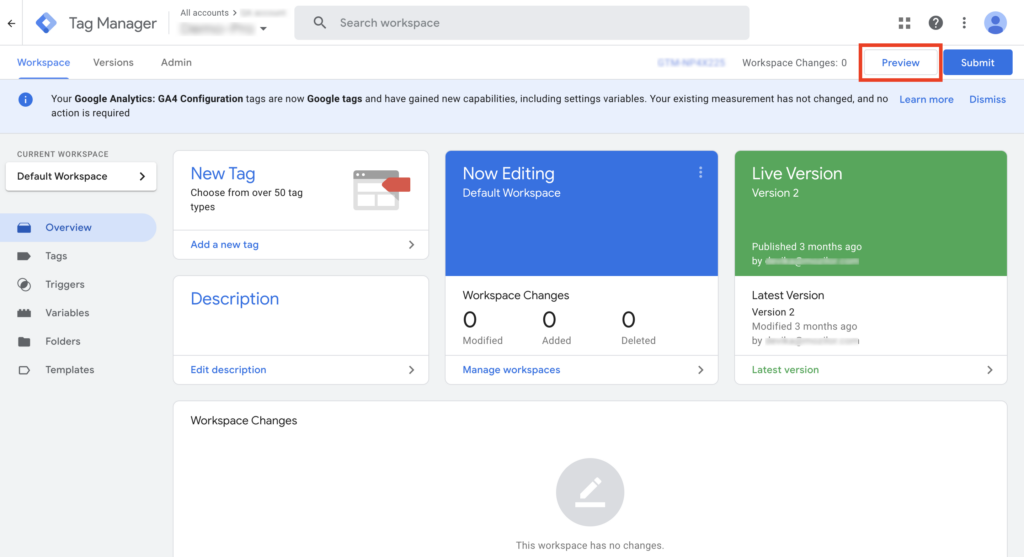
Step 5: Verify IntegrationTo preview and debug your website, click the Preview button at the top right corner of your GTM account.
Defining the Default Consent State of Google Consent Mode
CookieYes CMP maps all seven Google consent types into 4 categories:
| Google consent type | CookieYes consent type | Purpose |
| ad_storage | advertisement | To enable advertisement cookies. |
| analytics_storage | analytics | To enable analytics cookies. |
| functionality_storage | functional | To enable functional cookies for website functionality and settings. |
| personalization_storage | functional | To enable functional cookies for user personalization. |
| security_storage | necessary | To enable necessary cookies for website security and protection, user UI preferences, etc. Such cookies do not require consent. |
| ad_user_data | advertisement | To enable advertisement cookies to set consent for sending personal data to Google core platform service. |
| ad_personalization | advertisement | To enable advertisement cookies to use data for ad personalisation such as remarketing. |
Configuring Third-party Scripts in Google Tag Manager
CookieYes ensures automatic blocking of third-party cookies on your website before user consent is obtained. However, if you’re using Google Tag Manager to add third-party scripts to your website, you may want to block cookies set via GTM that have not been consented to use. To achieve this, create a customized event trigger within your GTM account. For detailed instructions on configuring third-party scripts in GTM with CookieYes, refer to our documentation: Block Third-Party Cookies with Google Tag Manager and CookieYes.