How to Exclude CookieYes from Google Analytics Data
Last updated on June 2, 2025
On this page
Before you proceed with the steps, enable static IP scanning for your domain.
Static IP scanning will be available only for users on the Ultimate plan.
How to Exclude CookieYes from Google Analytics Data
To identify internal traffic and create, edit, or delete data filters, you must have the Editor role assigned to you at the property level in Google Analytics.
Step 1: Create CookieYes Traffic
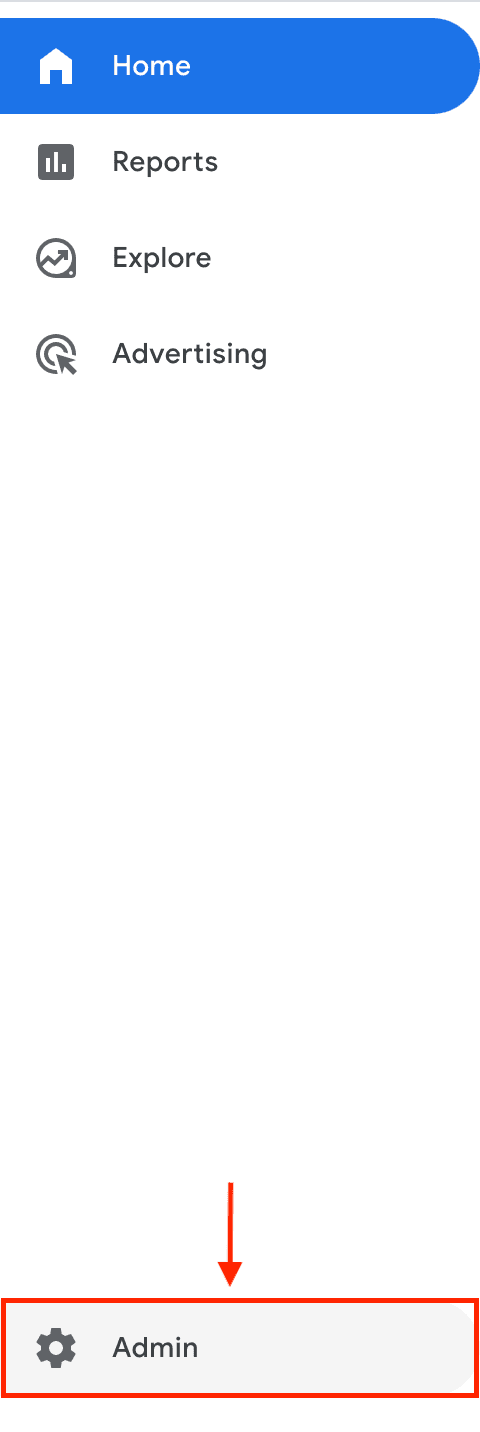
Log into Google Analytics [GA4] and navigate to Admin from the left sidebar.
In case you have multiple accounts, verify you are in the correct Google Analytics account and property before proceeding.
In Admin, under Data collection and modification, click Data streams.
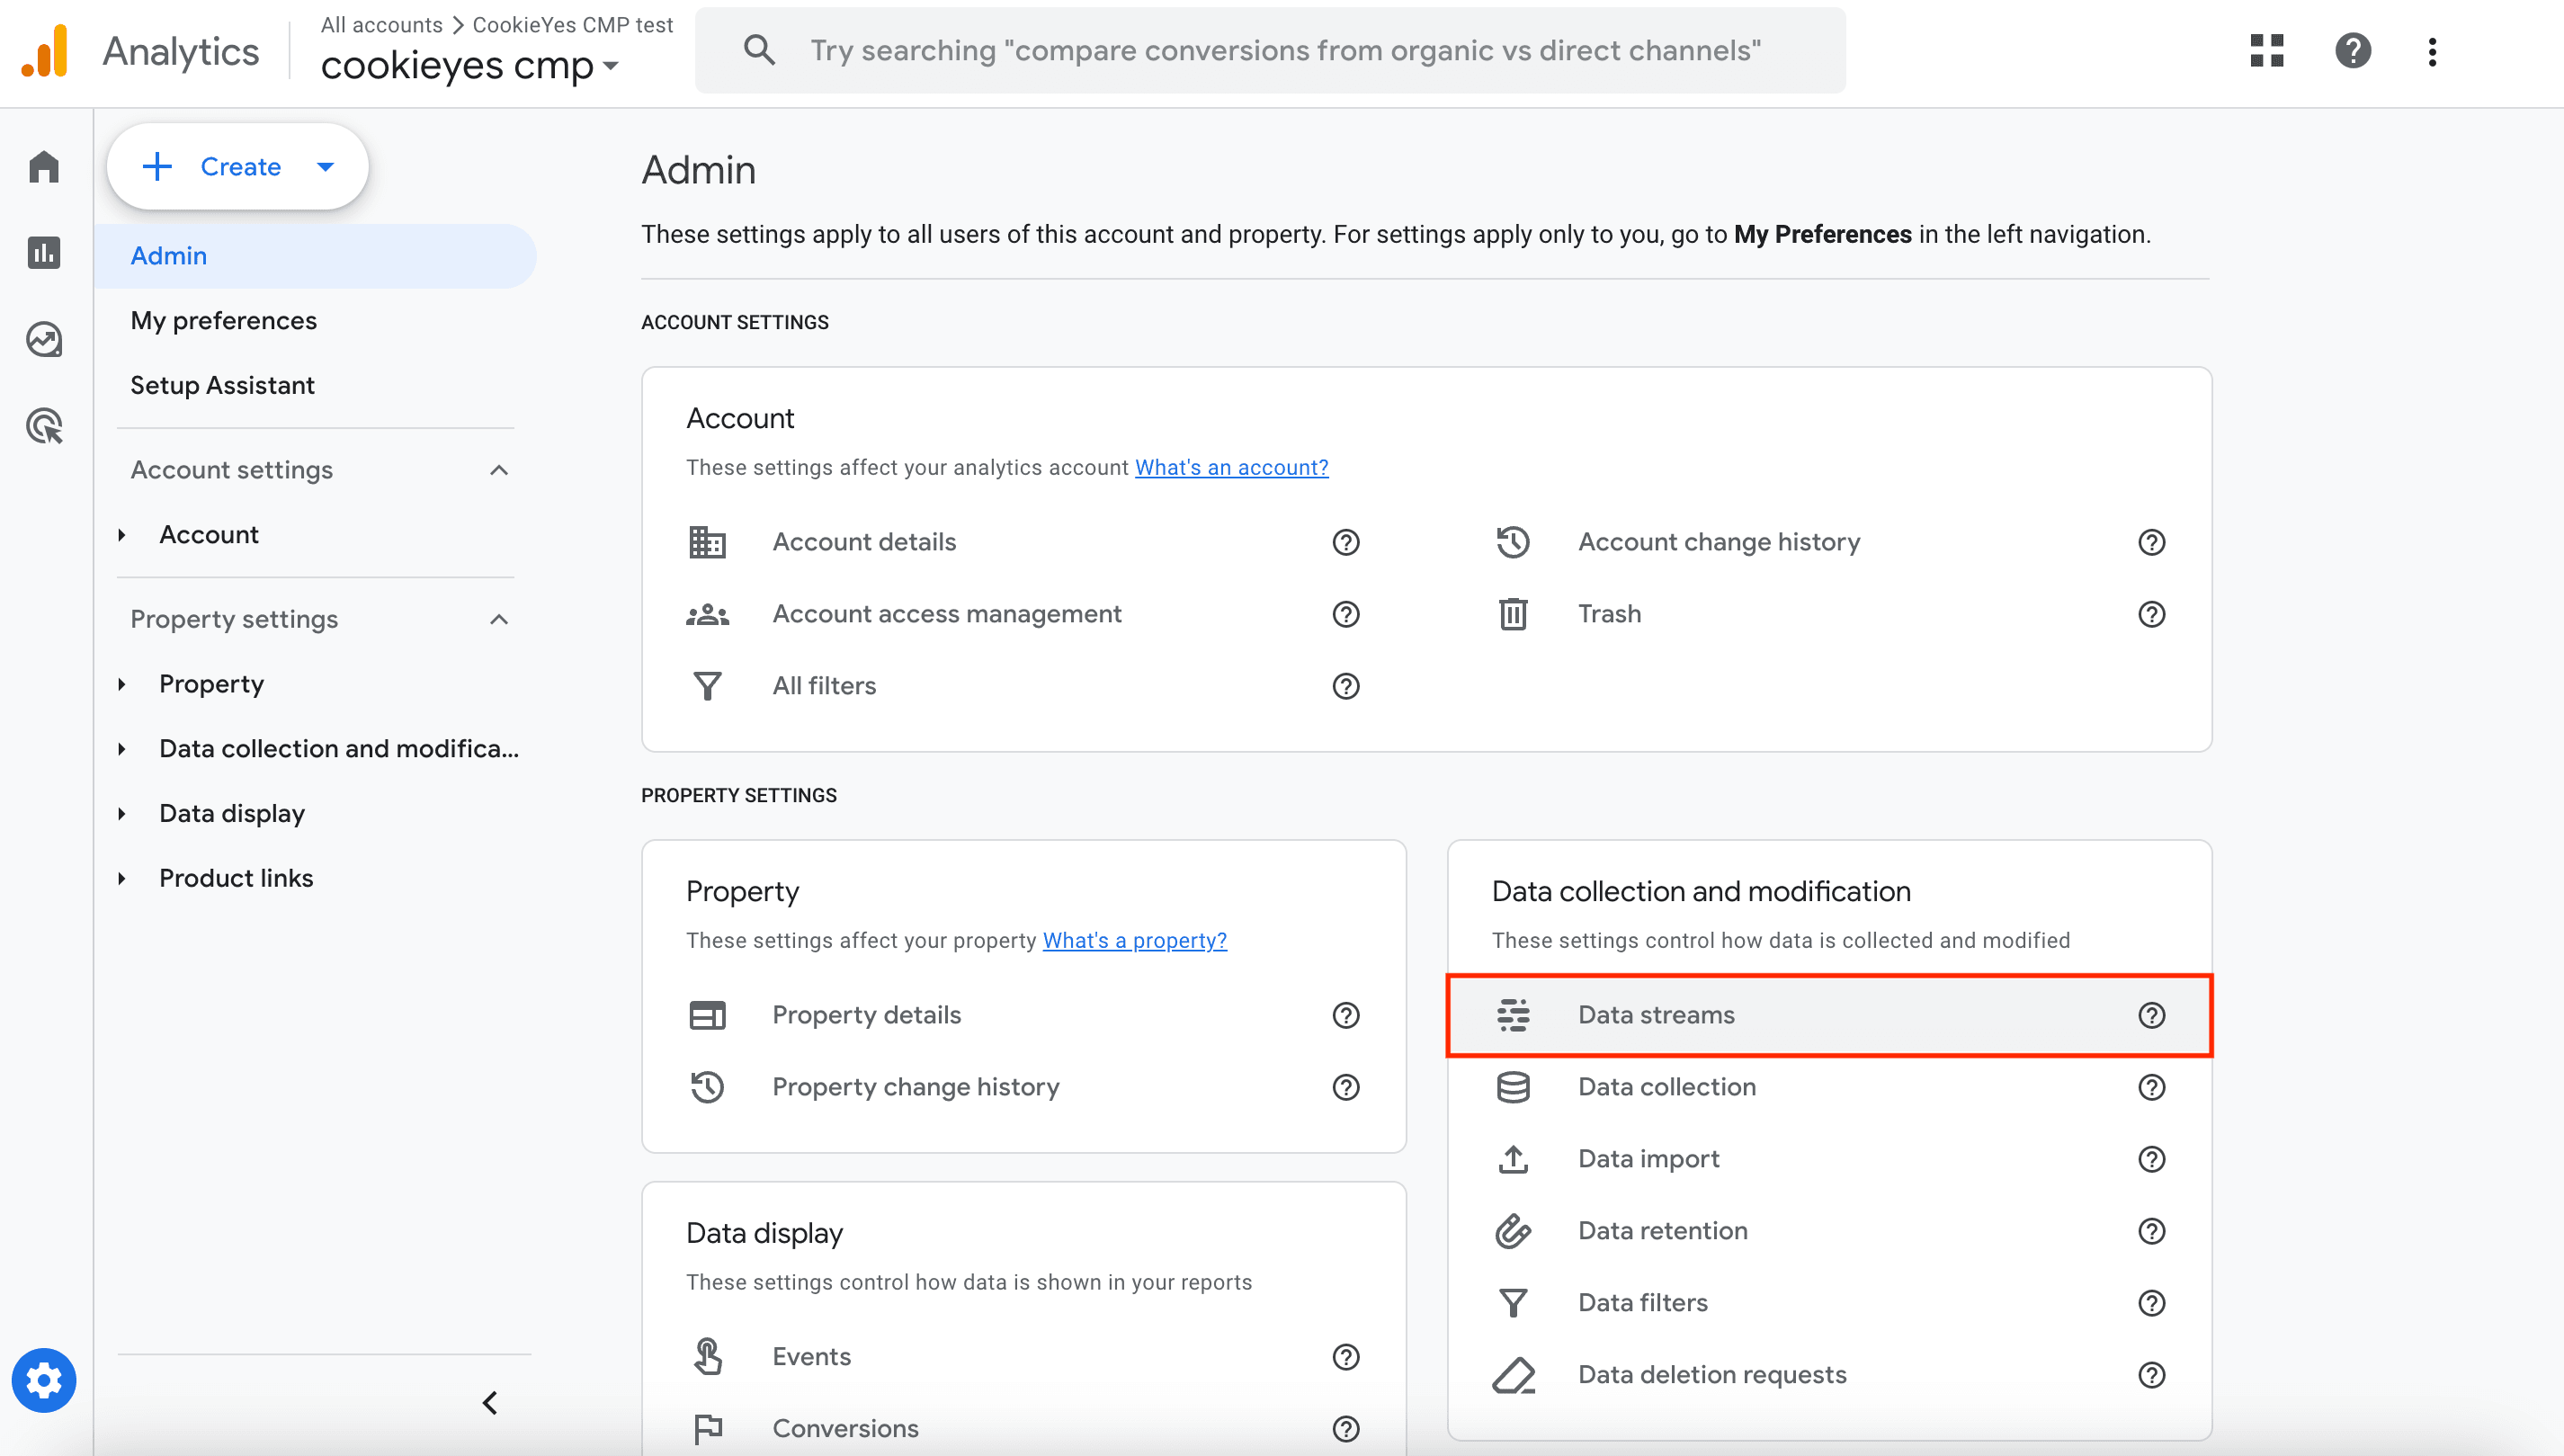
Click the web data stream.

The Web stream details modal appears.In Web stream details, click Configure tag settings.
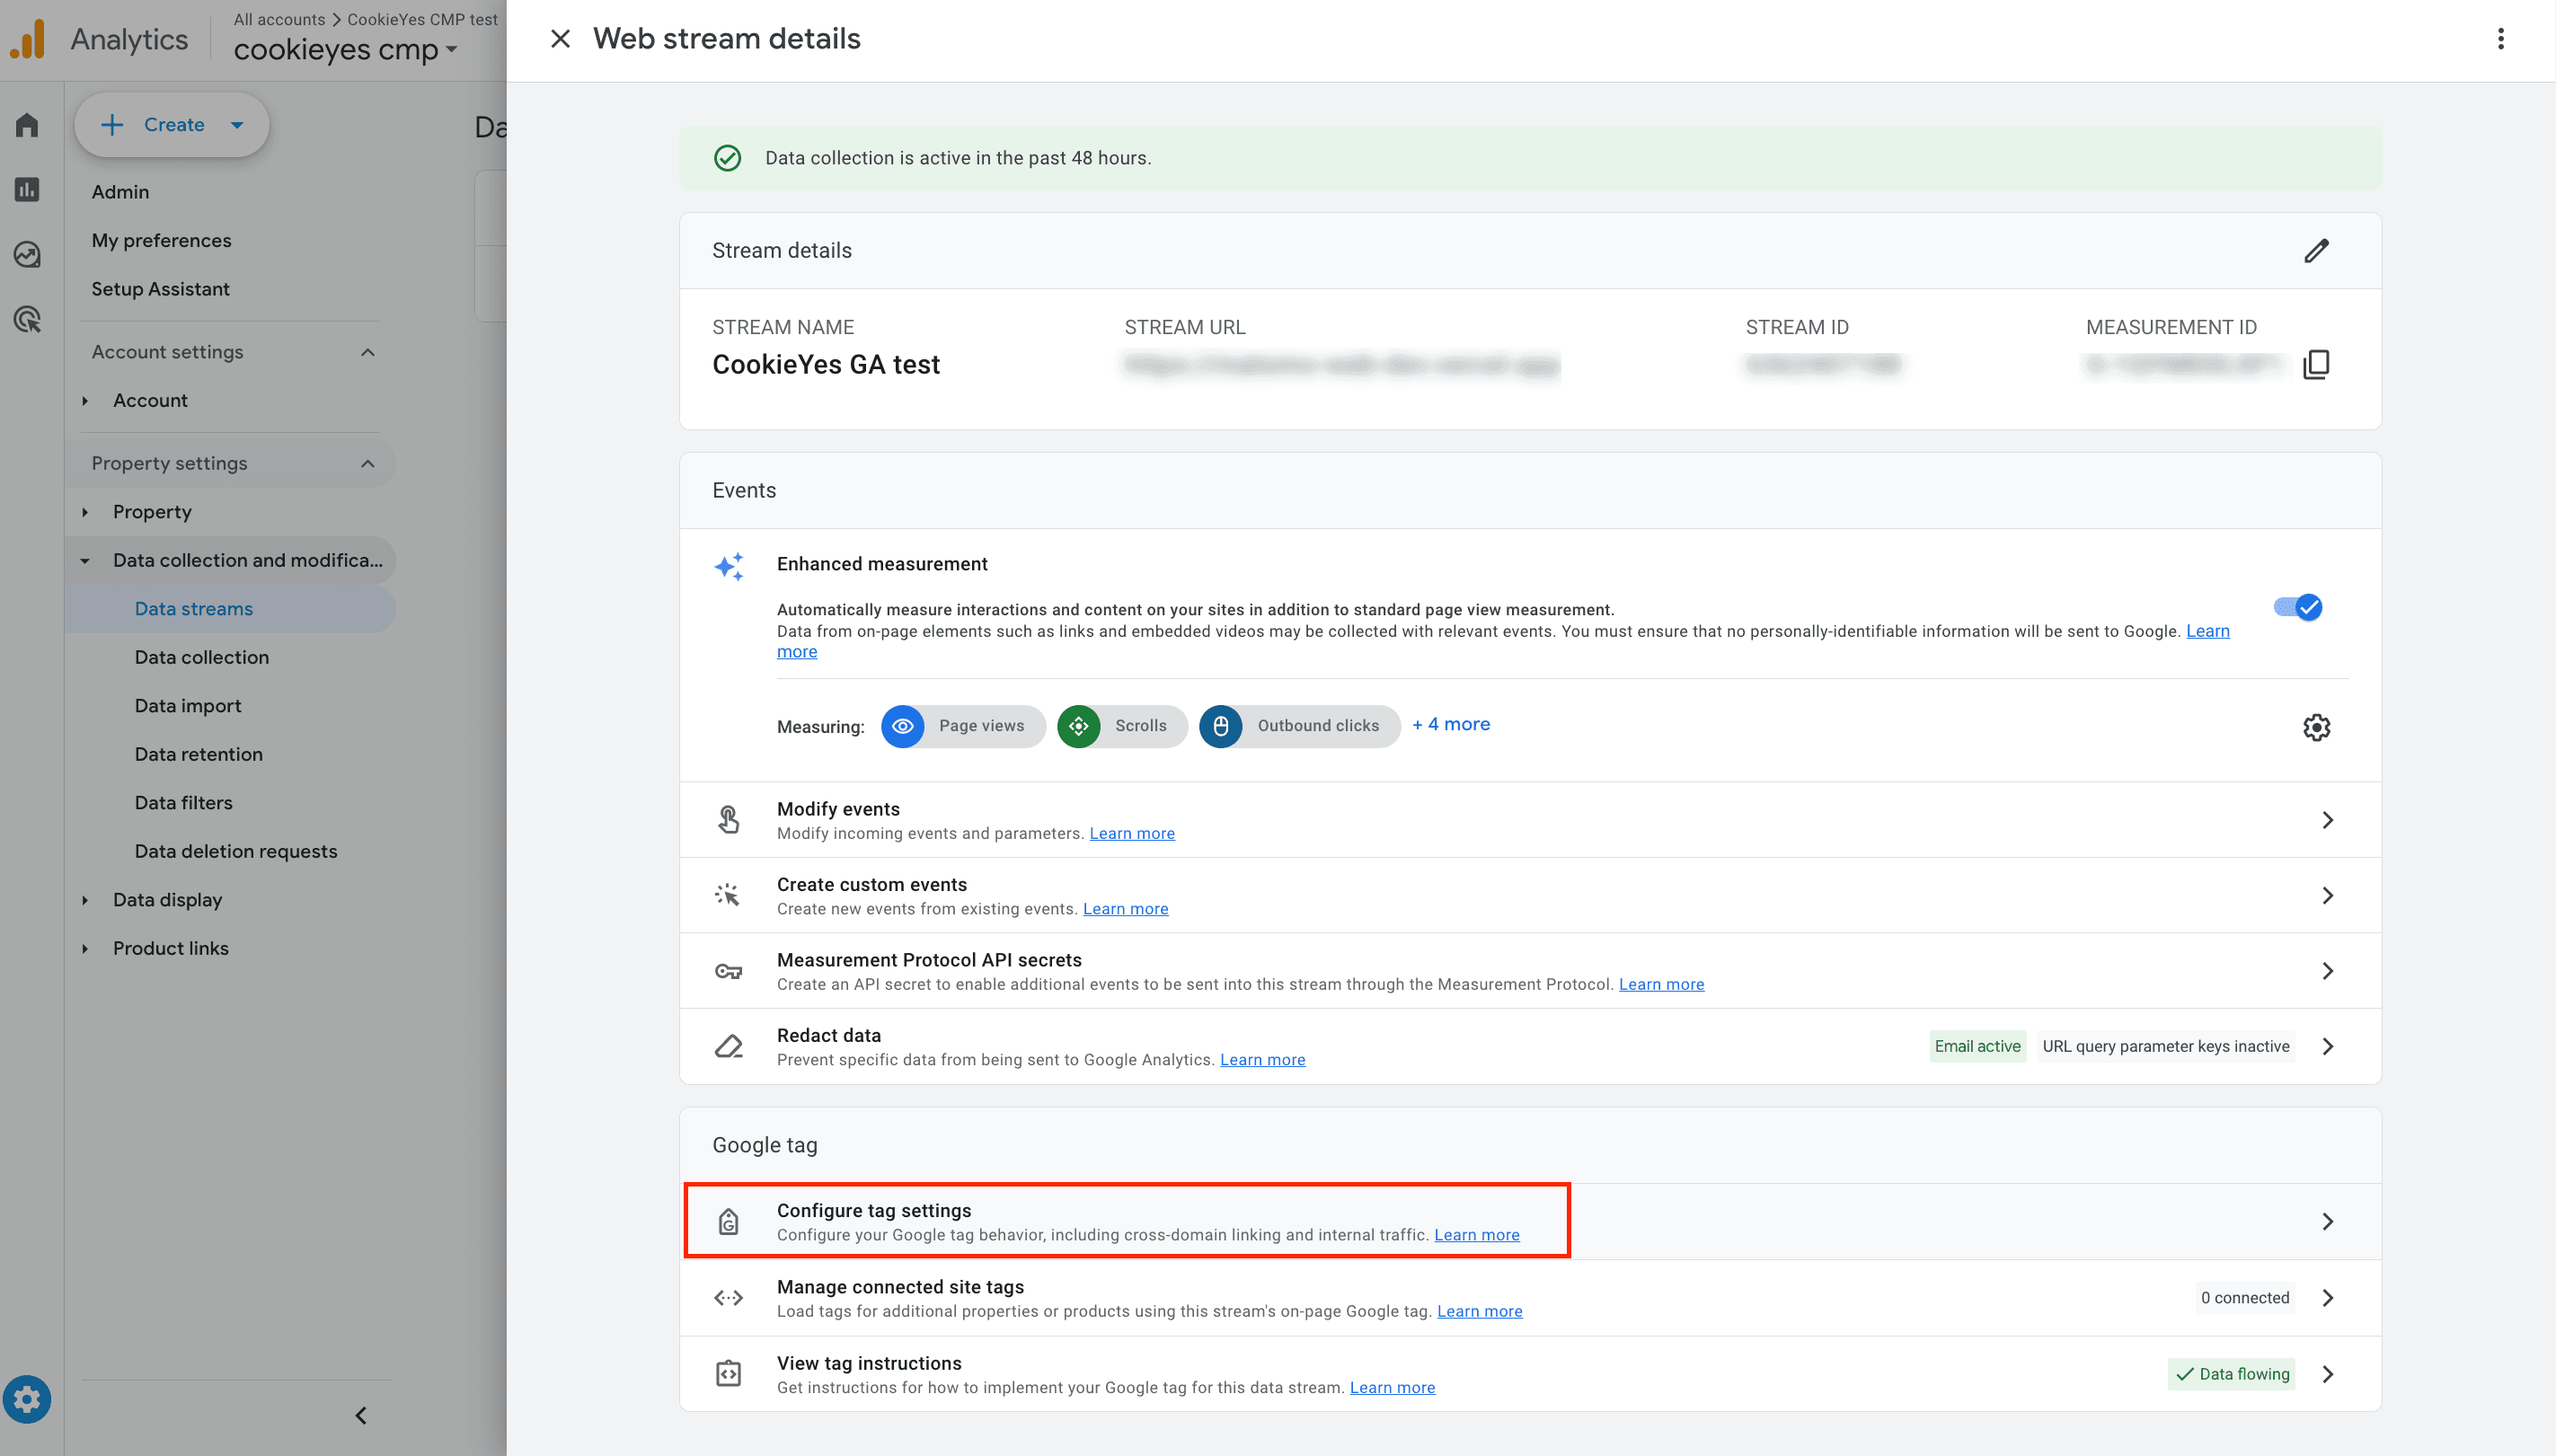
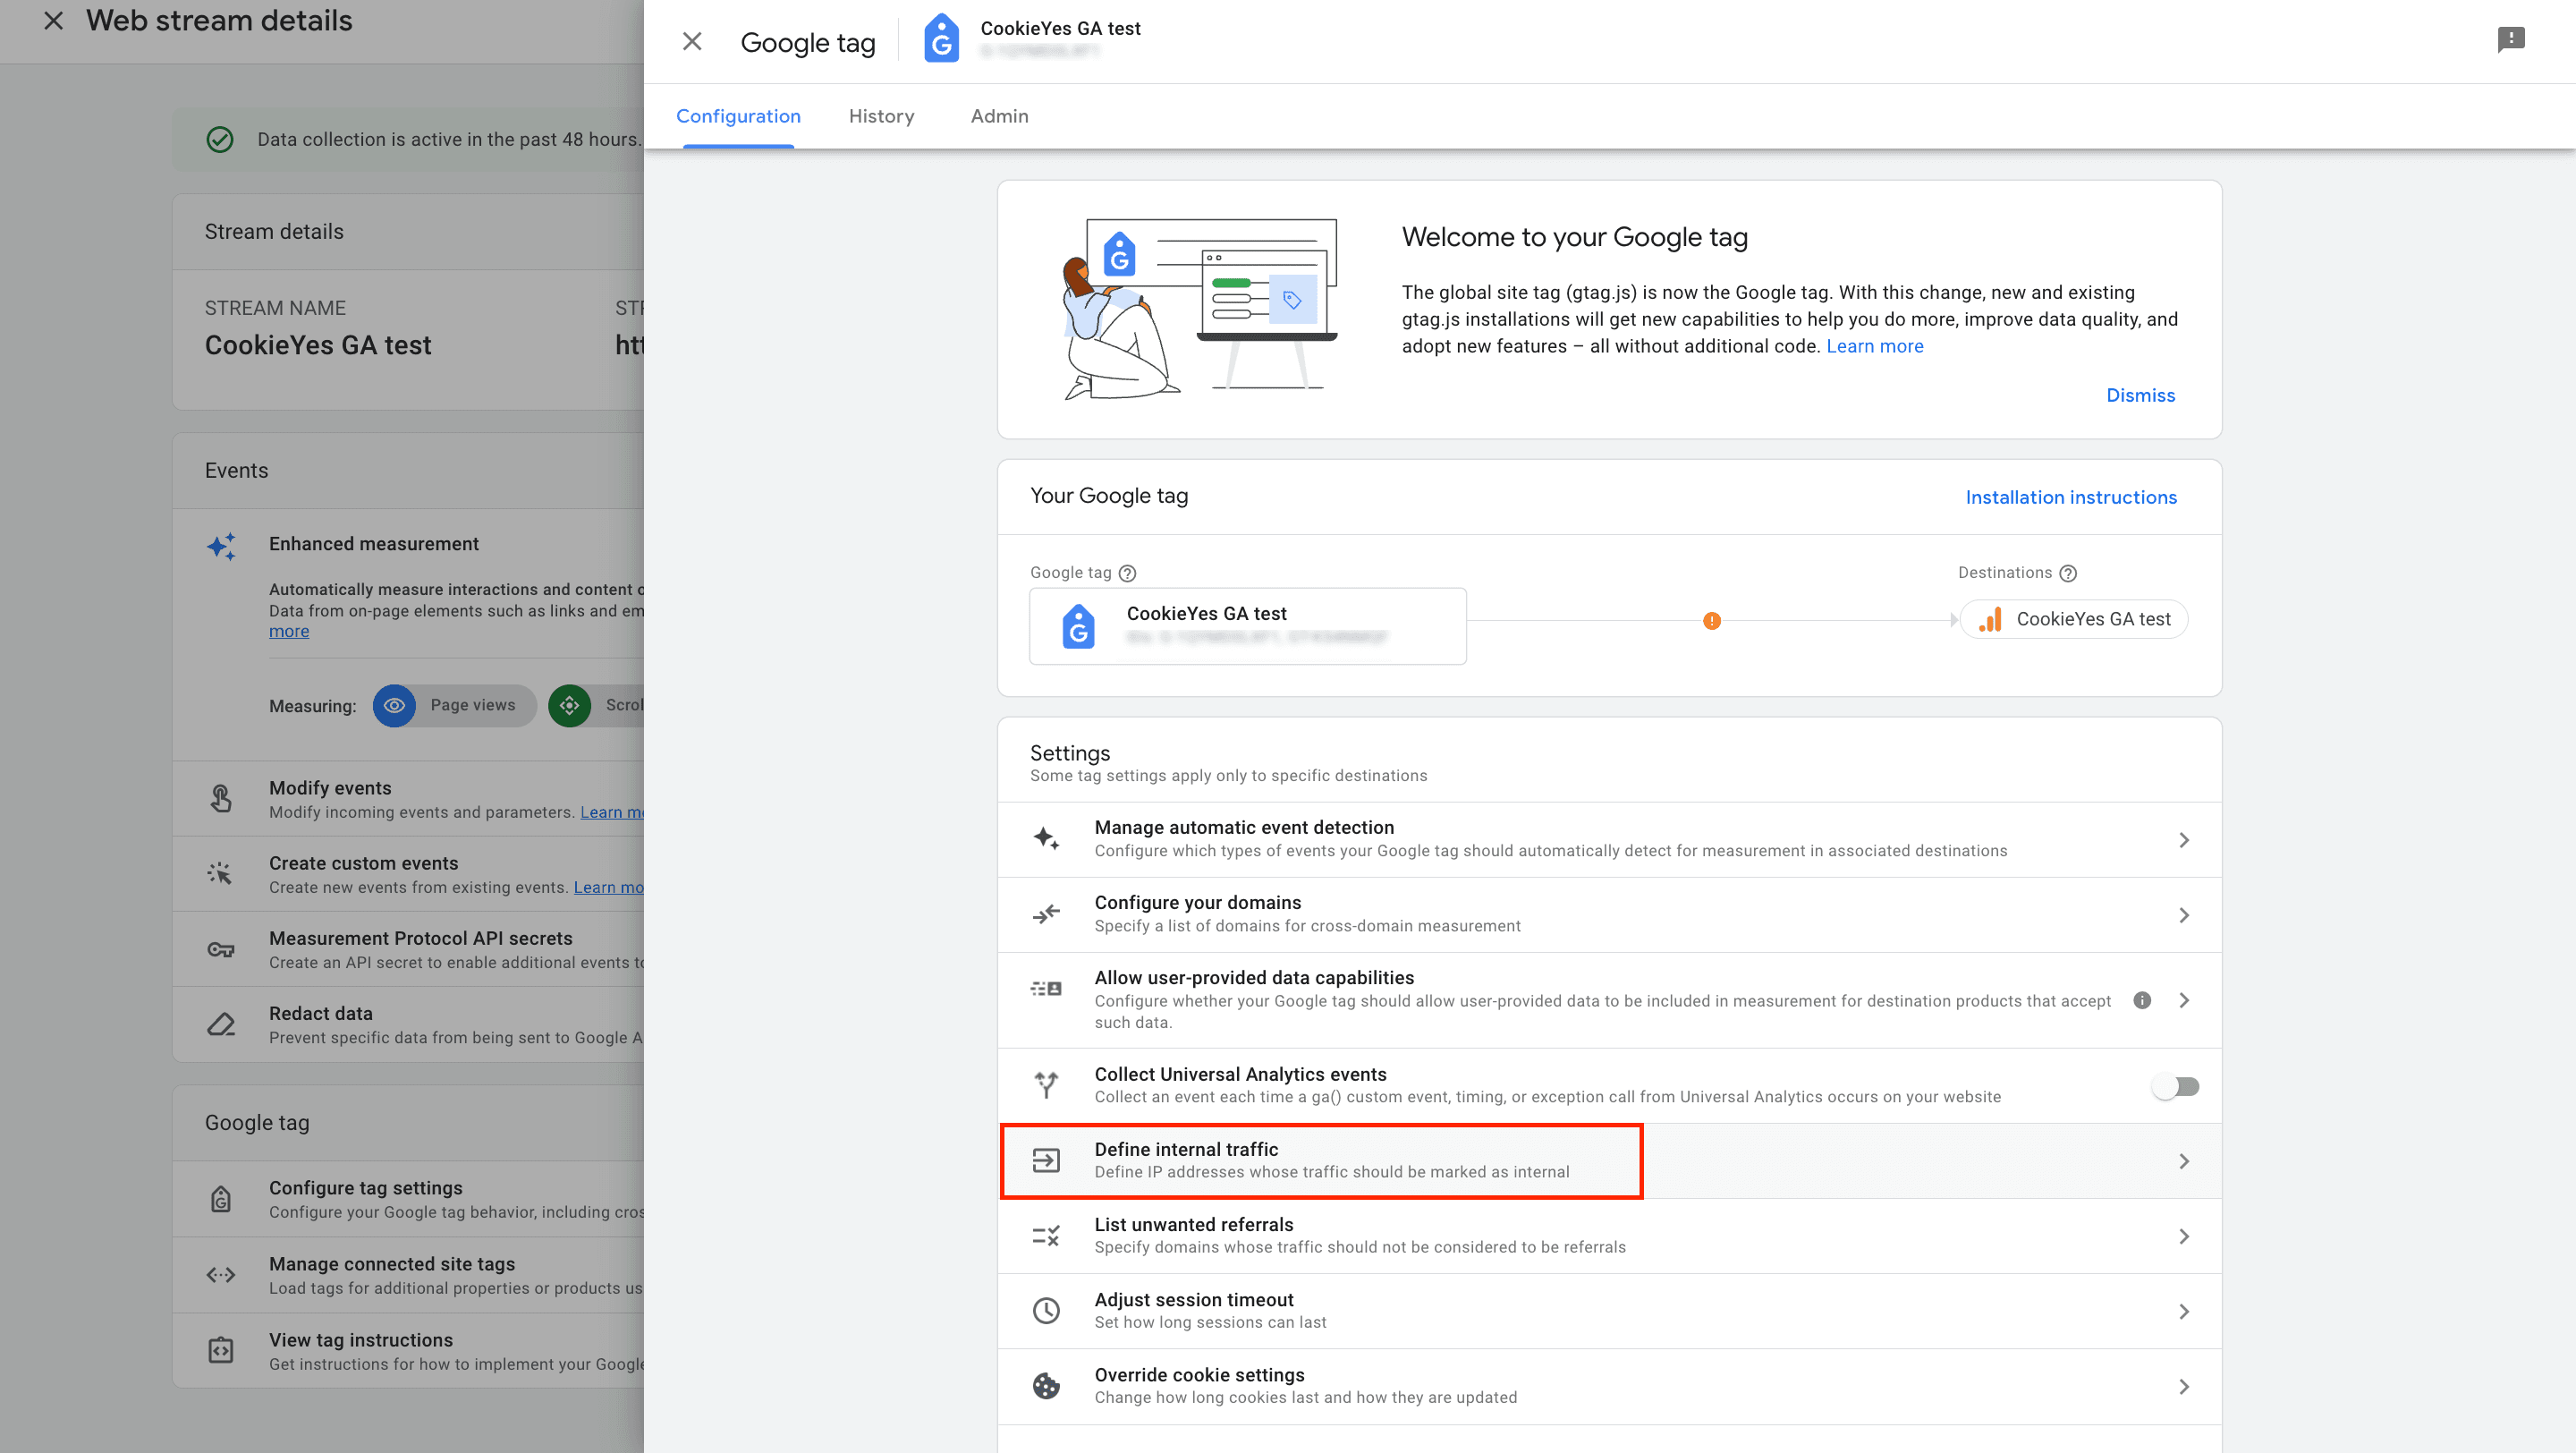
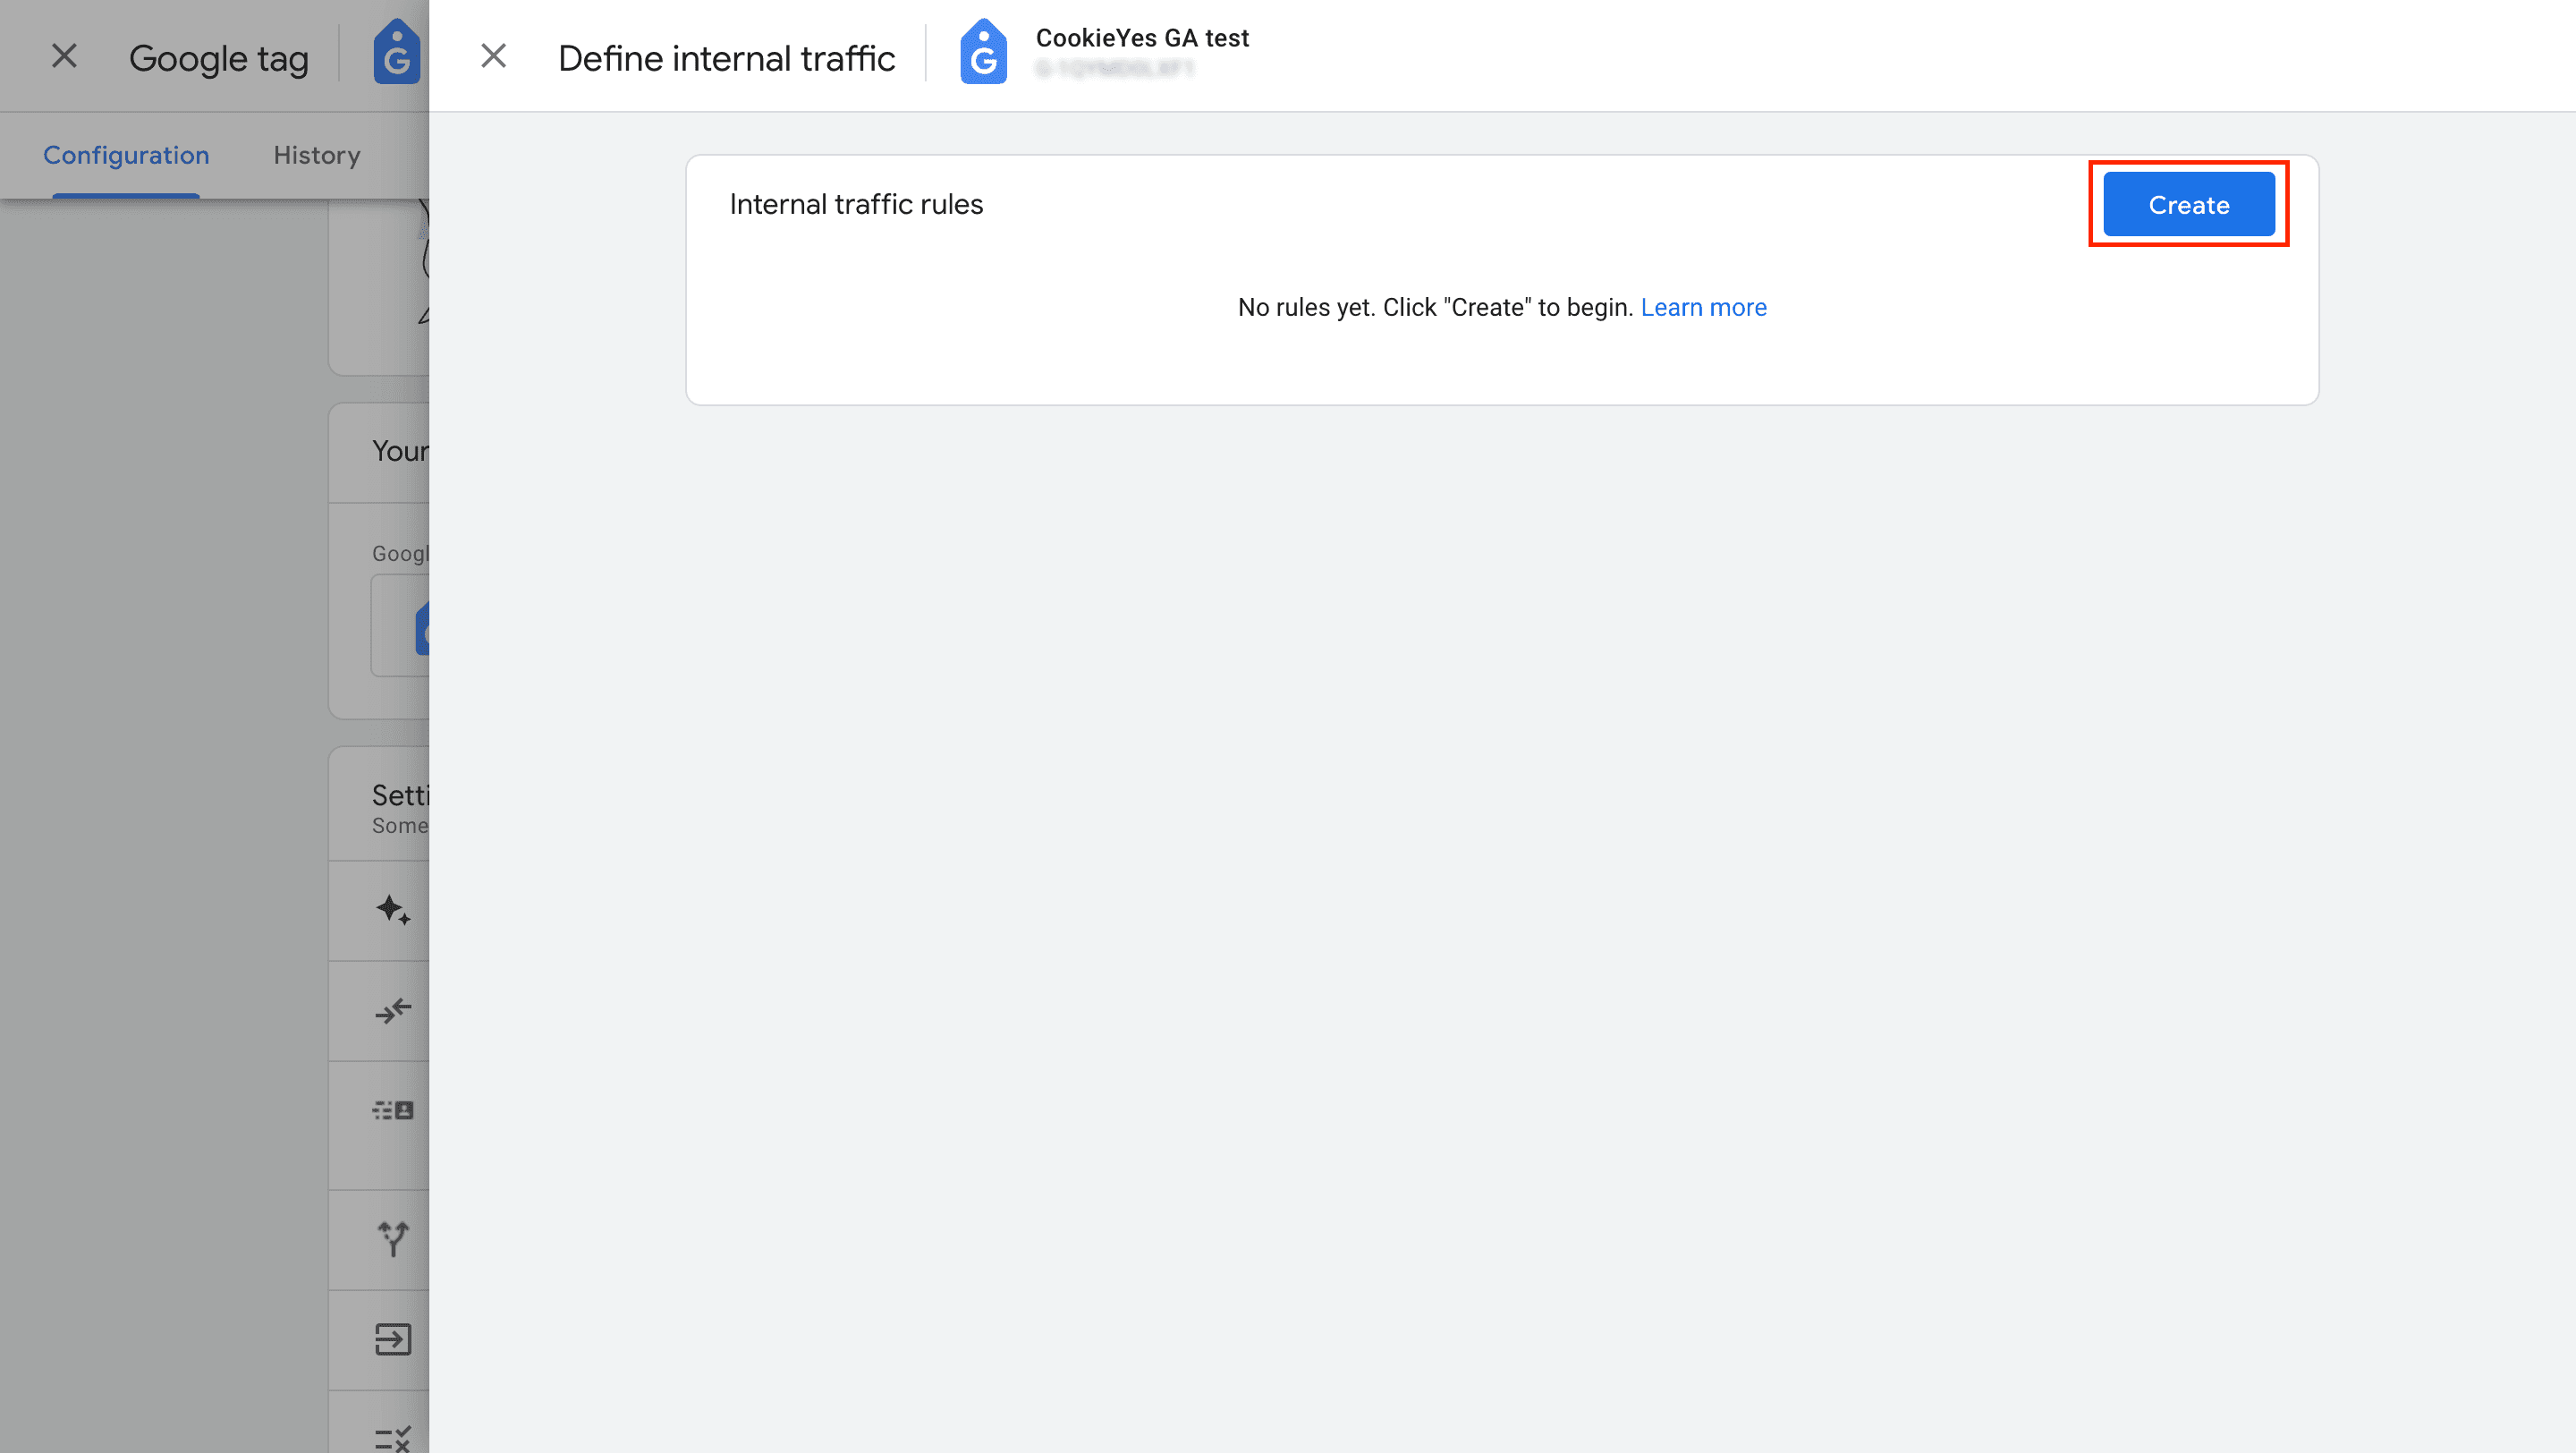
In the Google Tag Configuration modal, click Show More and select Define internal traffic.
Click the Create button to create internal traffic.
In the Create internal traffic rule modal, enter the following fields:
Enter a name for the rule. Here we’ve named it CookieYes Filter.
Enter
traffic_typevalue, e.g. CookieYes_traffic.In IP addresses > Match type, select
IP addressequals from the drop-down.In IP addresses > Value, enter one of the IP addresses from below.
3.248.28.214
54.77.122.154
Click Add condition, and add the other IP address. All IP addresses that match the conditions will be marked as internal traffic.
Click Create.
The preview should look like this: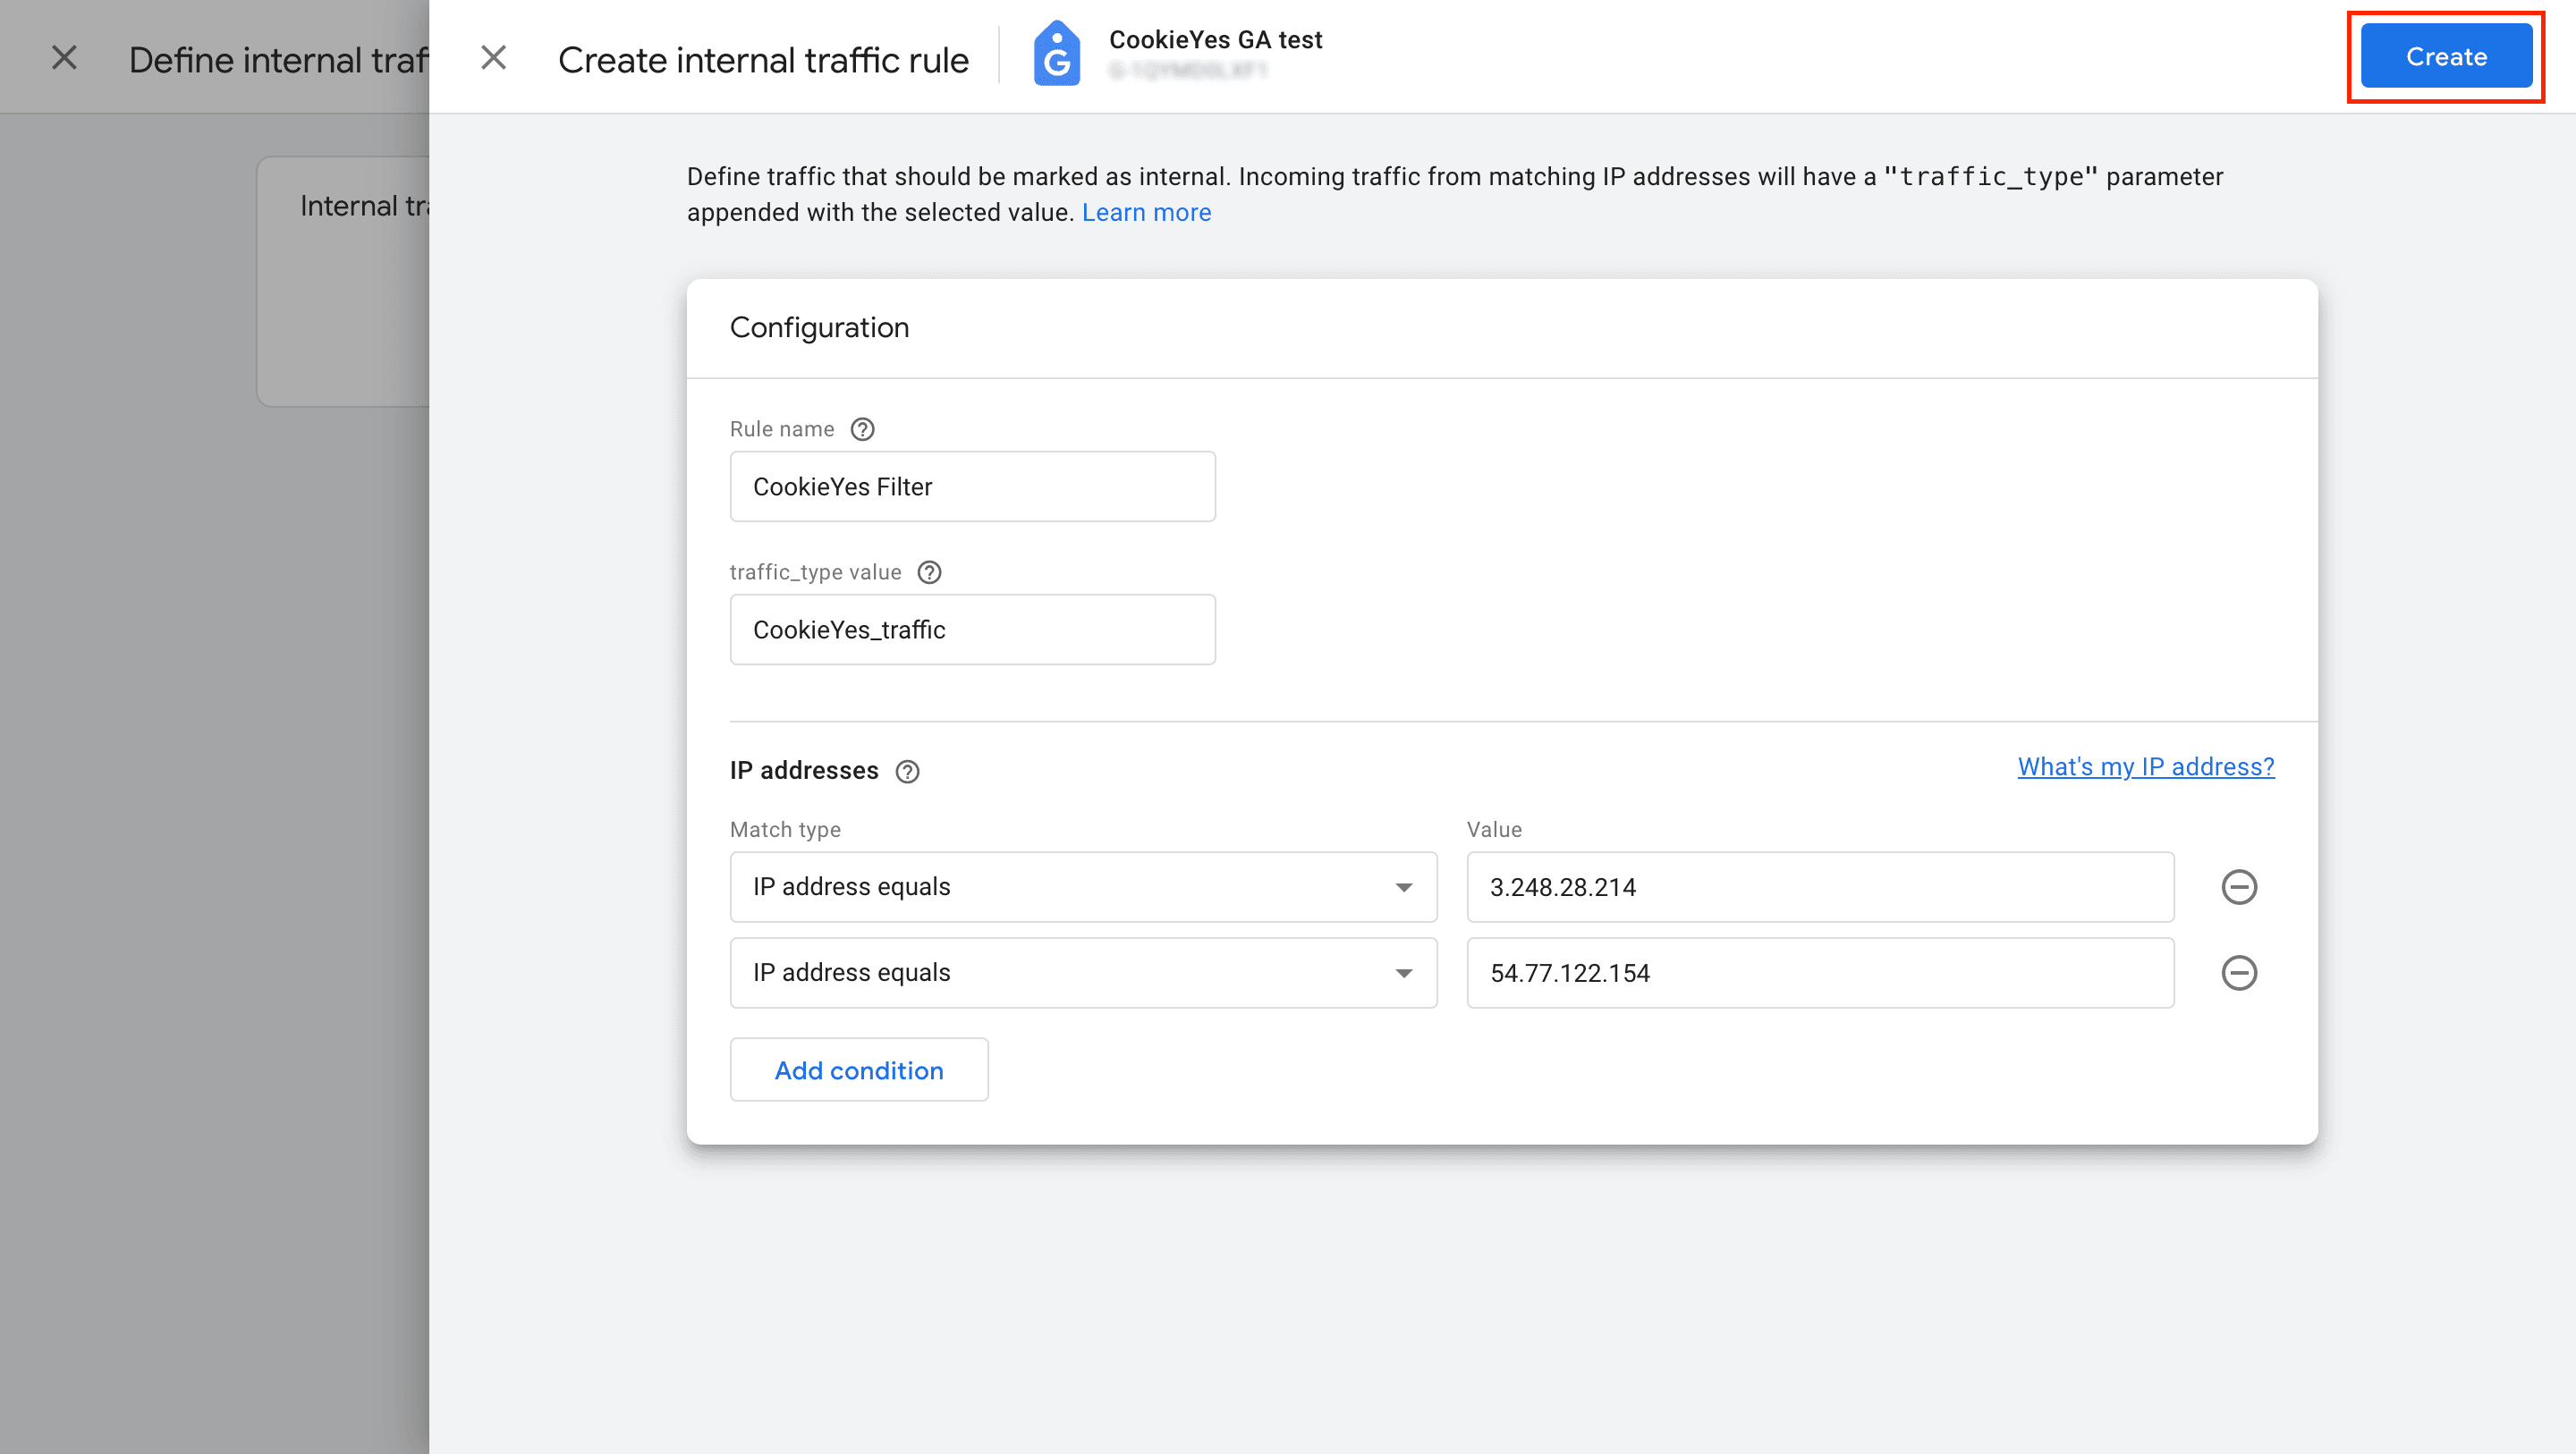
Step 2: Create Data Filter
- Navigate to the Admin Page.
- In Admin, under Data collection and modification, click Data filters.
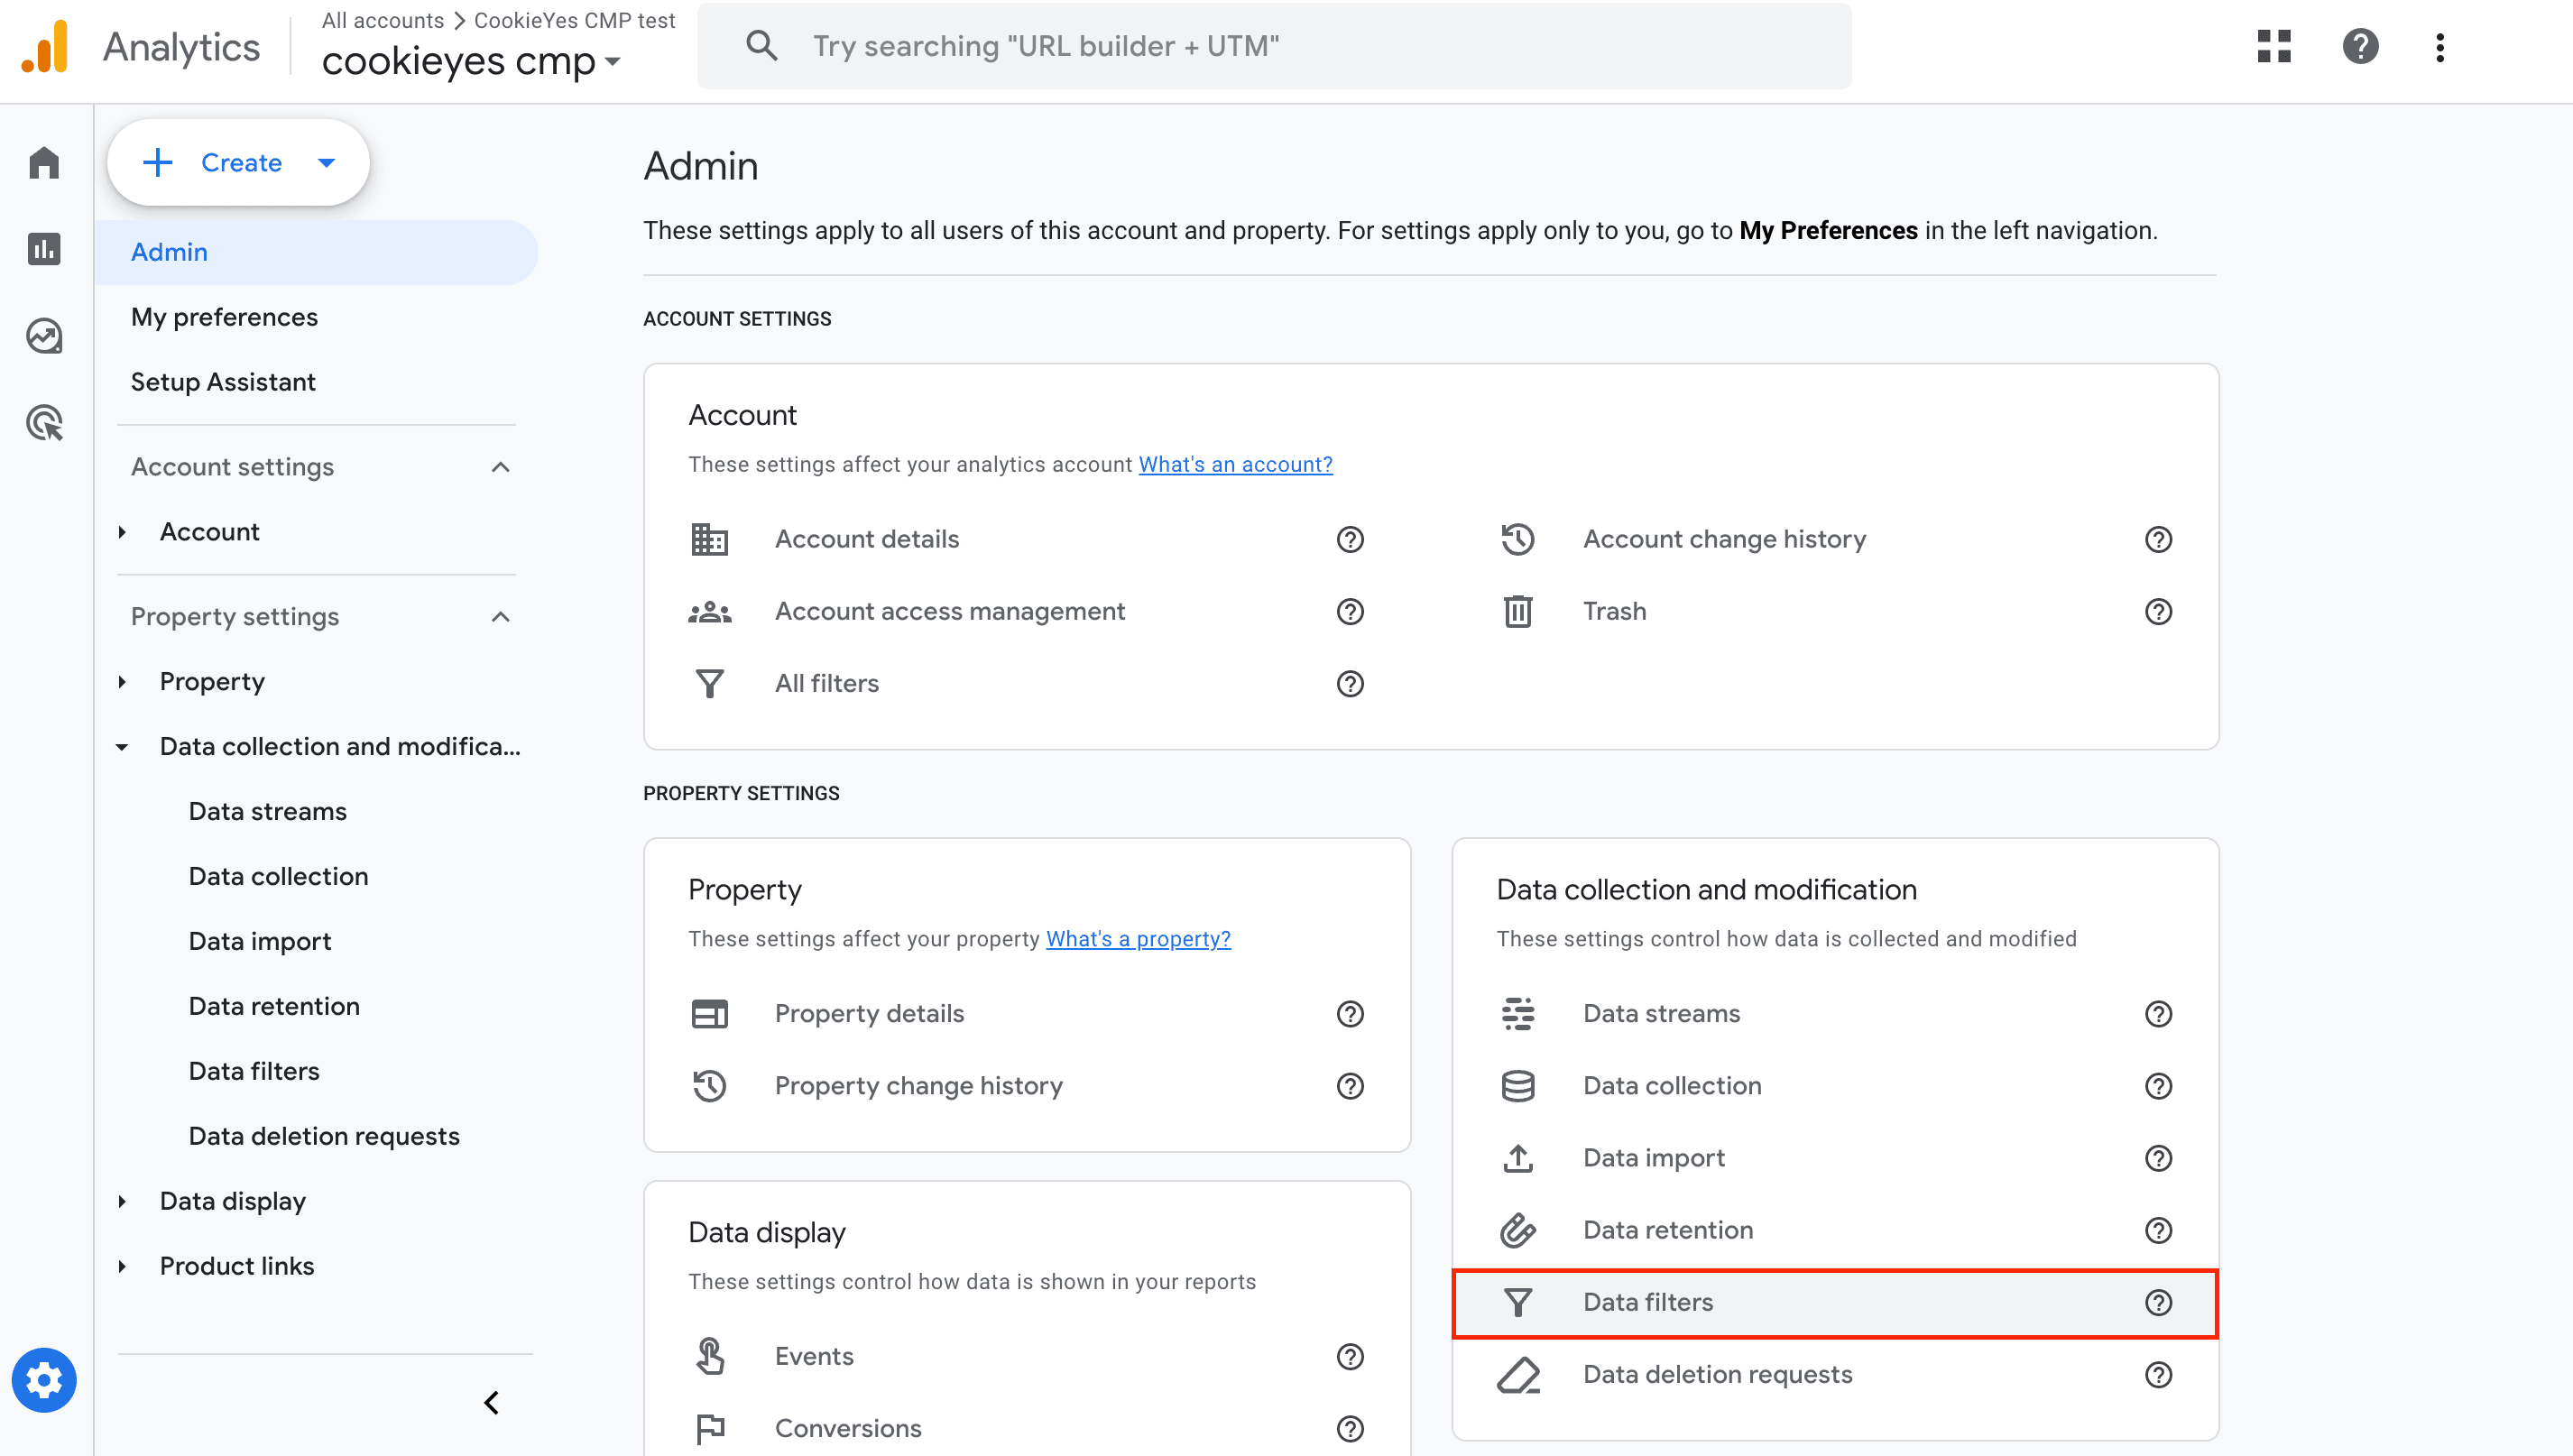
- Click Create Filter.
This creates a new data filter to exclude the required data from reports. Choose Filter Type as Internal traffic.
In the ‘Create data filter’ modal, enter the following fields:
Enter a Data filter name. Here we’ve named it CookieYes Data Filter.
Choose Exclude under Filter Operation to filter out events.
For the Parameter value, the value of the
traffic_typeparameter should match the name you entered while creating the internal traffic rule, e.g. CookieYes_traffic.Choose from the following filter states:
Testing: Analytics identifies matching data with the “Test data filter name” dimension.
Active: Analytics applies the data filter to incoming data and makes permanent changes.
Inactive: Analytics isn’t evaluating the filter.
Your data that satisfies a test data filter is assigned to the “Test data filter name” dimension and given a value of the filter name. You can view this test data in Explore to validate that the filter is working correctly before activating it.
Click Create.
The preview should be similar to this: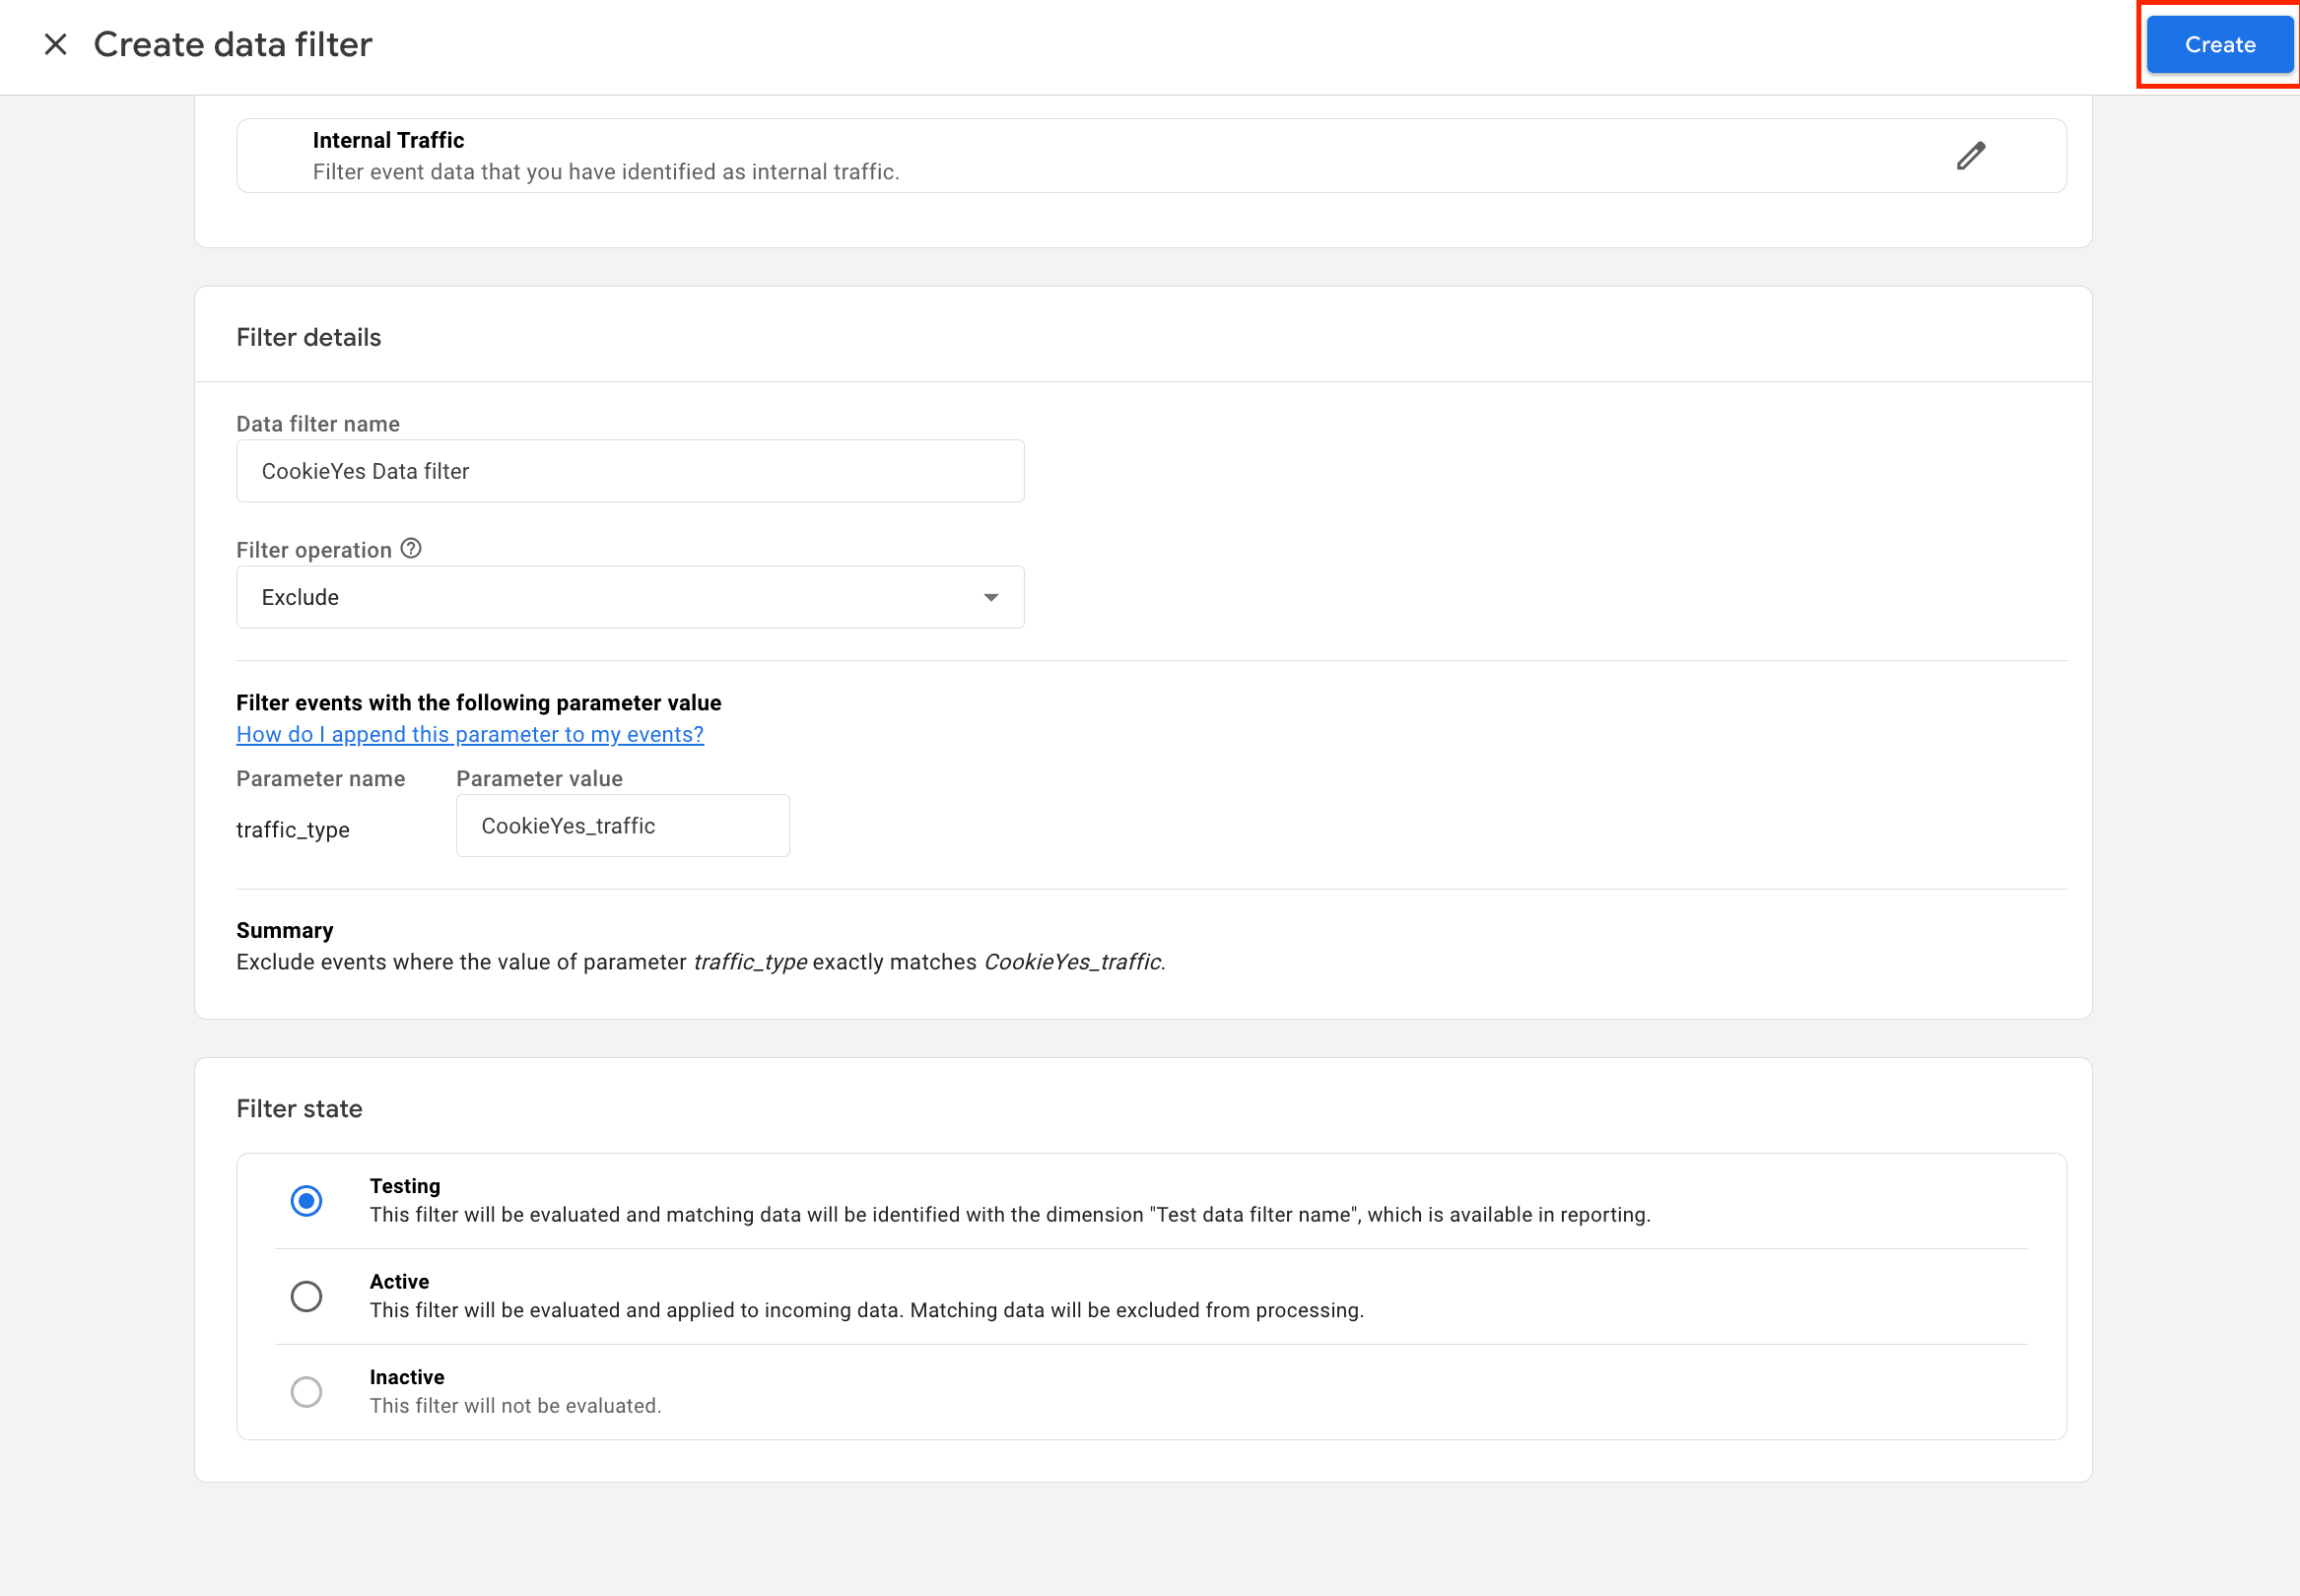
Step 3: Testing the data filter
Testing a data filter ensures it’s successfully filtering out traffic from the IP addresses. Traffic from filtered IP addresses is added to the “Test data filter name” dimension with the filter name as the value.
To find events triggered by a filtered IP address, you can build a free-form exploration with these settings:
- Technique: Free-form
- Rows: Test data filter name, Event name
- Values: Event count
- Filter: “Test data filter name contains [the name of your data filter]”
A data filter can take between 24-36 hours to apply. Check back later if no value is assigned.