Change Cookie Consent on Wix Websites Using CookieYes
According to the GDPR, the visitors to a website must be allowed to reverse the consent they have given to the site’s use of cookies.
CookieYes allows websites to give users the option to change their consent that they have already granted. To change consent for all websites other than WiX, please refer to the article on how to change cookie consent.
But the same cannot be done to change cookie consent on a Wix website. However, this article will help you accomplish this in simple steps.
Changing Cookie Consent on a Wix Website
|
Note |
Check out our guide Implementing CookieYes on Wix to learn how to add a cookie consent banner on your Wix website.
On a Wix website, simply adding the class will not make the HTML element bring back the banner. This is because Wix does not allow you to add a CSS class to any element directly. So, to add an element that enables users to change consent, follow the steps below:
Step 1: Add the HTML element to your Wix website
The first step is to add an HTML element on your Wix website, preferably a button anywhere on your website. Also, add a suitable text to the element to tell the users what it does. For example:- “Change Cookie Preferences”.
So now let’s see how to add a button with the label “Change Cookie Preferences” on your Wix site.
To add a button on Wix:
Step 1: Log in to your Wix account > Click on the Edit Site option at the bottom of the left panel.

Step 2: Click on the + Add button > Select Button > Click the required button category, choose a button > Drag and drop it anywhere on your website > And, click on Publish it the top right corner of the screen.

Now, the button will be published on your website. Here’s how the button will look like:

Step 2: Get the element ID
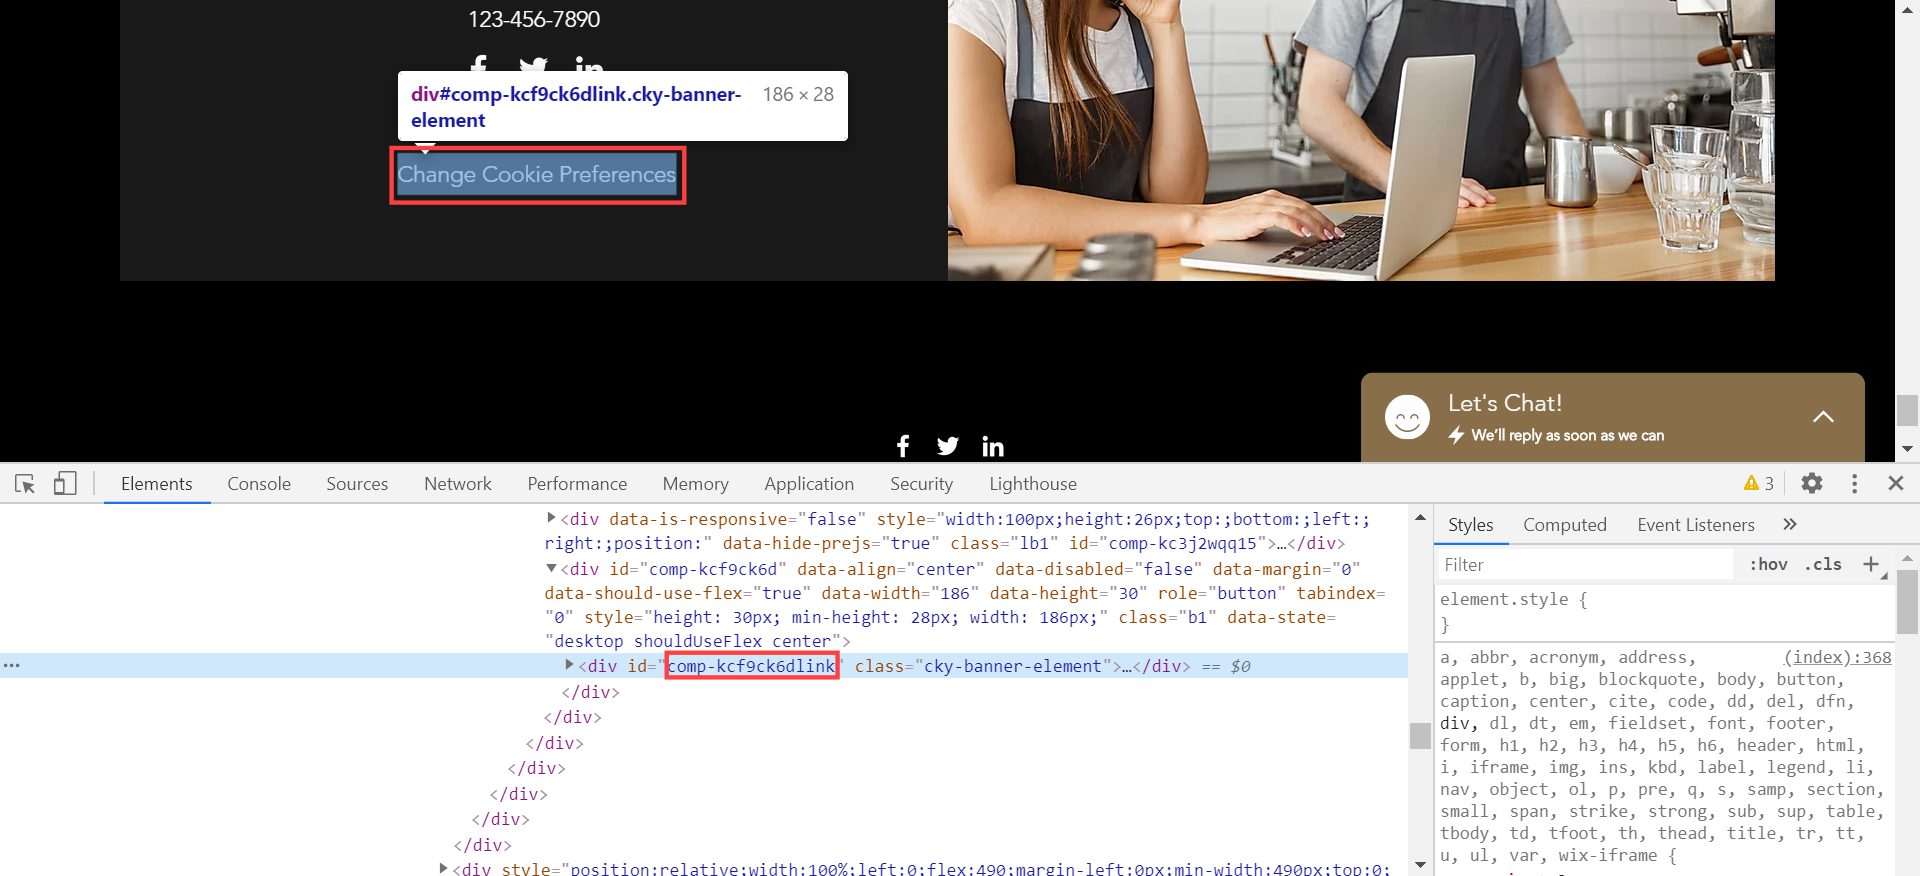
After adding the HTML element (for example:- a button or link text) to your Wix website, inspect the element, and obtain its id using the developer tools. This id needs to be added in the “change consent” code.
To obtain the ‘id’ of the HTML element that you have added:
Right-click on the element that you have created > Click Inspect > Copy its div id.
Step 3: Add the code snippet (for enabling the “change consent” functionality) within the custom code section on Wix
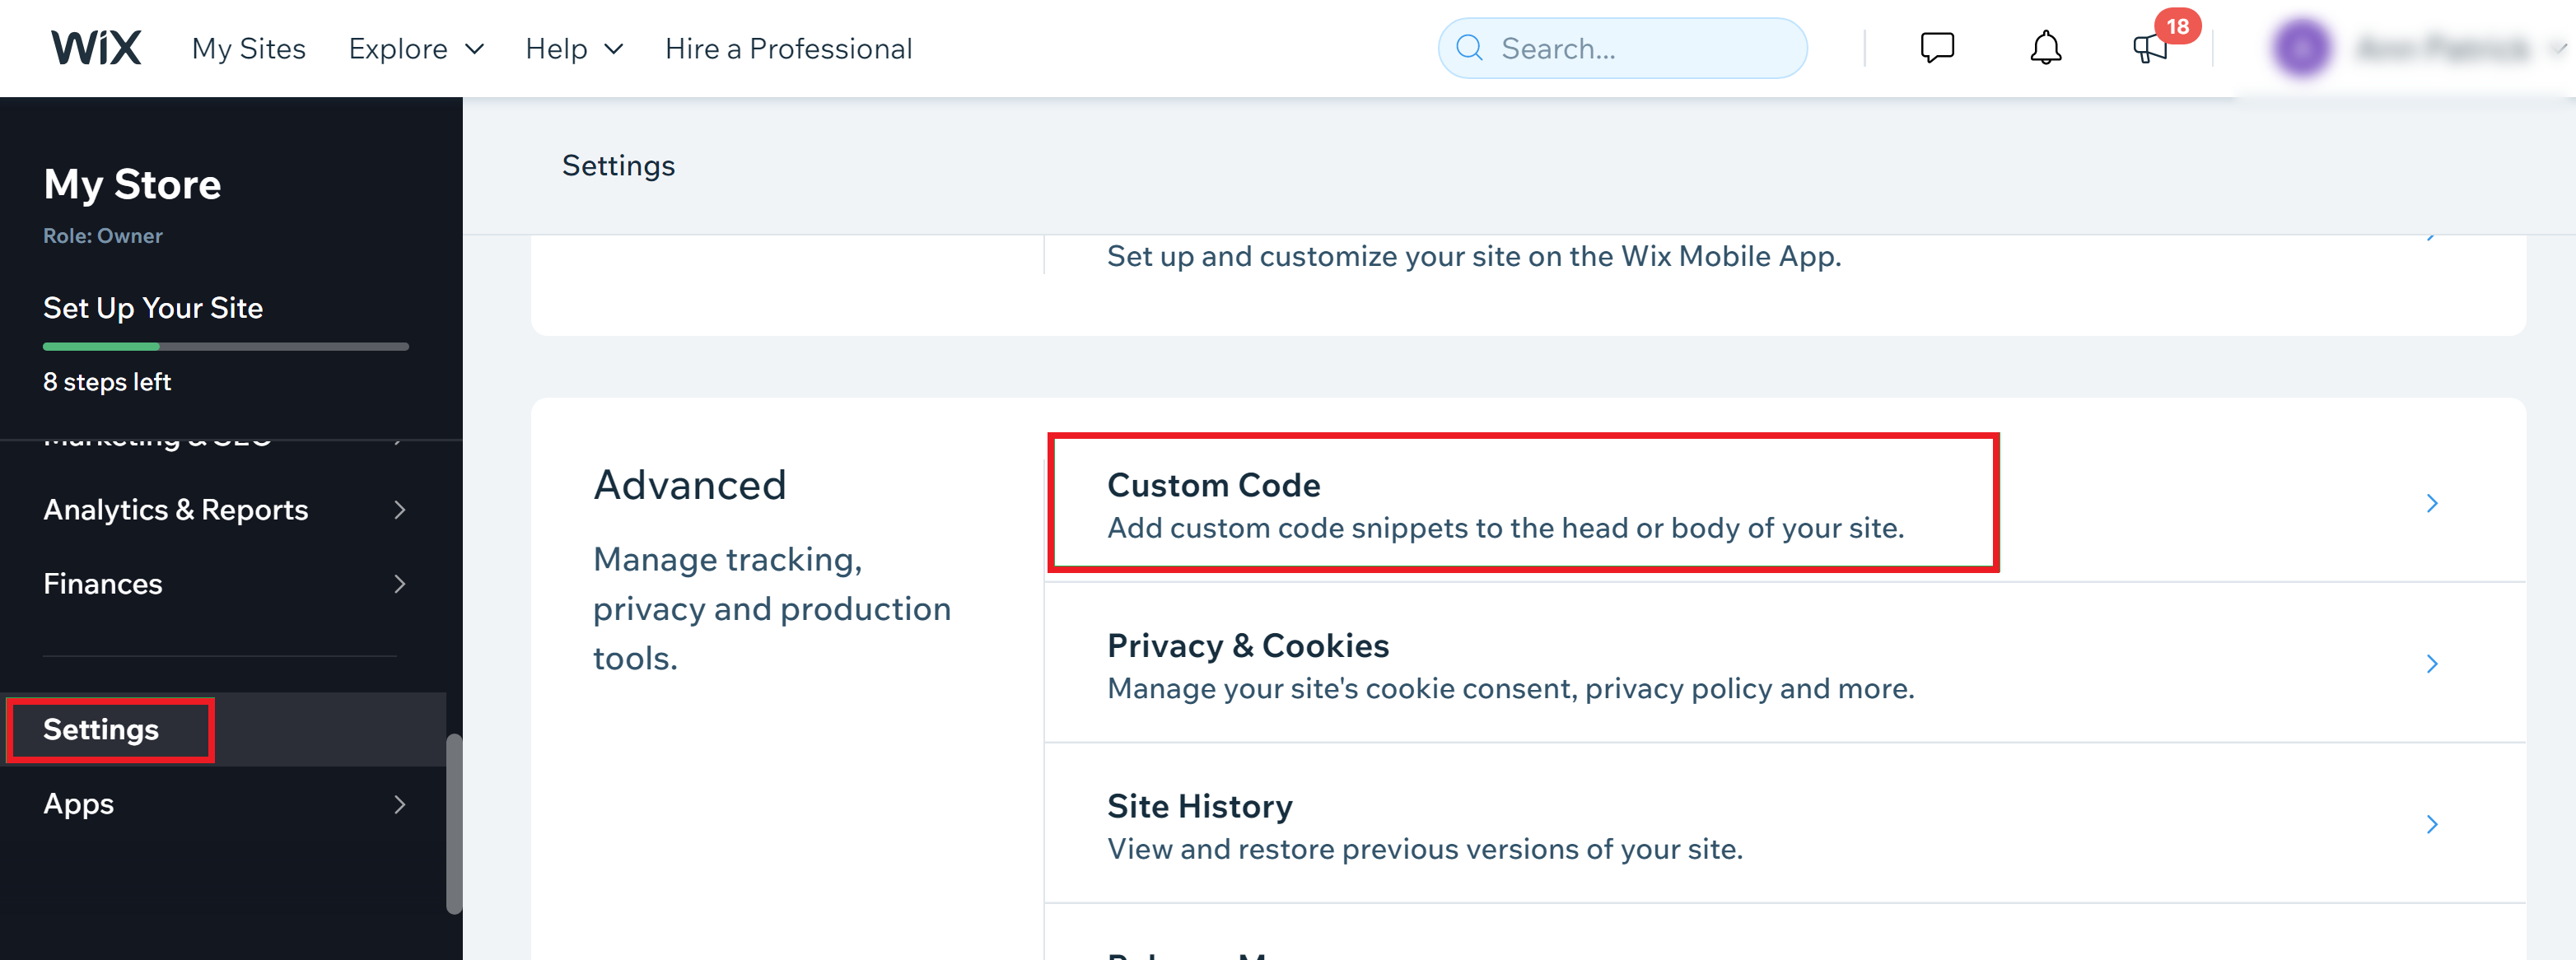
Step 1: From your Wix dashboard, scroll down through the left panel and select Settings. Then, click Custom Code.
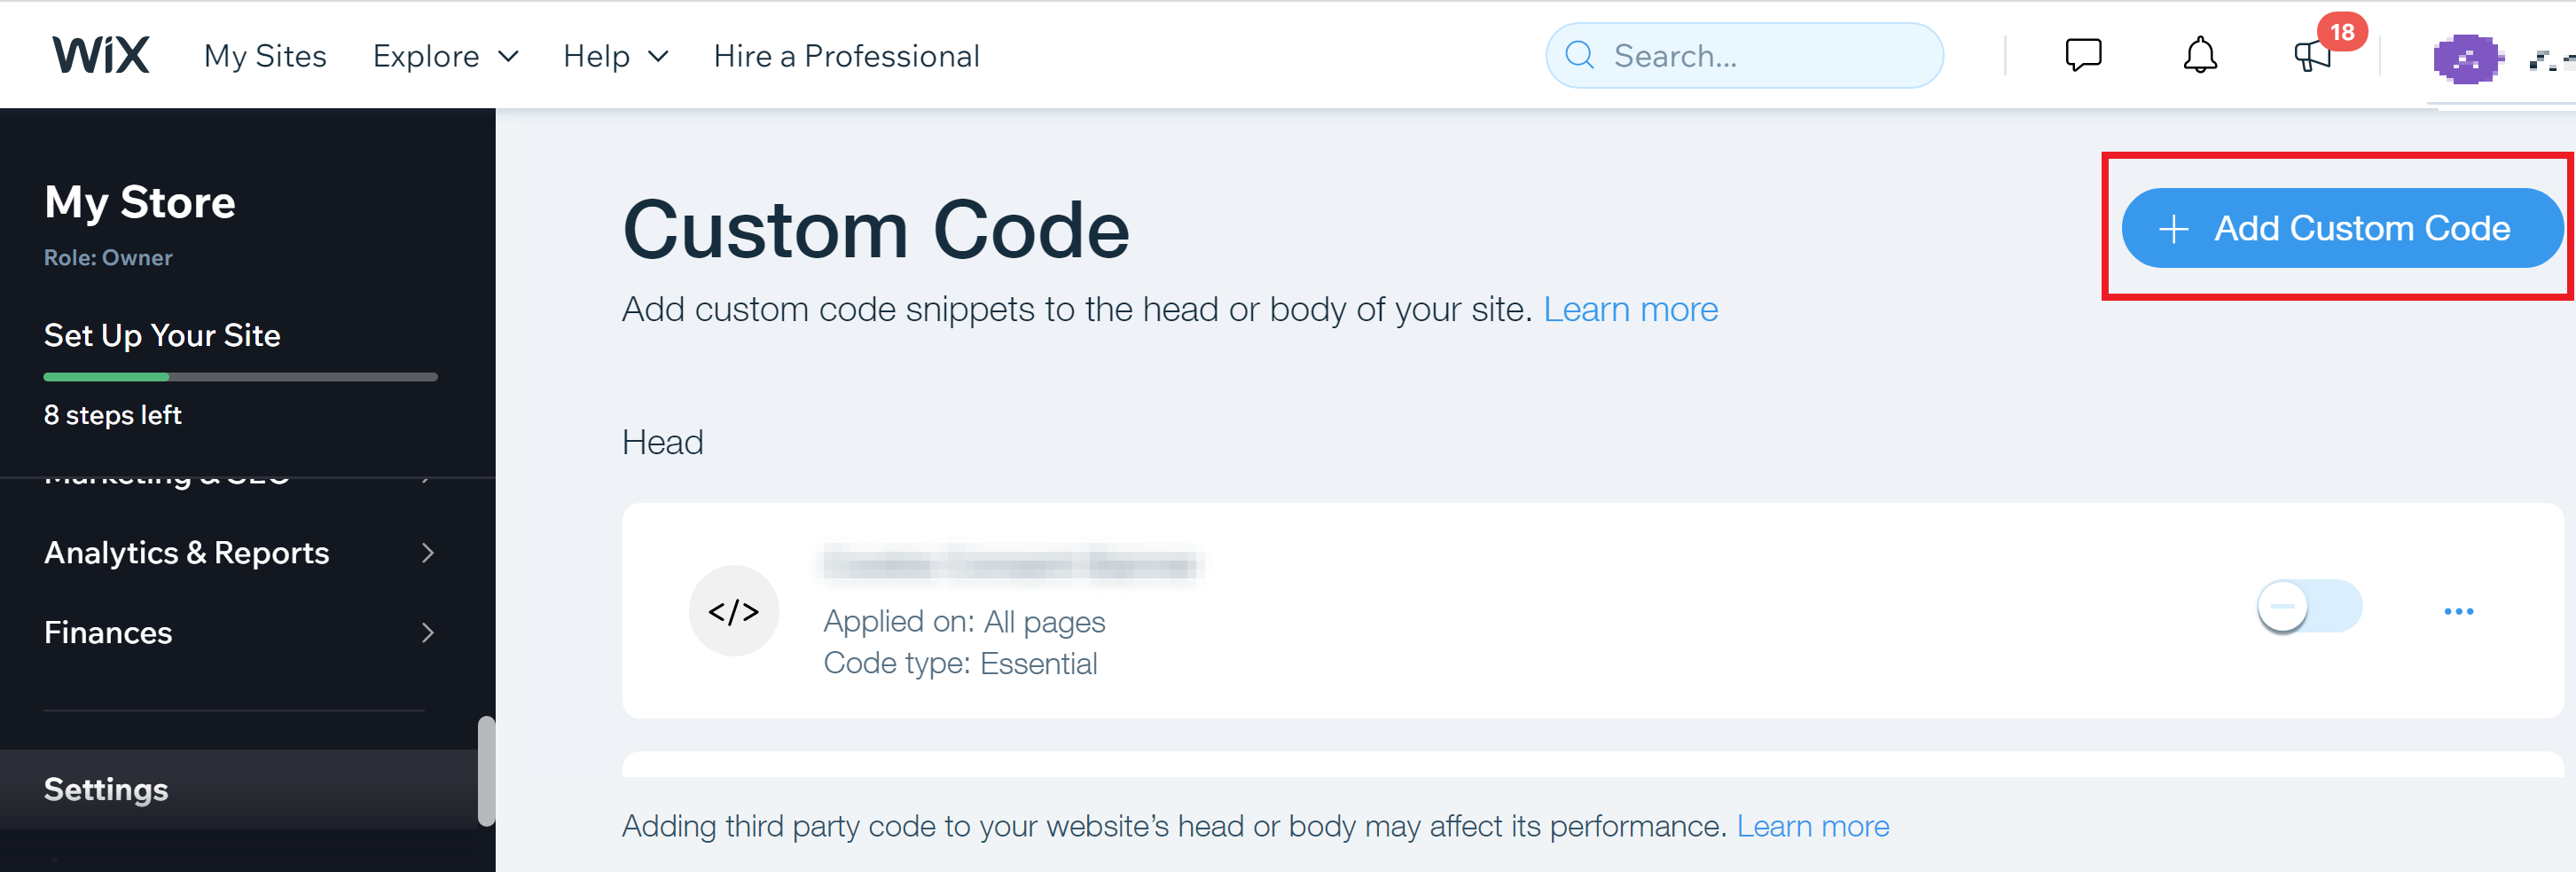
Step 2: Click + Add Custom Code in the top right corner.
Step 3: The final step is to add the below code snippet to the Wix Custom Code’s Body portion.
Code snippet that adds the “change consent” functionality to your Wix website:
<script>

var observer = new MutationObserver(function(mutations) {

mutations.forEach(function(mutation) {

if (mutation.type == "childList") {

var elem = document.getElementById('your-button-id');

if(elem) {

elem.classList.add('cky-banner-element');

}

}

})

})
    var ckyBody = document.getElementsByTagName("body")[0];

observer.observe(ckyBody, {

childList: true,

subtree: true,

})

</script>
|
Note |
3.1: Copy the above code snippet > Paste it into the code box as shown below.
3.2: Under Add Code to Pages, select All pages and switch to Load code on each new page from “Lode code once” (default).
3.3: Under Place Code in, select either in Body – start or Body – end.
3.4: Click Apply.

The above steps will help you add the “change consent” functionality to the HTML element that you have added to your Wix website.
Now, reload your website to see the clickable “Change Cookie Preferences” option on your website — when the users click on this element, the cookie consent banner set by CookieYes will reappear, and accordingly, the users will be able to change their consent.
“Change Cookie Preferences” option set by CookieYes on a Wix website
|
Note |
To know more about the configuration and customization of CookieYes, read our setup guide.
If you have any issues or queries regarding CookieYes, please contact our support team.
