Getting Started
Chapter 2:
How to Add Cookie Banner on Nuxt.js Website
Welcome to CookieYes! This documentation will guide you through setting up CookieYes on a Nuxt.js website. By following the steps, you can easily integrate CookieYes into your Nuxt.js website and enable a cookie consent banner.
Step 1: Sign Up on CookieYes and Create a Cookie Banner.
To begin, follow the below steps:
- Sign up on CookieYes and try it for free.
- Once you have created the account, create a cookie banner for your website.
Step 2: Install the cookie banner on the Nuxt.js website.
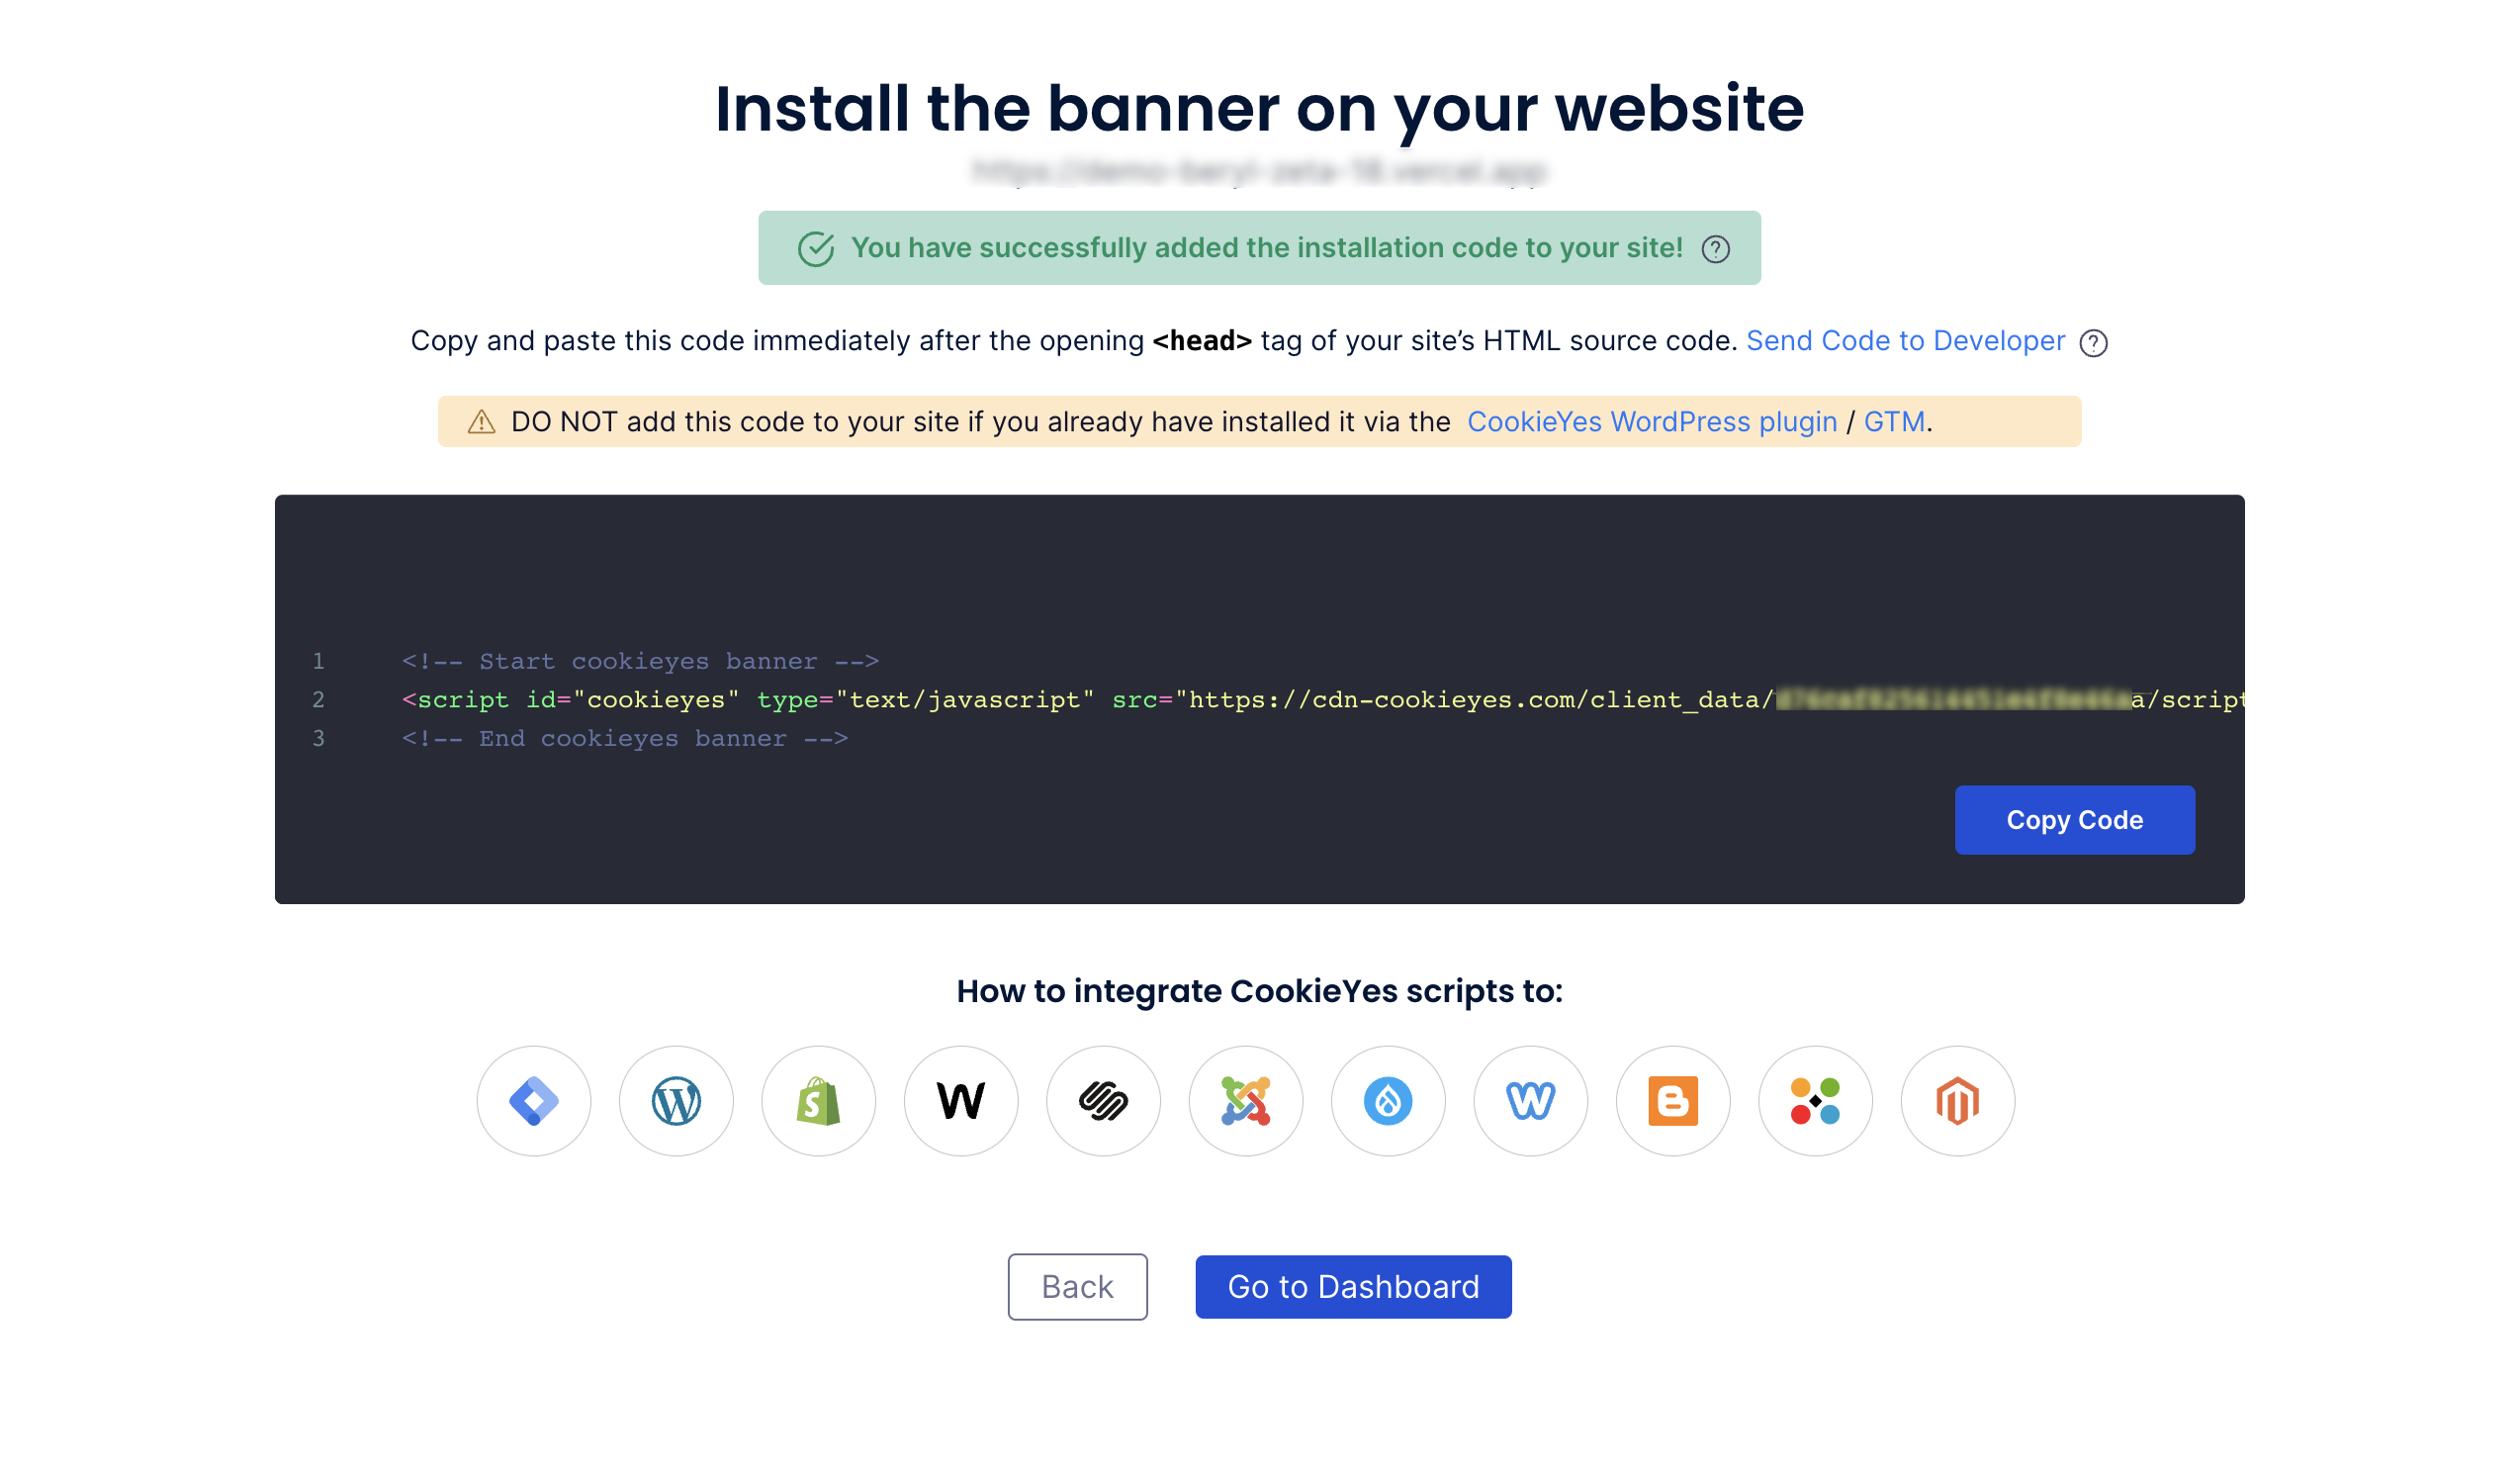
To deploy the cookie banner, navigate to the nuxt.config.js file at the root of your project, and add the CookieYes Installation code to the top of the head tag.
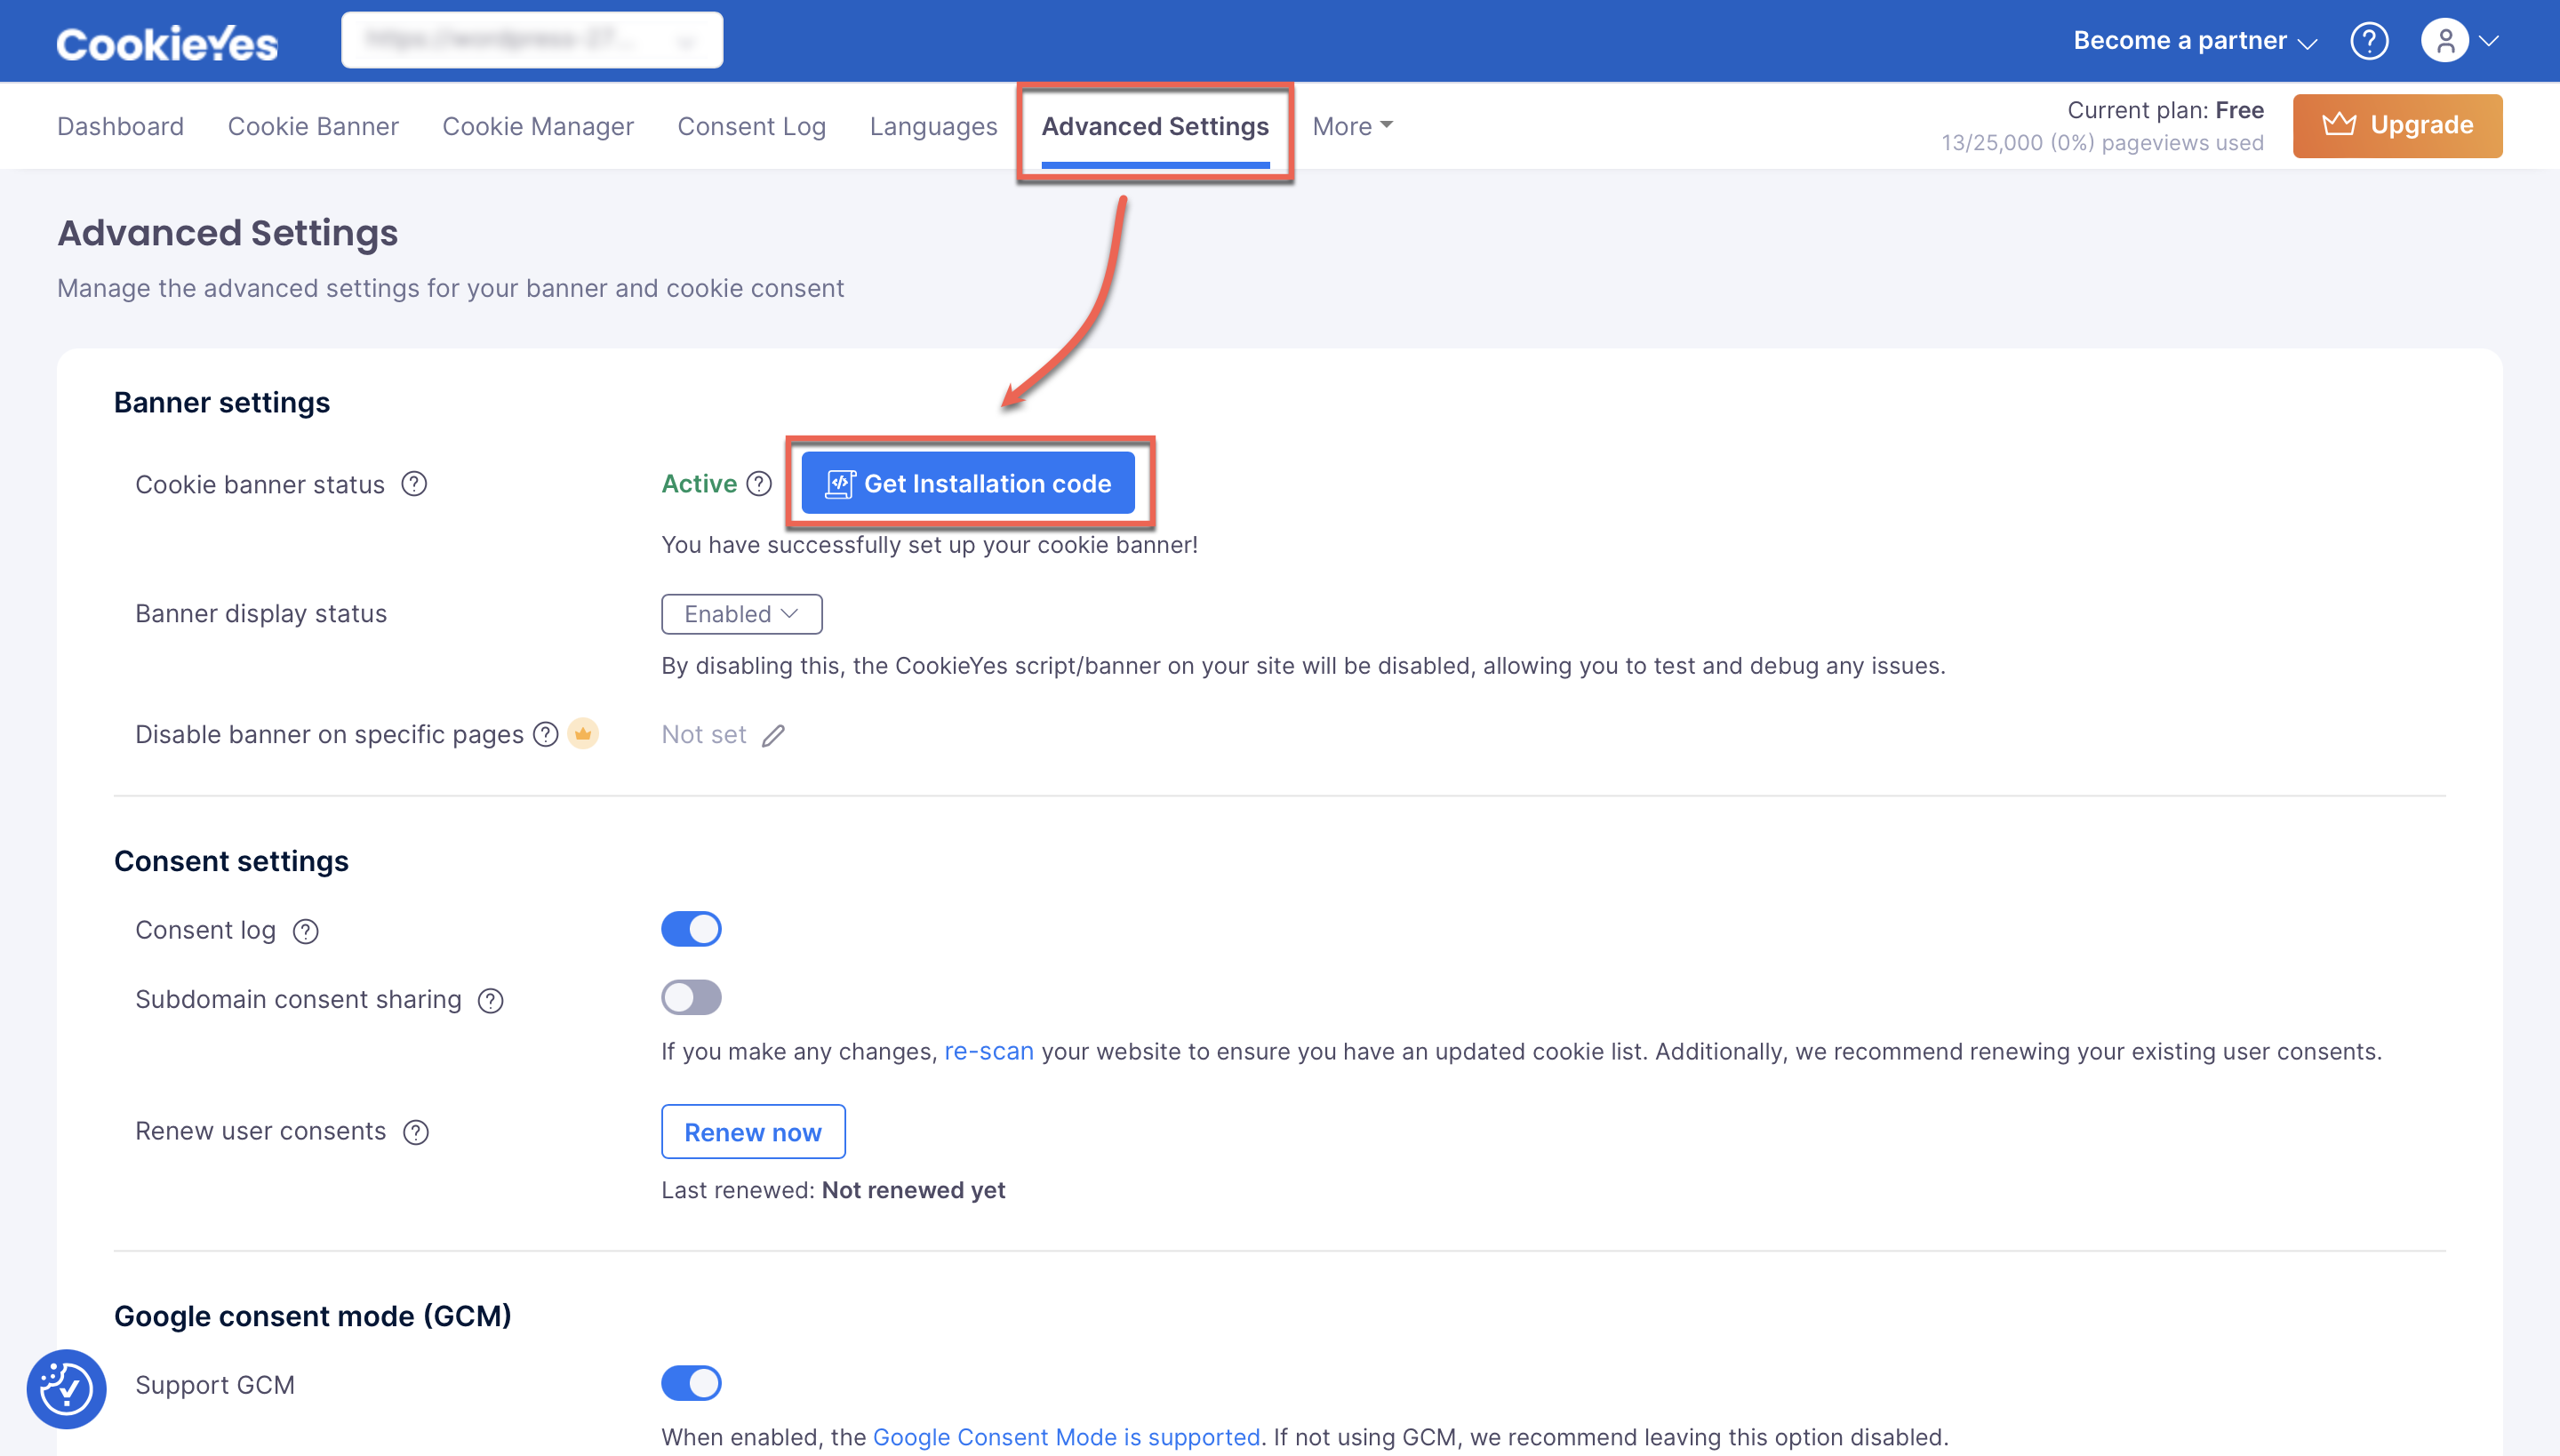
You can copy your installation code from Advanced Settings from the top navigation panel of your CookieYes dashboard.
Step 3: Verify Installation
After completing Step 2, you can verify the installation by clicking the Verify Installation button in the Cookieyes setup screen. If you have successfully installed the banner, you will see a success message showing that “ You have successfully added the installation code to your site! ”.
Now you will see the new cookie consent banner on your Nuxt.js website. From the CookieYes Dashboard, you can complete the website scanning and explore additional customizations and features.
Still have questions or facing issues? Contact technical support
Next chapter:
Complete website scanning