
How to Add a Cookie Policy to Craft CMS
Last updated on October 19, 2026
On this page
Prerequisites
After you sign up, you will be directed to the installation screens. You can install the cookie banner to support GDPR compliant for your use of cookies. If you prefer to create a cookie policy first, skip the installation and go directly to the CookieYes Dashboard.
Generate a Cookie Policy in CookieYes
Step 1. Access the cookie policy generator
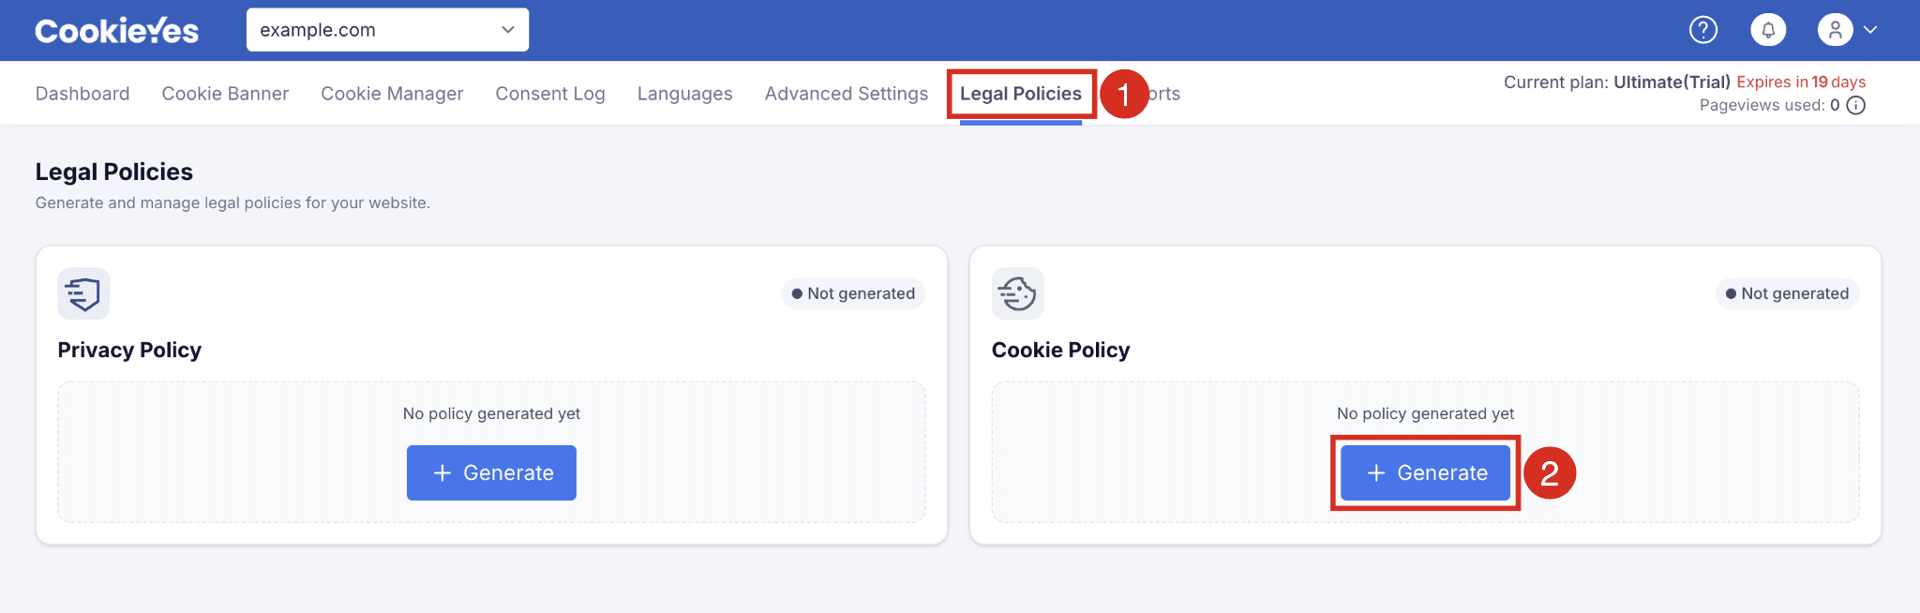
- Log in to your CookieYes account.
- From the top navigation bar, select Legal Policies.
- From the Cookie Policy section, click + Generate.
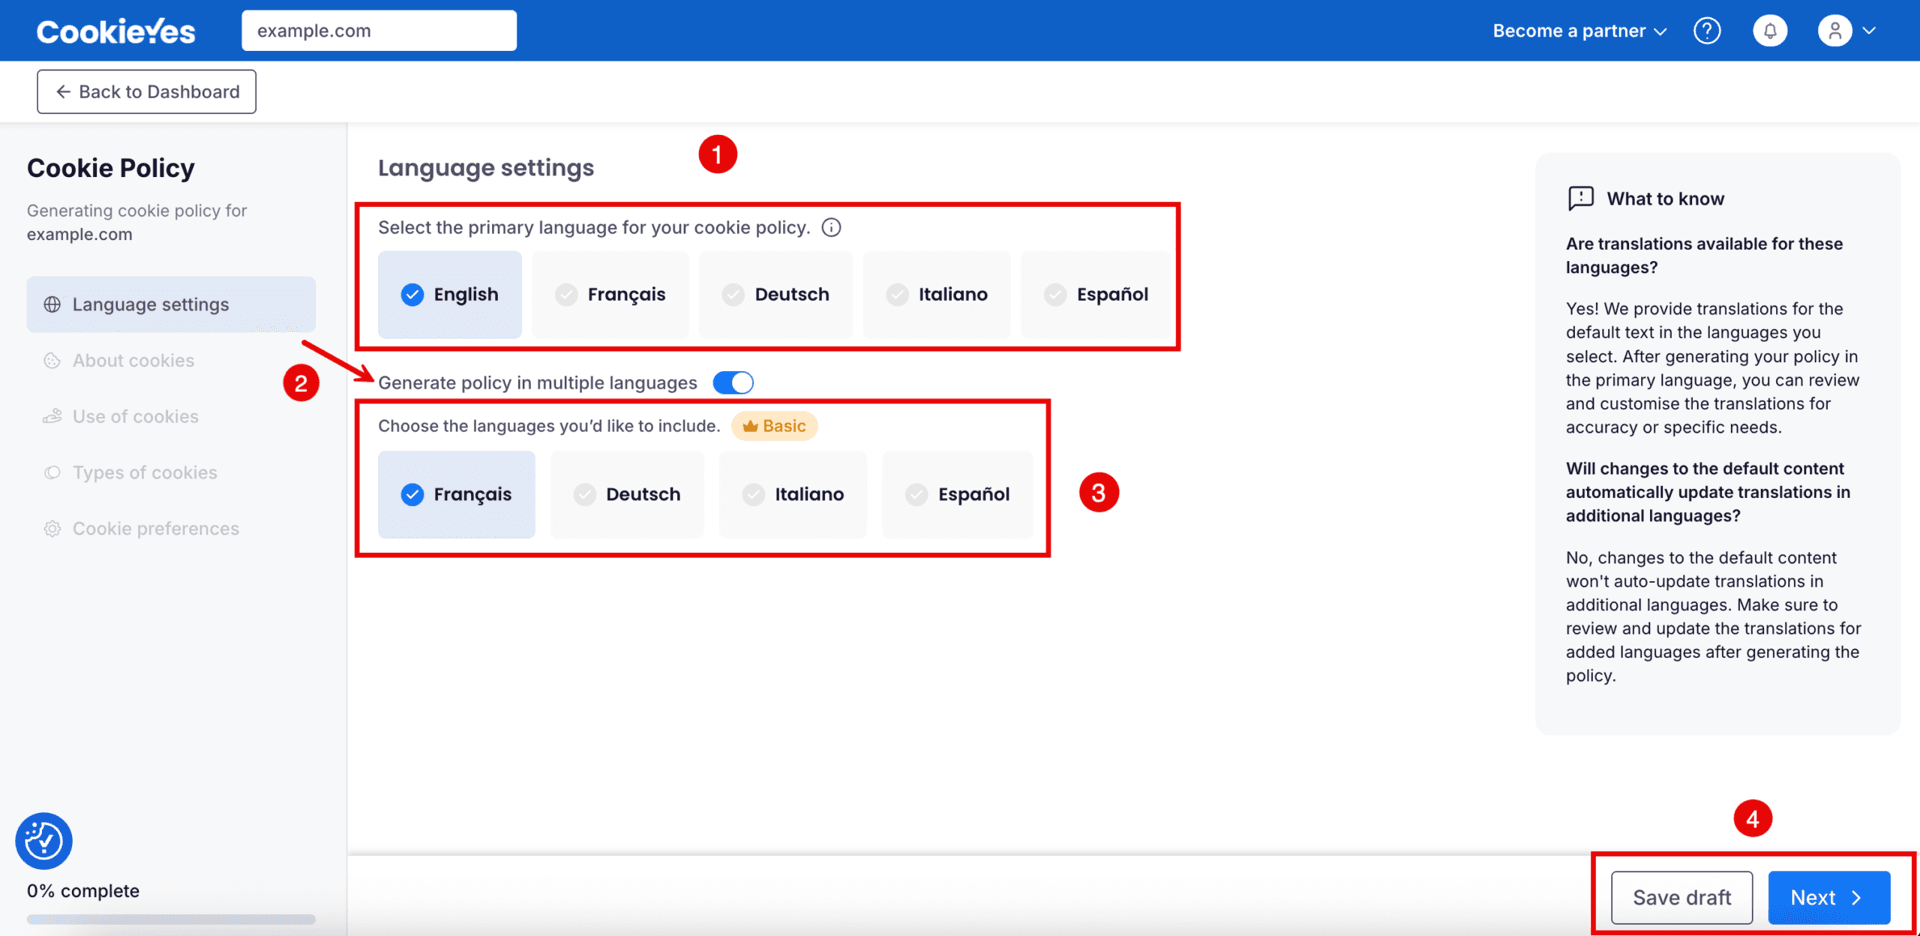
Step 2. Configure language settings
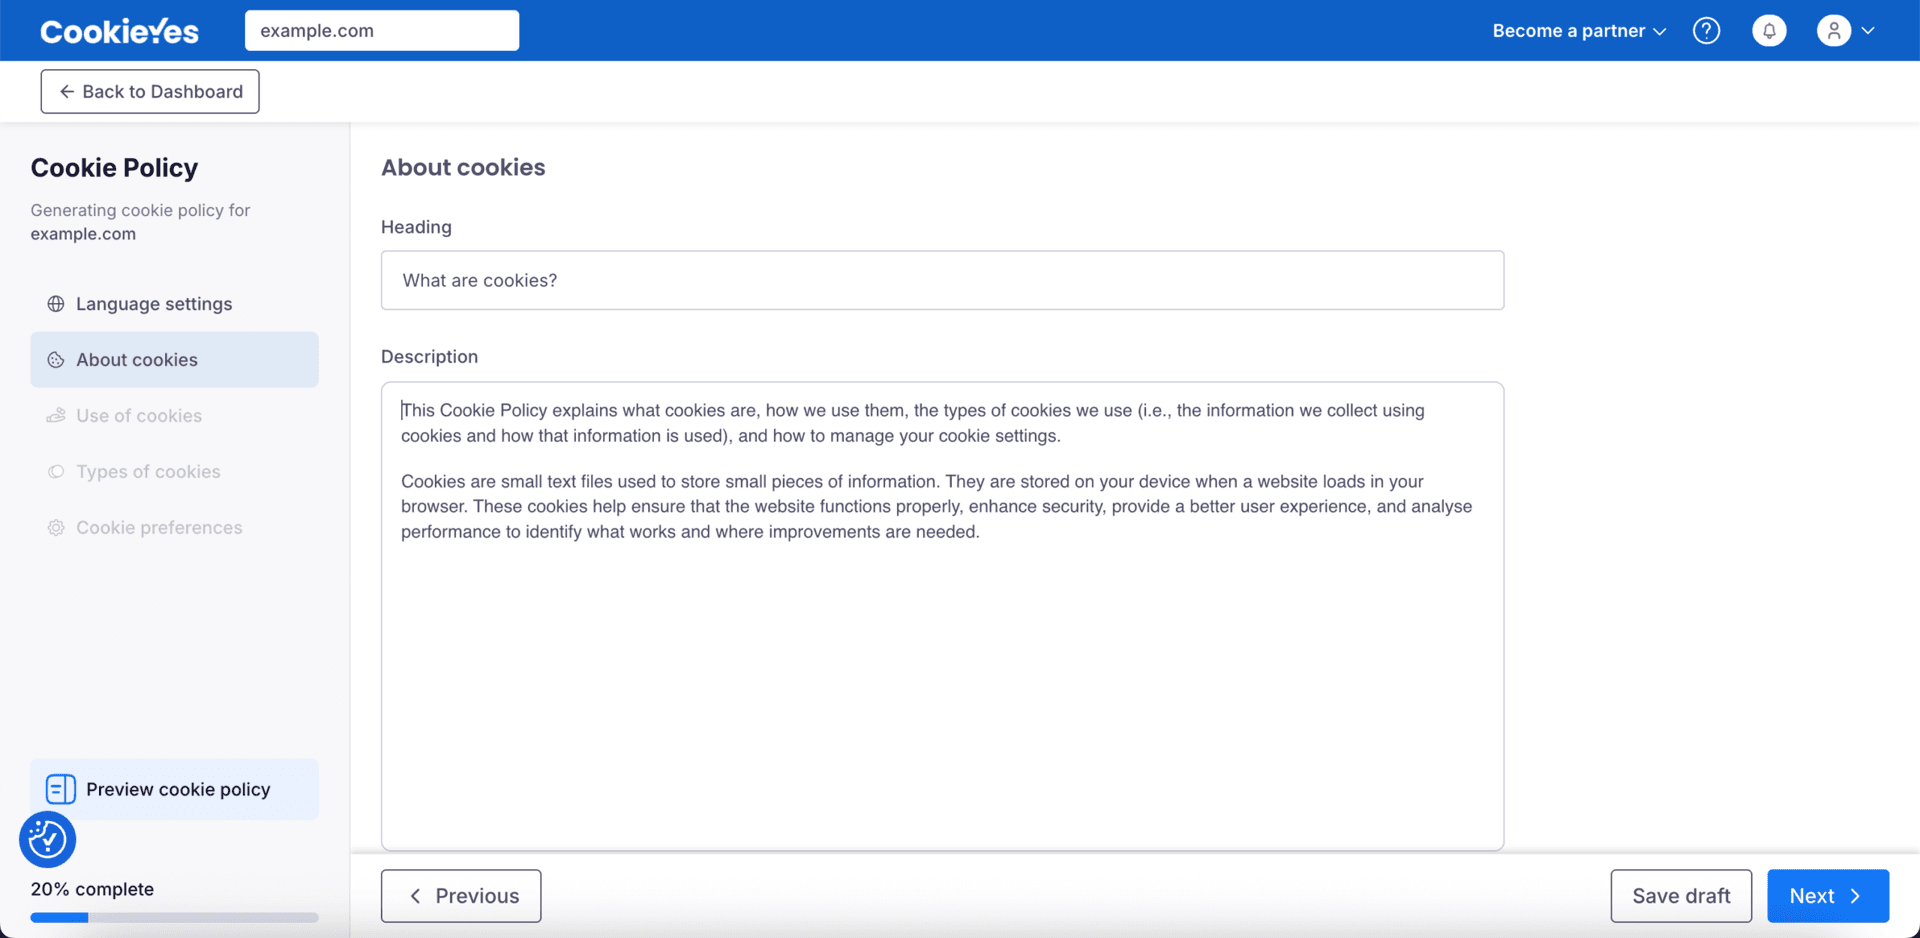
Step 3. Add about cookies details
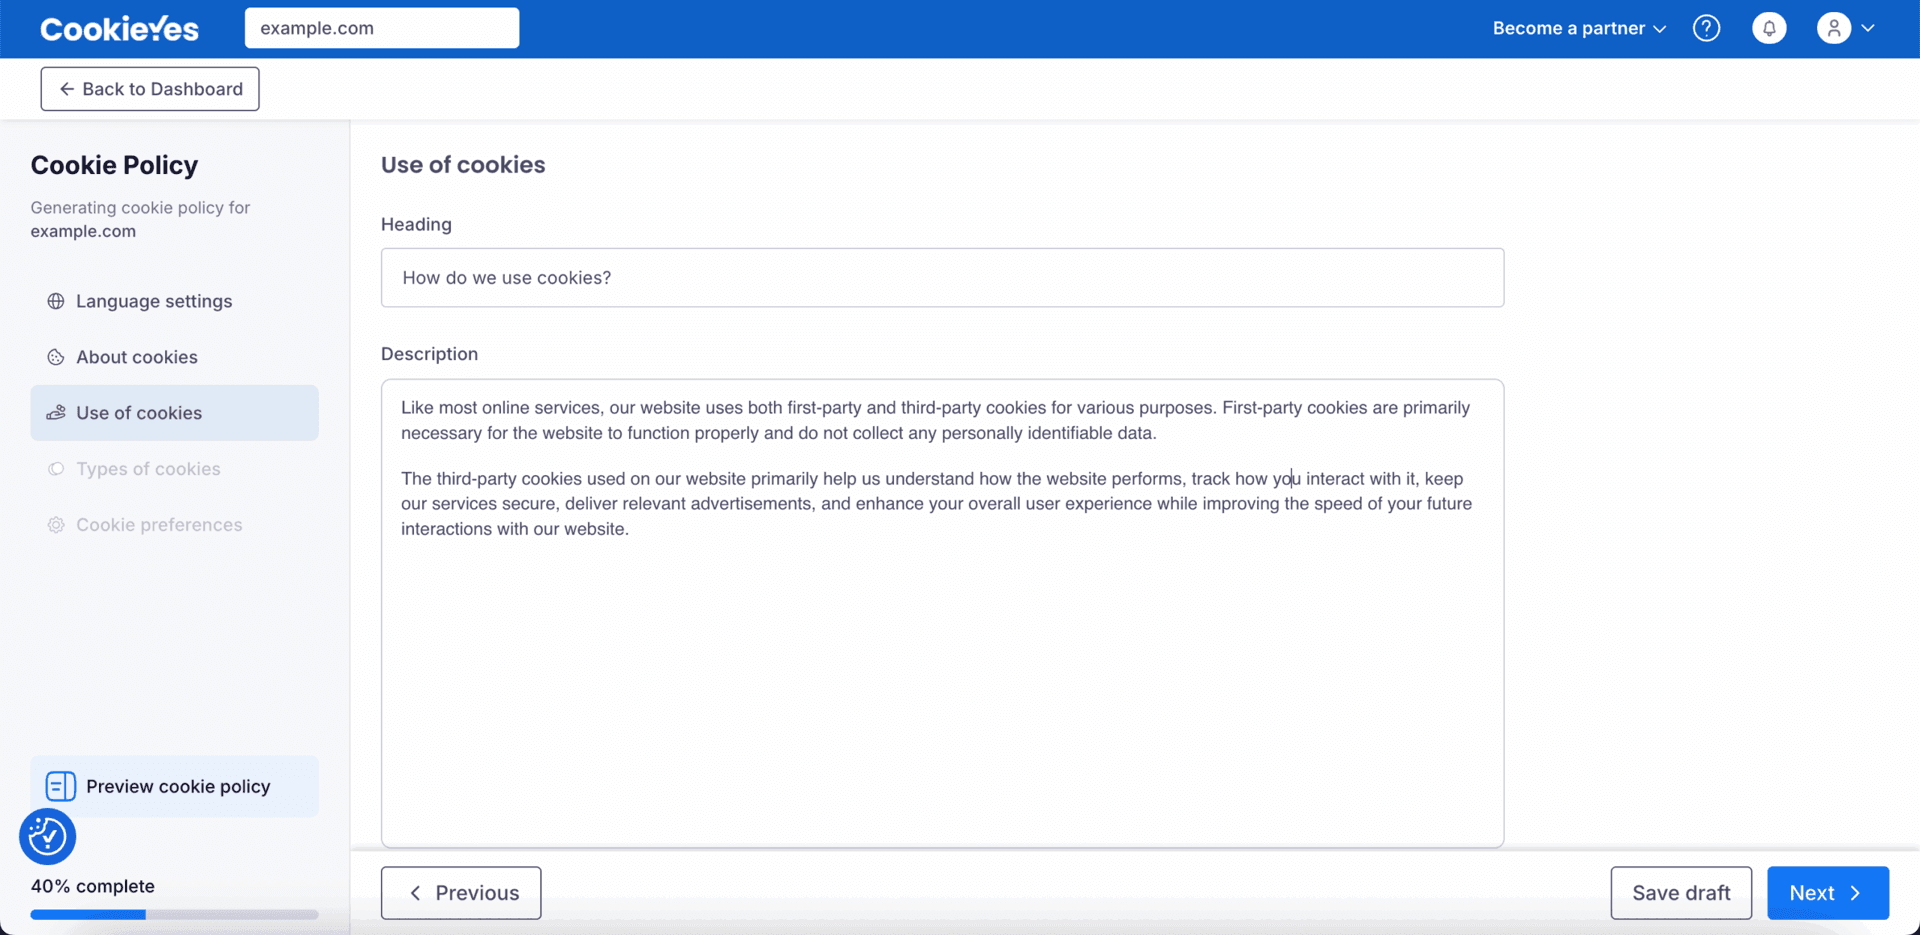
Step 4. Add use of cookies details
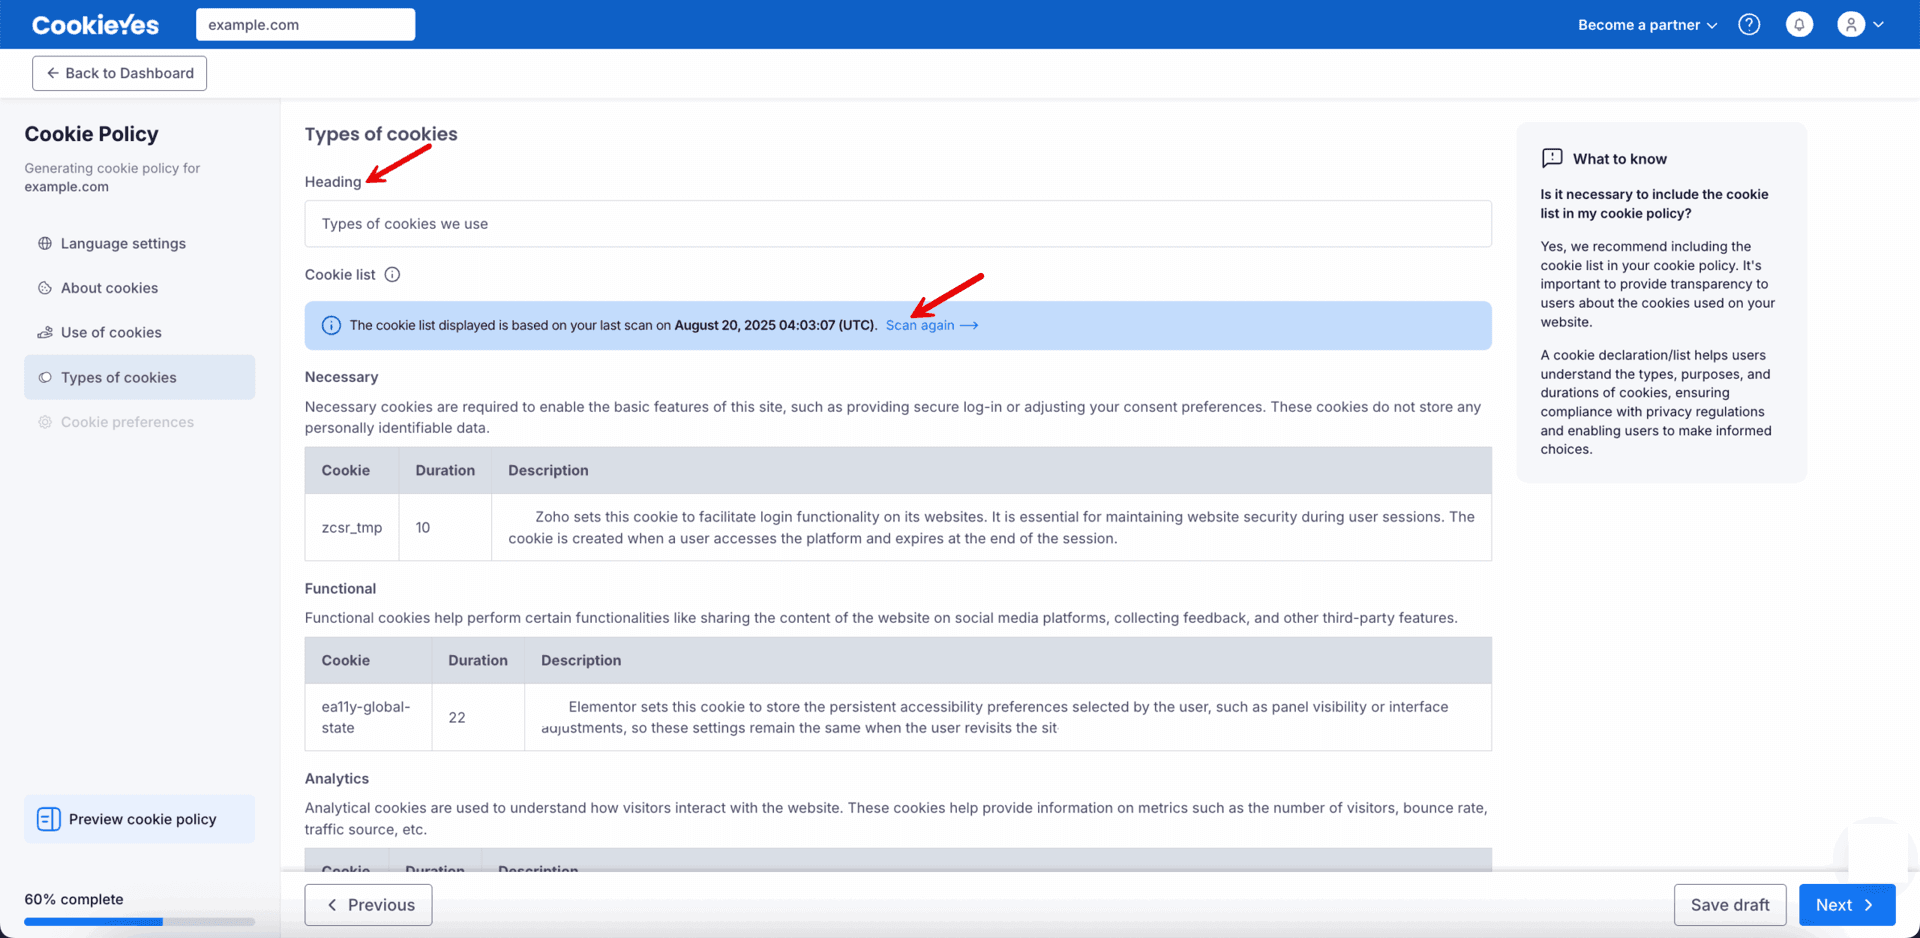
Step 5. Review and edit types of cookies
Step 6. Set cookie preferences and generate the cookie policy
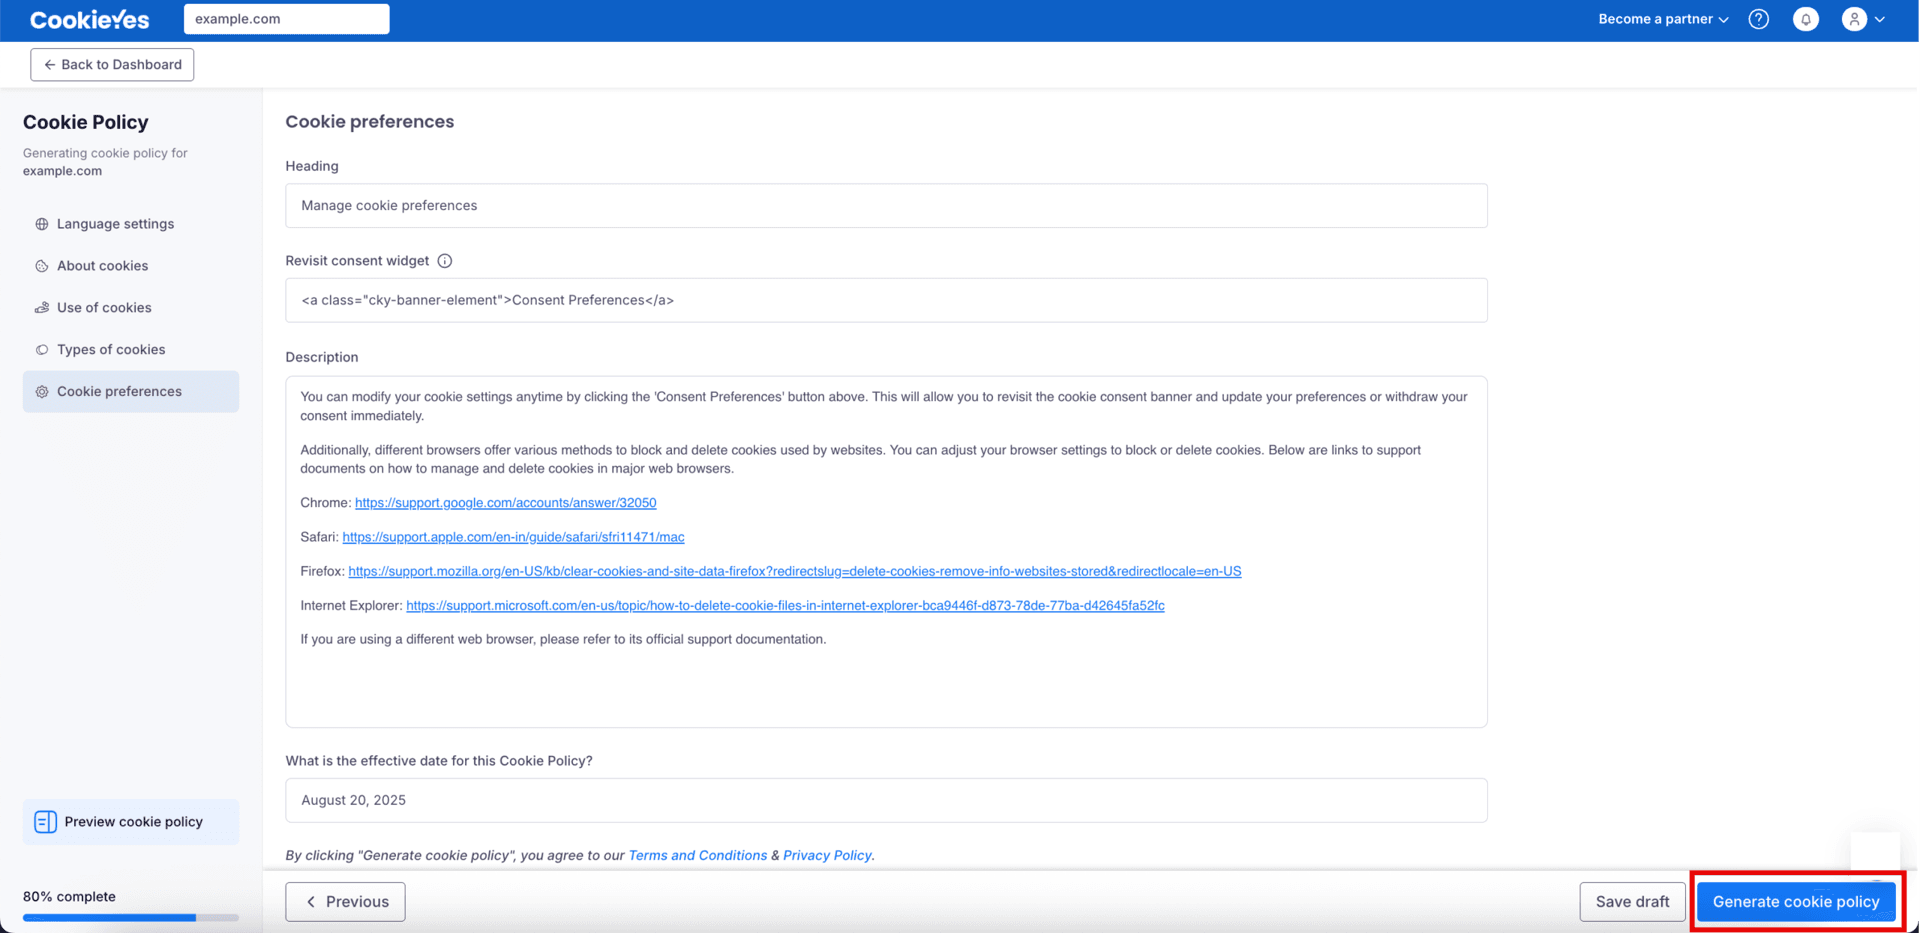
The Revisit consent widget enables your website visitors to manage their cookie preferences. You can remove the code in the field if you don’t want a widget to be displayed. For more details, refer to the guide.
Add the Cookie Policy to Craft CMS
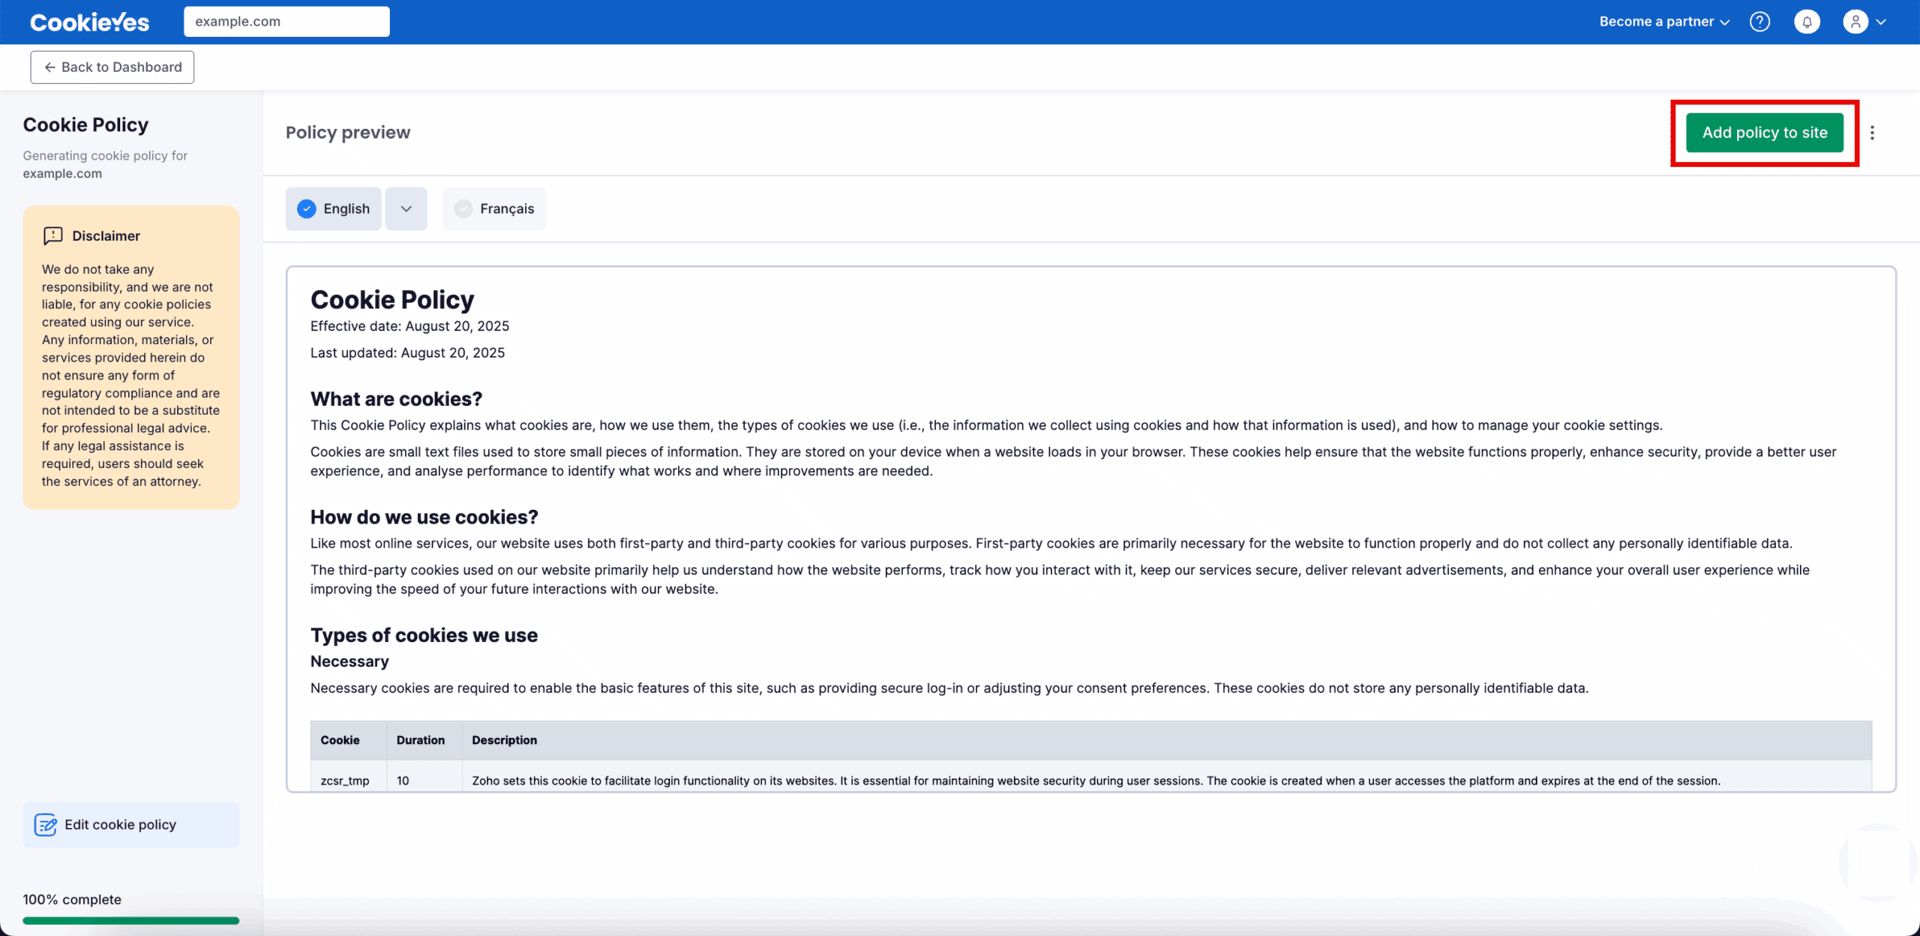
Choose one option and follow its steps.
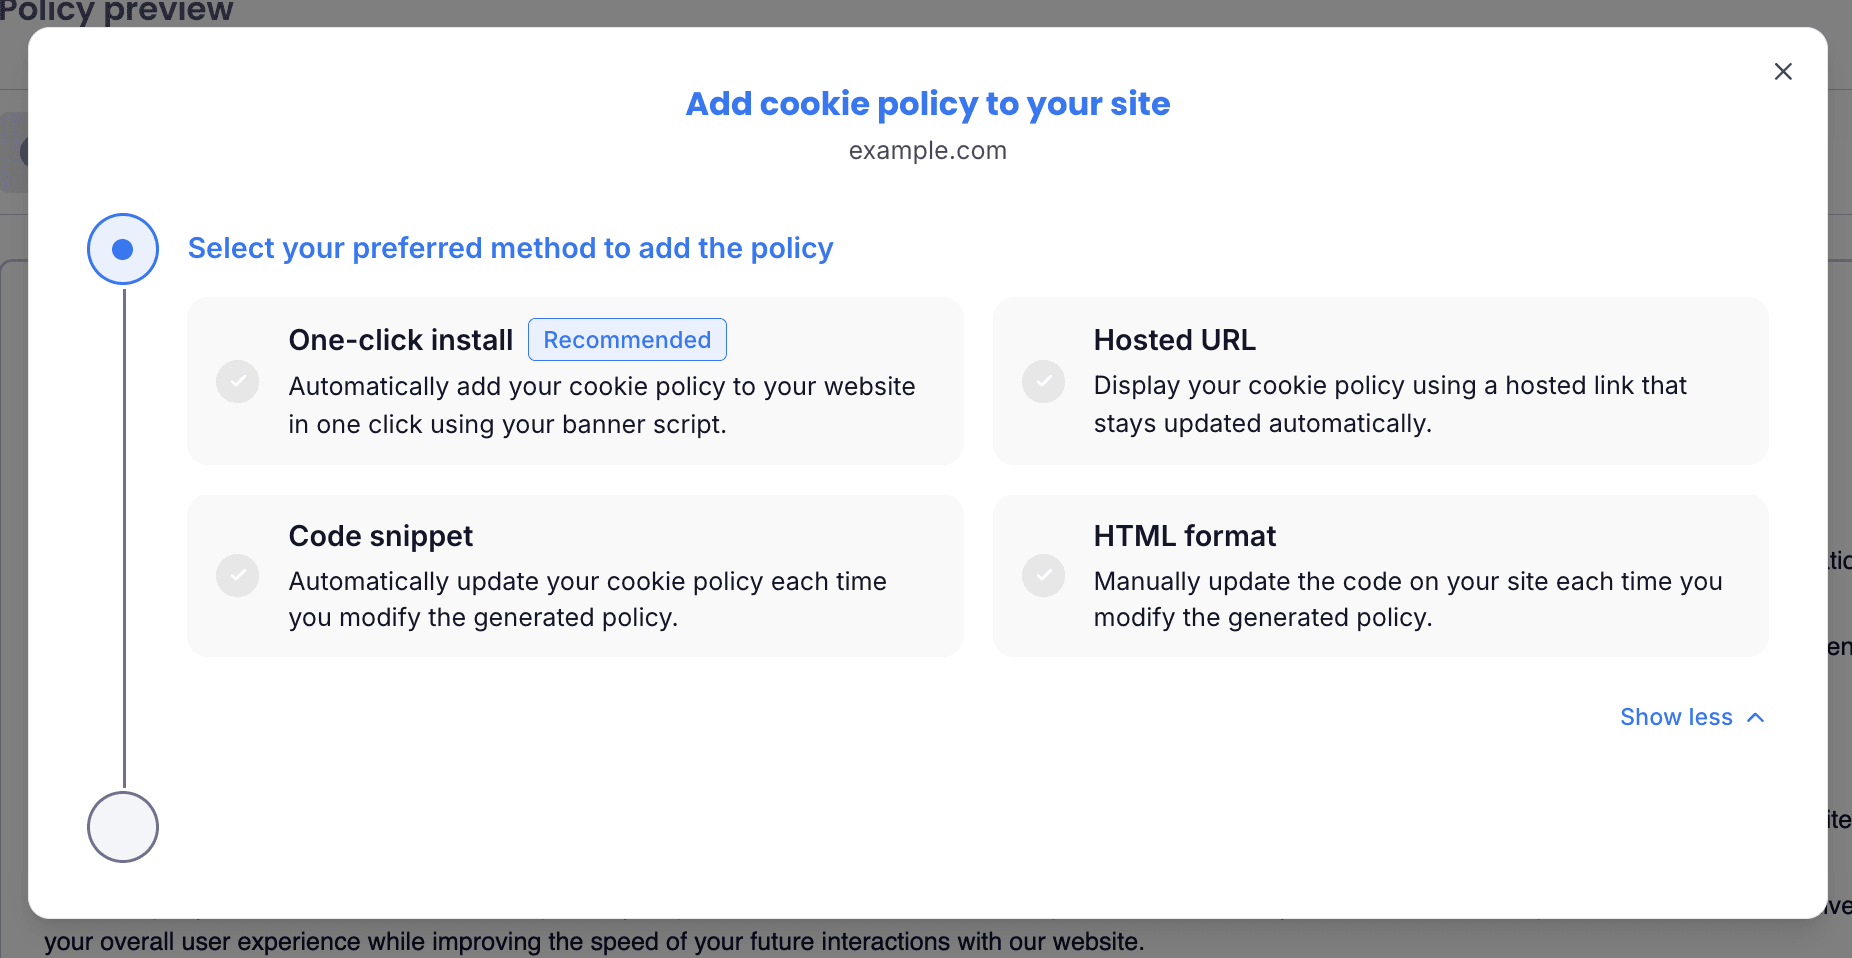
Option 1: One-click install (recommended)
Step 1: Select One-click install
Step 2: Create a policy page in Craft CMS
- Log in to your Craft CMS website.
- Go to Settings > Fields, then click + New field.
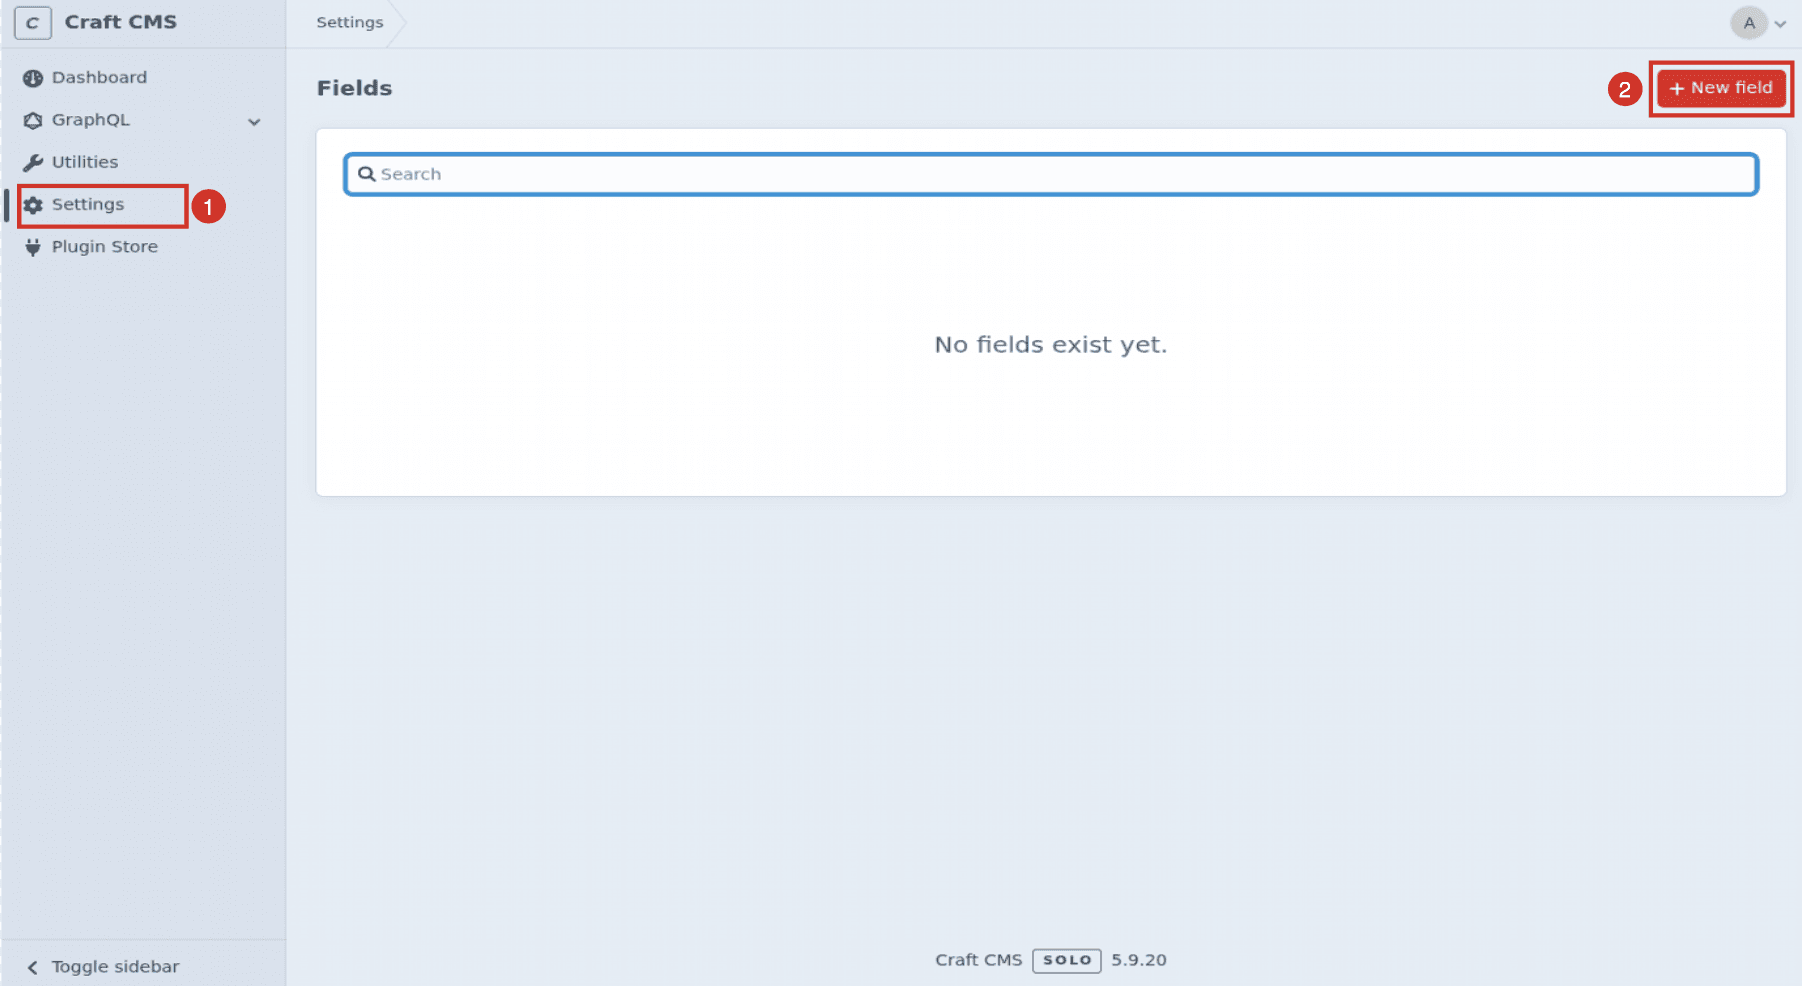
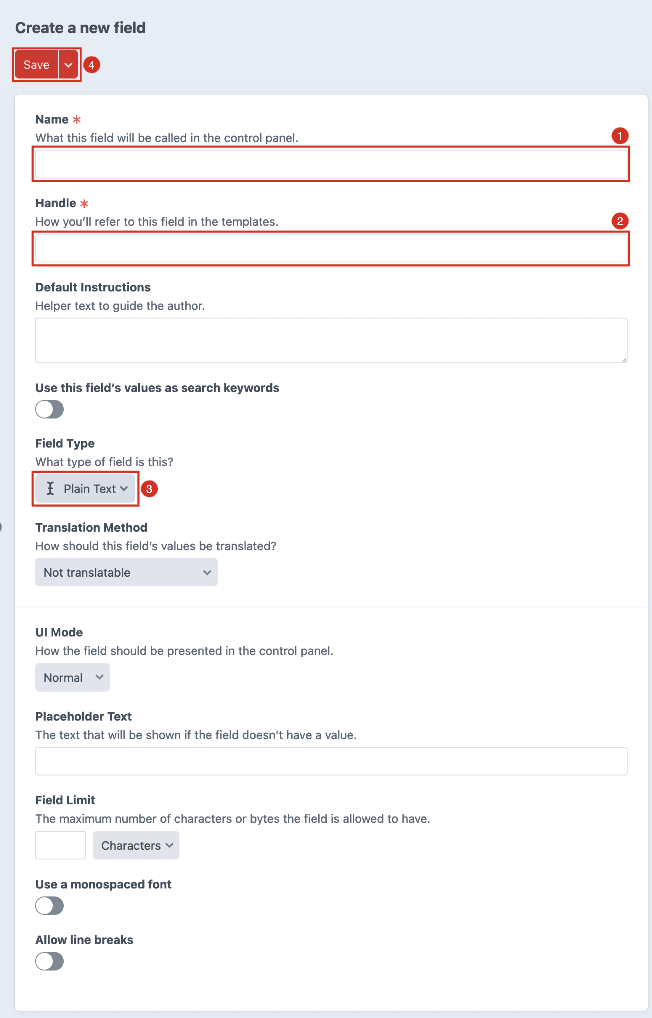
- Enter Body HTML in Name and bodyHtml in Handle. In Field Type, select Plain Text, then click Save.
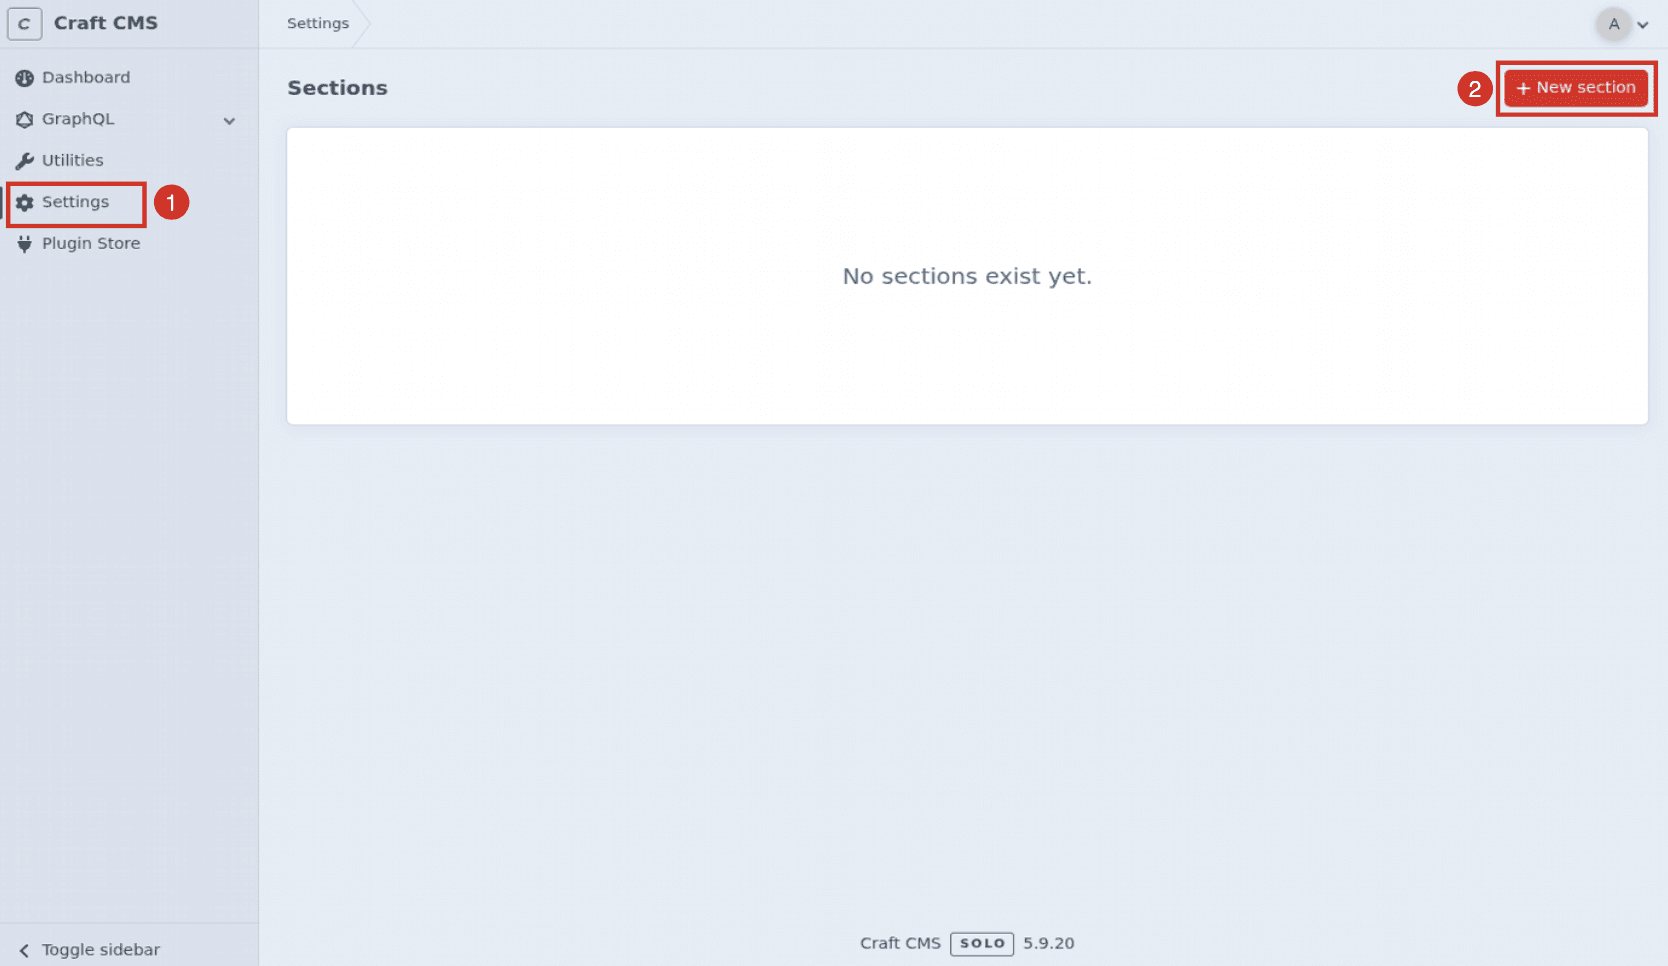
- Go to Settings > Sections, then click + New section.
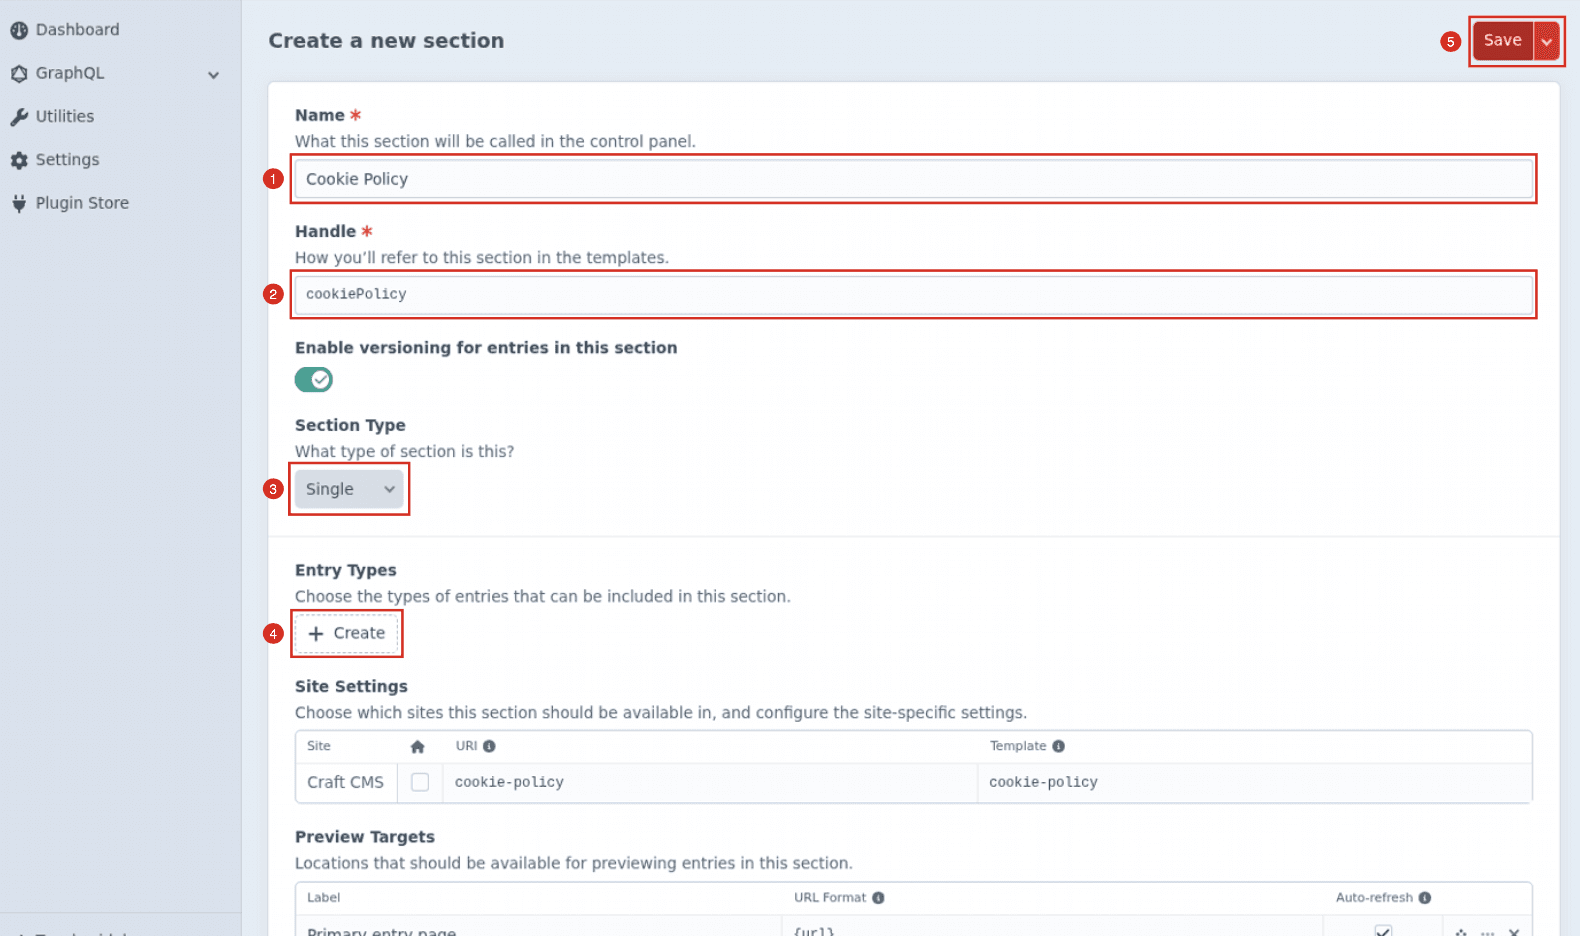
- Enter Cookie Policy in Name and cookiePolicy in Handle. In Section Type, select Single.
- Click + Create and add an entry type named Cookie Policy, then click Save.
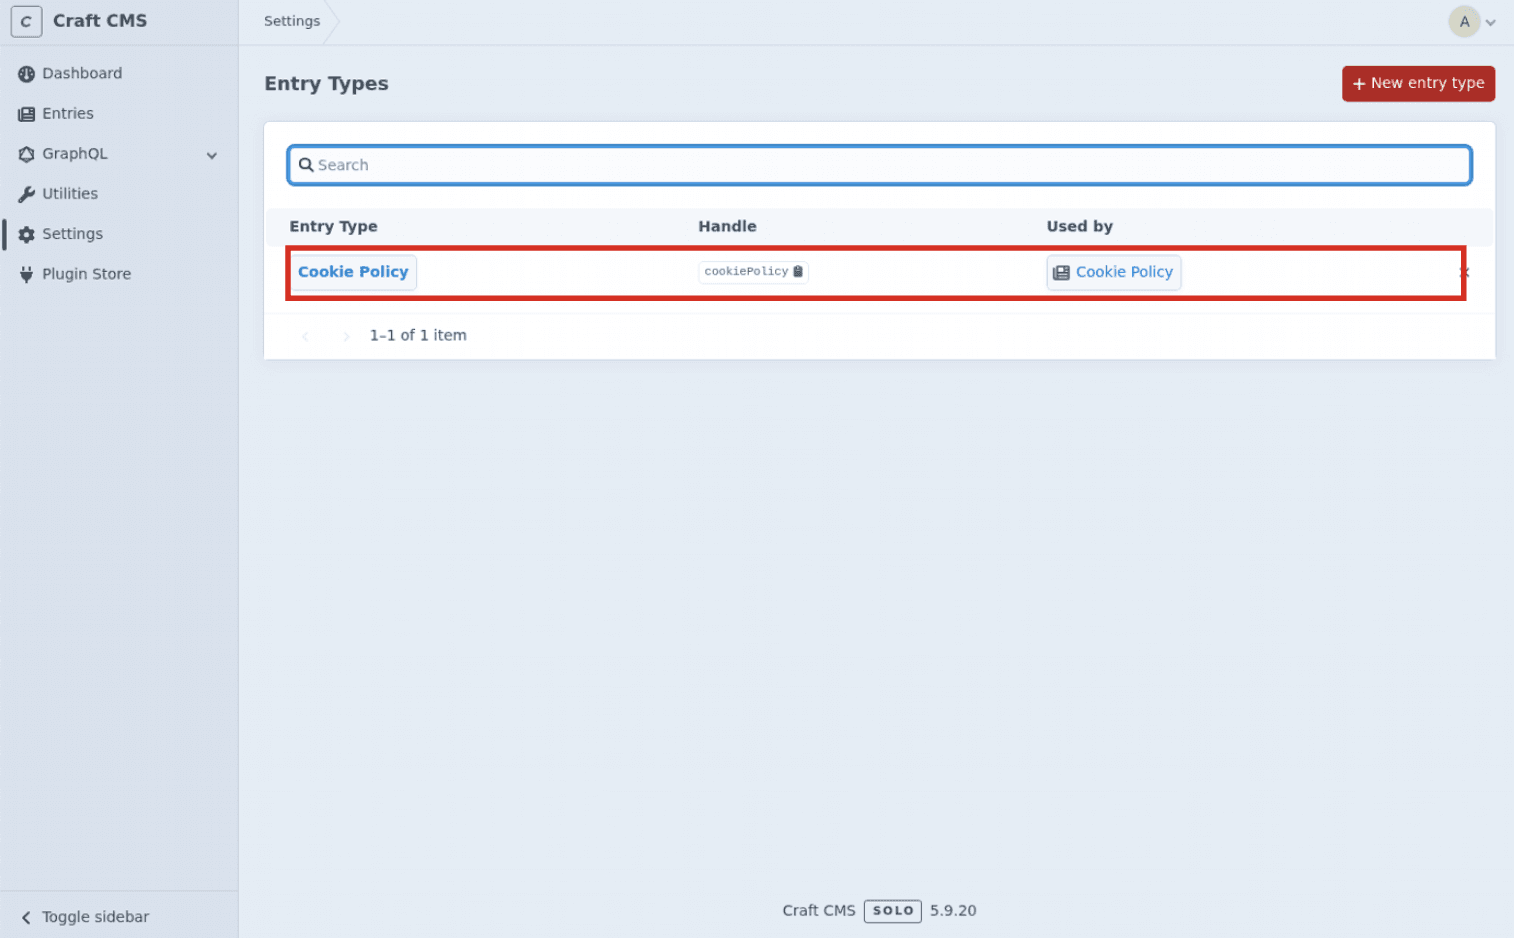
- In the Sections list, select Cookie Policy, then select its entry type.
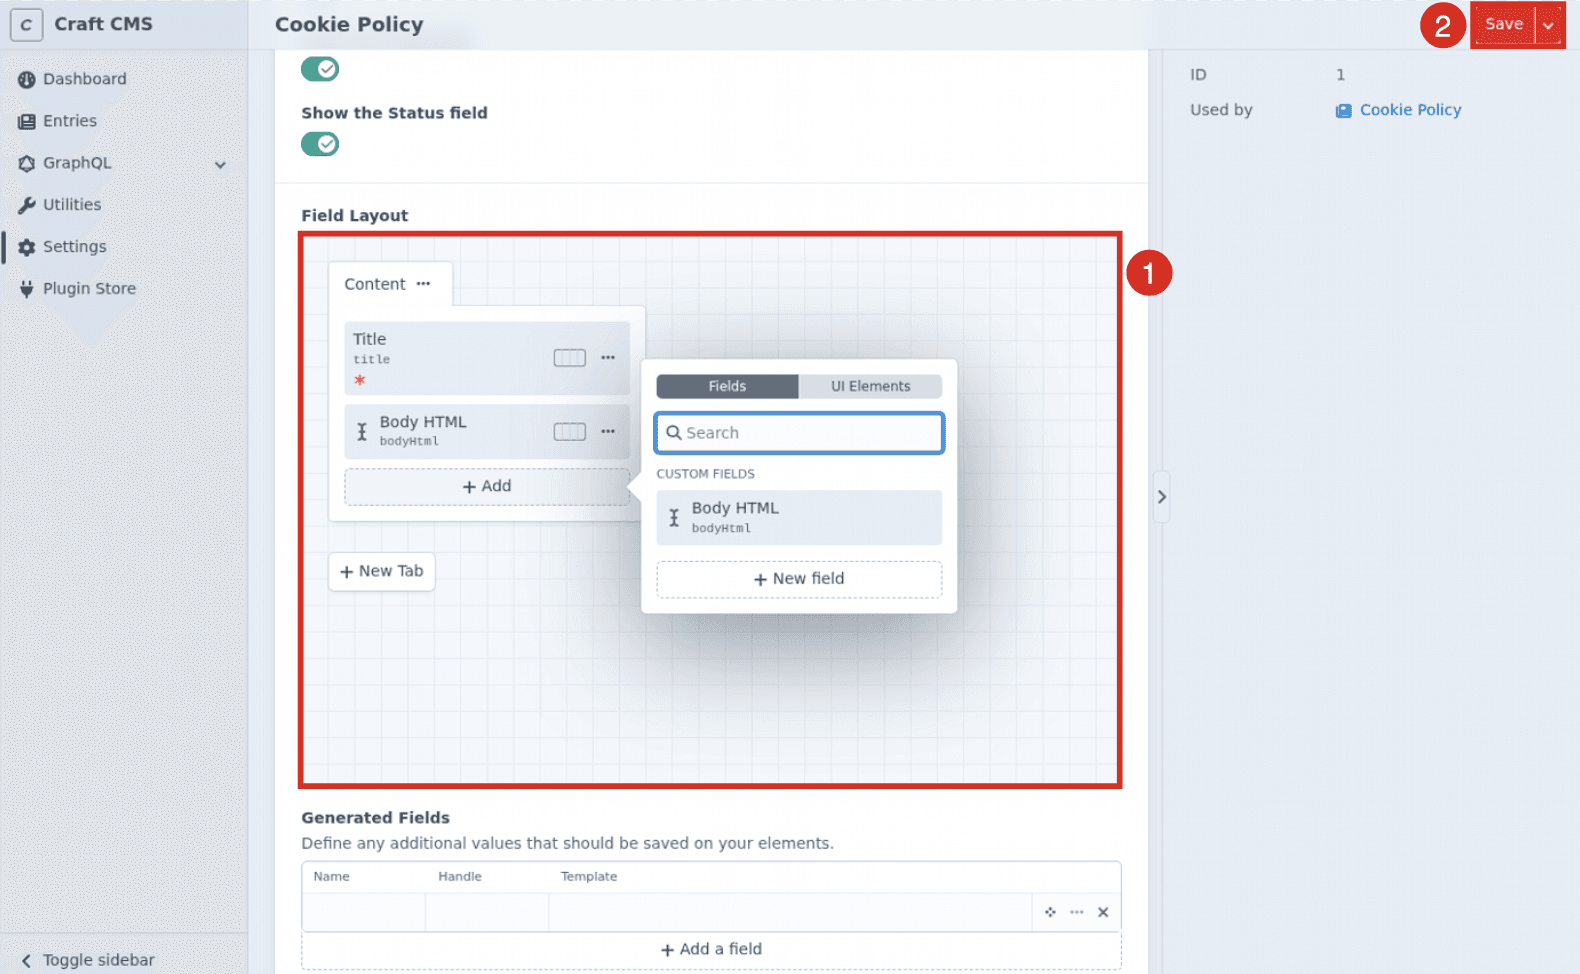
- In Field Layout, drag in the Body HTML field, then click Save.
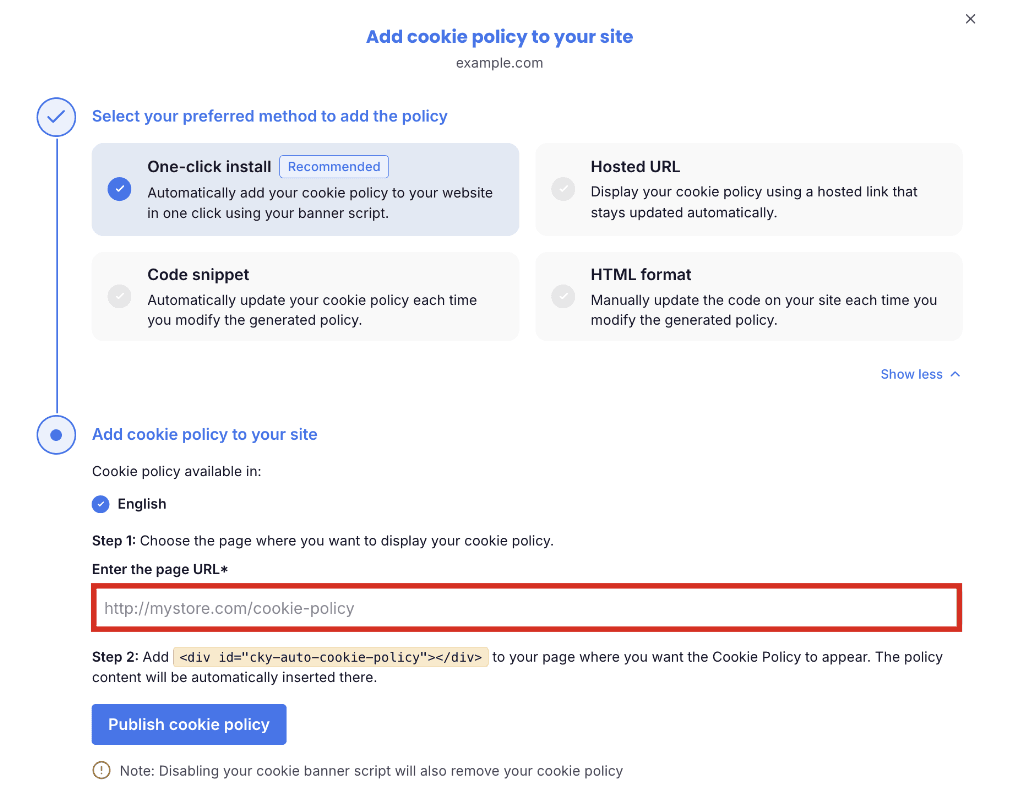
- Copy the URL of the cookie policy page and paste it into the CookieYes web app.
Step 3: Embed the policy code
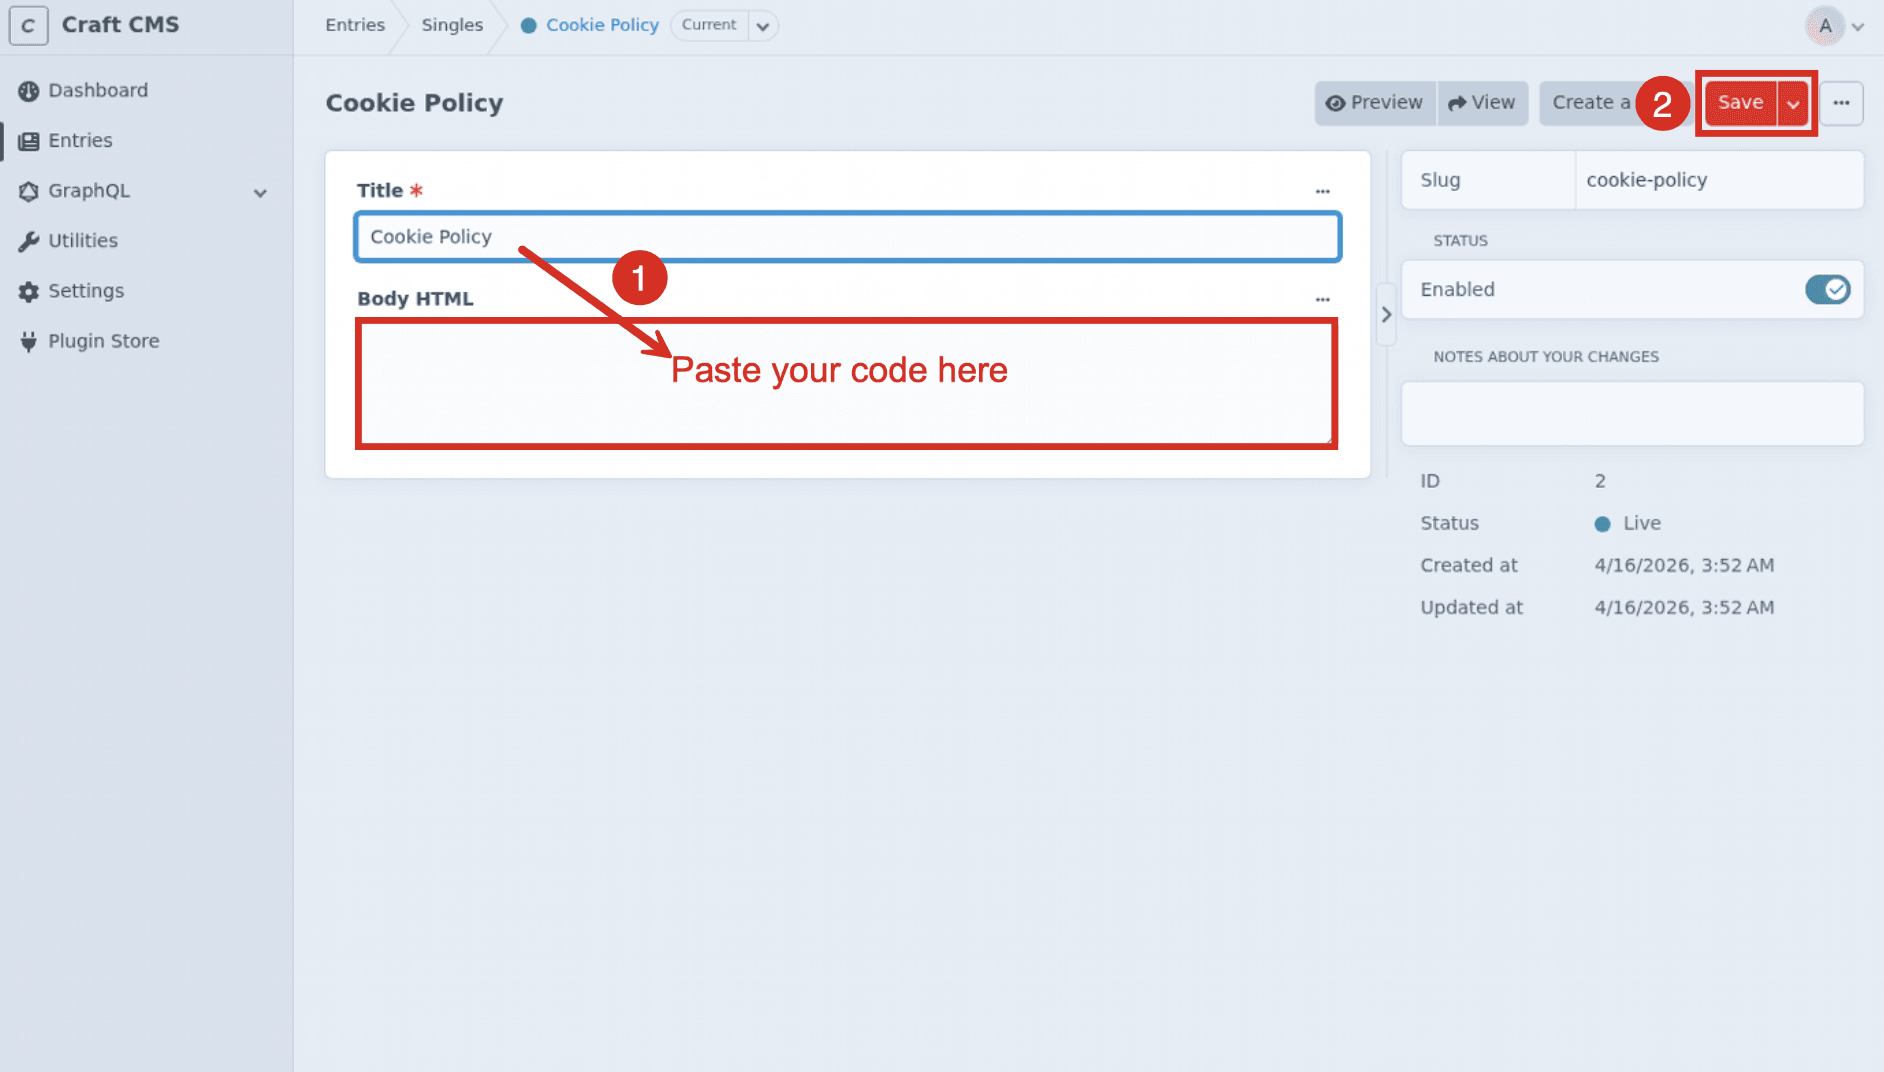
- In the left-hand menu, click Entries, then select the Cookie Policy entry.
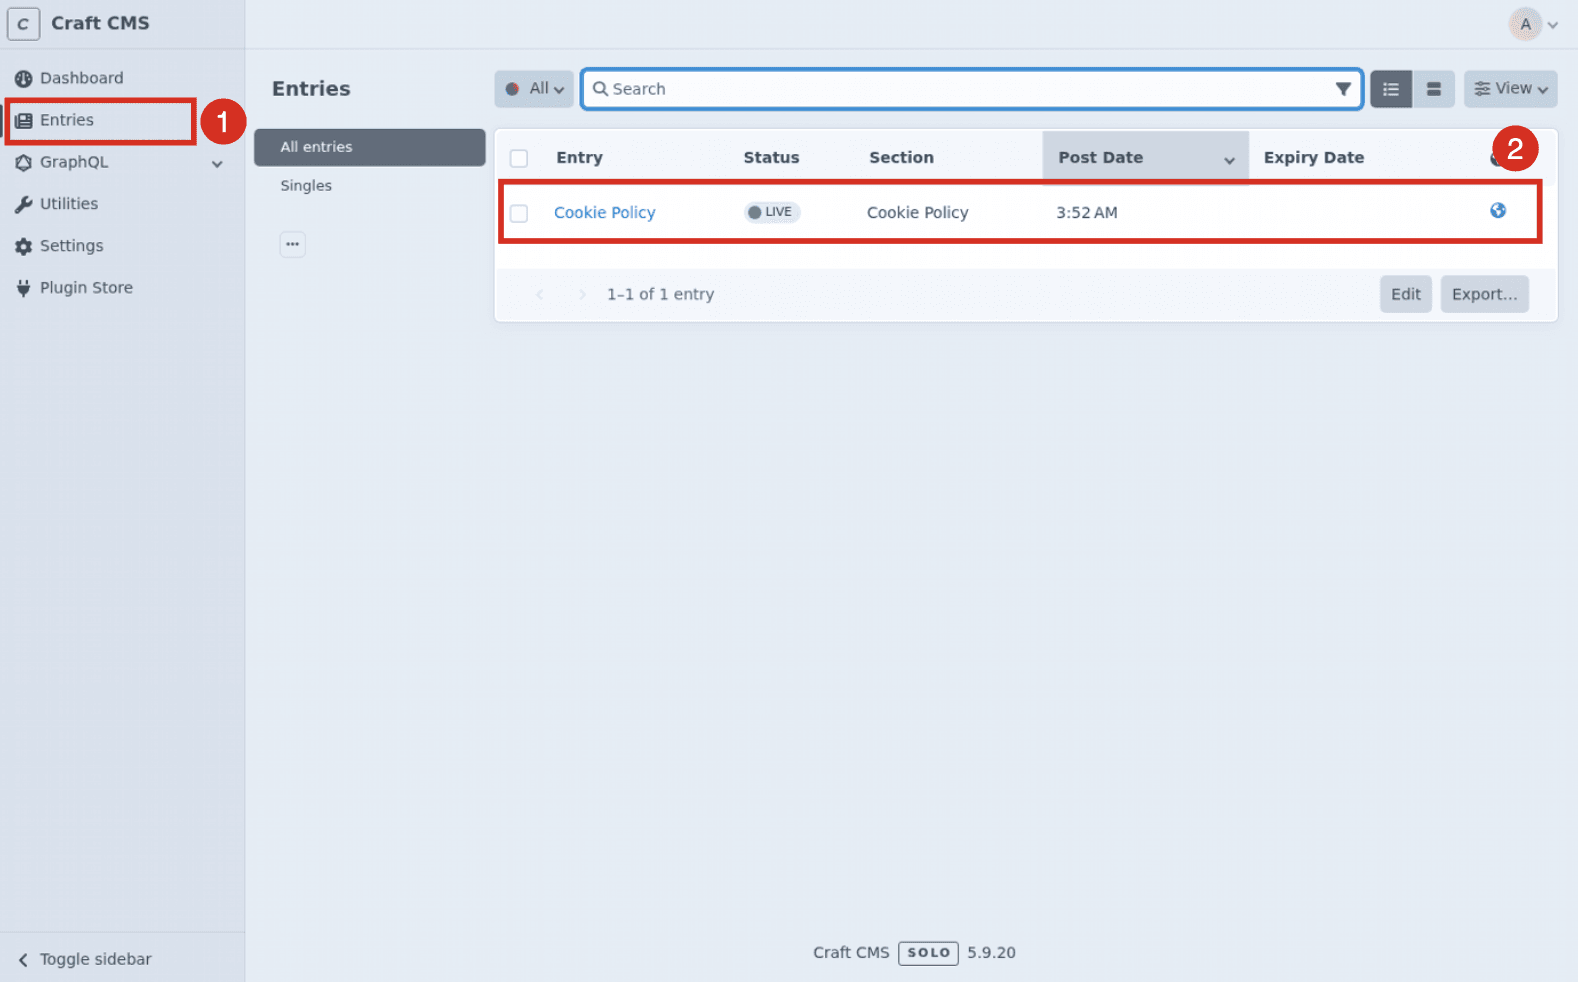
- Paste <div id="cky-auto-cookie-policy"></div> into Body HTML, then click Save.
Step 4: Publish and verify
1. Return to the CookieYes web app.
2. Click Publish cookie policy.
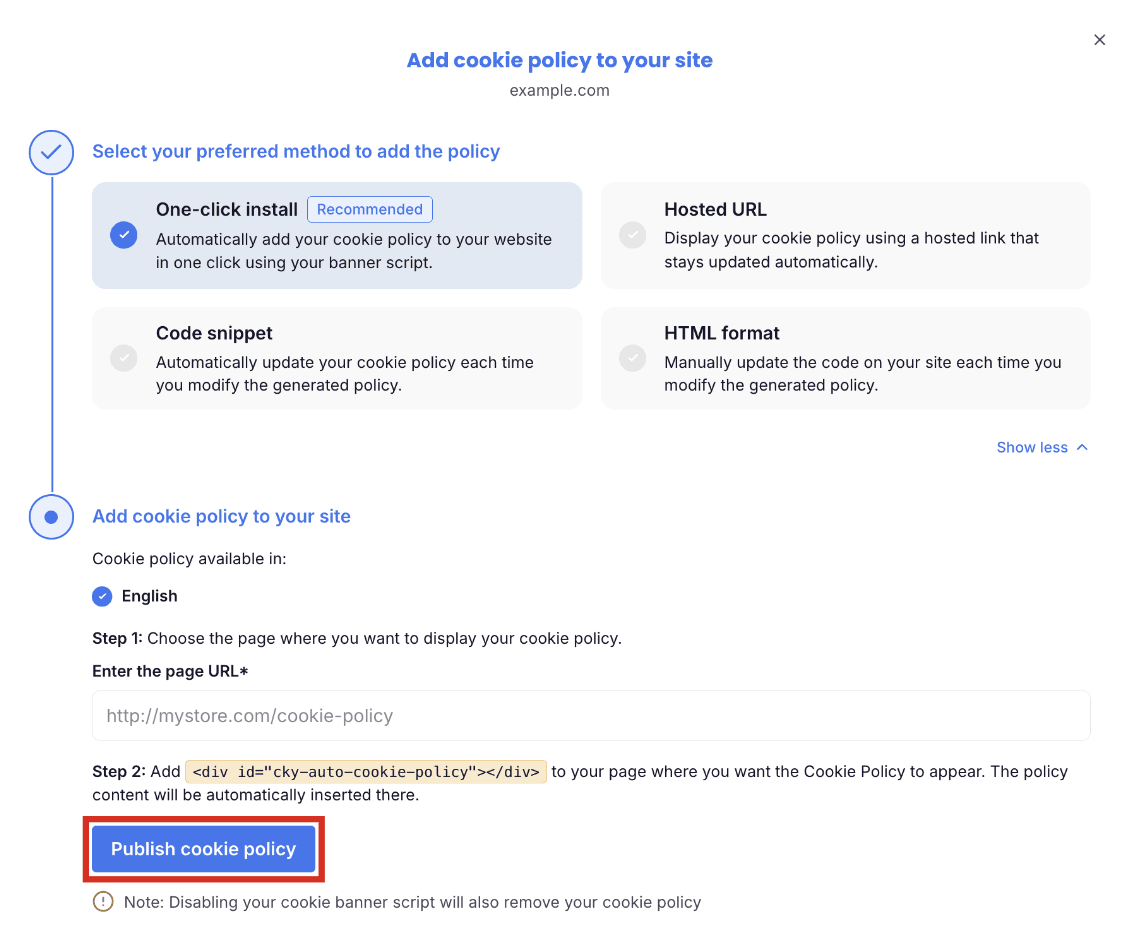
3. Open the live cookie policy page on your Craft CMS website.
Your cookie policy page is now live on your Craft CMS website. You can link the cookie policy in your website footer, and within your cookie banner so visitors can read it before they give consent.
Option 2: Hosted URL
Step 1: Copy the hosted URL
- In the modal, select Hosted URL.
- Click Copy URL.
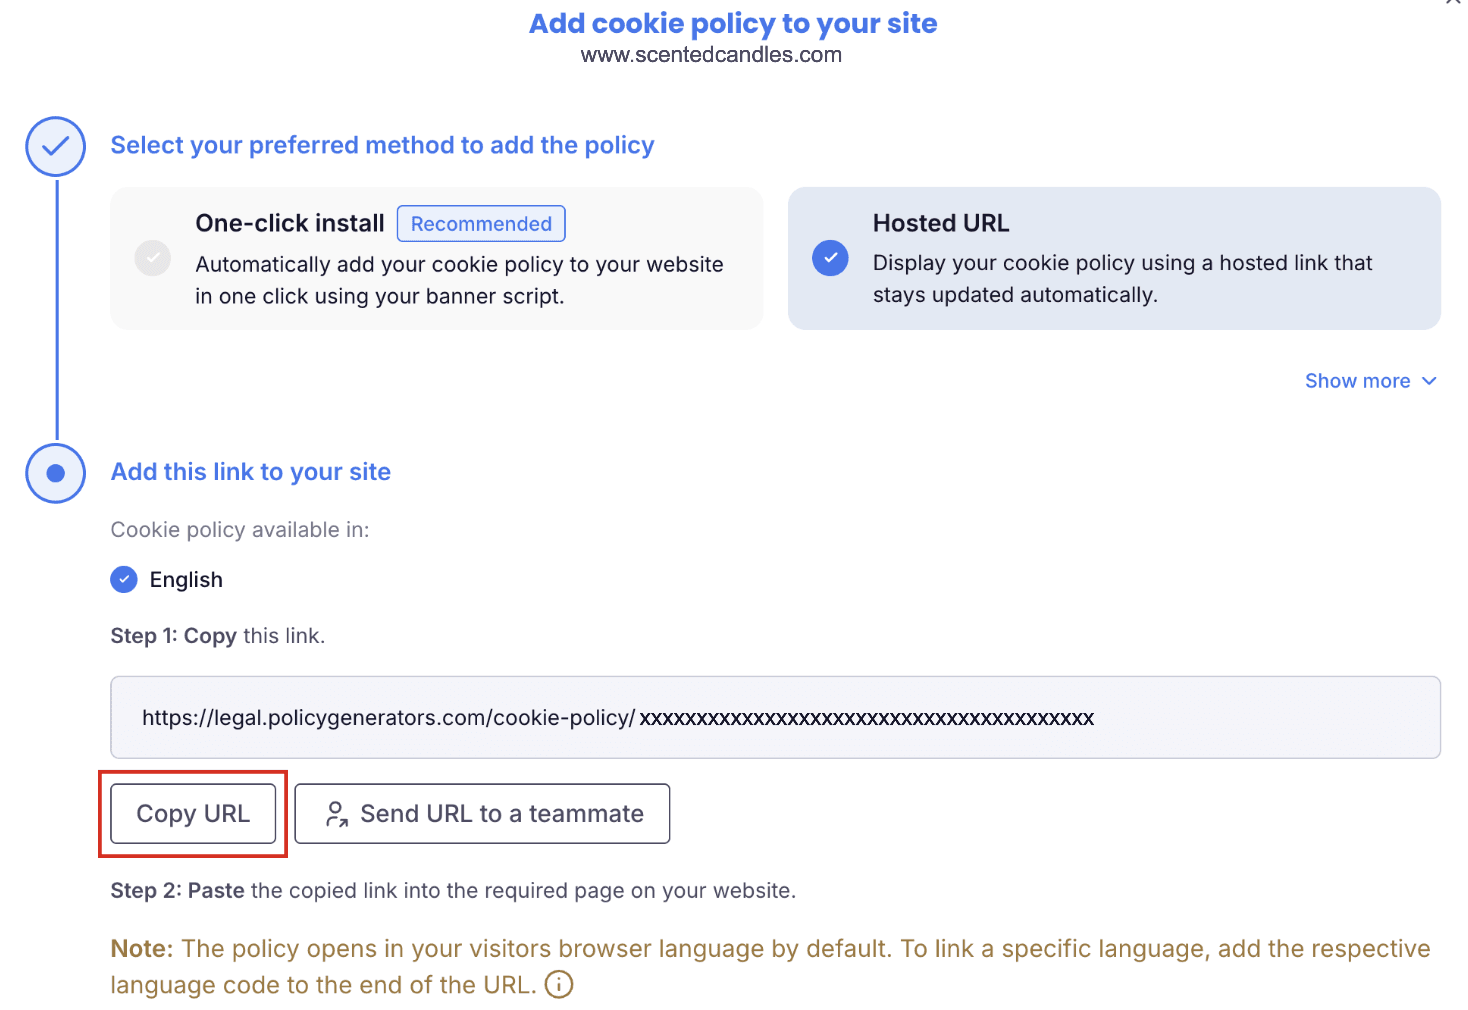
By default, the policy uses the visitor’s browser language. To set a specific language, add its code to the end of the URL. For example, /fr for French: https://legal.policygenerators.com/cookie-policy/xxxxxxxxxxxxxxxxx/fr
If someone else manages your website, click Send URL to a teammate to share the link with them.
Step 2: Add the link to Craft CMS
Option 3: Code snippet
Step 1: Copy the code snippet
- In the modal, select Code snippet.
- Click Copy code.
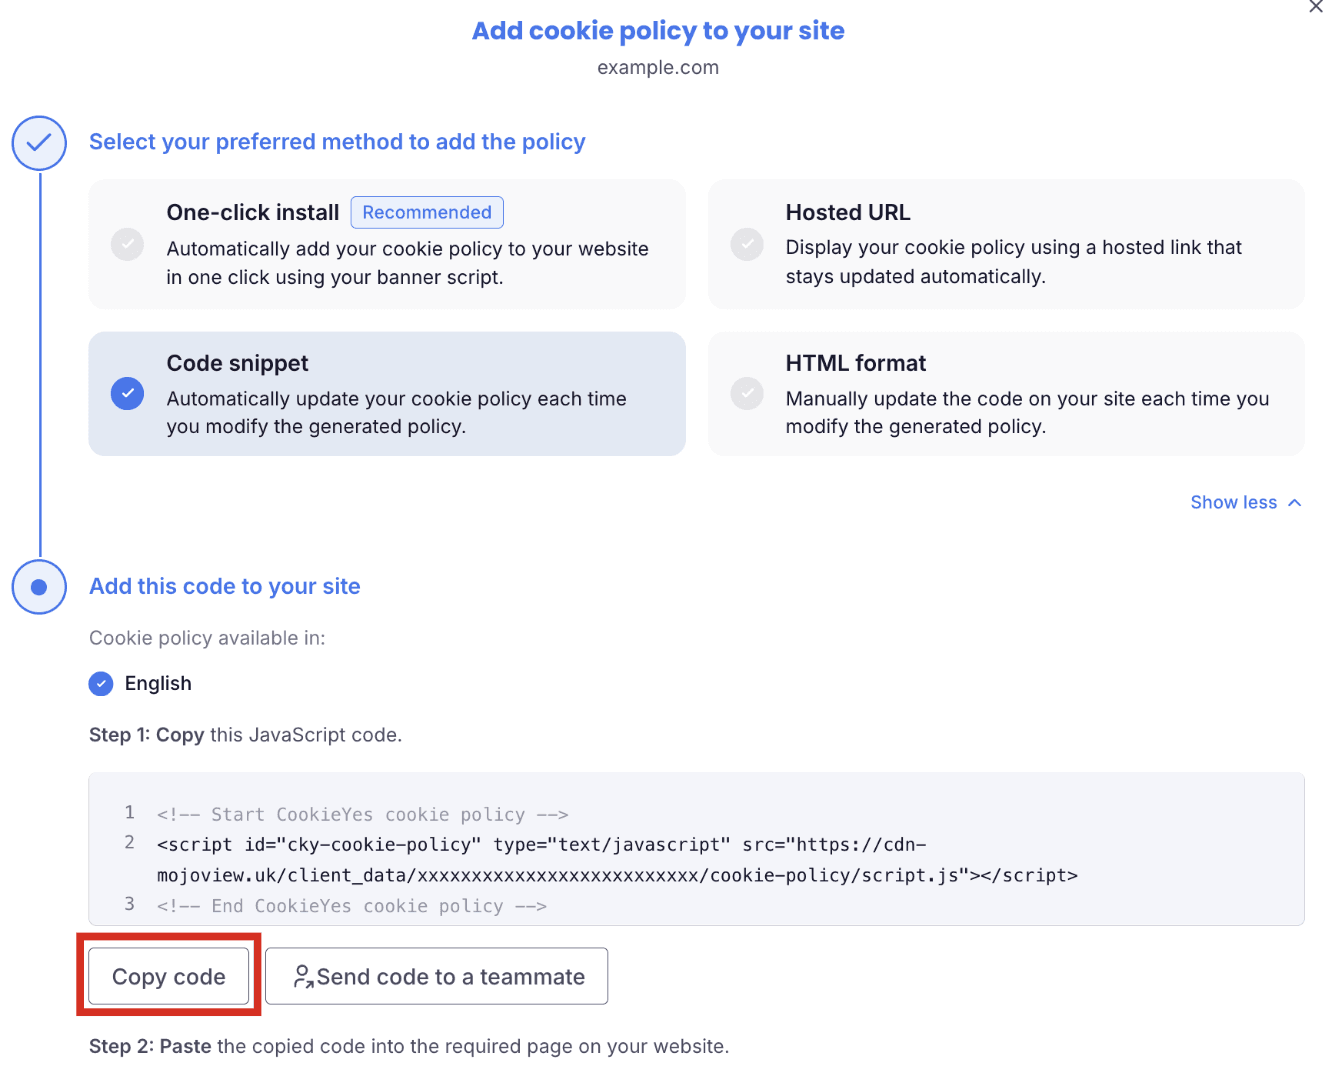
Tip: If someone else manages your website, click Send code to a teammate to share the code with them.
Step 2: Create a policy page in Craft CMS
- Log in to your Craft CMS website.
- Go to Settings > Fields, then click + New field.
- Enter Body HTML in Name and bodyHtml in Handle. In Field Type, select Plain Text, then click Save.
- Go to Settings > Sections, then click + New section.
- Enter Cookie Policy in Name and cookiePolicy in Handle. In Section Type, select Single.
- Click + Create and add an entry type named Cookie Policy, then click Save.
- In the Sections list, select Cookie Policy, then select its entry type.
- In Field Layout, drag in the Body HTML field, then click Save.
Step 3: Embed the policy code
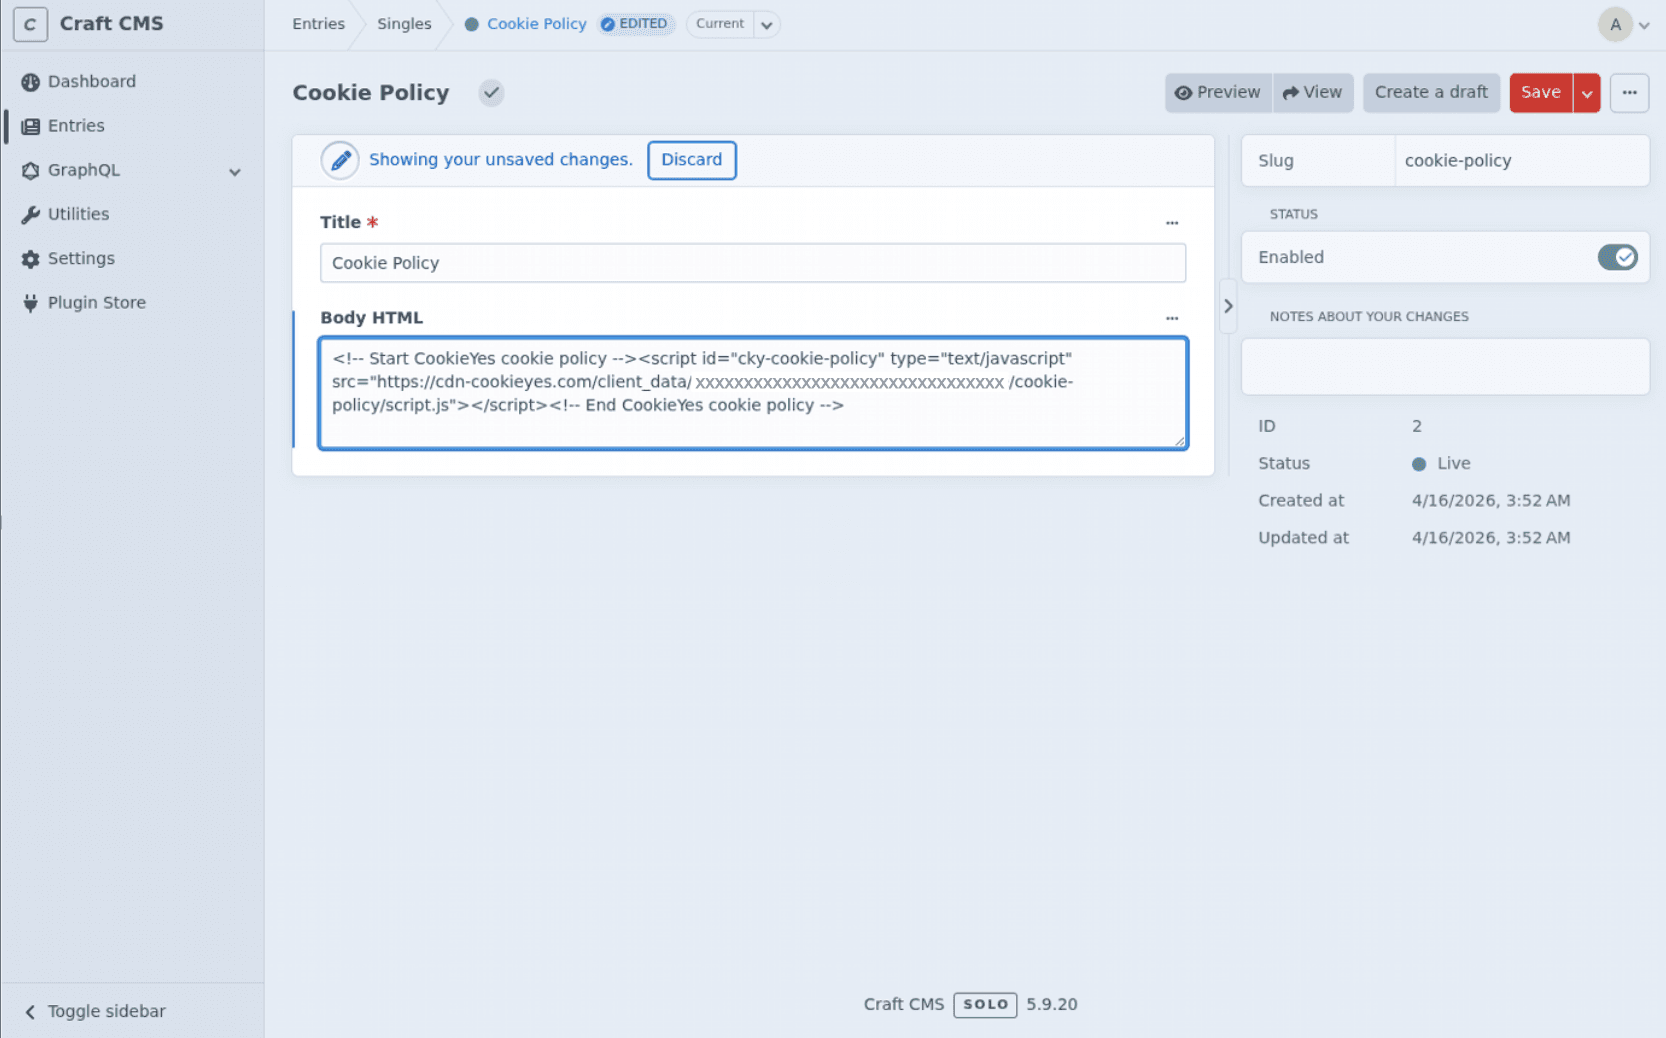
- In the left-hand menu, click Entries, then select the Cookie Policy entry.
- Paste the JavaScript snippet into Body HTML, then click Save.
Option 4: HTML format
Step 1: Copy the HTML
- In the modal, select HTML format.
- Select your preferred language.
- Click Copy code.
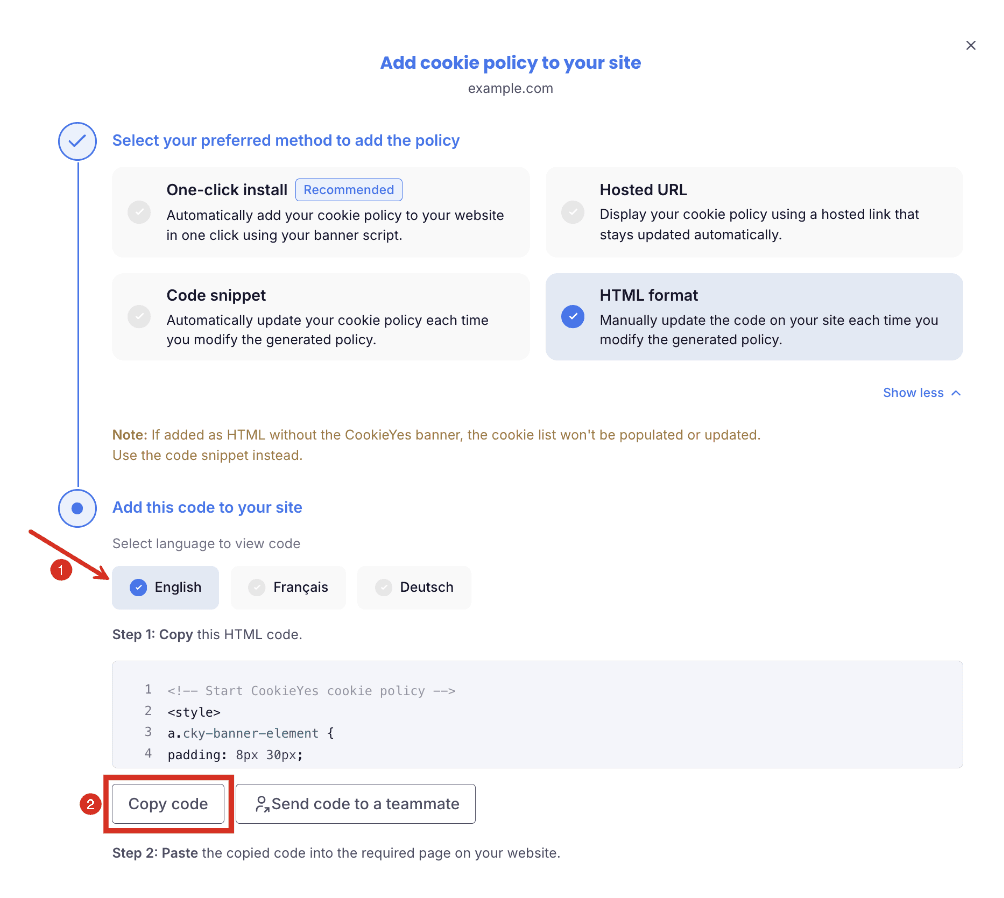
If someone else manages your website, click Send code to a teammate to share the code with them.
Step 2: Create a policy page in Craft CMS
- Log in to your Craft CMS website.
- Go to Settings > Fields, then click + New field.
- Enter Body HTML in Name and bodyHtml in Handle. In Field Type, select Plain Text, then click Save.
- Go to Settings > Sections, then click + New section.
- Enter Cookie Policy in Name and cookiePolicy in Handle. In Section Type, select Single.
- Click + Create and add an entry type named Cookie Policy, then click Save.
- In the Sections list, select Cookie Policy, then select its entry type.
- In Field Layout, drag in the Body HTML field, then click Save.
Step 3: Add the HTML
- In the left-hand menu, click Entries, then select the Cookie Policy entry.
- Paste the HTML into Body HTML, then click Save.
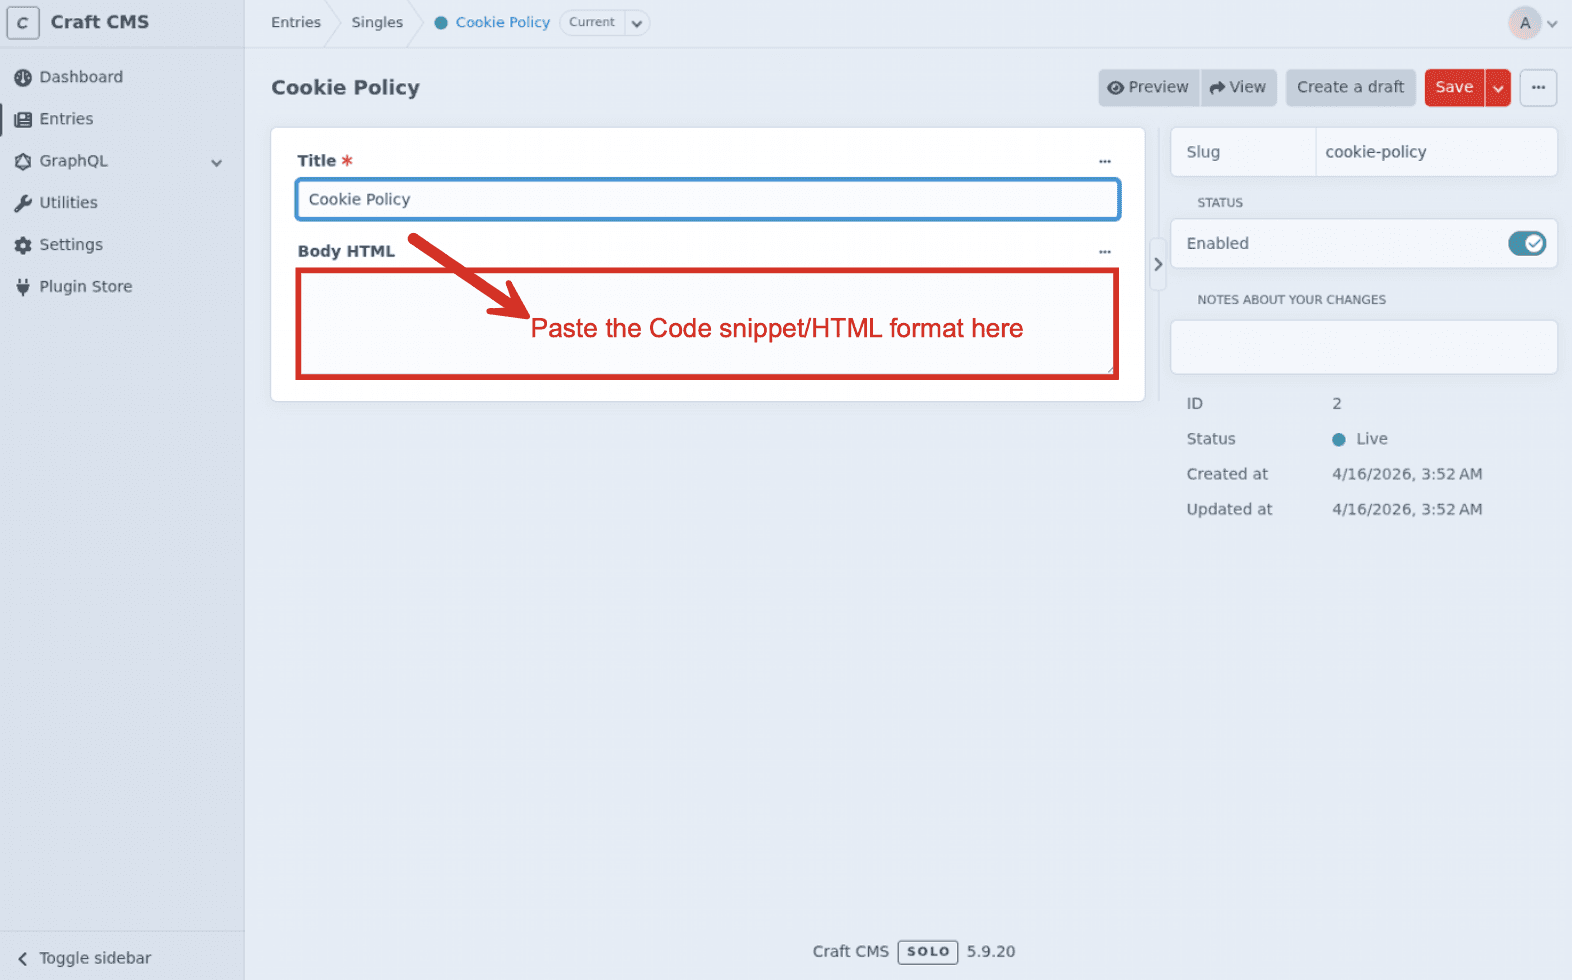
To remove the Cookie Policy heading at the top of the page, delete the following line from the HTML code: <h1 class="cookie-policy-h1">Cookie Policy</h1>