Installation Guide: AccessiYes Accessibility Widget
Last updated on May 11, 2026
Overview
The AccessiYes Accessibility Widget is a lightweight, easy-to-install tool that helps make your website more accessible and legally compliant with major accessibility standards, including WCAG 2.1, ADA and EAA. This guide provides clear, step-by-step instructions to help you integrate AccessiYes on your website.
You can install AccessiYes using one of two methods:
- WordPress Plugin Installation (recommended for WordPress users)
- JavaScript Embed Installation (for all other websites)
Method 1: Install via WordPress Plugin
Step 1: Install the Plugin
Option A: From WordPress Admin
- Log in to your WordPress admin dashboard.
- Go to Plugins > Add New.
- Search for “AccessiYes Accessibility Widget“.
- Click Install Now.
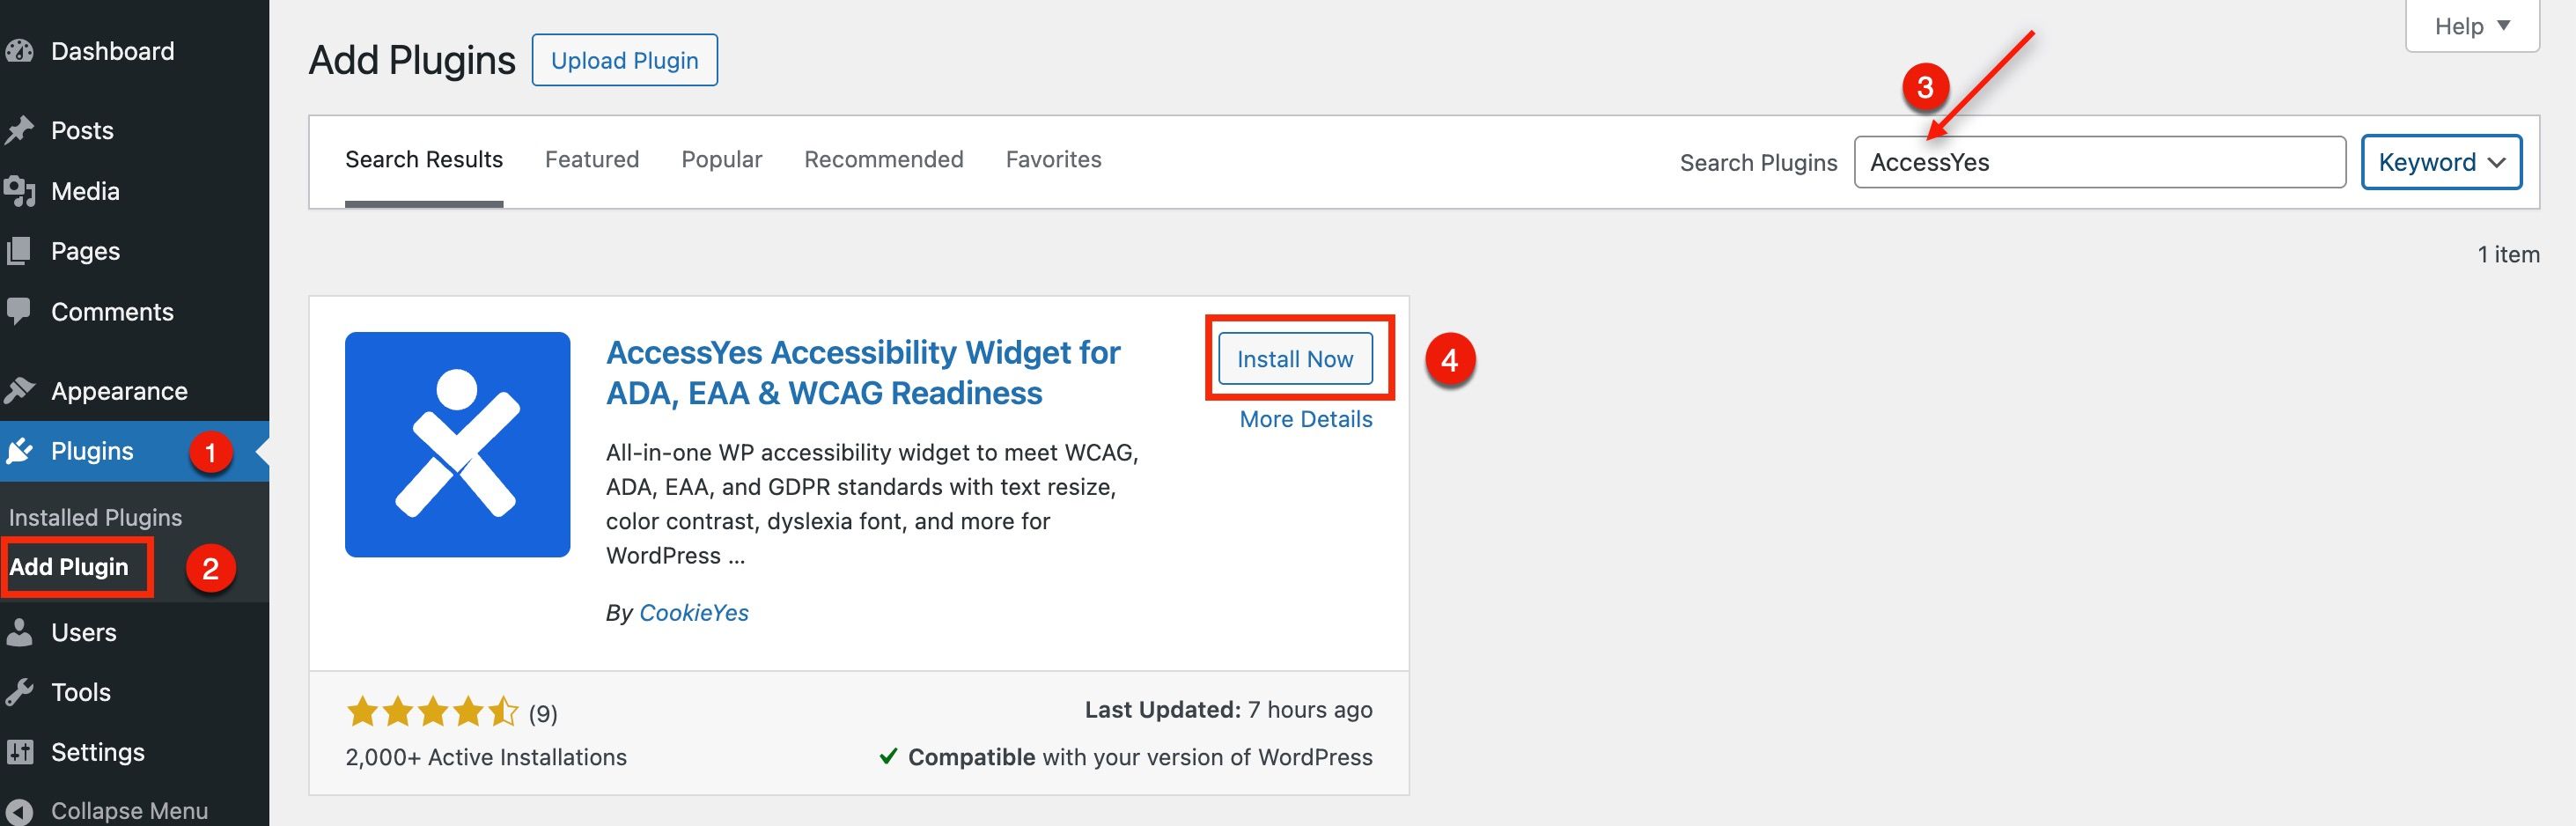
- After installation, click Activate.
Option B: Upload a ZIP File
- Download the plugin ZIP from the AccessiYes plugin page.
- Go to Plugins > Add New > Upload Plugin.
- Select the downloaded .zip file and click Install Now.
- Click Activate.
Method 2: Install via JavaScript Snippet
This method is suitable for non-WordPress websites, including those built with HTML, React, Wix, Webflow, or custom frameworks.
Step 1: Get Your Widget Code
- Go to the AccessiYes widget landing page.
- Click the Get installation code button.
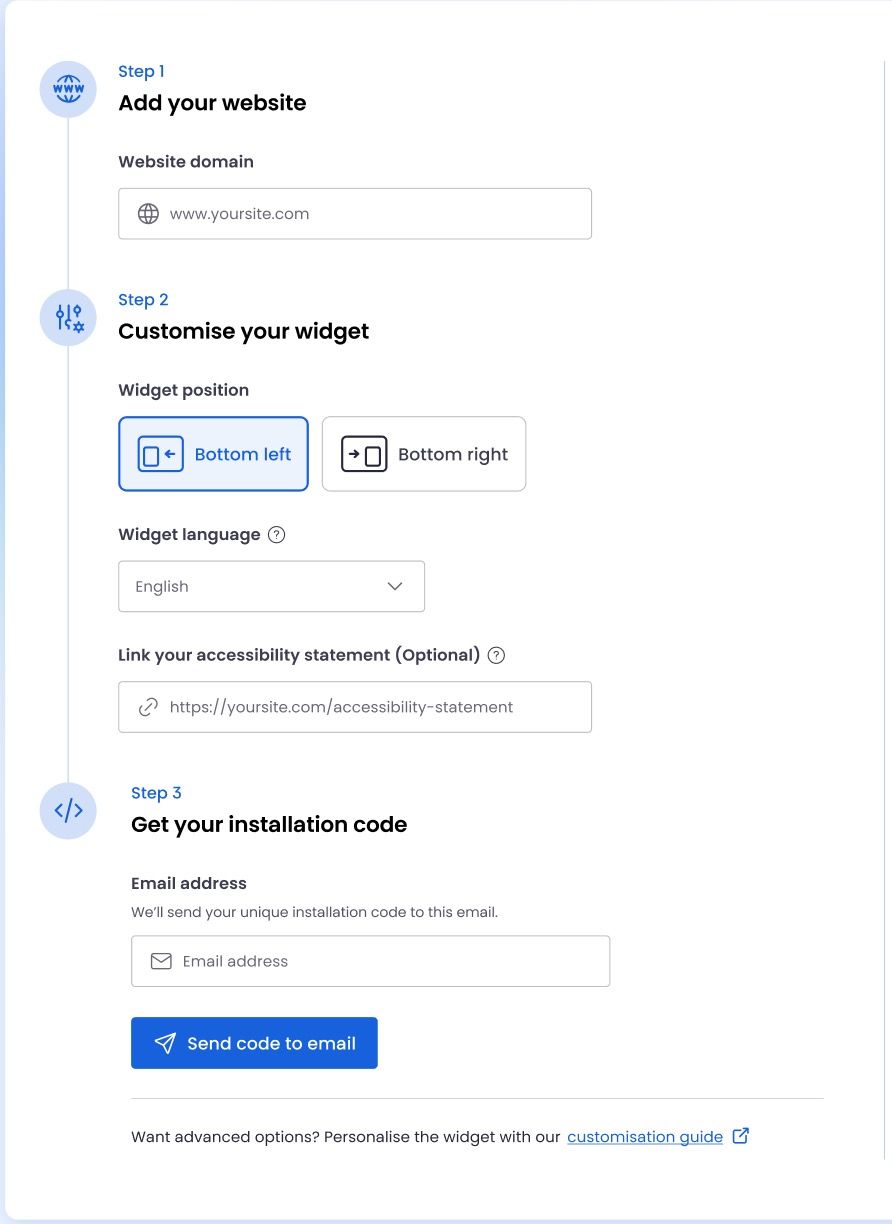
- Enter your website domain.
- Customise your widget settings:
- Choose the widget position(bottom left or bottom right).
- Choose the widget language.
- Add a link to your website’s accessibility statement. (Optional)
- Enter your email address and click Send code to email.
You’ll receive your unique installation script in your inbox.
Step 2: Add Script to Your Site
Copy the installation script from your email and paste it immediately after the opening of the <body> tag in your website’s HTML.
- For custom HTML websites, insert it manually in your HTML template.
- For platforms like Webflow, Wix, or Squarespace, use the custom code injection or site-wide code embed settings provided in your CMS.
Verify Installation
After completing the installation, open your website in a browser to verify that the AccessiYes accessibility widget appears. If the widget does not display, double-check that your widget key is entered correctly and that JavaScript is not blocked by your browser, ad blockers, or your site’s theme settings.
Conclusion
By following this guide, you’ve taken the essential first step toward making your website more accessible, inclusive, and compliant with global accessibility standards, including WCAG 2.1, ADA, and EAA. Whether you’ve installed the AccessiYes Accessibility Widget through the WordPress plugin or embedded the JavaScript snippet on a custom site, the widget is now ready to assist your visitors with a more user-friendly and adaptable browsing experience.
For the best results, we recommend exploring the widget’s configuration options to align it with your brand and your users’ needs.
If you encounter any issues or have questions, please visit the AccessiYes support resources or contact our support team for assistance.