Set Up and Manage Your CookieYes Agency Sites
Last updated on August 13, 2026
On this page
Prerequisites
Add sites to an organisation
- Log in to your CookieYes account.
- Click + New site.
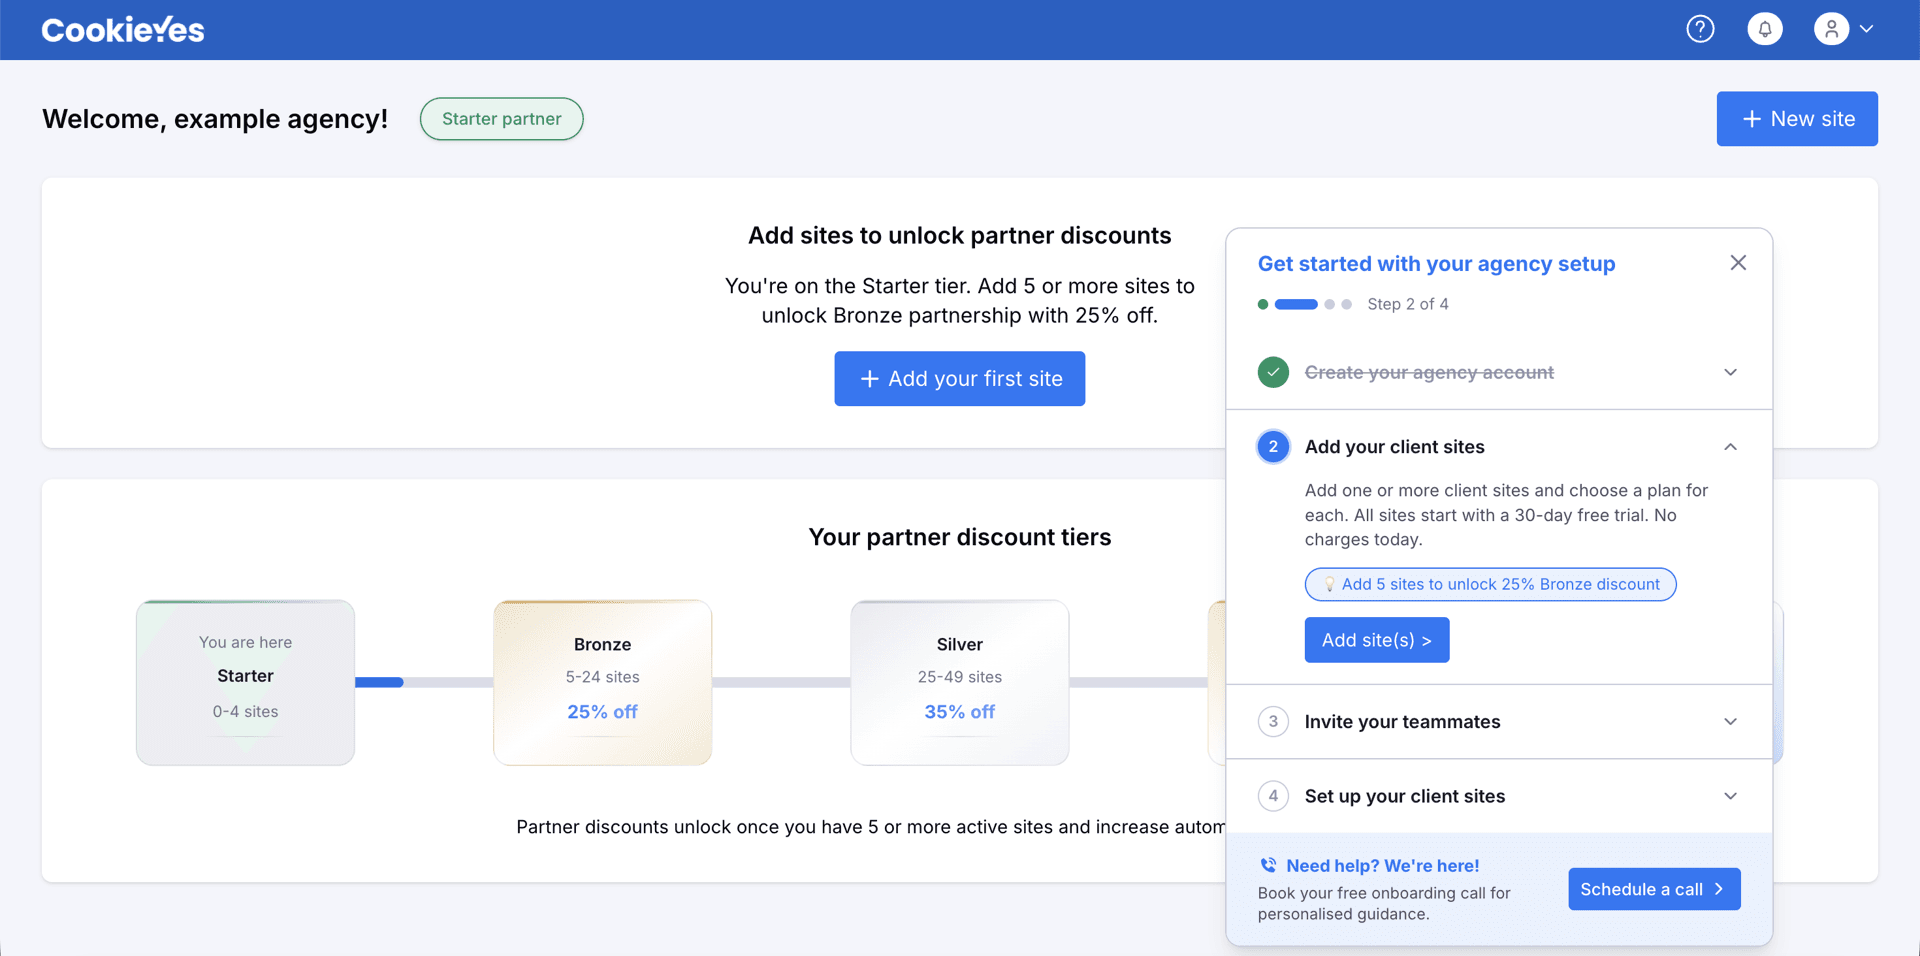
Note: You can also click + Add your first site or Add site(s) > to start the same flow.
- In the window that opens, provide the following:
- Organisation: Select your organisation from the dropdown.
- Site URL: Enter the site URL.
- Plan: Select a plan.
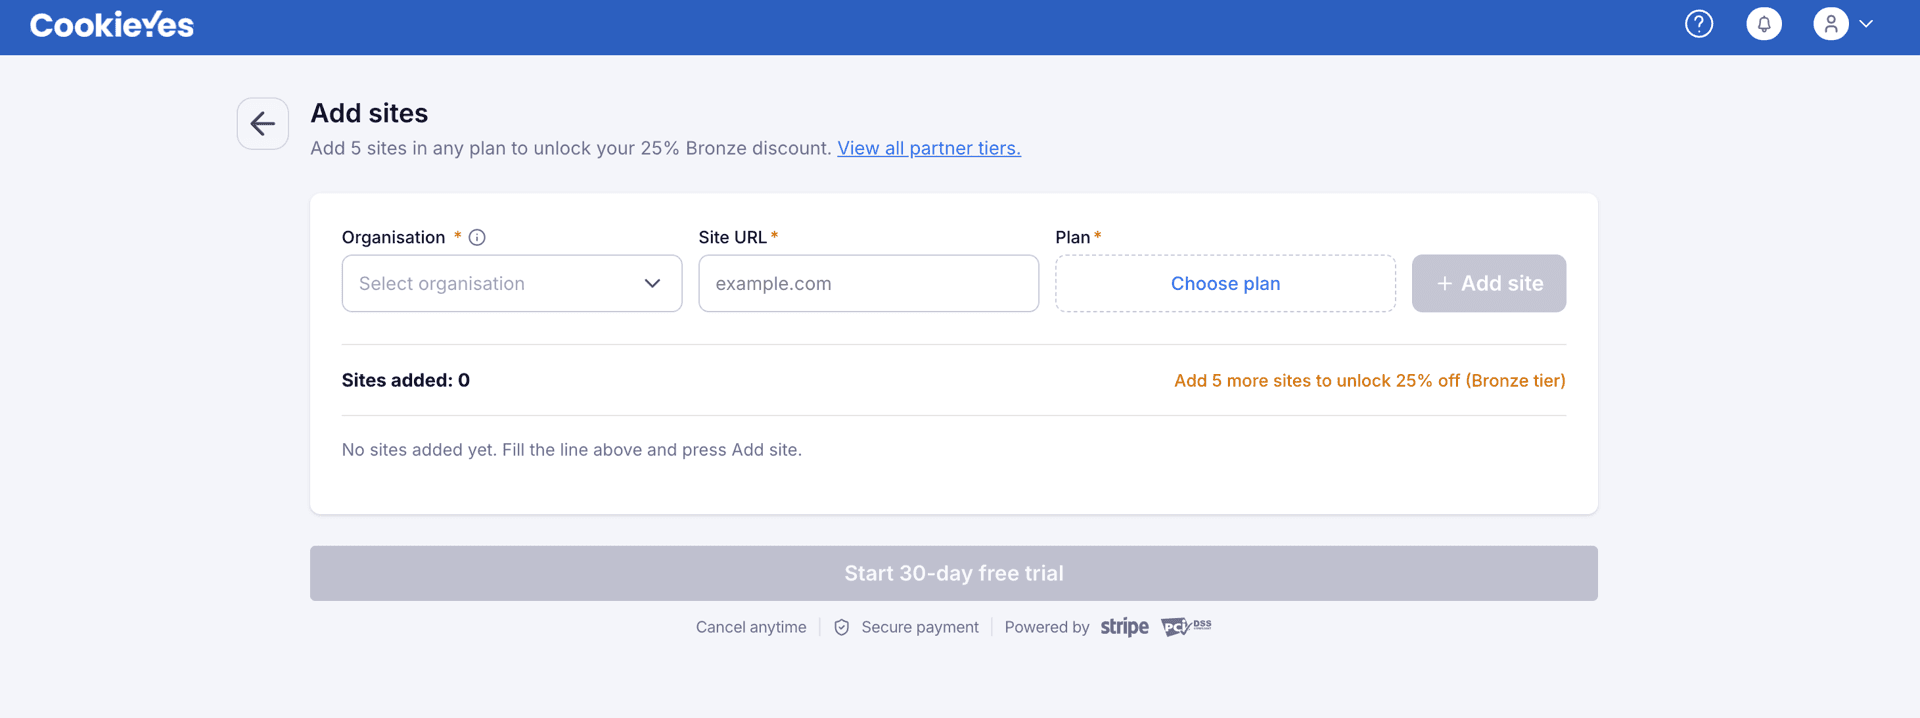
- Click + Add site to confirm the site.
- Click Start 30-day free trial to begin the trial and add your payment details.
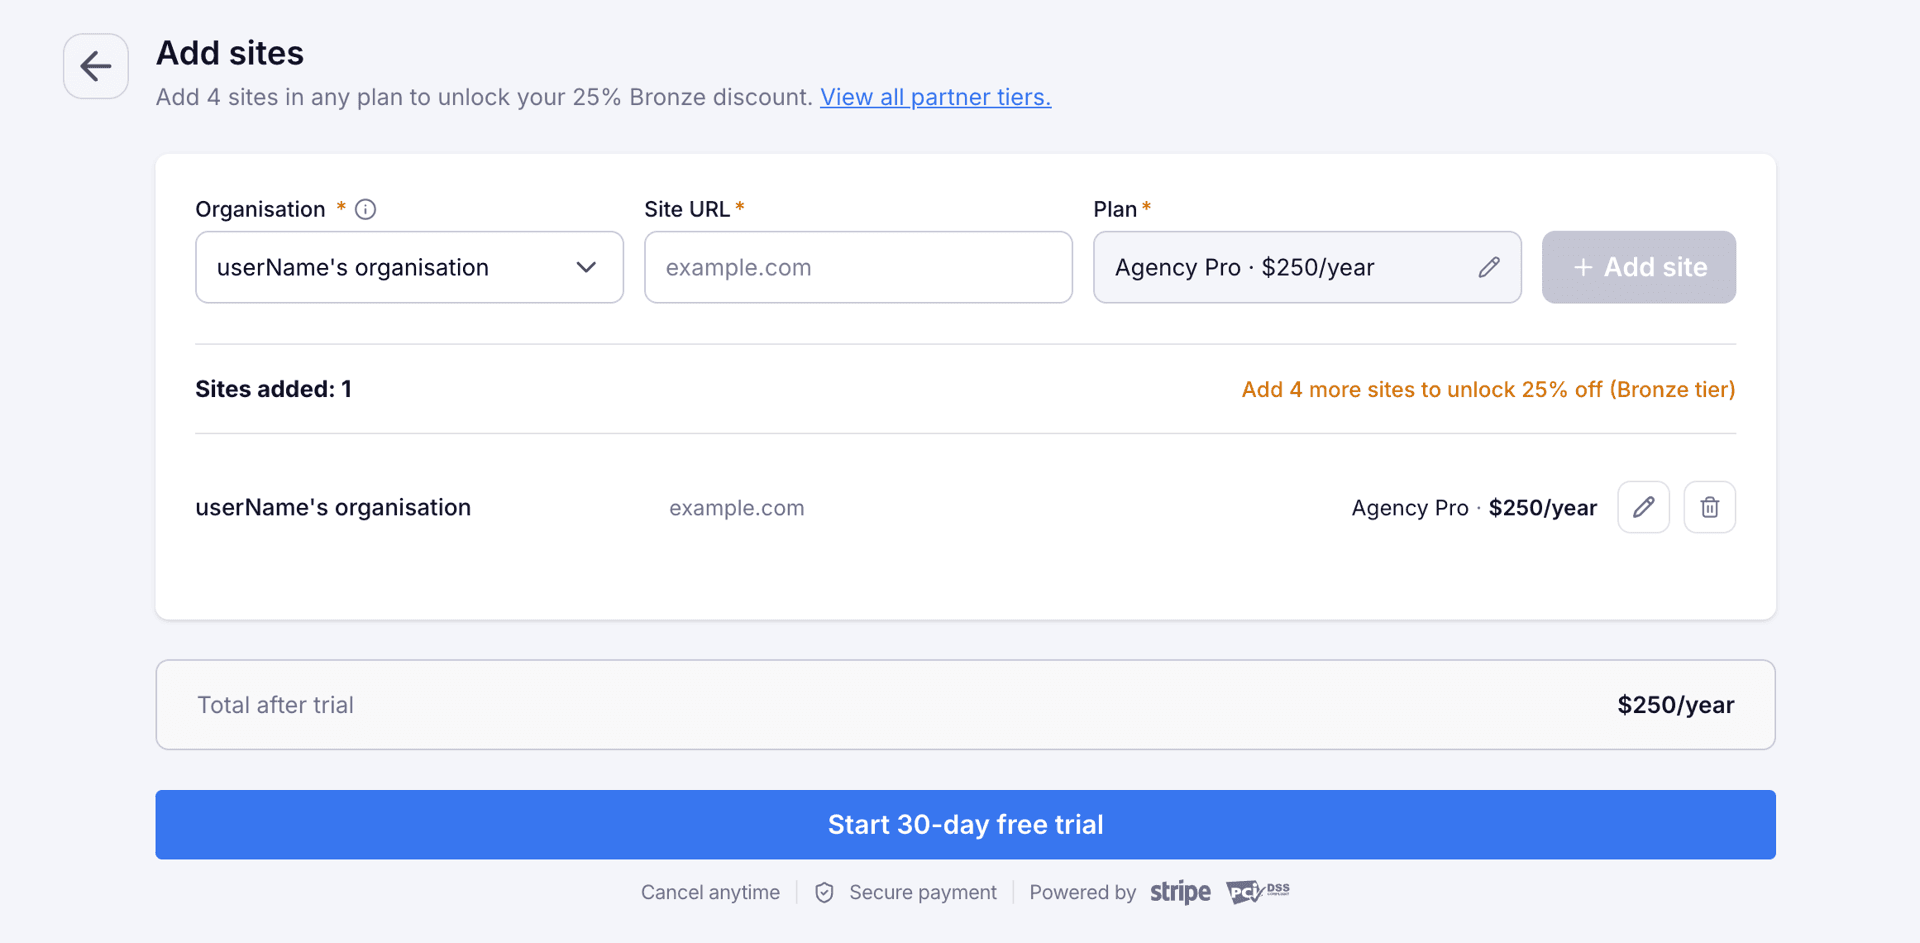
Repeat steps 3 and 4 to add further sites before starting the trial. Any number of sites, across any combination of plans, can be added in a single transaction. For how site count affects pricing, see How billing and discounts work for agency accounts.
View your sites
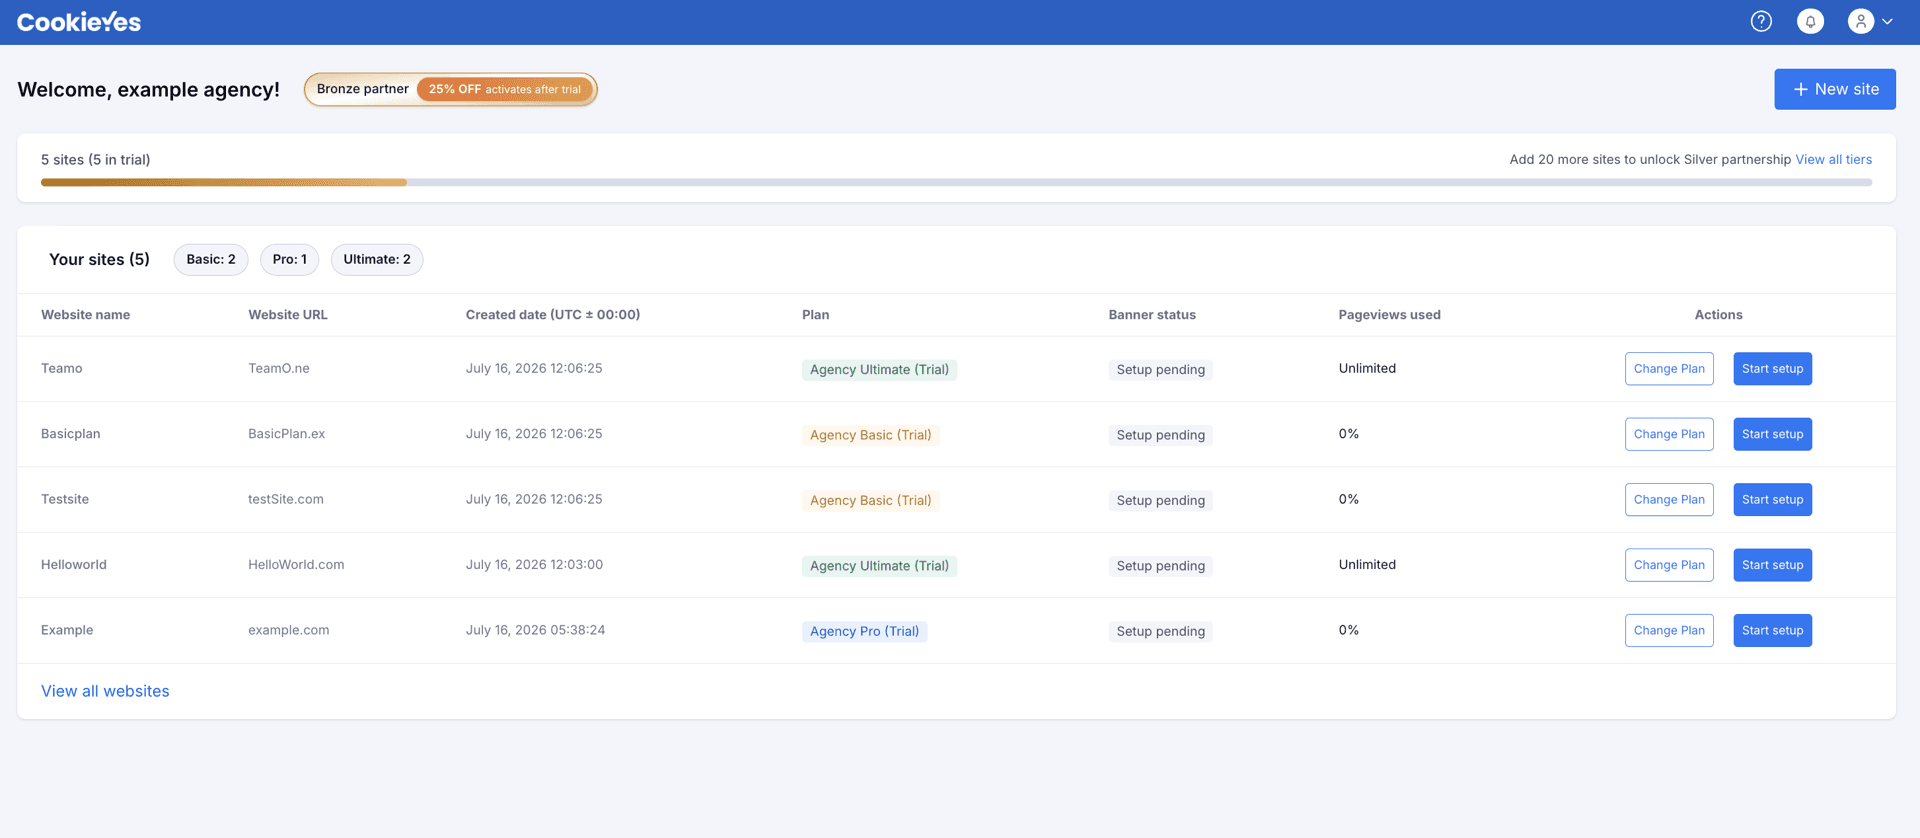
Click View all websites from the dashboard to open the list of sites across all your organisations. Each site can be managed from this list.
Set up a site
- On the View all websites screen, locate the site and click Start setup against it.
Note: Start setup is also available on the dashboard, against each site.
- Follow the setup screens to deploy the cookie banner on the client's website.
Note: See the setup guide for full instructions on deploying the banner.
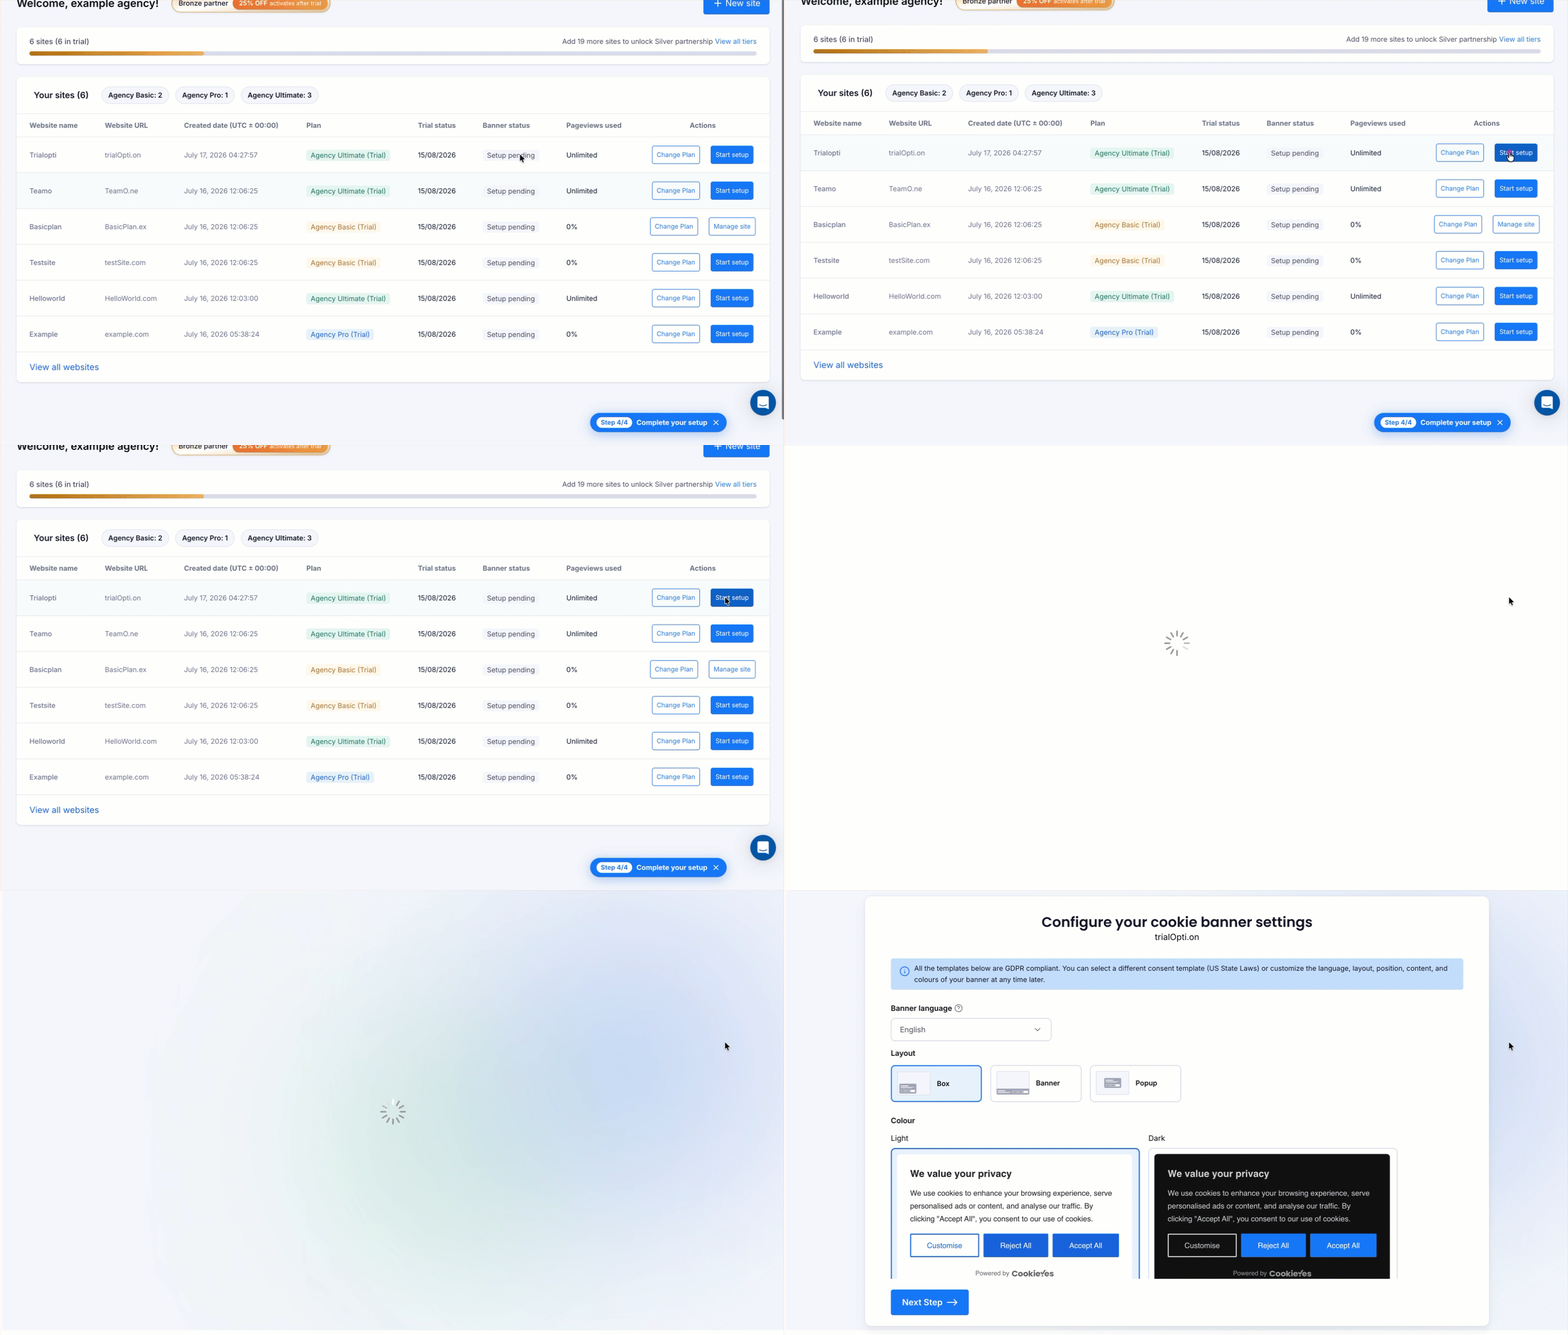
After you start setup, the Start setup button becomes Manage site.
Change a site's plan
- On the View all websites screen, locate the site and click Change plan against it.
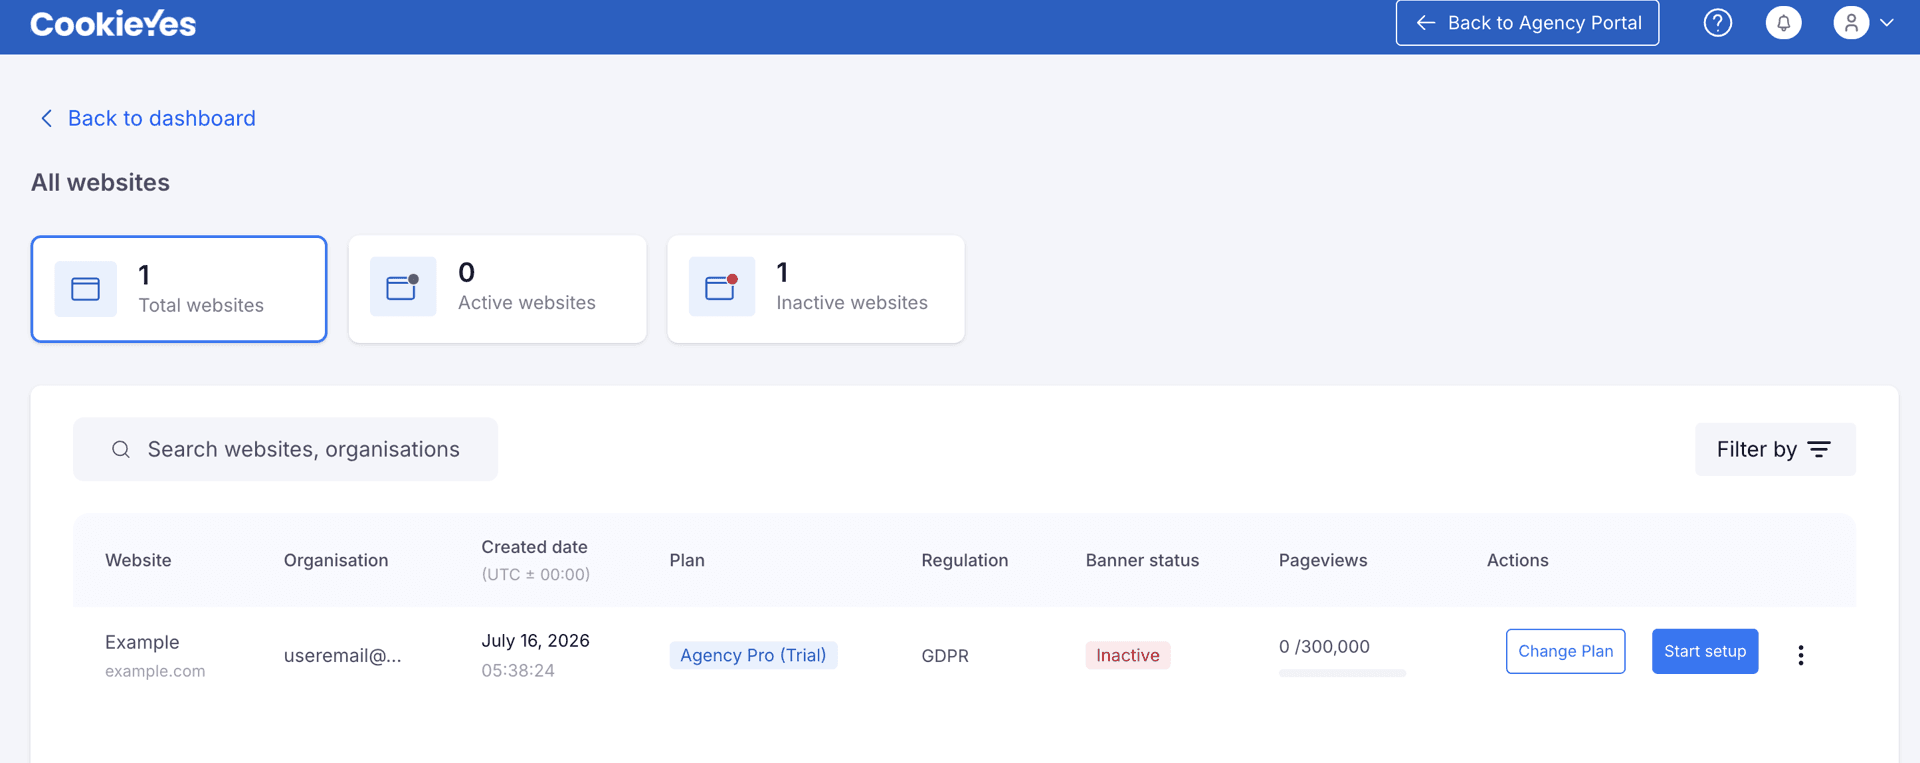
Note: Change plan is also available on the dashboard, against each site.
- Select the new plan and confirm.
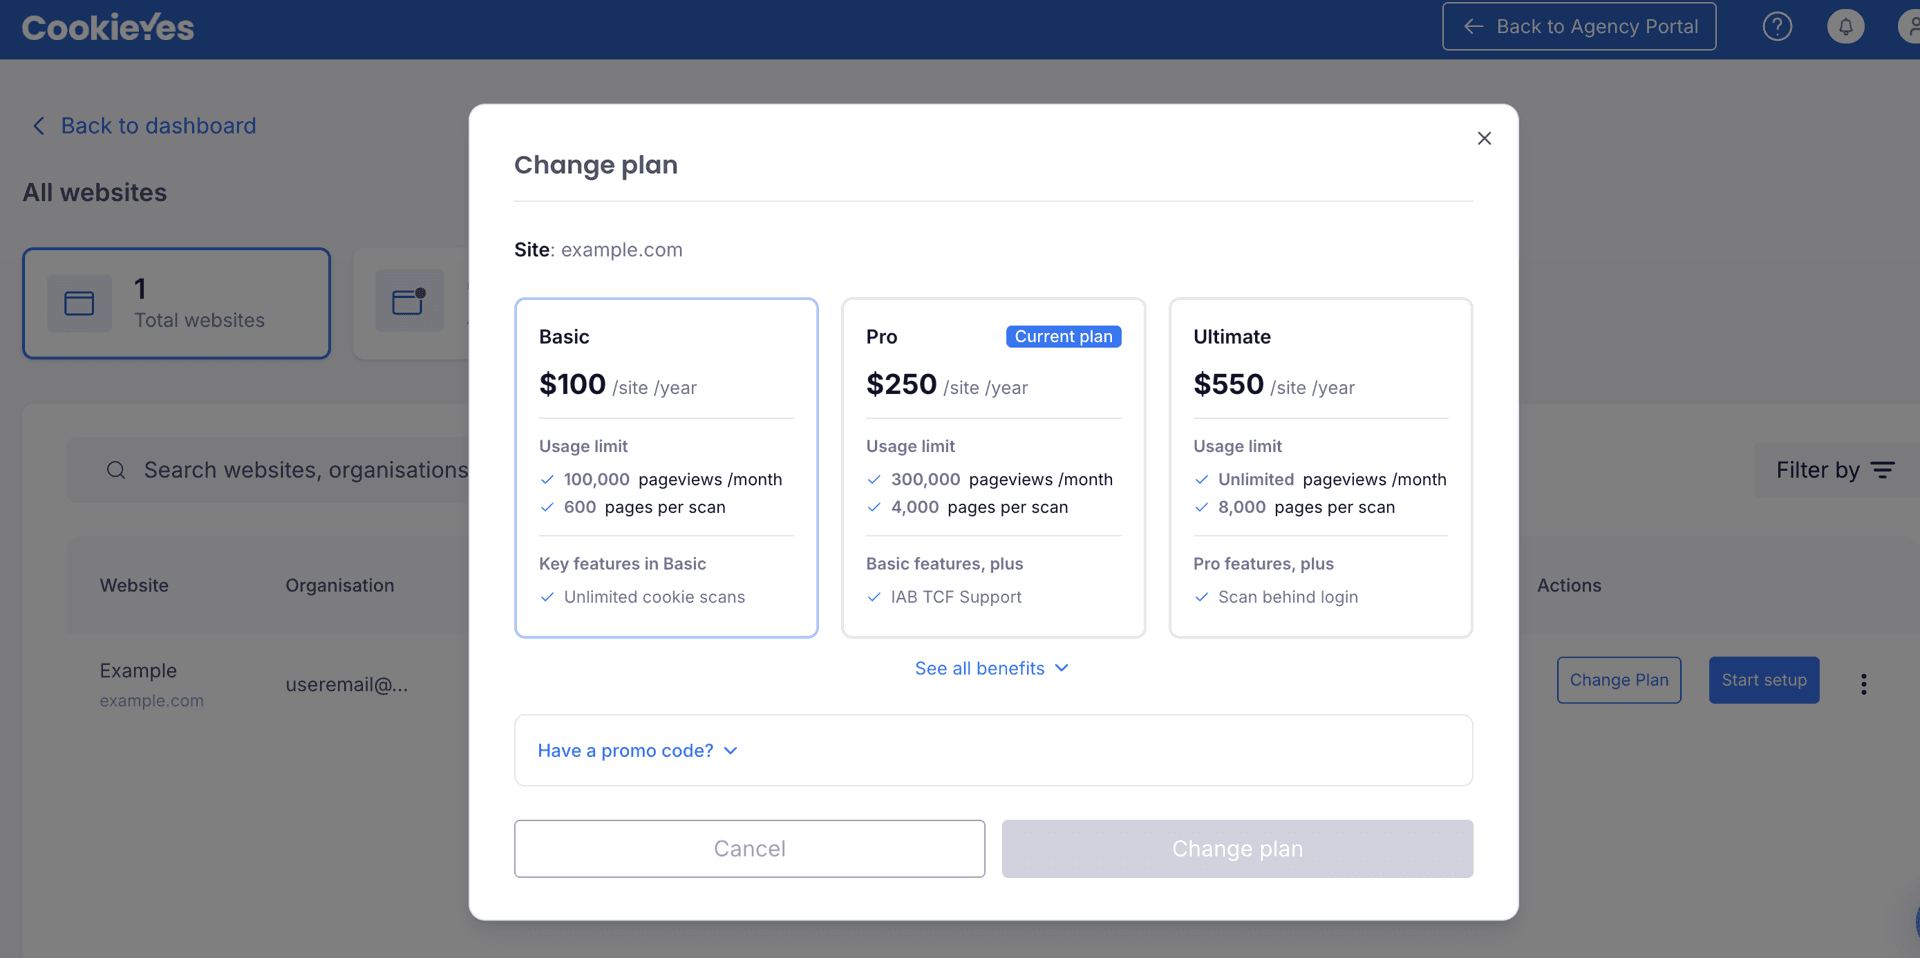
Note: For how plan changes affect your billing, see the billing guide.
Cancel a trial
- On the View all websites screen, locate the site in trial and open its options menu.
- Select Cancel trial.
- Review the confirmation popup. If the cancellation would lower your discount tier, the popup states this and explains how to retain the current tier.
- Click Cancel trial to confirm, or dismiss the popup to keep the trial.
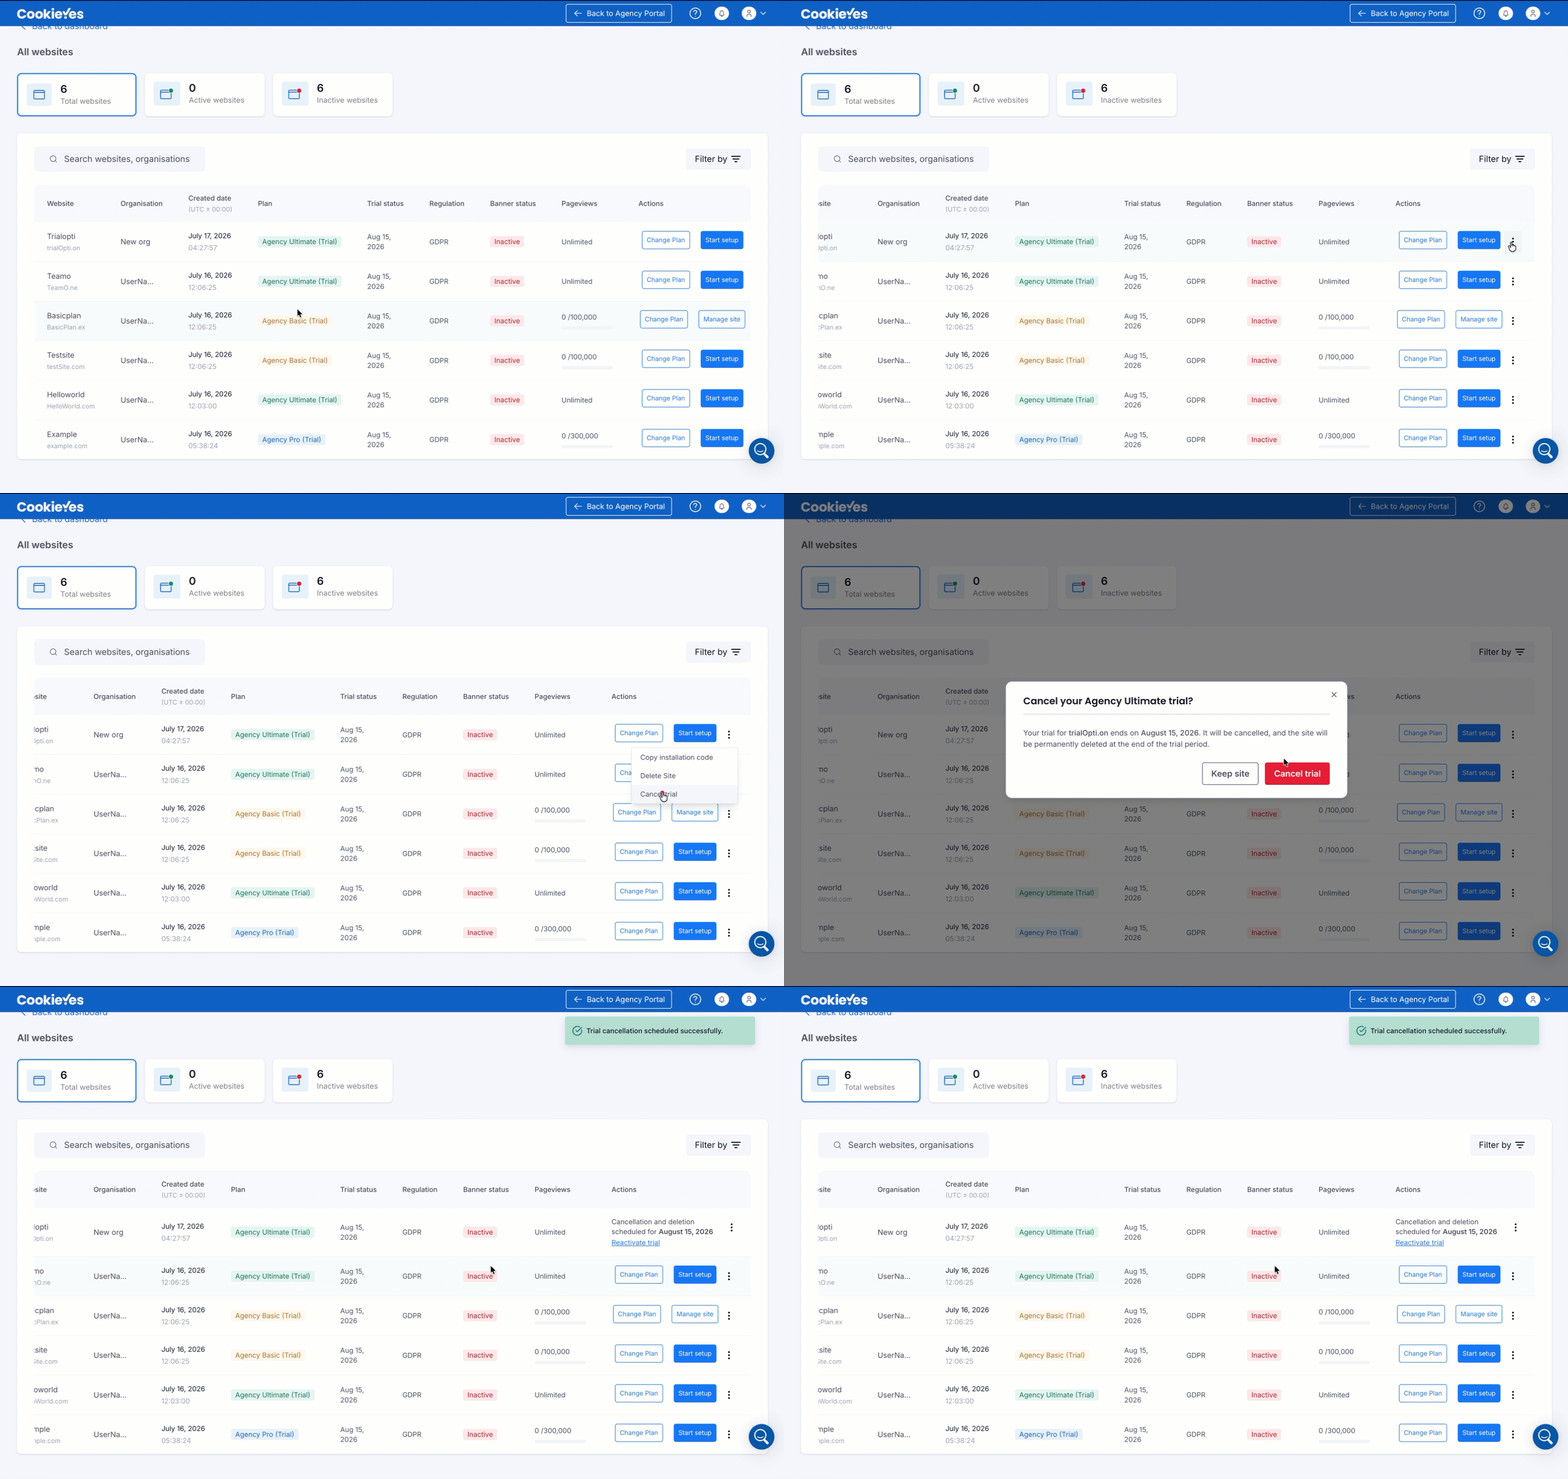
The site remains live until the end of the trial period, after which the trial is cancelled and the site is removed from your account and its banner is deactivated. Click Reactivate trial before then to retain the site. See How billing and discounts work for agency accounts for the effect on your discount.
Delete a site
- On the View all websites screen, locate the site and open its options menu.
- Select Delete Site.
- Review the confirmation popup. If the deletion would lower your discount tier, the popup states this and explains how to retain the current tier.
- Click Delete site to confirm, or dismiss the popup to keep the site.
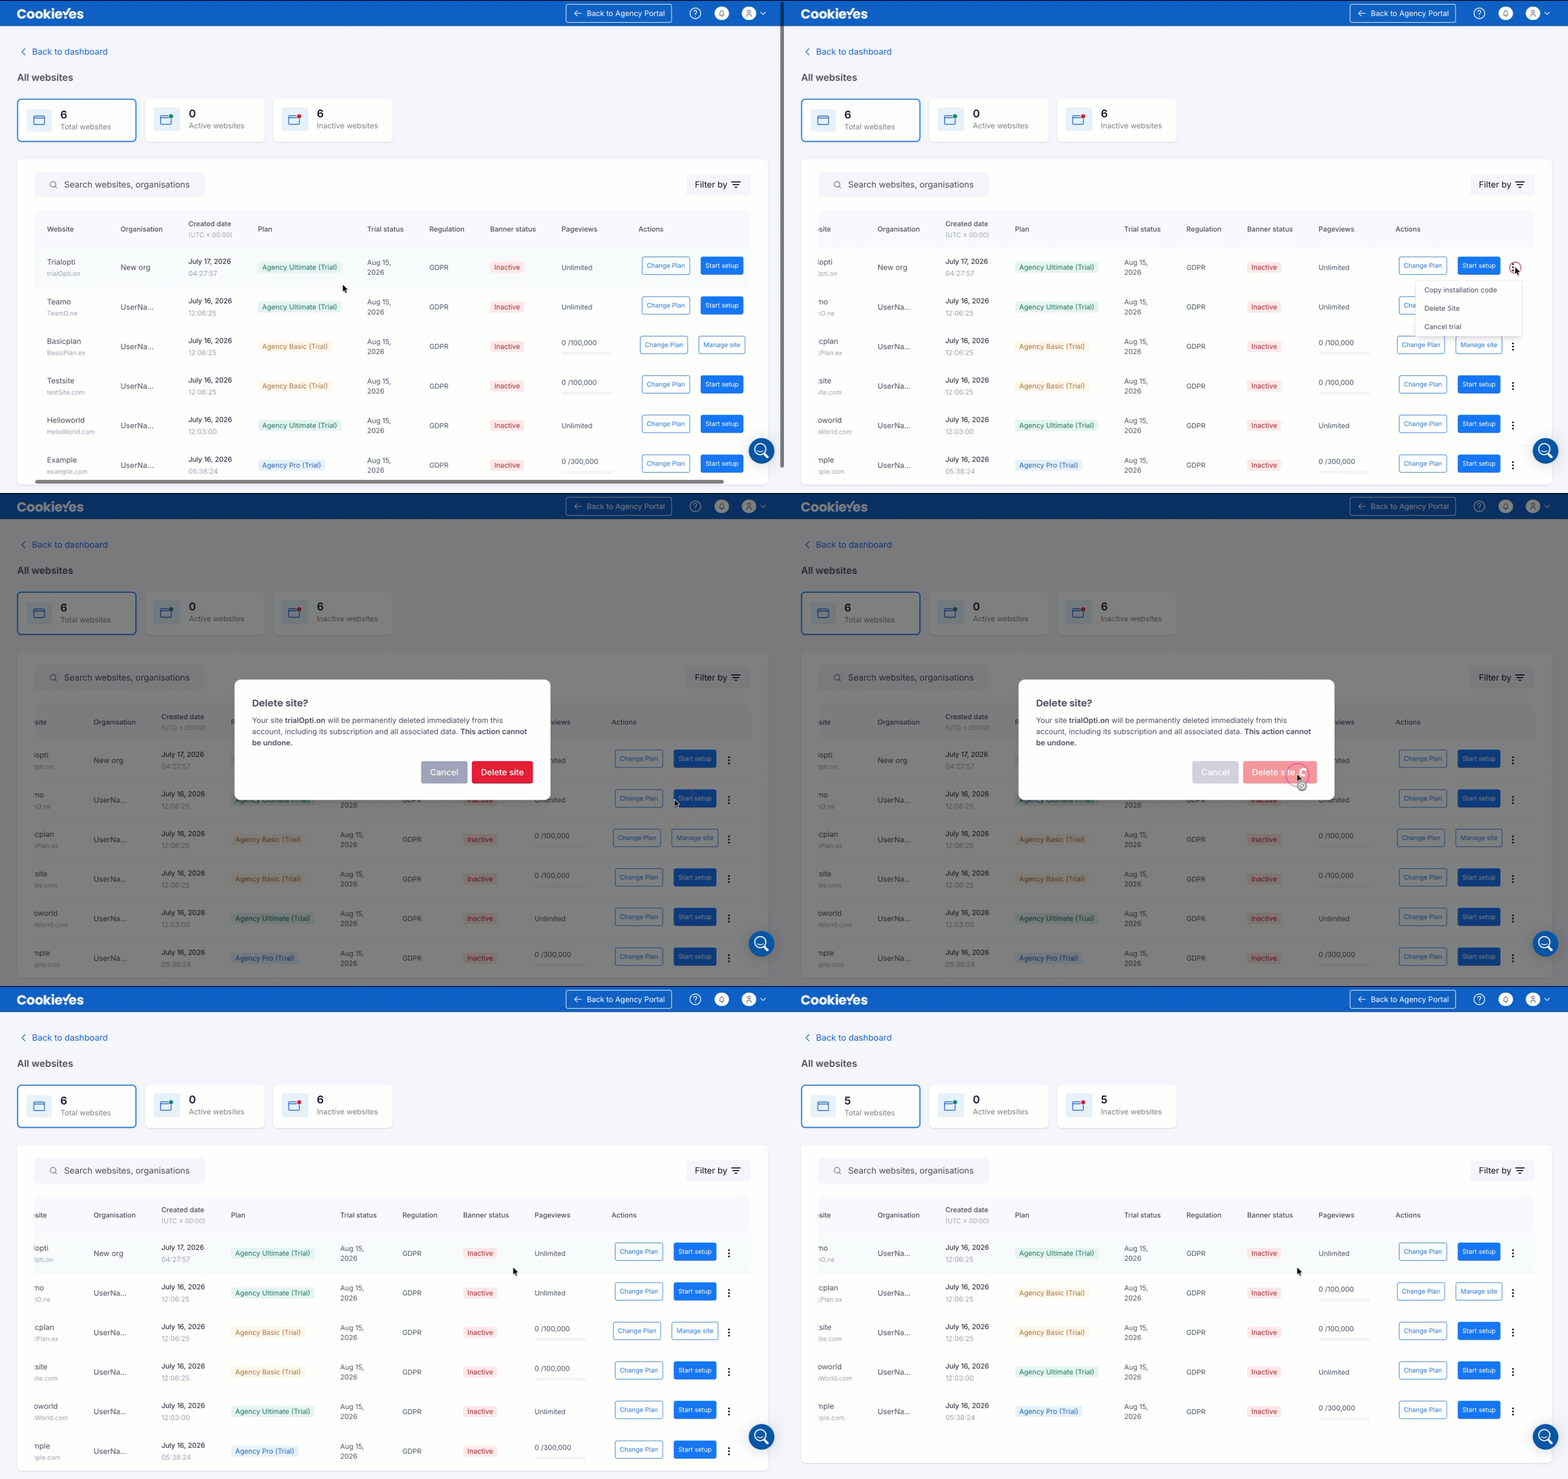
Deletion is immediate and can't be reactivated. You can add the site again later, but it starts from scratch as a new site. It also changes your paid site count and may lower your discount tier. See How billing and discounts work for agency accounts.
Invite your team
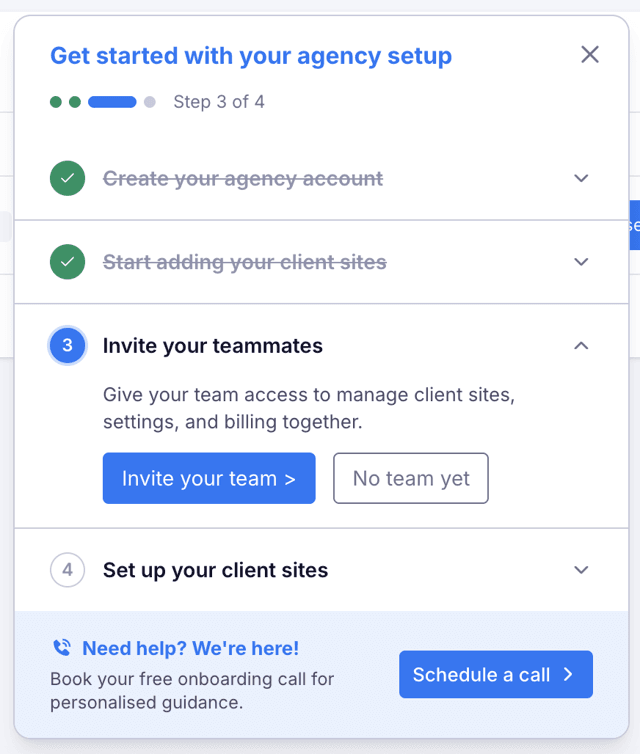
- In the CookieYes dashboard, click Invite your team >.
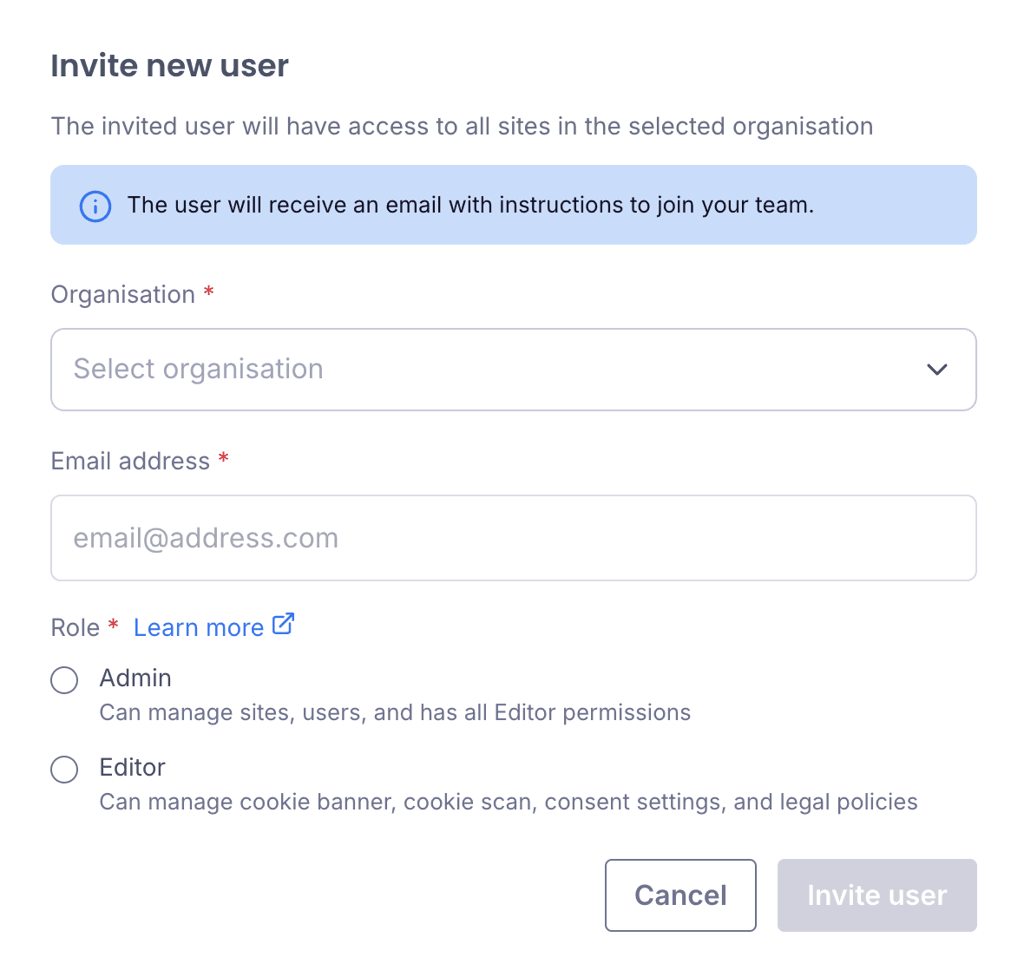
- In the modal, provide the following:
- Organisation: Select your organisation from the dropdown.
- Email address: Enter the user's email address.
- Role: Select a role.
- Click Invite user.
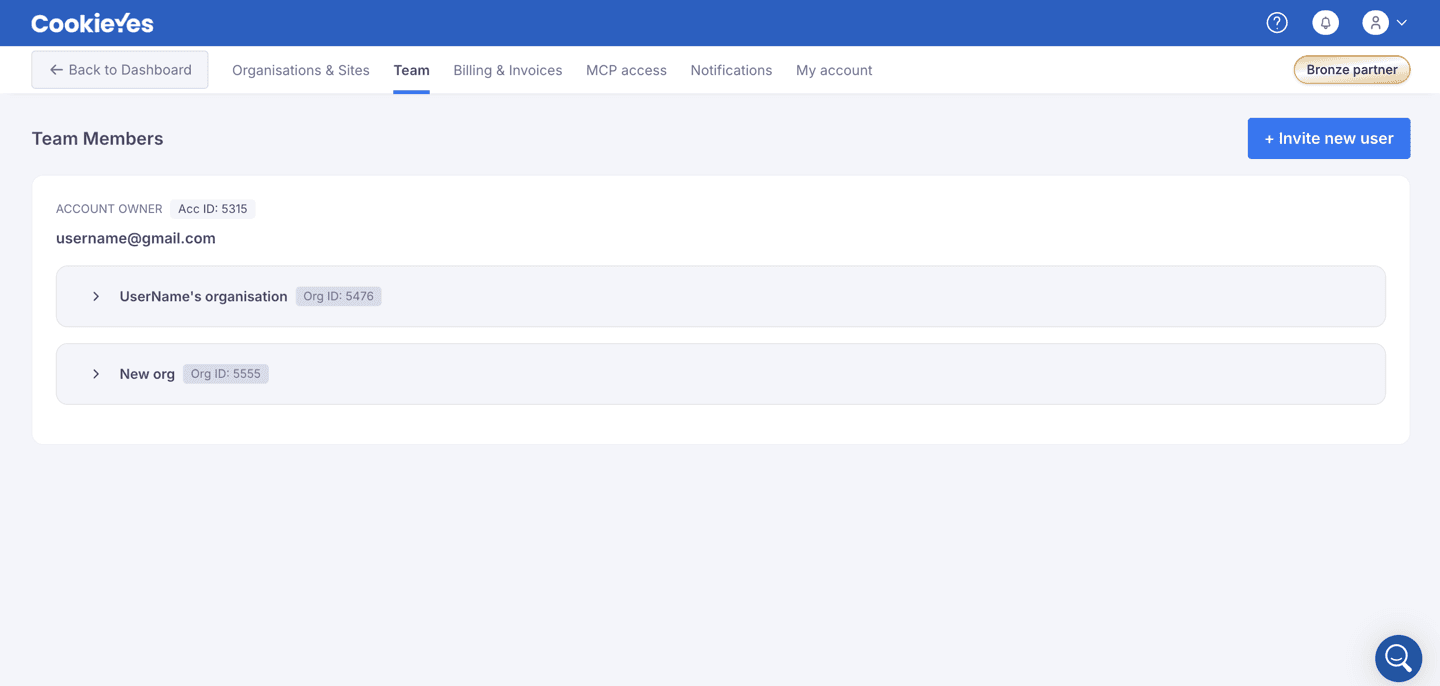
You can also invite a user from the profile menu. Open the profile menu, go to the Team tab, and click + Invite new user.
The invited user receives an email with the invitation.