Scan Behind Login
Last updated on June 2, 2025
On this page
Scan Behind Login is available to Ultimate plan users on request. Reach out to our Technical Support to access this feature.
- CookieYes Scan behind login only works with websites that use cookie-based logins, i.e. sites that temporarily store login details in cookies.
- Your website should display a same-page login, with all necessary fields—such as email or username, password, and submit button—on a single page.
How to Obtain Data Required for Scan Behind Login
Create a Test Account: Create a test account in your application. You will need to share the login credentials for this account, including the email or username and password.
To gather the required information for each field on your login form, follow these steps:
Step 1: Open Developer Tools
Step 2: Locate the Login Form
- In the Elements tab of Developer Tools, hover over the HTML elements. The section of code for the login form will be highlighted as you hover.
- The form is typically enclosed in a
<form>tag. Click to expand the <form> to make all the forms visible. Make sure you identify the correct form if there are multiple forms on the page.
Step 3: Identify Form Field Item
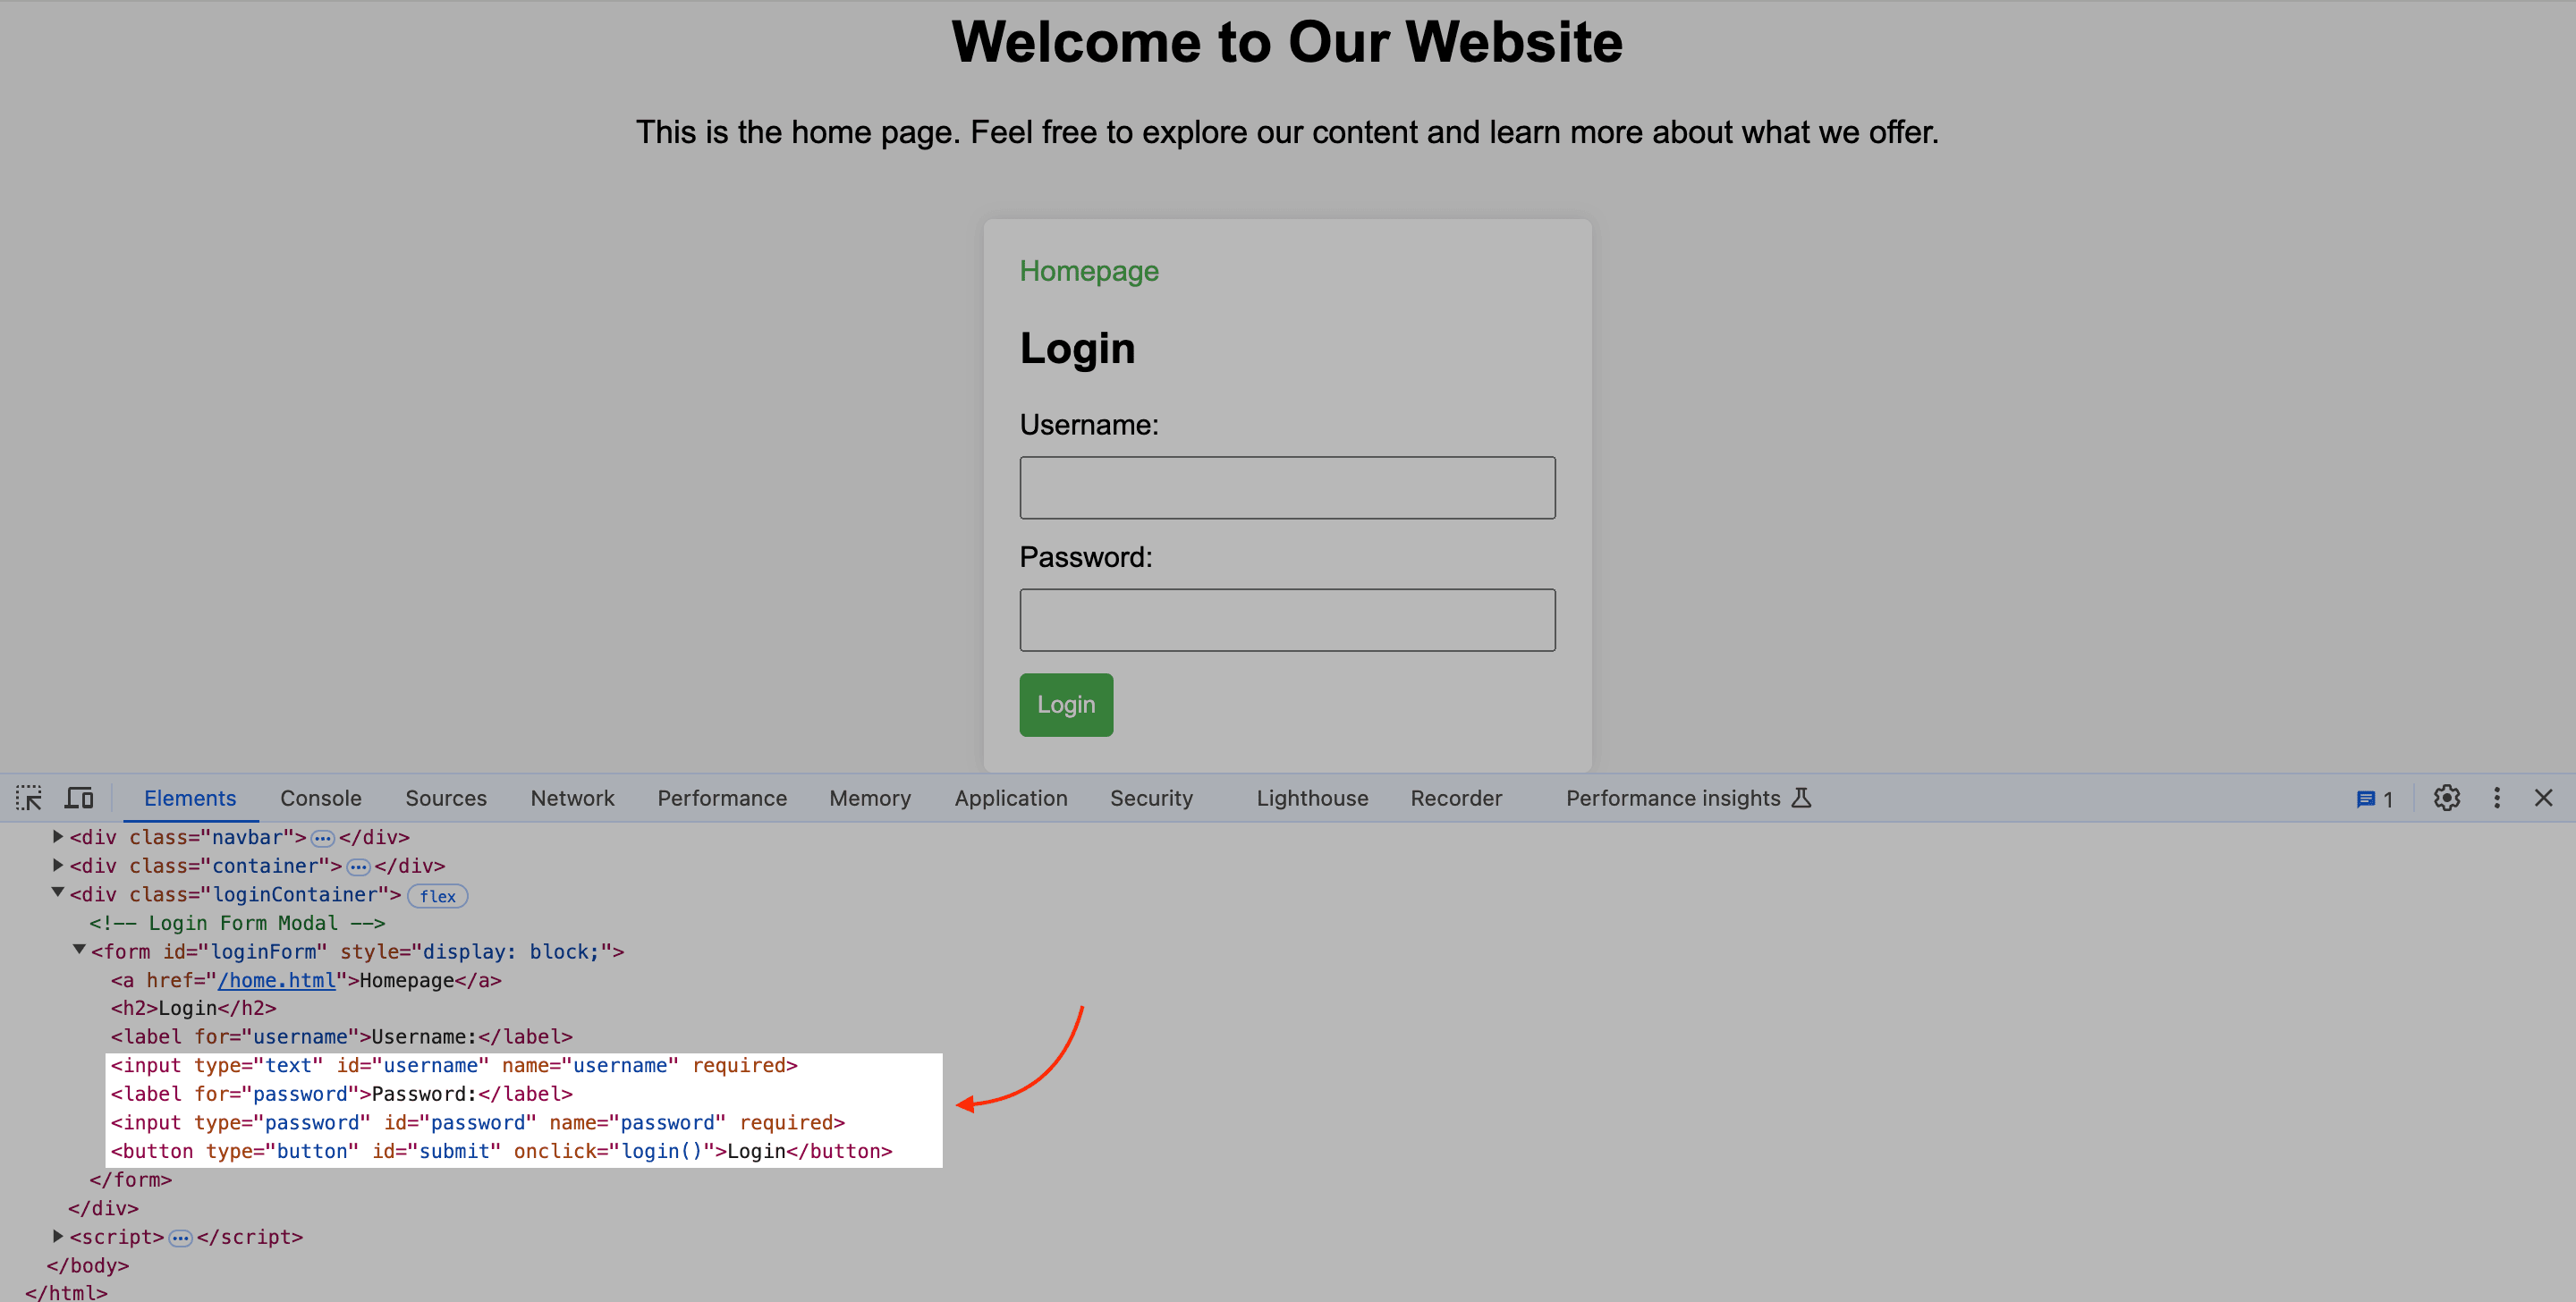
1. Email Input
- Locate the Email Input Field: Look for for an
<input>tag, which is a box where users enter their email or username. Typically, it uses a label like Email or Username, making it easy to identify. - Required Details:
- itemType:
input; This will be marked asinputin the code. - identifier:
username; Look for a part of the code that saysid="username"orname="username". This is the field’s identifier. - identifierType:
id; This usually indicates how the field is recognized in the code (often id or name). - value: The email placeholder or value of the newly created test account (e.g. [email protected])
- itemType:
2. Password Input
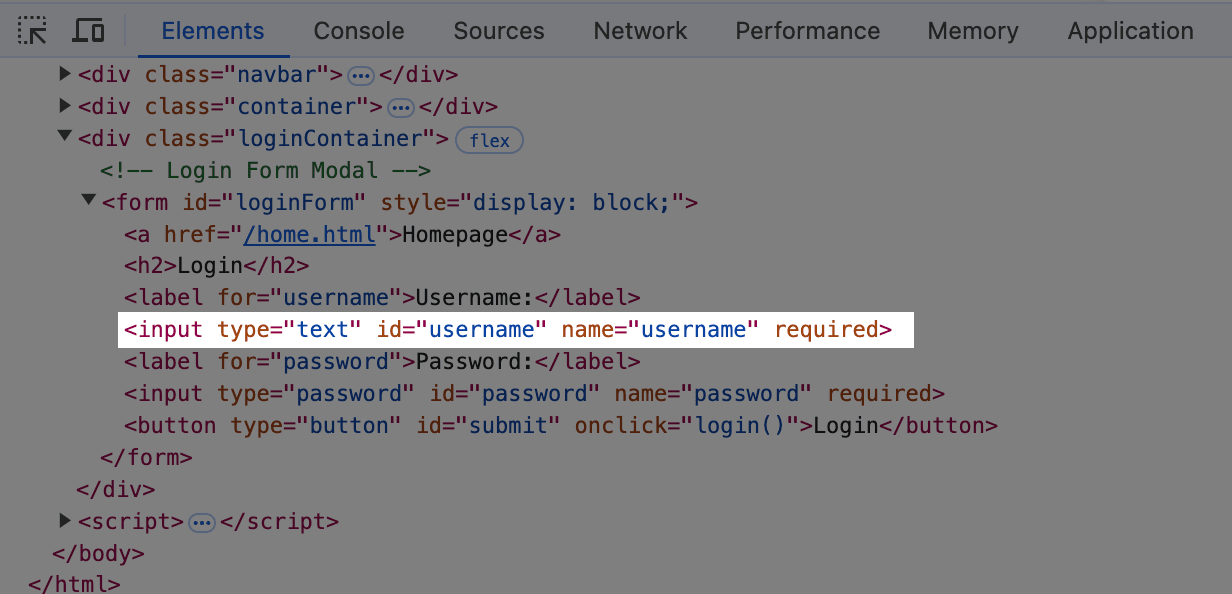
- Locate the Password Input Field: Look for an
<input>tag labeled Password. - Required Details:
- itemType:
inputThis will also be marked as “input.” - identifier:
passwordLook forid="password"orname="password". - identifierType:
"id"Similar to the email field, it will often be id or name. - value: The password placeholder or value of the newly created test account (e.g. 12345678).
- itemType:
Your login form may include additional fields beyond just email and password, so be sure to include extra fields that are present.
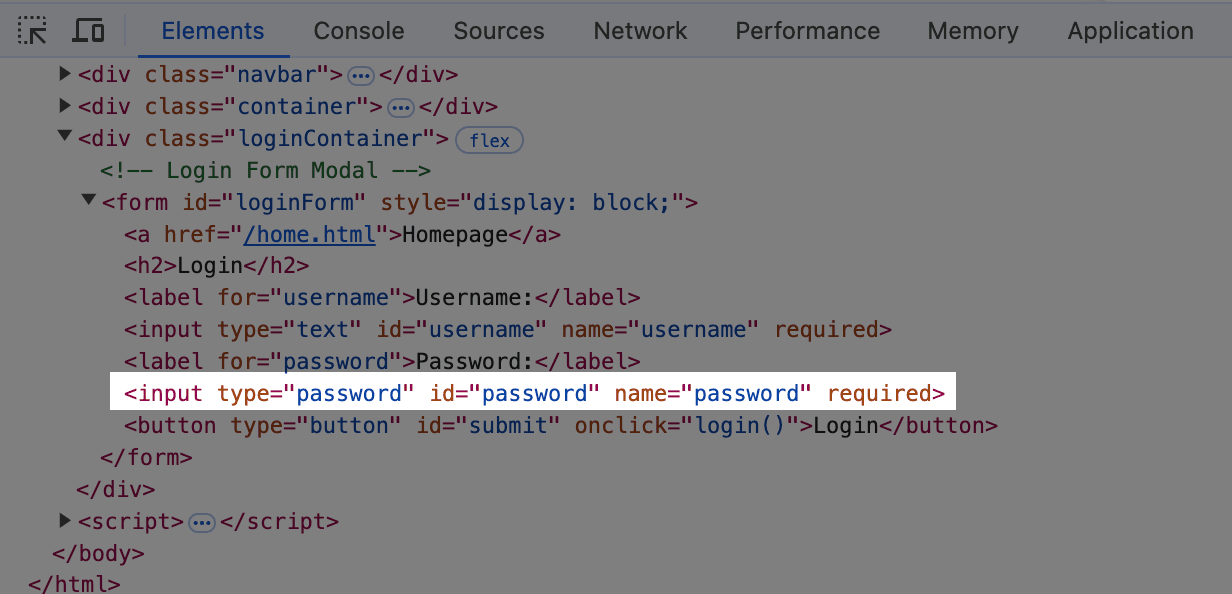
- Locate the Submit Button: Find the
<button>tag or<input>tag of type submit. This is the button that users click to log in. It typically uses a label like Email or Username. - Copy the Required Details:
- itemType:
buttonThis is typically marked as “button” or “input type=’submit'” in the code. - identifier:
submitLook forid="submit"or similar labels. - identifierType:
idThis is often id or name.
- itemType:
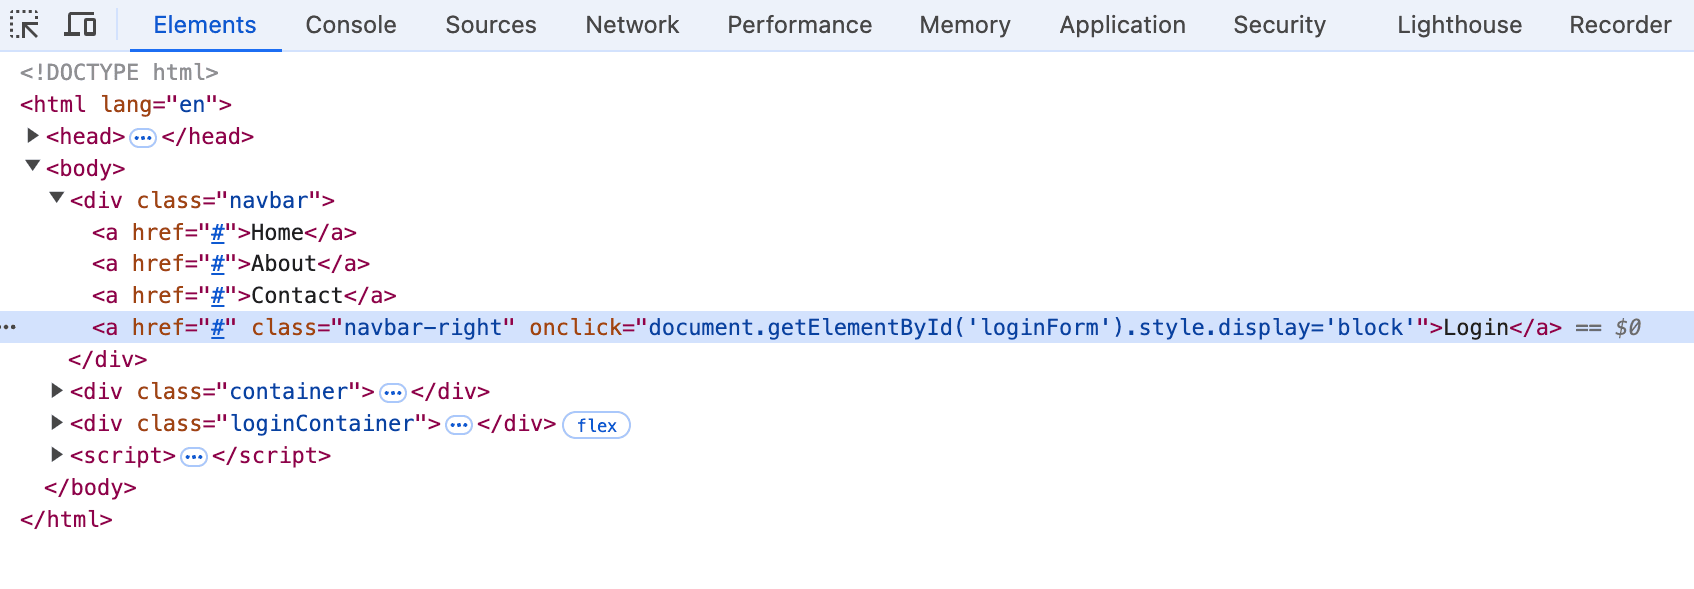
4. Login Trigger (If Present)
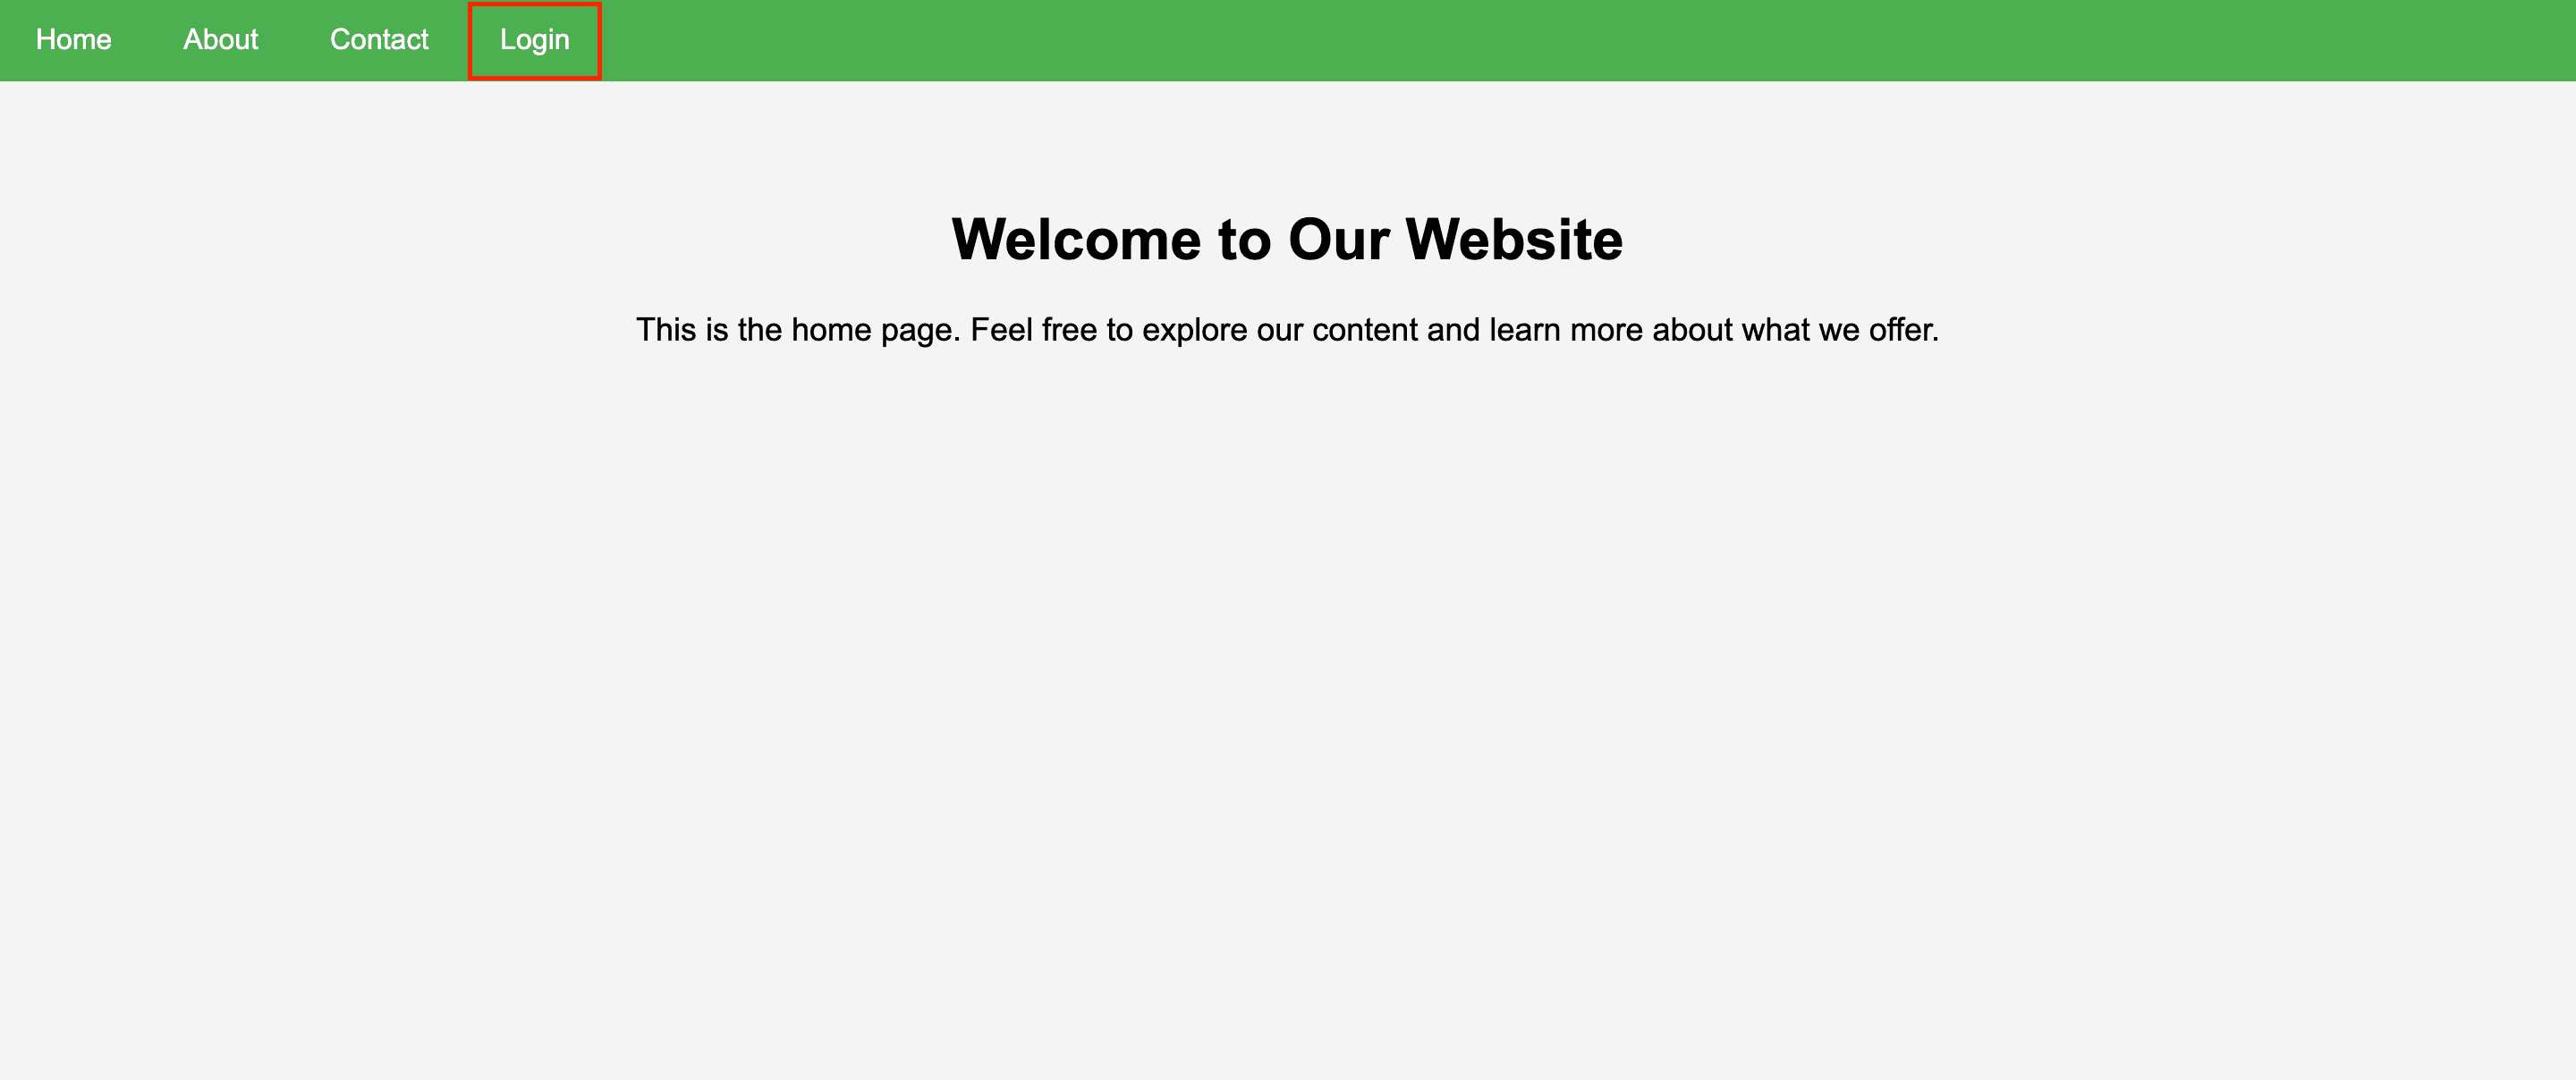
Identify Login Trigger: A login trigger is a button or link that opens the login form when users click it and it is usually labels such as Log In, Sign In. It appears on pages where the login form is not immediately visible.
- Required Details:
- In the code, check for any
onclickevents associated with the submit button. - Note any specific functions or actions mentioned next to the submit button in the code.
- In the code, check for any
Step 4: Compile the data
Registered Website URL:

Login form URL:

Form field Items

       Email Input
          itemType: "input"
          identifier: "email"
          identifierType: "name"
          value: "[email protected]"

        Password Input
          itemType: "input"
          identifier: "password"
          identifierType: "type"
          value: "12345678"

        Submit Button
          itemType: "button"
          identifier: "button"
          identifierType: "type"

 Login trigger :After compiling the data, send it to our technical support at [email protected]
Gathering the required details about your login form and any triggers allows for a thorough scan of your cookie usage behind the login wall.