Block Third-Party Cookies With Tag Manager (GTM)
Last updated on March 9, 2026
On this page
Note:
For blocking third-party cookies with google tag manager in the new version(Single Cookie) of CookiesYes refer to our guide.
Creating a custom event trigger in GTM
Step 1: Create a user-defined variable
- Sign in to your Google Tag Manager account > Click the required Container Name from your Accounts.
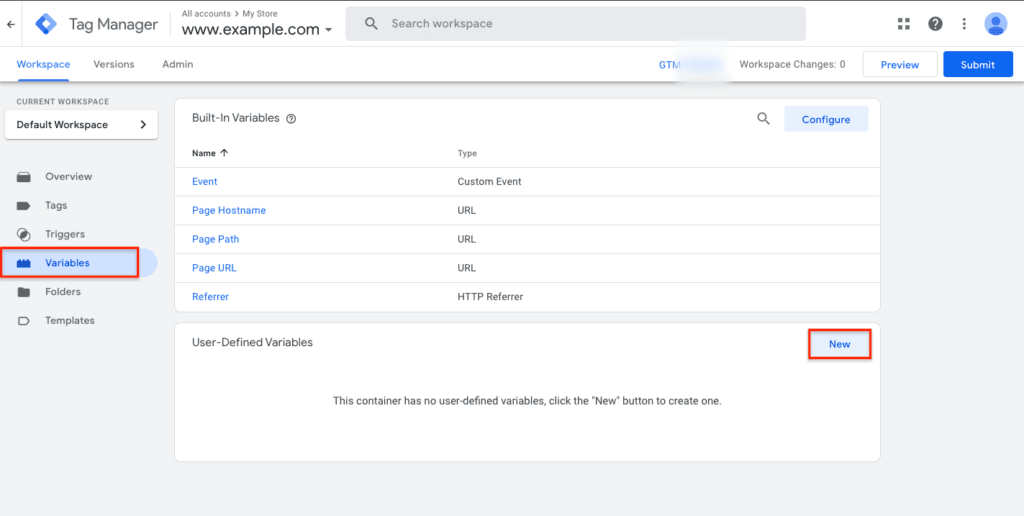
- From the left panel, select Variables > In the User-Defined Variables section, click New.
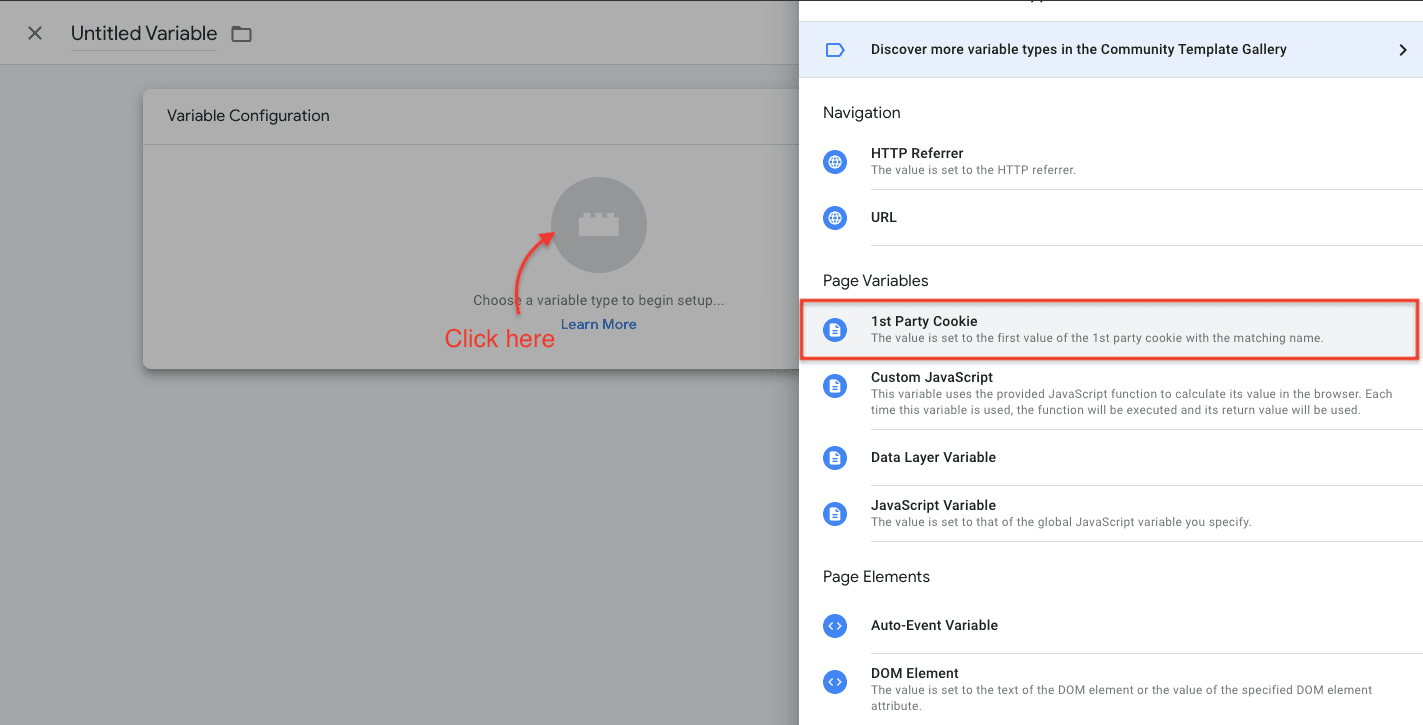
- Click Variable Configuration > Choose variable type as 1st Party Cookie from under Page Variables.
Note:
1st Party Cookie variable allows Google Tag Manager to access the first-party cookies created by your website.
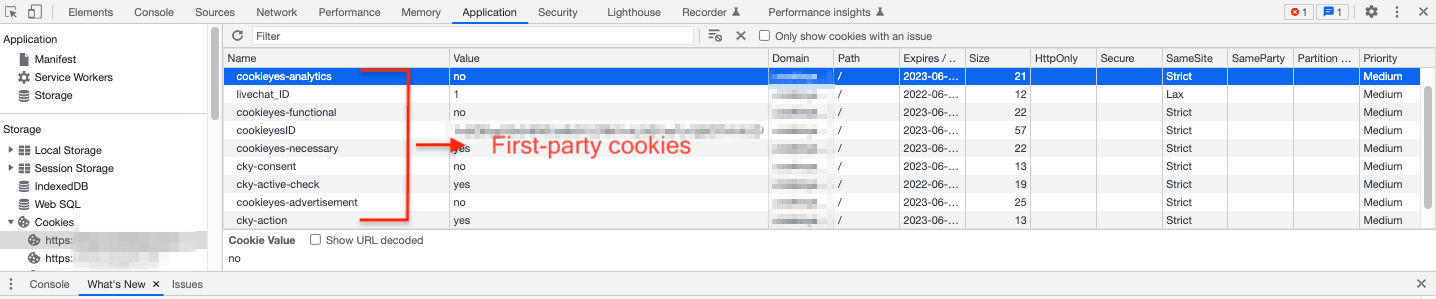
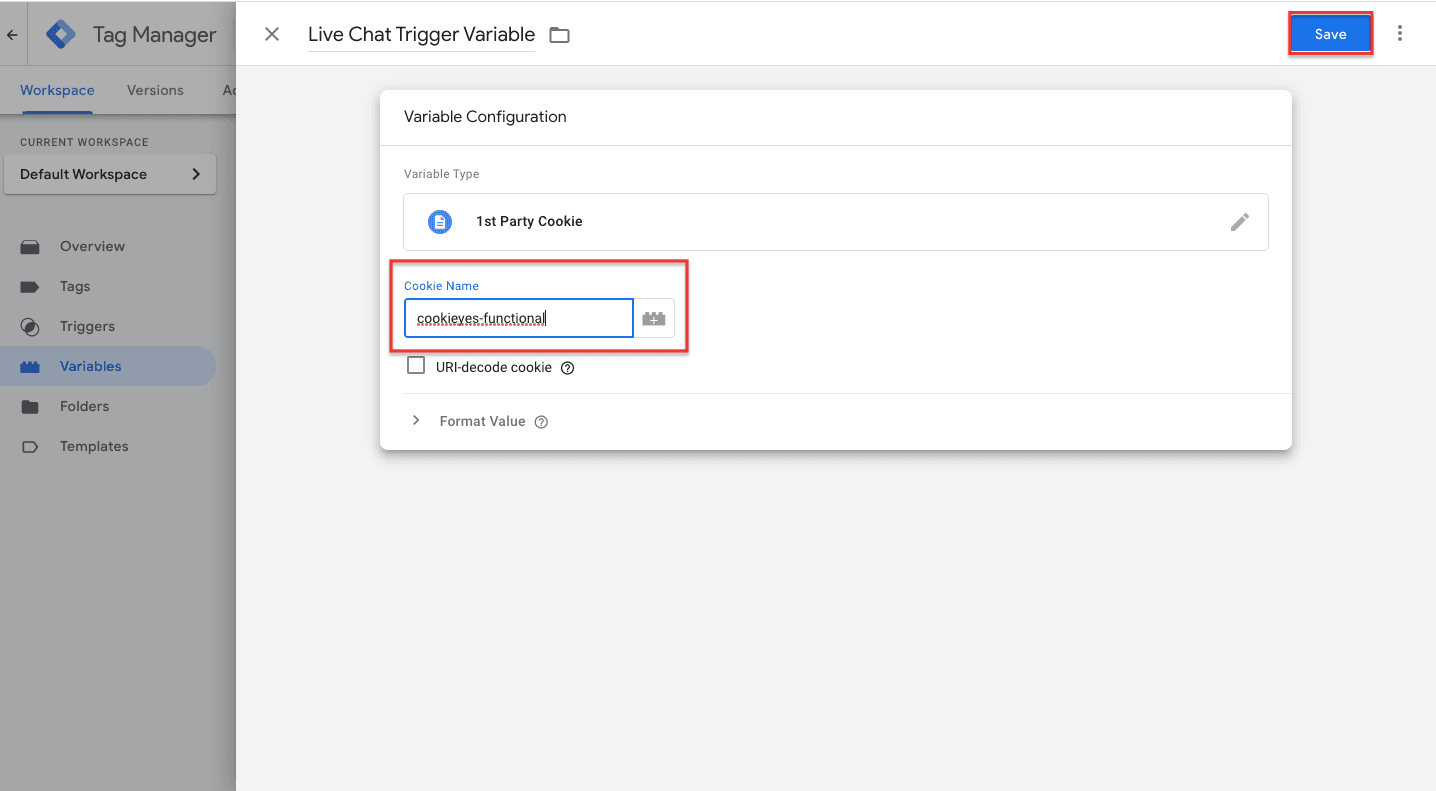
- In the Cookie Name text box, enter the name of that cookie for which you need to retrieve the value. E.g. cookieyes-functional
- Name the variable (here, we’ve named it ‘Live Chat Trigger Variable’) and click Save to save the variable.
Step 2: Create a custom event trigger
- From the left panel of your GTM account, select Triggers > In the Triggers section, click New.
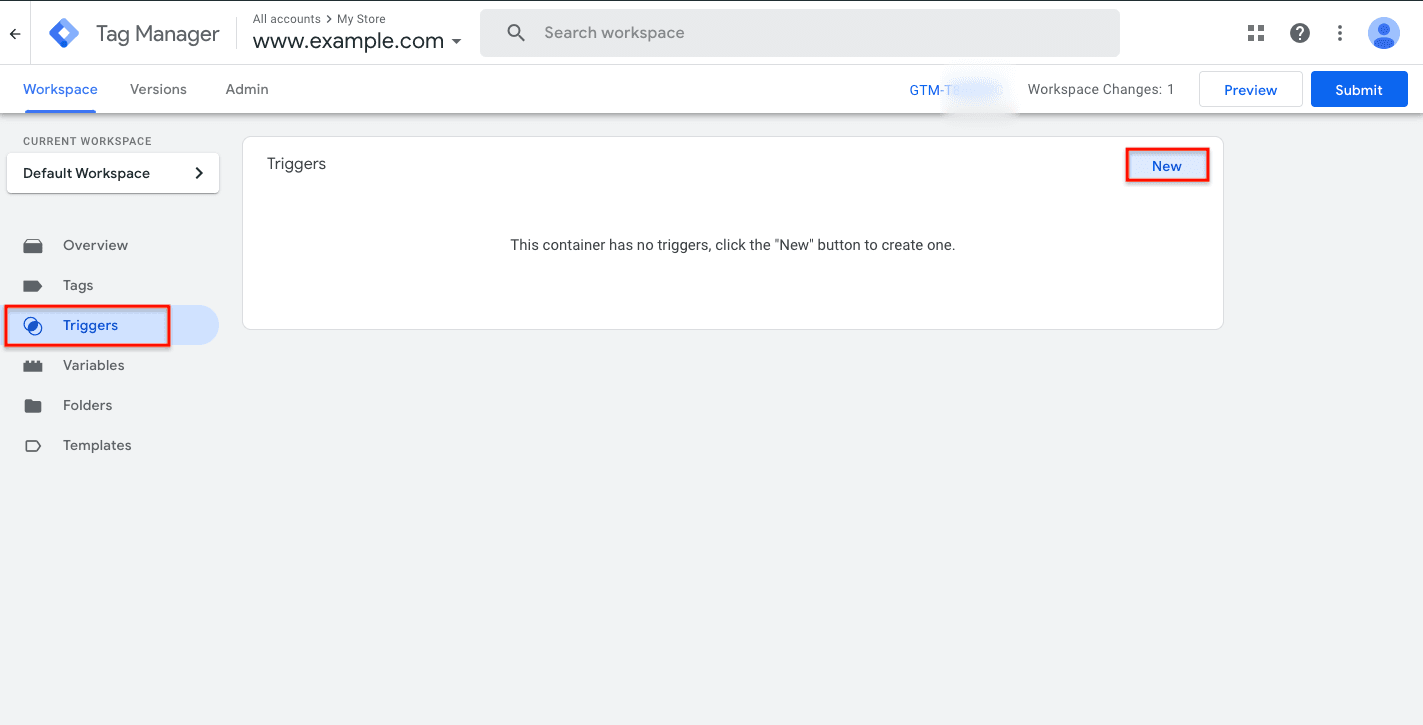
- Click Trigger Configuration > Choose Custom Event as the trigger type.
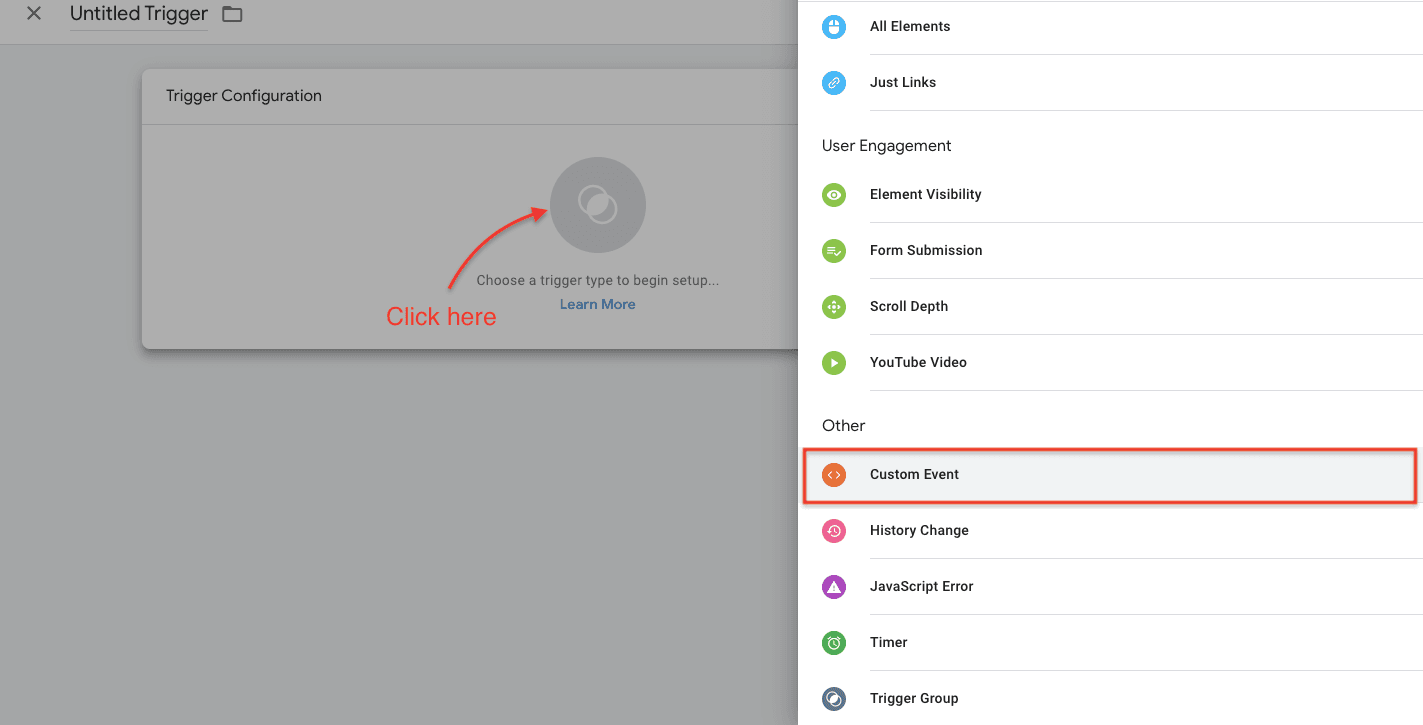
- In the Event Name text box, enter .* as shown below and check the Use regex matching option.
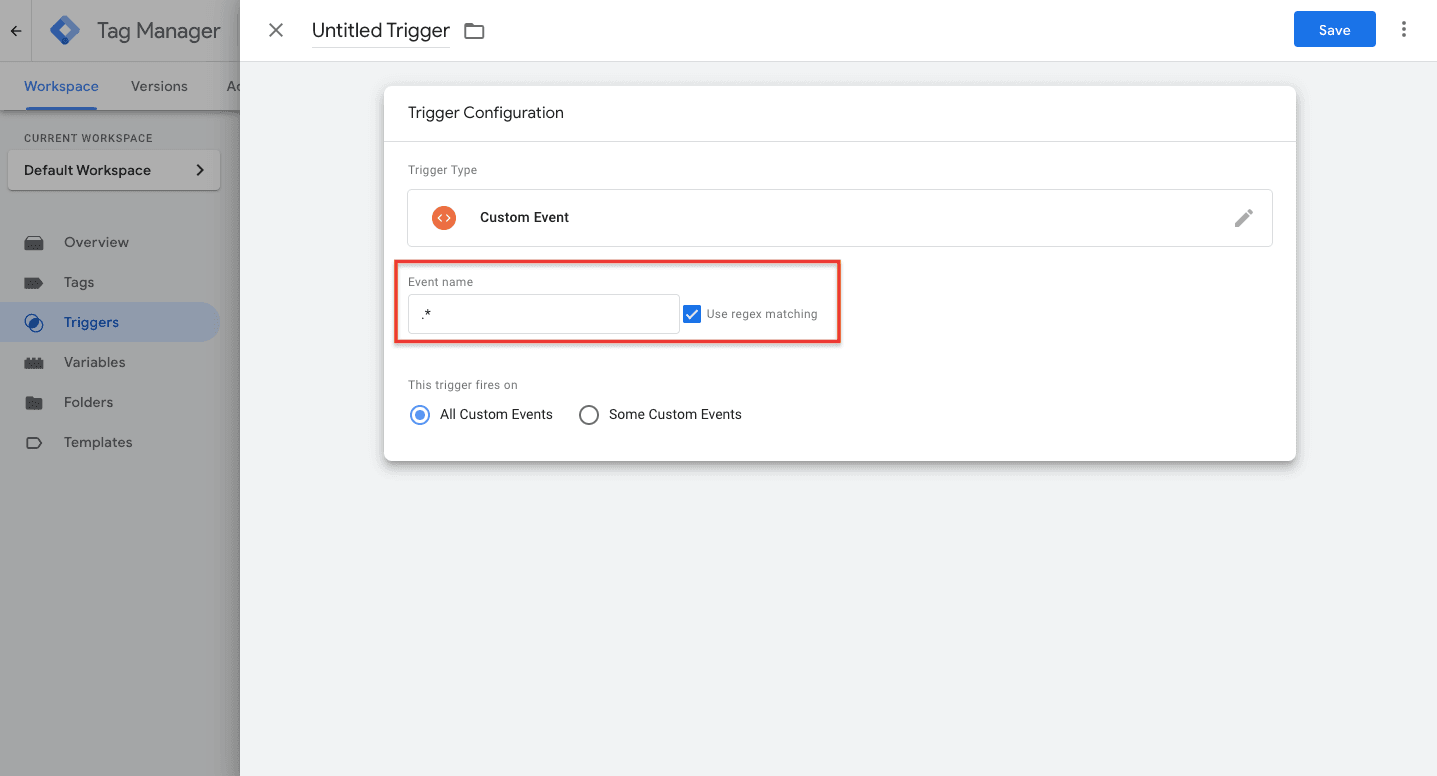
- Under This trigger fires on, choose Some Custom Events.
- Under Fire this trigger when an Event occurs and all of these conditions are true, set up a trigger condition.
e.g. Live Chat Trigger Variable (i.e. the name of the user-defined variable that you have created in Step 1), equals, and yes (as shown below).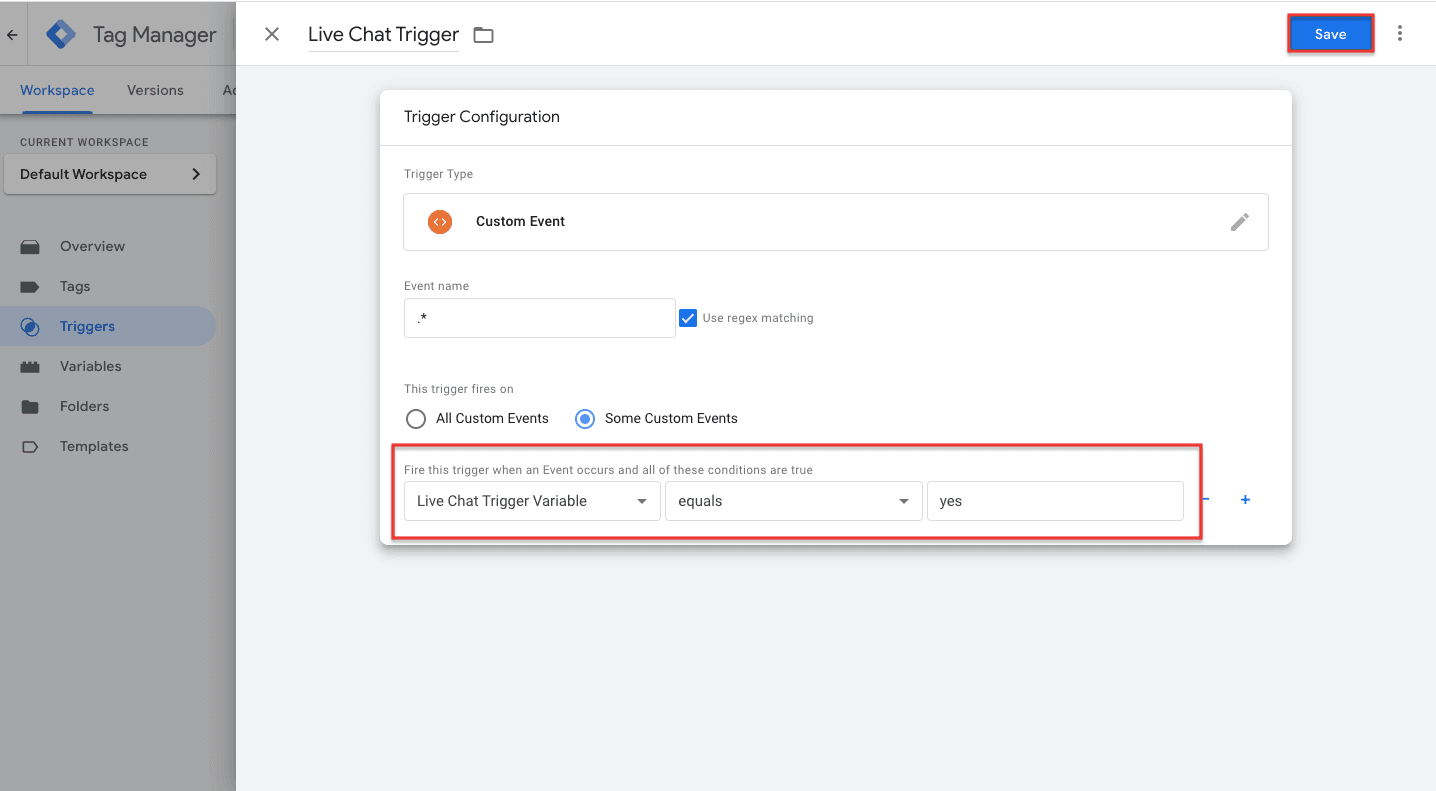
- Name the Trigger (we’ve named it ‘Live Chat Trigger’) and click Save to save the custom event trigger.
Step 3: Add the custom event trigger to the required custom HTML tag
- From the left panel of your GTM account, select Tags > Click the Tag name that needs to be fired.
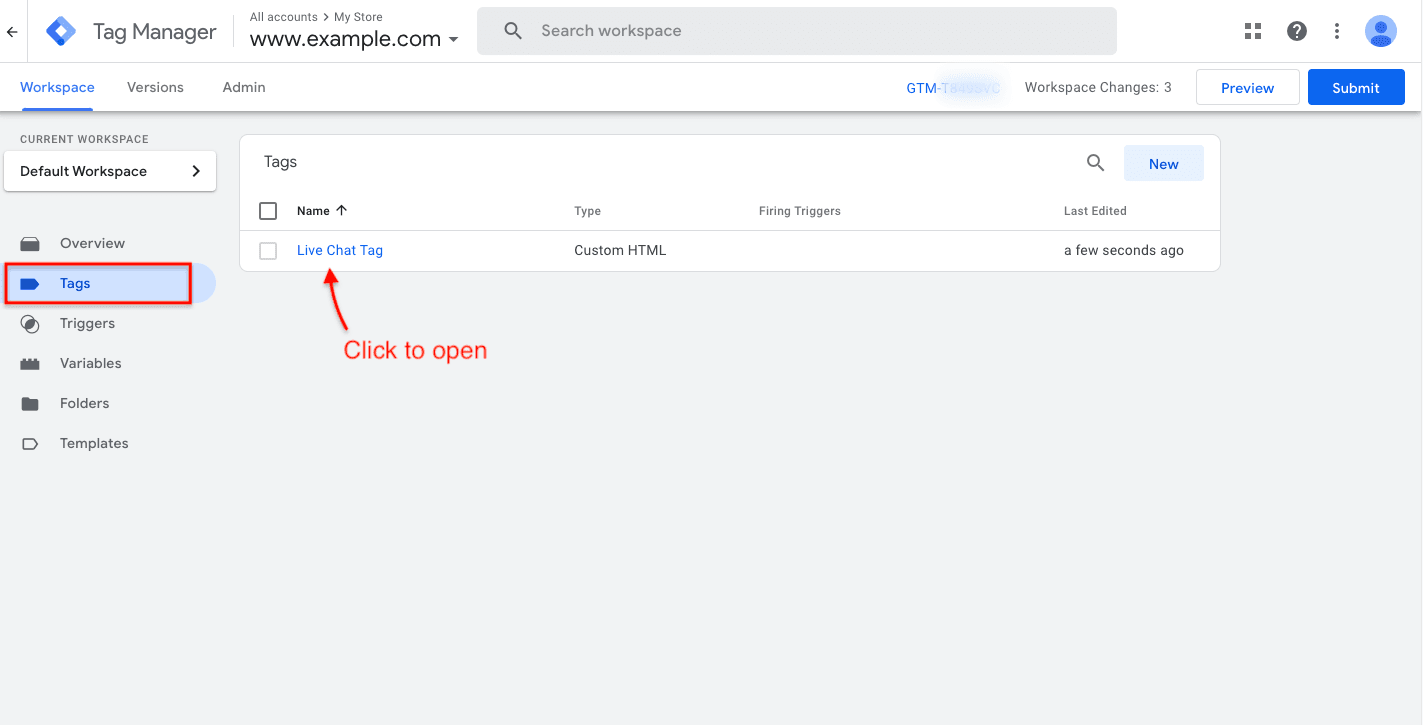
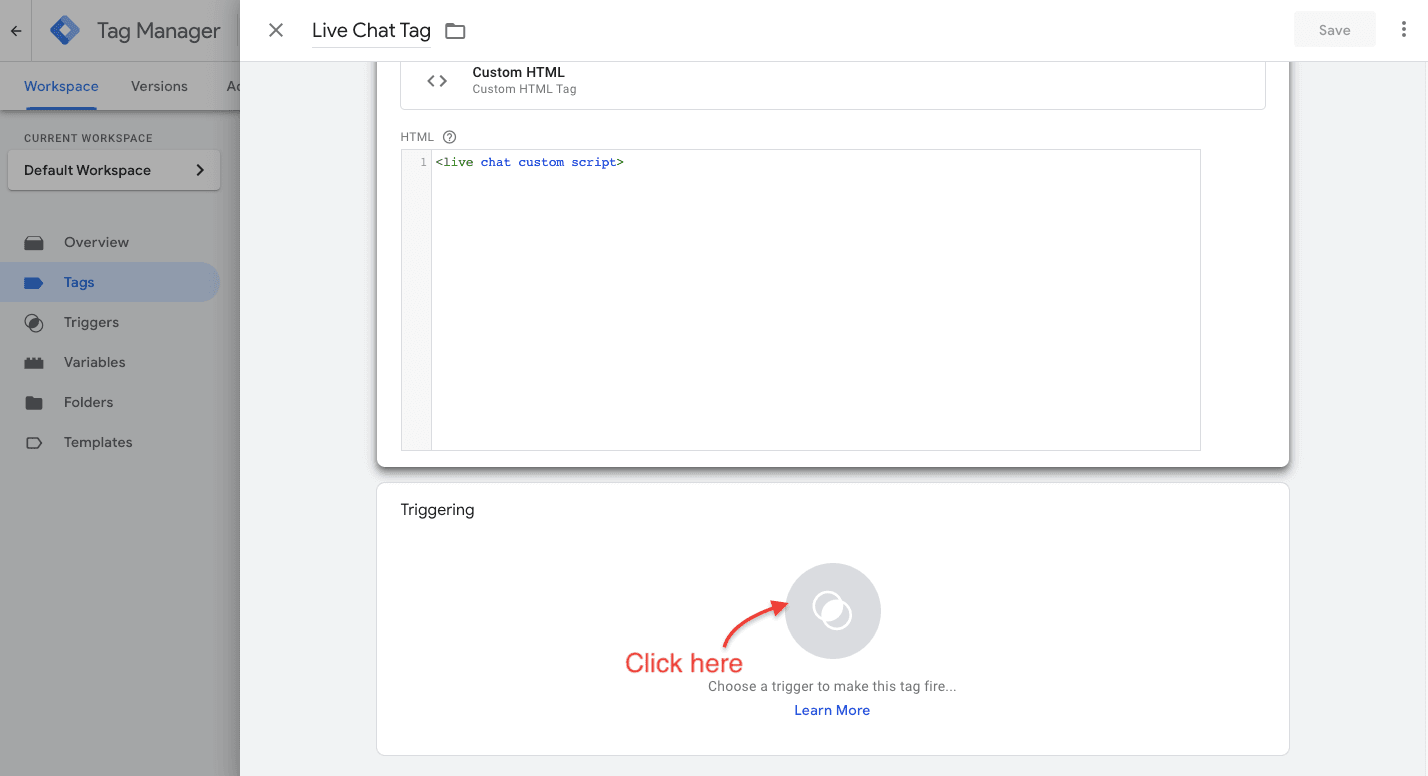
- Click Triggering.
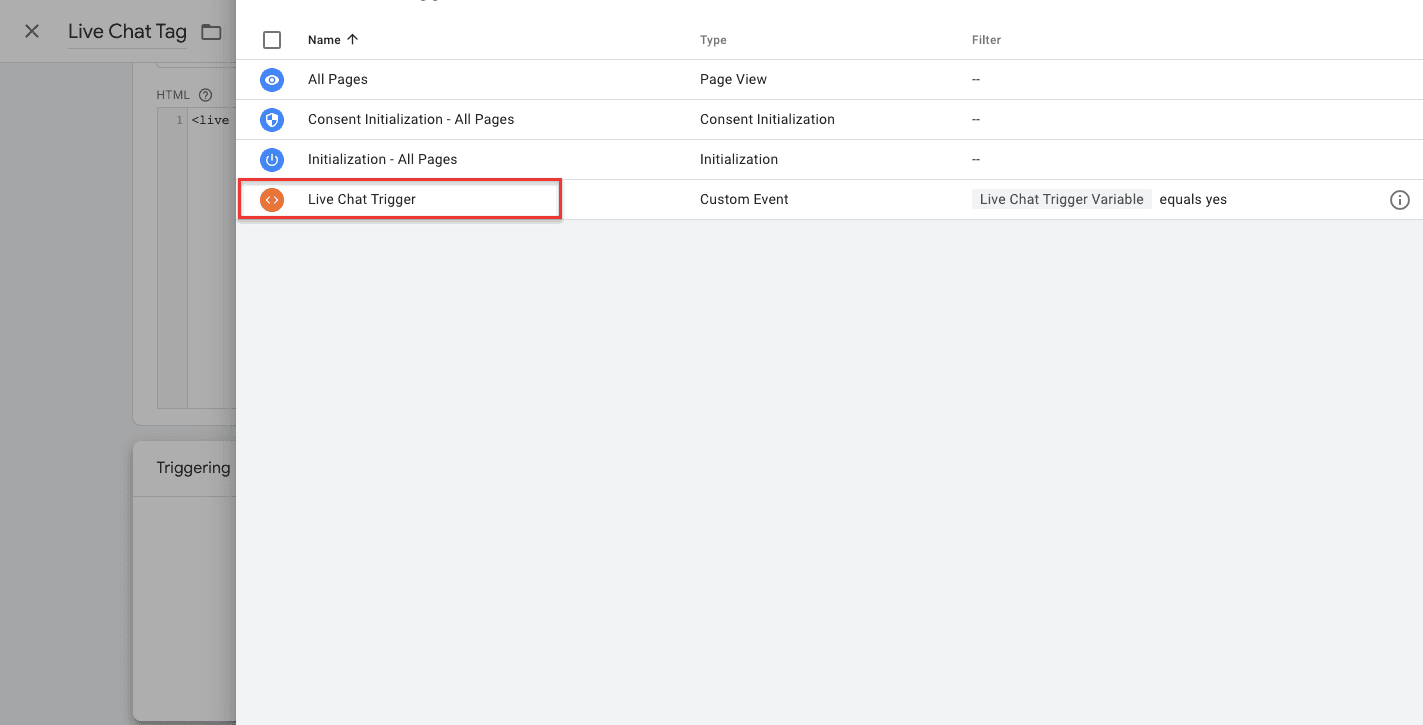
- Choose the custom event trigger that you have created in Step 2.
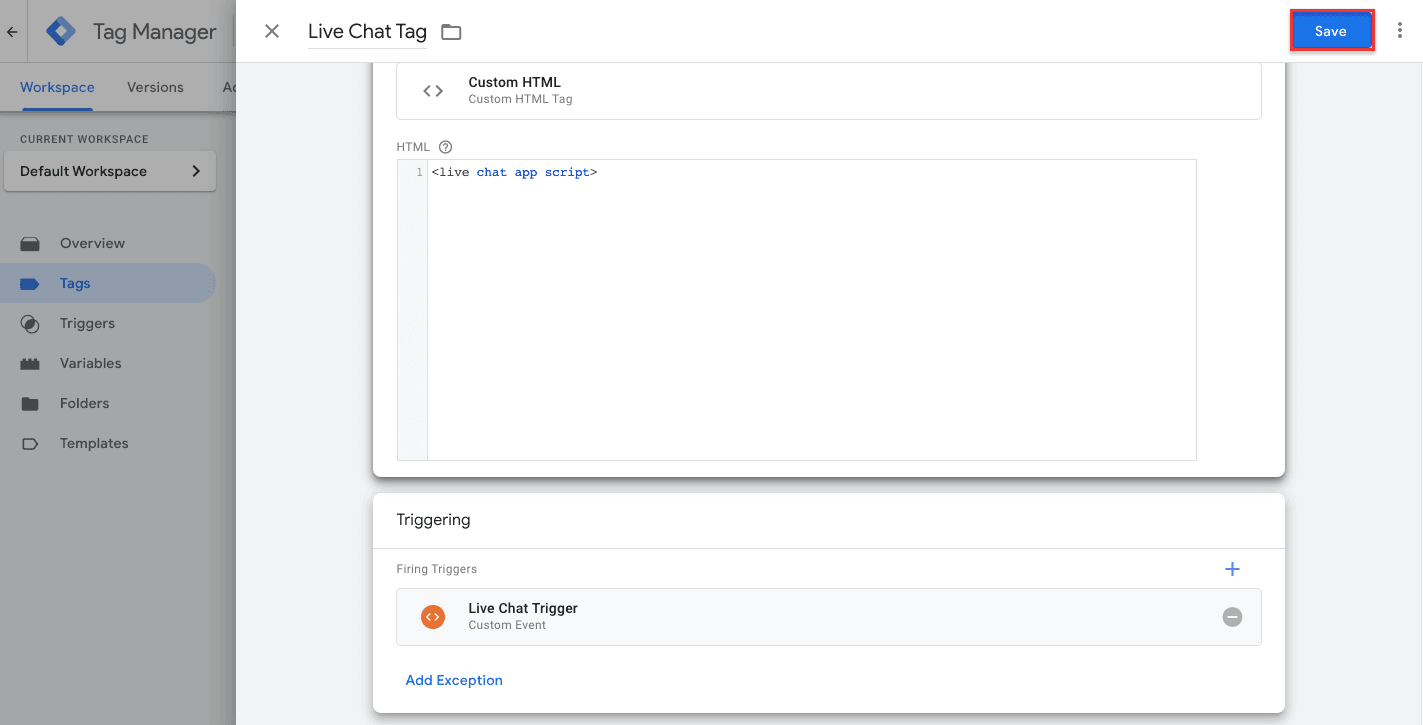
- Click Save.
Step 4: Submit changes
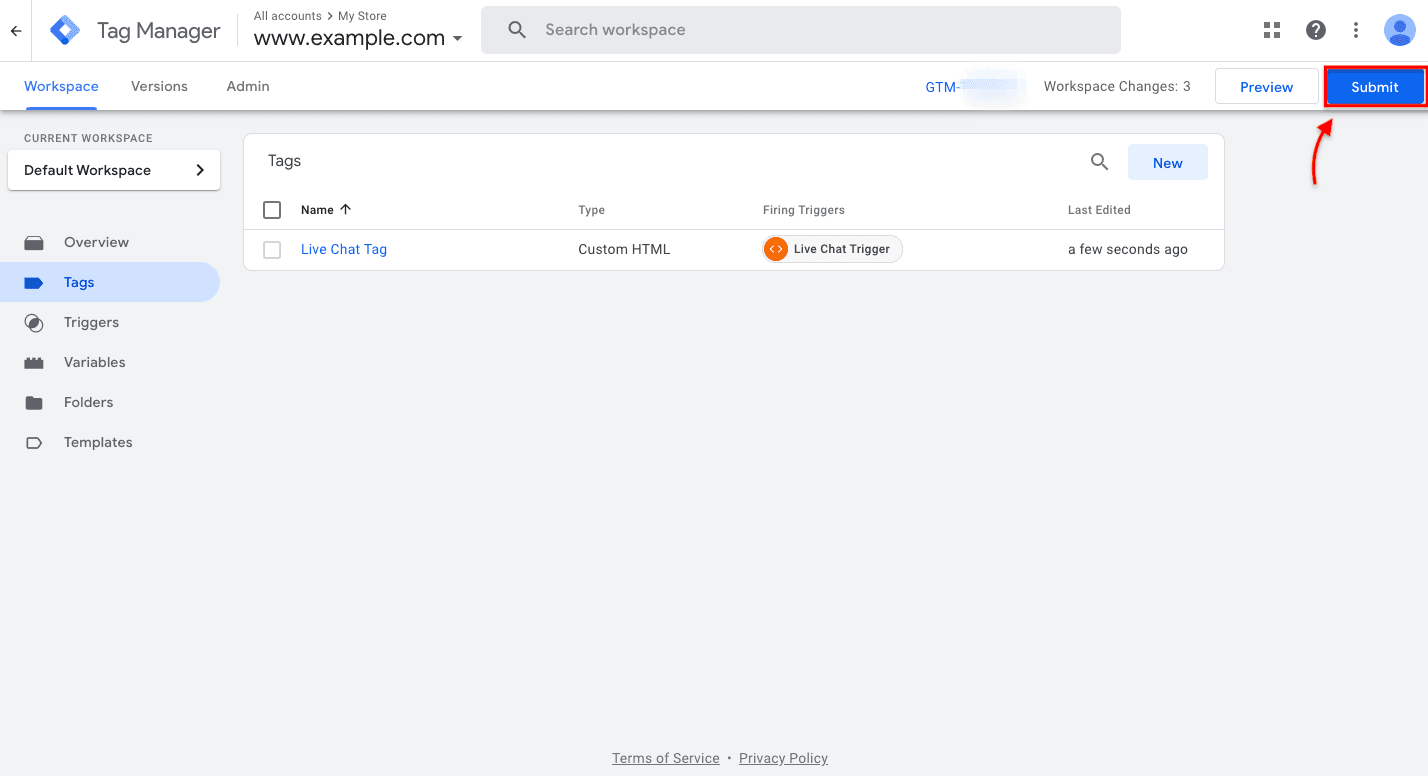
- Click the Submit button at the top right corner of your GTM account.
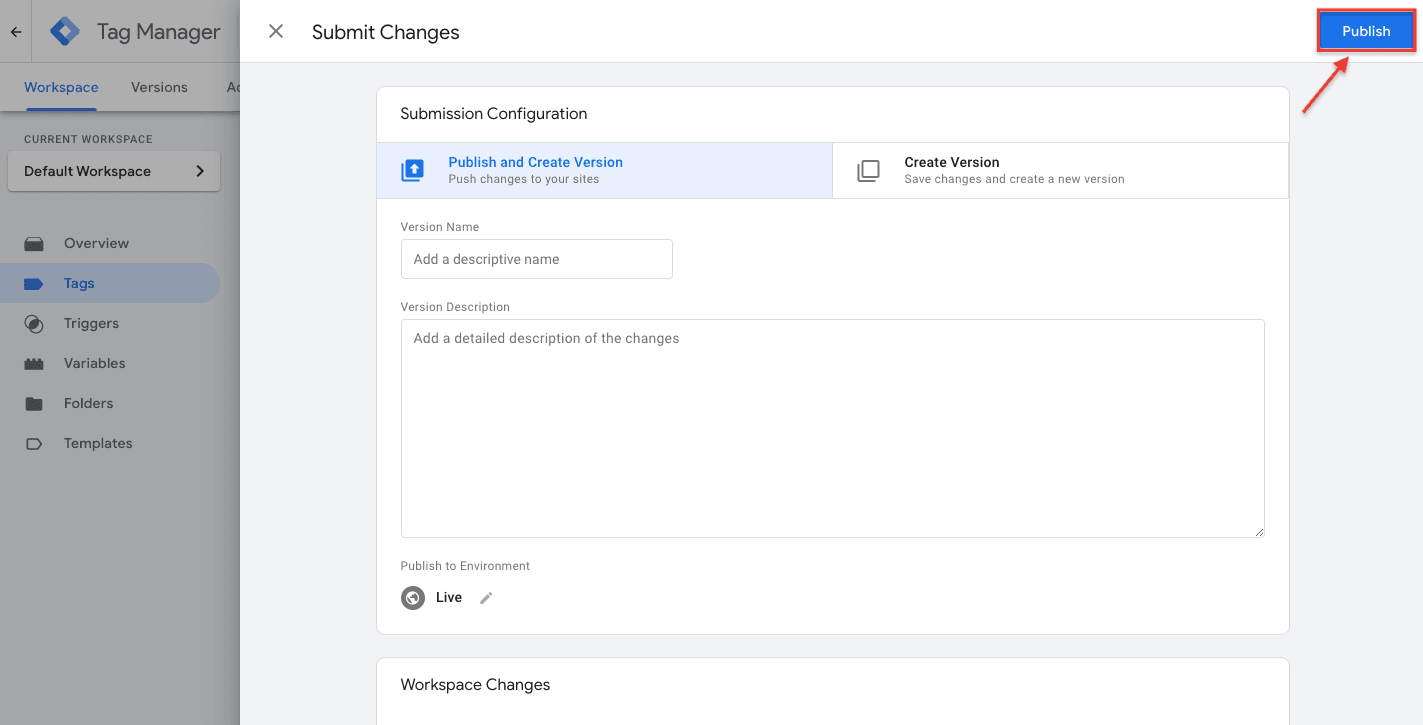
- Finally, click Publish to make this tag live on your website.
Once you have done these steps, your site visitors will not have Functional cookies running in the background after enabling Analytics cookies and disabling Functional cookies.
Now, take a look at your website’s active cookies before and after adding the custom event trigger in GTM.
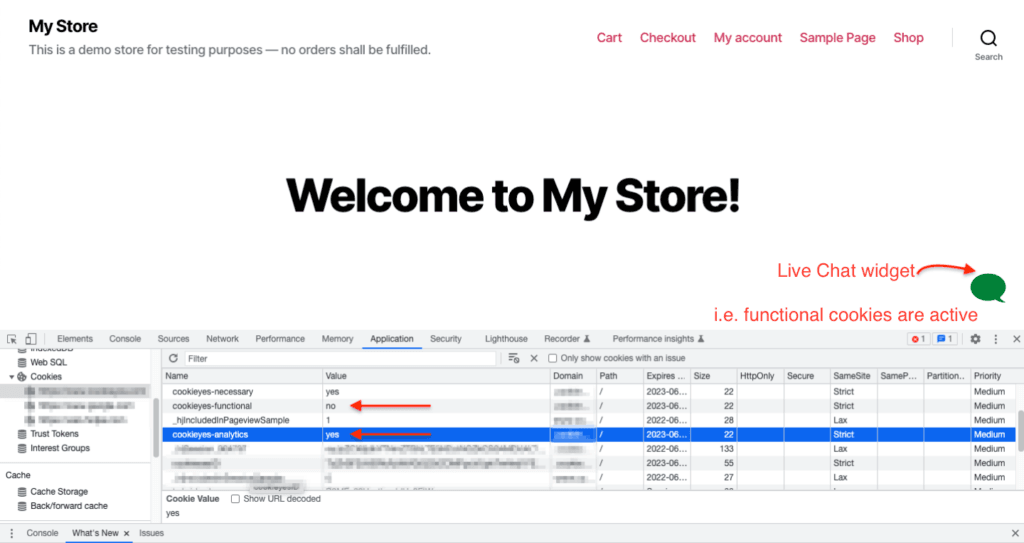
Before adding the custom event trigger in GTM
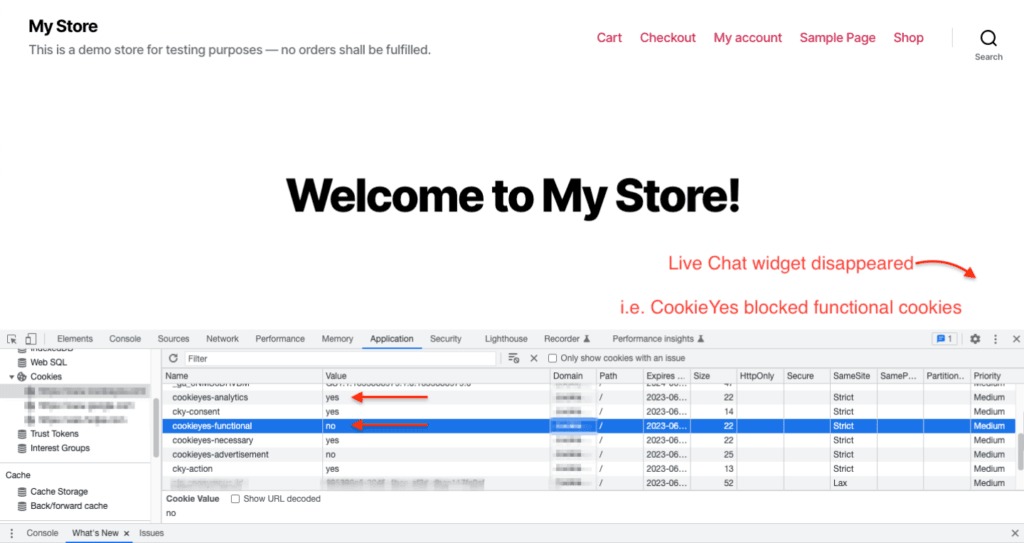
After adding the custom event trigger in GTM