Features
How to Display a Cookie Audit Table on Your Website
The EU’s General Data Protection Regulation (GDPR) requires you to make your European audience aware of what cookies are being used by your website, what their purposes are, how they are being used, and what information they collect from the users.
You can use a cookie audit table to notify your website visitors about the types of cookies you use, their purposes, and other specifications.
CookieYes enables you to add cookie audit tables inside your cookie consent banner as well as display them on any page on your website. You can also customize the cookie audit tables set by CookieYes easily.
If you don’t have an account with CookieYes, sign up and try for free.
Our setup guide will help you get started with CookieYes.
Displaying cookie audit tables on your website
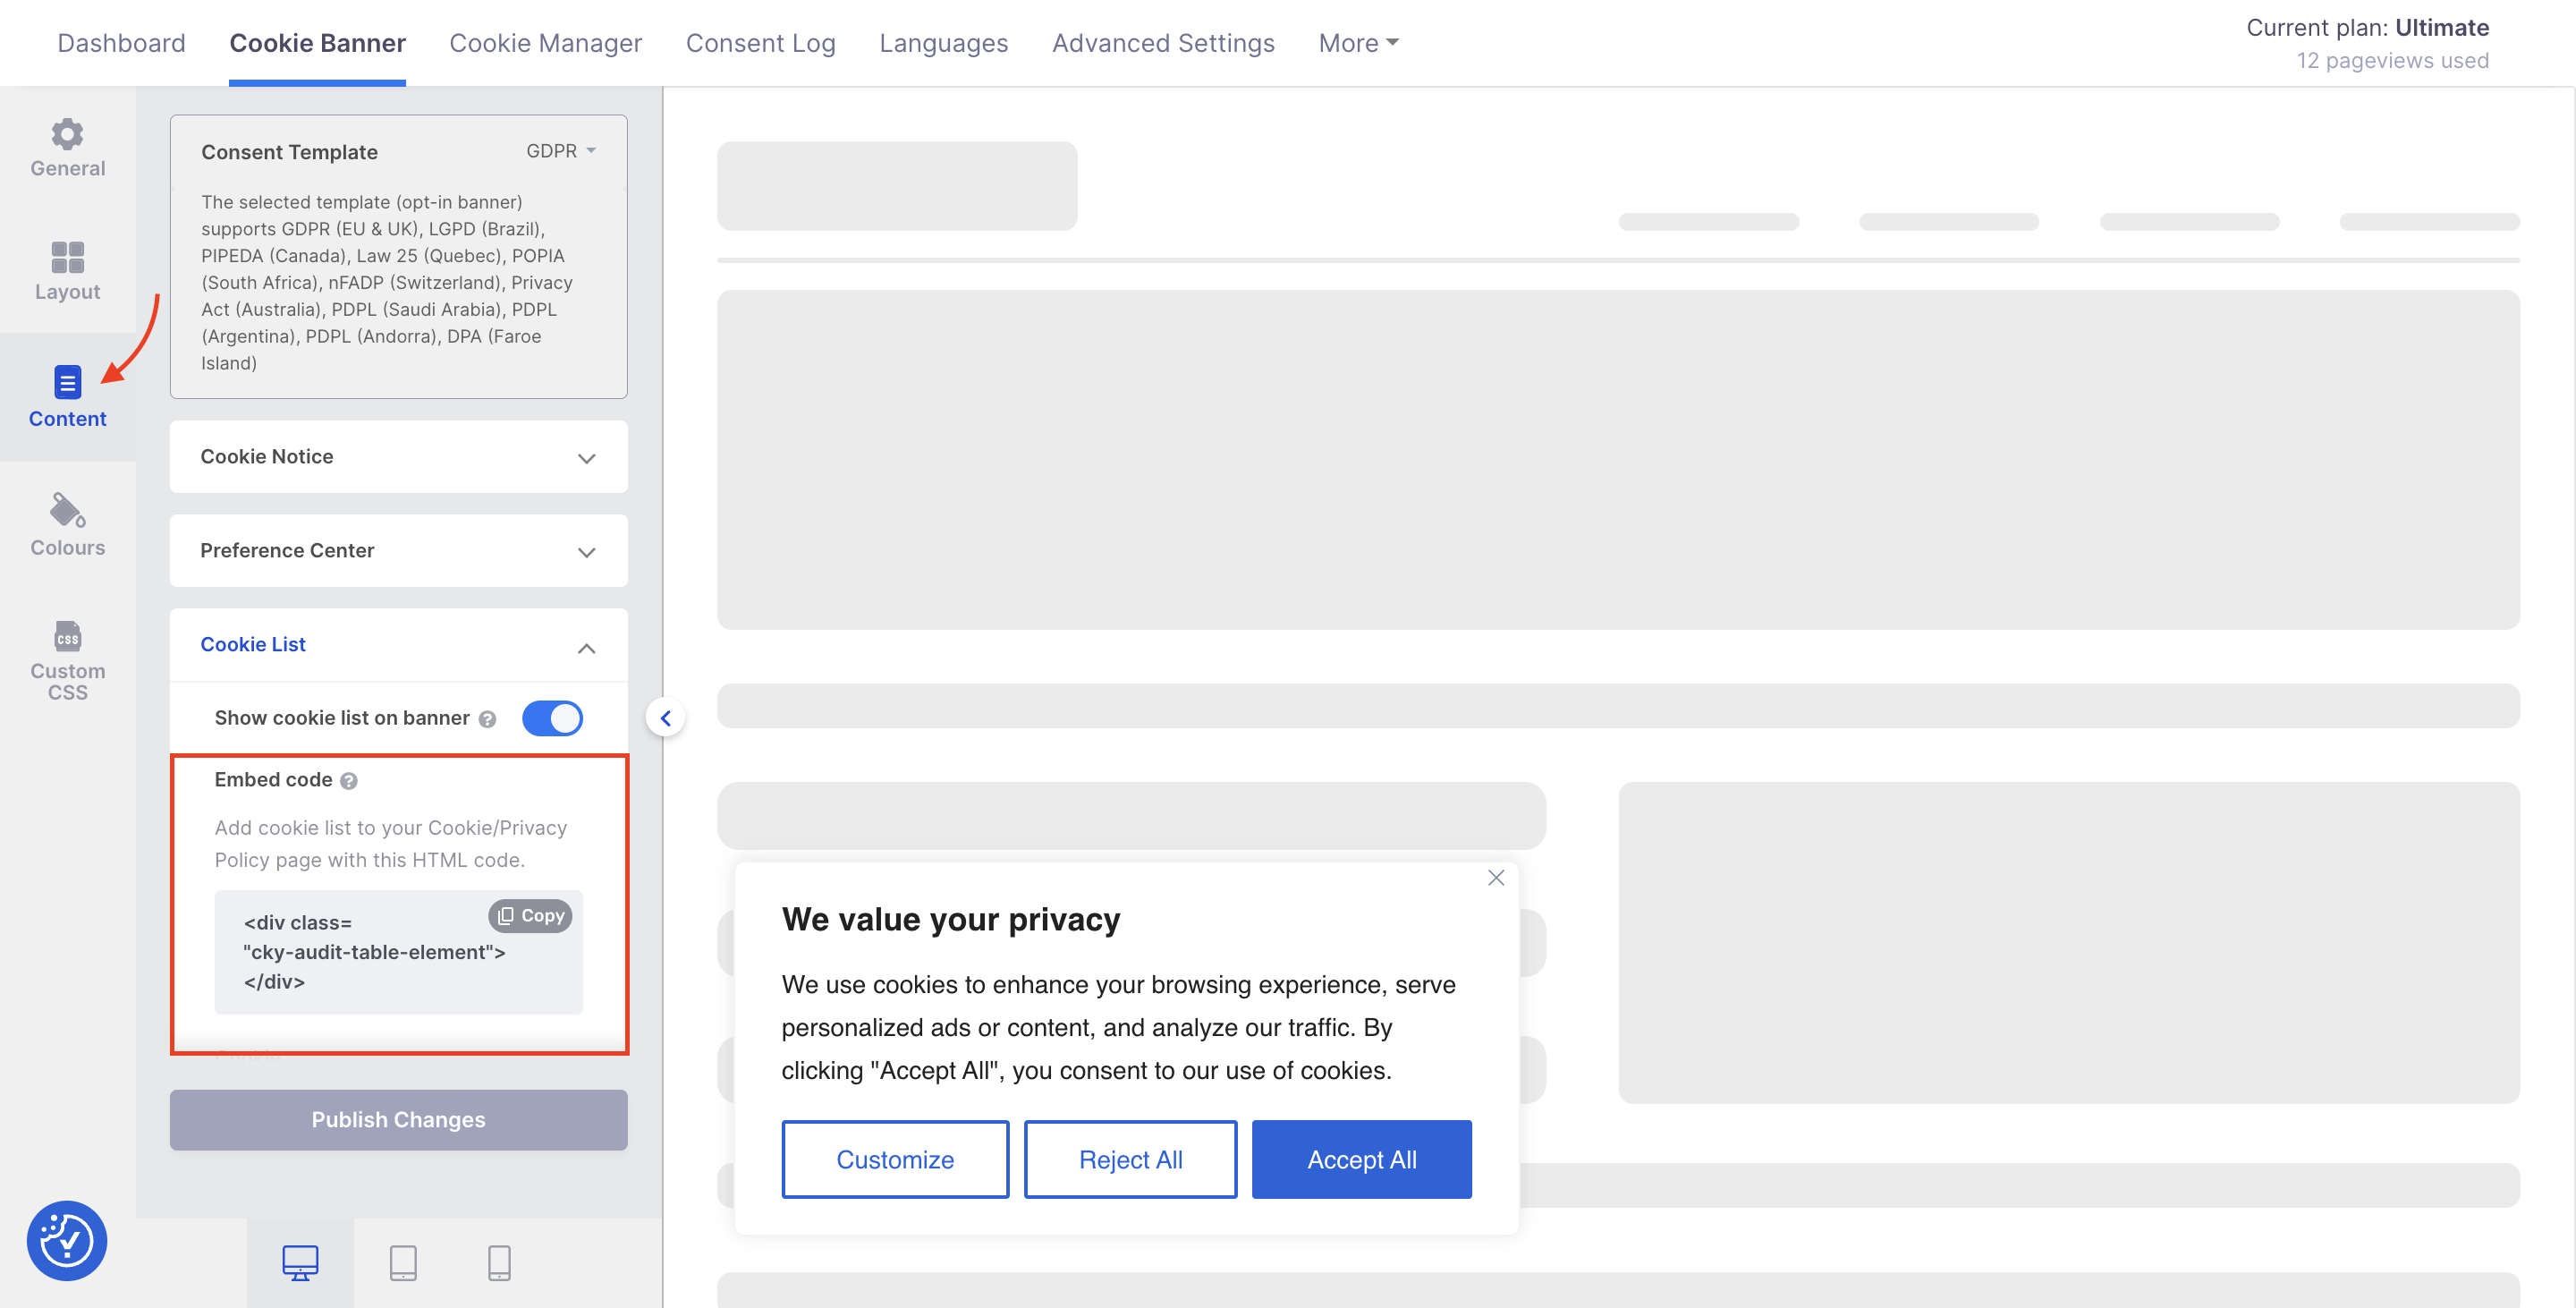
CookieYes allows you to display category-wise cookie audit tables on your website so that your site visitors can see them on their browsers. To do this:
- On the CookieYes Dashboard, navigate to Cookie Banner > Content > Cookie List.
- Copy the HTML code to embed the cookie list in your website.
This feature is only available for CookieYes webapp connected users.
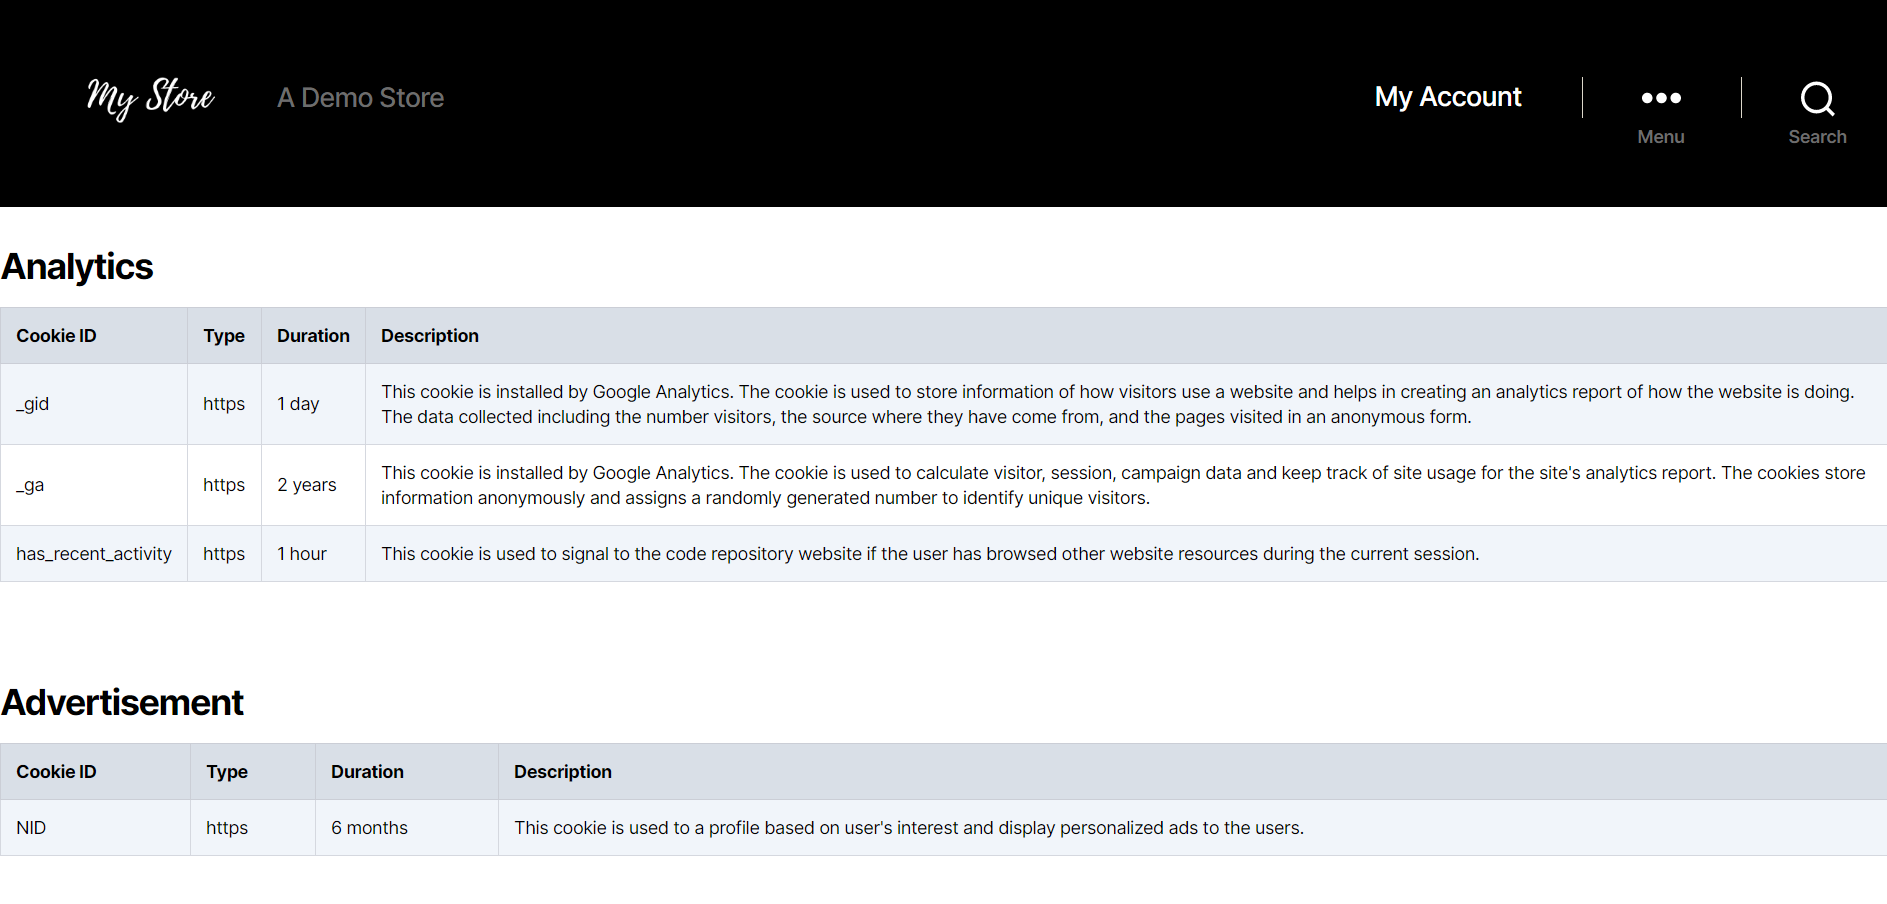
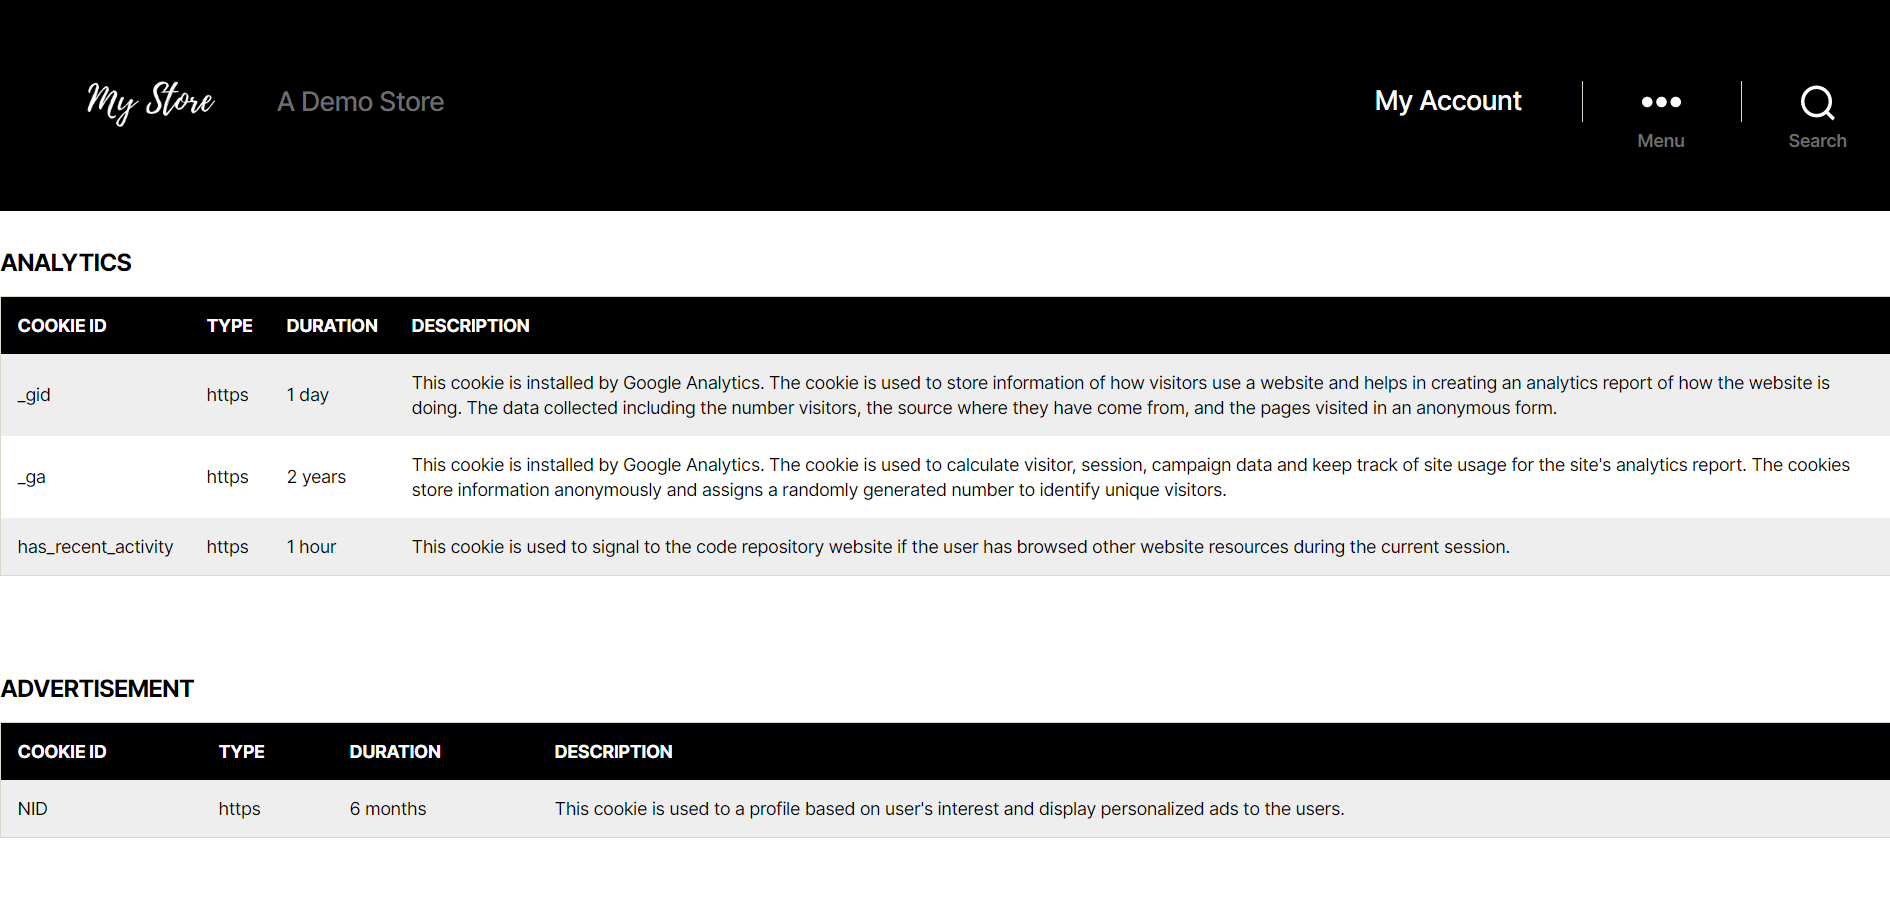
This is how your web page will look like after adding this code.
Customizing cookie audit table
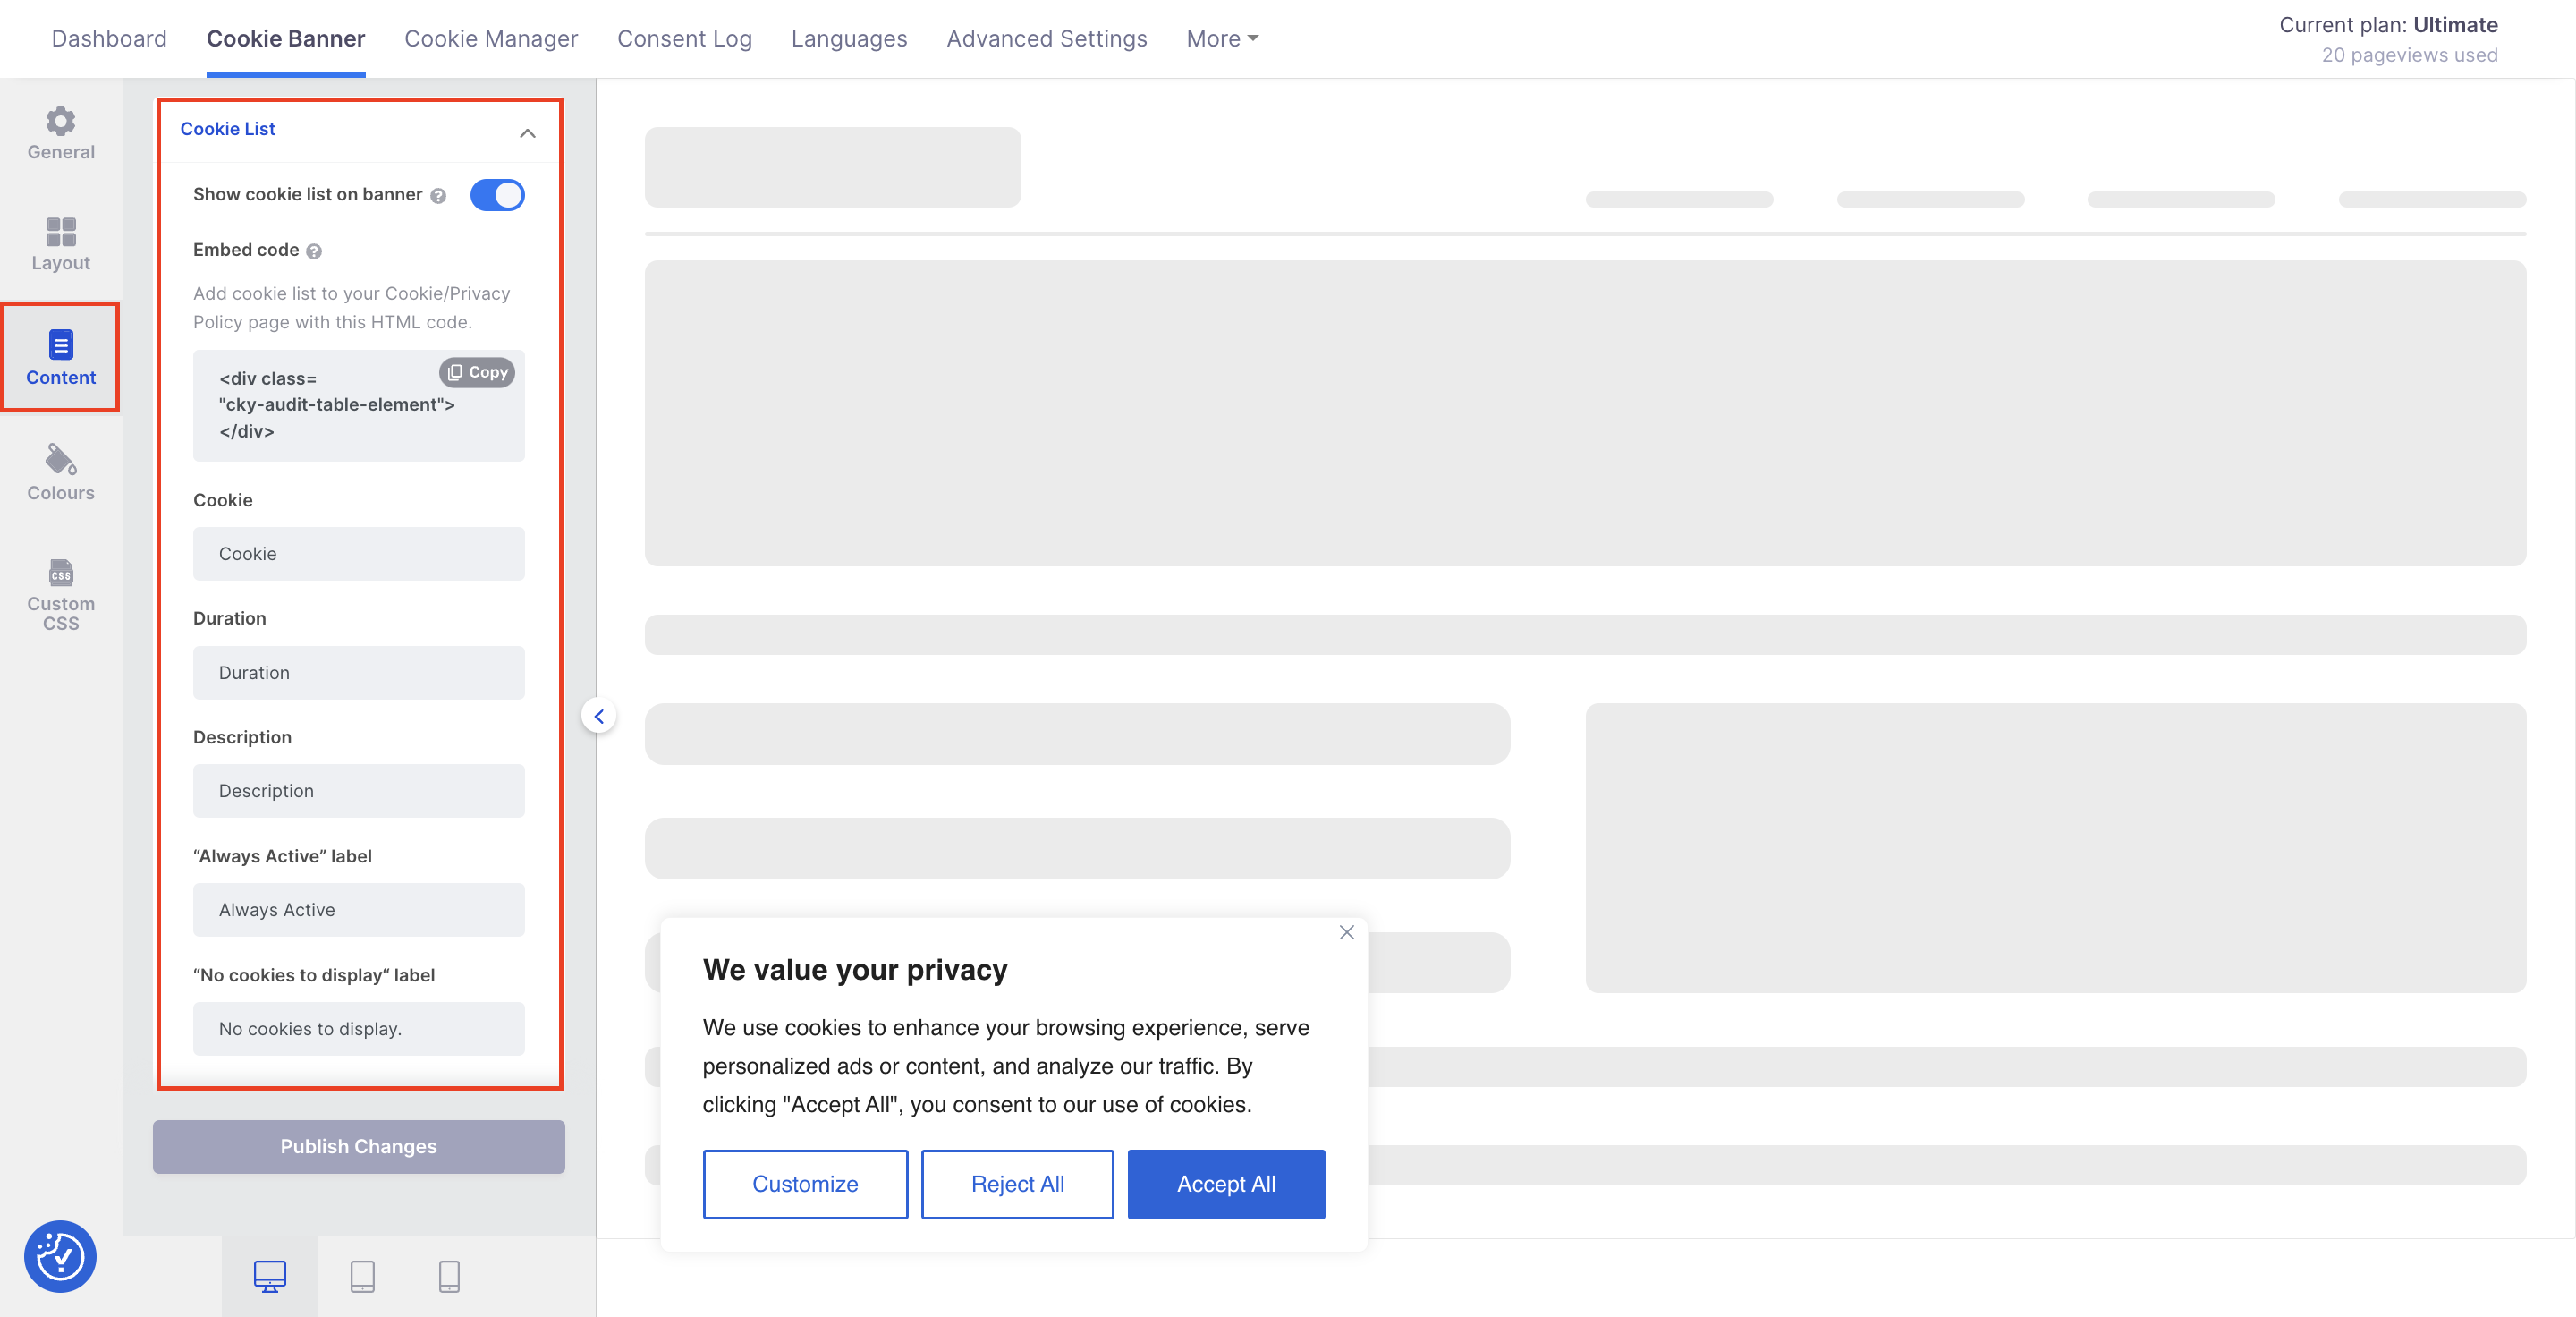
CookieYes lets you customize the column labels of your cookie audit table. This is how you can do it:
Step 1: Sign in to your CookieYes account. If you don’t have an account, sign up here for free.
Step 2: On the CookieYes Dashboard, navigate to Cookie Banner > Content > Cookie List.

Step 3: Change the label names according to your preference > Click Publish Changes to save all your settings.
- If you want to add further customization to your cookie audit table, you can include it inside the Custom CSS tab under the Add your Custom CSS here field.
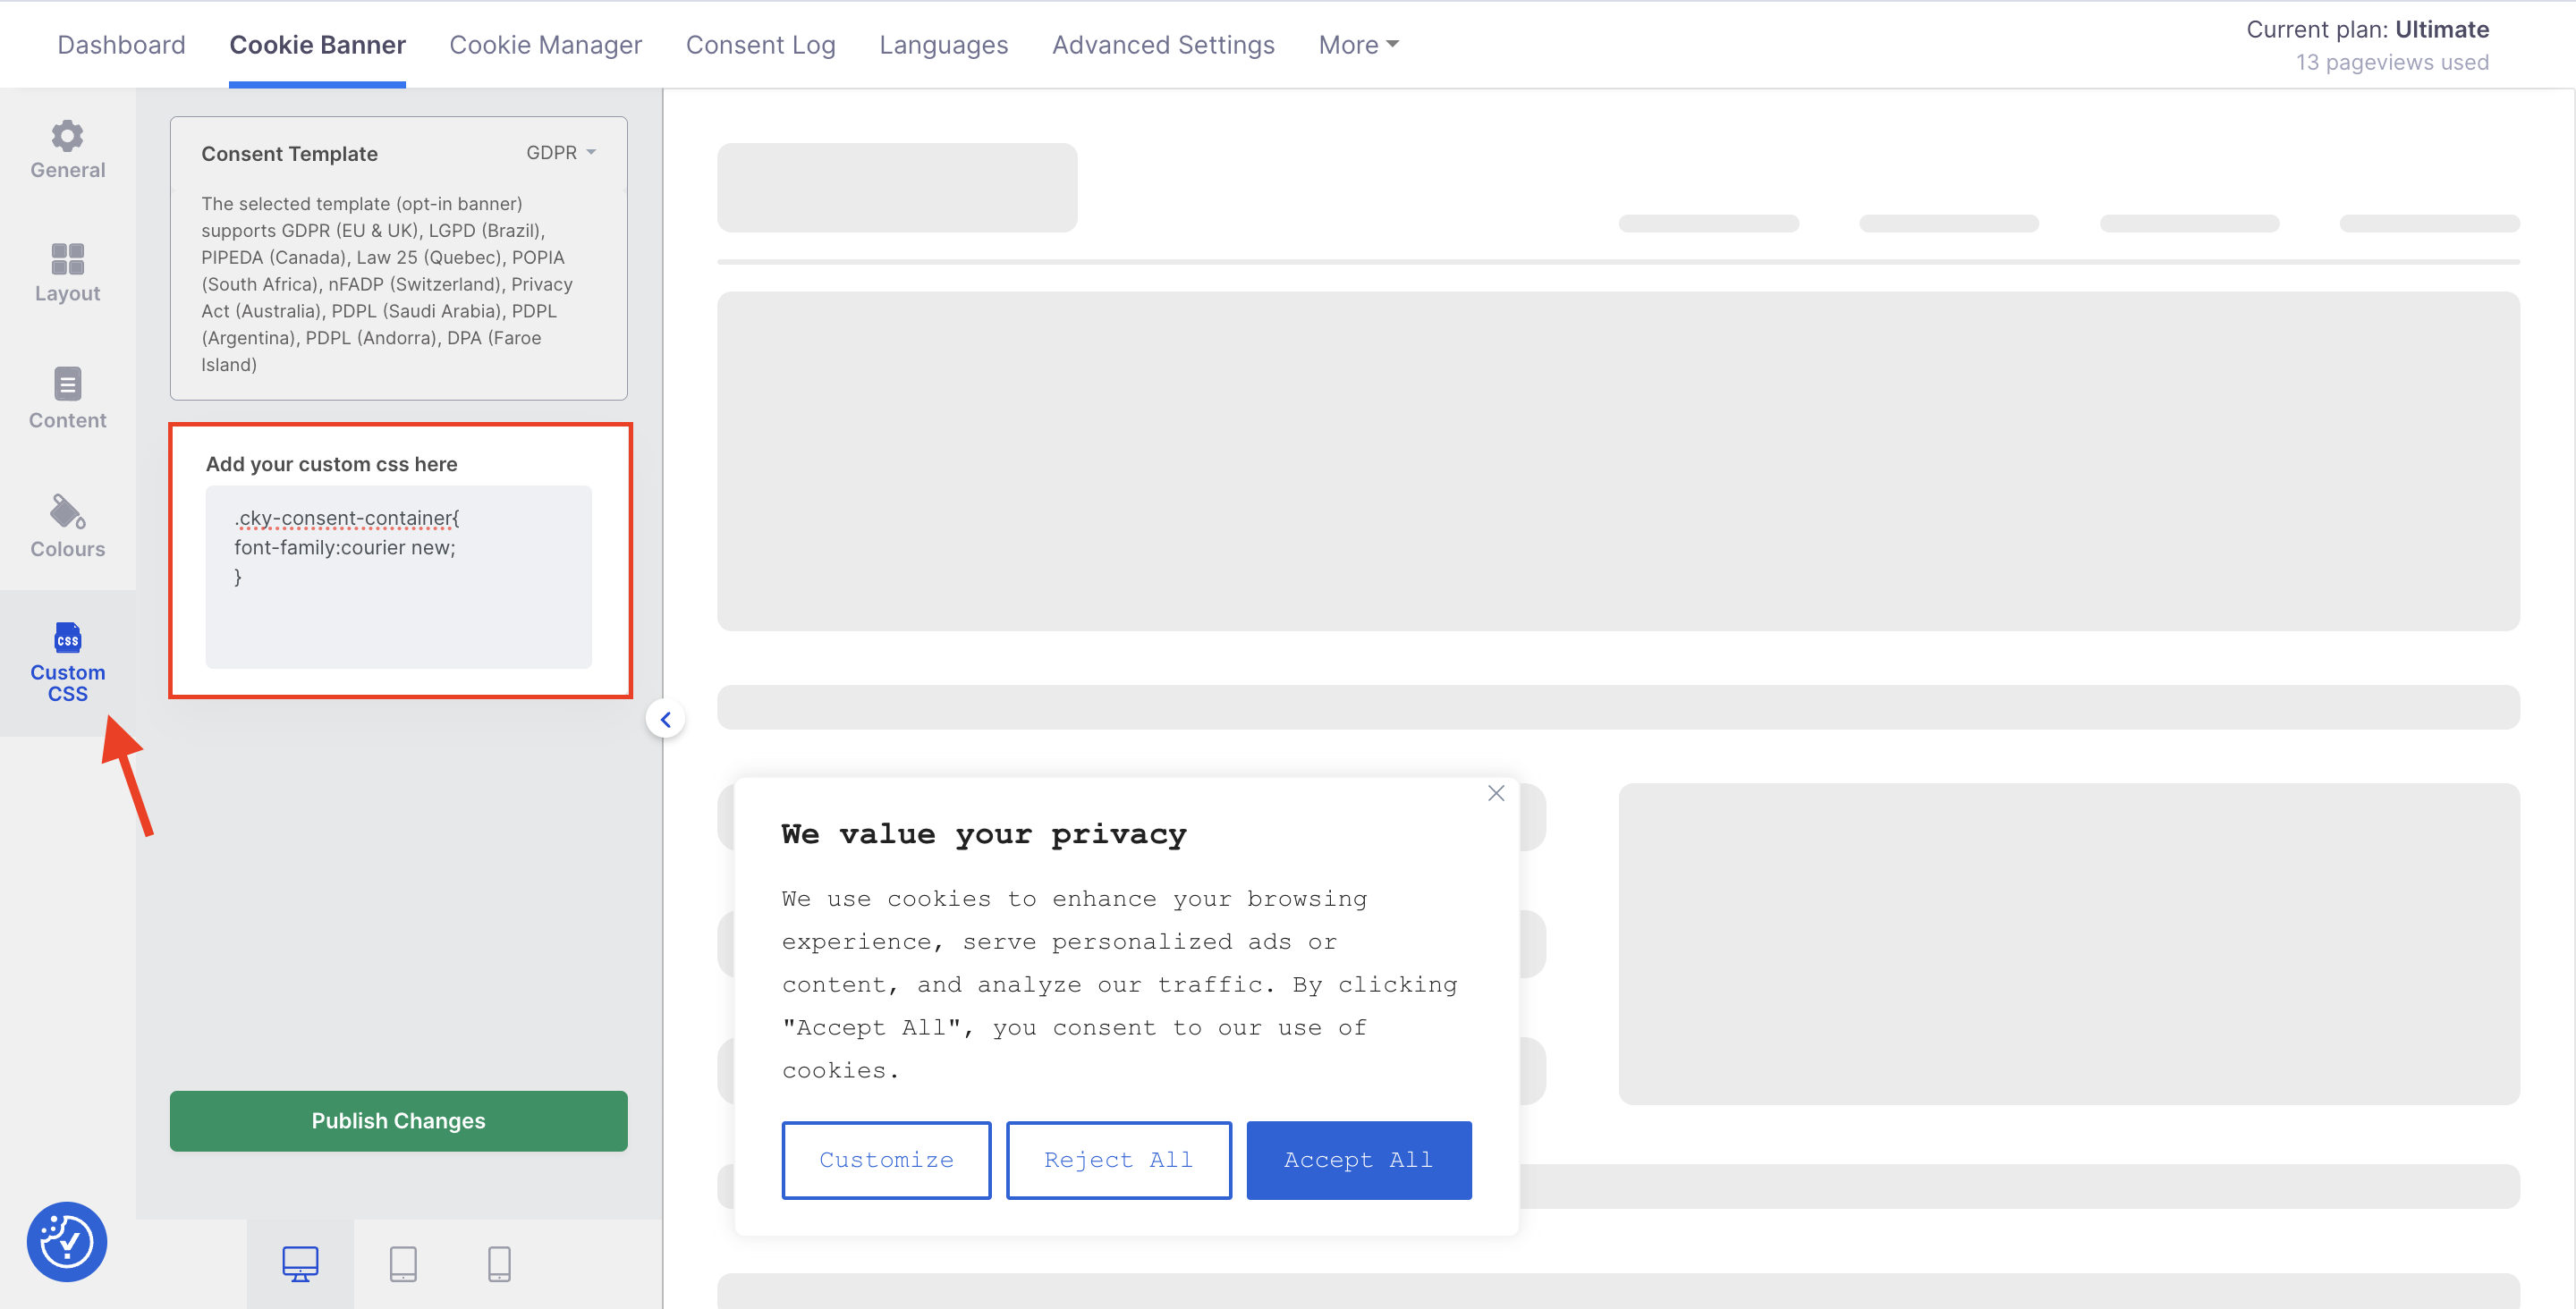
Now, reload your website to see the changes you have made.
CookieYes also allows you to add cookies to your cookie audit table manually.
Below are the steps to add a cookie to the audit table:
Step 1: From your CookieYes dashboard, go to Cookie Manager in the top navigation panel > Cookie List > Select the cookie category in which you want to add a cookie audit table.
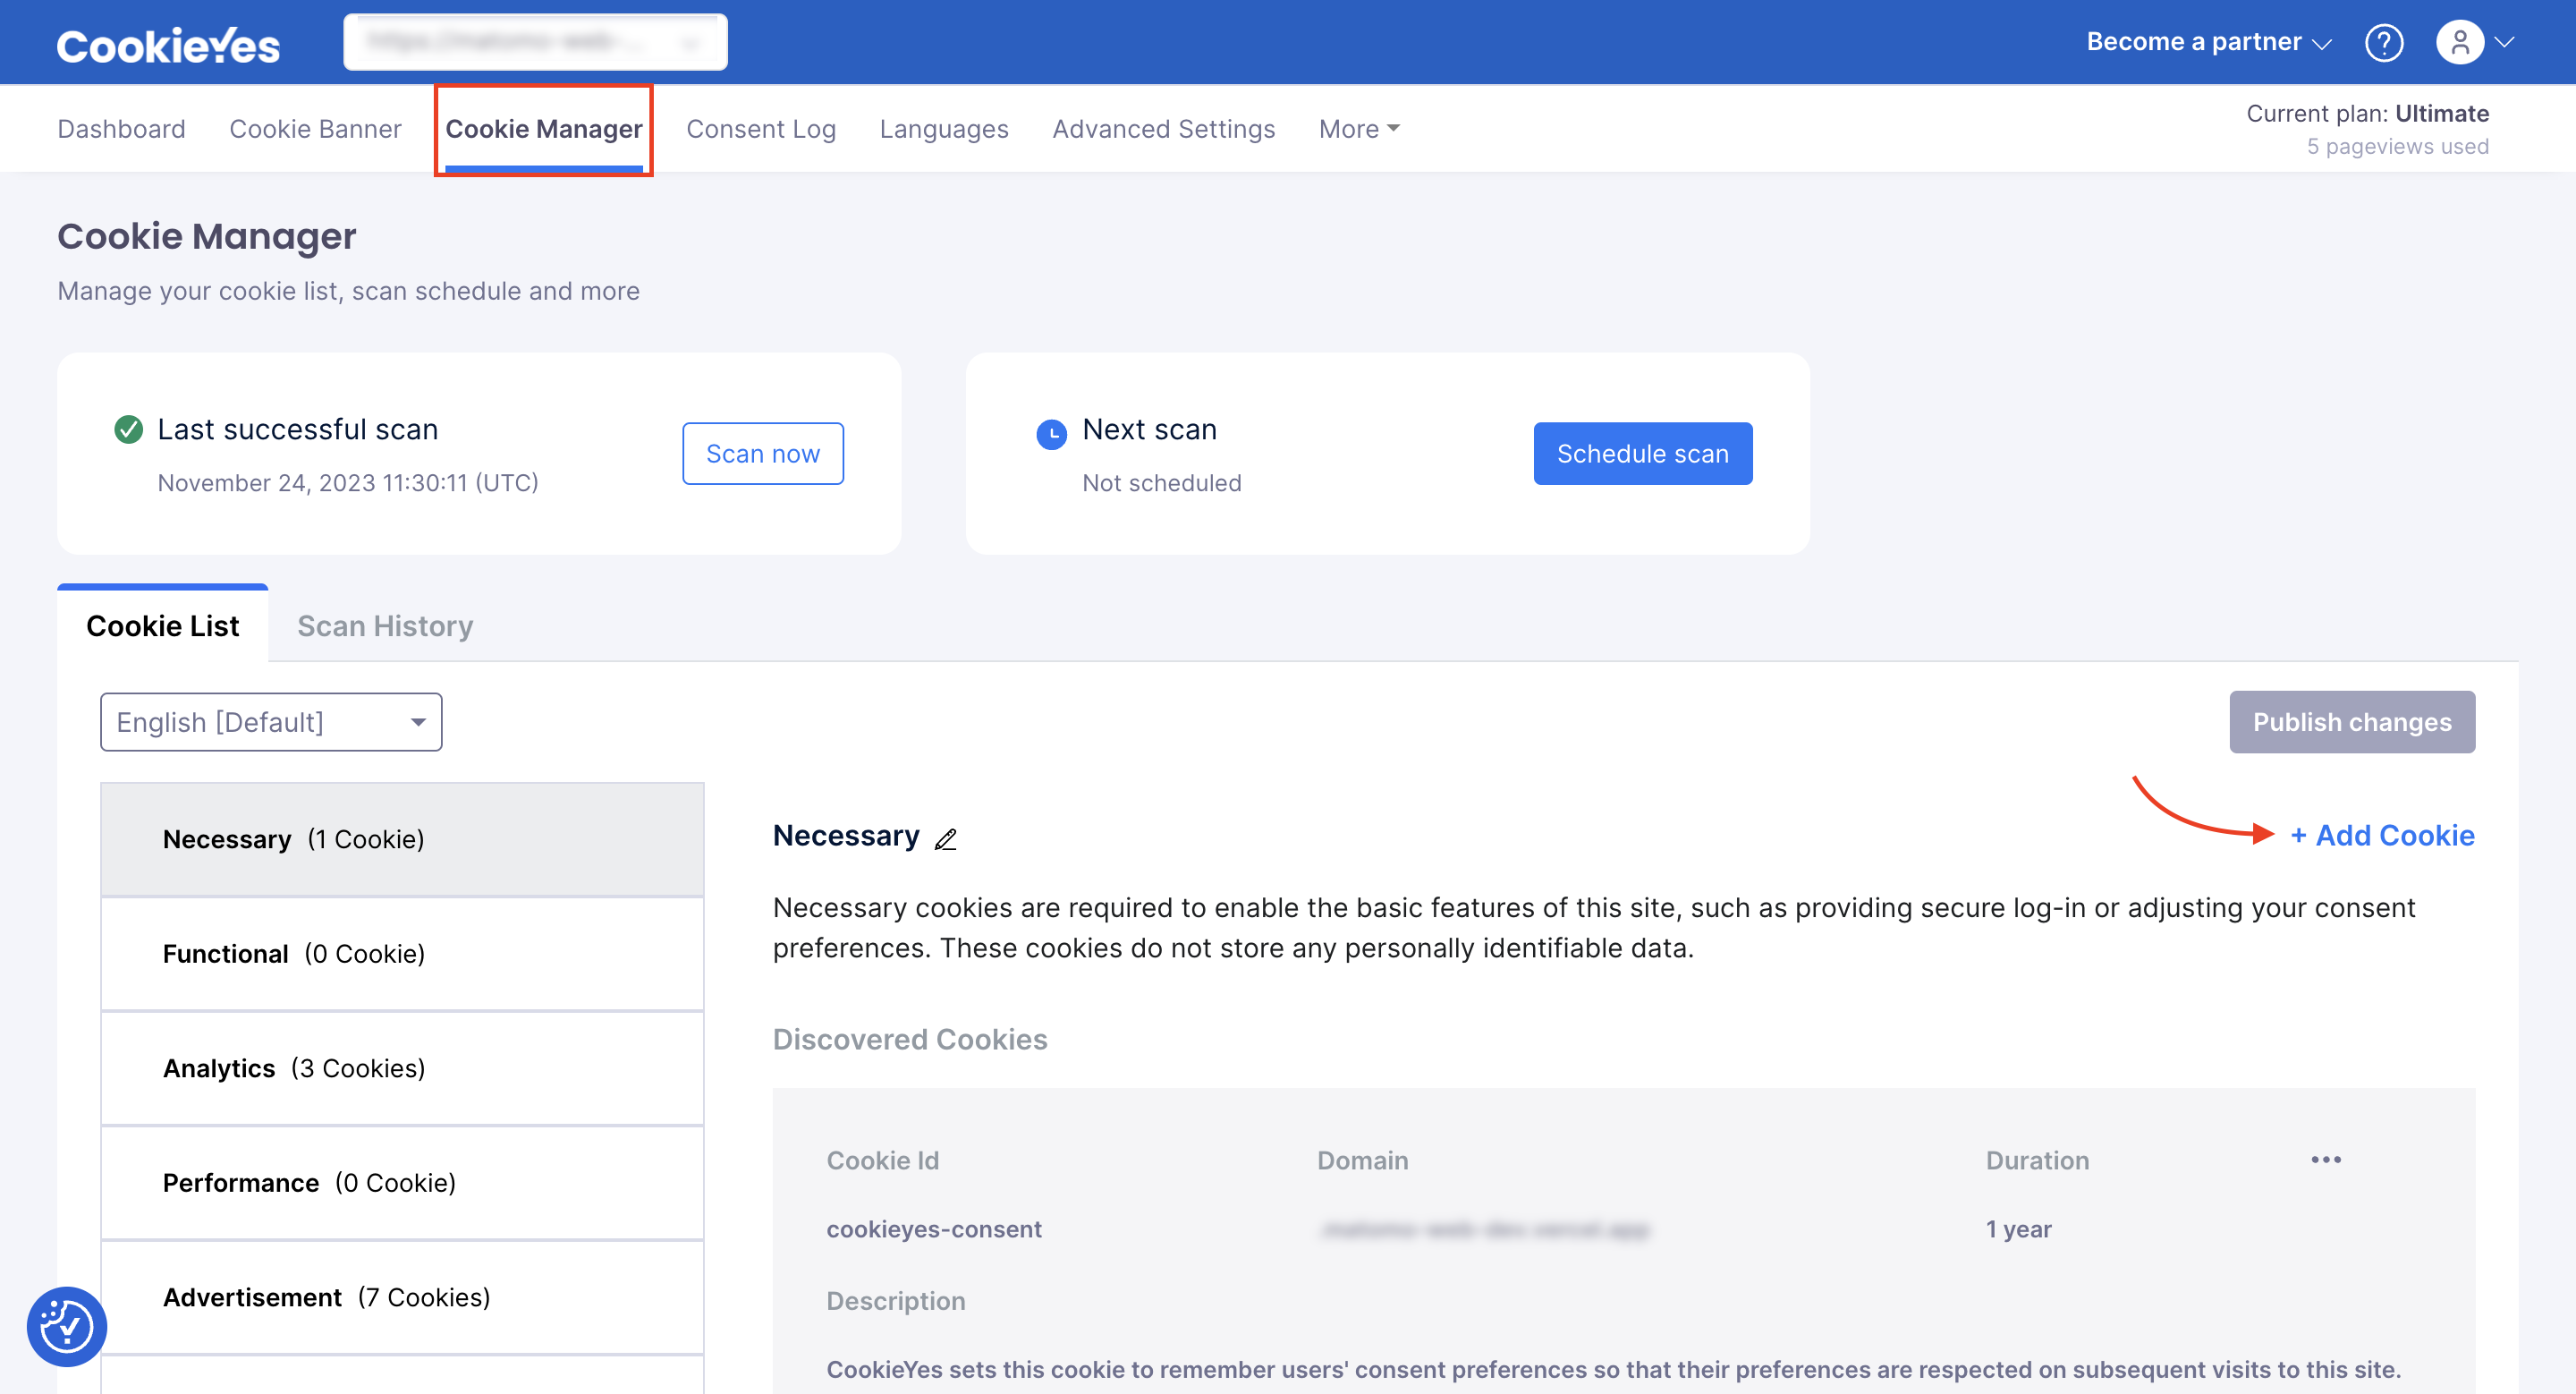
Step 2: Click on the + Add New Cookie button.
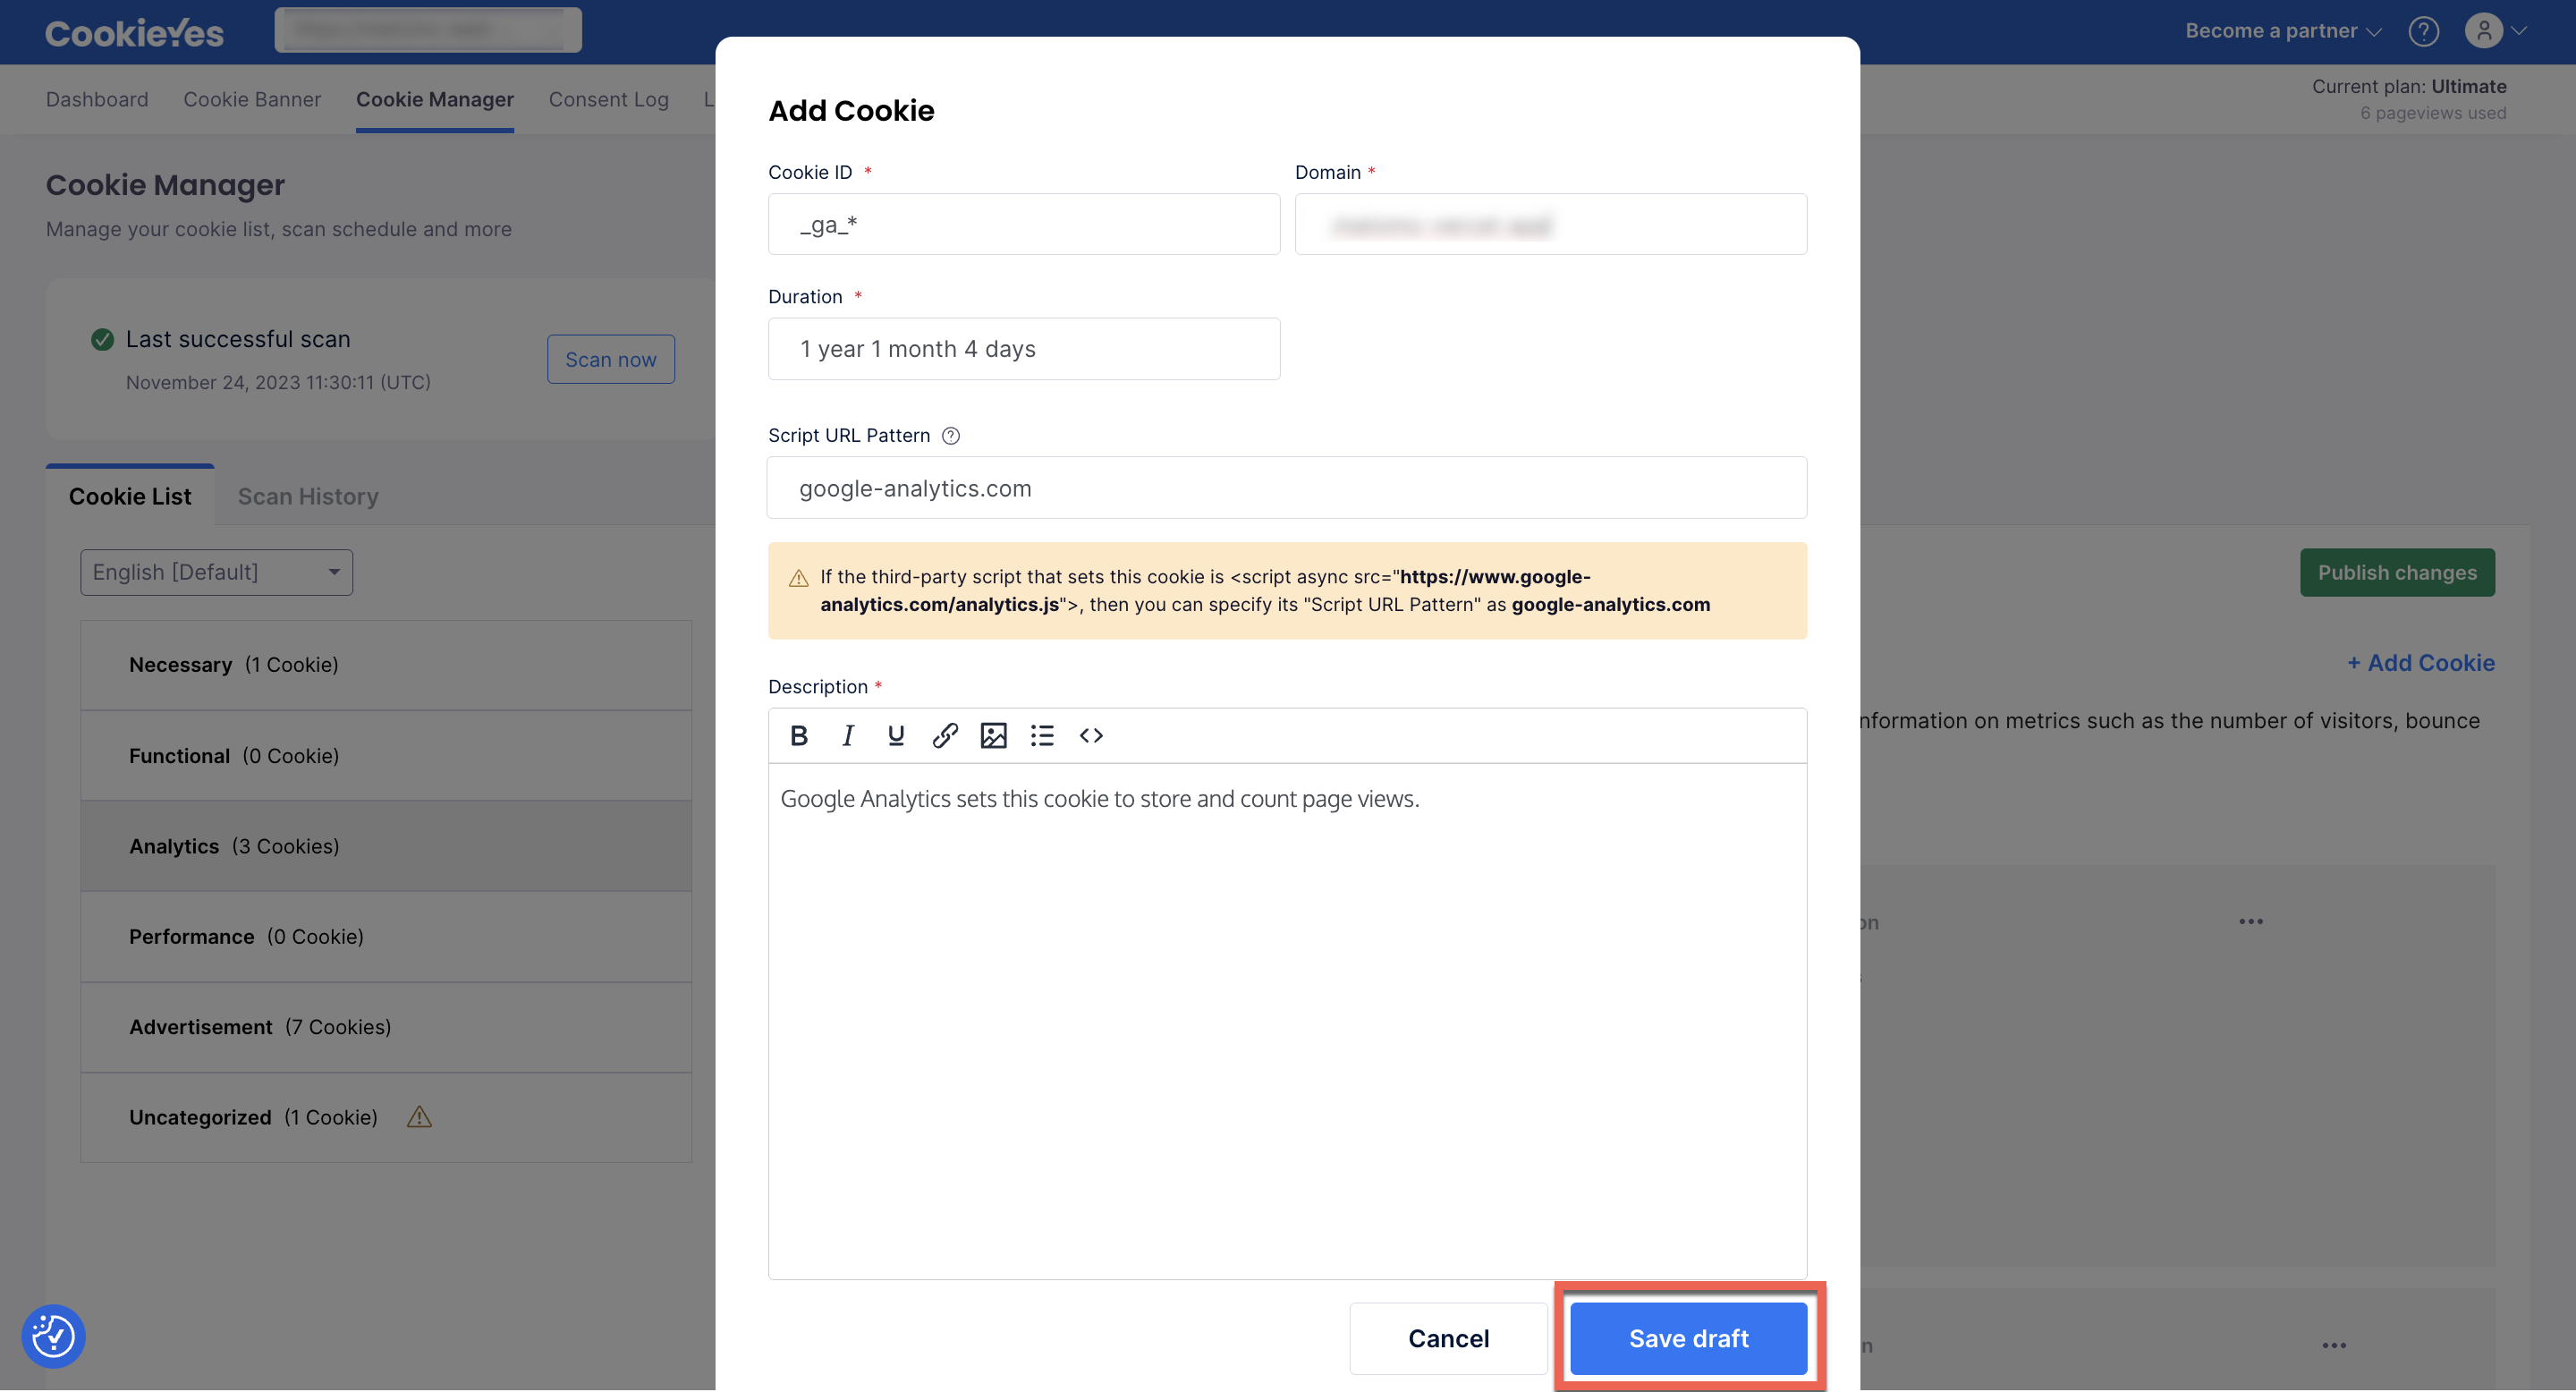
Step 3: Enter the Cookie ID, Domain, Duration, Script URL Pattern and Description in the respective text boxes > Click Save Draft and Publish Change.
- Cookie ID: Enter the name of the cookie. You can add a user-friendly name, as this field is for audit purposes.
- Domain: Add the domain from which the cookie is being installed on the user’s browser.
- Duration: Specify the time duration the cookies will persist on the users’ browser.
- Script URL Pattern: If a third party sets the cookie you are adding, then you can add its URL pattern here to enable auto-blocking before consent.
- Description: Enter the description of the cookie to help users clearly understand the purpose of a cookie, the type of data it collects, etc.
In the same way, you could add more cookies to the cookie list.
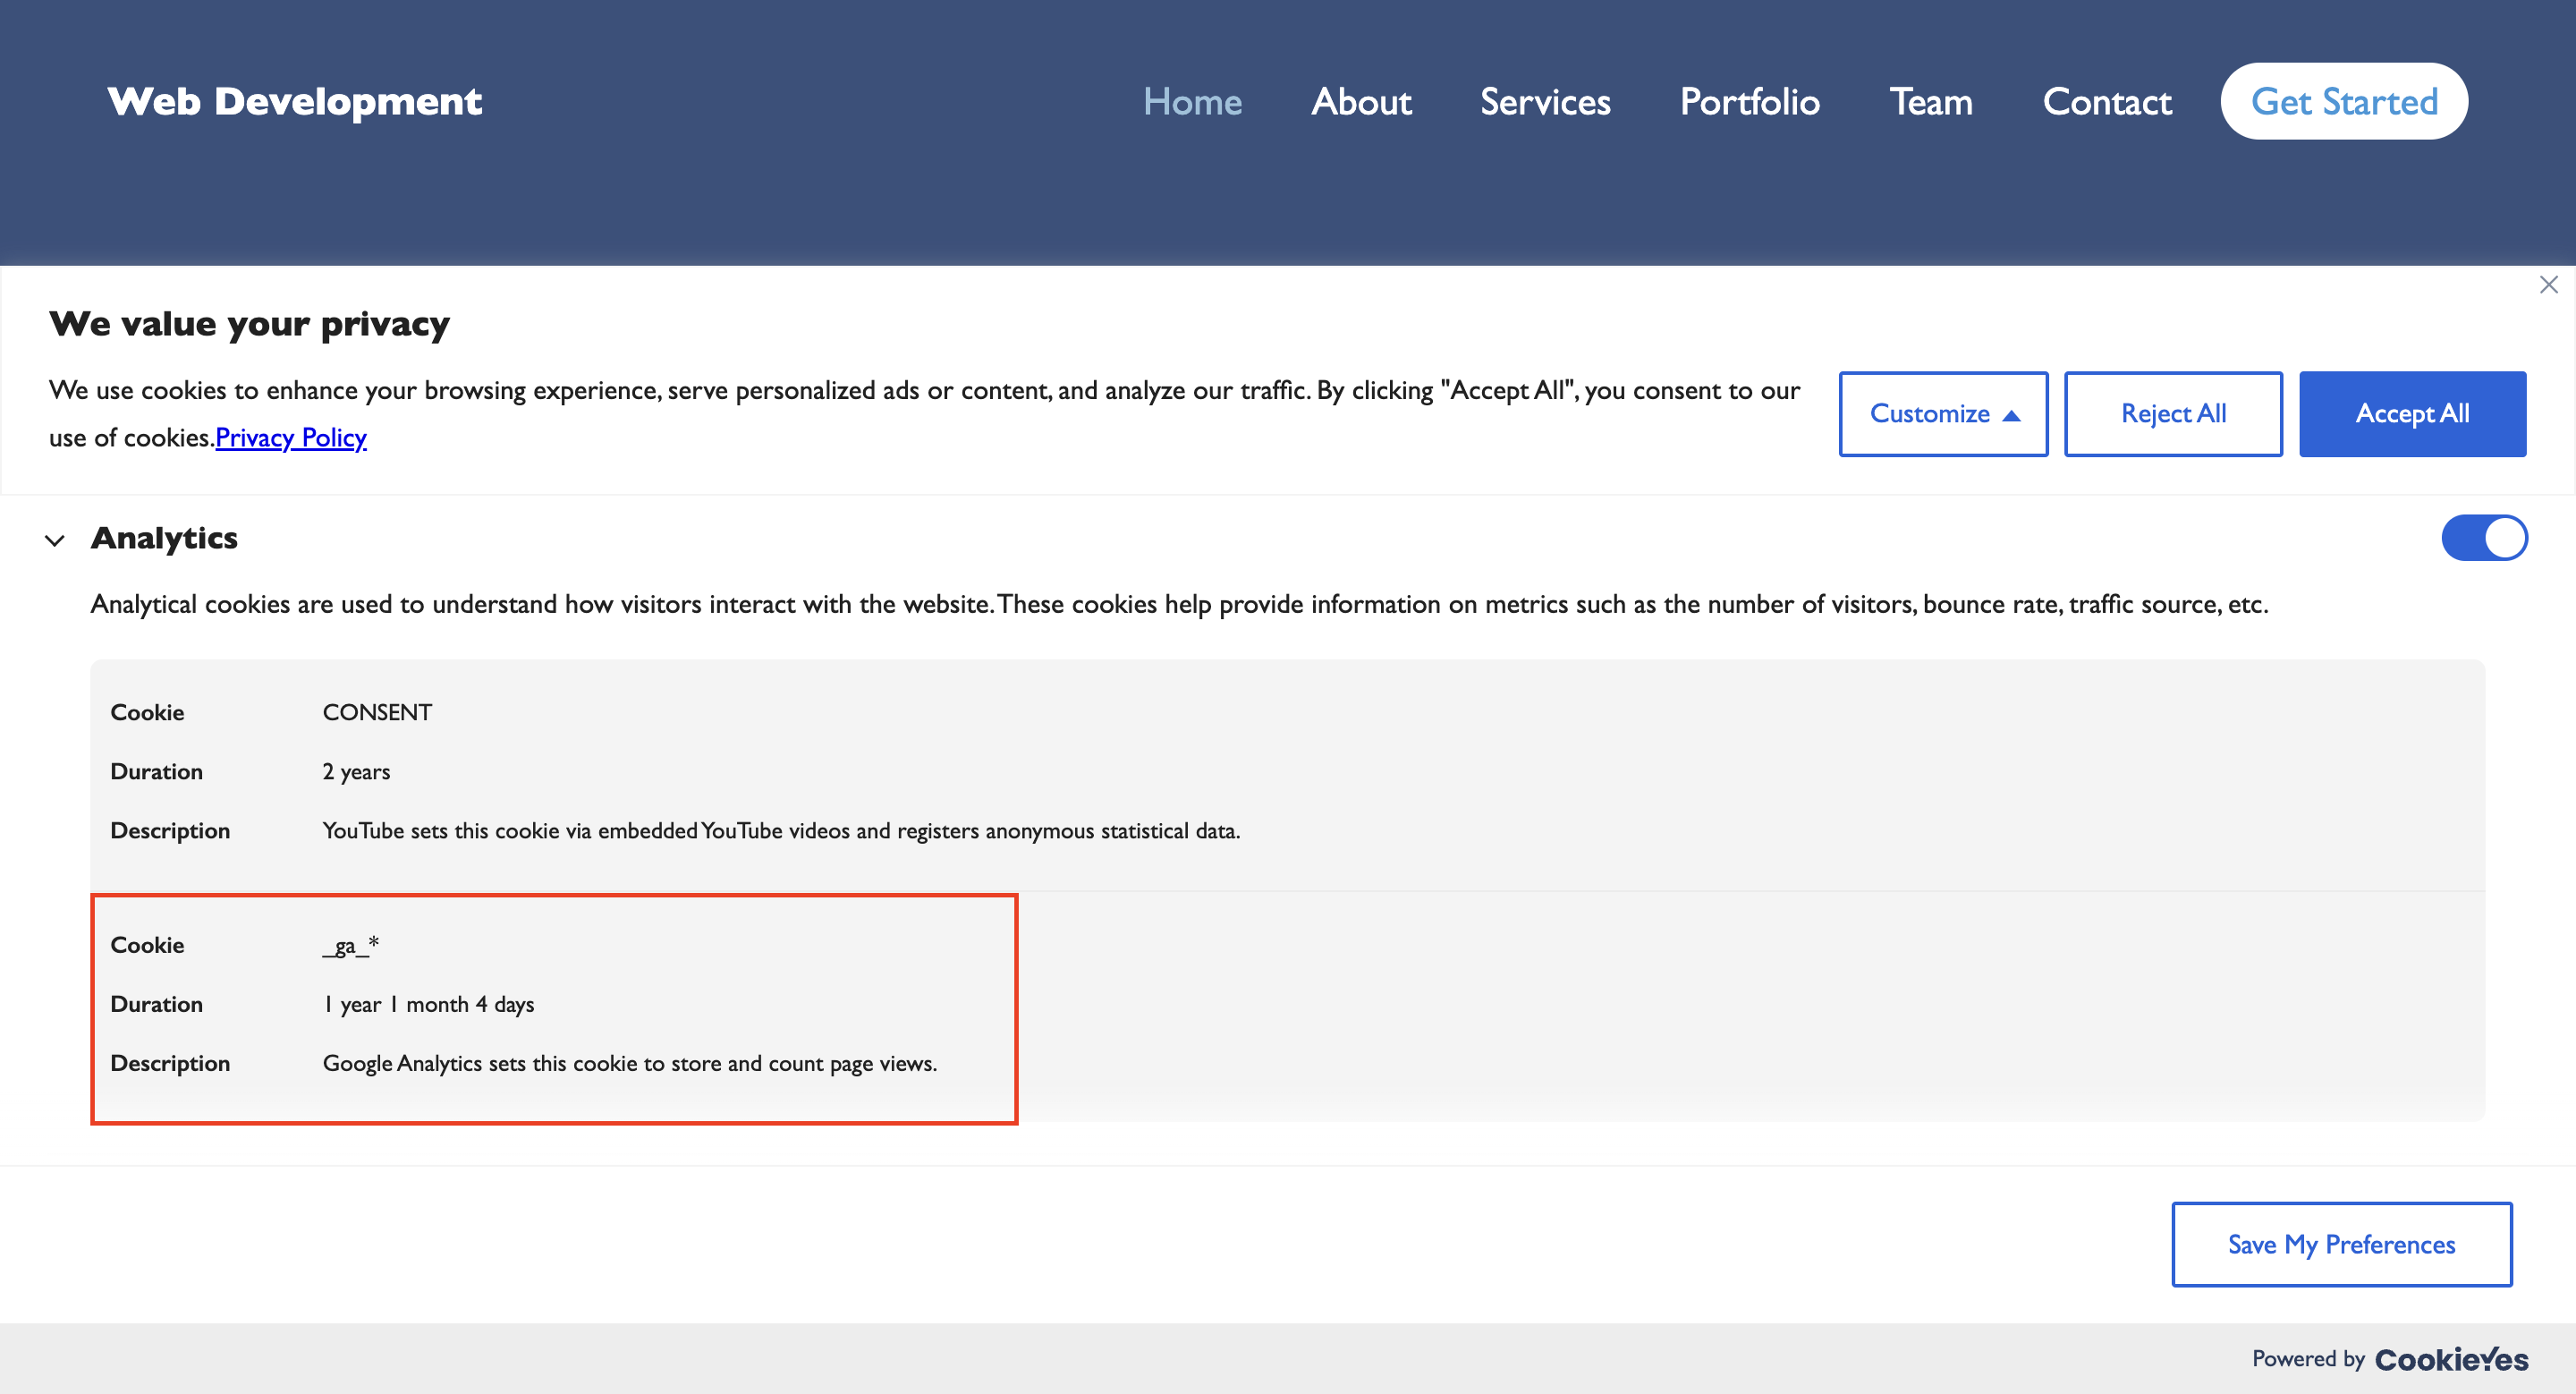
Ensure that you have added the CookieYes script to your website, as described in our setup guide. Then, the cookie banner consisting of your cookie audit table will be published on your website.
Here’s how CookieYes displays the cookie audit table in the cookie consent banner. Click Customize and go to the respective cookie category to see the cookie audit table that you have added.
If you have any issues or queries regarding CookieYes, feel free to contact our support team.