Features
How to Comply With Italy’s Cookie Guidelines
Italy’s Data Protection Authority (the Garante) published a set of cookie guidelines that came into effect on January 10, 2022. The cookie consent rules are applicable to you if your website has users based in Italy. This guide will walk you through how you can implement Garante’s cookie guidelines on your website and stay compliant.
- If you are new to CookieYes, then Sign up here and try for free.
- Access the setup guide to implement a cookie banner and follow this article for further steps.
- If you are a CookieYes user, log in to your CookieYes account.
Note: Ensure that you have completed website scanning. To scan your website, head to CookieYes Dashboard and click on ‘Scan website for cookies’. Once scanning is complete, CookieYes will categorize and auto-update your list of cookies in the cookie audit table.
Steps to comply with Italy’s new cookie guidelines
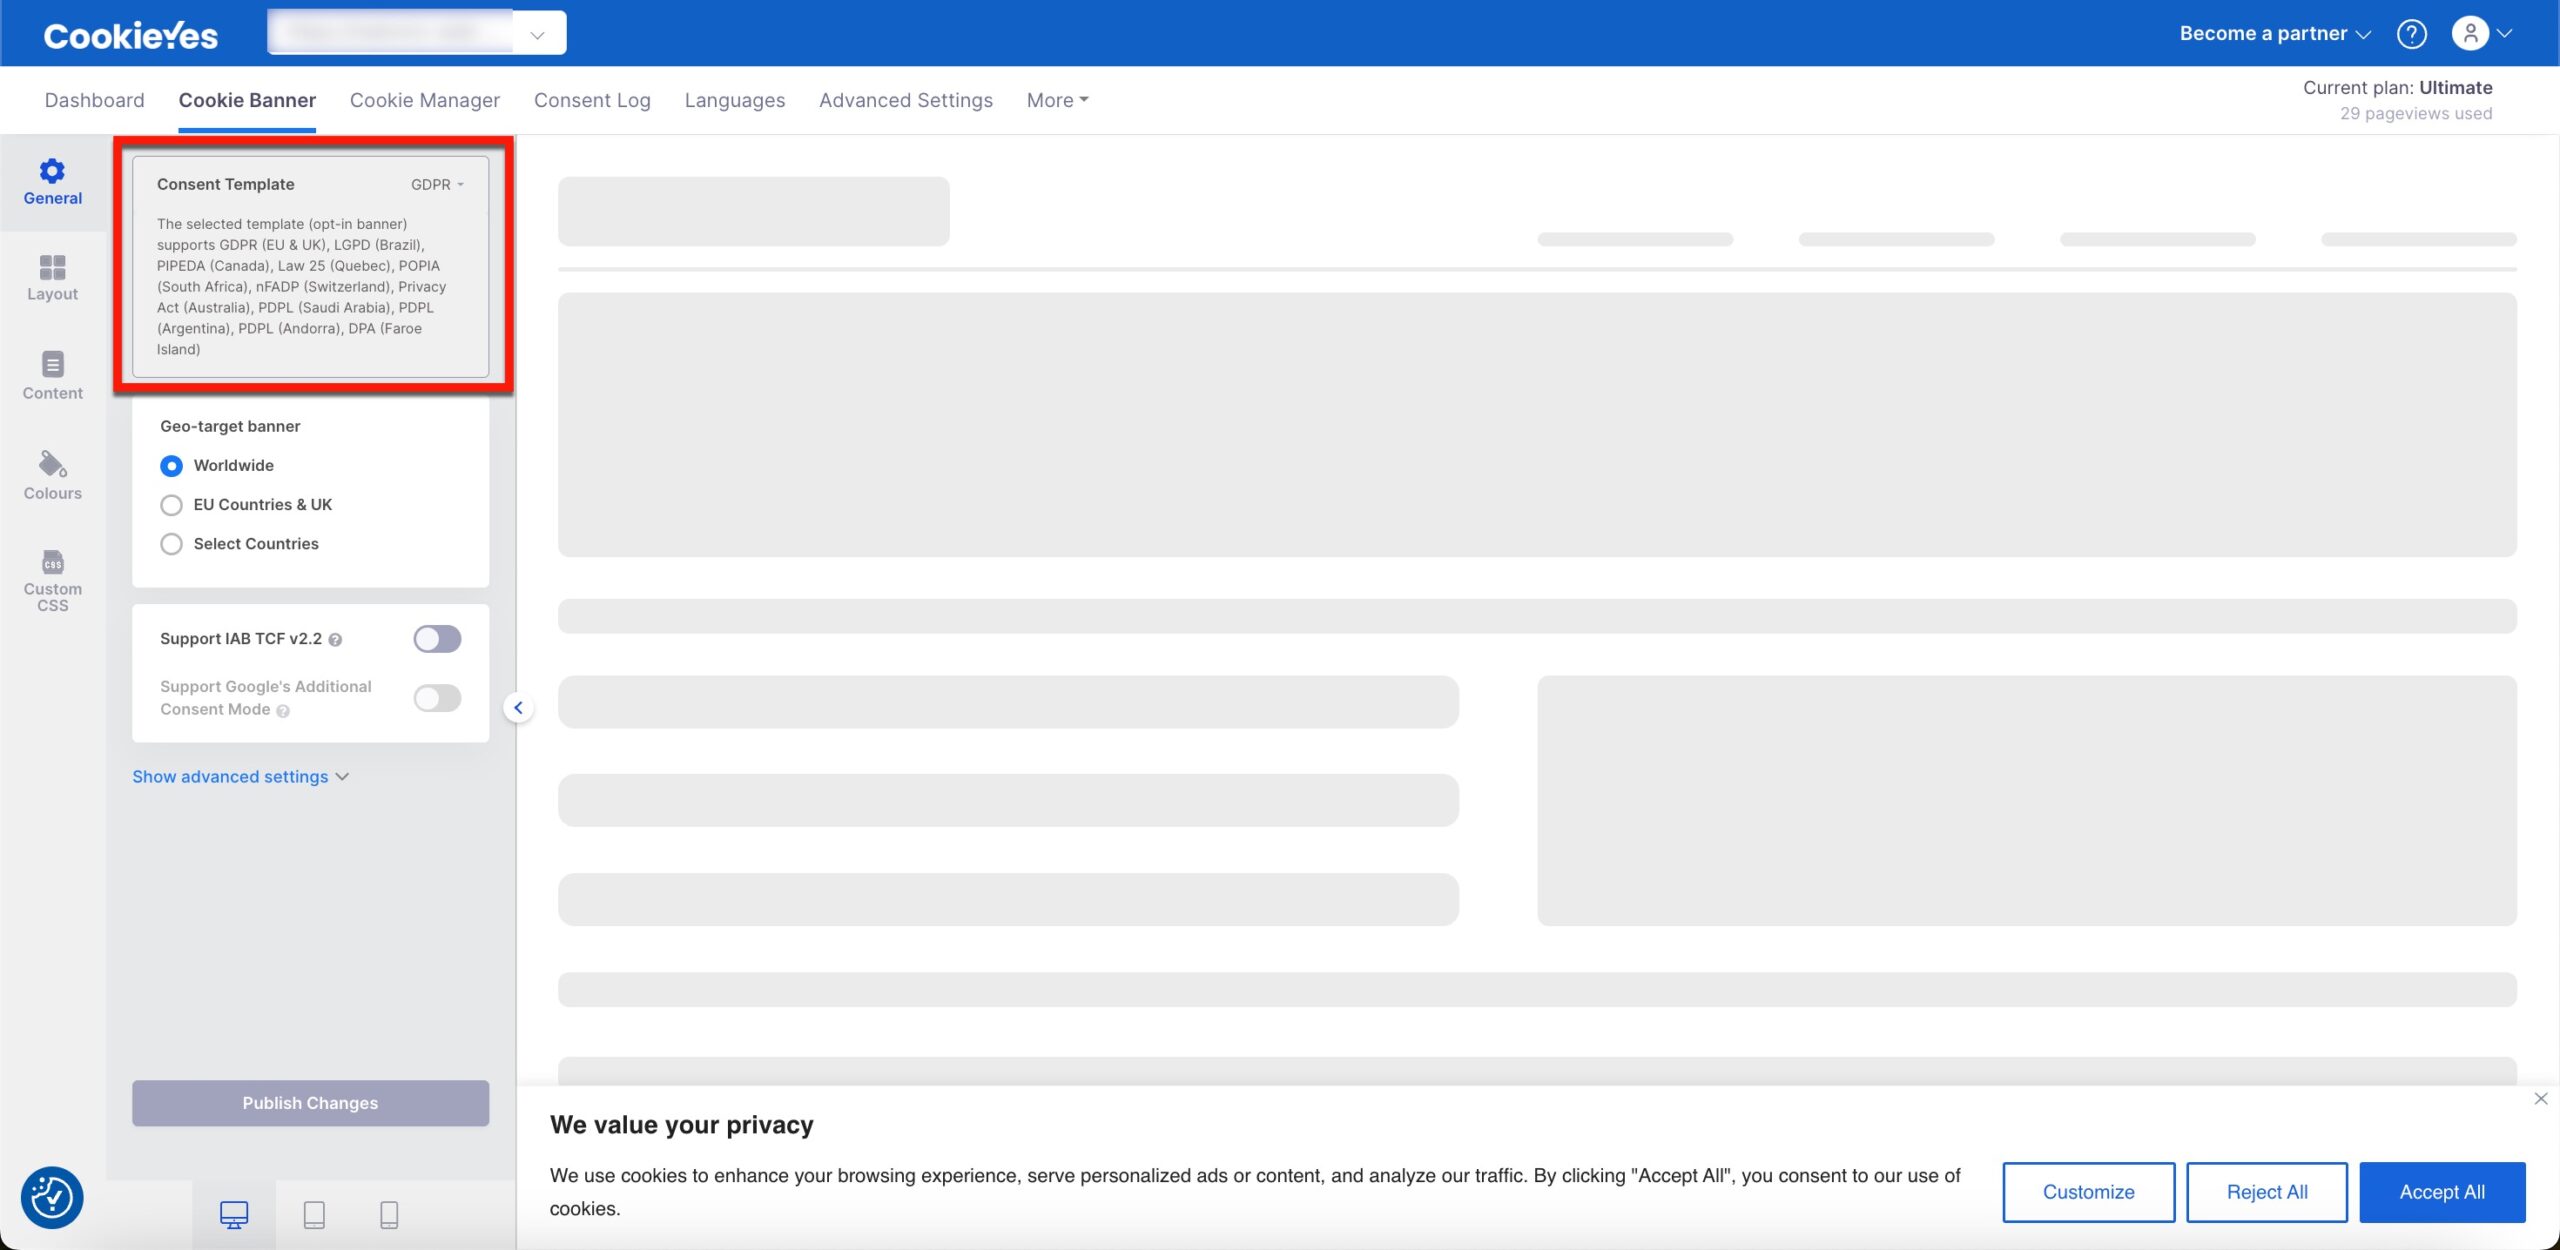
Step 1. From the CookieYes app, select Cookie Banner from the top navigation panel, and then in the General tab, ensure that you have selected GDPR under Consent Template.
Give granular control to users
You must allow users to give granular consent. This means in addition to the ‘Accept’ and ‘Reject’ buttons, users should be able to allow or deny the use of specific cookie categories.
In the banner preview on the right side, you can see the ‘Customize’ button displayed on your banner. Your users can click on this button and choose to give consent to specific cookie categories.
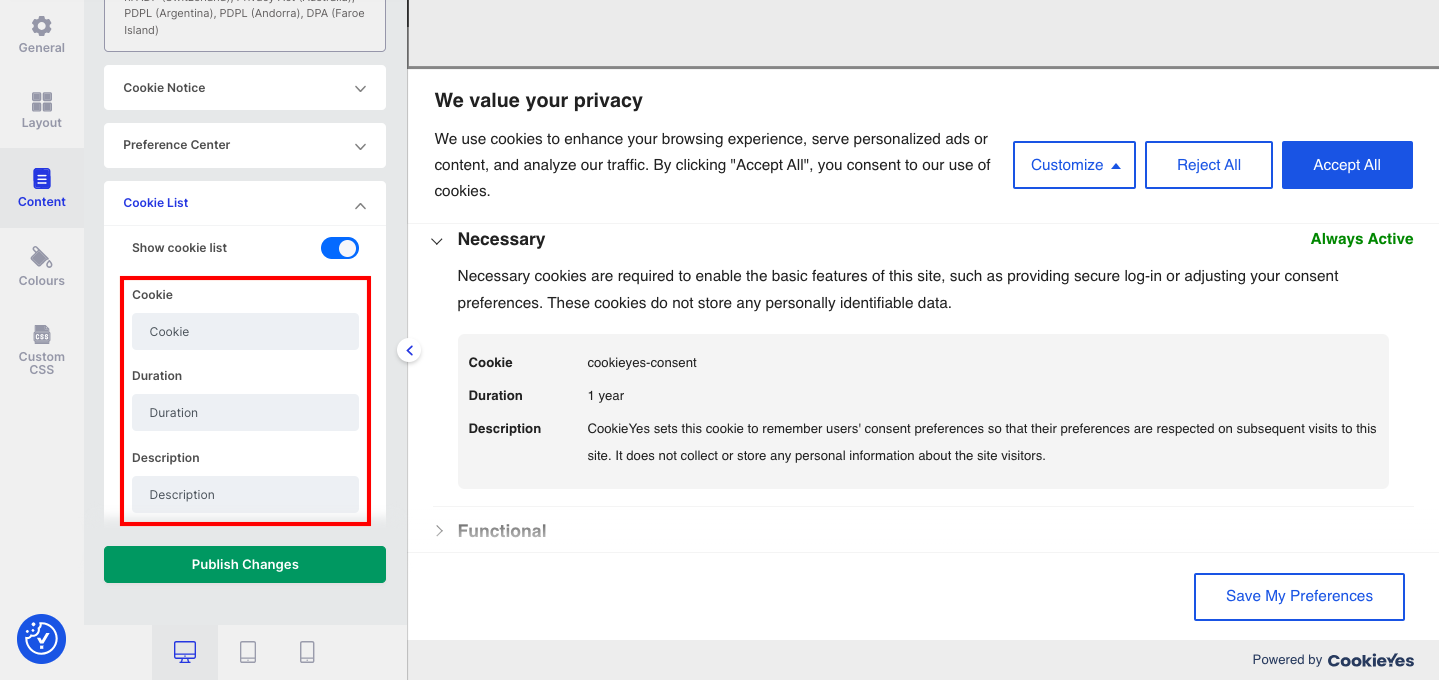
Step 2. Under Cookie List, the ‘Show cookie list’ feature is enabled by default. Here, you can edit the labels of your cookie list.
Allow users to close the banner
You must allow users to close the cookie banner and continue browsing your site without being tracked. In this case, only technical cookies (or strictly necessary cookies) will be set on a user’s browser.
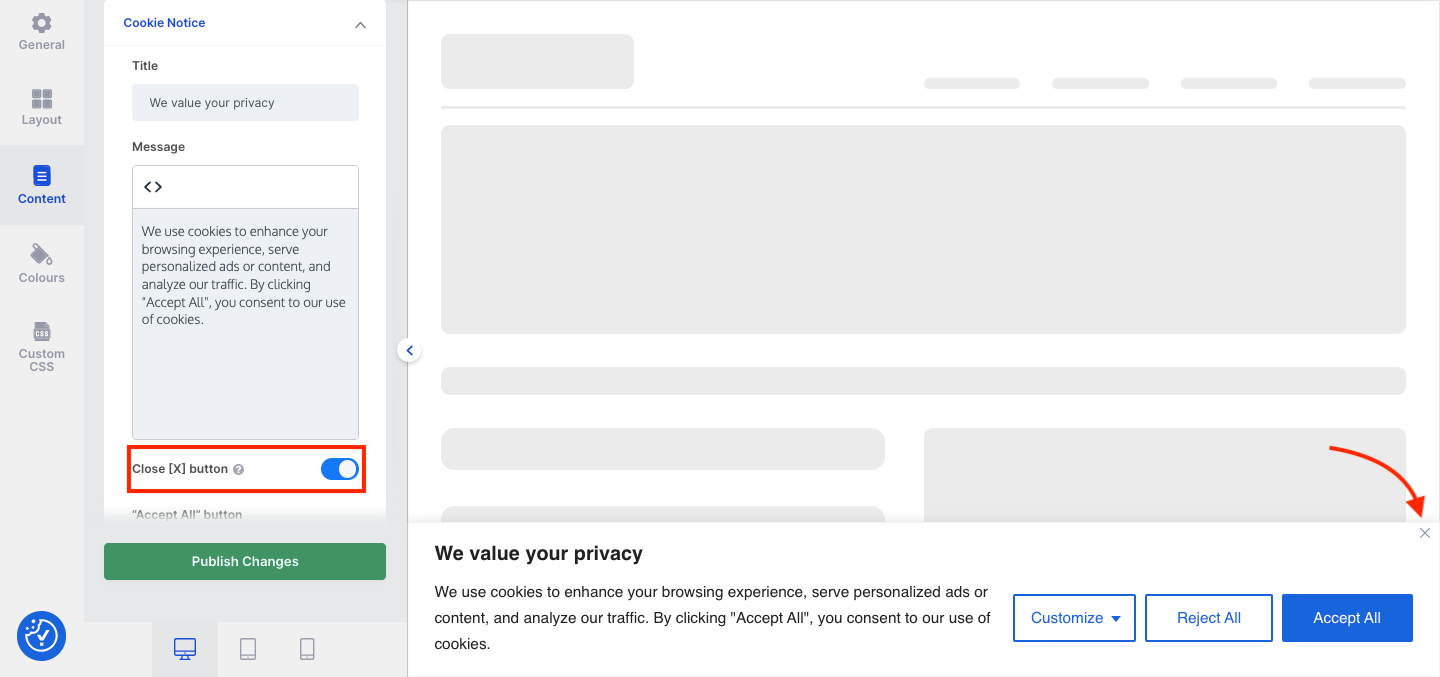
Step 3. Now, select Content and then click on Cookie Notice and enable the Close [X] button.
Provide a link to your privacy policy
You must link to the unabridged privacy policy which contains information as required under Articles 13-14 of the GDPR.
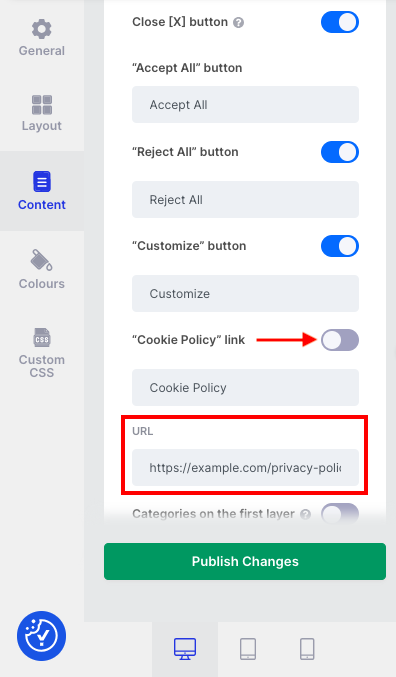
Step 4. Under Cookie Notice, enable the “Cookie Policy” link. You can change the label text and add the URL to your site’s privacy policy page.
Allow users to withdraw consent at any time
You must provide users with the right to withdraw or change their cookie preferences. This means after your user gives consent, they should be able to change their initial preferences easily at any time.
Step 5. Under Content, the feature to display a Revisit Consent Button is enabled by default. You can change the label and the position of the button that will appear on your website.
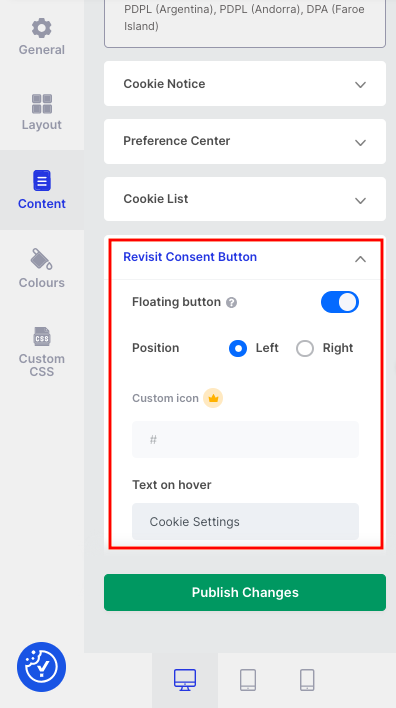
After you have completed Steps 2-5, you can click on the Publish Changes button and the changes will be reflected in your cookie banner.
Keep a record of all user consent
You must record cookie consent from your users and should also be able to demonstrate that valid consent has been obtained from users.
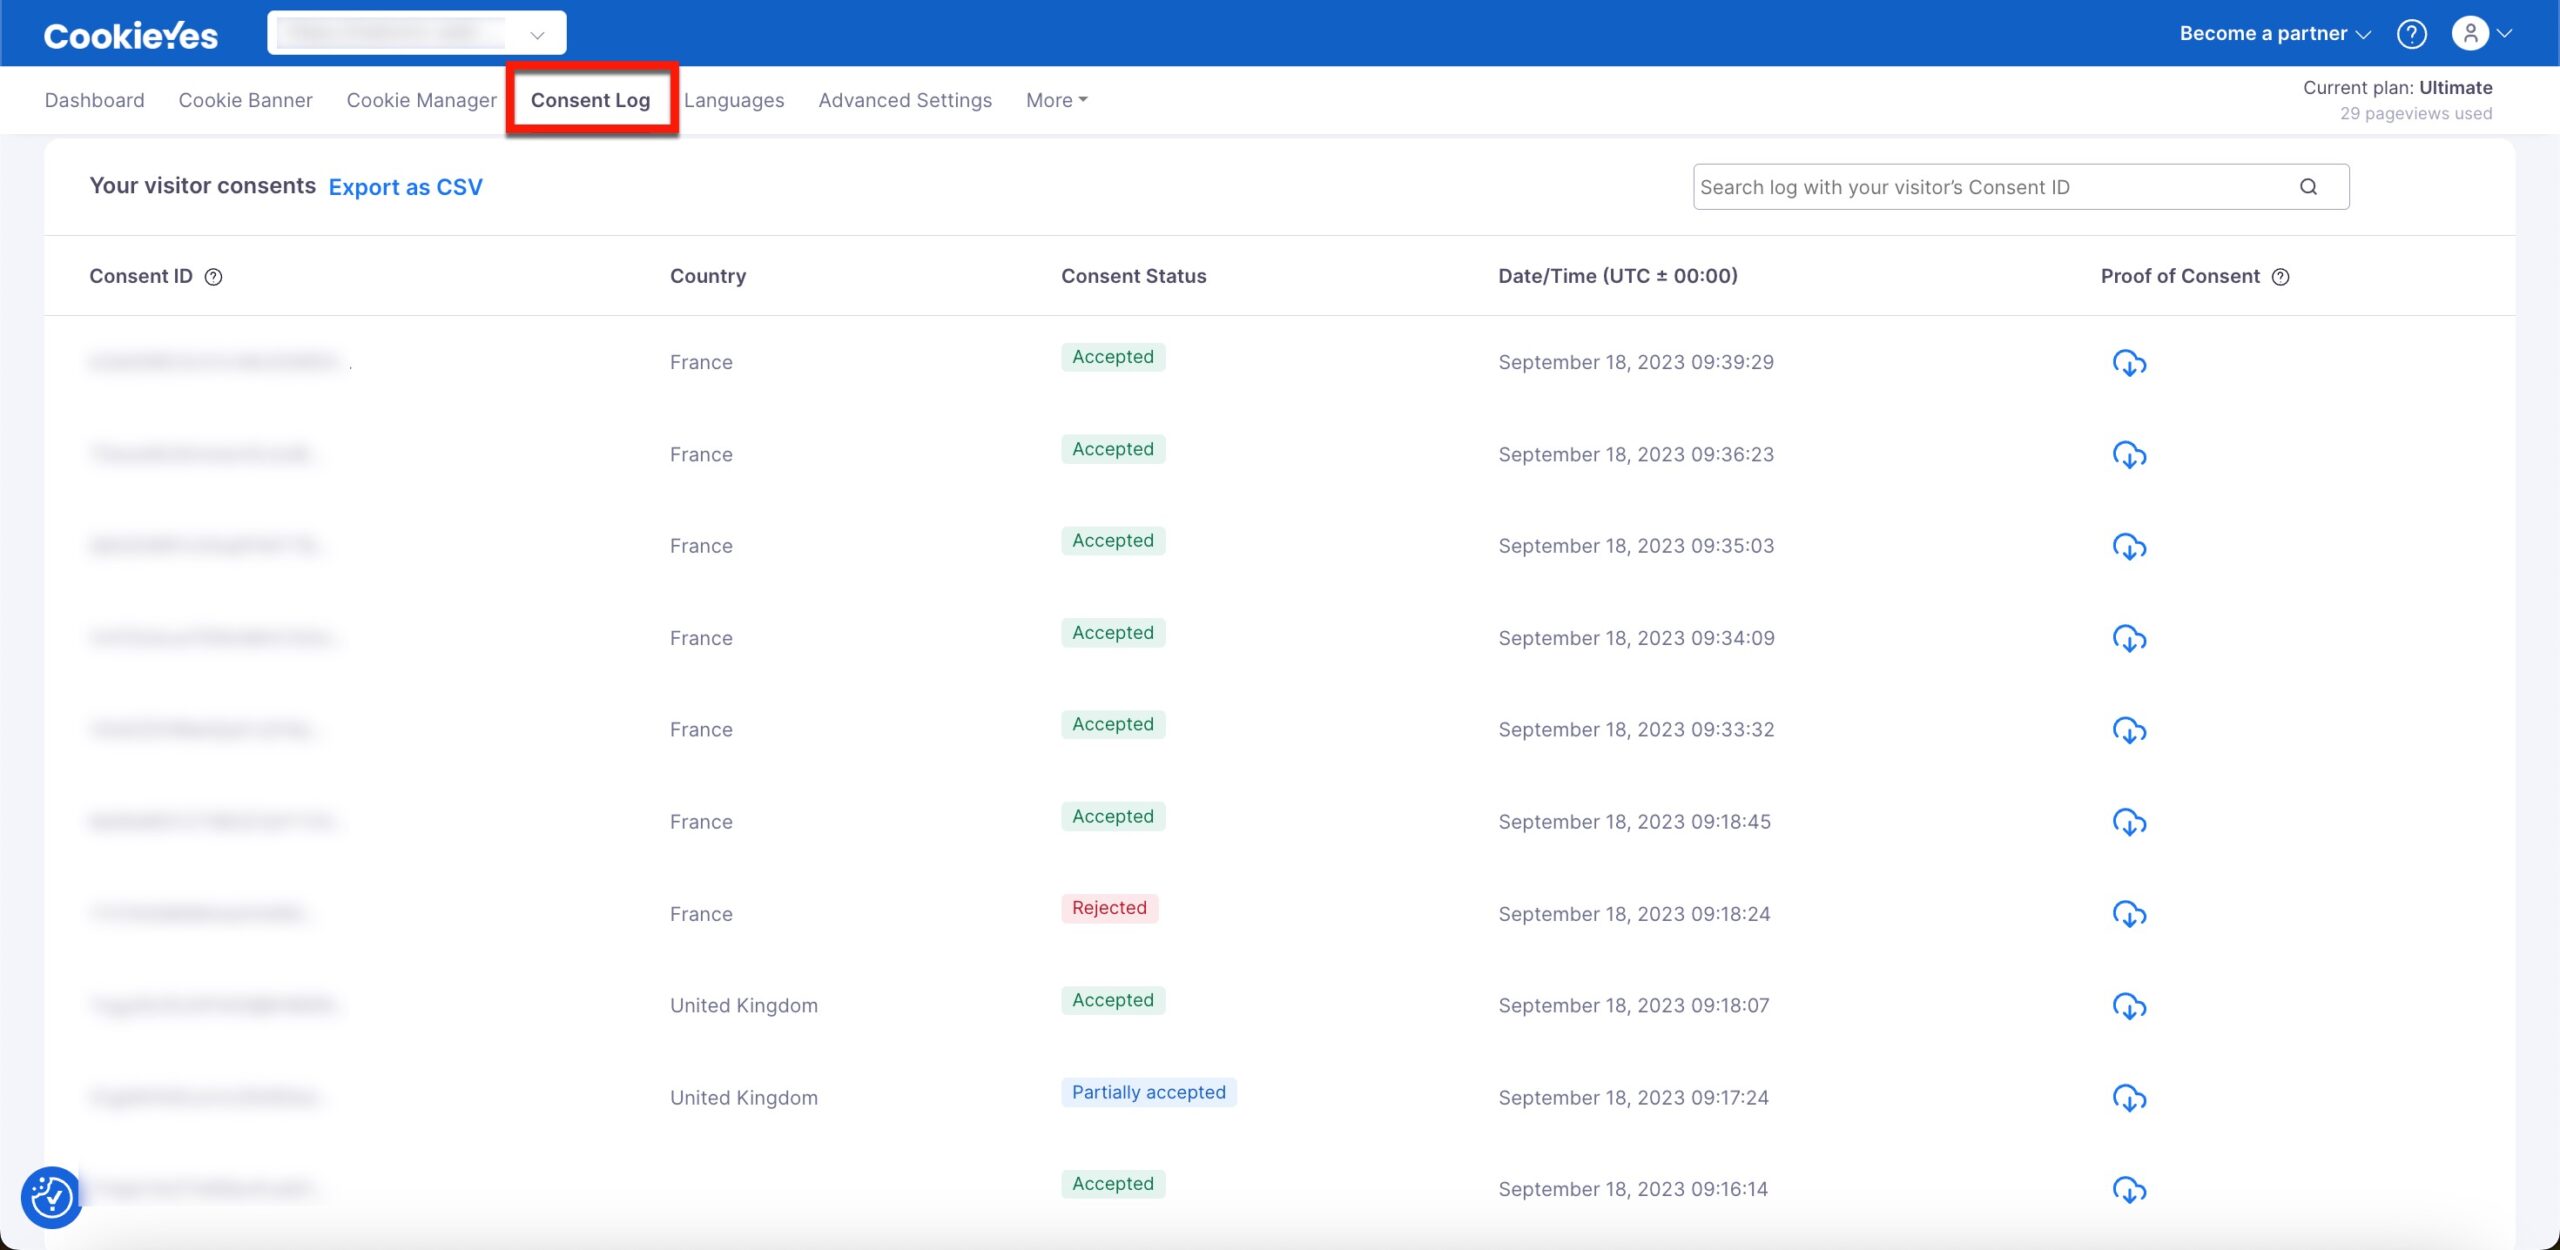
Step 6. You can access the log of all cookie consents recorded on your website under Consent Log. CookieYes enables your Consent Log by default (You can see the option in Advanced Settings).
Additional points to remember
- You must optimize the cookie banner for different devices. You can use the device preview option on CookieYes to see how your banner looks on different screens (desktop, mobile and tablet).
- The cookie banner can be displayed again to a user only after at least 6 months have passed since consent was collected the last time. CookieYes sets 1 year as the default for consent expiration. This means that only after 1 year the user will be asked for cookie consent again.
- Scrolling a website or inactivity by the user does not constitute valid consent. CookieYes, by default, does not set cookies if the user scrolls or browses the website without giving consent.
- Cookie walls which force users to give consent to access a website are not permitted. We recommend that you avoid using a popup cookie banner on your website.
- You may include a cookie policy on your website. You can head to the Dashboard > Cookie Policy and generate a custom cookie policy with a detailed cookie audit table. You can add this to your privacy policy or as a separate cookie policy page.
- If you want to display your cookie banner in Italian, check the instructions in Change the language of your cookie banner.
- If you have a multilingual website, you can use the auto-translation feature to display a banner in the user’s preferred language. (Available only for Basic, Pro, and Ultimate plans). For instructions, check the Add cookie banner on a multilingual website.